

Welcome to my Cyberpunk 2077 Starter Build for Levels 1-15 (Patch 2.5). This is how I start every new playthrough: the life path and start attributes I pick, the free iconic weapons I grab first, the perks I take until level 15, and how I make 150k Eddies before my first Ripperdoc visit.
With this Starting Build you get the best possible start in Cyberpunk 2077.
Table of Contents:
- The Perfect Starting Setup
- Perks for Levels 1-15
- Level 15 Starter Build Overview
- When to Start Phantom Liberty
- Must Know Basics
- Starter Build FAQ
Strengths and Weaknesses list for the Starter Build:
Strengths
Weaknesses
Once you hit level 15, it is time to pick an endgame build: Netrunner Builds, Melee Builds, Gun Builds, Character Builds, Sandevistan Builds, Berserk Builds, Stealth Builds, Tank Builds, Smart Weapon Builds or Tech Weapon Builds. Or browse all of them in my Cyberpunk 2077 Builds Database.
The Perfect Start in Cyberpunk 2077 (Beginner Build)

Let’s first start with a quick overview before I go into more details on each of these for our Starter Build for Cyberpunk 2077. If you follow this list, you will be off to a great start in Night City. This will take 2-4 hours depending on how fast you are clearing the NCPD missions.
- Regular Start (Don’t skip ahead to Phantom Liberty).
- Life Path and Attributes: Pick the life path whose story you like, and spend your 7 attribute points on the playstyle you want to play later. My three start spreads.
- Buff Routine: After the prologue, you are in your apartment. Sleep & shower to gain Skill XP and HP regen.
- Once you are out of your apartment and go downstairs, before you enter the elevator, do go to:
- Weapon Vendor: Buy the Iconic pistol Dying Night.
- Coach Fred: Capacity Boosters (in case you get over capacity so you can still move).
- Watson Clean Sweep (NCPD Missions):
- Watson is the first district you play in.
- Clearing all missions takes 1-2 hours. This will give you at least 10 levels, 15 Street Cred and over 150k Eddies Cash.
- Loot all enemies and either disassemble for materials or sell them at the vendor for extra Eddies.
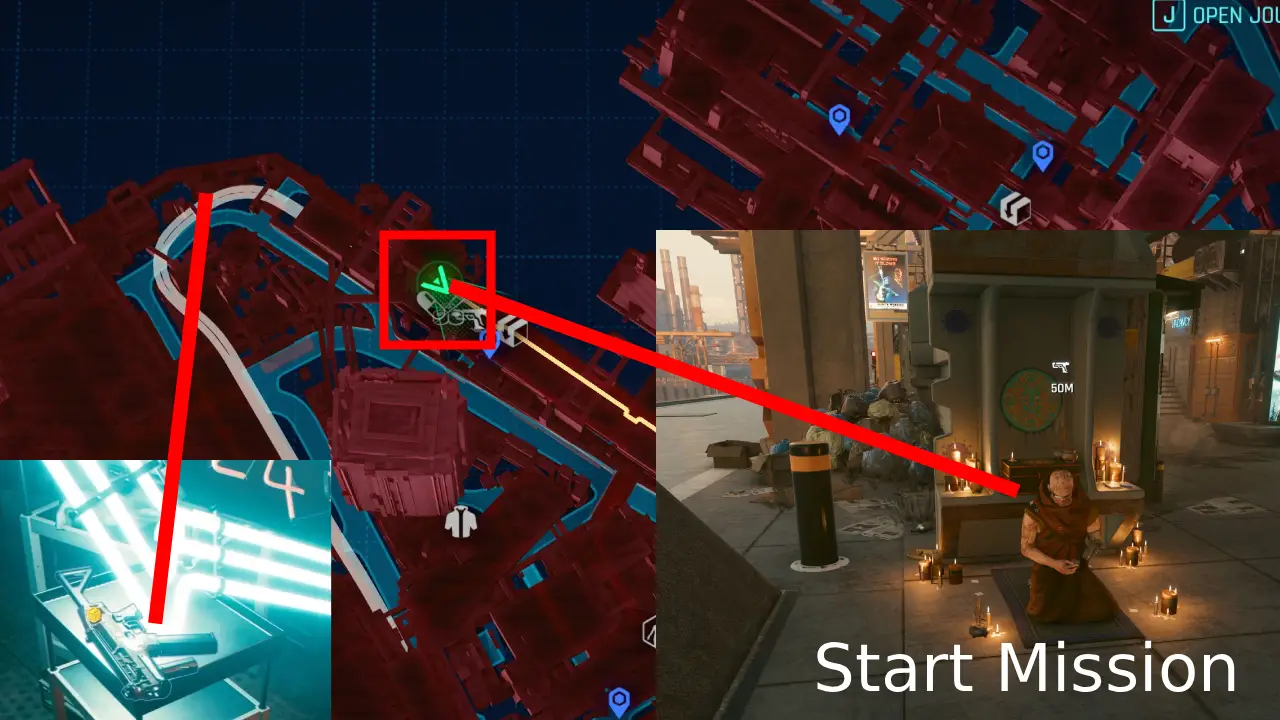
- Get the Fenrir SMG from the monk mission. This SMG is insanely good at the start because it often stuns enemies.
- Visit a Ripperdoc at level 10: After you have enough money, it’s time to get chromed up.
- Reinforced Tendons (Legs): Allow you to double jump
- Kerenzikov (Nervous System): Slows Time by 60% for 2s.
- Synaptic Accelerator (Nervous System): Slows time by 20% for 2s when enemy detection reaches 50%.
- Whatever else you can fit!
- Time to start playing for real. The Pickup mission is waiting for you!
- Grab the early iconics: The Kongou and the Satori are missable during The Heist. Where to find them.
- Phantom Liberty: I start it right after the main job Transmission in Act 2, at level 15 or higher. When to start it.
1. Regular Start

I always recommend picking the “Regular Start” option at the beginning of the game. Otherwise, you will miss out on a lot of content.
2. Which Life Path to Pick
Your life path decides your prologue, one unique side job and some extra dialogue options. It doesn’t change your attributes, your perks or which builds you can play, so every one of my builds works with every life path, and most of the game plays out the same.
- Streetkid: You start on the streets of Night City. Unique side job: Small Man, Big Mouth. You get the most extra dialogue options with gangs, fixers and cops.
- Corpo: You start as an Arasaka employee. Unique side job: War Pigs. Your corporate dialogue options are the most useful ones, and one of them lets you skip a big part of a tough mission.
- Nomad: You start in the Badlands, with the only action-heavy prologue. Unique side job: These Boots Are Made For Walkin’. You get more dialogue options in the Badlands and with Panam.
If you can’t decide, I would go with Corpo for the dialogue options, or Nomad if you want to start with some action.
3. Start Attributes
Every attribute starts at 3, and you get 7 points to spend in the character creator. Perks unlock at 4, 9, 15 and 20 in each attribute, and from then on you get 1 Attribute Point per level. I spend my 7 points on the playstyle I want to play later, so I never need to respec:
| Playstyle |  Body |
 Reflexes |
 Technical Ability |
 Intelligence |
 Cool |
|---|---|---|---|---|---|
| Netrunner (Lucy Build) |
+2 | +1 | +1 | +3 | None |
| Melee (Gorilla Arms Build) |
+3 | +2 | +2 | None | None |
| Guns (Smart SMG Build) |
+1 | +3 | +2 | +1 | None |
Not sure yet? Take the Guns spread. The Fenrir and the Dying Night weapon carry the early game, and Technical Ability helps every build, because it holds the cyberware perks. I list the perks I take with each spread in Perks for Levels 1-15.
4. Right After The Prologue – Inside the Apartment

Immediately after the Prologue in Cyberpunk 2077, you should sleep and take a shower. Optionally, you can also eat a Burrito.
- Sleep = Rested status that gives +10% Skill XP.
- Shower = Refreshed status that gives you HP regen.
- Burrito = Nourishment status Max Health and HP regen.
- You can see the effects in your weapon wheel or once you leave the apartment top left side.
Make sure to sleep first, because when you sleep, all other buffs disappear due to time skipping. Now that you are ready, it’s time to leave your apartment!
5. Right After The Prologue – Leaving the Apartment

Immediately after the Prologue in Cyberpunk 2077, you can leave your apartment. Once you are out of your room, walk down the stairs and continue the way ahead.
Coach Fred
- You will find a guy and a robot boxing. Talk to him; he is called Coach Fred.
- Buy 2x Capacity Booster from him. This is nice in case you get overencumbered.
- You can eat it and then have extra capacity to walk to the next store to sell stuff instead of having to dump it.
Weapon Vendor Wilson
- Enter the weapon vendor and talk to Wilson.
- Buy your first iconic pistol called
 Dying Night.
- Use this weapon for now, it deals overall good damage.
6. Watson District NCPD Missions

The Watson District is the starter district of Cyberpunk 2077. When you open the map you will find plenty of NCPD missions that you can complete. These are small side quests that require you to sweep an area clear of thugs. Easy money!
- Clearing all missions takes 1-2 hours.
- This will give you at least 10 levels, 15 Street Cred and over 150k Eddies Cash.
- Loot all enemies and either disassemble the loot for materials or sell it at the vendor for extra Eddies.
7. Acquiring the Fenrir SMG (Best early game SMG)
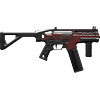
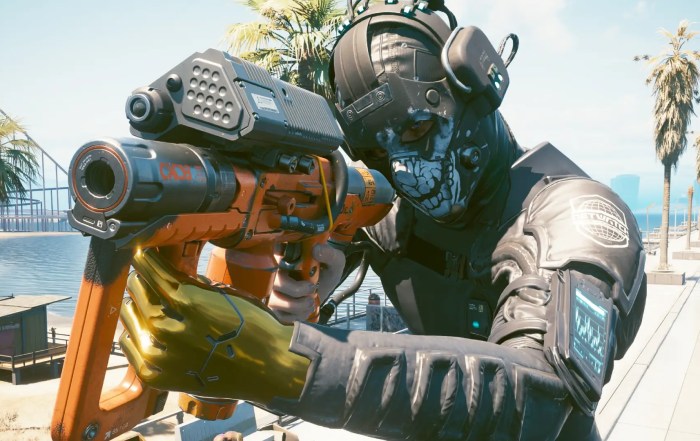
Getting the iconic Fenrir SMG is important in early game in Cyberpunk 2077. The Fenrir SMG is a heavily modified Saratoga SMG and one of the best early-and midgame weapons. It deals electrical damage and has a high chance to trigger an EMP blast that deactivates enemy cyberware and stuns them.
8. More Early Iconic Weapons
Iconic weapons have a unique effect, and you can upgrade every one of them to Tier 5++, so they stay useful for the whole game. Besides the Dying Night and the Fenrir, these are the ones I pick up early. Three of them are missable, so watch out.
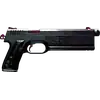 Kongou (Iconic Power Pistol): Missable. On the table by the bed in Yorinobu’s penthouse in Konpeki Plaza, during The Heist.
 Satori (Iconic Katana): Missable. During The Heist, after Yorinobu kills Saburo, go up to the AV landing pad on the roof of Konpeki Plaza, take out the two guards and open the AV. It is an optional objective.
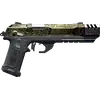 La Chingona Dorada (Iconic Power Pistol): After the main job Heroes, leave El Coyote Cojo, skip 24 hours and come back. Jackie’s pistols are on the altar next to his picture.
 Skippy (Iconic Smart Pistol): Once the city opens up after The Heist, go to Vista del Rey in Heywood, near the College Street fast travel point. It lies next to a dead body in an alley. It talks, and you decide whether it aims for the head or the legs.
 Lizzie (Iconic Power Pistol): Missable. During the main job Automatic Love, in Lizzie’s Bar, check the room on your right before Judy’s room.
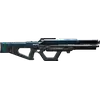 Widow Maker (Iconic Tech Precision Rifle): In Panam’s job Ghost Town, help her get her car back and take revenge on Nash. Take the Widow Maker from his body.
Missed one? Herold Lowe at the EBM Petrochem Stadium in Dogtown (Phantom Liberty DLC) sells the iconic weapons you missed.
9. Visit a Ripperdoc at Level 10

By the time you have cleared most of the NCPD Missions, you should have reached level 10. Now it’s time to visit a Ripperdoc and add some well-deserved chrome to your character! You can open the map and search for the Ripperdoc symbol, all of them sell the same stuff.
- Reinforced Tendons (Legs): Allow you to double jump.
- Kerenzikov (Nervous System): Slows Time by 60% for 2s when dashing while aiming.
- Synaptic Accelerator (Nervous System): Slows time by 20% for 2s when enemy detection reaches 50%.
- Whatever else you can fit!
By playstyle: Gorilla Arms and BioDyne Berserk for melee, and the Thermal Monowire for netrunners, are all sold from level 10. Every Ripperdoc also sells a lower Mk. of the Tetratronic Rippler cyberdeck from the start. Check your Cyberware Capacity before you buy.
Perks for Levels 1-15
By level 15 you have 14 more Attribute Points and around 15 Perk Points. These are the perks I take with each start spread, in this order. If you run out of points, finish the ones you already started first.
Netrunner Start (Lucy Build)
Attributes at level 15: 15 Intelligence, 9 Reflexes, 5 Body, 4 Technical Ability, 3 Cool.
- Intelligence 4:
 Optimization (+35% RAM recovery) and
 Subordination (Control quickhacks last twice as long on enemies at full health).
- Body 4:
 Painkiller (health regen during combat).
- Intelligence 9:
 Hack Queue (queue 2 quickhacks on one enemy),
 Data Recycler,
 Feedback Loop and
 System Overwhelm.
- Reflexes 9:
 Dash, so I can reposition between hacks.
- Intelligence 15:
 Queue Acceleration (3 quickhacks in the queue) and
 Overclock (keep hacking with Health when your RAM runs out).
Grows into: Lucy Build, or any of my Netrunner Builds.
Melee Start (Gorilla Arms Build)
Attributes at level 15: 15 Body, 9 Technical Ability, 6 Reflexes, 3 Intelligence, 3 Cool.
- Body 4: Painkiller. Technical Ability 4:
 Glutton for War (+1 health item charge).
- Body 9:
 Wrecking Ball and
 Breakthrough. Gorilla Arms count as Blunt weapons, and Breakthrough strips the Armor of whoever I hit with a Strong Attack.
- Body 15:
 Quake (a ground slam, and from midair a Superhero Landing) and
 Adrenaline Rush (a second health bar).
- Technical Ability 9:
 All Things Cyber,
 Renaissance Punk and
 Health Freak.
Gorilla Arms and BioDyne Berserk are both sold from level 10, so this start works almost right away. Grows into: Gorilla Arms Build, or any of my Melee Builds.
Guns Start (Smart SMG Build)
Attributes at level 15: 15 Reflexes, 9 Technical Ability, 5 Body, 4 Intelligence, 3 Cool.
- Reflexes 4:
 Slippery and
 Multitasker (shoot while sprinting, sliding and vaulting).
- Body 4: Painkiller. Technical Ability 4: Glutton for War.
- Reflexes 9:
 Ready, Rested, Reloaded (cheaper shooting and faster reloads with Assault Rifles and SMGs),
 Spice of Life (faster weapon swaps) and Dash.
- Technical Ability 9: All Things Cyber and Renaissance Punk.
- Reflexes 15:
 Sharpshooter and
 Air Dash.
The Fenrir is an SMG, so every one of these perks works with it from the start. Grows into: Smart SMG Build, SMG Build or Assault Rifle Build, or any of my Gun Builds.
Level 15 Starter Build Setup for Cyberpunk 2077
After having cleared all NCPD Missions you should be around level 15 with your character in Cyberpunk 2077. Additionally, your Street Cred should be around level 27 and you should have 100-150k cash to spend on whatever you like.
Let’s take a look at what stuff you should have by now at level 15:
- Weapons
- Iconic Pistol Dying Night
- Iconic SMG Fenrir
- You can also use any other weapon you like.
- Don’t forget to upgrade them to your current level tier.
- Cyberware Must-Haves
- Reinforced Tendons (Legs): Allow you to double jump.
- Kerenzikov (Nervous System): Slows Time by 60% for 2s when dashing while aiming.
- Synaptic Accelerator (Nervous System): Slows time by 20% for 2s when enemy detection reaches 50%.
- More Cyberware (Optional)
- Subdermal Armor (Integumentary System): Gives extra armor.
- Titanium Bones (Skeleton): Increases carry capacity.
- Mechatronic Core (Frontal Cortex): 20% more damage against robots, mechs, turrets, and drones.
This is all you really need for the start; now you can keep upgrading Cyberware and make sure not to forget to upgrade your weapons, otherwise they might start to feel weak when the enemies keep leveling up with you.
Gear: Since Update 2.0, clothes are mostly cosmetic. Your Armor comes from cyberware like Subdermal Armor, so wear whatever you like. Only a few pieces, like netrunner suits and visors, still give small bonuses.
Next Step: Pick Your Build: At level 15, I switch to the build I want to play until the end of the game. Pick the playstyle you liked most so far:
- Netrunner Builds: Quickhacks from stealth, quickhacks that spread through whole groups, or the Monowire up close.
 Melee Builds: Katanas, Mantis Blades, Gorilla Arms, hammers, throwing knives and the Monowire.
 Gun Builds: Pistols, revolvers, SMGs, assault rifles, LMGs, shotguns and sniper rifles.
- Character Builds: Play as David, Lucy, Rebecca, Johnny Silverhand, Adam Smasher, John Wick and more.
 Sandevistan Builds: Slow down time with the Apogee or the Falcon.
 Berserk Builds: Take a fraction of the damage and attack for free with BioDyne, Militech or Zetatech Berserk.
 Stealth Builds: Finish the fight before anyone knows you are there.
 Tank Builds: Walk straight through the fight with armor, health regen and Adrenaline Rush.
 Smart Weapon Builds: Smart guns that lock on, so the bullets do the aiming.
- Tech Weapon Builds: Charged shots through walls and Bolts that ignore Armor.
When to Start Phantom Liberty
Phantom Liberty unlocks after the main job Transmission in Act 2. Right after it, Songbird calls you and the first Dogtown job, Dog Eat Dog, starts. Head to the Stadium Parking terminal near the Pacifica entrance to begin.
- Level: 15 is the minimum. Dogtown enemies with a skull icon hit harder and take more to kill, so if they feel too tough, do a few Dogtown gigs and fights first.
- My timing: I start it as soon as Transmission is done. Dogtown unlocks the Relic perk tree, the Dogtown Ripperdoc with iconic cyberware, airdrops with Capacity Shards, and Herold Lowe for the iconic weapons you missed. Waiting until level 50 just makes all of that come too late.
- Skip Ahead to Phantom Liberty: The main menu lets you start a new character directly in Phantom Liberty, but you skip Act 1 and can’t set your own attributes. For a first playthrough, I always pick the Regular Start.
Must-Know Basics in Cyberpunk 2077
Here are some basics that you should know to make your Cyberpunk 2077 playthrough easier.
- How to make Money
- Upgrade Weapons
- How Gear Scaling Works
- How to get Perk Points Fast
- Cyberware Capacity Explained
How to make Money in Cyberpunk 2077
It is actually fairly easy to make money in Cyberpunk 2077. The best way to make money is to clear all the NCPD and Cyberpsycho missions in each district. As previously mentioned, clearing most of the Watson district NCPD mission alone already gives you approximately 150k Eddies Cash.
Upgrade Weapons
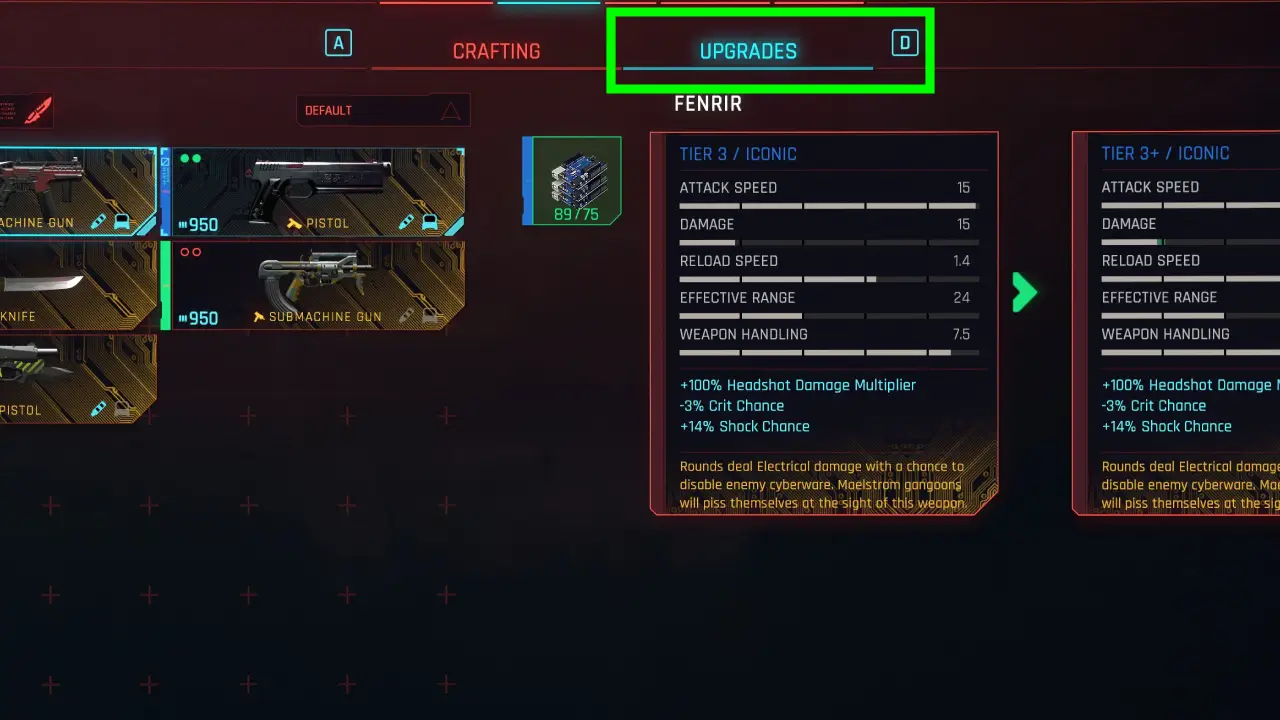
This often gets overlooked, but you can upgrade early-game weapons in Cyberpunk 2077. Go to the crafting section, then move to the Upgrade tab. Here you can upgrade all weapons if you have the necessary crafting components.
Gear Scaling in Cyberpunk 2077
Gear scaling is automated in Cyberpunk 2077. The moment you reach a certain level, you will start finding more and more high-quality items. Meaning the faster you reach a higher level the sooner you will find better gear from chests or enemies. That counts for Gear, Weapons, Quickhacks, Cyberware, Outfits, etc.
- Tier 1: Level 1-9
- Tier 2: Level 10-19
- Tier 3: Level 20-29
- Tier 4: Level 30-39
- Tier 5: Level 40-44
- Tier Iconic: Level 45-50
How to get Perk Points in Cyberpunk 2077
Perks are the bread and butter of any CP2077 Build, as they allow you to unlock more Perks in your skilltree.
- You get one Perk Point per character level.
- Skill Progression awards you with Perk Points.
- You can farm up to 13 Perk Shards (10 base game, 3 Phantom Liberty DLC)
Perk Point per Character Level
Not much needs to be said here; leveling up gives you one extra Perk Point.
Skill Progression
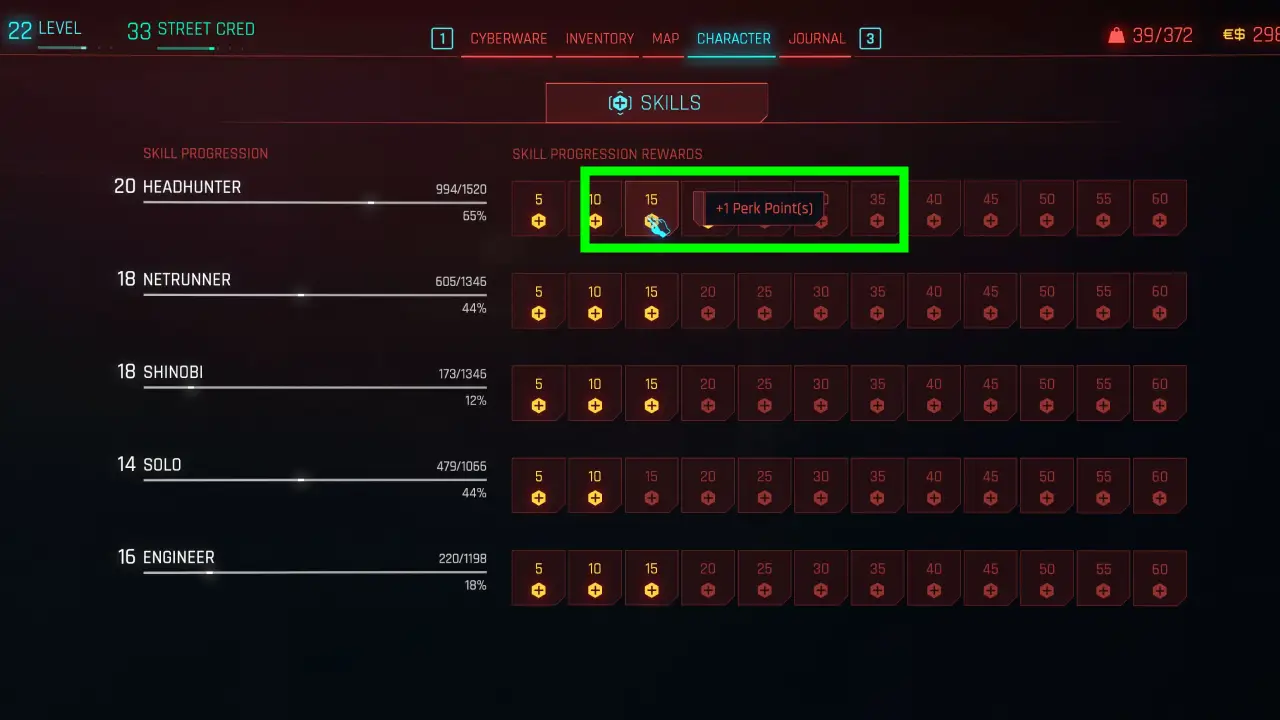
This is often overlooked; the Skill Progression system also awards you Perk Points at 15 and 35. So you can get an additional 10 Perk Points from this.
Character menu > bottom right Skill Progression.
Perk Shards
There are 10 base-game Perk Shards and 3 Phantom Liberty DLC Perk Shards you can collect to earn additional perks in Cyberpunk 2077.
Read Guide: All 13 Perk Shard Locations in Cyberpunk 2077
Cyberware Capacity Explained
Every piece of cyberware costs Cyberware Capacity, and you can’t install more than you have. This is how it grows:
- Character level: You start with 24 and get +3 for every level, so you have 66 at level 15 and 201 at level 60.
- Engineer skill: +5 at Engineer level 10 and +10 more at level 30. Engineer is the Skill Progression tree for Technical Ability.
- Capacity Shards: +2, +3, +4 or +6 each. They drop from enemies, police scanner activities and Dogtown airdrops: 60 capacity from the base game and 14 more from Phantom Liberty.
- Perks: Renaissance Punk (9 Technical Ability) gives +4 for every attribute at 9 or higher, and All Things Cyber makes Skeleton and Integumentary System chrome 20% cheaper.
- Edgerunner:
 Edgerunner (20 Technical Ability) lets you go up to 50 over your capacity, for -0.5% Max Health per point.
Note: The Capacity Boosters from Coach Fred raise your carrying capacity for loot, not your Cyberware Capacity.
Starter Build FAQ
Which life path is best in Cyberpunk 2077?
None of them changes your attributes or perks, so pick the story you want. I would go with Corpo for the most useful dialogue options, or Nomad for the only action-heavy prologue. All three compared.
How should I spend my starting attribute points?
On the playstyle you want to play later: Intelligence for a netrunner, Body for melee, or Reflexes for guns. Put the rest into Technical Ability, since every build uses its cyberware perks. My three start spreads.
What should I buy at my first Ripperdoc?
Reinforced Tendons for the double jump, Kerenzikov and the Synaptic Accelerator. At level 10, add Gorilla Arms and BioDyne Berserk for melee or the Thermal Monowire for netrunning. Ripperdoc visit at level 10.
When should I start Phantom Liberty?
Right after the main job Transmission in Act 2, at level 15 or higher. When to start Phantom Liberty.
Can I still get iconic weapons I missed?
Yes. Herold Lowe at the EBM Petrochem Stadium in Dogtown sells them, but you need Phantom Liberty. More early iconic weapons.
How do I get more Cyberware Capacity?
Level up, level the Engineer skill, collect Capacity Shards and take Renaissance Punk. Edgerunner then lets you go 50 over. Cyberware Capacity explained.
Do clothes give armor in Cyberpunk 2077?
Barely. Since Update 2.0 clothes are mostly cosmetic, and your Armor comes from cyberware. Level 15 setup.
Related Cyberpunk 2077 Content
- Cyberpunk 2077 Builds Database
- Cyberpunk 2077 Netrunner Builds
- Cyberpunk 2077 Melee Builds
- Cyberpunk 2077 Gun Builds
- Cyberpunk 2077 Character Builds
- Cyberpunk 2077 Sandevistan Builds
- Cyberpunk 2077 Berserk Builds
- Cyberpunk 2077 Stealth Builds
- Cyberpunk 2077 Tank Builds
- Cyberpunk 2077 Smart Weapon Builds
- Cyberpunk 2077 Tech Weapon Builds