Type: Dungeon, Trial, Arena & Overland
Buildname: Serpent
Table of Contents
Welcome to the 2H Stamina Dragonknight Build for ESO (Elder Scrolls Online). This build is optimized for group content such as dungeons, trials & arenas and has a very glass-cannon approach. The 2H Stamina Dragonknight build is optimized for maximum damage. The build works best in a group but with some minor adjustments can also be played as a solo setup if necessary.
- Two Hander & Dual Wield Setup
- Insane Single Target (ST) Damage
- Insane Area of Effect (AoE) Damage
- Crazy Splash Damage
- Dungeon, Trial & Arena Build
It is also recommended to read the Stamina Dragonknight Beginner Guide if you are a new player. You can find more Dragonknight Builds & Guides in the Dragonknight category of the website.
Group Setup – 2H Stamina Dragonknight Build
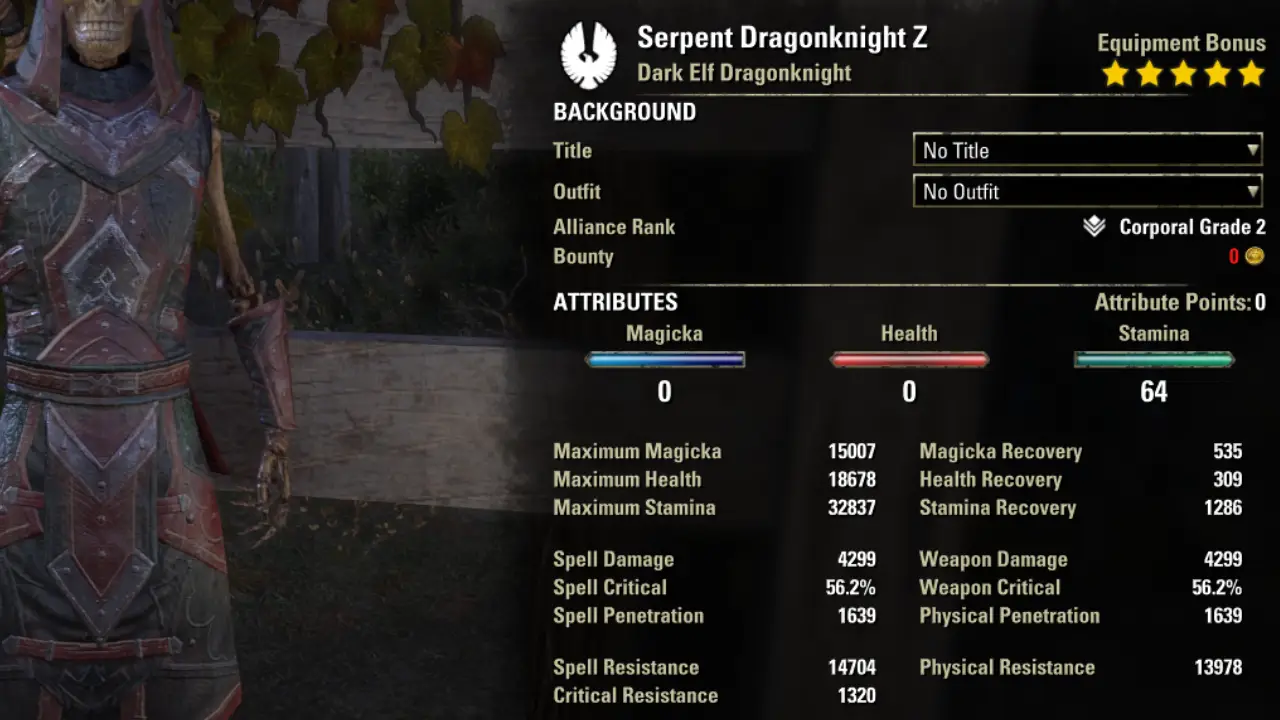

5x Relequen, 5x Pillar of Nirn, 1x Slimecraw, 1x Velothi Ur-Mage’s Amulet, on a Dark Elf with Lava Foot Soup-and-Saltrice food.
- Unbuffed: Out of combat, buff food active
- Buffed: In Combat, buff food, Raid Target Dummy buffs, Weapon damage enchantment, Weapon Power Potion active
Gear
You will find 3 different setups here. Setup 1 is the preferred setup. For people that do not have all the gear yet can use the Setup 2 which is easier to obtain and beginners can use Setup 3.
- Setup 1 is with Trial Gear
- Setup 2 is without Trial Gear
- Setup 3 is for Beginners
There are a lot of good Stamina Sets available, you can find more viable stamina dps sets in this Stamina DPS Sets Article. I also elaborate on specific sets that are often used in this article to give you a bit more insight as to why they are used.
Gear Setup 1
Perfected vs Imperfect Gear: Both perfected and imperfect gear is viable for the build. The perfected versions are a lot harder to obtain though. So if you don’t have any aim for the normal version first.
| Gear | Set | Weight | Trait | Enchantment |
|---|---|---|---|---|
| Chest | Perfected Arms of Relequen | Medium | Divine | Stamina |
| Belt | Perfected Arms of Relequen | Medium | Divine | Stamina |
| Shoes | Perfected Arms of Relequen | Medium | Divine | Stamina |
| Pants | Perfected Arms of Relequen | Medium | Divine | Stamina |
| Hands | Perfected Arms of Relequen | Medium | Divine | Stamina |
| Head | Pillar of Nirn | Medium | Divine | Stamina |
| Shoulder | Slimecraw | Medium | Divine | Stamina |
| Necklace | Velothi Ur-Mage’s Amulet | Jewelry | Bloodthirsty | Increased Physical Harm |
| Ring | Pillar of Nirn | Jewelry | Bloodthirsty | Increased Physical Harm |
| Ring | Pillar of Nirn | Jewelry | Bloodthirsty | Increased Physical Harm |
| Weapon 1 | Pillar of Nirn | 2H Sword | Precise | Flame Damage Enchant |
| Weapon 2 | Perfected Spectral Cloak | Dagger | Infused | Poison Damage Enchant |
| Weapon 2 | Perfected Spectral Cloak | Dagger | Infused | Weapon Damage Enchantment |
Gear Setup 2
| Gear | Set | Weight | Trait | Enchantment |
|---|---|---|---|---|
| Chest | Leviathan | Medium | Divine | Stamina |
| Belt | Leviathan | Medium | Divine | Stamina |
| Shoes | Hunding’s Rage | Medium | Divine | Stamina |
| Pants | Hunding’s Rage | Medium | Divine | Stamina |
| Hands | Hunding’s Rage | Medium | Divine | Stamina |
| Head | Stormfist | Medium | Divine | Health |
| Shoulder | Stormfist | Medium | Divine | Stamina |
| Necklace | Leviathan | Jewelry | Bloodthirsty | Increased Physical Harm |
| Ring | Leviathan | Jewelry | Bloodthirsty | Increased Physical Harm |
| Ring | Leviathan | Jewelry | Bloodthirsty | Increased Physical Harm |
| Weapon 1 | Hunding’s Rage | 2H Sword | Precise | Flame Damage Enchant |
| Weapon 2 | Spectral Cloak | Dagger | Infused | Poison Damage Enchant |
| Weapon 2 | Spectral Cloak | Dagger | Infused | Weapon Damage Enchant |
Gear Setup 3 Beginner
This setup is for new players. You want to craft or ask someone to craft 5x Hunding’s Rage and 4x Night Mother’s Gaze. 3x Agility jewelry can be bought in the guildstores for little money.
| Gear | Set | Weight | Trait | Enchantment |
|---|---|---|---|---|
| Chest | Night Mother’s Gaze | Medium | Divine | Stamina |
| Belt | Night Mother’s Gaze | Medium | Divine | Stamina |
| Shoes | Night Mother’s Gaze | Medium | Divine | Stamina |
| Pants | Night Mother’s Gaze | Medium | Divine | Stamina |
| Hands | Hunding’s Rage | Medium | Divine | Stamina |
| Head | Hunding’s Rage | Medium | Divine | Stamina |
| Shoulder | Hunding’s Rage | Medium | Divine | Stamina |
| Necklace | Agility | Jewelry | Robust | Increased Physical Harm |
| Ring | Agility | Jewelry | Robust | Increased Physical Harm |
| Ring | Agility | Jewelry | Robust | Increased Physical Harm |
| Weapon 1 | Hunding’s Rage | 2H Sword | Precise | Flame Damage Enchant |
| Weapon 2 | Hunding’s Rage | Dagger | Infused | Poison Damage Enchant |
| Weapon 2 | Hunding’s Rage | Dagger | Infused | Weapon Damage Enchant |
Where can I get the gear?
Perfected Arms of Relequen: vCloudrest
Arms of Relequen: Cloudrest
Pillar of Nirn: Falkreath Hold Dungeon
Perfected Spectral Cloak (Maelstrom 2H): vBlackrose Prison Arena
Spectral Cloak: nBlackrose Prison Arena
Slimecraw: vWayrest Sewers 1, Undaunted Enclave
Velothi Ur-Mage’s Amulet (Mythic): Antiquities
Perf. Ansuul’s Torment: vSanity’s Edge Trial
Hunding’s Rage: Craftable
Agility: Guildstore
Night Mother’s Gaze: Craftable
Leviathan. Crypts of Hearts 1 & 2
Perfected Titanic Cleave (Master’s Two Hander): vDragonstar Arena
Titanic Cleave (Master’s Two Hander): Dragonstar Arena
Mechanical Acuity: Craftable
Skills


| Two-Hander Mainbar | Dual Wield second bar |
|---|---|
| Slot 1: Carve | Slot 1: Deadly Cloak |
| Slot 2: Stampede | Slot 2: Anti-Cavalry Caltrops |
| Slot 3: Wrecking Blow | Slot 3: Disintegrating Dragonfire |
| Slot 4: Searing Claw | Slot 4: Incinerate |
| Slot 5: Reverse Slice | Slot 5: Molten Whip |
| Ultimate: Flawless Dawnbreaker | Ultimate: Shifting Standard |
- Carve: Great AoE (area of effect) damage and also applies a bleed on each esnemy.
- Stampede: Powerful ground DoT (damage over time effect)
- Wrecking Blow: Your main spammable.
- Searing Claw: Strong damage over time effect.
- Reverse Slice: Your execute ability after 30%.
- Flawless Dawnbreaker: Passively grants more weapon damage. Your secondary ultimate, strong against undead and daedra.
- Deadly Cloak: Your main backbar damage over time area effect that procs enchants on the backbar and also sets.
- Anti-Cavalry Caltrops: Deals AOE damage over time.
- Disintegrating Dragonfire: Strong damage over time effect for both Single Target and AoE damage.
- Incinerate: Strong damage ability, we use this every rotation once. Prebuff with this before the fight to get extra Weapon damage from Seething Fury buff Molten Whip.
- Molten Whip: Just passively slotted, gives you Seething Fury buff when you activate Flames of Oblivion.
- Shifting Standard: Your main ultimate, increases all your damage and also decreases incoming damage.
Class Mastery
Class Mastery is a new system in ESO that allows pure class builds to get two additional powerful passives to better compete against Subclass builds. Activating subclassing will deactivate Class Mastery passives.
All Dragonknight Class Mastery Passives
For our 2H Stamina Dragonknight Build, we are going to use the following:
 Inexorable Descent – Boosts Landslide passive to give 2% per stack instead of 1% damage boost.
- Wildfire Embers – Applies extra DoT.
Scribing Skills
The ESO Scribing System allows us to add modified new skills to our build. We have one good option for our two hander build called Bloody Smash. Bloody Smash deals good direct and damage over time damage. However it isn’t stronger than any of the other skills, therefore you can slot it but don’t have to.
Important: Please read here how to get Grimoires, Focus Scripts, Signature Scripts and Affix Scripts for the ESO Scribing System.
Base Scribing Skill:
- Two Handed: Smash


Bloody Smash
Smash turns into Bloody Smash with our Scribing scripts.
- Focus Script
- Signature Script
- Lingering Torment (Damage over time)
- Affix Script
- Berserk (5% more damage)
You can You can also test more combinations out with the ESO Scribing Simulator.
Champion Points – 2H Stamina Dragonknight Build
Below you can find the Champion Points setup for this build. Work your way from top to bottom in your allocation. For more information on Champion Points, please visit the Champion Points Overview Page on ESO-Hub.com.
Hovering over each perk will give you insights on what it does. Presets are also provided for each of the allocations below.
Click the tab below to open the allocation.
Important Info for 2H Stamina Dragonknight Build
Buff-food
Any of the three foods below works well with the build. For a list of all buff food and drink consumables please visit the Buff Food and Drinks Overview Page.
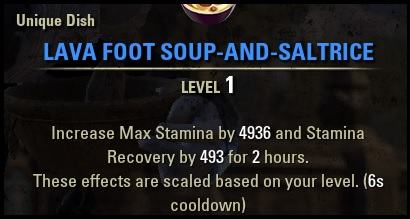
Lava Foot Soup and Saltrice
(Saltrice, Flour, Potato, Scrib Jelly)
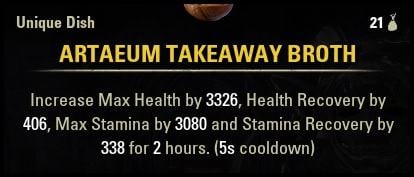
Artaeum Takeaway Broth
(Max Health+Max Stamina+Stamina Recovery+Health Recovery)
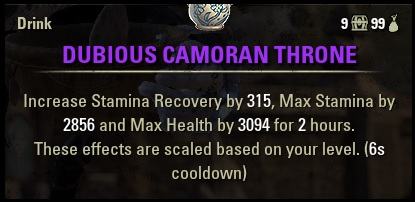
Dubious Camoran Throne
(2nd option if Artaeum is too expensive)
Mundus Stone
The Thief Mundus Stone increases our overall Weapon Critical Rating which boosts our damage. For more information on Mundus Stones please visit the Mundus Stone Overview Page.
The Thief Mundus Stone (Increased Weapon Critical)
Race
Any race with stamina based perks works for this setup. If you want a complete overview of all races and racial passives, then I recommend checking out the ESO Races Overview page.
Orc
Khajiit
Dark Elf
Nord
Redguard
Wood Elf
Imperial
High Elf
Potions
Potions are an important part of the 2H Stamina Dragonknight build, they apply very powerful buffs and extra resources to your character. Potions benefit from the Alchemy passive Medicinal Use, make sure to always have that passive active.
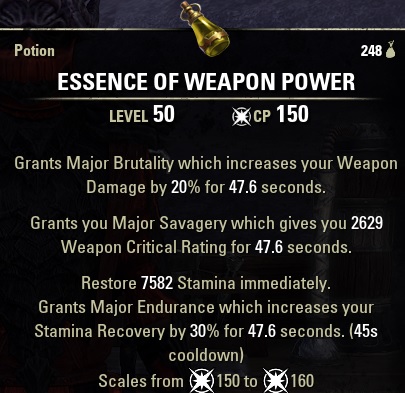
Weapon Crit Potions
(Weap dmg, Weap Crit, Stamina)
(Blessed Thistle, Dragonthorn, Wormwood)
Passives
- Ardent Flame: Combustion, Traumatic Burns, Fan the Flames, A Soul Ablaze
- Draconic Power: Iron Skin, Burning Heart, Elder Dragon, Scaled Armor
- Earthen Heart: Eternal Mountain, Battle Roar, Mountain’s Blessing, Helping Hands
- Two Handed: Forceful, Heavy Weapons, Balanced Blade, Follow Up, Battle Rush
- Dual Wield: Slaughter, Dual Wield Expert, Controlled Fury, Ruffian, Twin Blade and Blunt
- Medium Armor: Dexterity, Wind Walker, Improved Sneak, Agility, Athletics
- Fighters Guild: Intimidating Presence, Slayer, Banish the Wicked, Skilled Tracker
- Psijic Order (AoE Setup): Clairvoyance, Concentrated Barrier, Deliberation
- Undaunted: Undaunted Mettle, Undaunted Command
- Racial: All
- Alchemy: Medicinal Use
Attributes
All into Stamina
Resource Management
Using the Artaeum Buff Food already gives us a lot of extra stamina recovery that we need. Battle Roar also helps a lot giving resources back every time you active an ultimate. During the fight healers or tanks will throw Energy Orb that you can synergize to get back resources, these are very important!
Other than that you have to use potions on cooldown to give you a huge amount of stamina back and you can always perform some heavy attacks throughout the fight to restore stamina. If you have all these things you should be fine with sustain, just don’t forget to do heavy attacks when you drop low on stamina.
- Artaeum Takeaway Brooth or any other buff food listed
- Battle Roar
- Orbs or Spears from Healers
- Heavy Attacks resource return (optional)
- Potions
ESO Dragonknight Subclassing Build Options
ESO’s Subclassing offers a lot of variety, allowing you to swap, mix, and match different skill lines of various classes all on one character. Read our How does Subclassing work in ESO guide to get an understanding of how the subclass system works. We also have plenty of ESO Builds optimized for Subclassing.
Related Content
Other Stamina Dragonknight Guides:
- Stamina Dragonknight Beginner Guide (Read first if you are a new player)
- Stamina Dragonknight Beginner 160CP Build (Made for new players)
- Stamina Dragonknight Bow Build
- Stamina Dragonknight Dual Wield Build
- SOLO Stamina Dragonknight Build
- More viable Stamina DPS Sets Article for Endgame
Other 2H Stamina Builds:
- 2H Stamina Arcanist DPS Build
- 2H Stamina Templar DPS Build
- 2H Stamina Sorcerer DPS Build
- 2H Stamina Warden DPS Build
- 2H Stamina Necromancer DPS Build
Update Log 2H Stamina Dragonknight Build for ESO
15.04.2019 Updated Build for the Elsweyr Chapter. Stamina Dragonknight 2H Build PvE.
20.10.2019 Updated the Build for the Dragonhold DLC.
19.02.2020 Updated the Build for the Harrowstorm DLC.
17.05.2020 Updated the Build for the GREYMOOR CHAPTER.
20.08.2020 Updated the Build for the STONETHORN DLC, Greymoor Chapter.
03.09.2020 Updated the Champion Points 810, 600, 300.
26.10.2020 Updated the Build for the MARKARTH DLC, Greymoor Chapter.
05.03.2021 Updated the Build for the FLAMES OF AMBITION DLC, Blackwood Chapter.
25.05.2021 Updated the Build for the BLACKWOOD CHAPTER.
12.08.2021 Updated the Build for the WAKING FLAMES DLC, Blackwood Chapter.
02.09.2021 Updated the Champion Points link and added tooltips to the buff food links, WAKING FLAMES DLC, Blackwood Chapter.
21.10.2021 Updated the Build for the DEADLANDS DLC, Blackwood Chapter.
10.03.2022 Updated the Build for the ASCENDING TIDE DLC, High Isle Chapter.
20.05.2022 Updated the Build for the HIGH ISLE CHAPTER.
10.08.2022 Updated the Build for the LOST DEPTHS DLC, High Isle Chapter.
26.10.2022 Updated the Build for the FIRESONG DLC, High Isle Chapter.
13.03.2023 Updated the Build for the SCRIBES OF FATE DLC, Necrom Chapter.
31.05.2023 Updated the Build for the ESO NECROM CHAPTER.
25.10.2023 Updated the Build for the Necrom Update 40.
06.03.2024 Updated the Build for the Scions of Ithelia DLC U41, Gold Road Chapter.
31.05.2024 Updated the Build for the Gold Road Chapter U42.
20.08.2024 Updated the Build for Update 43, Gold Road Chapter.
28.10.2024 Updated the Build for Update 44, Gold Road Chapter.
11.03.2025 Updated the Build for Update 45, Fallen Banners.
27.05.2025 Updated the Build for Update 46, Seasons of the Worm Cult Part 1.
18.08.2025 Updated the Build for Update 47 Feast of Shadows DLC, Seasons of the Worm Cult.
27.10.2025 Updated the Build for Update 48 Seasons of the Worm Cult Part 2.
09.03.2026 Updated the Build for Update 49, Season 0.
04.06.2026 Updated the Build for Update 50, Season 0 + 1.
Tags: Stamina 2H Stamina Dragonknight Build, Dragonknight 2H Build, Stamina DK 2H Build, Stam DK 2H Build, Serpent Build Alcast.
Related Guides: