

Welcome to the ESO Blackrose Prison Guide. In this guide all 5 stages will be thoroughly explained. We will also take a look at what gear and build setups you should aim for to make your life easier in there; I will cover setups for healers, tanks and damage dealers.
The Blackrose Prison Arena, like mentioned before, has a total of 5 stages. Each stage contains 4 rounds, with each round having 3 waves, plus the boss fight.
Loot & Rewards
There are several rewards and ability-altering weapons that you can earn in the Blackrose Prison Arena.
Ability Altering Weapons
You can earn imperfect and perfect versions of the Blackrose Weapons. The imperfect versions drop in normal mode, whereas the perfect versions drop in veteran mode. The unique bonus is the same on the imperfect and perfect version. However, the perfect version also has an additional two-piece bonus like you can see below.
- Radial Uppercut & Perfected Radial Uppercut Two Hander
- Gallant Charge & Perfected Gallant Charge One-Handed and Shield
- Spectral Cloak & Perfected Gallant Charge Dual Wield
- Virulent Shot & Perfected Virulent Shot Bow
- Wild Impulse & Perfected Wild Impulse Destruction Staff
- Mender’s Ward & Perfected Mender’s Ward Restoration Staff
Rewards
- New Title
- Blackrose Executioner, obtained by completing the Blackrose Prison Conqueror achievement.
- Blackrose Condemner, obtained by completing Blackrose Prison Vanquisher achievement.
- The Unchained, obtained by completing the God of the Gauntlet achievement.
- New Dye
- Apricot Outrage, obtained by completing the Blackrose Prison Vanquisher achievement.
- New Skin
- Marshmist Palescale Skin, obtained by completing the Blackrose Prison Conqueror achievement.
Table of Contents
- Loot & Rewards
- Quick Tips
- Group Setup
- PowerUp Sigils
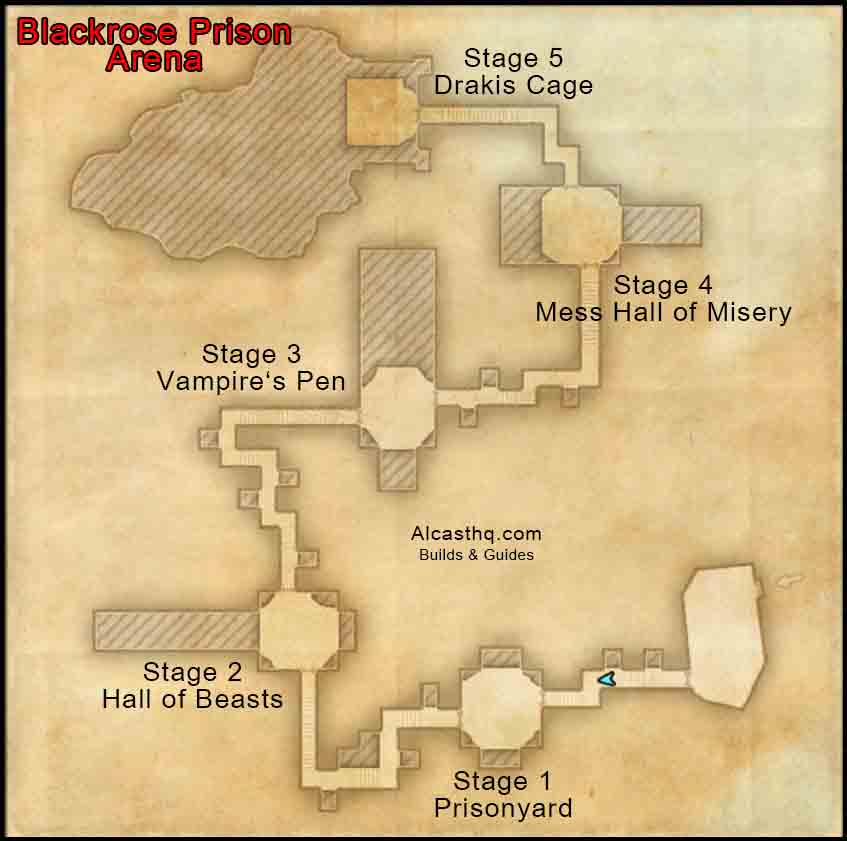
- Blackrose Prison Map
- Stage 1 Prisonyard
- Stage 2 Hall of Beasts
- Stage 3 Vampire’s Pen
- Stage 4 Mess Hall of Misery
- Final Stage 5 “Drakeeh’s Cage”
- Gameplay
- Achievement List
- Blackrose Prison Arena Helper Addon by @andy.s
- Advanced Tactics for Blackrose Prison Arena
Quick Tips
- Sigils: If you are new to the arena, make sure to use Sigils, they are insanely helpful.
- Stuns: There are a lot of mechanics in the Blackrose Prison Arena that stun you, stamina can be tough to manage, especially if you are playing a magicka character.
- Chaining: The tank will mainly be busy chaining monsters to stack them faster for AoE damage. Therefore make sure to have enough resources to constantly keep chaining.
- Stack & Burn: There are a lot of monsters, I recommend stacking them as much as possible and kill them with AoE damage.
- Energy Orbs & Shards: Make sure to use Energy Orb and Luminous Shards, this will ensure that your people will have better sustain.
- Positioning: The tank should try to position big monsters target area towards a wall, so their AoE high impact damage does not get thrown over half the Arena, but instead just hits the wall where nobody can be hit.
- Grouping: Make sure to go in with either two stamina or two magicka damage dealers. I do not recommend mixing them.
Group Setup for Blackrose Prison Arena
All my PvE builds will also have a specific Blackrose Prison Arena section, to showcase the recommended setups for the Blackrose Prison Arena. In this section of the Blackrose Prison Arena Guide I want to give you tips for each role.
Tank Specific Tips
Recommended Health: 50k or more
The tanks main job in this Arena is to chain monsters into one position, so your damage dealers can use AoE abilities to kill them fast. Therefore you will need a lot of magicka sustain and optimize time for chaining mobs in as fast as possible. This works best on a Dragonknight, as you can manage your magicka with Spell Symmetry and Unrelenting Grip very efficient. Every time you use Spell Symmetry you will save 25% magicka on the next cast of chains.
To optimize the time that you can spend on using Spell Symmetry and chaining, we are using the Mighty Chudan Monster Set. Having permanent Major Ward and Major Resolve (Increased Spell and Physical Resistance) is good, because that way we do not need to use another skill that costs magicka to keep those two very important buffs up. Therefore you can focus more on chaining. In addition, Mighty Chudan also gives you even more resistances thanks to the 1 piece bonus.
Like always, I also recommend using Ebon Armory. Ebon Armory is nice because it boosts the health of your group members, thus you can take more overall damage. The last set can be a choice of yours. In our 4-man team the tank used sets like Akaviri Dragonguard. The Akaviri Dragonguard set makes it possible to use more ultimates throughout the stages, which is especially nice when we look at high cost ultimates like Aggressive Warhorn and Magma Shell.
The Blackrose Prison Arena can be tanked with any class, as all classes have access to some sort of chaining mechanism. However, Dragonknight with the magicka cost chains is the best choice you can make.
Healer Specific Tips
Recommended Health: 24k
The most important thing in the Blackrose Prison Arena is, that the group members stay close together so the healer can make sure to get everyone in his Illustrious Healing. If people are too spread out it can be tough to heal the whole group, so make sure to keep that in mind. As a healer also make sure to provide Energy Orb and Luminous Shards to boost the overall sustain of your group members. In terms of sets there aren’t many options.
If your group is new to the Arena, I recommend using Kagrenac’s Hope. This will increase your resurrection speed by a lot and make it easier to resurrect people during combat. Also make sure to remind your damage dealers to slot some form of healing or shielding, so in case you die that they have something to shield or heal themselves with. Other good sets that you can use are for example Worm’s Raiment if your group consists of magicka damage dealers.
Stamina Damage Dealers Tips
Recommended Health: 24k or more
Stamina damage dealers are the preferred choice for Blackrose Prison Arena. They have very fast movement speed, high AoE and Single Target damage and have really good sustain with the right sets. Another very important point to consider is that stamina setups always have enough stamina to block or break free; this is because there are many mechanics that stun you or deal a lot of damage. You can both play a Two Hander or Dualwield frontbar setup. Dual Wield setup offers Deadly Cloak, which is really nice because it reduces all the AoE incoming damage by 20%, there is a lot of AoE damage trust me. Whirling Blade makes it easy to AoE damage most of the monsters, melting them fast into death! Two Hander can be nice if used in combination with Titanic Cleave and Brawler. Brawler will provide huge instant shields all the time because there is so many monsters and the Master’s Greatsword will make Brawler hit like a freaking truck, then you can finish of enemies with Reverse Slice. For the backbar make sure to utilize Arrow Barrage. As you can see it is very important that you focus on a lot of AoE damage to kill as many monsters as possible in a short time, otherwise you will get overrun.
In terms of sets, I can highly recommend using Vicious Serpent. Vicious Serpent is a no brainer as this set will provide you with the best sustain by far. Every time a monster dies, you gain around 2000 stamina, on top of that you also gain Major Expedition, which increases your movement speed by 30% and thus makes it easier to avoid incoming damage.
And most important, make sure to position yourself correctly, never stay in front of big mobs that have one shot mechanics. Always make sure to stay in the healer’s range and if necessary, slot Resolving Vigor to have some sort of self-heal.
Magicka Damage Dealers Tips
Magicka damage dealers have a tougher time in the Blackrose Prison Arena. That comes mostly due to the fact that magicka setups have such a small stamina pool. In the Blackrose Prison Arena you will need to dodge roll, block and CC break a lot, which drains your stamina very fast. Stamina management is one of the toughest things for magicka setups in the Blackrose Prison Arena. This is mostly a problem in Stage 2 and Stage 5, as there are lots of mechanics that can stun you. Especially in Stage 5, where you get hit by unavoidable stones thrown by totems. Depending on which class you play, I also recommend that you get access to Major Ward and Major Resolve to increase Spell and Physical Resistance by 5948. Most of the time abilities that apply those buffs also have other benefits. Here you can find abilities of each class that apply those buffs:
- Sorcerer: Boundless Storm
- Nightblade: Shadow Barrier passive activates when you cast Twisting Path
- Templar: Channeled Focus
- Dragonknight: Volatile Armor
- Warden: Expansive Frost Cloak (This ability applies Major Ward and Major Resolve to the full group)
In terms of magicka sustain, I recommend using Clockwork Citrus Filet (or Witchmother’s Potent Brew) or the False God’s Devotion set.
Power Up Sigils in Blackrose Prison
The Power Up Sigils in the Blackrose Prison Arena are group-specific. They function similar to the sigils in the Maelstrom Arena. For a new group I highly recommend utilizing the sigils, as they can help make the Arena a lot easier.
- Soulgem Sigil: When you use the Soulgem Power Up you are resurrecting all of your dead group members, kind of like a second chance.
- Shield Sigil: This will apply a shield, protection you from some of the damage you receive and it reflects all ranged attacks.
- Sustain Sigil: This sigils applies sustain to your group, increasing your regeneration stats by a lot including ultimate regeneration.
- Healing Sigil: This will heal you for a specific amount of time.
Blackrose Prison Map
All the different stages have similar surroundings in terms of size and spawn points. Each stage has a total of 5 rounds: 4 trash fight rounds and 1 boss fight round. Each round consists of 3 waves.
Stage 1 Prisonyard

The Prisonyard is the first stage of the Blackrose Prison Arena. In this Arena you will fight against the Imperials that have sided with the Leader of the Blackguards. There will be a lot of fire damage in this Arena due to the Flame Atronachs and the boss that you fight.
Round 1 – 4 in the Prisonyard
The first Arena is fairly easy once you get the hang of it. The tank has to make sure to stack as many monsters as possible, so the damage dealers can focus on AoEing the enemies down and the healer can focus on healing the whole group. When you are stacking monsters, make sure to focus on the big monsters, they usually have more health and die slower. Therefore keep all your AoE DoTs on the ground so the small monsters die and try to focus the big monsters. Some of the monsters that spawn in the first stage of the Blackrose Prison Arena are CC immune. The Imperial Cleaver with the two hander, which is not a problem because the monster is melee and will come to you anyway. The Imperial Dread Knight with sword and shield will also come to you because the monster is melee. The most annoying monster is the Imperial Incinerator with a Destruction Staff, the monster has a long range and is CC immune, therefore you can not pull him into the middle. The Incinerator will therefore stay far way from the group, make sure that when those monsters spawn that your damage dealers focus the Incinerators down. They also have a dangerous AoE fire attack, which when not interrupted can deal a lot of damage to the group.
Another thing to mention, if the Flame Atronachs become a problem because there is too many of them, you can also kill them as they do not have that much health, but just remember they will keep respawning.
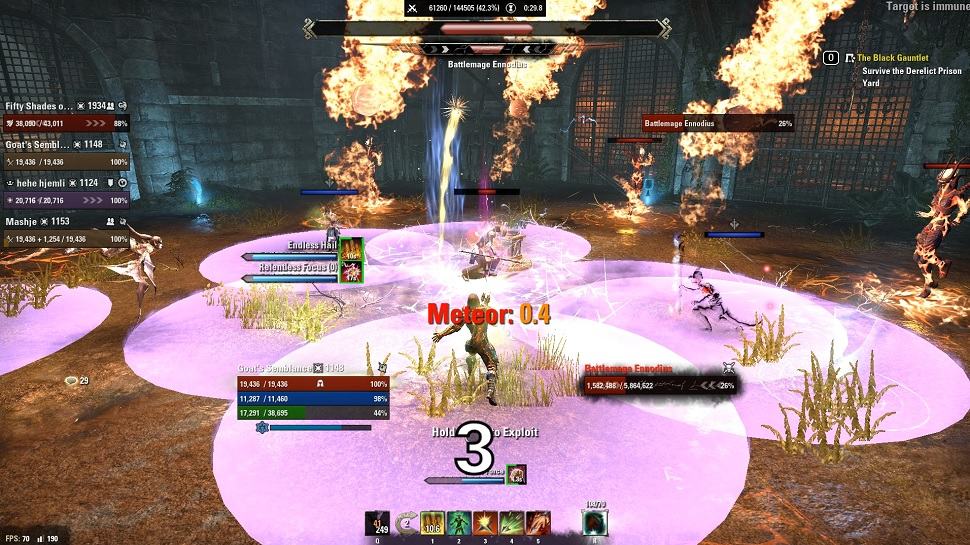
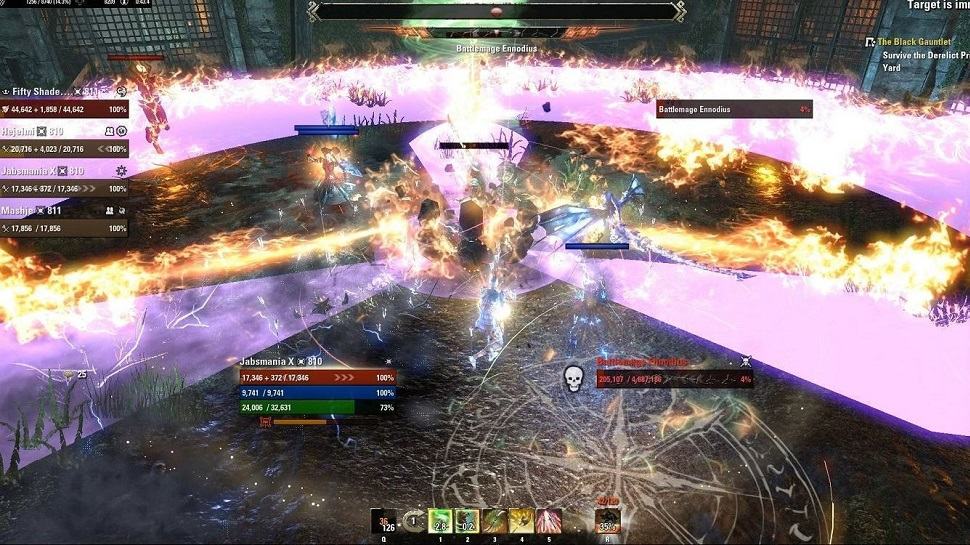
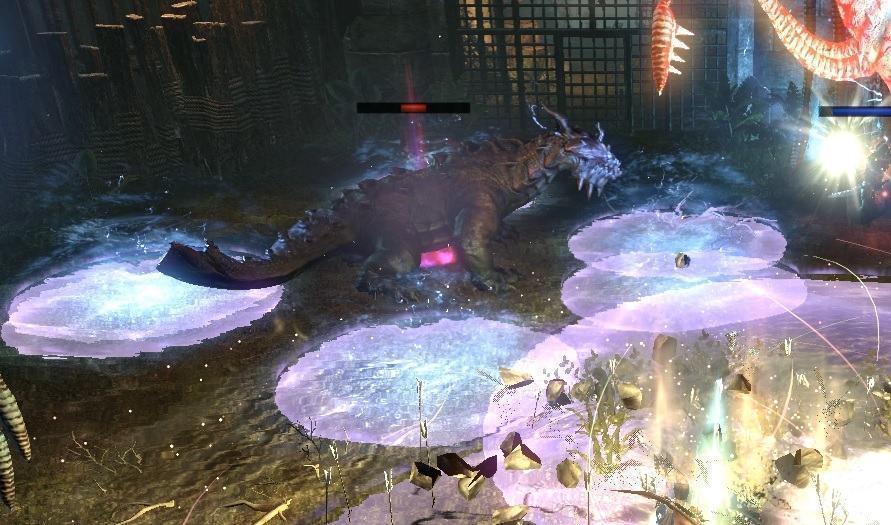
Bossfight – Battlemage Ennodius [HP: 5,884 Mio.]
This bossfight is fairly simple, essentially it is a dps race. Therefore make sure to focus the boss at all times. There are only two dangerous attacks that the boss does from time to time. The Fire Meteors, which the boss will start charging and you see a circle below each party member. You need to make sure to spread out to spread the damage. if your group is too stacked and overlaps with each other, you will die. The other dangerous attack is the Fire Cage, the boss will teleport to the middle, 3 fire beams will come out and you have to make sure to avoid the fire beams. Other than that there are Flame Atronachs spawning, you could choose to kill them so you do not get any Fire AoE on the ground from them. However, I recommend just focusing on the boss itself and avoid the Fire AoE circles from the Flame Atronachs, they are easy to sidestep.
Monsters & Mechanics
- Imperial Cleaver (Two Handed)
- Frontal cleave attack.
- Immune to crowd control effects.
- Imperial Archer (Bow)
- Channels Snipe, can be interrupted, deals a lot of damage if you get hit by it.
- Casts Endless Hail on the group.
- Imperial Footsoldier
- Daggerthrow, Throw Flying Dagger towards a player, applies snare.
- Imperial Incinerator
- Strong Fire Light Attack damage.
- Channels a Fire AoE Spell that needs to be interrupted, if not it will deal a lot of damage.
- Immune to crowd control effects.
- Imperial Dread Knight (Sword and Shield)
- Casts a conal Fire Breath attack.
- Uses Talons to root the group.
- Uses Shied Bash attack on a player.
- Immune to crowd control effects.
- Flame Atronach
- Keep respawning.
- They always stay on the fire circles on the ground.
- Fire AoE bomb when they move position.
- Casts Fire circle that rolls over the whole arena in one direction.
- Battlemage Ennodius (Boss)
- Uses Lava Whip on 1 player, usually the tank.
- Light Attacks deal a lot of damage.
- Fire Meteor, the boss will start charging Meteors around himself and you see a circle below each party member. You need to make sure to spread out, if you overlap two circles you are going to die.
- Fire Cage, the boss will teleport to the middle, 3 fire beams will come out and you have to make sure to avoid red beams.
Stage 2 Hall of Beasts

In the Hall of Beasts you have to fight against hordes of monsters like Spiders, Haj Motas, Trolls and so on. The boss in this arena is called Tames-The-Beast, that should give you a pretty straight up idea of what to expect here.
Round 1 – 4 in Hall of Beats
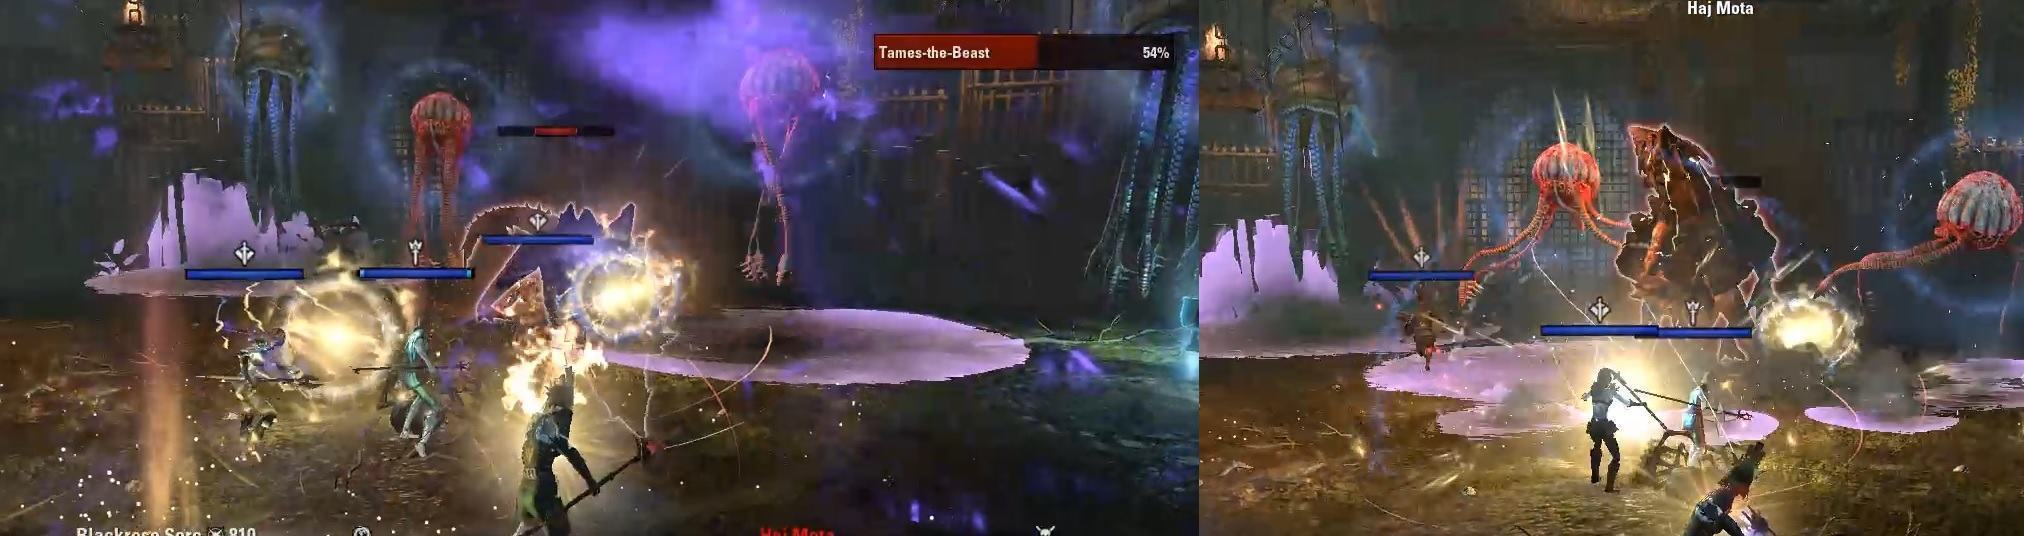
The difficulty curve in stage 2 is a lot higher than Stage 1. Stage 2 is most likely one of the hardest stages to complete. If you get through this stage you should actually be able to complete the Blackrose Prison Arena! The Netches cannot be killed which is quite annoying to say the least. On top of that when they get hit by any sort of damage they will shoot shock damage at you which deals damage. Try to stay close to the middle, the Netches will walk through there less frequently as compared to the outer edge of the Arena. If they still go through the middle make sure to avoid their AoE attacks and heal through the damage that they apply to you via the shock balls. The tank has the most important work to do in stage 2, he needs to pull all monsters that can be pulled towards the middle. Especially mobs like Spiders, which are ranged and will not come to you automatically. Always make sure to focus on chaining the ranged monsters, melee monsters usually come to the middle themselves. Haj Motas, Trolls and Wamasus cannot be pulled in the middle, but this is not a problem because they are melee anyway and will come to you once they get taunted. The only non-chainable enemy in this Arena is the ranged Beastmaster Handler Archer. Therefore it is important that your damage dealers focus the archers down, while the tank is positioning the other monsters.
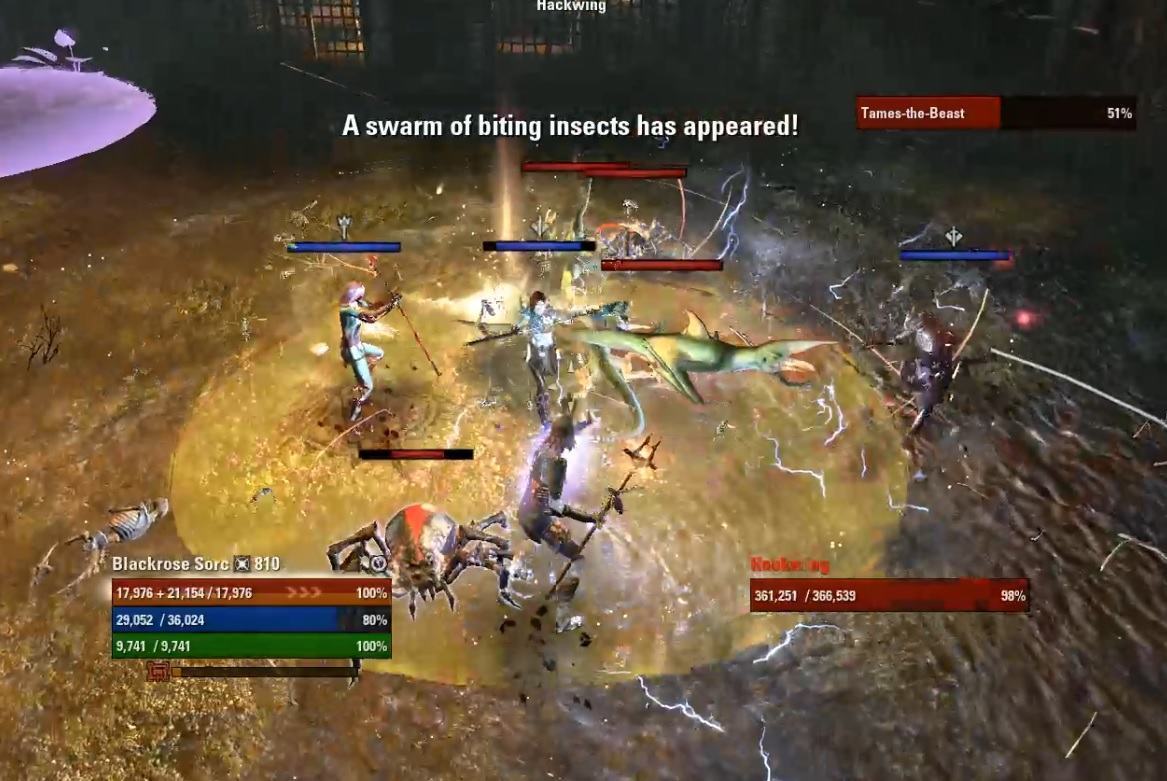
Boss Fight – Tames-The-Beast [HP: 4,887 Mio.]
This boss fight is tough, the boss itself is not really the biggest problem here, but the massive amount of monsters that spawn are. The fight starts off in the middle, try to damage the boss as much as possible here. There are random small mobs spawning throughout the Arena every now and then. At certain percentages you will see the boss doing a gesture to call more monsters; this spawns larger monsters:
- 80% – Troll
- 60% – Haj Mota
- 40% – Wamasu
Make sure to focus down those big monsters, they have abilities that deal a lot of damage and have to be avoided like you will see in the list below. If the Troll, Haj Mota and Wamasu are not killed after a certain timeframe, the mobs and the boss will enrage. After 40% only the small monsters will keep spawning throughout the Arena, so make sure to keep AoE DoTs on the ground to kill them off. If necessary also use direct damage AoE attacks to kill them and focus the main boss till he is dead. Another important thing throughout the boss fight is the Swarm. Tames-The-Beast will cast a swarm of biting insects on someone and the group has to stack on that person to share the damage; if not, the player will die. This is also dangerous because when you stack tightly together, enemy AoE damage can really hit you hard. Usually it is enough if 3 people share the damage and not have all 4 stack, so only stack on the tank if he has the swarm. Otherwise let him keep managing the monsters away from the group.

Monsters & Mechanics
- Bull Netch (unkillable)
- Poison Bloom, big poison AoE on the ground moving with the Bull Netch.
- Shock Ball attack, when the Netch gets hit they shoot Shock balls at players.
- Betty Netch (unkillable)
- Shock AoE, big shock AoE on the ground that the Netch will cast when people are close by.
- Shock Ball attack, when the Netch gets hit they shoot Shock balls at players.
- Hackwing
- Dive, the Hackwings fly through the arena, dealing AoE damage to everything in their way.
- Rake, conal attack that deals a lot of damage, must be avoided.
- Furious Talons, the Hackwing jumps and flies a bit in a straight area, dealing AoE damage to everyone in the AoE range.
- Spider
- Venomous Spit, this is a single target attack, the spiders spit often, and if there are several spiders spitting it can stack up a lot of damage on one player, so make sure to kill spiders as fast as possible.
- Hoarvor
- Cone Attack, the Hoarvors have a very small conal attack, deals heavy damage, make sure to avoid it.
- Crocodile
- Slash, conal AoE infront of the Crocodile, deals a lot of damage, must be avoided.
- Beastmaster Handler (Bow)
- Immune to crowd control effects.
- Venom Spray, conal poison attack that will apply a huge poison DoT if you get it by it, can be dodge rolled.
- River Troll
- Healing, when the Troll drops low on health he starts smashing his chest, he tries to heal himself, you can interrupt this.
- Stomp, the Troll smashes his fists into the ground, dealing AoE damage around him. Very high damage, must be avoided.
- Wamasu
- Storm Bound, Shock ball that the Wamasu shoots at a player, deals little damage but snares.
- Impending Storm, Wamasu charges up and shoots Shock AoE circles over the place, must be avoided because it deals a lot of damage.
- Haj Mota
- Bog Burst charge attack, Haj Mota goes into the ground, charging over a straight area dealing a lot of damage, must be avoided.
- Shockwave, the Haj Mota slams his head into the ground, releasing 5 small AoE circles that deal a huge amount of damage, must be avoided at all times.
- Tames-The-Beast (Boss)
- Crushing Roots, the boss charges up roots and then shoots them at you, rooting and damaging you, you have to roll dodge to break free of the roots.
- Swarm, the boss will cast a swarm of biting insects on someone. The group has to stack on that person to share the damage, if not shared the player will die.
- Snipe, the boss will cast a snipe on the player that taunted him, can be interrupted.
- Enrage, if you do not kill mobs like Haj Mota, Troll, Wamasu in a certain timeframe, the mobs with the boss will enrage.
Stage 3 Vampire’s Pen

In stage 3 of the Blackrose Prison Arena you will meet hordes of undead enemies. The first thing you will notice is that there are floating blueish portals in the arena. Try avoiding them, when you step inside them more monsters will spawn, they are fairly easy to kill in case you still step into one of the portals. The most dangerous enemies in this arena are the Infuser enemies, they sometimes channel an attack and buff their fellow monsters, so you need to make sure to interrupt that. In addition, you will also have to deal with Gargoyles, which have AoE damage put a nasty bleed on the tank and deal a lot of damage in general.
Round 1 – 4 in Vampire’s Pen
The most important thing in this stage 3 of Blackrose Prison Arena is that you focus the Infusers, like mentioned above if not interrupted they will buff their teammates and everything will deal more damage. You can also interrupt them channeling their spell. In this arena you will have a lot of monsters that mostly do light attacks, like Cold Mages, Skeletal Mages, Bloodfiends and Infusers. Bloodfiends are not the problem but the ranged mages if they use light attacks at the same time on a player that is not the tank it can instantly kill you. Luckily a lot of the monsters like Skeletal Mages, Skeletal Soldier and Bloodfiends have low health and die really quick. Cold Mages also do not have a lot of health and can be killed quite easy. Infusers are crowd control immune, that means you can not chain them inside the group, make sure to focus them when they spawn, while the tank is chaining in all the other monsters. Gargoyles and Bone Colossus can also not be chained, but they are melee monsters and will come to you anyway, the tank has to make sure to taunt those big monsters as soon as possible, because they more or less one shot non tank players.
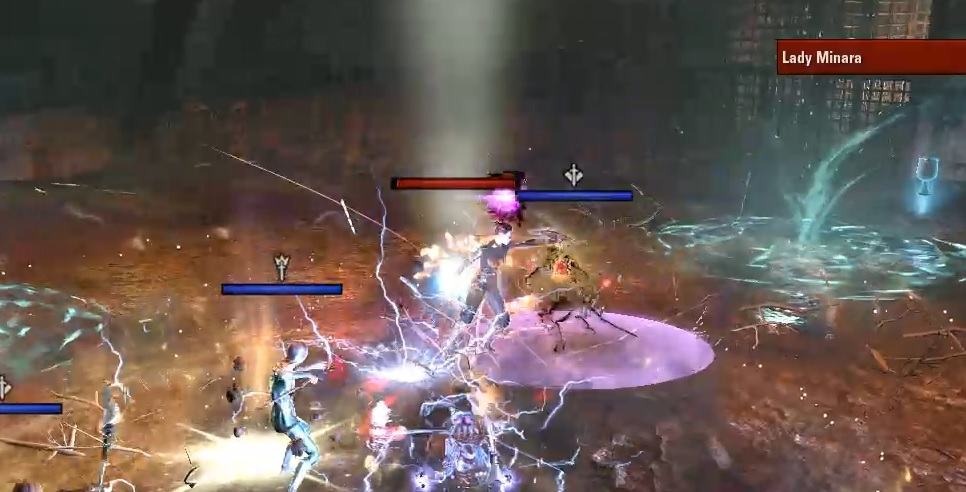
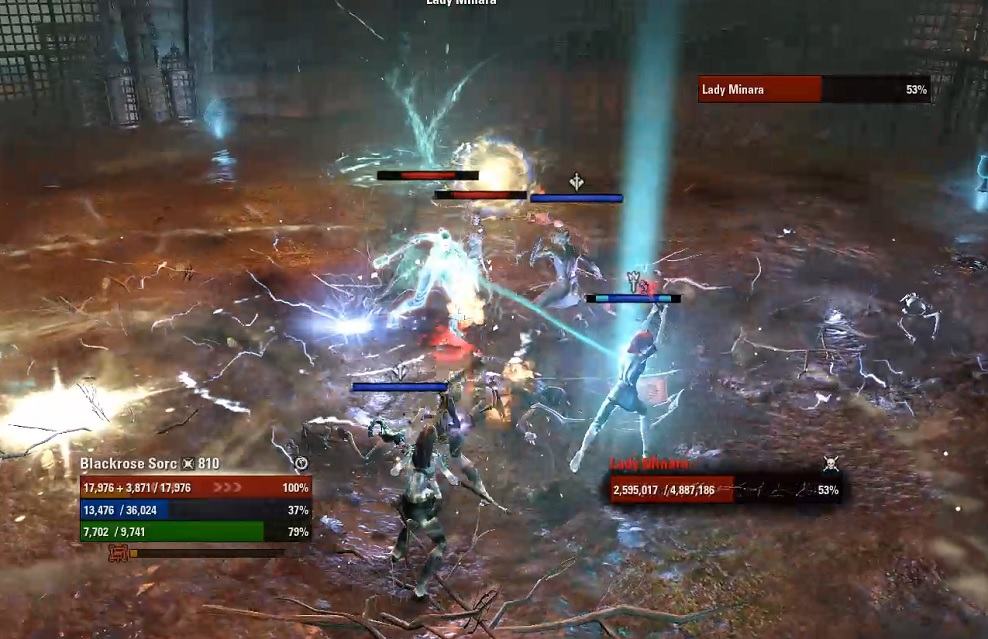
Boss Fight – Lady Minara [HP: 4,887 Mio.]
The tank needs to face the boss away from the group, Lady Minara does a Shield Bash attack on the tank that also has a small AoE radius and if someone else stands too close you will get one shot (similar to Zaan in Scalecaller Peak Shieldbash). Like before, you will also still have the blueish portals that float around in the arena, if you step inside them they will spawn monsters. At 80% an Infuser will spawn that you need to focus down, once he is dead keep damaging the boss. If the Infuser can channel his attack without being interrupted, he will enrage his mates. At 60% a Bone Colossus will spawn that you need to focus down as he deals a lot of extra damage to the tank, also the boss will get a blue beam which makes him immune to damage. At 40% it gets tricky, both a Bone Colossus and an Infuser will spawn. Make sure to focus the Colossus first because you want to break the beam, after that kill the Infuser. At 20% you will again get a Bone Colossus and two Infusers, make sure to kill them as fast as possible. You could try to nuke the boss once you killed the Colossus to break the beam, but it is tricky to do. So I recommend just getting rid of all the monsters.
- 80% – Infuser
- 60% – Bone Colossus
- 40% – Bone Colossus & Infuser
- 20% – 1 Bone Colossus & 2 Infuser
When a Colossus spawns, a blue beam from the Colossus connects to the boss, making him immune to damage. You need to kill the Colossus to break the beam. Another important mechanic here is that if you let the monsters alive that spawn from the portals for too long, they will merge into a Colossus, the tank has to make sure to chain them in so they die quickly.

Monsters & Mechanics
- Bloodfiend
- Rending Slash, Light Attack of Bloodfiend.
- Cold Mage
- Light Attacks, Cold Mages Light Attacks deal a lot of damage.
- Infuser
- Immune to crowd control effects.
- Infuse, the Infuser starts channeling a spell, buffing his undead friends which will increase their damage by a lot. This can and must be interrupted.
- Light Attack, the Light Attacks also deals a lot of damage.
- Skeletal Soldier
- Only spawns if you walk into a portal.
- Skeletal Mage
- Only spawns if you walk into a portal.
- Light Attacks, the Light Attacks deal a lot of damage.
- Gargoyle
- Double Swipe, Light Attack of Gargoyles, deals a lot of damage and also applies the bleed.
- Bleed, when they do Light Attacks, they also apply a nasty bleed on the tank.
- Focal Quake, the Gargoyles smashes his fists into the ground several times, dealing a lot of damage, must be avoided.
- Afterquake, after he has done the Smash, two AoE fields will grow on two players. You must avoid those fields that grow bigger over time, they deal a lot of damage but do not last long.
- Screeching Bat
- Scream, conal attack that stuns you for a brief moment and deals low damage.
- Bone Colossus
- Heavy Attack, the Colossus charges up his heavy attack. Must be dodge rolled, if you are a tank even if you block it will still knock you back and deal a lot of damage.
- Lady Minara
- Explosive Bash, small AoE Shield Bash on the tank, if other people than the tank get it by this you will die.
- Drain, the boss will suck blood out of a player, this has to be breaked free immediately, otherwise the boss will heal up.
- Curse, the boss will cast a blue beam towards a player. Once you are cursed you have to go to one of the blue portals to get rid of the curse. If you take too long you will get one shot.
- Batswarm, she will cast a Batswarm from time to time on the furthest player outside, which drains health and gives it to her, make sure to avoid the AoE with the Batswarm.
- Enrage, when a Colossus spawns, a blue beam will connect the boss and the Colossus, making the boss immune to all damage. You have to kill the Colossus to get rid of the beam.
Stage 4 Mess Hall of Misery

In stage 4 of the Blackrose Prison Arena you fight the same monsters as throughout stage 1 – 3. Technically there is nothing new in terms of mechanics, but you have to fight some monsters from the previous rounds together all mixed up. You will also find all the previous mechanics in this stage like the unkillable Netches, Flame Atronachs and the floating blueish portals that you have to deal with.
Round 1 – 4 in Mess Hall of Misery
During the rounds several strong monsters will spawn. Like in the previous stages, make sure to focus the important big monsters. I will lead you through the different rounds and explain the more important monsters in those rounds.
Round 1 Wave 1 – 3
In the first wave you have to fight an Imperial Cleaver and small monsters, this part is pretty easy. The second wave you have to face a Crocodile, two Imperial Incinerator, which are dangerous because of their AoE Fire attack that has to be interrupted, make sure to focus them down as fast as possible. The other monster that spawned is an Infuser; the tank has to make sure to interrupt his channel, otherwise the other monsters will get buffed. Once the two Incinerators are dead, kill the Infuser. The third wave has an Archer that you need to focus, while the damage dealers focus the Archer, the tank can stack the other small monsters close to the archer so they die fast in the AoE damage of your damage dealers.
Round 2 Wave 1 – 3
In the first wave make sure to focus the Imperial Incinerator that spawns, all the other mobs can be chained into the middle or walk to the tank anyway. On the second wave you have to focus again an Imperial Incinerator, all other monsters will go to the tank and then can be killed in AoE. wave 3 gets a bit tricky, because now the boss from stage 1 will spawn together with two Imperial Incinerators. Make sure to focus the Imperial Incinerators first and then focus on the boss. Once you dropped the boss to 66% health he will despawn and the round is over.
Round 3 Wave 1 – 3
In the first wave make sure to focus the Imperial Archer that spawns, once he is dead focus the Hackwings. Second wave has a Haj Mota spawning, focus on him and the tank should try to chain in the Spiders that spawn along with the Haj Mota in this wave. Third wave Tames-the-Beast will spawn with two Crocodiles. At 80% the Boss will also spawn a Troll, ignore it and focus on the boss. once the boss reaches 66% health he will despawn along with the Troll. You need to kill the two Crocodiles that spawned with the boss to finish the round.
Round 4 Wave 1 – 3
The first wave consists of a lot of small monsters, the tank can chain in all monsters and the damage dealers can AoE them down. The second wave has two Infusers and a Gargoyle that spawn. Make sure to focus on the Infusers, then once those are dead kill the Gargoyle. In the third wave Lady Minara will once again spawn. Before you focus her kill the two Infusers that spawn with her and then focus the boss. The boss will once again despawn once he reaches 66% health.
Boss Fight – Battlemage Ennodius, Tames-The-Beasts, Lady Minara [HP: 3 x 3,225 Mio.]
During this boss fight you will now fight once again against all the previous bosses. When the bosses spawn, they will all still have around 66% (Mini Boss HP). The tricky part here is that things like the Flame Atronachs, Netches and floating blueish portals are also around in addition to all the boss mechanics. Battlemage Ennodius will spawn first, focus her till she is dead. At 35% (Mini Boss HP), the second boss, Tames-The-Beasts, will already have spawned, so you really have to make sure to kill the Battlemage as fast as possible. This way you can avoid having to fight two bosses at the same time. As soon as Tames-The-Beast spawns he calls a Wamasu to his aid; focus the Wamasu as soon as Battlemage Ennodius is dead. Once the Wamasu is dead focus Tames-The-Beast. Now you have breathing room, you can regenerate ultimate and resources if you want to. Once Tames-The-Beast is down to 35% (Mini Boss HP), the next boss Lady Minara will spawn. The tank has to make sure to also taunt here while the rest of the group focuses on Tames-The-Beast. In addition, Tames-The-Best will also summon a Haj Mota. Make sure to focus the Haj Mota, and then continue to focus Tames-The-Beast. When you manage to do that, the hardest part is over. Now focus Lady Minara till she is dead and that’s it for this stage.
The big problem for most groups here is that bosses and monsters overlap spawns with each other. It gets tricky once the second boss spawns with 66% (Mini Boss HP), because when he drops to 60% (Mini Boss HP), which is usually fast because of all the AoE damage then a Wamasu will spawn. By that time you should have the first boss dead and immediately focus the Wamasu. If you are too slow you will have the first and second boss alive with Wamasu and that will be difficult to manage. Once the Wamasu is dead, focus the second boss, at 40% (Mini Boss HP) a Haj Mota will spawn. You can ignore the Haj Mota and nuke the boss or kill the Haj Mota and then kill the boss. The Tank has to make sure to face the Haj Mota away from the group because of the Shockwave attack. Just remember, when the second boss drops to around 35% (Mini Boss HP) the third boss will spawn, so if you decide to kill the Haj Mota make sure not to touch the second boss.
If you are too slow killing the different bosses, it can also happen that the other bosses spawn before you reach the health threshold of around 35.
Easier Tactic
Kill the first boss as fast as possible. Then damage the second boss till 60% (Mini Boss HP) so the Wamasu spawns, kill the Wamasu and then do not damage the second boss anymore. As long as you do not drop the second boss below 40% (Mini Boss HP) then the Haj Mota will not spawn. The second boss itself is not really dangerous, just need to keep him taunted and be aware of the bug swarm mechanic. Now just wait till the third boss Lady Minara spawns and kill that boss first. Once Lady Minara is dead, continue with the second boss. Just remember, it is important not to drop the second boss below 40% (Mini Boss HP), otherwise the Haj Mota will spawn. Also make sure to kill the small ads that spawn, if you do not kill skeleton ads they will transform into a Colossus.
- Note: If you still have issues, use the Shield Sigil after the first boss is dead or while the second one spawns.

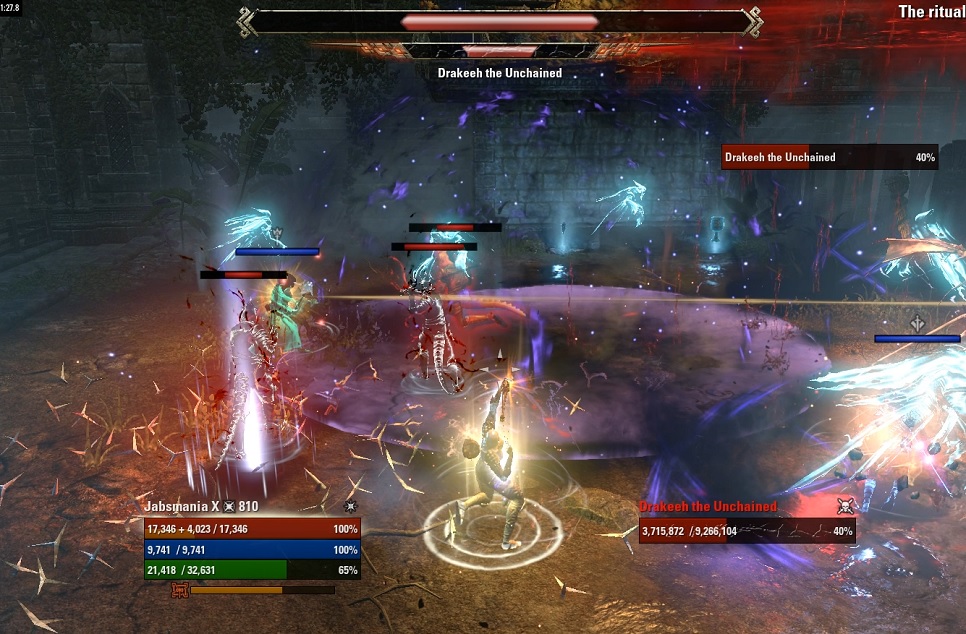
Final Stage 5 Drakeeh’s Cage

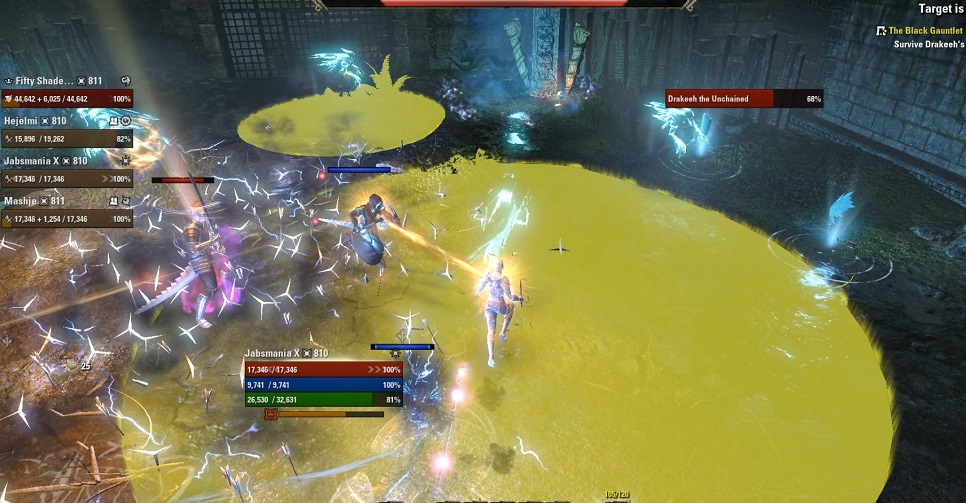
The final stage of the Blackrose Prison Arena can be quite challenging. You have to make sure to try avoid the white Ghosts that float around, they apply Maim debuff to you, decreasing your damage output. If you absorb 3 white Ghosts, you have to go cleanse on one of the three praying portal stones, if you fail to do so you will die from the curse. Stamina management is also tough in this stage, because you constantly get stunned from the Stone Totems.
Round 1 – 4 in Drakeeh’s Cage
In this stage it is important that you focus the Soul of Void monsters. They have some very nasty attacks that they constantly cast if not interrupted. Therefore, make sure to make them your priority. The tank also has to make sure that monsters like the Resurrected Prisoner and Resurrected Convict don’t channel their hard hitting abilities by interrupting them. The whole group can of course help with interrupting those targets, as well. Also make sure to focus on the Stone Totems once they spawn; the faster they are down, the better. Having the Totems up means a lot of stuff can kill you should you find yourself getting stunned from the stones they throw. Another dangerous enemy in this stage is the Lich King, he casts very powerful attack, like explained below. Also make sure to focus the Lich as fast as possible and avoid his AoE attacks.
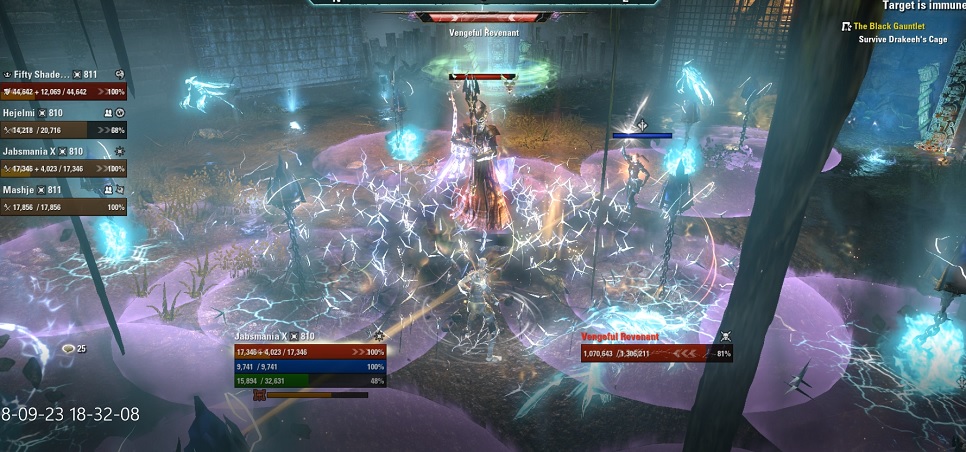
Boss Fight – [HP: 12,018 Mio.]
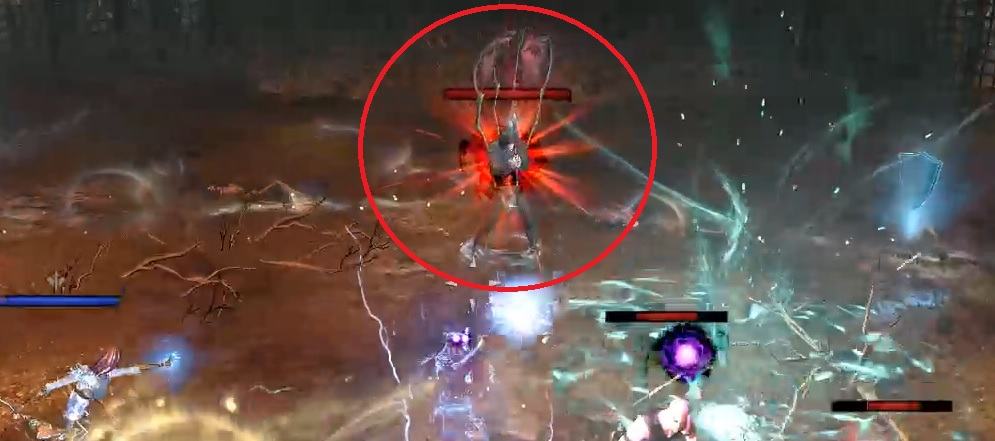
The most important mechanic fighting Drakeeh is the Ghost phase. Drakeeh marks Ghosts from time to time and the player has to make sure to absorb the marked Ghosts (similar to Maelstrom Arena with the last boss where you can absorb the Ghosts). If you fail to do so the group will wipe. When you absorb 3 Ghosts, you get a curse and you have to go cleanse at one of the blue portals. Make sure to only go cleanse once you have 3 Ghosts, because the portals do not always respawn immediately and if you cleanse too much you might die to the curse because there are no portals left. Don’t forget, you can also absorb the Ghosts that are not marked, but you should avoid doing so, because you likely won’t have enough blue portals left to cleanse with, which could lead to a wipe. After every Ghost phase, Drakeeh is going to place a Negate around him, so make sure not to stand close to him in order to avoid the explosion. There is a lot of movement involved here to reposition the boss, you need to make sure to manage your resources well because you have to constantly reapply your DoTs and reallocate to a new position.
Monsters & Mechanics
- Resurrected Prisoner
- Quick Strike, this is the Light Attack of the Prisoners.
- Conal Heavy Attack, must be avoided by players other than the tank, will one shot if not avoided.
- Uppercut, the monster will charge up and attack the targeted player, will one shot.
- Shock Aura, medium sized AoE damage, must be avoided or interrupted.
- Resurrected Convict
- Entropic Flare, Light Attack of the Convict.
- Void, the Mage starts channelling a spell, if not interrupted it will explode on the ground and shoot 3 small AoEs out that deal a lot of damage.
- Soul of Void
- Chill Spear, Soul of the Void will channel a spell and shoot four ice bolts towards the group, dealing a lot of damage. Cannot be interrupted – has to be blocked or dodge rolled.
- Chill Touch, the Soul of the Void will start channelling an attack close to you, dealing moderate damage, this can be interrupted or dodge-rolled
- Double Strike, Light Attack of the Voids that deal a lot of damage.
- Vengeful Revenant (Lich)
- Soul Rupture, he places 3 AoE fields on the ground that explode after one or two seconds, must be avoided because it deals heavy damage.
- Geysir
- Defiling Eruption, hole in the ground that appears, shoots skulls on players, tank needs to step on it.
- Daedric Portal
- These spawn from time to time and shoot out skeleton heads. The tank needs to step on top of them to mitigate the damage. Otherwise the group will get a lot of incoming damage.
- Totem of Stone
- Barrage of Stone, The Totems shoot stones at you that deal a bit of damage and stun you for a brief second, make sure to kill them as fast as possible. You can block or dodge roll the stones.
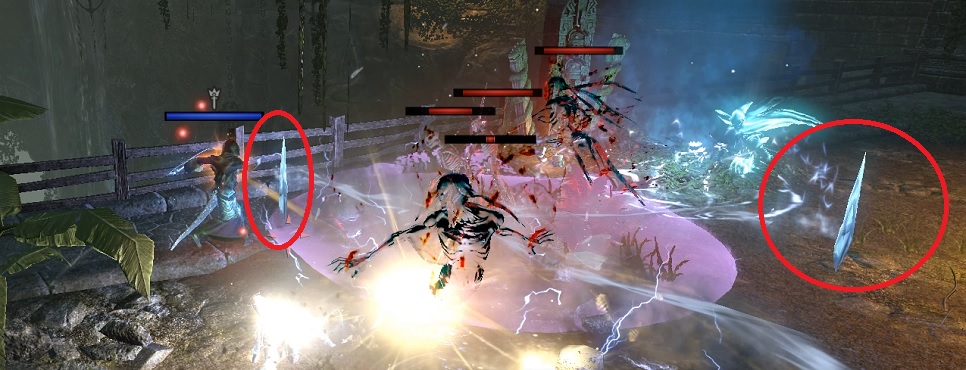
- White Ghosts
- Those Ghosts are floating around and if you walk into them, you get a Maim debuff, reducing your overall damage, you have to go cleanse the debuff at one of the blue portals.
- Blue Portals
- The Portals are for when you get 3 of the Ghosts absorbed, then you will get a curse that you need to go cleanse at the portal, otherwise you will die. Once cleansed, the portal will go away for a short time.
- Drakeeh the Unchauned
- Mark, Drakeeh will mark a few ghosts, the players have to absorb those ghosts, if you get 3 ghosts make sure to go cleanse it at the ritual stone.
- Spirit Scream, a while after he marked some of the ghosts, he will try to drain them and create an explosion, if all ghosts are absorb by the players, this deals low damage. If you fail to absorb all the marked ghosts, it will be a one shot.
- Negate, after the Spirit Scream, Drakeeh will drop a Negate around himself, this can be easily avoided. It also deals a lot of damage so do not stand in it.
- Cleave, Drakeeh uses a frontal cleave which deals a lot of damage, make sure to avoid it as a non tank player.
- Jump, Drakeeh targets a player, jumps into the air and slams his sword into the ground, make sure to avoid or block this mechanic, it deals a lot of damage. After impact he also shoots stone waves out of the ground that do moderate damage.
- Shadow Proxy, those are mimics of Drakeeh that can do the same abilities as the main boss.
- Void, Drakeeh starts channeling a spell, if not interrupted it will explode on the ground and shoot 3 small AoEs out that deal a lot of damage.
Gameplay
Worlds 1st God of the Gauntlet Achievement run, Speedrun, No Death, No Sigil.
First Time Blackrose Prison Arena Run with Magicka Sorcerer – Blind Run, PTS.
Stamina Warden Blackrose Prison Arena Run, PTS.
Stamina Templar Blackrose Prison Arena Run, PTS.
Achievements
There is plenty of achievements that you can complete in the Blackrose Prison Arena. You can get a total of 395 Achievement Points in this Arena.
- Blackrose Prison Vanquisher
- Defeat Battlemage Ennodius, Tames-the-Beast, Lady Minara, and Drakeeh the Unchained in the Normal Blackrose Prison Arena.
- Complete Derelict Prison Yard
- Complete Hall of Beasts
- Complete Vampire’s Pen
- Complete Hall of Misery
- Complete Drakeeh’s Cage
- Rewards
- 15 Achievement Points
- Title: Blackrose Condemner
- Dye: Apricot Outrage
- Defeat Battlemage Ennodius, Tames-the-Beast, Lady Minara, and Drakeeh the Unchained in the Normal Blackrose Prison Arena.
- A Thrilling Trifecta
- Defeat Battlemage Ennodius, Lady Minara, and Tames-the-Beast within 20 seconds of each other in Veteran Blackrose Prison Arena.
- Rewards
- 10 Achievement Points
- Blackrose Buccaneer
- Defeat Battlemage Ennodius, Tames-the-Beast, Lady Minara, and Drakeeh the Unchained in Veteran Blackrose Prison in under 40 minutes without dying. The timer starts when the first arena begins.
- Rewards
- 50 Achievement Points
- Blackrose Prison Conqueror
- Defeat Battlemage Ennodius, Tames-the-Beast, Lady Minara, and Drakeeh the Unchained in Veteran Blackrose Prison Arena.
- Complete Derelict Prison Yard
- Complete Hall of Beasts
- Complete Vampire’s Pen
- Complete Hall of Misery
- Complete Drakeeh’s Cage
- Rewards
- 50 Achievement Points
- Title: Blackrose Executioner
- Skin: Marshmist Palescale
- Defeat Battlemage Ennodius, Tames-the-Beast, Lady Minara, and Drakeeh the Unchained in Veteran Blackrose Prison Arena.
- Cleansing the Damned
- Have a single group member successfully absorb at least three of Drakeeh’s targets during his Spirit Ignition ability and cleanse themselves without dyeing.
- Rewards
- 10 Achievement Points
- Faster than Flames
- Defeat Battlemake Ennodius without group members taking flame damage while her Flame Spouts ability is active in Veteran Blackrose Prison Arena.
- Rewards
- 10 Achievement Points
- Gauntlet Gallop
- Defeat Battlemage Ennodius, Tames-the-Beast, Lady Minara, and Drakeeh the Unchained in Veteran Blackrose Prison Arena in under 30 minutes. The timer starts when the first arena begins.
- Rewards
- 50 Achievement Points
- God of the Gauntlet
- Defeat Battlemage Ennodius, Tames-the-Beast, Lady Minara, and Drakeeh the Unchained in Veteran Blackrose Prison Arena in under 40 minutes without dying and without activating Sigils during combat. The timer starts when the first arena begins.
- Rewards
- 50 Achievement Points
- Title: The Unchained
- Meteor Mayhem
- Use Battlemage Ennodius’ Meteor ability to stun all four atronachs simultaneously in the first arena of Blackrose Prison Arena.
- Rewards
- 10 Achievement Points
- Rarely Rooted
- Defeat Tames-the-Beast without a group member becoming trapped by the Crushing Roots ability in Veteran Blackrose Prison Arena.
- Rewards
- 10 Achievement Points
- Rise of the Fallen
- Use a Sigil of Resurrection in any arena to revive three other group members at once in Blackrose Prison Arena.
- Rewards
- 10 Achievement Points
- Sigil Stingy
- Defeat Battlemage Ennodius, Tames-the-Beast, lady Minara, and Drakeeh the Unchained in Veteran Blackrose Prison Arena without using Sigils during combat.
- Rewards
- 50 Achievement Points
- Skeletal Summoning
- Defeat Lady Minara after three Bone Colossus are summoned within 30 seconds of the round beginning in Veteran Blackrose Prison Arena.
- Rewards
- 10 Achievement Points
- Spirits Sundered
- Defeat Drakeeh the Unchained while always ensuring he absorbs at least 2 spirits before casting Spirit Scream in Veteran Blackrose Prison Arena.
- Rewards
- 10 Achievement Points
- Unchained and Undying
- Defeat Battlemage Ennodius, Tames-the-Beast, lady Minara, and Drakeeh the Unchained in Veteran Blackrose Prison Arena without dying.
- Rewards
- 50 Achievement Points
Blackrose Prison Arena Helper
https://www.esoui.com/downloads/info2181-BlackrosePrisonHelper.html
If you are on PC you can download Blackrose Prison Arena Helper Addon that will make your life easier in the arena. @andy.s on the EU PC server made the addon, please consider donating something to him :)
Advanced Tactics for Blackrose Prison Arena
The advanced video guide is here for people that already played through the arena and want to try to nuke/burst down bosses.