Welcome to the Best BG3 Necromancer Build. The Necromancer is a subclass of the Wizard Class and is a very skilled spellcaster with access to plenty of Necromancy spells. You will be able to animate the dead and bend them to your will.
This build transforms the Wizard from a mere scholar into a Deathlord, capable of siphoning the life force of enemies to fuel an unstoppable army of the undead.
Table of Contents for the BG3 Necromancer Build:
- Necromancer Build Overview
- Necromancer Character Creation (Level 1)
- Necromancer Leveling Guide (2-12)
- Necromancer Build Equipment
- Necromancer Build Extra Info
Please visit our Best BG3 Builds overview page for more builds. If you are interested in more Wizard subclass builds, check our BG3 Wizard Builds category page. To get an overview of all classes, please visit the BG3 Classes overview page.
Necromancer Strengths
Necromancer Weaknesses
BG3 Necromancer Build Overview
Here is a quick overview of the Wizard class and the Necromancy School subclass. If you’re already familiar with them, please skip this section.
Subclass Selection: We will select the Necromancy Subclass at Level 2.
Wizard Class Summary
The Wizard is the most astute spellcaster in Baldur’s Gate 3, with access to a huge array of spells. It makes the perfect starting point for a Necromancer Build.
Some new players get confused about the differences between the Sorcerer and Wizard classes, because they look very similar on the surface. We explained that in-depth in our BG3 Sorcerer vs Wizard Guide.
Necromancy School Subclass Summary
The Necromancy subclass provides a mix of turn-based efficiency, survivability, and massive buffs to summoned units.
As a reminder, we can select the Necromancy Subclass at Level 2.
Character Creation (Level 1) – BG3 Necromancer Build
In this section, we will walk you through the Character Creation for your BG3 Necromancer Build, including the best Race, Background, Skills, Abilities, Spells and Cantrips.
Subclass Selection: We will select the Necromancy Subclass at Level 2.
Top 5 Necro Races
You can use any race for the BG3 Necromancer Build; the differences between the races are quite mild. However, there are a few that are a little more useful than average. The table below summarises the best five Necromancer races.
To optimize your Necromancer, look for races that offer utility beyond raw stats, such as:
| Race | Strengths | Info |
|---|---|---|
Wood Elf |
|
Wood Elves are one of the best races in BG3, thanks to their increased Movement Speed which can give you an upper hand in many situations.
Their immunity to Sleep is especially useful in the early-game, where your low HP will cause you to fall victim to enemy mages who love to cast the Sleep spell. You can also choose Wood Half-Elf, which comes with many of the same benefits. |
|
High Elf |
|
Very similar to Wood Elf, but missing the Stealth Proficiency and doesn’t get extra Movement Speed. You can choose an extra Cantrip to learn, which is handy but not super important. |
Duergar |
|
With their wide choice of armour and weapon proficiencies, and resistances to poison, charm, and paralysis, Duergar are one of the strongest races in BG3.
The only downside of Duergar is their small stature – this reduces their base Movement Speed to 7.5 metres per turn (most races get 9 metres). |
Lolth-Sworn Drow |
|
Drow have similar bonuses to other Elves, but also come with a couple of extra Spells and Superior Darkvision.
You can choose Seldarine Drow instead if you want; they are functionally identical but have a different backstory to their Lolth-Sworn brethren. |
Deep Gnome |
|
The Deep Gnome does a good job of shrugging off a variety of hostile conditions, thanks to its Gnome Cunning. They can also see in the dark.
However, their small size means that they have reduced Movement Speed, like the Duergar. |
Wood Elf
![]()
The Wood Elf (or Wood Half-Elf) is a top-tier choice for a Necromancer. Necromancy Wizards are naturally “squishy” and immobile; this race directly compensates for those weaknesses.
- Proficiency in
 Stealth and Perception
 - Extra Weapon Proficiencies:
- Shortswords
- Longswords
- Shortbows
- Longbows
- Fey Ancestry
 Advantage against Charmed
- Immune to Magical Sleep
- Darkvision
- Fleet of Foot – 1.5 metres of extra Movement Speed
High Elf
![]()
Very similar to Wood Elf, but missing the Stealth Proficiency and doesn’t get extra Movement Speed.
You can choose an extra Cantrip to learn, which is handy but not super important.
- Proficiency in Perception
- Extra Weapon Proficiencies:
- Shortswords
- Longswords
- Shortbows
- Longbows
- Fey Ancestry
- Advantage against Charmed
- Immune to Magical Sleep
- Darkvision
- Choose an extra Cantrip (cast with Intelligence)
Duergar
![]()
With their wide choice of armour and weapon proficiencies, and resistances to poison, charm, and paralysis, Duergar are one of the stronger races in BG3.
The only downside of Duergar is their small stature, which reduces their base Movement Speed to 7.5 metres per turn (most races get 9 metres).
- Can wear Medium Armour
- Can wield axes and hammers
- Dwarven Resilience
- Advantage against Poisoned
- Resistance to Poison Damage
- Superior Darkvision
- Duergar Resilience
- Advantage on Saving Throws against illusions
- Advantage against Charmed and Paralysed
- Duergar Magic
- Enlarge (Level 3)
- Invisibility (Level 5)
Lolth-Sworn Drow
![]()
Drow have similar bonuses to other Elves, but also come with a couple of extra Spells and Superior Darkvision.
You can choose Seldarine Drow instead if you want; they are functionally identical but have a different backstory to their Lolth-Sworn brethren.
- Perception Proficiency
- Fey Ancestry
- Advantage against Charmed
- Immune to Magical Sleep
- Superior Darkvision
- Drow Magic
- Dancing Lights (Level 1)
- Faerie Fire (Level 3)
- Darkness (Level 5)
Deep Gnome
The Deep Gnome does a good job of shrugging off a variety of hostile conditions, thanks to its Gnome Cunning. They can also see in the dark.
However, their small size means that they have reduced Movement Speed, like the Duergar.
![]()
- Gnome Cunning
- Advantage on Intelligence, Wisdom and Charisma Saving Throws
- Superior Darkvision
- Stone Camouflage
- Advantage on Stealth Checks
Starting Cantrips
The BG3 Necromancer Build (Wizard) can select three Cantrips to start the game with. Cantrips are basic spells that do not consume a spell slot when cast, effectively meaning you can cast them as often as you like without limitations.
We recommend choosing the following Cantrips to start the game with:
Note that if you chose High Elf as your race, then you can choose ![]() Fire Bolt as your High Elf Cantrip and therefore get an extra Cantrip from the Wizard list. In that case, we also recommend choosing
Fire Bolt as your High Elf Cantrip and therefore get an extra Cantrip from the Wizard list. In that case, we also recommend choosing ![]() Bone Chill. It deals 1-8
Bone Chill. It deals 1-8 ![]() Necrotic Damage, prevents an enemy from regaining HP and also inflicts Disadvantage on Undead Attack Rolls.
Necrotic Damage, prevents an enemy from regaining HP and also inflicts Disadvantage on Undead Attack Rolls.
Starting Spells
The Necromancer Build (Wizard) lets you learn 6 Spells in Character Creation, but you will only be able to Prepare (equip) 4 of them.
Wizards use a “Learn vs. Prepare” system. Here is the fast breakdown:
- Learned Spells: You pick 6 spells at Level 1, but these are just in your “library.”
- Prepared Spells: You can only use spells that are currently Prepared (initially 4 slots).
- Swap Anytime: Outside of combat, you can open your spellbook and swap your Prepared Spells for free.
With that in mind, we recommend Learning the following spells:
If you don’t know what we mean by terms like Advantage, Concentration or Saving Throw, or want to find out how systems like Stealth work, you will find our BG3 Hidden Mechanics Guide very useful.
Recommended Spells to prepare:
This will give you a good spell for any situation. Please keep in mind that if someone else in your party already uses something similar, swap it out for something else!
Background & Skills
Your most important Abilities for the Wizard Necromancer are going to be Intelligence and Dexterity. For optimal results, you should choose your Background and Skills accordingly.
We recommend choosing the Sage Background, which gives you two Skill Proficiencies:
You can now choose two additional Skills to be Proficient with. Make sure you have these two covered:
Ability Points
Intelligence is your primary stat, but your survivability depends on Dexterity and Constitution.
- Intelligence (Primary): Increases your Spell Save DC and Attack Rolls. High Intelligence ensures your spells actually land and your enemies fail their saving throws.
- Dexterity (Defense): Since Wizards lack Armor Proficiency, Dexterity is your main source of Armour Class (AC). It also improves your Initiative, letting you summon minions before enemies move.
- Constitution (HP & Concentration): Increases your Max HP and helps you pass Concentration Checks. This is vital for maintaining powerful “ongoing” Necromancy spells after taking damage.
With all of this in mind, we recommend an ability spread something like this:
Important Tip:
- The “Even Number” Rule: In Baldur’s Gate 3, only even numbers (12, 14, 16) increase your actual modifier. An 11 is functionally the same as a 10, so we aim for even numbers to maximize efficiency.
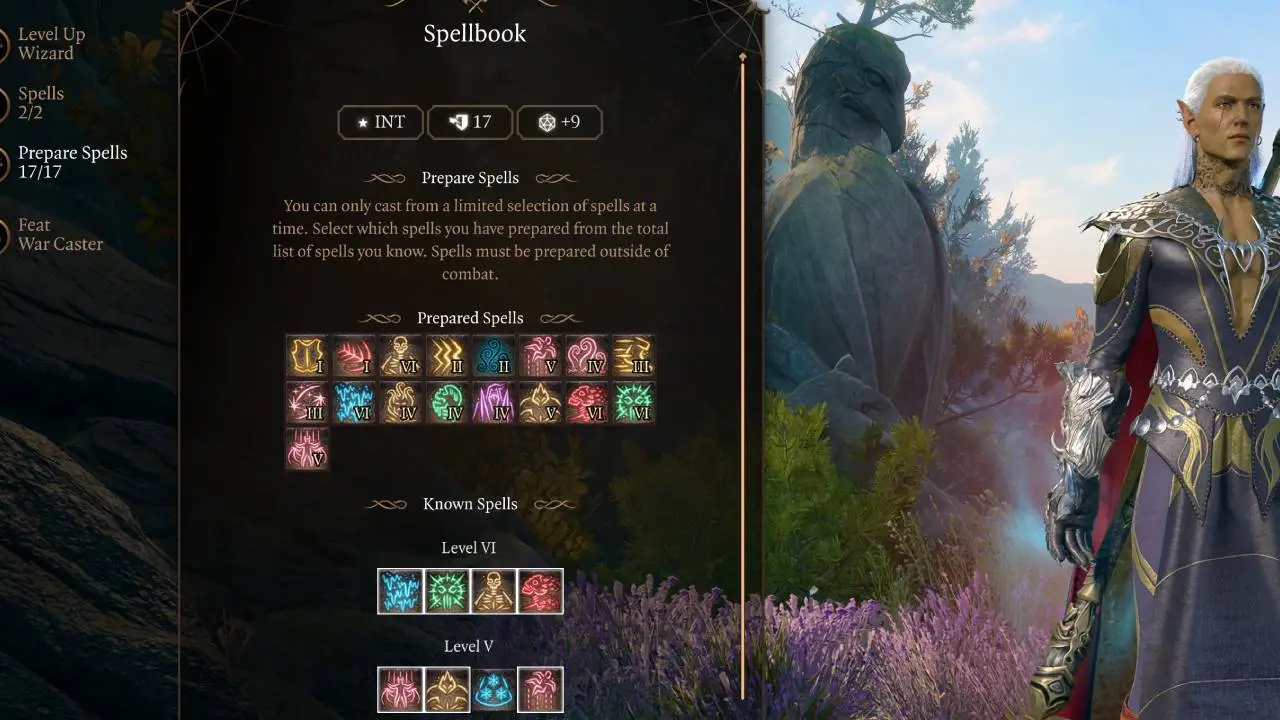
Prepare Spells
Like we already mentioned in the Spells section of this BG3 Necromancer Build, learning and preparing spells are different mechanics.
- Learned Spells: You pick 6 spells at Level 1, but these are just in your “library.”
- Prepared Spells: You can only use spells that are currently Prepared (initially 4 slots).
- Swap Anytime: Outside of combat, you can open your spellbook and swap your Prepared Spells for free.
Recommended Spells to prepare:
This will give you a good spell for any situation. Please keep in mind that if someone else in your party already uses something similar, swap it out for something else!
BG3 Necromancer Leveling Guide (2-12)
We will now walk through the process of leveling up your Necromancy Wizard in Baldur’s Gate 3. For ease of reading, we’ve split this part up into early, mid, and late game leveling sections.
We’ve listed what we think are the strongest or most useful spells and cantrips to unlock at each level, but don’t shy away from experimenting with other spells.
Early-Game Leveling Process (2-4)
We’ll start with the early game, at levels 2-4.
Level 2 (Subclass Selection)
At Level 2, you need to choose your Subclass. The Wizard class has a total of 9 different subclasses (Abjuration, Evocation, Necromancy, Conjuration, Enchantment, Divination, Illusion, Transmutation and Bladesinging). For this build, we’ll be going with the Necromancy Subclass.
At this level, your Necromancer gains:
Learn 2 more Spells:
Level 3
At Level 3, the Necromancer build gains another ![]() Arcane Recovery charge, increasing the number of Spell Slots they can replenish without needing a Long Rest.
Arcane Recovery charge, increasing the number of Spell Slots they can replenish without needing a Long Rest.
You gain 1 level 1 slot and two level 2 slots. We recommend learning the following Spells:
Level 4
At Level 4, it’s time to choose a Feat to unlock for your Necromancer Build in BG3.
You can also select another Cantrip; we recommend:
You’ll be able to Learn 2 more Spells here, too. We recommend picking up the following Spells:
Mid-Game Leveling Process (5-8)
We’ll now go through the mid-game leveling, at levels 5-8.
Level 5
Level 5 is the definitive turning point for the Necromancer. This is where you finally can start raising undead because of the Animate Dead spell.
You also unlock Third Level Spells at this level, too. Some First and Second-Level spells can be upcasted to the Third Level to make them more powerful.
As usual, you can choose two spells to Learn. We recommend:
Level 6
At Level 6, your Necromancer finally gets some Necromancy subclass-specific features. You can animate more dead, and they will become more powerful.
You get to learn two additional Spells:
Level 7
At Level 7 for your Necromancer Wizard Build, you unlock the following:
Learn two more Spells. We recommend choosing:
Level 8
At Level 8, you can choose another Feat.
You can Learn two more Spells, as usual. Good options are:
Since you increased your Intelligence to 20, this time around you’ll get two new slots for Prepared Spells, instead of the usual one.
Late-Game Leveling Process (9-12)
We’ll now go through the end-game levels for the Baldur’s Gate 3 Necromancer Build, Levels 9-12.
Level 9
At Level 9 of your BG3 Necromancer Build, you gain access to even more powerful magic. You’ll unlock the following features here:
- Arcane Recovery Slots increased to 5.
- Another Fourth Level Spell Slot, giving you three in total.
- One Fifth Level Spell Slot, and the ability to Learn and Prepare Fifth Level Spells.
Learn two more Spells. We recommend:
Level 10
At Level 10, you unlock the following:
Learn two more Spells. We recommend:
Level 11
At Level 11 you’ll gain access to the most powerful magic available in Baldur’s Gate 3, making your necromancer build even stronger.
At this point, you’ll get:
- Another Arcane Recovery Charge that brings your total number to 6.
- One Sixth Level Spell Slot, and the ability to learn Spells of this tier.
Learn two more Spells. We recommend choosing:
Level 12 – Max Level
Congratulations, you reached level 12 with your BG3 Necromancer Build.
At Level 12, your Necromancer unlocks the following:
Learn two more Spells. We recommend:
BG3 Necromancer Build Equipment
The Necromancer Build for Baldur’s Gate 3 also benefits from some cool equipment you can get.
We have included both an early game and a late game section for equipment, so you can use this build no matter how far through the game you are.
Some of the items are quite expensive – you may be interested in our BG3 Infinite Gold Guide to help you afford them all.
Early-Game Equipment
Early-Game equipment is available in Act I and the earlier parts of Act II. It is generally less powerful than the late-game version of the build.
| Slot | Icon | Item | Effects | Location |
|---|---|---|---|---|
| Head |  |
The Shadespell Circlet |
|
Sold by Omeluum in the Underdark, after helping him to investigate the Parasite |
| Cloak |  |
Cloak of Protection |
|
Purchased from Quartermaster Talli in Last Light Inn |
| Chest |  |
The Protecty Sparkswall |
|
Looted from a gilded chest at the far end of the trapped bridge in Grymforge |
| Gloves |  |
Bracers of Defence |
|
Looted from a gilded chest in the secret area of the Apothecary’s Cellar |
| Boots |  |
Boots of Genial Striding |
|
Sold by Blurg in the Myconid Colony |
| Necklace |  |
Pearl of Power Amulet |
|
Sold by Omeluum in the Myconid Colony |
| Ring 1 |  |
Ring of Protection |
|
Steal the Sacred Idol in Druid Grove (quest) |
| Ring 2 |  |
Crusher’s Ring |
|
Dropped by Crusher in the Goblin Camp |
| Main Weapon |  |
The Spellsparkler |
|
Rescue Counsellor Florrick from the fire in Waukeen’s Rest |
| Second Weapon | Any |
|
N/A |
Late-Game Equipment
The table below shows the recommended late-game setup for the Necromancy Wizard. In the late-game, we will be putting a little more emphasis on improving the Spell Save Difficulty Class stat, making it harder for enemies to succeed their Saving Throws against our spells.
| Slot | Icon | Item | Effects | Location |
|---|---|---|---|---|
| Head |  |
Hood of the Weave |
|
Sold by Mystic Carrion in Philgrave’s Mansion |
| Cloak |  |
Cloak of the Weave |
|
Sold by Helsik at the Devil’s Fee, once her special stock is unlocked |
| Chest |  |
Robe of the Weave |
|
Inside a Globe of Invulnerability in Ramazith’s Tower |
| Gloves |  |
Helldusk Gloves |
|
Dropped by Haarlep in the House of Hope. |
| Boots |  |
Helldusk Boots |
|
Looted from a locked gilded chest on the top floor of Wyrm’s Rock Fortress |
| Necklace |  |
Spellcrux Amulet |
|
Looted from the Warden in Moonrise Towers Prison |
| Ring 1 | |
Ring of Protection |
|
Steal the Sacred Idol in Druid Grove (quest) |
| Ring 2 | Crypt Lord Ring |
|
Rewarded by Mystic Carrion for finding his servant, ensuring that Thrumbo survives | |
| Main Weapon |  |
Markoheshkir |
|
Found inside a Globe of Invulnerability in Ramazith’s Tower |
| Second Weapon | Any |
|
N/A |
 Markoheshkir Additional Info
A Legendary quarterstaff, ![]() Markoheshkir is one of the strongest weapons in the game for “full spellcaster” characters. It gives several bonuses:
Markoheshkir is one of the strongest weapons in the game for “full spellcaster” characters. It gives several bonuses:
- +1 bonus to Spell Save DC and Spell Attack Rolls
- Arcane Battery: Once per Long Rest, remove the Spell Slot cost of your next spell.
Gain a special elemental buff of your choice until your next Long Rest, unlocking a special buff and new abilities. This is especially good because it doesn’t require Concentration. You can choose from the following variants:
Gain 50% Resistance to Acid Damage. Can cast Melf’s Acid Arrow and Hunger of Hadar once per Short Rest. Acid Spells deal extra Acid Damage equal to your Proficiency Bonus. When you deal Spell damage, you inflict 1 turn of Noxious Fumes, causing nearby creatures to take 1d4 Acid Damage per turn.
Gain 50% Resistance to Poison Damage. Can cast Cloudkill and Ray of Sickness once per Short Rest. Poison Spells deal extra Poison Damage equal to your Proficiency Bonus. When you deal Spell damage, you inflict 1 turn of Poisoned on the target, causing Disadvantage on Attack Rolls and Ability Checks.
Gain 50% Resistance to Thunder Damage. Can cast Shatter and Destructive Wave once per Short Rest. Thunder Spells deal extra Thunder Damage equal to your Proficiency Bonus. When you deal Spell damage, you inflict 1 turn of Reverberation on the target, causing a -1 penalty to Strength, Dexterity and Constitution Saving Throws.
Gain 50% Resistance to Lightning Damage. Can cast Chain Lightning and Lightning Bolt once per Short Rest. Lightning Spells deal extra Lightning Damage equal to your Proficiency Bonus. When you deal Spell damage, you gain 1 Lightning Charge.
Gain 50% Resistance to Cold Damage. Can cast Cone of Cold and Ice Storm once per Short Rest. Cold Spells deal extra Cold Damage equal to your Proficiency Bonus. When you deal Spell damage, you inflict 1 turn of Encrusted with Frost, causing Disadvantage on Dexterity Saving Throws and possibly Freezing the target if they reach 7 stacks.
Gain 50% Resistance to Fire Damage. Can cast Fireball and Wall of Fire once per Short Rest. Fire Spells deal extra Fire Damage equal to your Proficiency Bonus. When you deal Spell damage, you gain 1 turn of Heat, causing you to take 1d4 Fire Damage per turn but allowing you to use Heat Convergence to convert your Heat stacks to bonus Fire damage on your next attack.
Necromancer Build Extra Info
Below is some additional info that will help you to play the Necromancer Build, including how to use the Necromancy of Thay book to perfect your necromantic abilities.
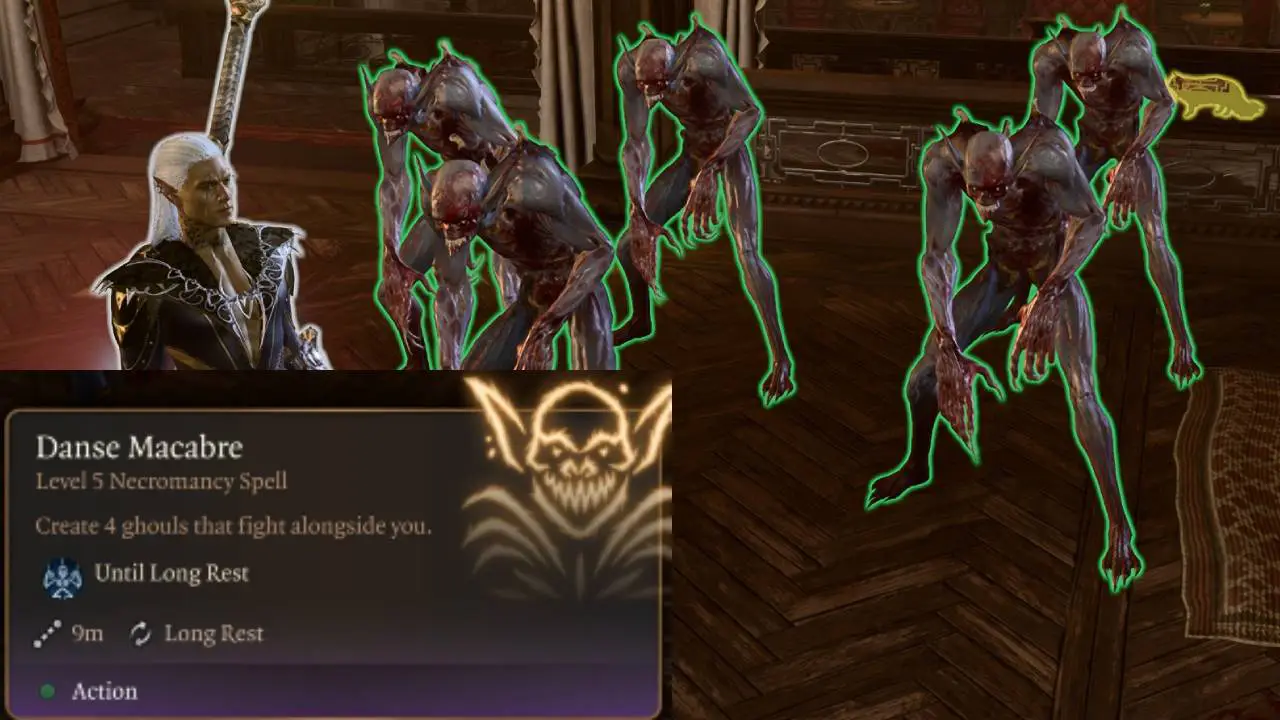
Necromancy of Thay Book & Dans Macabre Spell in BG3
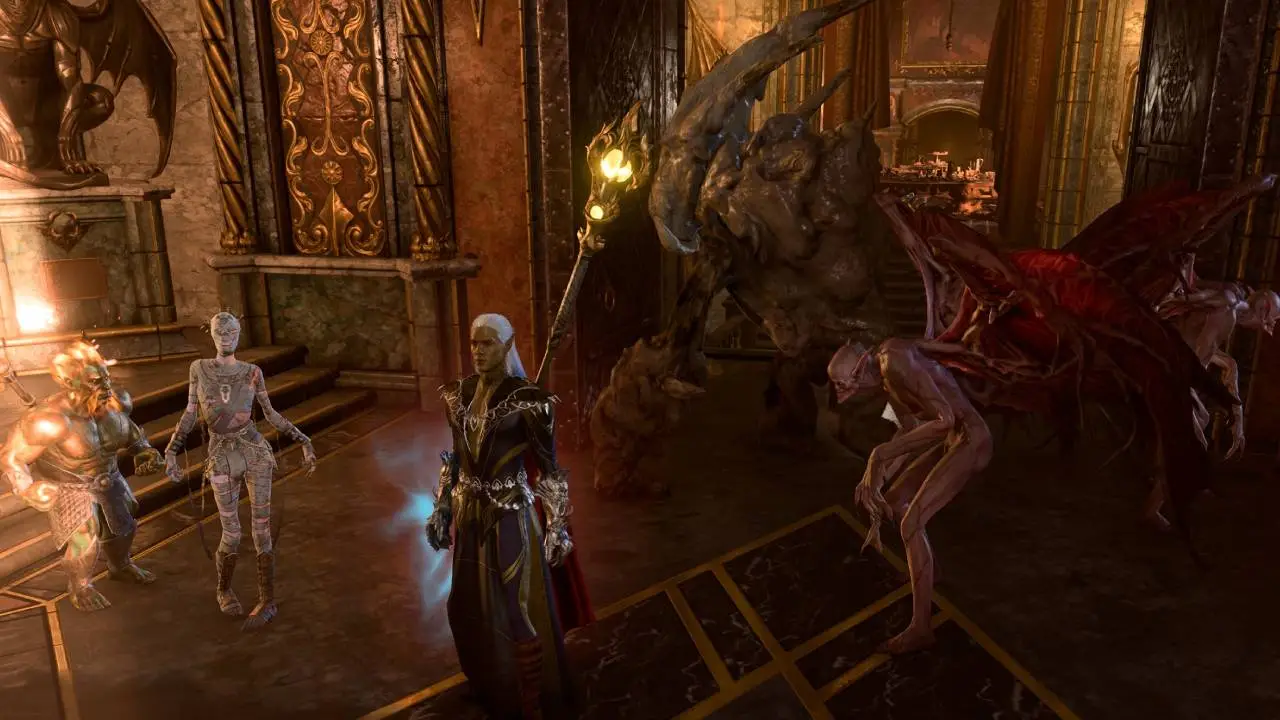
What would a BG3 Necromancer Build be without the Necromancy of Thay book. This is one of the items that will boost the power of your Necromancer once again. Because if you manage to finish the quest, you can summon 4 Ghouls via the Dans Macabre spell.
The spell doesn’t require corpses, and you can stack 4 Ghouls on top of your other summons! Make sure to read our in-depth guide on how to get and how to open the Necromancy of Thay book in BG3.

Best Party Composition
Your BG3 character will always perform better when they are in a party that synergises together nicely and works well as a team.
There are lots of awesome party compositions in BG3, with so many classes and subclasses, the possible combinations are almost limitless.
Here is a combo that works great for the Necromancy School Wizard:
If you want your Necromancer to be part of an evil-aligned party, you might also be interested in our Dark Urge Build, Minthara Build, Astarion Build or Lae’zel Build.
BG3 Necromancer Build Tips & Tricks
Maximising the Necromancer requires balancing your own safety with the positioning of your horde.
Mirror of Loss
If you successfully acquire a buff from the Mirror of Loss during your playthrough, you should put the extra points into Intelligence. This will improve your spellcasting.
If you don’t know what the Mirror of Loss is or how to use it, you may be interested in our Mirror of Loss Guide. The Mirror can give up to three additional Ability Points to all members of your party, making it very strong.
Necromancer Build Illithid Powers (optional)

Illithid Powers are unlocked later in BG3 when you learn more about Mind Flayers and Tadpoles. By eating Jars of Mind Flayer Parasites you gain one point. This is another optional skill tree that you can get access to if you want. Here are some of the best Illithid Powers for the BG3 Wizard Build with the Necromancy School subclass: