Classes:
Role: PVE Tank
Welcome to the ESO Dragonknight Subclasses Build Tank Guide! This page is your go-to resource for building and optimizing a Dragonknight focused on subclassing in ESO. Make sure to bookmark it. Like all my ESO Builds, it will be regularly updated to reflect balance changes, gear updates, and new content.
This ESO Tank Subclassing Build combines Dragonknight, Arcanist, and Warden together.
Table of Contents for Dragonknight Subclassing Build:
- Dragonknight Subclassing Playstyle & Stats
- Tank Gear Setups
- Tank Skill Setups & Rotation
- Recommended Passives
- Scribing Skills (Optional)
- Mythic Set Options (Oakensoul, Death Dealer, Wild Hunt)
- Champion Points & Optimization
- Alternative Skill-Lines for Subclassing on Dragonknight
- Resource Management & Sustain Tips
- Outfit Style & Fashion Showcase
- Update Log
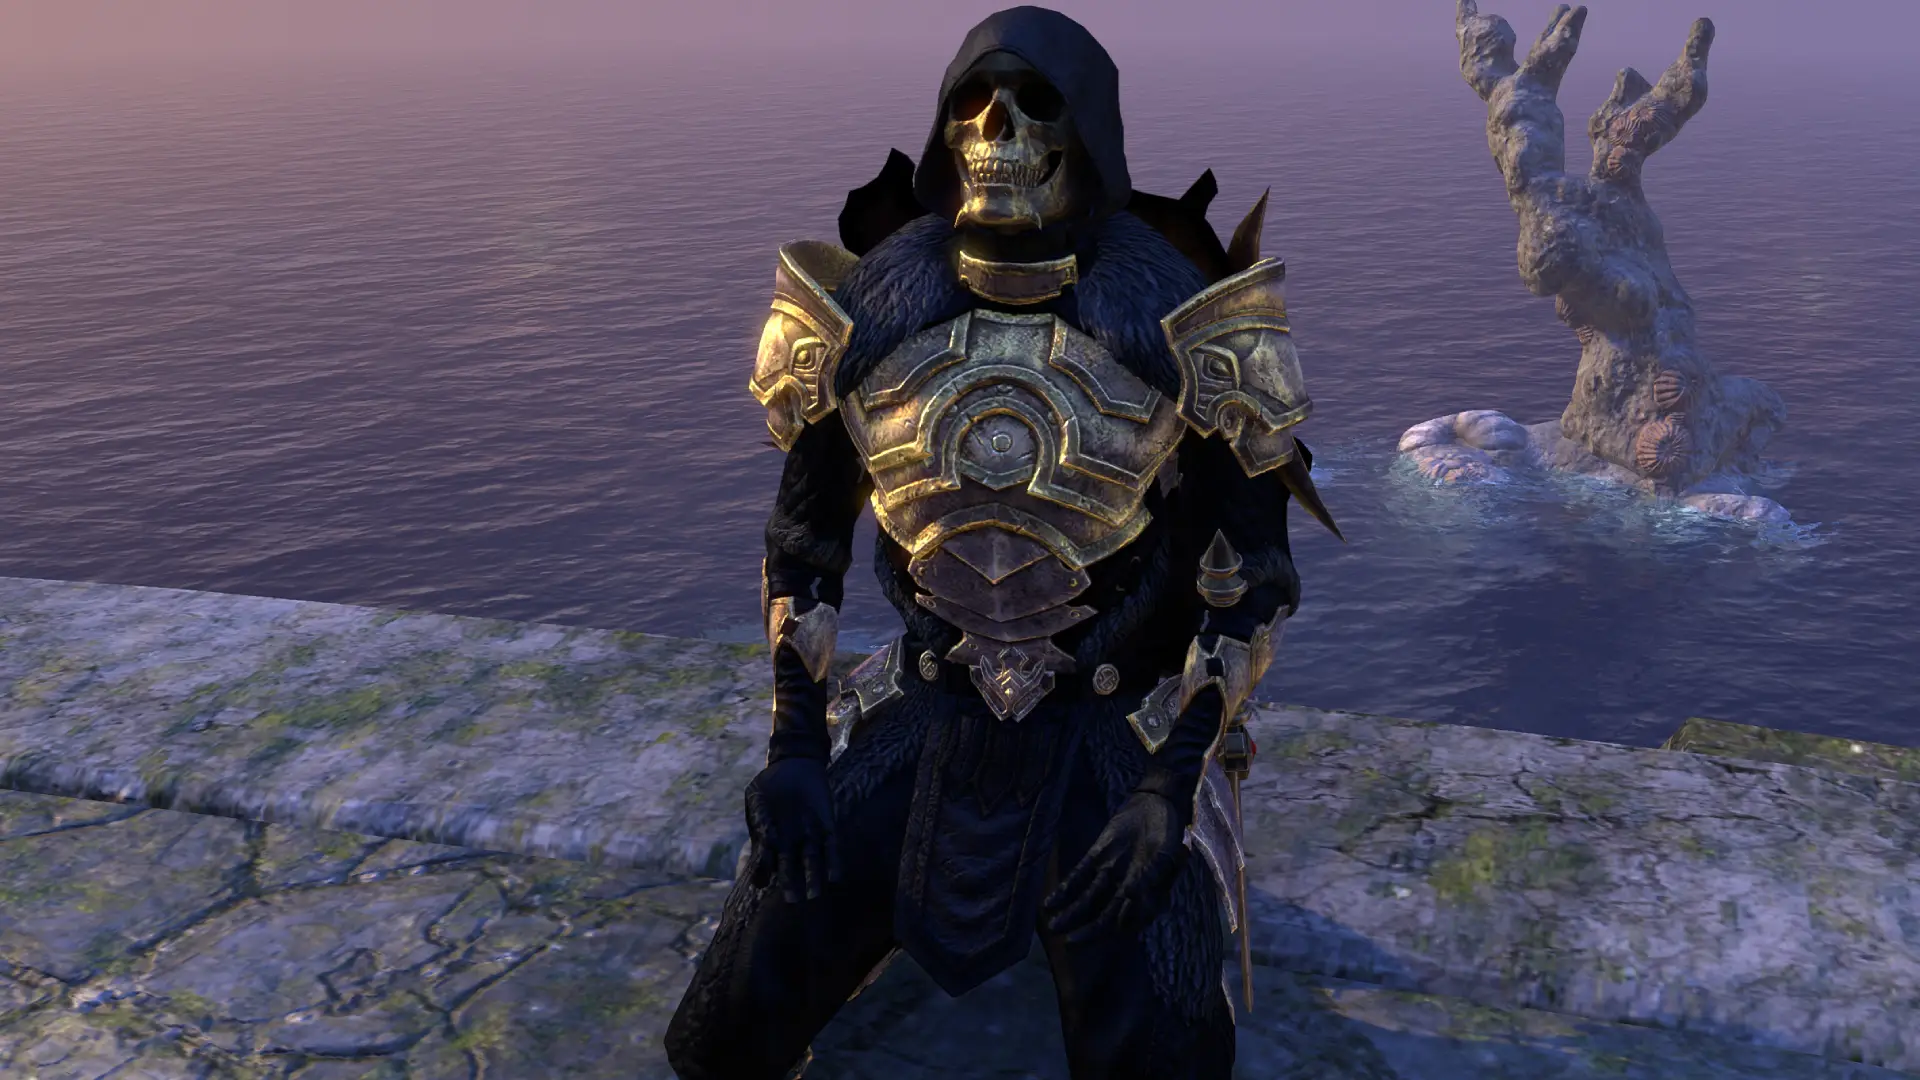
ESO Dragonknight Subclassing Build Playstyle & Stats
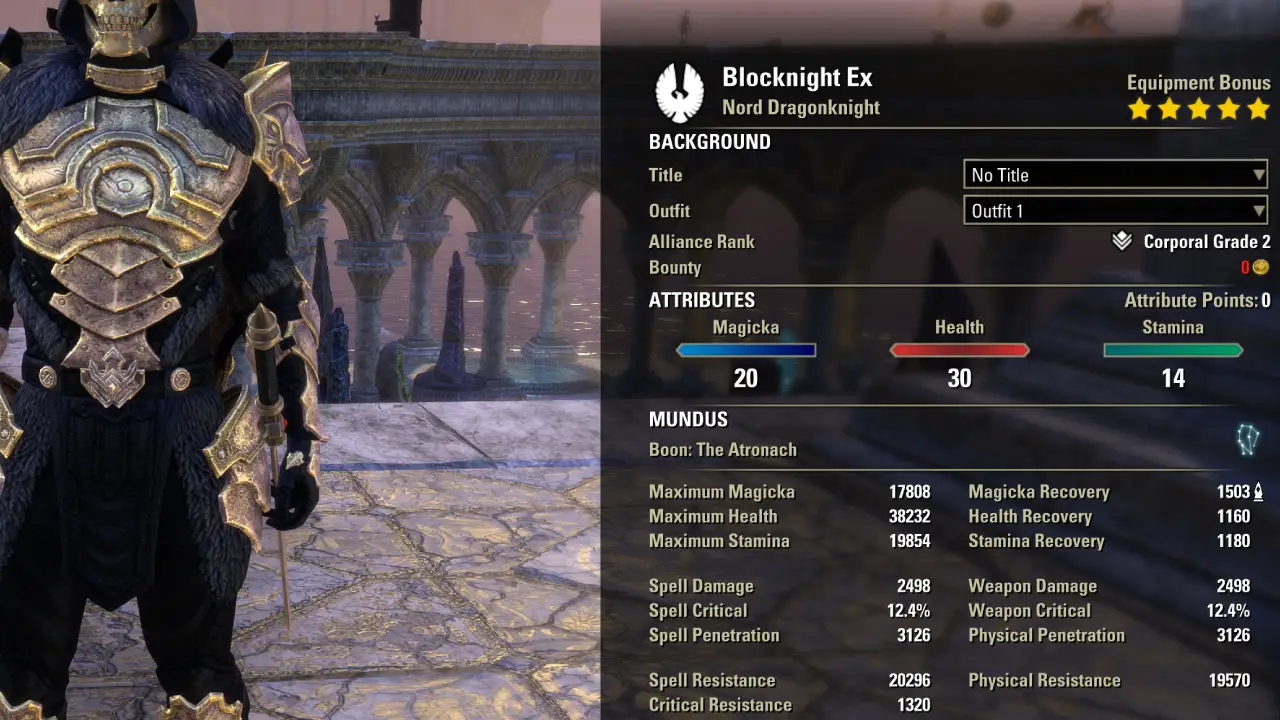

- Image 1: Unbuffed, with Best-in-Slot gear setup with
 Orzorga’s Smoked Bear Haunch food.
 - Image 2: Fully buffed, with Best-in-Slot gear setup with Orzorga’s Smoked Bear Haunch food.
The ESO Tank Dragonknight Subclassing Build specializes in surviving by itself while also being able to support and heal to a certain degree. This allows you to survive no matter what happens while also being able to help your teammates.
- Build Type: Tank PVE
- Difficulty: Intermediate
- Subclasses: Dragonknight + Arcanist + Warden.
- Skill-Lines: Earthen Heart (Dragonknight), Soldier of Apocrypha (Arcanist), Winter’s Embrace (Warden).
- Gear Progression: Beginner, Advanced, and Best in Slot.
- Skill Loadouts: Main Skill Setup.
- Mythic Options: Spaulder of Ruin, Cryptcanon Vestments, Ring of the Wild Hunt.
It’s crucial to understand that a build is only truly complete when paired with the right Consumables, Mundus Stone, and Champion Point setup. These elements significantly impact your overall performance and can make a major difference in both damage and survivability.
If you are new to tanking, please read our Tanking Beginner Guide for ESO and the Advanced Tanking Guide for ESO.
More Subclassing Guides:
- All Subclassing Builds and Guides
- How to unlock the Subclassing Quest in ESO
- The Ultimate Subclassing Guide – How It Works
- How to prepare for Subclassing in ESO
- Subclassing Power Leveling Guide for ESO
Our 3 Skill-Lines for the ESO Dragonknight Subclasses Build
For this build, we are using the following skill lines: ![]() Earthen Heart (Dragonknight),
Earthen Heart (Dragonknight), ![]() Soldier of Apocrypha (Arcanist),
Soldier of Apocrypha (Arcanist), ![]() Winter’s Embrace (Warden).
Winter’s Embrace (Warden).
- Earthen Heart (Dragonknight) – Powerful skills and sustain passives. Godmode ultimate,
- Soldier of Apocrypha (Arcanist) – Strong skills and passives.
- Winter’s Embrace (Warden) – Strong group support and block mitigation passive.
You can view the Alternative Skill-Line Options section for a few other good recommended combinations for the ESO Arcanist Subclasses Build.
Why Arcanist and Warden as Subclassing Choice?
Arcanist and Warden are our subclasses of choice for our ESO Dragonknight Subclass Build. You can view the Alternative Skill-Line Options section for a few other good recommended combinations for the ESO Warden Subclasses Build.
Arcanist
The Arcanist class is loaded with useful tanking skills and passives.
- Runic Sunder – Ranged taunt, steals 2000 armor, applies Minor Maim.
- Impervious Runeward – Applies a big shield for a short time.
- Runeguard of Still Waters – Applies Minor Resolve to you and group members, immobilizes enemies. You gain Minor Protection.
- Rune of the Colorless Pool – Debuffs a target with Minor Vulnerability and Minor Brittle.
- Aegis of the Unseen Passive – Increases your resistance while a Soldier of Apocrypha ability is active.
- Wellspring of the Abyss Passive – Increases sustain.
- Circumvented Fate passive – Applies Minor Evasion.
Warden
The Warden class skill line has less usage, but it provides a powerful group defensive ability and a great damage mitigation passive.
- Expansive Frost Cloak – Grants Major Resolve to you and allies in a large radius, boosting Physical and Spell Resistance.
- Piercing Cold Passive – Increases block mitigation.
Gear Setups

The ESO Tank Dragonknight Subclassing Build comes with three gear setups. A beginner, advanced, and endgame gear setup. The beginner gear is all crafted gear, you can simply ask a guild member to craft these items for you to increase your power level as a new player. Also, see the ESO Grind Guide for tips on leveling up fast. The Advanced setup requires you to get some dungeon/world gear, and the endgame setup has items from all sources of the game!
- Beginner Gear (Craftable only)
- Advanced Gear
- Best-In-Slot Gear
Please note that there are a lot of good, viable ESO Tank Sets that you can use depending on your situation.
Beginner Gear
Our Beginner Gear only includes craftable sets. I recommend replacing these sets with any of the advanced gear items as soon as possible.
| Gear | Set | Weight | Trait | Enchantment |
|---|---|---|---|---|
| Heavy | ||||
| Heavy | ||||
| Heavy | ||||
| Heavy | ||||
| Heavy | ||||
| Light | ||||
| Medium | ||||
| Jewelry | ||||
| Jewelry | ||||
| Jewelry | ||||
| 1H-Weap | ||||
| Shield | ||||
| Frost Staff |
Where can I get the gear?
Fortified Brass: Craftable
Druid’s Braid: Craftable
Advanced Gear
Our Advanced Gear only includes craftable, overland, dungeon, and arena gear. These are generally easier to get.
| Gear | Set | Weight | Trait | Enchantment |
|---|---|---|---|---|
| Heavy | ||||
| Heavy | ||||
| Heavy | ||||
| Heavy | ||||
| Heavy | ||||
| Light | ||||
| Medium | ||||
| Jewelry | ||||
| Jewelry | ||||
| Jewelry | ||||
| 1H-Weap | ||||
| Shield | ||||
| Frost Staff |
Where can I get the gear?
Turning Tide: Shipwright’s Regret Dungeon
Powerful Assault: Tel Var Merchant
Puncturing Remedy: normal Dragonstar Arena
Tremorscale: vet Volenfell Dungeon
Best-in-Slot Gear
For our Best-in-Slot Gear for the ESO Dragonknight Subclassing Tank Build we are using very powerful sets. It is important to understand that there are plenty of good ESO Tanking sets. Below is one of the great set combos that you can use with this build:
- Perf. Lucent Echoes: When you have more than 50% health, boosts group damage; when you have less than 50% health, boosts your damage reduction against monsters by 20%.
- Powerful Assault: This is used on the back bar and triggers with Echoing Vigor. It boosts the damage of the group.
- Perf. Defensive Position: Restores magicka when you reflect or absorb a spell via Defensive Stance.
- Archdruid Devyric: When you deal damage with a Heavy Attack, an AoE appears and applies Major Vulnerability, increasing the damage you deal to enemies.
- Reduce Spell Cost: This is important because we have plenty of magicka based skills that we use.
| Gear | Set | Weight | Trait | Enchantment |
|---|---|---|---|---|
| Heavy | ||||
| Heavy | ||||
| Heavy | ||||
| Heavy | ||||
| Heavy | ||||
| Light | ||||
| Medium | ||||
| Jewelry | ||||
| Jewelry | ||||
| Jewelry | ||||
| 1H-Weap | ||||
| Shield | ||||
| Frost Staff |
Where can I get the gear?
Perf. Lucent Echoes: vet Lucent Citadel
Powerful Assault: Tel Var Merchant
Perf. Defensive Position: Asylum Sanctorium
Archdruid Devyric: Earthen Root Enclave Dungeon
Skill Setups & Rotation Tips

Skill-Lines used: ![]() Earthen Heart (Dragonknight),
Earthen Heart (Dragonknight), ![]() Soldier of Apocrypha (Arcanist),
Soldier of Apocrypha (Arcanist), ![]() Winter’s Embrace (Warden).
Winter’s Embrace (Warden).
For our Skills for the ESO Dragonknight Subclassing Build, we have our primary main skill setup that is perfect for most situations. If you want to see viable Scribing skills, please view the Scribing section of the subclassing build.
For more clarity about Mythics, read the Mythic Set Options Explained section of the Tank Dragonknight Subclasses Build for ESO.
Main Skill Setup – Two Bars
Note: Because we don’t use ![]() Pierce Armor you have to make sure your healer or another DPS has a skill that applies Major Breach, reducing the enemy’s resistance (Ex:
Pierce Armor you have to make sure your healer or another DPS has a skill that applies Major Breach, reducing the enemy’s resistance (Ex: ![]() Elemental Susceptibility).
Elemental Susceptibility).


| Frontbar S&B | Backbar Staff |
|---|---|
| Slot 1: Impervious Runeward | Slot 1: Elemental Blockade |
| Slot 2: Runic Sunder | Slot 2: Runeguard of Still Waters |
| Slot 3: Magma Fist | Slot 3: Expansive Frost Cloak |
| Slot 4: Defensive Stance | Slot 4: Silver Leash |
| Slot 5: Igneous Shield | Slot 5: Echiong Vigor |
| Ultimate: Magma Shell | Ultimate: Aggressive Horn |
Skills Rotation Explanation:
- Impervious Runeward – Applies a big shield for a short time.
- Runic Sunder – Ranged taunt, steals 2000 armor, applies Minor Maim.
- Magma Fist– Applies a unique debuff called Heat Shock, which increases damage taken.
- Defensive Stance – Absorbs a projectile, increases block damage, and reduces block cost. Also activates Perf. Defensive Position.
- Igneous Shield – Applies a damage shield to yourself and allies. Applies Major Mending, increasing your healing received.
- Magma Shell (Ultimate) – Panic button ultimate. Once activated, you take no more damage for a few seconds.
- Elemental Blockade – Grants damage shield, snares enemies and procs our backbar weapon enchantment.
- Runeguard of Still Waters – Applies Minor Resolve to you and group members, immobilizes enemies. You gain Minor Protection.
- Expansive Frost Cloak – Grants Major Resolve to you and allies in a large radius, boosting Physical and Spell Resistance.
- Silver Leash – Taunts enemies and pulls enemies towards you.
- Echoing Vigor – Stamina-based HoT that heals yourself and nearby allies over time. This is used to proc the Powerful Assault set.
- Aggressive Horn (Ultimate) – Grants Major Force and max stats; critical for burst windows.
The goal of your tank build is to keep up the buffs, debuffs and keep yourself alive with shields and healing. Additionally, make sure to read the Recommended Passives section carefully. A lot of passives are activated by using skills.
Recommended Passives
- Earthen Heart: Heart of Stone, Landslide, Blessing at the Peak, Mountain Giant
- Soldier of Apocrypha: Circumvented Fate, Implacable Outcome, Aegis of the Unseen, Wellspring of the Abyss
- Winter’s Embrace: Glacial Presence, Frozen Armor, Icy Aura, Piercing Cold
- One Hand and Shield: Fortress, Sword and Board, Deadly Bash, Deflect Bolts, Battlefield Mobility
- Destruction Staff: Penetrating Magic, Elemental Force, Ancient Knowledge, Destruction Expert (Note: Do not activate Tri Focus passive)
- Heavy Armor: Resolve, Constitution, Juggernaut, Revitalize, Rapid Mending
- Medium Armor: If you have spare skill points, max out this skill line too.
- Light Armor: If you have spare skill points, max out this skill line too.
- Undaunted: Undaunted Command, Undaunted Mettle
- Racial: All
- Alchemy: Medicinal Use
Scribing Skills – Optional Setup for the Subclassing Dragonknight
Our Dragonknight Tank Subclasses Build in ESO has plenty of Scribing skills to choose from that are actually useful. Here are a few combinations that are great fro tanks.
Scribing Simulator: You can test out any scribing skill combination with the ESO Scribing Simulator.
Good Tanking Scribing Skills
- Goading Throw – Ranged taunt, heals you and debuffs enemy with Major Maim, reducing their damage done.
- Heroic Torch – Generates ultimate points for you and group. Also grants Minor Heroism, increasing ultimate generation.
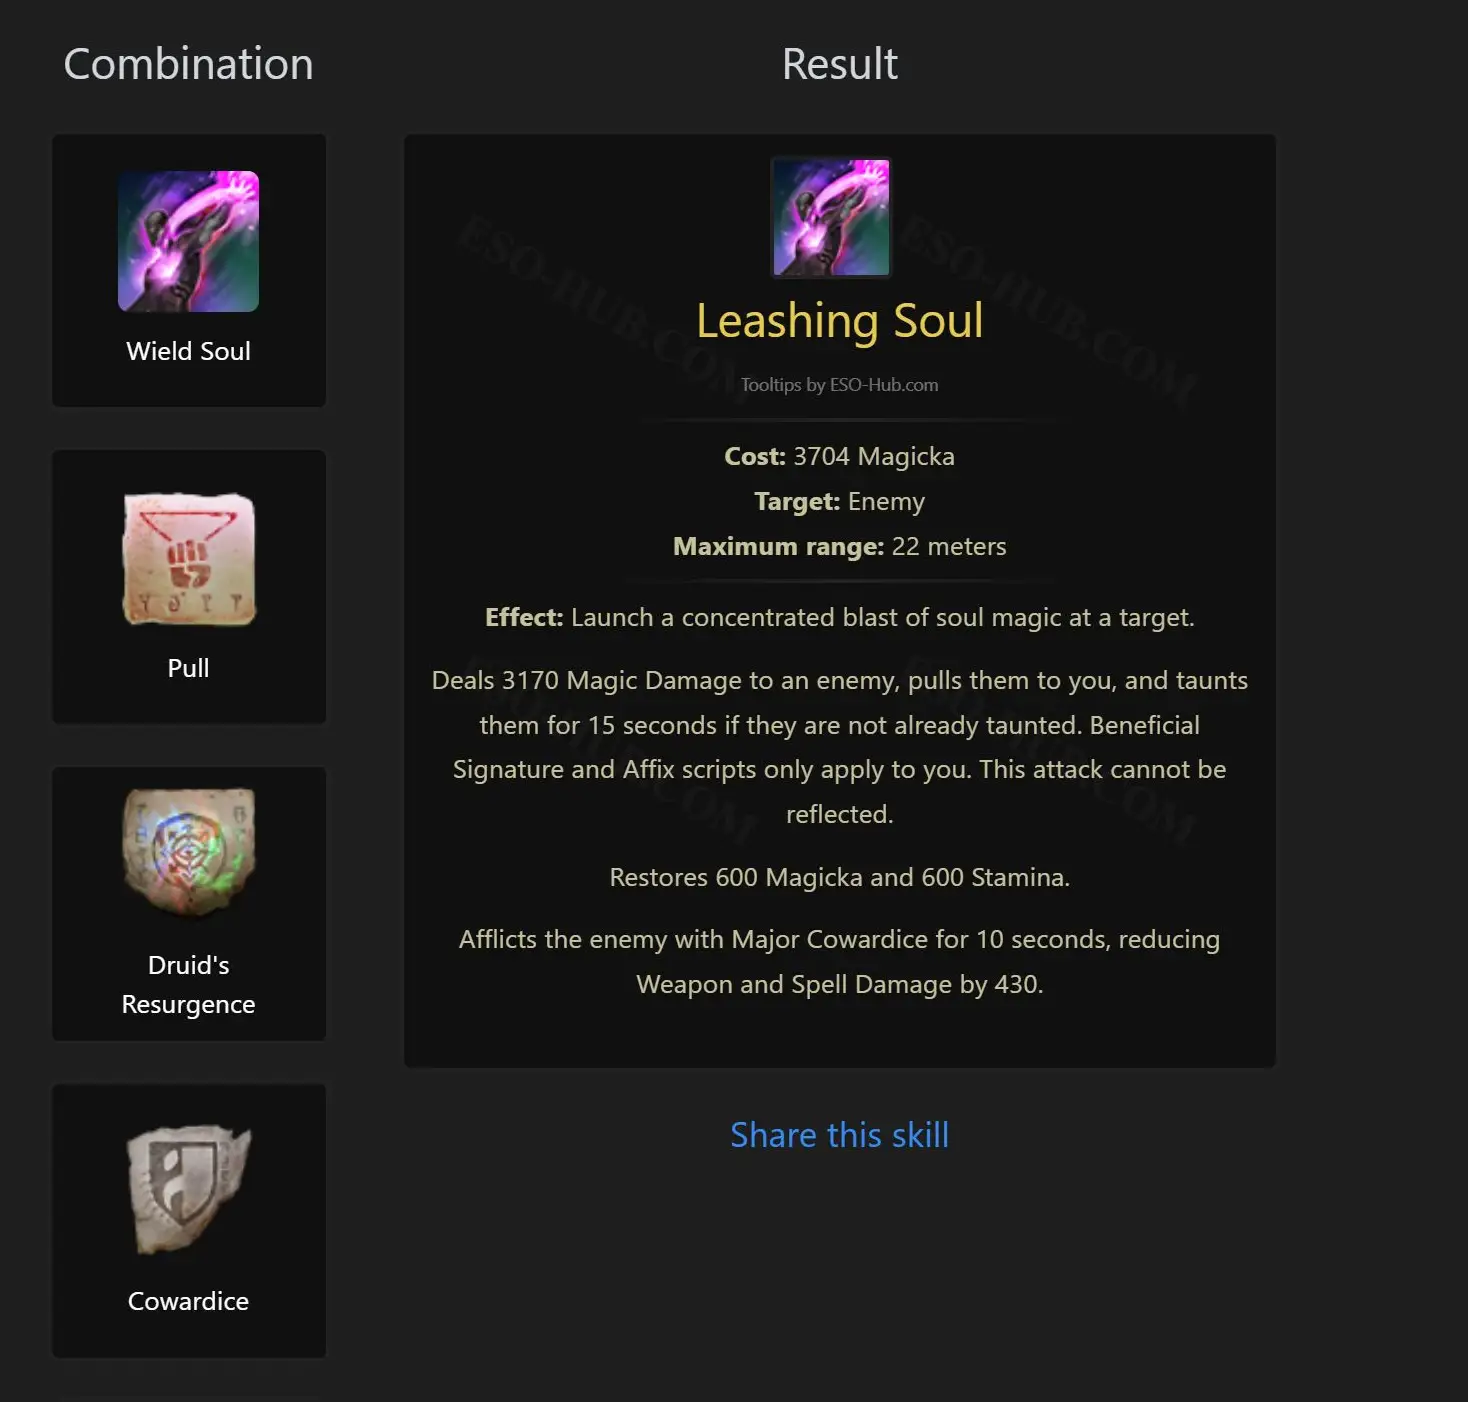
- Leashing Soul – Ranged taunt, pulls enemy to you. Restores resources, applies Major Cowardice to enemy, reducing their damage done.
- Warding Burst – Shields you and allies, generates ultimate and applies Minor Courage, increasing damage for the group.
- Warding Contingency – Grants a damage shield to you or an ally. Reduces damage taken. Grants Minor Intellect and Minor Endurance, increasing recovery.
- Chilling Trample – Deals frost damage, applies Concussion, Sundered, and Hemorrhaging status effects. Grants Major Heroism, increasing ultimate regeneration.
Tip: Click on the Modified Skill URL in the table to see the combination in the Scribing Simulator.
Dragonknight Skills Setup with Scribing

Here is the most optimal setup when you include Scribing skills on the Dragonknight Tank Subclassing Build.
- Swap 1: Swap Silver Leash for Leashing Soul. Leashing Soul taunts and pulls the enemy to you. Restores some resources and debuffs the enemy with Major Cowardice, reducing the damage they do.
- Swap 2: Swap Impervious Runeward for Warding Burst. This has the benefit of shielding you or an ally. Generates ultimate and applies Minor Courage, increasing your damage.
Note: You can adjust certain scripts if you already have certain buff/debuff available through other means.


| Frontbar S&B | Backbar Staff |
|---|---|
| Slot 1: Warding Contingency | Slot 1: Elemental Blockade |
| Slot 2: Runic Sunder | Slot 2: Runeguard of Still Waters |
| Slot 3: Magma Fist | Slot 3: Expansive Frost Cloak |
| Slot 4: Defensive Stance | Slot 4: Leashing Soul |
| Slot 5: Igneous Shield | Slot 5: Echoing Vigor |
| Ultimate: Magma Shell | Ultimate: Aggressive Horn |
Mythic Set Options

With the ESO Tank Dragonknight Subclasses Build, you have a few options on what Mythic item you can use, all have their strengths and weaknesses.
Generally, I don’t recommend running a Mythic with this Tank build because the power we get from other set effects is more important. However, here are a few options you can test out for niche applications: ![]() Ring of the Wild Hunt,
Ring of the Wild Hunt,![]() Death Dealer’s Fete,
Death Dealer’s Fete, ![]() Oakensoul Ring.
Oakensoul Ring.
Here is a quick summary of the different pros and cons of each Mythic item for our subclassing tank build.
| Mythic | Pros | Cons | Best Use Case |
|---|---|---|---|
|
|
|
|
|
|
|
|
|
|
|
Champion Points & Optimization

In this section of the ESO Dragonknight Subclasses Build, we are going to take a look at important info for things that are often overlooked when replicating a build. Most often, players forgot to use the correct Consumables. These can make or break a build because they provide immense buffs to the character.
- Champion Points Allocation
- Attribute Distribution
- Mundus Stone
- Optimal Races
- Consumables (Food & Potions)
Recommended Champion Points Allocation
Champion Points increase the power level of your build tremendously. Therefore, it is recommended to reach 918 Champion Points as fast as possible. Once you reach this level, you will be able to slot most of the important perks in all trees. It caps out at around 1656 though. You can read my ESO Powerleveling Guide to optimize farming Champion Points for the ESO Dragonknight Subclasses Build.
In the table below, you see all the slottable Champion Point perks that you have to run with this setup to optimize our damage.
View the full Champion Points spec:![]()
![]()
![]() Champion Points Setup for the Dragonknight Subclassing Build.
Champion Points Setup for the Dragonknight Subclassing Build.
| Craft | Warfare | Fitness |
|---|---|---|
| Free choice | ||
| Free choice | ||
| Free choice |
Explanation of each slotable Perk:
Craft
- Steed’s Blessing – Increases your out-of-combat Movement Speed by 20%.
Warfare
- Enduring Resolve – Reduces your damage taken by 6% against damage-over-time attacks.
- Duelist’s Rebuff – Reduces your damage taken by 6% against single-target attacks.
- Unassailable – Reduces your damage taken by 6% against area of effect attacks.
- Ironclad – Reduces your damage taken by 6% against direct damage attacks.
Fitness
- Boundless Vitality – Grants 1400 Max Health.
- Celereity – Increases your movement speed by 10%.
- Fortified – Grants 1731 Armor.
- Bastion – Increases the effectiveness of your damage shields by 15%.
Attribute Distribution
We are distributing our attribute points like this: 30 HP, 20 Magicka, 14 stamina.
Important: Whatever you do, your stamina needs to be slightly higher than your magicka on any tank build. Because the synergy of ![]() Energy Orb restores whatever resource has a higher max. Stamina is more important than magicka because if you fail to block because you are out of stamina, you will most likely be defeated.
Energy Orb restores whatever resource has a higher max. Stamina is more important than magicka because if you fail to block because you are out of stamina, you will most likely be defeated.
![]() 30 Points
30 Points
![]() 20 Points
20 Points
![]() 14 Points
14 Points
Best Mundus Stone for the Dragonknight Tank Subclassing Build
You generally have two good options when it comes to tanking. ![]() The Lord Mundus Stone (Extra HP) to
The Lord Mundus Stone (Extra HP) to ![]() The Atronach Mundus Stone (Magicka Recovery). For an overview of all the Mundus Stones in ESO you can check out the Mundus Stone Overview Page.
The Atronach Mundus Stone (Magicka Recovery). For an overview of all the Mundus Stones in ESO you can check out the Mundus Stone Overview Page.
Because we have a lot of magicka based abilities, I recommend using ![]() The Atronach Mundus Stone.
The Atronach Mundus Stone.
Best if you don’t need extra HP
- The Atronach Mundus Stone (Magicka Recovery)
- Increases Magicka recovery by 310
With 7 Divine armor pieces:
Increases Magicka recovery by 507
- Increases Magicka recovery by 310
Best if you need extra HP
- The Lord Mundus Stone (Max Health)
- Increases Maximum Health by 2225
With 7 Divine armor pieces:
Increases Maximum Health by 3639
- Increases Maximum Health by 2225
Best Races for the Dragonknight Subclassing Build
There are a few good options for races for any tanking build. But hands down Nord outshines every other race. It simply has the best tanking passives you can wish for, as you will see below. Extra health and Stamina, ultimate gen and extra resistance, basically the full package. Imperial and Argonian are also solid choices.
- Nord – Best defensive play and also has good stamina-based passives & extra ult gen.
- Resist Frost – Increases your Max Health by 1000 and Frost Resistance by 4620.
- Stalwart – Increases your Max Stamina by 1500. When you take damage, you gain 5 Ultimate. This effect can occur once every 10 seconds.
- Rugged – Increases your Physical and Spell Resistance by 2600.
- Imperial – High Health and Stamina with a 6% cost reduction to all abilities. Flexible and sustain-friendly, especially effective for tank and PvP builds.
- Tough – Increases your Max Health by 2000.
- Imperial Mettle – Increases your Max Stamina by 2000.
- Red Diamond – Reduces the cost of all your abilities by 6%.
- Argonian – High survivability and bonus healing, good for solo play.
- Life Mender – Increases your healing done by 6%.
- Argonian Resistance – Increases your Max Health by 1000 and your Disease and Poison Resistance by 2310.
- Resourceful – Increases your Max Magicka and Max Stamina by 1000. When you drink a potion, you restore 3125 Health, Magicka, and Stamina.
Consumables (Food & Potions)
Food and Potions are important for every build, they give insane stat boosts and valuable buffs. You can buy all of these from any of the Guild Stores or craft them yourself.
Food Options


You have a few different options as a Dragonknight Subclassing Tank in ESO when it comes to buff food. Here you mostly have to decide whether you want more max stats or more recovery. I prefer to play with ![]() Orzorga’s Smoked Bear Haunch because it gives me a lot of extra recovery that I need to not run out of magicka for my skills.
Orzorga’s Smoked Bear Haunch because it gives me a lot of extra recovery that I need to not run out of magicka for my skills.
Best Food for Max HP + HP/MAG/STAM REGEN
![]() Orzorga’s Smoked Bear Haunch (Check Price) – Increase Max Health by 4312, Health Recovery by 406 and Stamina and Magicka Recovery by 369 for 2 hours.
Orzorga’s Smoked Bear Haunch (Check Price) – Increase Max Health by 4312, Health Recovery by 406 and Stamina and Magicka Recovery by 369 for 2 hours.
- Cheap Alternative:
 Jewels of Misrule (Check Price) – Increase Stamina and Magicka Recovery by 357 and Max Health by 3927 for 2 hours. These effects are scaled based on your level.
Best Food for Max resources HP/STAM/MAG
![]() Bewitched Sugar Skulls (Check Price) – Increase Max Health by 4620, Max Stamina and Magicka by 4250, and Health Recovery by 462 for 2 hours. These effects are scaled based on your level.
Bewitched Sugar Skulls (Check Price) – Increase Max Health by 4620, Max Stamina and Magicka by 4250, and Health Recovery by 462 for 2 hours. These effects are scaled based on your level.
- Cheap Alternative: Longfin Pasty with Melon Sauce (Check Price) – Increase Max Health by 4462 and Max Magicka and Max Stamina by 4105 for 2 hours.
You can find a full list of all buff foods in the ESO Buff Food and Drinks Database.
Potions
In The Elder Scrolls Online, potions are a vital part of any build, especially for tanks. They inject a considerable amount of resources and recovery into your character when activated. This allows you to increase your survivability by a huge margin if timed correctly.
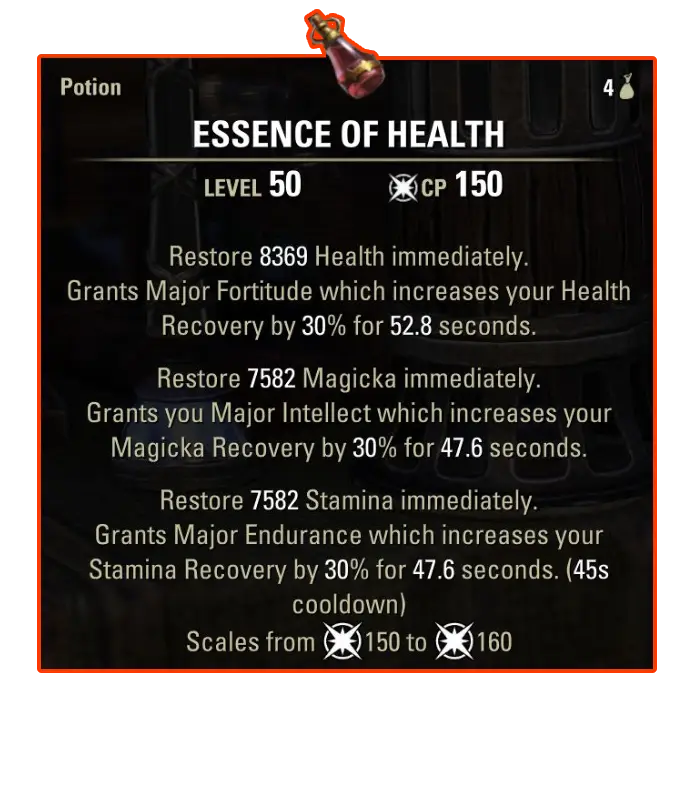
Best Potion
- Essence of Health “Tri-Stat”
- Check Price: scroll down, it needs to say Restore Health, Restore Magicka, Restore Stamina
- Combine Columbine, Bugloss, and Mountain Flower.
Cheap Alternative
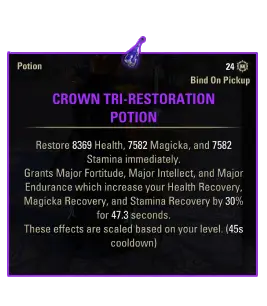
- Crown Tri-Restoration Potion
- This is the same potion as Essence of Health “Tri-Stat”.
- You get these from daily login rewards and crown crates.
Alternative Skill-Lines for Subclassing on Dragonknight
Our current ESO Dragonknight Subclasses Build utilizes one Dragonknight, one Arcanist, and one Warden skill-line: ![]() Earthen Heart (Dragonknight),
Earthen Heart (Dragonknight), ![]() Soldier of Apocrypha (Arcanist),
Soldier of Apocrypha (Arcanist), ![]() Winter’s Embrace (Warden).
Winter’s Embrace (Warden).
Below you will find a few other variants that will work with this Subclassing Dragonknight Tank Build.
| Build | Skill-line 1 | Skill-line 2 | Skill-line 3 |
|---|---|---|---|
| Current Build | |||
| Build Variant 1 | |||
| Build Variant 2 |
Resource Management & Sustain Tips
Resource management doesn’t sound interesting, but it is the key to success if you want to play a tank in ESO. Our Dragonknight Tank Subclasses Build has a lot of sustain tools that it can use.
- Heavy Attacks restore a big amount of stamina; if you hit an off-balanced enemy, it gives twice the amount back. You don’t need to permablock; try to find time to do Heavy Attacks in your rotation.
- Potions: We constantly use Potions with this build, which will inject extra resources every 45 seconds.
- Synergies: Healers often provide Synergies that restore resources, activate the synergy. (Example: Energy Orb Synergy)
- Buff-Food: If necessary, select a food that provides extra recovery.
- The Storm Voice activates whenever we use either one of our Ultimates and returns resources.
- Combustion returns Magicka every time we apply the Burning Status effect.
- Mountain Giant restores additional Stamina whenever we do a Heavy Attack.
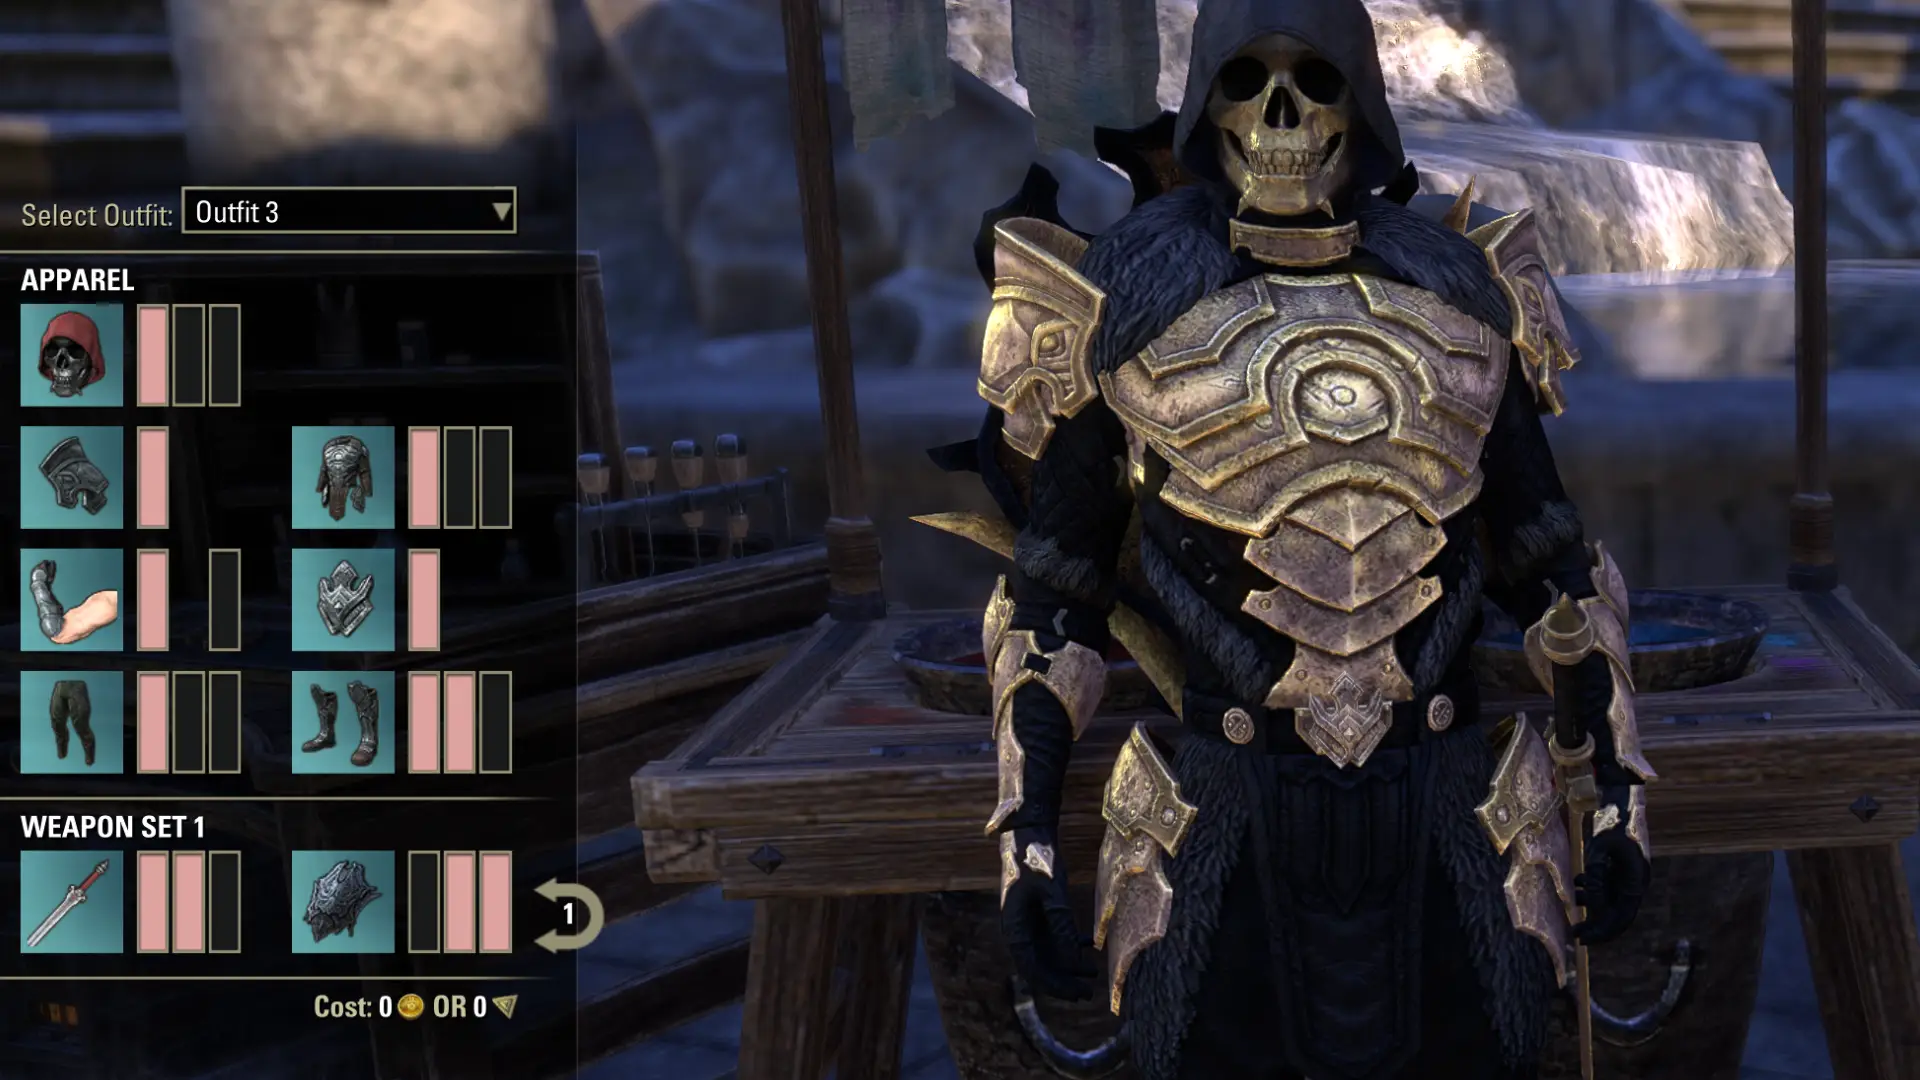
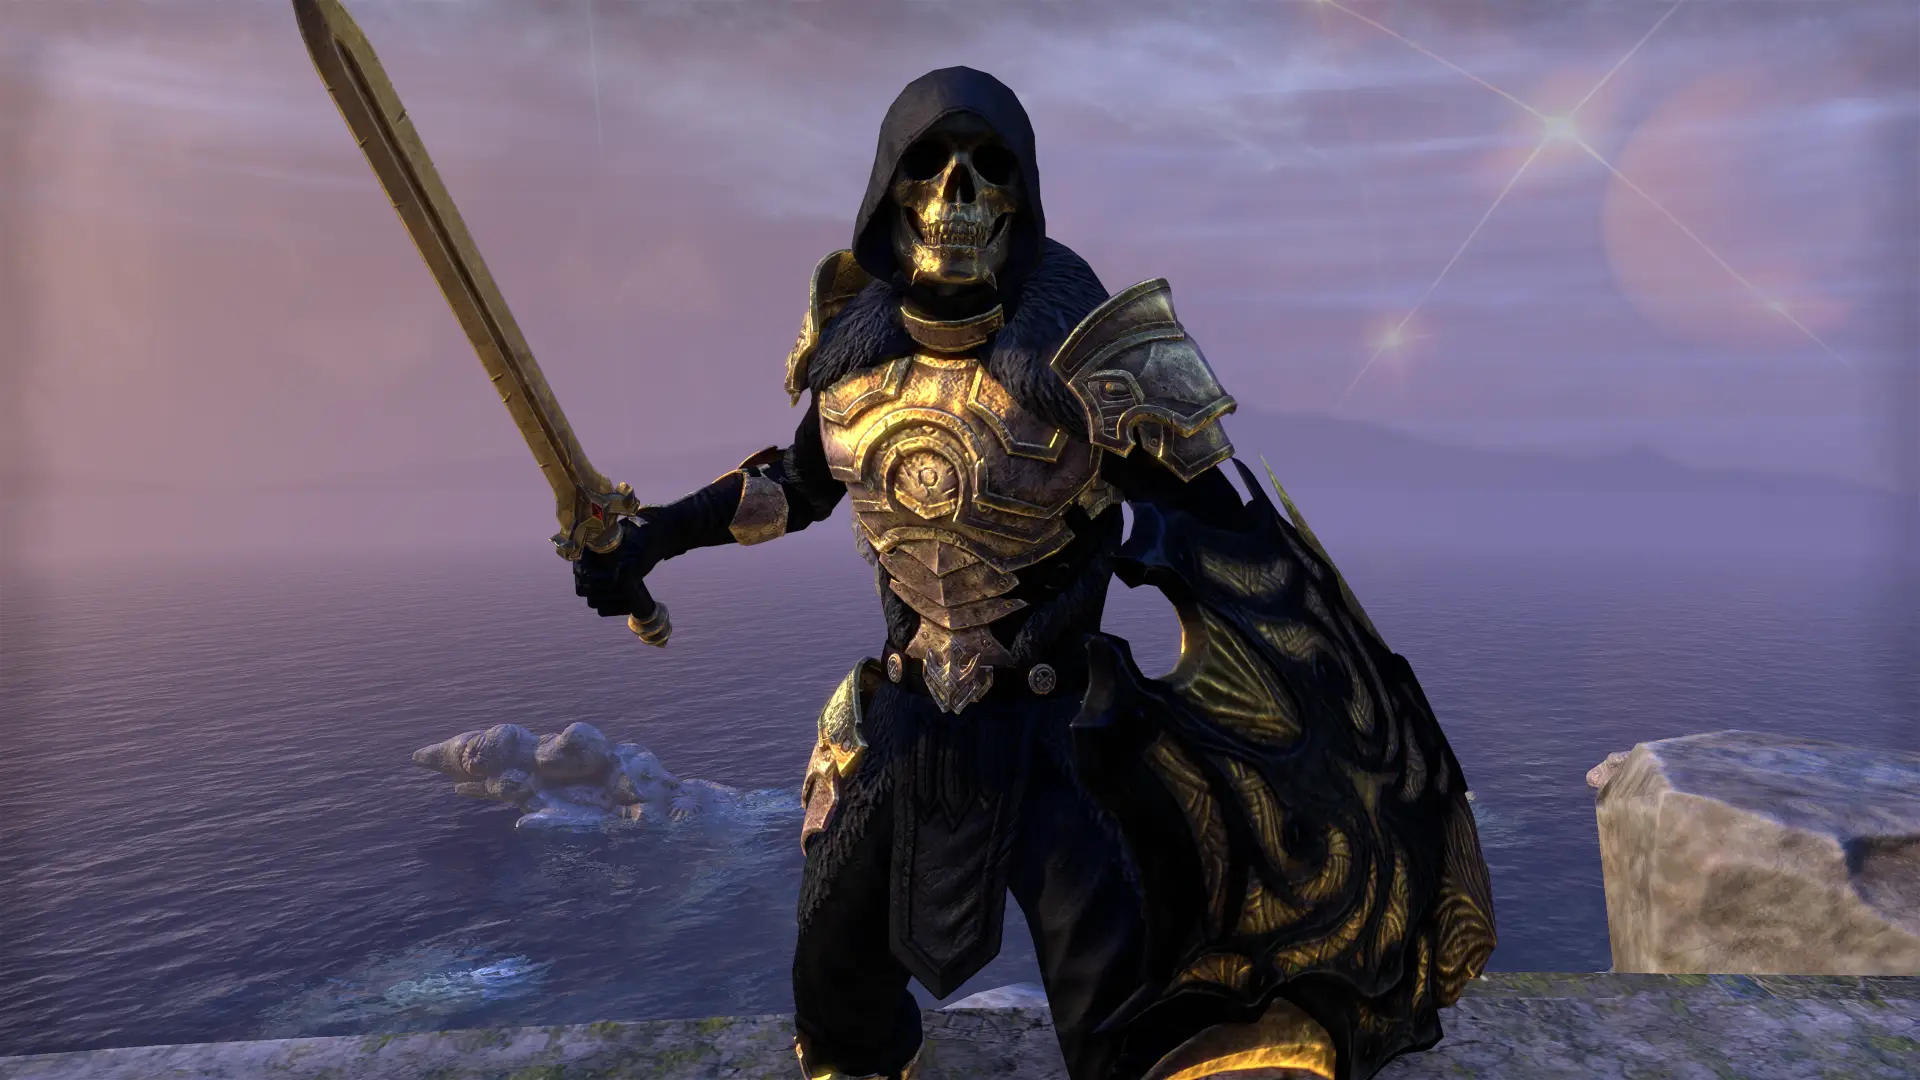
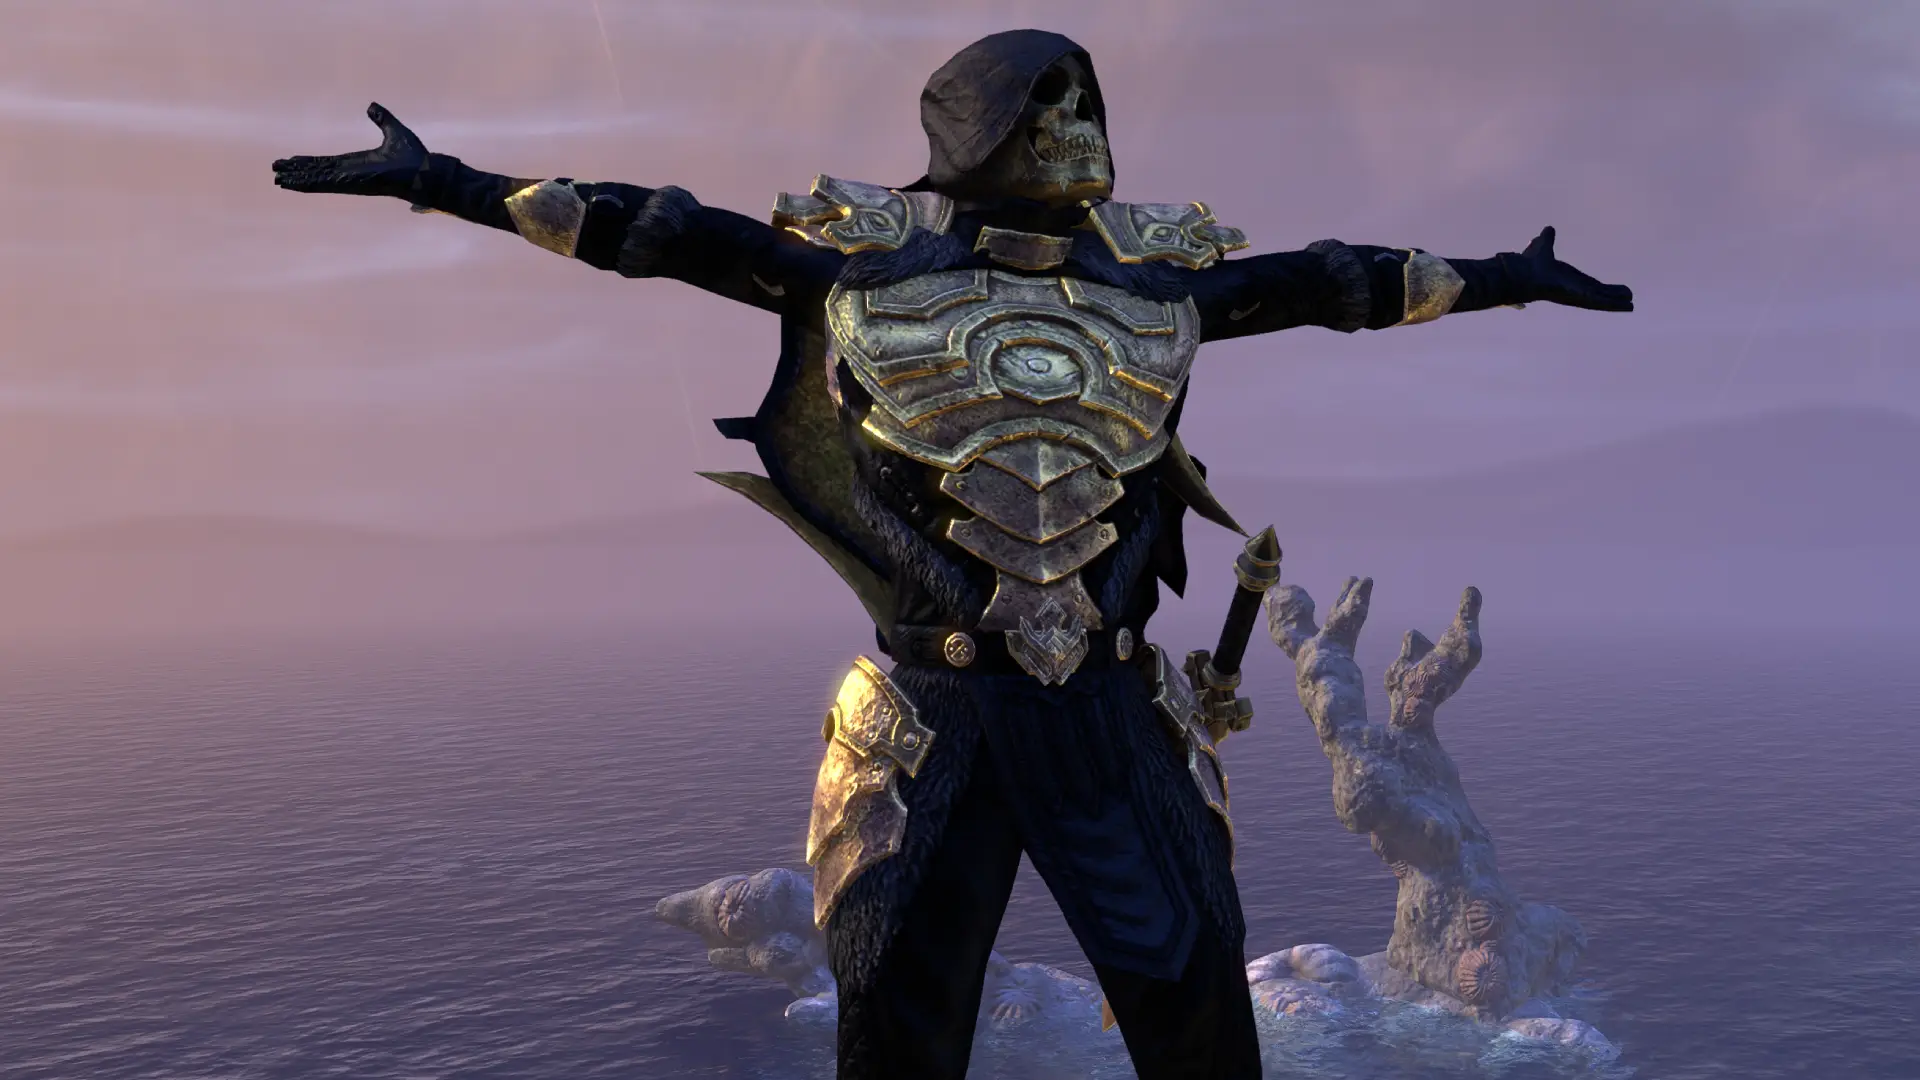
Dragonknight Subclassing Outfit Style & Fashion Showcase
If you would like to replicate the Outfit I used for this ESO Dragonknight Subclassing Build, here is all the info you will need!
| Slot | Name |
|---|---|
| Head | Gravegrasp Helm |
| Shoulder | Nord Carved Pauldrons |
| Chest | Nord Carved Cuirass |
| Hands | Nord Carved Gauntlets |
| Waist | Nord Carved Girdle |
| Legs | Nord Carved Greaves |
| Feet | Nord Carved Sabatons |
| Weapon & Shield | Sancre Tor Sentry Sword, Morag Tong Shield |
| Skin and Markings | Hidden |
| Hair Style | Hidden |
| Dyes | Legate’s Black, Blood Gold |
Update Log for the ESO Tank Dragonknight Subclasses Build
The Update Log for the ESO Dragonknight Subclasses Build shows all major changes (updates) made to the build since its launch.
10.04.2025 Added the Template for the Build.
21.05.2025 Added the Subclassing Tank Dragonknight Build for ESO’s update 46, Seasons of the Worm Cult Part 1.
18.08.2025 Updated the Build for Update 47 Feast of Shadows DLC, Seasons of the Worm Cult.
27.10.2025 Updated the Build for Update 48 Seasons of the Worm Cult Part 2.
09.03.2026 Updated the Build for Update 49, Season 0.
03.06.2026 Updated the Build for Update 50, Season 0 and 1.
Related Guides: