


Welcome to the Ancestor Module Godroll Perk Guide for The First Descendant. Here you will find the best Ancestor Module perks for each Descendant in the game. Please visit the TFD Ancestor Module Database for a list of all Ancestor modules.
Table of Contents:
- Ancestor Module Godroll List – All Characters
- Descendant Synchronization Value Explained
- Ancestor Module Stat Scaling Explained
- Ancestor Perk Quality & Examples
For builds on other Descendants, visit our The First Descendant Builds Database, or check out the Character Tier List or the Weapon Tier List.
TFD Wiki: We have expanded Alcasthq with tfd.gameslantern.com, a Wiki & Database for anything related to The First Descendant. Use the Character Editor or the Weapon Editor to theorycraft and create builds yourself. Browse Descendants, Weapons, Leaderboard Loadouts or use the Compare Tool. There are plenty of other features you can check out, too!
Feedback: If you have any feedback for any character’s Ancestor mod, please join our TFD Discord Server and tag @alcast.
The First Descendant Ancestor Module Godroll List
Click on any of the character links below to get directed to that character’s Ancestor Module Godroll Perks list.
Important Ancestor Module Know-How:
- Ancestor Module Godrolls can vary depending on what build you use on a character! This means it’s not just one godroll fits it all.
- Ancestor Modules scale off your Descendant’s Synchronization Value. Higher values = better roll stats range.
- Any perks below Ultimate quality are often weak. So aim to go for at least one or two Transcendent/Ultimate quality perks!
- Ancestor Modules with 2 positive perks and 1 negative perk can roll the highest stats. (MUST READ!!!!)
Click on any of the characters below to see their Ancestor Module perks.
- Female Descendants Ancestor Module:
- Male Descendants Ancestor Modules:
Dia Ancestor Module

- Optimized Dia Build for TFD
- Dia Ancestor Module Stats Sheet: Delightful Resolution
- Dia Synchronization Value: 0.732
Important: Perk quality is crucial for your Ancestor module power level. Having the right perks alone isn’t enough. Blue/purple perks can be so weak that they don’t help at all. In fact, you might lose power if you have to replace a normal module.
- No Red Mod (Mobbing)
- Ratio: Chill + Fusion
- Essential: Crit Dmg + Cooldown
- Optional: Max Hp / Duration Up / Range
- Negative: Singular Boost Ratio, Singular Modifier, Max Shield, Def
- Blooming Ecstasy (Mobbing)
- Ratio: Chill + Fusion
- Essential: Crit Dmg + Cooldown
- Optional: Max Hp / Duration Up / Range
- Negative: Singular Boost Ratio, Singular Modifier, Max Shield, Def
- Chill Brand (Bossing)
- Ratio: Chill + Fusion
- Essential: Crit Dmg + Cooldown
- Optional: Max Hp / Duration Up
- Negative: Singular Boost Ratio, Singular Modifier, Max Shield, Def
Serena Ancestor Module

- Optimized Serena Build for TFD
- Serena Ancestor Module Stats Sheet: Hope’s Resolution
- Serena Synchronization Value: 0.49
- Important: Perk quality is crucial for your Ancestor module power level. Having the right perks alone isn’t enough. Blue/purple perks can be so weak that they don’t help at all. In fact, you might lose power if you have to replace a normal module.
Most often, Serena is played as a weapon-based Descendant. However, she also has a skill-based build that some users play. Serena’s damage scales off her HP, therefore Max HP should be your top priority on any Ancestor Module in The First Descendant.
Because Serena’s synchronization value is one of the lowest, the Ancestor module is more of a small improvement, rather than a full power-up. Which is also why you shouldn’t equip one unless it has insanely good rolls on it, preferably max HP. Serena’s damage scales off max HP, but the hardcap is 39k. So if you actually go over the cap with a good Ancestor Module HP roll, make sure to finetune your build in the Arche Tuning section, remove a HP perk, and add another multi-hit/firearm perk.
- No Red Mod Purge (Mobbing)
- Ratio: Fire + Singular
- Essential: Max Hp + Duration
- Optional: Cost / Cooldown
- Negative: Max Shield / Def / Range / Singular Boost Ratio /Modifier
- Hymm (Mobbing)
- Ratio: Fire + Dimension
- Essential: Max Hp + Duration
- Optional: Cooldown / Skill Cost / Range
- Negative: Max Shield / Def / Range / Singular Boost Ratio /Modifier
- No Red Mod Purge (Bossing)
- Ratio: Fire + Dimension
- Essential: Max Hp + Duration
- Optional: Cooldown / Skill Cost
- Negative: Max Shield / Def / Range / Singular Boost Ratio /Modifier
- Divine Surge (Mobbing)
- Ratio: Fire + Singular
- Essential: Cooldown + Singular
- Optional: Fire / Duration / Skill Cost
- Negative: Max Shield / Def / Range / Singular Boost Ratio /Modifier
Bunny Ancestor Module

- Optimized Bunny Build for TFD
- Bunny Ancestor Module Stats Sheet: Runner’s Resolution
- Bunny Synchronization Value: 1.673
Important: Perk quality is crucial for your Ancestor module power level. Having the right perks alone isn’t enough. Blue/purple perks can be so weak that they don’t help at all. In fact, you might lose power if you have to replace a normal module.
- Crit Condense (Mobbing)
- Ratio: Electric + Fusion
- Essential: Crit Rate + Crit Damage
- Optional: Fusion / Skill Cost / Cooldown / Range
- Negative: Def / Max Shield / Max Mp
- Electric Link (Mobbing)
- Ratio: Electric + Singular
- Essential: Crit Rate + Crit Damage
- Optional: Skill Cost / Cooldown / Range
- Negative: Def / Max Shield / Max Mp
- Electric Charge (Bossing)
- Ratio: Match Element For Boss + Fusion
- Essential: Fusion + Crit Damage
- Optional: Skill Cost / Fusion
- Negative: Def / Max Shield / Duration Up
- Electric Transition (Mobbing)
- Ratio: Electric + Fusion
- Essential: Crit Rate + Crit Damage
- Optional: Skill Cost / Electric / Range
- Negative: Def / Max Shield / Duration Up
- High Voltage (Mobbing)
- Ratio: Electric + Fusion
- Essential: Crit Rate + Crit Damage
- Optional: Fusion / Skill Cost / Range
- Negative: Def / Max Shield / Duration Up
- Bionic Fuel (Mobbing)
- Ratio: Electric + Fusion
- Essential: Crit Rate + Crit Damage
- Optional: Electric / Range / Max Hp
- Negative: Def / Max Shield / Max Mp
Hailey Ancestor Module

- Optimized Hailey Build for TFD
- Hailey Ancestor Module Stats Sheet: Runner’s Resolution
- Hailey Synchronization Value: 1.245
Important: Perk quality is crucial for your Ancestor module power level. Having the right perks alone isn’t enough. Blue/purple perks can be so weak that they don’t help at all. In fact, you might lose power if you have to replace a normal module.
- Cold Heart (Mobbing)
- Ratio: Chill + Singular
- Essential: Crit Damage + Singular
- Optional: Cooldown / Chill / Skill Cost
- Negative: Max Shield / Def / Max Mp
- Camo Sniping (Mobbing)
- Ratio: Chill + Singular
- Essential: Crit Damage + Singular
- Optional: Cooldown / Chill
- Negative: Max Shield / Def / Max Mp
- Cold Heart Gunner (Mobbing)
- Essential: Crit Damage + Cooldown
- Optional: Duration Up / Cost
- Negative: Max Shield / Def / Max Mp
Ines Ancestor Module

- Optimized Ines Build for TFD
- Ines Ancestor Module Stats Sheet: Snare’s Resolution
- Ines Synchronization Value: 1.346
Important: Perk quality is crucial for your Ancestor module power level. Having the right perks alone isn’t enough. Blue/purple perks can be so weak that they don’t help at all. In fact, you might lose power if you have to replace a normal module.
- Time Of The Hunting Hounds (Mobbing)
- Ratio: Electric + Tech
- Essential: Max Mp + Crit Damage
- Optional: Tech / Range / Cooldown
- Negative: Max Shield / Def / Singular Modifier
- No Red Purge (Mobbing)
- Ratio: Electric + Singular
- Essential: Max Mp + Crit Damage
- Optional: Singular / Range / Cooldown
- Negative: Max Shield / Def / Singular Modifier
- Plasma Bullet (Mobbing)
- Ratio: Electric + Singular
- Essential: Max Mp + Crit Damage
- Optional: Cooldown / Singular
- Negative: Max Shield / Def / Tech Boost Ratio /Modifier
- Plasma Ball (Mobbing)
- Ratio: Electric + Tech
- Essential: Max Mp + Crit Damage
- Optional: Tech
- Negative: Max Shield / Def / Singular Modifier
- Plasma Condensation (Mobbing)
- Ratio: Electric + Tech
- Essential: Max Mp + Crit Damage
- Optional: Tech / Electic / Max Mp
- Negative: Max Shield / Def / Singular Modifier
- Plasma Condensation (Bossing)
- Ratio: Electric + Tech
- Essential: Tech + Crit Damage
- Optional: Electric / Max Mp
- Negative: Max Shield / Def / Singular Modifier
Nell Ancestor Module

- Optimized Nell Build for TFD
- Nell Ancestor Module Stats Sheet: Tactician’s Resolution
- Nell Synchronization Value: 1.651
Important: Perk quality is crucial for your Ancestor module power level. Having the right perks alone isn’t enough. Blue/purple perks can be so weak that they don’t help at all. In fact, you might lose power if you have to replace a normal module.
- Shattering Heart (Mobbing)
- Ratio: Non Attribute + Fusion
- Essential: Crit Damage + Fusion
- Optional: Non Attribute / Tech / Range
- Negative: Max Shield / Def / Max Mp
- Shattering Heart (Bossing)
- Ratio: Non Attribute + Tech
- Essential: Crit Damage + Tech
- Optional: Cooldown / Non Attribute
- Negative: Max Shield / Def / Max Mp
- Restored Heart (Support)
- Ratio: Non Attribute + Fusion
- Essential: Duration Up + Cooldown
- Optional: Range
- Negative: Max Shield / Def / Max Mp
Harris Ancestor Module

- Optimized Harris Build for TFD
- Harris Ancestor Module Stats Sheet: Pioneer’s Resolution
- Harris Synchronization Value: 1.600
Important: Perk quality is crucial for your Ancestor module power level. Having the right perks alone isn’t enough. Blue/purple perks can be so weak that they don’t help at all. In fact, you might lose power if you have to replace a normal module.
- No Red Module Non Crit (Mobbing)
- Ratio: Toxic + Fusion
- Essential: Fusion + Toxic
- Optional: Cooldown
- Negative: Cost / Max Shield
- Resist Build (Support)
- Ratio: Toxic + Fusion
- Essential: Def + Fusion
- Optional: Toxic
- Negative: Max Shield
- Defence Strip (Support)
- Ratio: Toxic + Fusion
- Essential: Def + Fusion
- Optional: Cooldown
- Negative: Cost / Max Shield
- No Red Module Crit (Mobbing)
- Ratio: Toxic + Fusion
- Essential: Crit Rate + Crit Damage
- Optional: Fusion / Cooldown / Range
- Negative: Cost / Max Shield
Viessa Ancestor Module
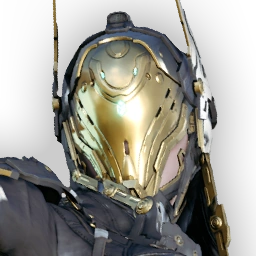
- Optimized Viessa Build for TFD
- Viessa Ancestor Module Stats Sheet: Hunter’s Resolution
- Viessa Synchronization Value: 1.162
Important: Perk quality is crucial for your Ancestor module power level. Having the right perks alone isn’t enough. Blue/purple perks can be so weak that they don’t help at all. In fact, you might lose power if you have to replace a normal module.
- Hypothermia (Mobbing)
- Ratio: Chill + Fusion + Tech
- Essential: Crit Damage + Crit Rate
- Optional: Tech / Cooldown / Skill Cost
- Negative: Max Shield / Def / Max Mp
- Glacial Cloud (Mobbing)
- Ratio: Chill + Fusion
- Essential: Crit Rate + Crit Damage
- Optional: Chill / Cooldown / Fusion
- Negative: Singular Skill Power Boost + Skill Modifier / Max Shield / Def / Max Mp
- Cold Bloodedness (Mobbing)
- Ratio: Chill + Fusion + Tech
- Essential: Crit Rate + Crit Damage
- Optional: Chill / Cooldown / Tech
- Negative: Max Shield / Def / Max Mp
- Absolute Zero (Mobbing)
- Ratio: Chill + Singular
- Essential: Crit Damage + Cooldown
- Optional: Singular / Chill / Cooldown / Skill Cost
- Negative: Fusion And Tech Skill Boost + Skill Modifer / Max Shield / Def / Max Mp
- Frost Bullet (Mobbing)
- Ratio: Chill + Tech
- Essential: Crit Rate + Crit Damage
- Optional: Cooldown / Tech
- Negative: N/A
- Cold Snap Watch (Mobbing)
- Ratio: Chill + Fusion + Tech
- Essential: Crit Damage + Tech
- Optional: Cooldown
- Negative: Singular Skill Power Boost + Skill Modifier / Max Shield / Def / Max Mp
Gley Ancestor Module

- Optimized Gley Build for TFD
- Gley Ancestor Module Stats Sheet: Thirster’s Resolution
- Gley Synchronization Value: 1.093
Important: Perk quality is crucial for your Ancestor module power level. Having the right perks alone isn’t enough. Blue/purple perks can be so weak that they don’t help at all. In fact, you might lose power if you have to replace a normal module.
- Predator Instinct Gunning (Mobbing)
- Essential: Duration + Max Hp
- Optional: Cooldown
- Negative: Range / Skill Crit Rate / Skill Crit Damage / Singular Boost Ratio / Modifier
- Explosive Life Support (Mobbing)
- Ratio: Non Attribute + Dimension
- Essential: Non Attribute + Dimension
- Optional: Cooldown / Max Hp
- Negative: Singular Skill Boost + Skill Modifer / Def
- Massive Sang (Bossing)
- Ratio: Non Attribute + Dimension
- Essential: Dimension + Non Attribute
- Optional: Cooldown / Max Hp
- Negative: Singular Skill Boost + Skill Modifer / Def
- Blood And Iron (Mobbing)
- Ratio: Non Attribute + Dimension
- Essential: Crit Dmg + Dimension
- Optional: Range / Cooldown / Max Hp
- Negative: Singular Skill Boost + Skill Modifer / Def
- Demonic Modification (Mobbing)
- Ratio: Non Attribute + Dimension
- Essential: Non Attribute + Dimension
- Optional: Duration / Cooldown / Max Hp
- Negative: Singular Skill Boost + Skill Modifer / Def
Freyna Ancestor Module

- Optimized Freyna Build for TFD
- Freyna Ancestor Module Stats Sheet: Dominator’s Resolution
- Freyna Synchronization Value: 1.752
Important: Perk quality is crucial for your Ancestor module power level. Having the right perks alone isn’t enough. Blue/purple perks can be so weak that they don’t help at all. In fact, you might lose power if you have to replace a normal module.
- Non Crit Contagion (Mobbing)
- Ratio: Toxic + Tech
- Essential: Toxic + Tech
- Optional: Cooldown / Duration / Range
- Negative: Skill Crit Rate / Skill Crit Damage / Max Shield / Def / Dimension Skill Modifier
- Crit Contagion (Mobbing)
- Ratio: Toxic + Tech
- Essential: Crit Rate + Crit Damage
- Optional: Toxic / Tech / Cooldown
- Negative: Max Shield / Def / Dimension Skill Modifier
- Venom Injection (Bossing)
- Ratio: Toxic + Tech
- Essential: Crit Damage + Crit Rate
- Optional: Tech
- Negative: Def / Dimension Skill Modifier
- Non Crit Venom Injection (Mobbing)
- Ratio: Toxic + Tech
- Essential: Tech + Toxic
- Optional: Max Hp / Max Shield
- Negative: Skill Crit Rate / Skill Crit Damage / Def / Dimension Skill Modifier
- Crit Venom Injection (Mobbing)
- Ratio: Toxic + Tech
- Essential: Crit Rate + Crit Damage
- Optional: Tech / Toxic / Cooldown
- Negative: Max Shield / Def / Dimension Skill Modifier
Valby Ancestor Module

- Optimized Valby Build for TFD
- Valby Ancestor Module Stats Sheet: Shape of Water’s Resolution
- Valby Synchronization Value: 1.589
Important: Perk quality is crucial for your Ancestor module power level. Having the right perks alone isn’t enough. Blue/purple perks can be so weak that they don’t help at all. In fact, you might lose power if you have to replace a normal module.
- No Red Module Non Crit (Mobbing)
- Ratio: Non Attribute + Fusion
- Essential: Cooldown + Max Mp
- Optional: Fusion / Range / Skill Cost
- Negative: Skill Crit Rate / Skill Crit Damage / Max Shield / Def
- Crit Supply Moisture (Mobbing)
- Ratio: Non Attribute + Fusion
- Essential: Cooldown + Crit Damage
- Optional: Crit Rate / Fusion / Skill Cost
- Negative: Max Shield / Def
- Water Play (Mobbing)
- Ratio: Non Attribute + Fusion
- Essential: Cooldown + Max Mp
- Optional: Non Attribute / Range / Skill Cost
- Negative: Max Shield / Def
- Singing Water (Mobbing)
- Ratio: Non Attribute + Fusion
- Essential: Cooldown + Max Mp
- Optional: Fusion / Range / Skill Cost
- Negative: Skill Crit Rate / Skill Crit Damage / Max Shield / Def
- Hydro Pressure Bomb (Mobbing)
- Ratio: Non Attribute + Fusion
- Essential: Cooldown + Max Mp
- Optional: Fusion / Range / Skill Cost
- Negative: Skill Crit Rate / Skill Crit Damage / Max Shield / Def
- Spiral Tidal Wave (Mobbing)
- Ratio: Non Attribute + Fusion
- Essential: Cooldown + Crit Damage
- Optional: Crit Rate / Fusion / Skill Cost
- Negative: Max Shield / Def / Max Mp
Sharen Ancestor Module

- Optimized Sharen Build for TFD
- Sharen Ancestor Module Stats Sheet: Assassin’s Resolution
- Sharen Synchronization Value: 1.194
Important: Perk quality is crucial for your Ancestor module power level. Having the right perks alone isn’t enough. Blue/purple perks can be so weak that they don’t help at all. In fact, you might lose power if you have to replace a normal module.
- Area Supression (Mobbing)
- Ratio: Electric + Fusion
- Essential: Crit Damage + Fusion
- Optional: Electric / Cooldown
- Negative: Max Shield / Def / Max Hp
- Ambushed Purge (Mobbing)
- Ratio: Electric + Fusion
- Essential: Crit Damage + Fusion
- Optional: Duration
- Negative: Max Shield / Def / Max Hp
- Battlesuit Melting (Support)
- Ratio: Electric + Fusion
- Essential: Duration Up + Def
- Optional: Electric / Cooldown
- Negative: Skill Crit Rate / Skill Crit Damage
- Overcharged Edge (Mobbing)
- Ratio: Electric + Fusion
- Essential: Crit Damage + Fusion
- Optional: Electric / Cooldown / Max Shield
- Negative: Def / Max Hp
- Release Cutting Force (Mobbing)
- Ratio: Electric + Fusion
- Essential: Crit Damage + Fusion
- Optional: Electric / Cooldown
- Negative: Max Shield / Def / Max Hp
- Focused Edge (Mobbing)
- Ratio: Electric + Fusion
- Essential: Crit Damage + Fusion
- Optional: Electric / Cooldown
- Negative: Max Shield / Def / Max Hp
Luna Ancestor Module

- Optimized Luna Build for TFD
- Luna Ancestor Module Stats Sheet: Artist’s Resolution
- Luna Synchronization Value: 1.357
Important: Perk quality is crucial for your Ancestor module power level. Having the right perks alone isn’t enough. Blue/purple perks can be so weak that they don’t help at all. In fact, you might lose power if you have to replace a normal module.
- Noise Surge (Mobbing)
- Ratio: Non Attribute + Singular
- Essential: Crit Damage + Singular
- Optional: Non Attribute
- Negative: Def / Tech Skill Power Boost Ratio / Modifier
- Battlefield Concert (Mobbing)
- Ratio: Non Attribute + Tech
- Essential: Crit Rate + Crit Damage
- Optional: Tech / Duration Up
- Negative: Def / Singular Skill Power Boost Ratio / Modifier
- Battlefield Concert (Bossing)
- Ratio: Non Attribute + Tech
- Essential: Crit Rate + Crit Damage
- Optional: Tech / Duration Up
- Negative: Def / Singular Skill Power Boost Ratio / Modifier
- Nimble Footsteps (Support)
- Ratio: Non Attribute + Singular
- Essential: Duration + Max Mp
- Optional: Range / Cooldown
- Negative: Skill Crit Rate / Skill Crit Damage
- Aggressive Melody (Support)
- Ratio: Non Attribute + Singular
- Essential: Duration + Max Mp
- Optional: Range / Cooldown
- Negative: Skill Crit Rate / Skill Crit Damage
- Singers Mercy (Support)
- Ratio: Non Attribute + Singular
- Essential: Duration + Max Mp
- Optional: Range / Cooldown
- Negative: Skill Crit Rate / Skill Crit Damage
Enzo Ancestor Module

- Optimized Enzo Build for TFD
- Enzo Ancestor Module Stats Sheet: Quartermaster’s Resolution
- Enzo Synchronization Value: 1.549
Important: Perk quality is crucial for your Ancestor module power level. Having the right perks alone isn’t enough. Blue/purple perks can be so weak that they don’t help at all. In fact, you might lose power if you have to replace a normal module.
- Gun Build Focus Fire (Mobbing)
- Ratio: Non Attribute + Singular
- Essential: Duration Up + Cooldown
- Optional: Range
- Negative: Dimension Skill Boost + Skill Modifer / Max Mp / Def
- Skill Focus Fire (Mobbing)
- Ratio: Non Attribute + Singular
- Essential: Crit Damage + Duration
- Optional: Singular / Cooldown / Range
- Negative: Dimension Skill Boost + Skill Modifier / Max Mp / Def
- Compressed Bullet (Mobbing + Support)
- Ratio: Non Attribute + Dimension
- Essential: Duration Up + Max Shield
- Optional: Cooldown / Range
- Negative: Crit Rate / Crit Damage / Def / Max Mp
- No Red Module Shield Build (Mobbing)
- Ratio: Non Attribute + Dimension
- Essential: Max Shield + Duration
- Optional: Max Hp
- Negative: Crit Rate / Crit Damage / Def / Max Mp
- Supply Firearm Enhancer (Support)
- Ratio: Non Attribute + Dimension
- Essential: Cooldown + Duration
- Optional: Cost / Range
- Negative: Crit Rate / Crit Damage / Def
- Reinforce Front Line (Mobbing)
- Ratio: Non Attribute + Dimension
- Essential: Duration + Max Shield
- Optional: Max Hp
- Negative: Crit Rate / Crit Damage / Def / Max Mp
Blair Ancestor Module

- Optimized Blair Build for TFD
- Blair Ancestor Module Stats Sheet: Chef’s Resolution
- Blair Synchronization Value: 1.550
Important: Perk quality is crucial for your Ancestor module power level. Having the right perks alone isn’t enough. Blue/purple perks can be so weak that they don’t help at all. In fact, you might lose power if you have to replace a normal module.
- Next Level Recipe (Mobbing)
- Ratio: Fire + Dimension
- Essential: Crit Damage + Duration
- Optional: Range / Dimension
- Negative: Singular Skill Boost + Skill Modifer / Max Mp / Def / Max Shield
- Next Level Recipe (Bossing)
- Ratio: Fire + Dimension
- Essential: Crit Damage + Dimension
- Optional: Dimension / Cooldown / Fire
- Negative: Singular Skill Boost + Skill Modifer / Max Mp / Def / Max Shield
Lepic Ancestor Module
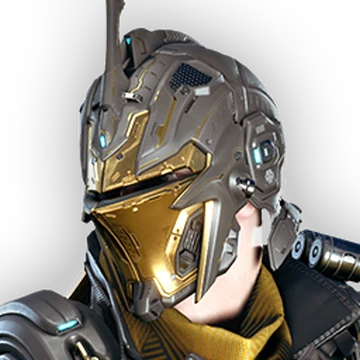
- Optimized Lepic Build for TFD
- Lepic Ancestor Module Stats Sheet: Grenadier’s Resolution
- Lepic Synchronization Value: 1.208
Important: Perk quality is crucial for your Ancestor module power level. Having the right perks alone isn’t enough. Blue/purple perks can be so weak that they don’t help at all. In fact, you might lose power if you have to replace a normal module.
- Explosive Stacks (Mobbing)
- Ratio: Fire + Tech
- Essential: Crit Rate + Crit Damage
- Optional: Tech / Cooldown / Duration
- Negative: Max Shield / Def / Max Mp / Singular Boost Ratio + Modifier
- Firearm Master (Bossing)
- Ratio: Fire + Tech
- Essential: Crit Rate + Crit Damage
- Optional: Tech / Duration
- Negative: Max Shield / Def / Max Mp / Singular Boost Ratio + Modifier
- Any Red Module Tow Build (Mobbing + Support)
- Ratio: Fire + Tech
- Essential: Duration + Tech
- Optional: Fire
- Negative: Max Shield / Def / Max Mp / Singular Boost Ratio + Modifier
Ajax Ancestor Module
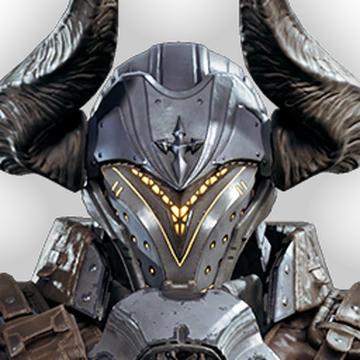
- Optimized Ajax Build for TFD
- Ajax Ancestor Module Stats Sheet: Guardian’s Resolution
- Ajax Synchronization Value: 0.841
Important: Perk quality is crucial for your Ancestor module power level. Having the right perks alone isn’t enough. Blue/purple perks can be so weak that they don’t help at all. In fact, you might lose power if you have to replace a normal module.
- Non Crit Void Explosion (Mobbing)
- Ratio: Non Attribute + Tech
- Essential: Def + Cooldown
- Optional: Tech / Non Attribute / Range
- Negative: Dimension Skill Boost + Skill Modifer / Max Mp
- Body Enhancement Tank (N/A)
- Essential: Shield + Hp
- Optional: Def
- Negative: Dimension Skill Boost + Skill Modifer / Max Mp
- Matrix Recompulsion Buff (Support)
- Essential: Def + Duration Up
- Optional: Range / Skill Cost
- Negative: Dimension Skill Boost + Skill Modifer / Max Mp
- Mobile Fortress (Mobbing)
- Ratio: Non Attribute + Tech
- Essential: Def + Duration Up
- Optional: Tech / Range / Skill Cost
- Negative: Dimension Skill Boost + Skill Modifer / Max Mp
- Matrix Recompulsion Boss (Support)
- Essential: Def + Cooldown
- Optional: Skill Cost / Duration Up
- Negative: Dimension Skill Boost + Skill Modifer / Max Mp
Jayber Ancestor Module

- Optimized Jayber Build for TFD
- Jayber Ancestor Module Stats Sheet: Tech Expert’s Resolution
- Jayber Synchronization Value: 1.448
Important: Perk quality is crucial for your Ancestor module power level. Having the right perks alone isn’t enough. Blue/purple perks can be so weak that they don’t help at all. In fact, you might lose power if you have to replace a normal module.
- Non Crit Turret Engineering (Mobbing)
- Ratio: Non Attribute + Dimension
- Essential: Duration + Dimension
- Optional: Non Attribute / Cooldown
- Negative: Crit Damage / Crit Rate / Max Shield / Def / Max Mp
- Crit Turret Engineering (Mobbing)
- Ratio: Non Attribute + Dimension
- Essential: Crit Rate + Crit Damage
- Optional: Dimension / Non Attribute / Cooldown
- Negative: Max Shield / Def / Max Mp
- Purge Code (Bossing)
- Ratio: Non Attribute + Dimension
- Essential: Crit Rate + Crit Damage
- Optional: Cooldown / Dimension
- Negative: Max Shield / Def / Max Mp
Yujin Ancestor Module

- Optimized Yujin Build for TFD
- Yujin Ancestor Module Stats Sheet: Medic’s Resolution
- Yujin Synchronization Value: 1.296
Important: Perk quality is crucial for your Ancestor module power level. Having the right perks alone isn’t enough. Blue/purple perks can be so weak that they don’t help at all. In fact, you might lose power if you have to replace a normal module.
- Duty And Sacrifice (Support)
- Ratio: Non Attribute + Fusion
- Essential: Cooldown + Duration
- Optional: Range / Skill Cost
- Negative: Max Shield / Def / Max Mp
- Proliferating Allergy (Mobbing)
- Ratio: Non Attribute + Singular
- Essential: Crit Rate + Crit Damage
- Optional: Singular / Cooldown
- Negative: Duration / Max Shield / Def / Max Mp
- Crit Combat Protocol (Mobbing)
- Ratio: Non Attribute + Fusion
- Essential: Critical Hit Rate + Critical Hit Damage
- Optional: Fusion / Cooldown, Max Hp, Skill Cost
- Negative: Max Shield / Def / Max Mp / Singular
- Non Crit Combat Protocol (Mobbing)
- Ratio: Non Attribute + Fusion
- Essential: Fusion + Non Attribute
- Optional: Cooldown , Max Hp, Skill Cost
- Negative: Max Shield / Def / Max Mp / Singular
- Battlefield Medic (Mobbing)
- Ratio: Non Attribute + Singular
- Essential: Singular + Critical Hit Damage
- Optional: Non Attribute , Skill Cost
- Negative: Max Shield / Def / Max Mp / Fusion
Keelan Ancestor Module

- Optimized Keelan Build for TFD
- Keelan Ancestor Module Stats Sheet: Adventurer’s Resolution
- Keelan Synchronization Value: 1.38
Important: Perk quality is crucial for your Ancestor module power level. Having the right perks alone isn’t enough. Blue/purple perks can be so weak that they don’t help at all. In fact, you might lose power if you have to replace a normal module.
- No Red Module Non Crit (Mobbing)
- Ratio: Toxic + Singular
- Essential: Cooldown + Singular
- Optional: Toxic
- Negative: Crit Damage / Crit Rate / Max Shield / Def / Skill Cost
- No Red Module Crit Mobbing (Mobbing)
- Ratio: Toxic + Singular
- Essential: Crit Rate + Crit Damage
- Optional: Toxic / Singular
- Negative: Max Shield / Def / Skill Cost
- Focus On Prey (Bossing)
- Ratio: Toxic + Fusion
- Essential: Crit Rate + Crit Damage
- Optional: Toxic / Fusion
- Negative: Max Shield / Def / Skill Cost
- Non Crit Sceptic Torrent (Mobbing)
- Ratio: Toxic + Singular
- Essential: Cooldown + Singular
- Optional: Toxic
- Negative: Crit Damage / Crit Rate / Max Shield / Def / Skill Cost
- Fierce Attack (Mobbing)
- Ratio: Toxic + Singular
- Essential: Cooldown + Singular
- Optional: Toxic
- Negative: Crit Damage / Crit Rate / Max Shield / Def / Skill Cost
- Crit Sceptic Torrent (Mobbing)
- Ratio: Toxic + Singular
- Essential: Crit Rate + Crit Damage
- Optional: Toxic / Singular
- Negative: Max Shield / Def / Skill Cost
Esiemo Ancestor Module

- Optimized Esiemo Build for TFD
- Esiemo Ancestor Module Stats Sheet: Explosive Master’s Resolution
- Esiemo Synchronization Value: 1.643
- Important: Perk quality is crucial for your Ancestor module power level. Having the right perks alone isn’t enough. Blue/purple perks can be so weak that they don’t help at all. In fact, you might lose power if you have to replace a normal module.
Keep in mind Esiemo’s 2nd and 4th skill is fusion based, and the 1nd and 3rd is tech based. So depending on what you play you will need to either pick tech or fusion, or both also work.
- Crit Cluster Bomb (Mobbing)
- Ratio: Fire + Tech / Fusion
- Essential: Crit Damage + Crit Rate
- Optional: Max Shield / Tech / Fire
- Negative: Def / Max Mp
- Explosive Propaganda (Bossing)
- Ratio: Fire + Tech / Fusion
- Essential: Max Shield + Crit Damage
- Optional: Crit Rate / Skill Cost / Fire
- Negative: Def / Max Mp
- Non Crit Cluster Bomb (Mobbing)
- Ratio: Fire + Tech
- Essential: Max Shield + Cooldown
- Optional: Fire / Skill Cost / Range
- Negative: Critical Hit Rate / Critical Hit Damage / Def / Max Mp
- Non Crit Rampaging Mad Bomber (Mobbing)
- Ratio: Fire + Tech
- Essential: Max Shield + Tech
- Optional: Fire / Cooldown
- Negative: Critical Hit Rate / Critical Hit Damage / Def / Max Mp
Kyle Ancestor Module

- Optimized Kyle Build for TFD
- Kyle Ancestor Module Stats Sheet: Controller’s Resolution
- Kyle Synchronization Value: 1.904
Important: Perk quality is crucial for your Ancestor module power level. Having the right perks alone isn’t enough. Blue/purple perks can be so weak that they don’t help at all. In fact, you might lose power if you have to replace a normal module.
- Superconductive Bombing Mark 2 (Mobbing)
- Ratio: Non Attribute + Tech
- Essential: Cooldown + Max Shield
- Optional: Non Attribute / Tech
- Negative: Def
- Superconductive Bombing Mark 2 (Bossing)
- Ratio: Non Attribute + Tech
- Essential: Crit Rate + Crit Damage
- Optional: Tech / Non Attribute / Max Shield
- Negative: Def / Cooldown
Descendant Synchronization Value Explained
In The First Descendant, Synchronization Value is a per-Descendant stat that affects Ancestor Modules.
- Ancestor Modules scale off your Descendant’s Synchronization Value.
- Higher Synchronization Value = better roll ranges on the random options an Ancestor Module can have. That means both the minimum and maximum possible option values go up for that Descendant.
- You can check a Descendant’s Synchronization Value in-game via Info screen, Sub section for that character.
Why it exists
Nexon uses Synchronization Value as a balance lever. Some Descendants have lower or higher values depending on their overall performance, so their Ancestor Modules don’t over- or under-scale. If a Descendant gets buffed or reworked, Synchronization Values may be adjusted accordingly.
What happens to Ancestor Modules you already own
If a Descendant’s Synchronization Value changes, your existing Ancestor Modules for that Descendant update automatically to match the new scaling.
Quick practical takeaway
When farming or readjusting Ancestor Modules, a Descendant with a higher Synchronization Value will generally get stronger stat rolls, so two players rolling the “same” Ancestor Module on different characters may see different ranges.
Ancestor Module Stat Scaling Explained
Depending on how many perks you have on an Ancestor Module in The First Descendant, they can have different stat ranges. If a negative perk is included, that means you will get stronger positive perks as a trade-off.
- 2 Positive + 1 Negative = Strongest Rolls
- 2 Positive = 2nd Strongest rolls
- 3 Positive + 1 Negative = 3rd Strongest Rolls
- 3 Positive = Weakest Rolls
| Example Perk Max HP | Rolls | Strength |
|---|---|---|
| Max HP 65.9% | 2 Positive + 1 Negative | Highest Values |
| Max HP 52.7% | 2 Positive | 2nd Highest Values |
| Max HP 46.7% | 3 Positive + 1 Negative | 3rd Highest Values |
| Max HP 40.0% | 3 Positive | lowest Values |
Therefore, depending on how many stats you want to buff, it can make sense to get 2 positive and 1 negative perk to get the highest values. But if you want to get as many perks as possible, you probably want to go for the option of 3 Positive +1 Negative.
Serena has a low synchronization value, so her Max HP perk can only go up to 65.9%[x]. Whereas a normal module like Increased HP gives you 218.5%[x]. Now even if you get a max HP perk from an Ancestor Module it doesn’t sound that great anymore if we compare it to other modules. Therfore, slotting an Ancestor module with Max HP only makes sense if you can stack it on top of other Max HP mods. But that means you need to remove something else, maybe a range mod? Maybe it’s not worth it at all depending on your build!
Make sure to check out our optimized The First Descendant Builds that are updated with every new season! Or check out The First Descendant Community Builds Database.
Why Ancestor Module Quality Is Important in TFD
Let’s take a look at how effective some of these stats for Ancestor Modules are and lets also look at their max and min values. It most often really comes down to what build you are running and how useful the Ancestor Module perks enhance your build. Just keep in mind that you will have to replace another normal module; it always comes with a trade-off!
Example 1 Adventurer’s Resolution
Here we have an Ancestor module with 3 positive perks. This one is very useful, but obviously I would have preferred a 2 positive + 1 negative perk module to enhance the power of the perks even further. For example, the Toxic Boost Ratio max with 3 positive perks is 0.514x, but with 2 positive and 1 negative it would be at max 0.847x, which is a significant power increase.
Because Keelans abilities are Toxic and he relies on Skill Cooldown, this module can be very useful, but with what do we swap it out? The Focus on Fusion module gives us 68.2%[+] and -6.1% Skill Cooldown [+]. This translates into 0.682x[+] Fusion Skill Modifier and 0.061x[+] Skill Cooldown. Our Ancestor Module improves both of these stats and we additionally get even more Toxic Skill Power Boost ratio, therefore, you want to replace the Focus on Fusion module with this Ancestor Module!
- Fusion Skill Modifier 0.711x [+] minmax(0.193x-0.732x)
- Toxic Skill Power Boost Ratio 0.491x[+] minmax(0.136x-0.514x)
- Skill Cooldown -0.111x[+] minmax(-0.19x–0.051x)
Example 2-3 Hunter’s Resolution
This Ancestor Module is a good showcase of why perks are stronger when you have a negative perk in your module. Let’s just look at the Skill Critical Hit Rate and compare the values. The Ancestor Module with 3 positive perks gives us a transcendent quality Skill Critical Hit Rate at 240.1%. The 3 positive 1 negative Ancestor Module gives us an epic quality Skill Critical Hit Rate at 230.7%. Now the transcendent is obviously still stronger, but lets look at the max values!
Example Nr 2 can actually get a higher max value because the negative perk enhances the positive perks as a trade-off. Therefore, I would actually prefer the 3 positive 1 negative Ancestor Module over the other one with the transcendent quality, especially since all the stats there are super helpful. If I play a Viessa Absolute-Zero Build, all my skills are Singular and Chill too; it’s basically an insanely strong Ancestor Module if you can make the extra Skill Cost work.
- Example Nr 2
- 3 positive 1 negative perk
- Skill Critical Hit Rate 230.7%
- Purple Quality
- minmax(75.1%-283.7%)
- Example Nr 3
- 3 positive perks
- Skill Critical Hit Rate 240.1%
- Transcendent Quality
- minmax(64.2%-242.6%)
Example 4 Assassin’s Resolution
The module shown in the image under Nr. 4 is a good Ancestor Module for Sharen. Her builds often favour crit setups, and all damage is electric. So all three perks are valuable. Obviously, I would have loved to get a negative perk like Max Shield or DEF to further enhance the three positive perks.
- Skill Critical Hit Rate 108.9%[x] minmax(61.8%-233.8%)
- Electric Skill Power Boost Ratio 0.312x[+] minmax(0.134x-0.509x)
- Skill Critical Hit Damage 108.0%[x] minmax(40.9%-154.3%)
Example 5 Guardian’s Resolution
Nr. 5 is a handy Ancestor Module for any Ajax Build that focuses on skill critical damage. The Skill Critical Hit Rate perk is pretty much a godroll, it has 241.8% and the max for 3 positive perks is 242.6%. However, if we had a negative perk attached to this the max value would go up to 283.7%. If we only had 2 positive and 1 negative perk it would even go up to a max of 400.1%. Once again showcasing just how insanely powerful the negative perk enhances the positive counterparts.
- Skill Cooldown -0.134x[+] minmax(-0.196x–0.052x)
- Max Shield 121.0%[x] minmax(51.7%-195.5%)
- Skill Critical Hit Rate 241.8%[x] minmax(64.2%-242.6%)
Example 6 + 7 Marksman’s Resolution
Let’s compare two Ancestor Modules for a Hailey Build. Both of these Ancestor Modules can be useful, for different builds! I would use Nr 7. for any Hailey Crit Build, because look at the juicy stats it give as long as you can stomache the extra skill cost. This module is insane, especially because it gets the highest values due to it being 2 positive and 1 negative perk.
Nr. 8 is great if you want to focus on Cooldown and Cost, but the Dimension Boost ratio is a bit useless. However, the negative Max Shield perk is perfect, since we don’t care about our shield anyway. So I would only use this if it can actually replace another Cooldown or Cost module!
- Example Nr 7
- Skill Critical Hit Rate 126.2%[x] minmax(42.6%+161.2%)
- Skill Critical Hit Damage 91.2%[x] minmax(28.2%-106.4%)
- Negative: Skill Cost 0.031x[+] minmax(0.019-0.072x)
- Example Nr 8
- Skill Cooldown 0.092x[+] minmax(-0.092x–0.024x) (literally godroll perk)
- Skill Cost -0.081x[+] minmax(-0.102x–0.026x)
- Dimension Skill Power Boost Ratio 0.105x[+] minmax(0.045x-0.172x)
- Negative: Max Shield -26.1%[x] minmax(46.1%-12.2%)
Example 9 Chef’s Resolution
The last example is for a Blair Build. Most of Blairs skills are Dimension based, so the Singular buff only applies to his second skill. Now if your build focuses on the second skill, then great! Otherwise not so much. However, the other two rolls are high quality and can be useful. The Fire perk is amazing (literally godroll for 3 positive perks module), and the range perk, you have to decide for yourself if you need more range or not. If you are already at the range cap, you could try replacing a range module with this and see if you are still at the cap or slightly below it. Then obviously, it would make sense to use this Ancestor Module since you will be getting more or less the same range but also a lot of extra fire damage.
- Singular Skill Modifier 0.317x[+] minmax()
- Skill Effect Range 0.514x[+] minmax()
- Fire Skill Power Boost Ratio 0.401x[+] minmax(0.106x-0.401x) (This is a godroll perk wow)
Note: If this Ancestor Module was 2 positive 1 negative, the Fire Skill Power Boost Ratio could have gone up to a max of 0.661x instead of 0.401x.
Related Guides for The First Descendant

You can also check out our Ultimate Weapons Database for The First Descendant or the Builds Database for The First Descendant.