Type: Dungeon, Trials & Overland
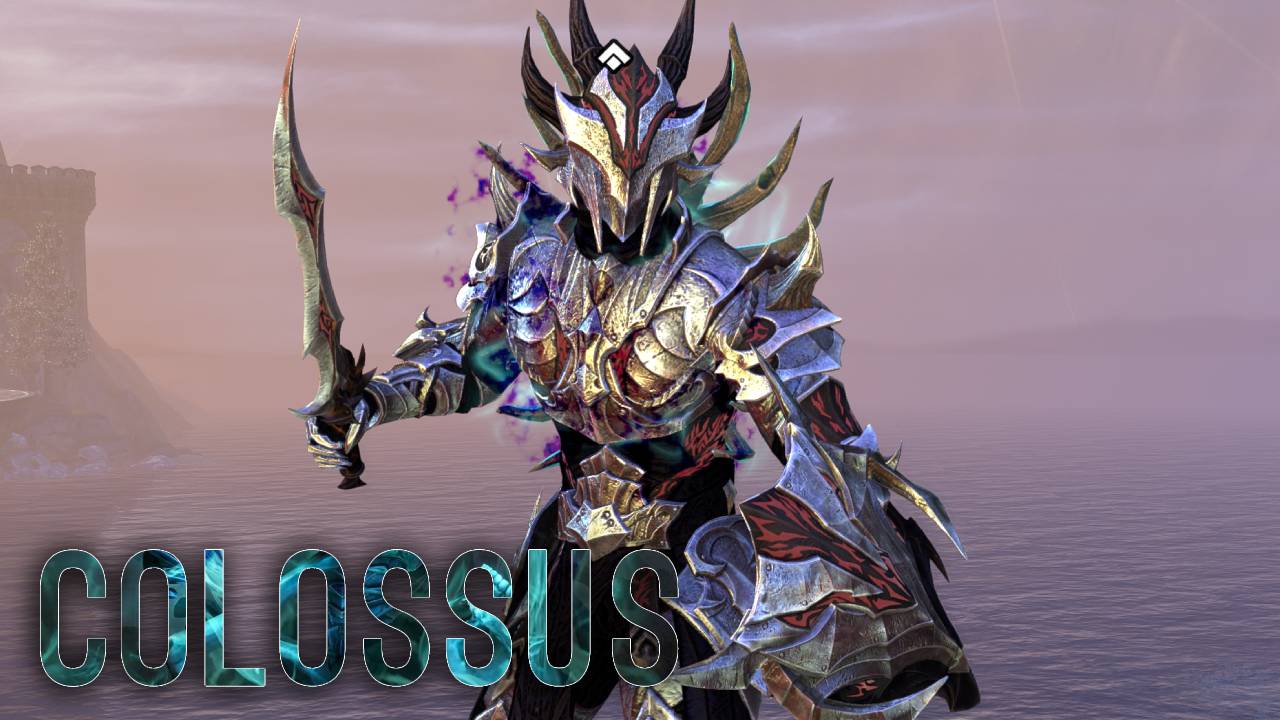
Buildname: Colossus
Table of Contents
Welcome to the Necromancer Tank Build PvE “Colossus” for ESO (Elder Scrolls Online). Make sure to bookmark the link as I will keep updating the build for each new Update of ESO. The Necromancer Tank Build PvE “Colossus” is optimized for Dungeons, Arenas, and Trials.
Keep in mind there is a huge variety of different tank builds out there that synergize well depending on your group setup. Remember, each Dungeon or Trial needs some small adjustments to the build. So if you for example feel that you need more health, then go for it!
Other Tank Guides:
The Necromancer class has a very strong tanking toolkit, especially thanks to the Bone Tyrant skill line. Beckoning Armor is a nice ability to pull in ranged targets without paying too much attention to them. Unnerving Boneyard applies debuffs to the enemies and players can even use a synergy with this skill. Hungry Scythe scales of health and grants us great healing. More info about skills in the skills section of the build.
- Necromancer Class
- Trial, Dungeon & Arena
- Tank/ Support Build
- Heavy Armor
- Great sustain
- Great survivability
- Great self-healing
Dungeon & Trial Setup Necromancer Tank Build
In this section, we are going to take a look at the ESO Necromancer Tank Build setup.
5x Perf. Saxhleel Champion, 2x Perf. Puncturing Remedy (Frontbar), 5x Crimson Oath’s Rive (backbar) 2x Archdruid Devyric with Bewitched Sugar Skills on a Nord.
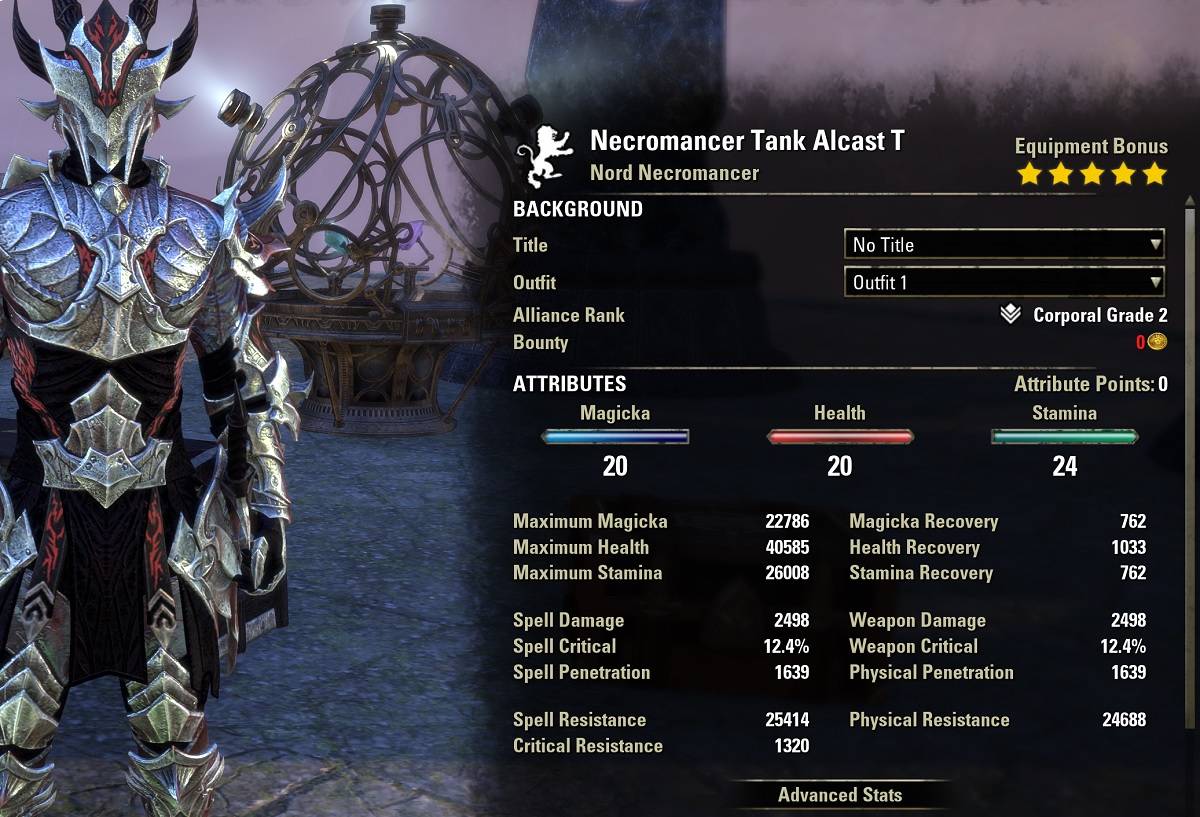
- Unbuffed: Out of combat, buff-food active.
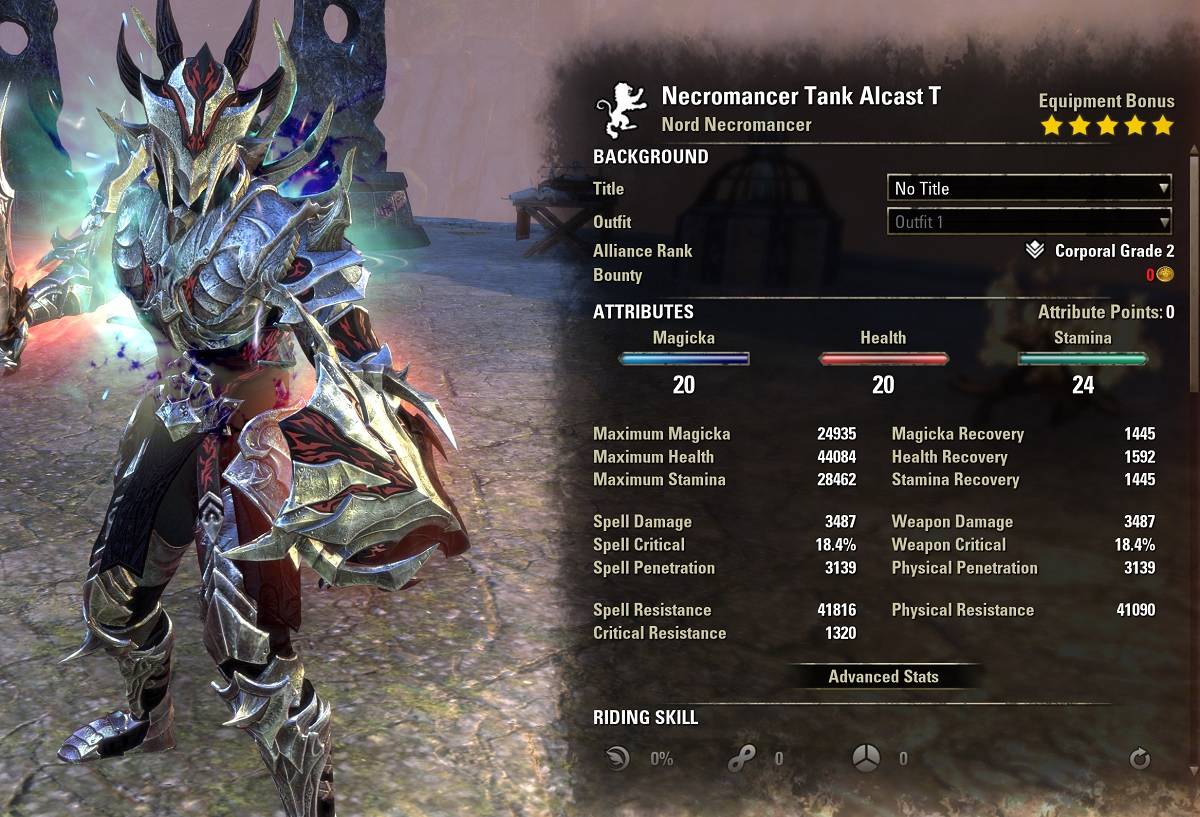
- Buffed: In combat, Raid Target Dummy buffs, Tri-Stat Potions, Spirit Guardian active.
Gear Necromancer Tank Build
You can find more good sets for tanking in the “Must Have Tanking Sets” Article. To be fully ready I recommend trying to get most of these sets and confirm with your raid leader what combinations you need them in.
Gear Setup
We are using Perf. Saxhleel Champion which allows us to get a great uptime on Major Force alongside Major Vulnerability from the ultimate, boosting overall damage by a lot for our group. Archdruid Devyric can be activated via Heavy Attack. Crimson Oath’s Rive is used to debuff enemy armor and is activated via Beckoning Armor, you can also select another set here if you want. On the frontbar we have Perf. Puncturing Remedy which heals and increases resistance even further.
Backbar Weapon: We use a Frost staff as a base backbar weapon, because of the Ancient Knowledge passive. However, you can also use a Lightning Staff or another sword and board if you wish to do so.
| Gear | Set | Weight | Trait | Enchantment |
|---|---|---|---|---|
| Chest | Perf. Saxhleel Champion or Lucent Echoes | Heavy | Reinforced | Tri Stat Enchantment |
| Belt | Perf. Saxhleel Champion or Lucent Echoes | Heavy | Sturdy | Health Enchantment |
| Shoes | Perf. Saxhleel Champion or Lucent Echoes | Heavy | Sturdy | Health Enchantment |
| Pants | Perf. Saxhleel Champion or Lucent Echoes | Heavy | Infused | Tri Stat Enchantment |
| Hands | Perf. Saxhleel Champion or Lucent Echoes | Heavy | Sturdy | Health Enchantment |
| Head | Archdruid Devyric | Light | Infused | Tri Stat Enchantment |
| Shoulder | Archdruid Devyric | Medium | Sturdy | Health Enchantment |
| Necklace | Crimson Oath’s Rive | Jewelry | Infused | Reduce Magicka Cost of Spells |
| Ring | Crimson Oath’s Rive | Jewelry | Infused | Reduce Magicka Cost of Spells |
| Ring | Crimson Oath’s Rive | Jewelry | Infused | Bracing Enchantment |
| Weapon 1 S&B | Perf. Puncturing Remedy | 1H-Weap | Decisive | Weakening Enchantment |
| Weapon 1 S&B | Perf. Puncturing Remedy | Shield | Sturdy | Tri-Stat Enchantment |
| Weapon 2 Destro | Crimson Oath’s Rive | Frost Staff | Infused | Crusher Enchantment |
Beginner Gear Setup
This beginner setup is here for people that do not have access to the other setup now. You can ask a friend to craft Fortified Brass and Torug’s Pact for you. You could also use Plague Doctor instead of Torug’s Pact as it is very cheaply available in the Guild Stores.
| Gear | Set | Weight | Trait | Enchantment |
|---|---|---|---|---|
| Chest | Fortified Brass | Heavy | Reinforced | Stamina Enchantment |
| Belt | Fortified Brass | Light | Sturdy | Health Enchantment |
| Shoes | Fortified Brass | Medium | Sturdy | Health Enchantment |
| Pants | Torug’s Pact | Heavy | Infused | Stamina Enchantment |
| Hands | Torug’s Pact | Heavy | Sturdy | Health Enchantment |
| Head | Night’s Silence | Heavy | Infused | Stamina Enchantment |
| Shoulder | Night’s Silence | Heavy | Sturdy | Health Enchantment |
| Necklace | Torug’s Pact | Jewelry | Infused | Magicka Recovery Glyph |
| Ring | Torug’s Pact | Jewelry | Infused | Reduce Prismatic Cost Enchant (Idenko Glyph) |
| Ring | Torug’s Pact | Jewelry | Infused | Bracing Enchantment |
| Weapon 1 S&B | Fortified Brass | 1H-Weap | Decisive | Weakening Enchantment |
| Weapon 1 S&B | Fortified Brass | Shield | Sturdy | Stamina Enchantment |
| Weapon 2 Destro | Fortified Brass | Frost Staff | Infused | Crusher Enchantment |
Where can I get the gear?
Perfected Saxhleel Champion: vRockgrove Trial
Saxhleeel Champion: Rockgrove Trial
Crimson Oath’s Rive: The Dread Cellar dungeon
Perfected Puncturing Remedy: vDragonstar Arena
Puncturing Remedy: Dragonstar Arena
Archdruid Devyric: vThe Earthen Root Enclave, Undaunted Enclave Rewards
Fortified Brass: Craftable
Torug’s Pact: Craftable
Night’s Silence: Craftable
Plague Doctor: Deshaan, Guildstore
Skills ESO Necromancer Tank Build


| S&B Mainbar | Destro Staff off-bar |
|---|---|
| Slot 1: Unnerving Boneyard | Slot 1: Spirit Guardian |
| Slot 2: Expunge and Modify | Slot 2: Elemental Blockade |
| Slot 3: Pierce Armor | Slot 3: Inner Rage |
| Slot 4: Deaden Pain | Slot 4: Spell Symmetry |
| Slot 5: Hungry Scythe | Slot 5: Beckoning Armor |
| Ultimate: Temporal Guard | Ultimate: Glacial Colossus |
Skills explanation:
- Unnerving Boneyard: Applies Major Breach and Minor Vulnerability to all enemies in the skill area, debuffing their resistances and damage taken. Also provides a Synergy.
- Expunge and Modify: Used to cleanse debuffs and also restores resources. Also reduces all ability cost by 3%. (Flex Spot, you can use another skill here if you want)
- Pierce Armor: This is your main taunt ability.
- Necrotic Potency: While slotted applies 3% Damage mitigation. Also increases ultimate regeneration a lot if there are corpses on the ground.
- Hungry Scythe: This ability scales of your Max Health and can be used whenever you need a heal.
- Temporal Guard: This is only passively slotted for the extra 5% damage mitigation that we gain through Minor Protection. While blocking, we also gain a small shield.
- Spirit Ward: The ghost heals you and also mitigates damage you take by 10%. It also keeps the Undead Confederate passive active.
- Elemental Blockade: If you are using a frost staff, this can proc Minor Brittle and Minor Maim on the enemy, which increases enemy critical damage taken and reduces enemy damage. Also provides a small shield to allies.
- Inner Rage: This is your main taunt ability.
- Spell Symmetry (Flex Spot): Trade Health for Magicka, be careful as this reduces healing done for 50%.
- Beckoning Armor: Buffs your resistances and pulls in ranged enemies that hit you.
- Glacial Colossus: Applies Major Vulnerability for 15 seconds, increasing damage done to targets by a lot. Also stuns enemies.
Class Mastery
Class Mastery is a new system in ESO that allows pure class builds to get two additional powerful passives to better compete against Subclass builds. Activating subclassing will deactivate Class Mastery passives.
All Necromancer Class Mastery Passives
For our Necromancer Tank Build, we are going to use the following:
Scribing Skills
The ESO Scribing System offers plenty of adjustable skills to add to our build. The Scribing Skills aren’t a must have. There are some viable options that you can use in certain situations for tank builds.
Important: Please read here how to get Grimoires, Focus Scripts, Signature Scripts and Affix Scripts for the ESO Scribing system.
Base Scribing Skill useful to our build:
- World: Soul Burst and Wield Soul
- Mages Guild: Ulfsild’s Contingency
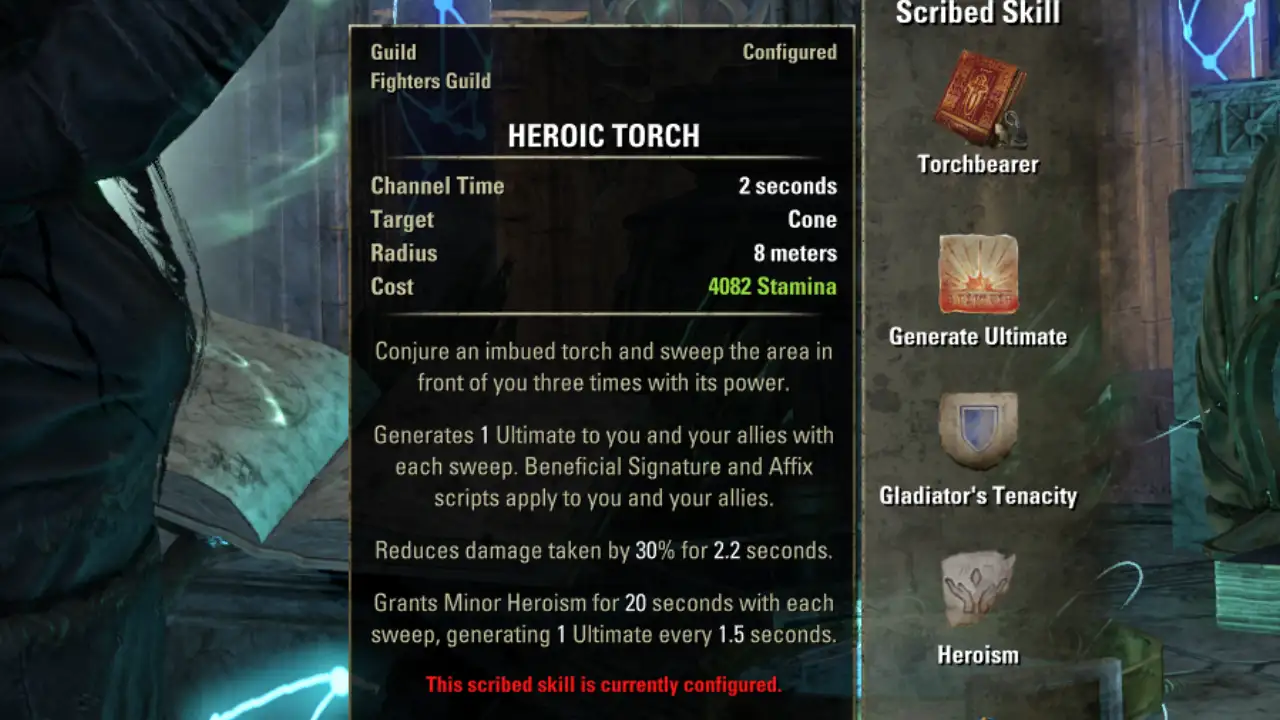
- Fighters Guild: Torchbearer


The skills are unlocked by:
- Soul Burst: Complete Final ESO Scribing Quest
- Wield Soul: Complete ESO Scribing Tutorial Quest
- Ulfsild’s Contingency: Reach Mages Guild Rank 5
- Torchbearer: Reach Fighters Guild Rank 5


Soul Burst (Leashing Burst)
Soul Burst turns into Leashing Burst by adding the following scripts below. This is an AoE centered around you and pulls all targets to you, reduces their movement speed and interrupts casting enemies. Great against trash packs.
- Focus Script
- Signature Script
- Affix Script
Wield Soul (Leashing Soul)
Wield Soul turns into Leashing Soul by adding the following scripts below. With our Scribing Scripts, we taunt the enemy and pull them to us. We also restore resources and apply Major Cowardice on the enemy, reducing their damage by a large amount.
- Focus Script
- Signature Script
- Affix Script
Ulfsild’s Contingency (Warding Contingency)
Ulfsild’s Contingency turns into Warding Contingency by adding the following scripts below. You apply a rune to yourself. When an enemy hits you the rune triggers and grants a damage shield to you and allies. It also reduces damage by 8% and grants you Minor Protection, reducing damage even further by 5%.
- Focus Script
- Signature Script
- Affix Script
Torchbearer (Heroic Torch)
Torchbearer turns into Heroic Torch by adding the following scripts below. It generates 1 Ultimate to you and your allies with every sweep. It also reduces damage taken by 30% for a short duration and grants Minor Heroism, generating 1 Ultimate every 1.5 seconds.
- Focus Script
- Signature Script
- Affix Script
Champion Points for the ESO Necromancer Tank Build
Below you can find the Champion Points setup for this build. Work your way from top to bottom in your allocation. For more information on Champion Points, please visit the Champion Points Overview Page on ESO-Hub.com.
Important:
- Warfare Tree: This tree gives you a mix between damage, healing and damage mitigation.
- Fitness Tree: This tree gives you extra health, sustain and defensive buffs.
- Craft Tree: This tree is mostly optional, nothing really “impacts” combat, therefore you can pick whatever you prefer, or use the preset below.
- Perks: Hovering over each perk will give you insights on what it does. Presets are also provided for each of the allocations below.
Click the tab below to open the allocation.
Important Info for Necromancer Tank Build PvE
Buff-food
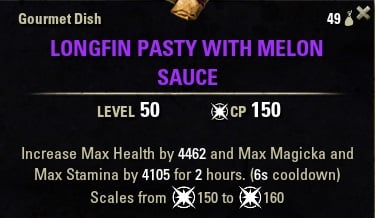
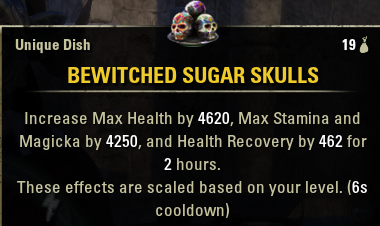
In general, most Tanks like to go with max resource buff foods such as the Bewitched Sugar Skulls or the cheaper version Longfin pasty with Melon Sauce. However, you could also use Jewels of Misrule which provides Health and a lot of Magicka and Stamina recovery.
Longfin pasty with Melon Sauce
(Max Health+Max Stamina+Max Magicka)
Bewitched Sugar Skulls
The Bewitched Sugar Skulls is a slightly more advanced version that has a bit higher stats and also includes health recovery. Though it also costs more.
You can also visit the Buff Food and Drinks Overview Page for more information on all food and drinks.
Mundus Stone
The Lord is a good Mundus Stone to increase maximum Health. However, you can also use other available Mundus Stones if you don’t need the extra Health. For an overview of all the Mundus Stones in ESO you can check out the Mundus Stone Overview Page.
The Lord Mundus Stone (Max Health)
Race
You can find more about racial passives on the ESO Race Overview page.
Nord
Argonian
Imperial
Orc
Redguard
Dark Elf
Potions
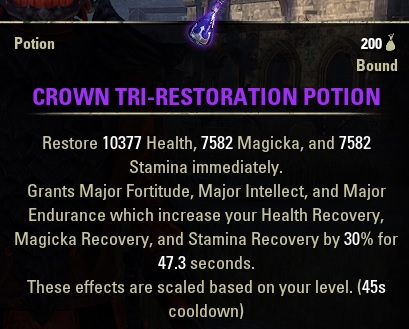
You can use both the crafted or the crown store Tri-Stat potion.
Tri-Stat Potion
(Health, Stamina, Magicka)
(Bugloss, Columbine, Mountain Flower)

Passives
- Grave Lord: Reusable Parts, Death Knell, Dismember, Rapid Rot
- Bone Tyrant: Death Gleaning, Disdain Harm, Health Averice, Last Gasp
- Living Death: Curative Curse, Near-Death Experience, Corpse Consumption, Undead Confederate
- One Hand and Shield: Fortress, Sword and Board, Deadly Bash, Deflect Bolts, Battlefield Mobility
- Destruction Staff: Penetrating Magic, Elemental Force, Ancient Knowledge, Destruction Expert (Note: Do not activate Tri Focus passive)
- Heavy Armor: Resolve, Constitution, Juggernaut, Revitalize, Rapid Mending
- Medium Armor: If you have spare skillpoints, max out this skill line too.
- Light Armor: If you have spare skillpoints, max out this skill line too.
- Undaunted: Undaunted Command, Undaunted Mettle
- Psijic Order: Clairvoyance, Concentrated Barrier, Deliberation
- Racial: All
- Alchemy: Medicinal Use
Attributes
I recommend placing all attributes into health. However, you can adjust the values yourself, if you feel you have too much health, then place some points in either stamina or magicka.
0 Magicka, 64 Health, 0 Stamina
Resource Management ESO Necro Tank Build
Spirit Guardian reduces your damage taken by 10%, heals you and also keeps the Undead Confederate passive active to boost your sustain.
Spell Symmetry returns Magicka, you can use this as much as you want, but be careful that your Healer is healing you. Because you loose Health while using this.
Energy Orb is a skill that Healers use to throw into the group. You can use the synergy this skill provides to regain around 4000 resources. Our max Stamina is a bit higher than our Max Magicka, that is because you will get resources depending on your higher max Stamina or Magicka. And because we are a tank, Stamina is definitely more important.
Heavy Attacks restore a big amount of stamina, if you hit an off-balanced enemy it gives twice the amount back. You don’t need to permablock, try to find time to do Heavy Attacks in your rotation.
Potions are also a key to manage your resources well, I recommend using Tri-Stat potions to regain all three resources at the same time. Further below you will learn how to craft the right potions.
- Spirit Guardian
- Spell Symmetry
- Heavy Attacks
- Potions
- Orbs (Undaunted skill-line)
Choosing an Argonian as a race for your tank will also increase sustain due to the Resourceful racial passive.
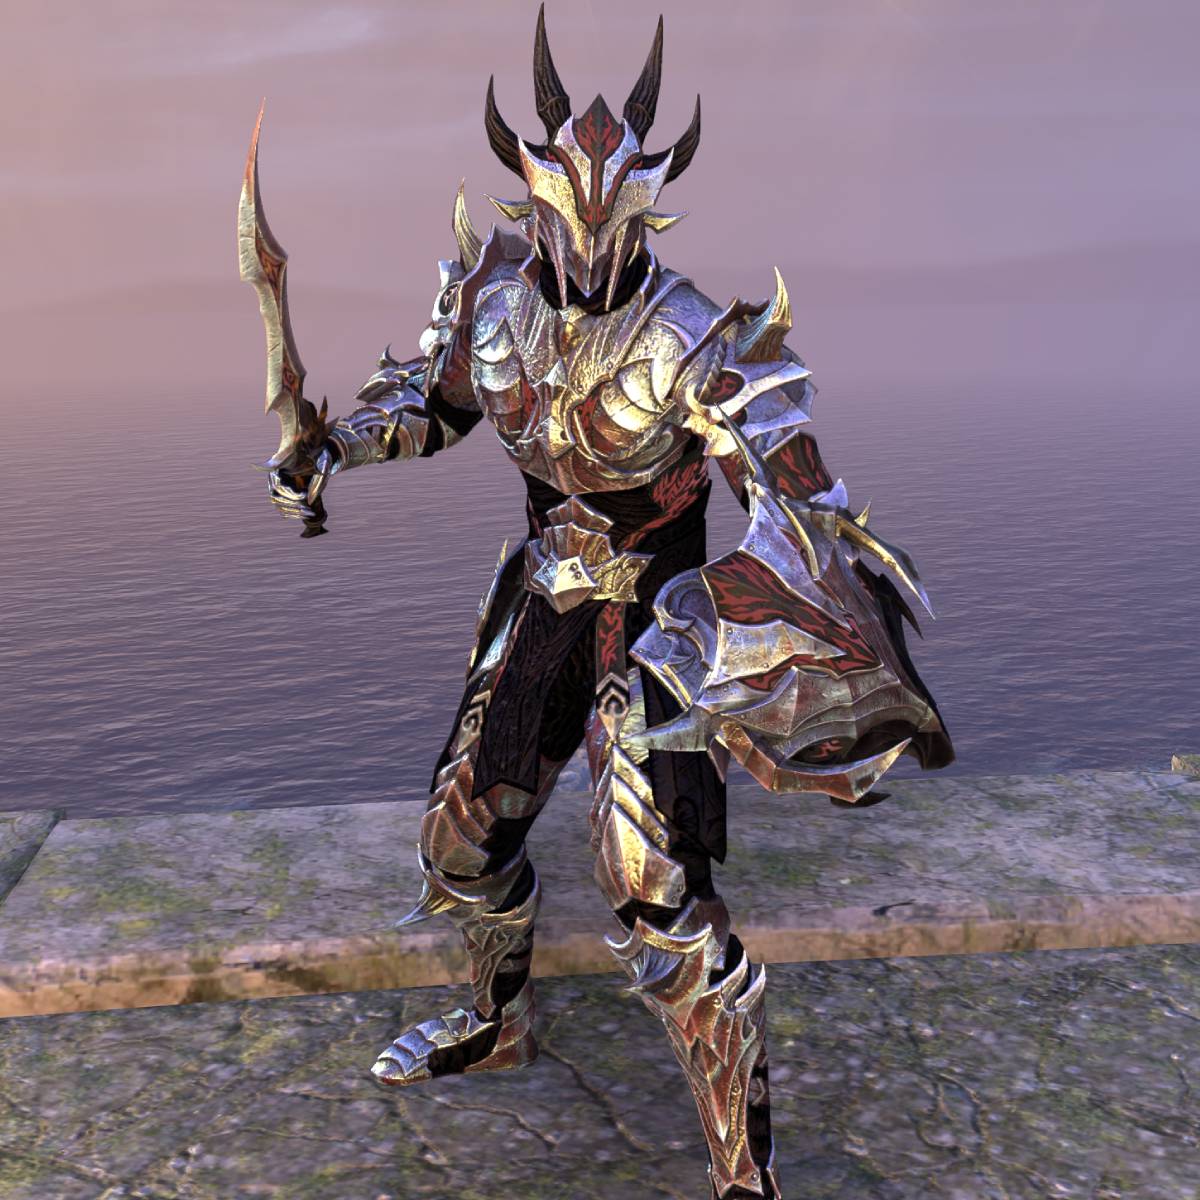
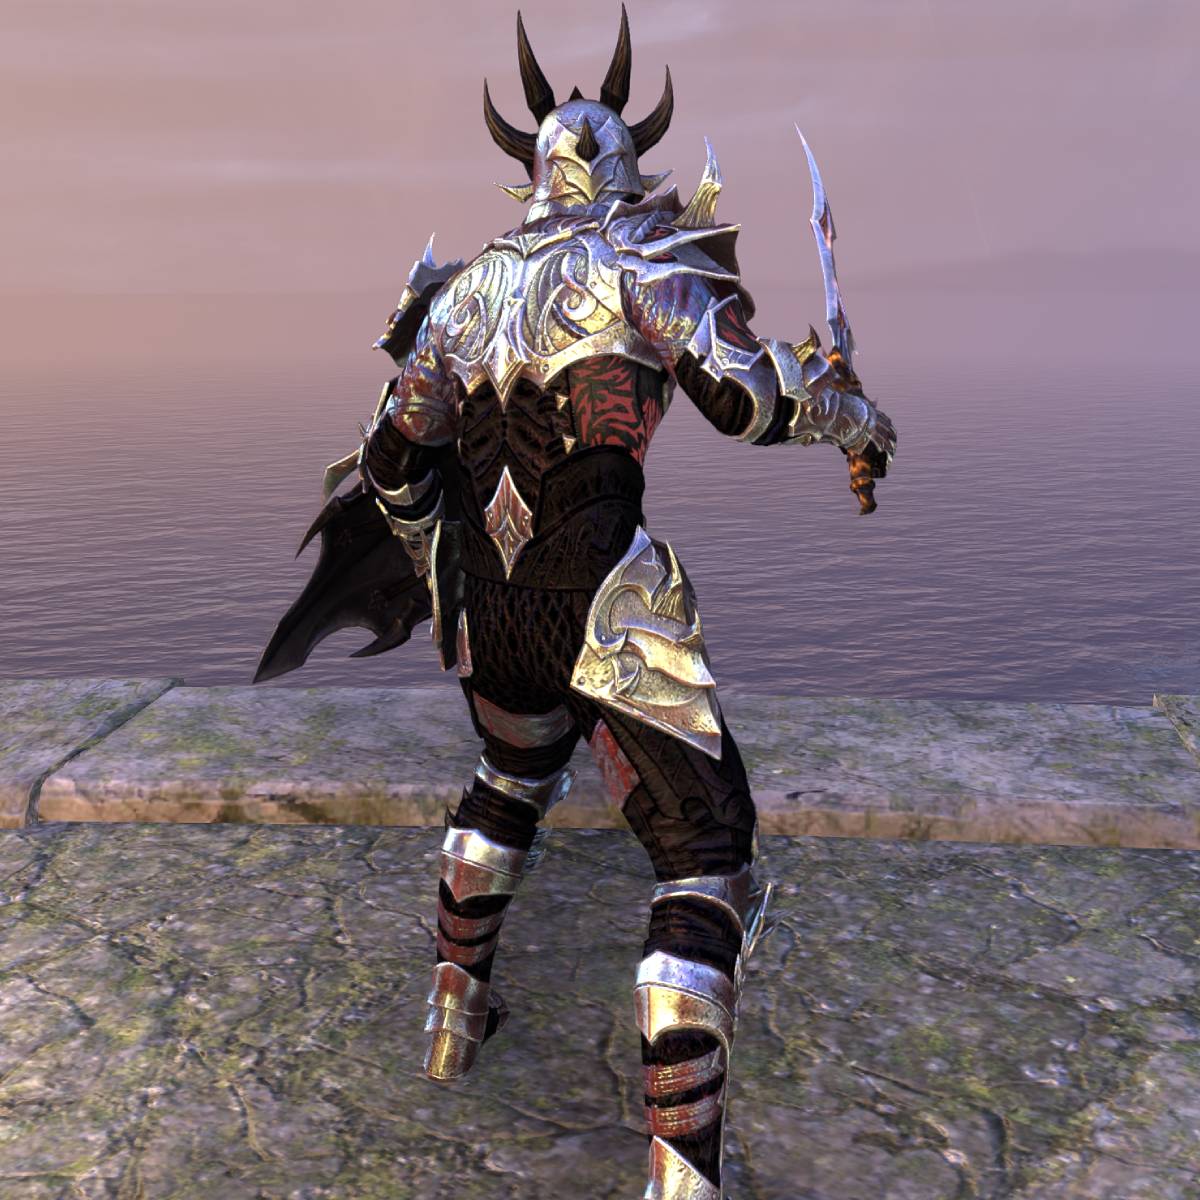
Outfit Style Showcase of the Necromancer Tank Build for ESO
Let us take a look at the outfit style of the Necromancer Tank Build for ESO. You can find a few images here and an image of the outfit editor dye station below.
- Annihilarch’s Chosen: Helmet, Pauldrons, Gauntlets, Greaves, Cuirass, Girdle, Sabatons, Sword, Shield
- Dyes: Frozen Blood, Void Pitch
| Slot | Name |
|---|---|
| Head | Annihilarch’s Chosen Motif |
| Shoulder | Annihilarch’s Chosen Motif |
| Chest | Annihilarch’s Chosen Motif |
| Hands | Annihilarch’s Chosen Motif |
| Waist | Annihilarch’s Chosen Motif |
| Legs | Annihilarch’s Chosen Motif |
| Feet | Annihilarch’s Chosen Motif |
| Weapon & Shield | Annihilarch’s Chosen Motif |
| Dyes | Frozen Blood, Void Pitch |
Update Log for the Necromancer Tank Build
11.082019 Updated the Build for the SCALEBREAKER DLC, Elsweyr Chapter, Necromancer Tank Build PvE.
20.10.2019 Updated the Build for the DRAGONHOLD DLC, Elsweyr Chapter.
20.02.2020 Updated the Build for the HARROWSTORM DLC, Greymoor Chapter.
08.05.2020 Updated the Build for the GREYMOOR CHAPTER.
20.08.2020 Updated the Build for the STONETHORN DLC, Greymoor Chapter.
27.10.2020 Updated the Build for the MARKARTH DLC, Greymoor Chapter.
03.03.2021 Updated the Build for the FLAMES OF AMBITION DLC, Blackwood Chapter.
26.05.2021 Updated the Build for the BLACKWOOD CHAPTER.
11.08.2021 Updated the Build for the WAKING FLAME DLC, Blackwood Chapter.
01.09.2021 Updated the Champion Points and Buff Food links, WAKING FLAME DLC, Blackwood Chapter.
18.10.2021 Updated the Build for the DEADLANDS DLC, Blackwood Chapter.
03.03.2022 Updated the Build for the ASCENDING TIDE DLC, High Isle Chapter.
12.05.2022 Updated the Build for the HIGH ISLE CHAPTER.
09.08.2022 Updated the Build for the LOST DEPTHS DLC, High Isle Chapter.
24.10.2022 Updated the Build for the FIRESONG DLC, High Isle Chapter.
09.03.2023 Updated the Build for the SCRIBES OF FATE DLC, Necrom Chapter.
30.05.2023 Updated the Build for the ESO NECROM CHAPTER.
25.10.2023 Updated the Build for Necrom Update 40.
06.03.2024 Updated the Build for the Scions of Ithelia DLC Update 41, Gold Road Chapter
23.05.2024 Updated the Build for the Gold Road Chapter U42.
20.08.2024 Updated the Build for Update 43, Gold Road Chapter.
28.10.2024 Updated the Build for Update 44, Gold Road Chapter.
11.03.2025 Updated the Build for Update 45, Fallen Banners.
28.05.2025 Updated the Build for Update 46, Seasons of the Worm Cult Part 1.
18.08.2025 Updated the Build for Update 47 Feast of Shadows DLC, Seasons of the Worm Cult.
27.10.2025 Updated the Build for Update 48 Seasons of the Worm Cult Part 2.
03.06.2026 Updated the Build for Update 50, Season 0 and 1.
Tags: Necromancer Tank Build PVE, Necro Tank Build, Necro Health Tank Build PvE.
Other ESO Builds:
- Dragonknight Tank Build for ESO
- Sorcerer Tank Build for ESO
- Nightblade Tank Build for ESO
- Warden Tank Build for ESO
- Templar Tank Build for ESO
- Arcanist Tank Build for ESO
Related Guides: