

Welcome to the Lep Seclusa Dungeon Guide for both Veteran and Veteran Hard Mode in ESO (The Elder Scrolls Online); specifically, this guide will cover all difficult mechanics and how you can survive them. Lep Seclusa on normal mode has the same mechanics that just deal less damage and sometimes can be ignored; essentially, it’s a less punishing version. Lep Seclusa is located in Abah Landing in Hew’s Bane.
Lep Seclusa dungeon has 6 bosses: 3 main bosses, 3 mini-bosses and a lot of trashmob packs. There are no secrets or buffs and you are able to skip the mini-bosses if you wish, but be aware that skipping the mini-bosses will have some consequences. If you choose to leave Siege Master Malthoras alive, the siege of Lep Seclusa will continue and there will be extra damage to avoid during your dungeon run.
If you have more questions, you can also ask someone in our community partner discord about this Lep Seclusa Dungeon Guide!
Table of contents:
-
- Sets & Rewards in Lep Seclusa
- Trashmobs
- Boss Fights
- Boss 1 – Lewin Frey (skippable mini-boss)
- Boss 2 – Garvin the Tracker
- Boss 3 – Siege Master Malthoras (skippable mini-boss)
- Boss 4 – Noriwen
- Boss 5 – Flamedancer Ajim-Rei (skippable mini-boss)
- Boss 6 – Orpheon the Tactician (Endboss)
- Skipping
Thank you to the PC EU guild Unlucky and the players isiiimode, Kwiebe-Kwibus and MyNameIsElias for taking me through the dungeons and explaining the mechanics!
The Story in Lep Seclusa
The Moth Priest sanctuary of Lep Seclusa is besieged, and the Elder Scroll it protects is threatened. You and your allies must defend the Moth Priests and their precious relic from the sinister Orpheon the Tactician and his army of deserters.
Sets in Lep Seclusa
3 different sets drop in Lep Seclusa.
- Light: Fledgling’s Nest set
- Medium: Noxious Boulder set
- Heavy: Heroic Unity set
- Monster Set: Orpheon The Tactician set (Veteran and Veteran Hard Mode only)
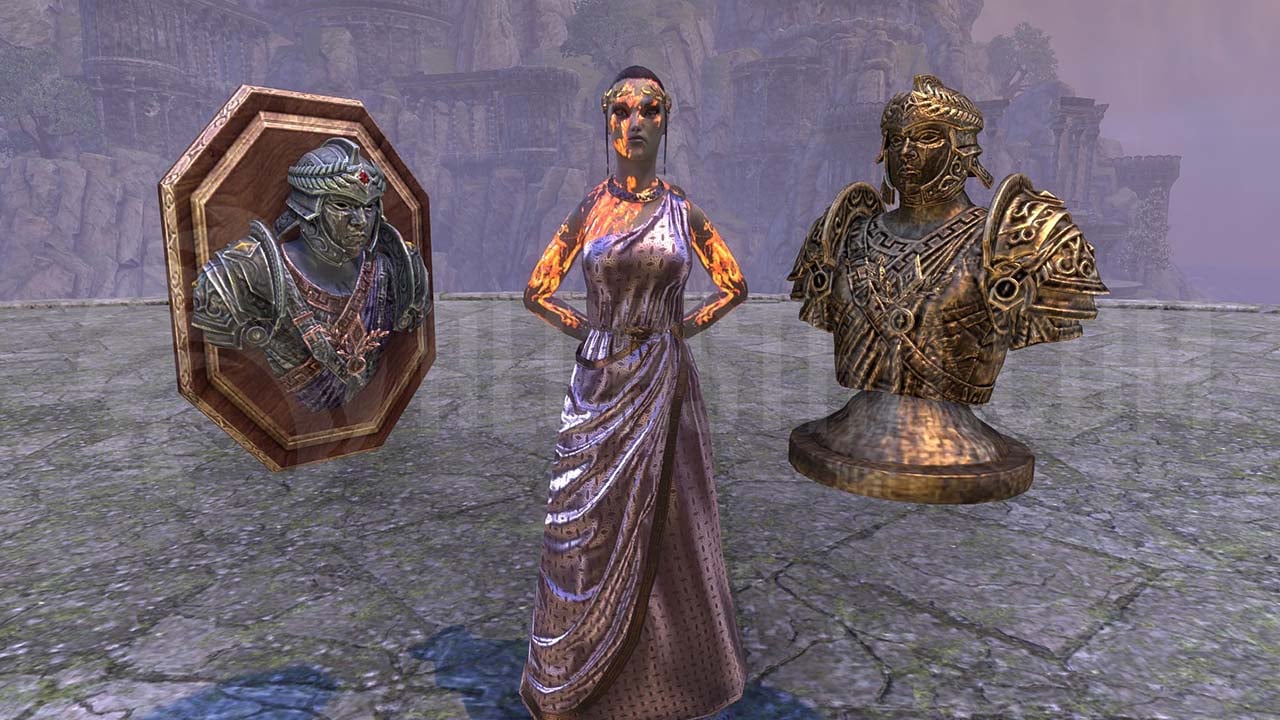
Rewards in Lep Seclusa
- Dye: Exiled Goldenrod (Fallen Banners Scout achievement)
- Skin: Tactician’s Gold Lattice (Fallen Banners Delver Achievement)
- Memento: Dust of the Conqueror’s Flame(Lep Seclusa Conqueror Achievement)
- Skill Style: Grand Healing, Sea Elf (Lep Seclusa Challenger Achievement)
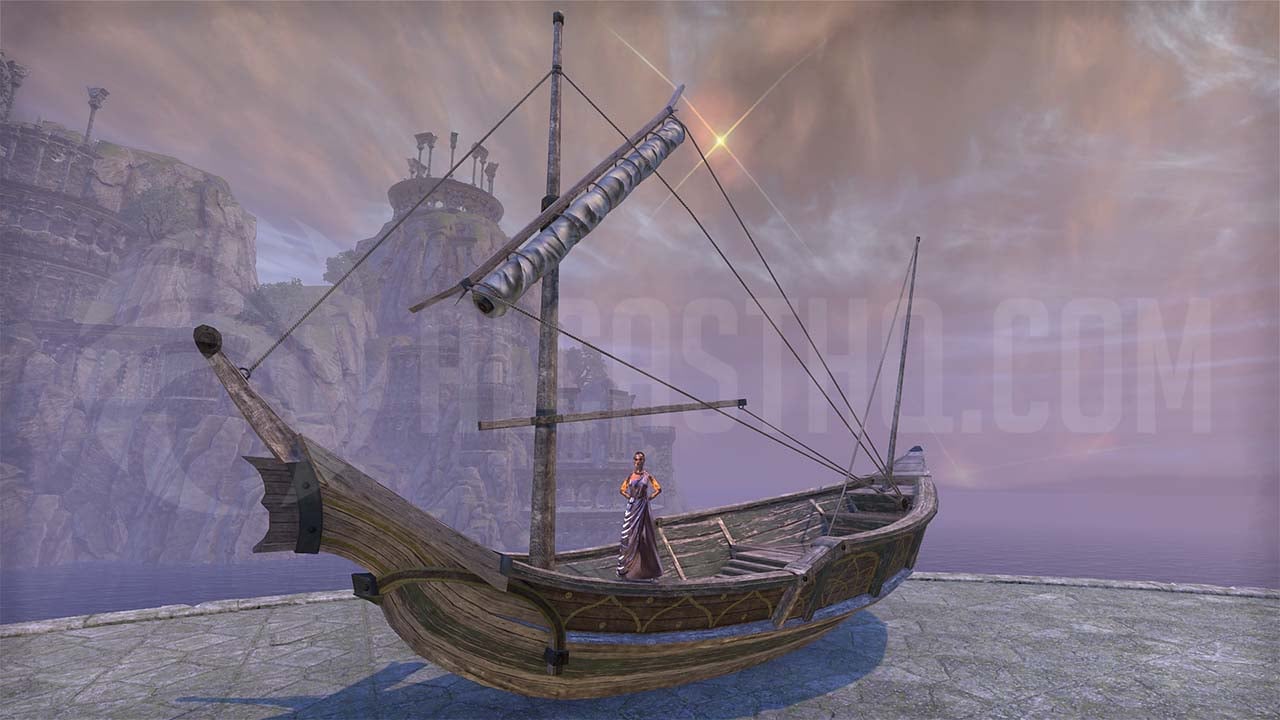
- Furnishing: Redguard Boat, Sailing can be bought from Undaunted Quartermaster for 50,000 Gold after completing the Lep Seclusa Vanquisher achievement
- Title: Moth Trusted (Sic Semper Achievement)
- Title: The Unflinching (Lep Seclusa Champion Achievement)
- Trophy: Orpheon the Tactician (complete on normal mode) and Bust: Orpheon the Tactician (complete on Veteran Mode)
-

- ESO Exiled Goldenrod Dye

-
- Tactician’s Gold Lattice Skin

-
- ESO Dust of the Conqueror’s Flame memento

-
- ESO Grand Healing, Sea Elf skill style
-
- ESO Orpheon the Tactician bust and trophy
-
- ESO Redguard Boat, Sailing
Trashmonsters in Lep Seclusa
Lep Seclusa has a few trash monster with unique skills that you will have to deal with.
Deserter Infuser: Deserter Infusers are similar to all other Infusers in ESO in that they will start channeling their Infuse ability which when completed will enrage themselves and all other adds. Always interrupt Infusers. Infusers can also cast Shield to other adds, you should interrupt this as well.
Deserter Shock Mage: These Shock Mages will keep channeling an ability called Electrify which will turn the water electric. It’s important to interrupt them.
Haj Mota: They will cast Shockwave in front of them, charge underground, knocking back anyone in their way and spit Toxic Mucus at the tank if they are far away. Stay behind the Haj Motas to avoid most of their hits.
-
- Deserter Infuser casting Infuse and being interrupted

-
- Deserter Infuser Shielding another add

-
- Deserter Shock Mage and Haj Mota

Lep Seclusa Bosses
Below you can find a list of all the bosses in Lep Seclusa. You can also see how much health each boss has.
| Boss | Health |
|---|---|
| Lewin Frey | 4,736,815 |
| Garvin the Tracker | 5,954,854 / 8,932,282 Hard Mode |
| Siege Master Malthoras | 5,413,503 |
| Noriwen | 11,368,356 / 18,189,370 Hard Mode |
| Flamedancer Ajim-Rei | 4,734,105 |
| Orpheon the Tactician (Endboss) | 12,829,988 / 20,527,982 Hard Mode |
Bosses
Boss 1 – Lewin Frey
ESO Lewin Frey is the first mini-boss you will encounter in Lep Seclusa, but you can choose to skip him by just walking up the stairs. His mechanics aren’t that punishing, just avoid most of the shock AOE’s on the ground and you should be able to kill him. His hardest hitting ability is the Conduit damage over time effect which your healer should have no trouble healing.
Lewin Frey Abilities
Charged Strike: His light attack at the person who taunted him.
Conduit: Lewin channels a lightning attack at a random player, leaving a Conduit damage over time effect an a shock AOE that damages other people as well.
Sparks: His heavy attack. Cone shaped AOE towards the tank which the tank should block.
Thunderstorm: Lewin calls down lightning form adds that will explode and leave smaller lightning AOE’s on the ground that move. If you touch the lightning, it will stun you.
Thunder Thrall: He jumps to a players location and does a shock explosion around him. Move away from it to avoid the damage.
Overcharge: Lewin creates a lightning AOE around him that explodes dealing damage and making himself Overcharged with a lightning form.
-
- Conduit

-
- Sparks

-
- Thunderstorm

-
- Thunder Thrall

-
- Overcharge

Boss 2 – Garvin the Tracker
![]()
ESO Garvin the Tracker is the first main boss of Lep Seclusa. Garvin has quite a few punishing mechanics that will easily kill players if the mechanics are not followed. Additionally many of the adds he summons have their unique skills that need to be interrupted. His hardest hitting ability is Piercing Dervish which leaves a Wild Spores damage over time effect to anyone hit by it.
Short explanation for Garvin the Tracker fight in Veteran Hard Mode
You can choose to try to burn Garvin the Tracker down ignoring and avoiding all Monstrous Dunerippers, or use his Noxious Boulder ability to get rid of them. There are many skills that should be interrupted, so be sure your tank, healer or damage dealer has slotted an interrupt ability like Crushing Shock. You can not chain the adds, but your tank can taunt them and move behind a rock to bring them closer to each other for easier interrupts. Every time the boss jumps away, he will start placing Hunter’s Traps around him until he is interrupted.
- 95% Storm Mage
- 85% Flame Archer
- 80% Monstrous Duneripper
- 75% Infuser
- 65% Storm Mage
- 55% Flame Archer
- 50% Monstrous Duneripper
- 45% Infuser
- 40% Monstrous Duneripper
- 35% Storm Mage
- 30% Flame Archer
- 30% Enrages all the Monstrous Dunerippers you haven’t dealt with. Keep interrupting the adds and kill the boss.
- 25% Infuser
Please report any errors on our community partner discord!
Garvin the Tracker Abilities in Hard Mode
Slice: Boss’s basic light attack which sleaves a small Serrated Wound bleed on the tank.
Whirlwind: Garvin does a backflip and kicks dirt in front of him. This applies a healing absorption debuff called Trauma to anyone hit by the small dirt AOE’s. The target must be healed for around 25k health until the healing absorption disappears.
Noxious Boulder: Boss charges a Noxious Boulder and kicks it in front of him in a direct line. It will explode and leave a large AOE which will dissipate after some time. This mechanic exists to kill the Monstrous Dunerippers.
Vanishing Powder: Boss vanishes and appears again behind one of the big rocks found at the corners.
Hunter’s Trap: After using his Vanishing Powder, Garvin will start placing Hunter’s Traps around him until he is interrupted.
Piercing Dervish: Garvin charges an attack in front and behind him meaning you should stand either on his right, or left side as it leaves a “safe zone”. When the Piercing Dervish erupts, it will deal initial damage and apply Trauma – a small healing absorption debuff.
Wild Spores: Garvin casts a heavy hitting damage over time effect on all players called Wild Spores. Everyone should remain within the healers reach.
Ricochet: Targets two players and creates a poison link between the players applying a debuff called Tracked for 6 seconds. You must break line of sight to the other player by going behind a rock before the debuff ends or both players will die. The red circle around above the players heads will disappear when the mechanic ends. The poison link does not do damage to other players.
Venom Eruption: The whole area starts filling with Venomous Clouds. You must break line of sight to the boss or you will die very quickly. This can be done by hiding behind a rock until the Venomous Clouds dissipate.
Summon add: Monstrous Duneripper
- These Monstrous Dunerippers will spawn at the corners of the map at 80%, 50% and 40%. They will instantly enrage if anyone deals damage to them so it’s best to stay far away from them.
- You have two ways of dealing with the Monstrous Dunerippers
- Aim Garvins Noxious Boulder towards it and one shot it. This is done by facing the boss towards the Duneripper (but not too close) so the Boulder hits it.
- Ignore them and burn the boss and adds really fast.
- If the Duneripper gets aggroed, you can no longer use the Noxious Boulder to kill it. You can try to kill it fast, but it usually ends in a wipe. It looks like the Dunerippers also aggro if they walk over Garvins Traps (Hunter’s Trap).
- If you try to fight them, they will deal huge amounts of damage with its Bite, Hemorrhaging Chomp, Crushing Chomp, Rupture and Tail Swipe abilities and kill the tank (and everyone else).
Summon add
The adds listed below spawn throughout the fight and should be interrupted whenever possible. You can not chain the adds, but your tank can taunt them and move behind a rock to bring them closer to each other.
- Deserter Storm Mage: Targets a player and starts casting small Agonizing Bolts at their feet. Keep moving or you will get hit by the hard hitting Agonizing Bolt (shows up as Lightning Bolt in your death recap). Targets a player and casts Expansive Shock which looks like a players channeled lighting staff heavy attack. You can interrupt the Expansive Shock to avoid its damage.
- Deserter Flame Archer: Targets a player and starts shooting small Scorching Volley fire AOE’s at their feet – dodge/move away from them as this can not be interrupted. They also target a player and start channeling Rapid Fire, which you can and should interrupt. Additionally you should interrupt their Flaming Arrow Spray that they will try to shoot out in a cone shape in front of them.
- Deserter Infuser: Always interrupt Infusers. They will start channeling their Infuse ability which when completed will enrage themselves, all other adds and the boss making them do more damage. Infusers can also cast Shield to other adds and the boss, meaning you should interrupt this as well.
-
- Whirlwind
-
- Monstrous Dunerippers outline is visible through the terrain
-
- Noxious Boulder
-
- Noxious Boulder hitting the Duneripper
-
- Noxious Boulder AOE’s
-
- Hunter’s Trap cast and interrupting
-
- Piercing Dervish start of cast
-
- Piercing Dervish damage effect
-
- Piercing Dervish – Wild Spores
-
- Ricochet
-
- Venom Eruption begin cast
-
- Venom Eruption, hiding behind a rock
-
- Agonizing Bolts and Expansive Shock
Boss 3 – Siege Master Malthoras
ESO Siege Master Malthoras is the second skippable mini-boss in Lep Seclusa. If you choose to skip him, he will keep sieging for the rest of the dungeon, meaning there will be more AOE damage for you to avoid. There are a couple achievements related to avoiding getting hit by sieges: Siege Survivor and Tactical Recklessness as an example. His mechanics are quite forgiving and the adds he summons do not have any special skills either. Try to avoid standing in AOE’s and you shouldn’t have trouble killing him.
Siege Master Malthoras Abilities
Ballista Mechanic: Siege Master Malthoras will stay on the ledge with this sieges until you repair the sieges on the ground and shoot all four of his sieges. When he comes down, he will throw fire bombs at the sieges, making them unusable for the rest of the fight.
Piercing Shot & Quick Shot: Boss’s light attacks.
Fire Bomb: Malthoras throws Fire Bombs at all players feet leaving small fire AOE’s on the ground. Move away from them to avoid getting hit by the lingering flames.
Vanish: When Siege Master Malthoras health reaches 50%, he will use vanish to get back up on the ledge and call adds.
Directed Volley: Malthoras targets a player and shoots a Directed Volley at them. You should block this.
Volley: He targets a player, shooting down a volley of arrows at their feet. Move away from the Volley AOE’s quickly as the damage quickly ramps up.
Quakeshot: The boss targets the tank and shoots AOE’s at him, but be aware as these small AOE’s bounce when they hit something and can travel behind him as well.
Shattering Stomp: Large AOE that will knock you back if you stay in it.
Call adds: Deserter Invoker, Fire Mage, Knight and Assassin: At 50% health, Siege Master Malthoras will call adds that do not have any special mechanics, just kill them to continue the fight.
-
- Repairing Ballistas

-
- Shooting with the Ballistas

-
- Burnt sieges during the fight

-
- Fire Bombs being cast

-
- Fire Bombs

-
- Directed Volley

-
- Volley

-
- Quakeshot

-
- Shattering Stomp

Boss 4 – Noriwen
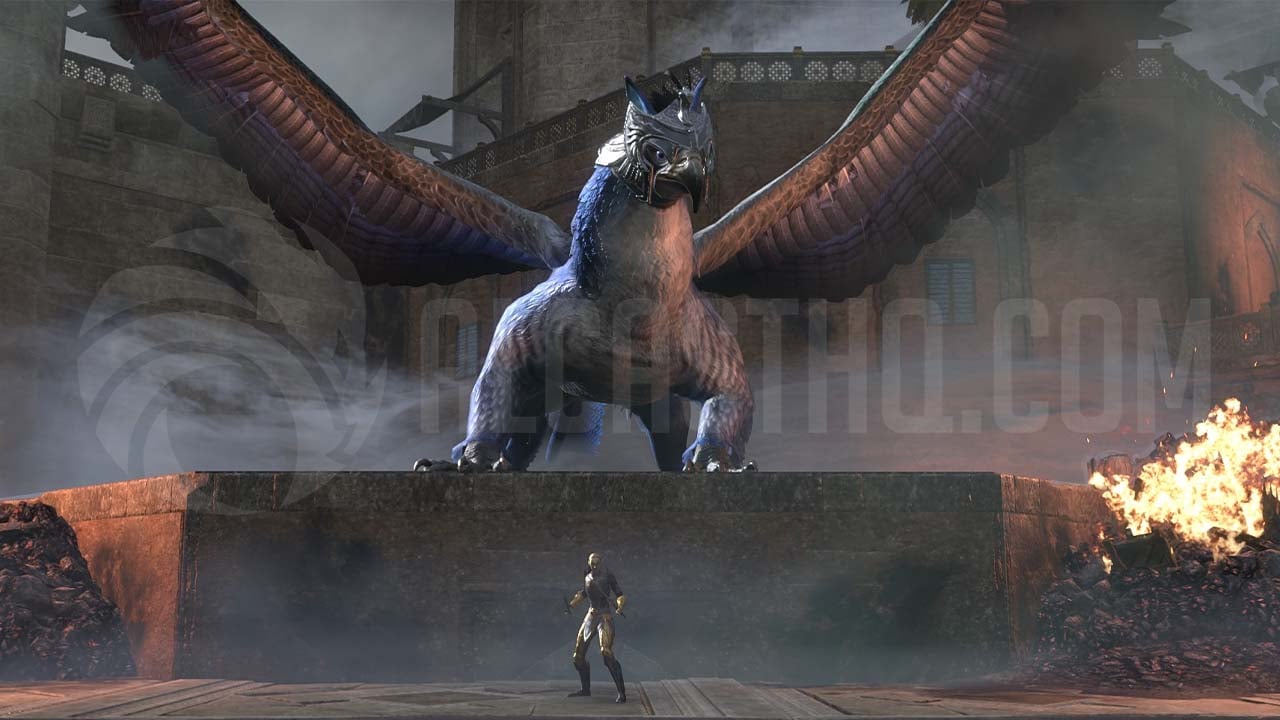
Noriwen is the second main boss you will encounter in Lep Seclusa in ESO. She also has a huge gryphon Alcunar at her side who does not directly join the fight, but will keep attacking from the ledge making the fight harder. Noriwen dictates where your group should fight as she has a punishing mechanic for the tank unless you follow her quickly. The fight includes a vast amount of moving AOE’s meaning players should be around of their surroundings at all times.
Short explanation for Noriwens fight in Veteran Hard Mode
When Noriwen charges away, the tank needs to follow her at all times or be pulled by her Chain Pull ability which applies a deadly fire damage over time effect (the dot can be purged); otherwise, they risk taking significant damage. Additionally, Gryphons that “Bomb” the area will be present throughout the whole fight; therefore, try to block or dodge them so you do not get staggered and pushed into an AOE.
- 95% Noriwen charges away and throws Blast Powder.
- 85% Noriwen charges away and throws Blast Powder.
- 70% Noriwen charges in front of Alcunar and will not move, meaning you have to fight her while Alcunar attacks.
- 50% Noriwen vanishes and summons two Flame Gryphons. She will rejoin the fight after the Gryphons die.
- 45% Noriwen charges away and throws Blast Powder.
- 40% Noriwen summons two Flamey Gryphons, but does not vanish. Taunt the Gryphons and follow Noriwen.
- 35% She charges away and throws Blast Powder.
- 25% She charges away and throws Blast Powder.
- 20% Noriwen charges in front of Alcunar and stays there until the end of the fight.
Please report any errors on our community partner discord!
Noriwen Abilities in Hard Mode
Slash: Boss’s Light Attack.
Brand: Your tank should block Noriwens Brand ability (heavy attack). If dodged, it will enrage the boss.
Chain Pull: After Noriwen has charged away, she will pull the tank with her Chain Pull ability if the tank is too far away. Chain Pull applies a very heavy hitting fire damage over time called Ignited. The tank should always run after the boss or slot a cleansing ability such as Efficient Purge to get rid of the dot.
Blast Powder: After charging away Noriwen will target a random player and throw Blast Powder that will explode and leave small AOE’s on the ground. Touching the Blast Powder will apply an Ignited Damage over time effect. This is not as severe as the Ignited dot from Chain Pull.
-
- Brand

-
- Chain Pull

-
- Blast Powder

Noriwens Gryphons and their abilities
Gryphon Bomber
Gryphon Bombers will hover on the sides of the arena, swooping across the field in a direct line. You should move away, block or dodge their Bomb Point swoops or you will get staggered. During the Flame Gryphon phase (50% and under 40%) Gryphon Bombers stop swooping, turn to flames and will drop a Bomb Line across the arena.
Flame Gryphons
Two Flame Gryphons spawn when Noriwen reaches 50% and 40% health. You will be fighting two Flame Gryphons just by themselves at the 50% mark, but at 40% Noriwen will be in the fight as well. Occasionally one of the Gryphons will take flight and cast high damage fire skills like Cyclone, a large round fire AOE that moves towards a player in a straight line. The flying Gryphon will also swoop forwards leaving small “Birds Eye View” fire AOE’s in its path. The Flame Gryphon that stays on the ground will cast normal bites and a Riposte, a cone shaped attack that should be blocked by your tank.
Giant Gryphon, Alcunar
Alcunar will not join the fighting arena nor can it be taunted; instead, it will just stand on the ledge behind Noriwen. Alcunar slaps its wings creating moving Wing Gusts that you should try to avoid as they will deal Conduit shock damage and apply a damaging AOE around your character. Alcunar will also randomly Snap, Stomp and Swipe at players near the ledge, but these can be blocked or dodged and generally don’t deal much damage.
-
- Gryphon Bombers

-
- Gryphon Bomber can be blocked or dodged

-
- Gryphon Bombers will drop fire bombs during the Flame Gryphon phase

-
- Flame Gryphons

-
- Flame Gryphon – Taking Flight

-
- Flame Gryphon – Cyclone

-
- Flame Gryphon – Birds Eye View

-
- Flame Gryphon – Riposte

-
- Alcunar – Wing Gust

-
- Alcunar – Wing Gust – Conduit

-
- Alcunar – Snap

-
- Alcunar – Stomp

-
- Alcunar – Swipe

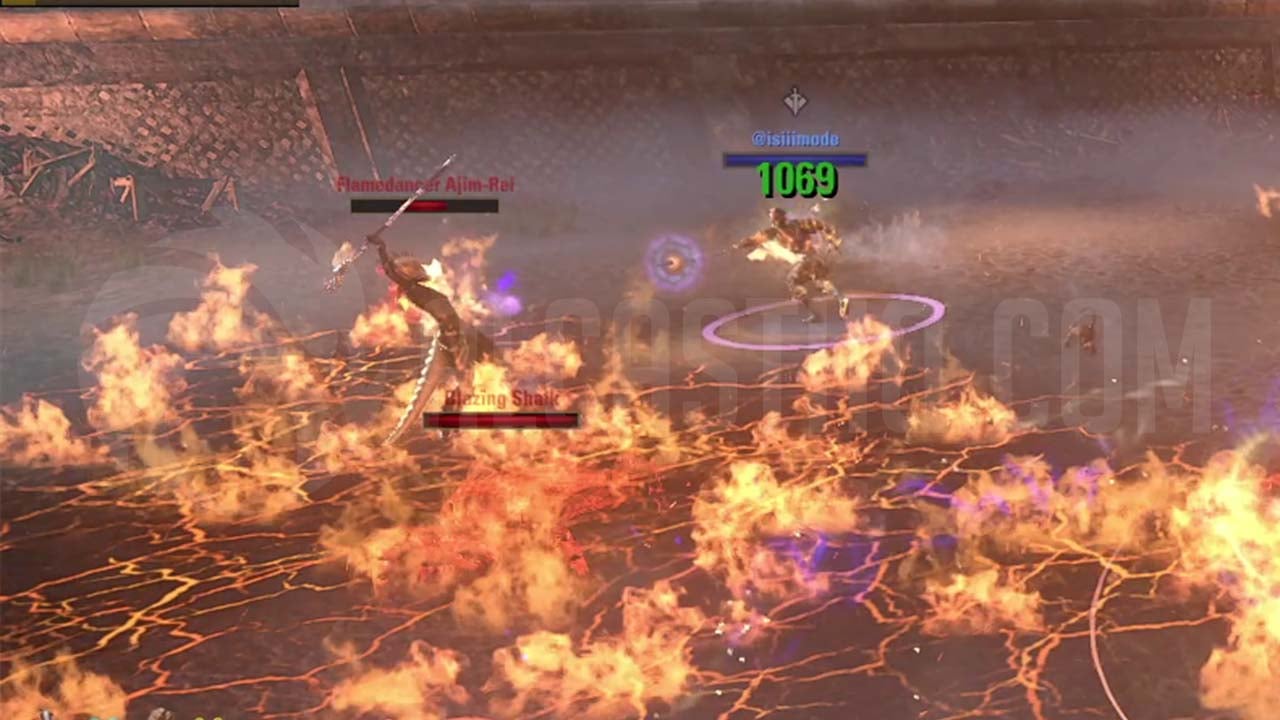
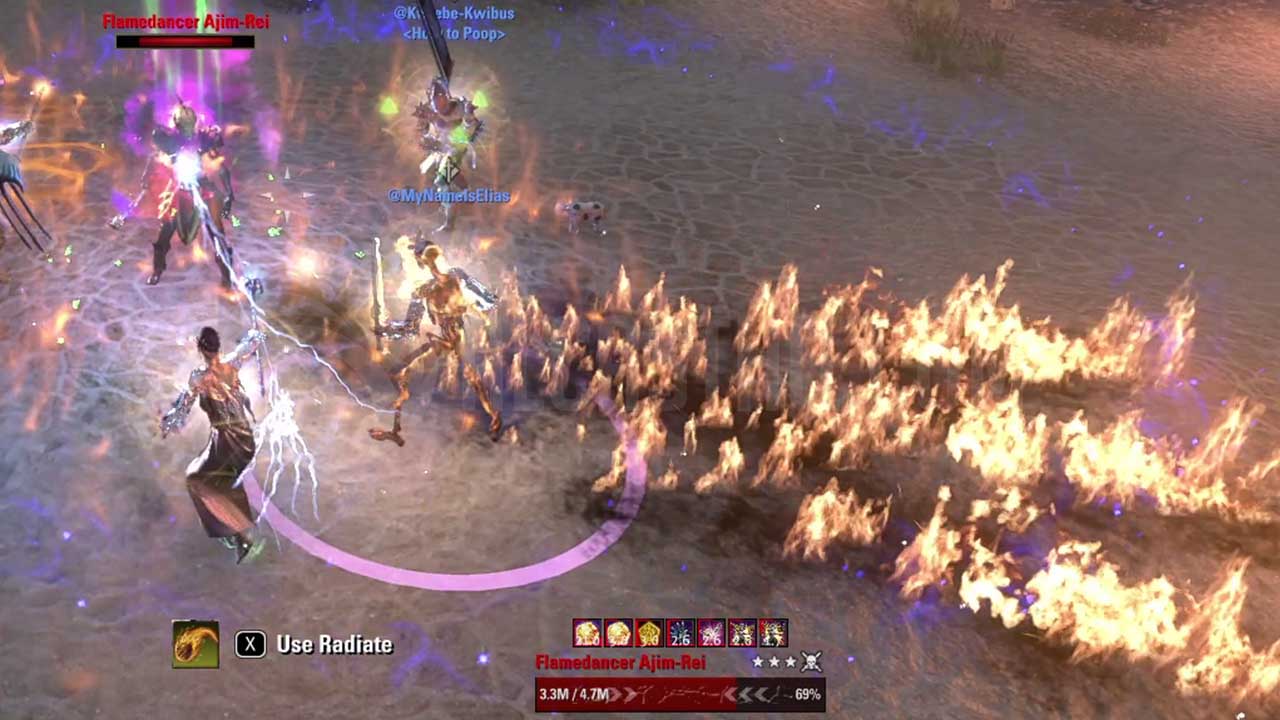
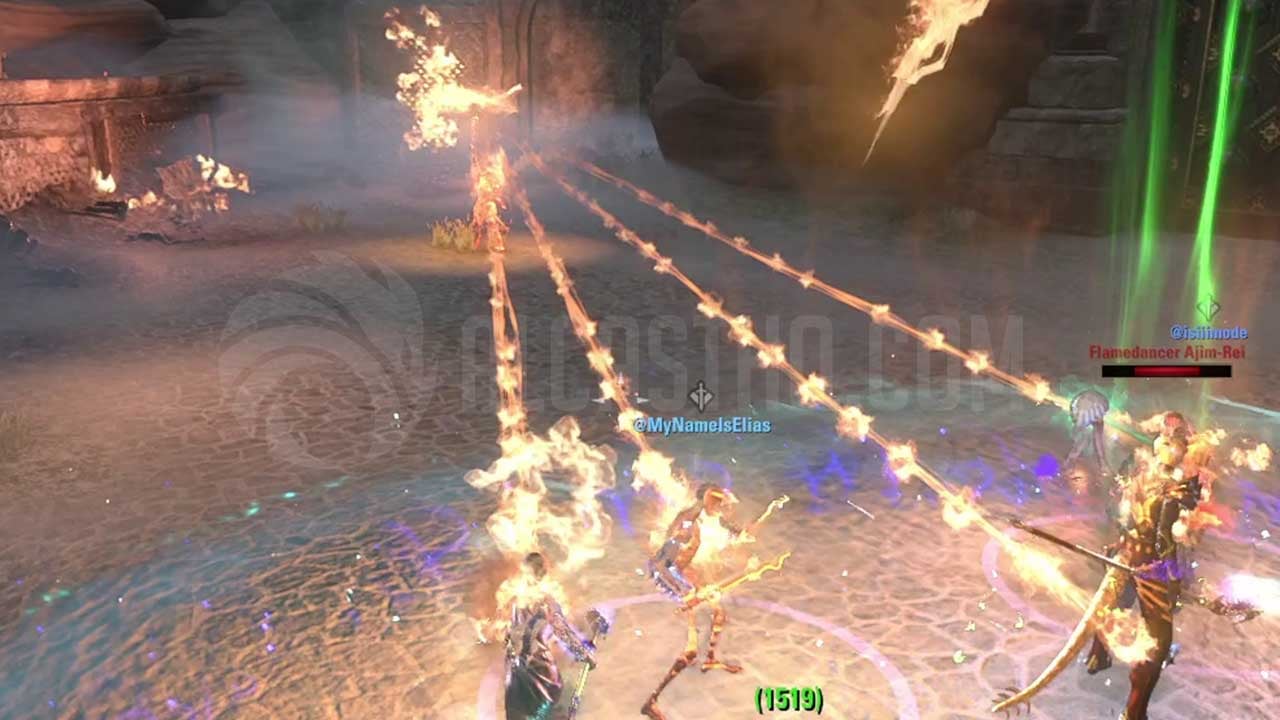
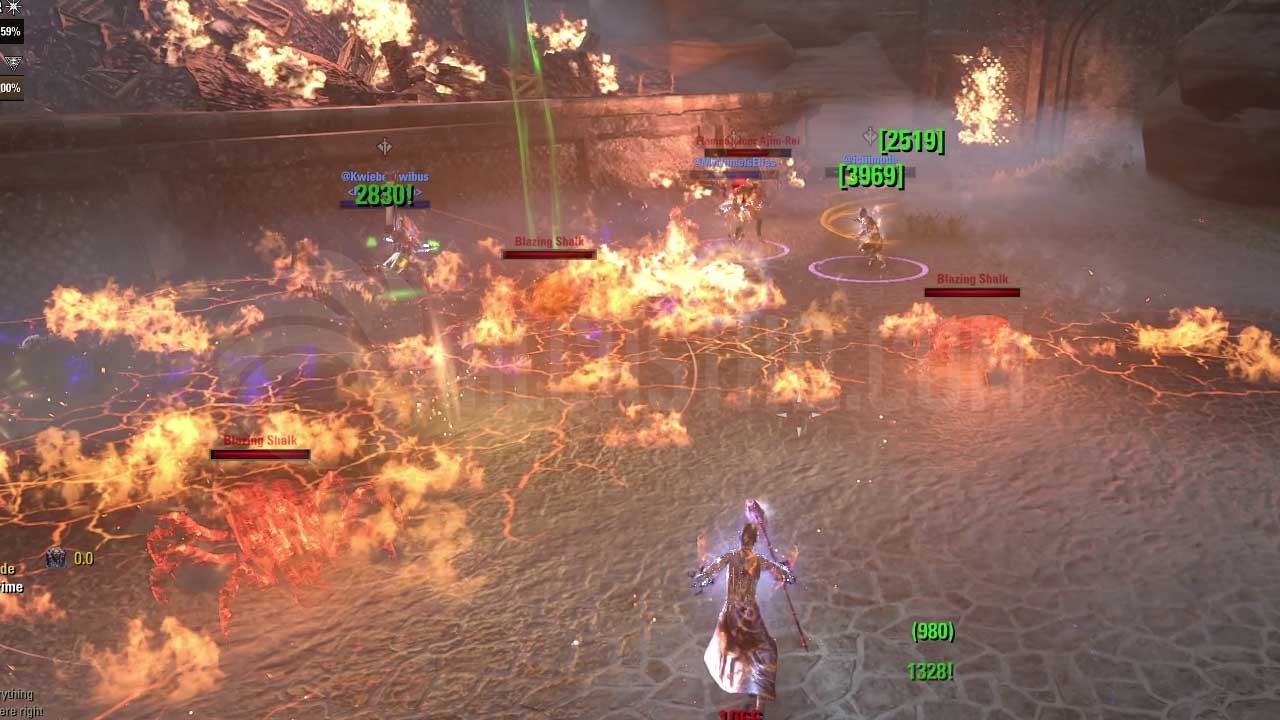
Boss 5 – Flamedancer Ajim-Rei
ESO Flamedancer Ajim-Rei is the third and last mini-boss you encounter in Lep Seclusa. She is also skippable. As Flamedancer Ajim-Reis name suggest, all of her abilities are fire based. Her highest hitting ability is Imminent Eruption due to it always doing 50% of your health as Oblivion damage and the fact it can not be mitigated. None of her other abilities hit hard by themselves, but letting Shalks live and ignoring everything might create a situation where your fighting area is full of flames and the smaller attacks combined suddenly overwhelm the group.
Flamedancer Ajim-Rei Abilities
Flare: Flamedancer Ajim-Rei’s light attack.
Incinerating Prance: Flamedancer Ajim-Rei’s heavy attack.
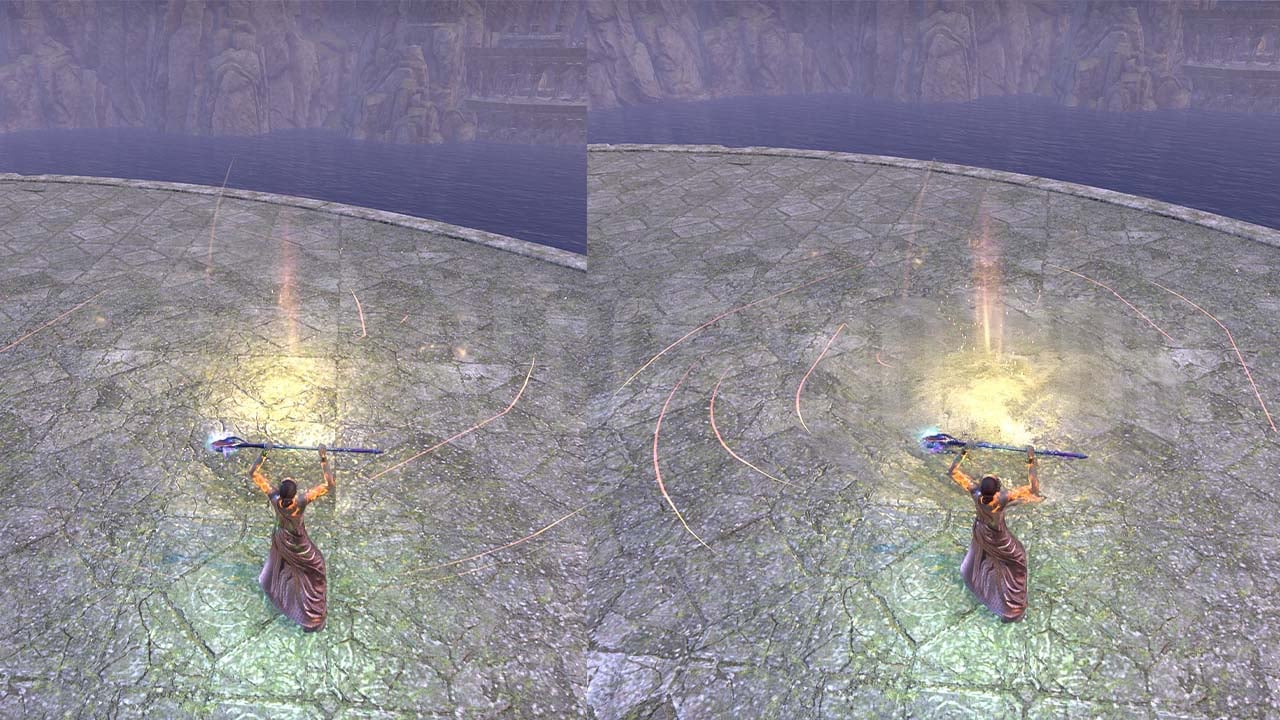
Imminent Eruption: The boss casts Fire AOE’s under each player that will Erupt after a few seconds. You should always interrupt this! Eruption seems to always do 50% of your health as oblivion damage to you meaning you should never stack with other players when the boss casts this skill. Oblivion damage means it can not be negated so shields, block, dodge and other mitigations won’t work.
Heat Wave: Flamedancer Ajim-Rei targets a player and casts three Heat Waves towards them. Anyone hit by the Heat Wave will get a Ignited damage over time applied to them
Summon Flame Aspect: Flamedancer Ajim-Rei can summon two different Flame Aspects that are invulnerable to damage.
- First type of Flame Aspect will keep shooting fireballs at players with their Firestorm Waltz ability until interrupted; therefore, it is crucial to interrupt them. Firestorm Waltz does not do increasing damage and can be blocked, dodged or shielded to reduce the damage.
- Second type of Flame Aspect will target one player (red circle above the players head) and cast Scorching Heat towards them. Neither of the Flame Aspects deal that much damage by themselves.
Summon Blazing Shalk: These Blazing Shalks charge at players creating Molting Flames on the ground that will stay until the Blazing Shalk that created the fire dies. Molting Flames deal moderate damage if you stand in them and also applies the Ignited damage over time effect.
-
- Imminent Eruption

-
- Heat Wave
-
- Flame Aspect – Firestorm Waltz
-
- Flame Aspect – Schorching Heat

-
- Blazing Shalks
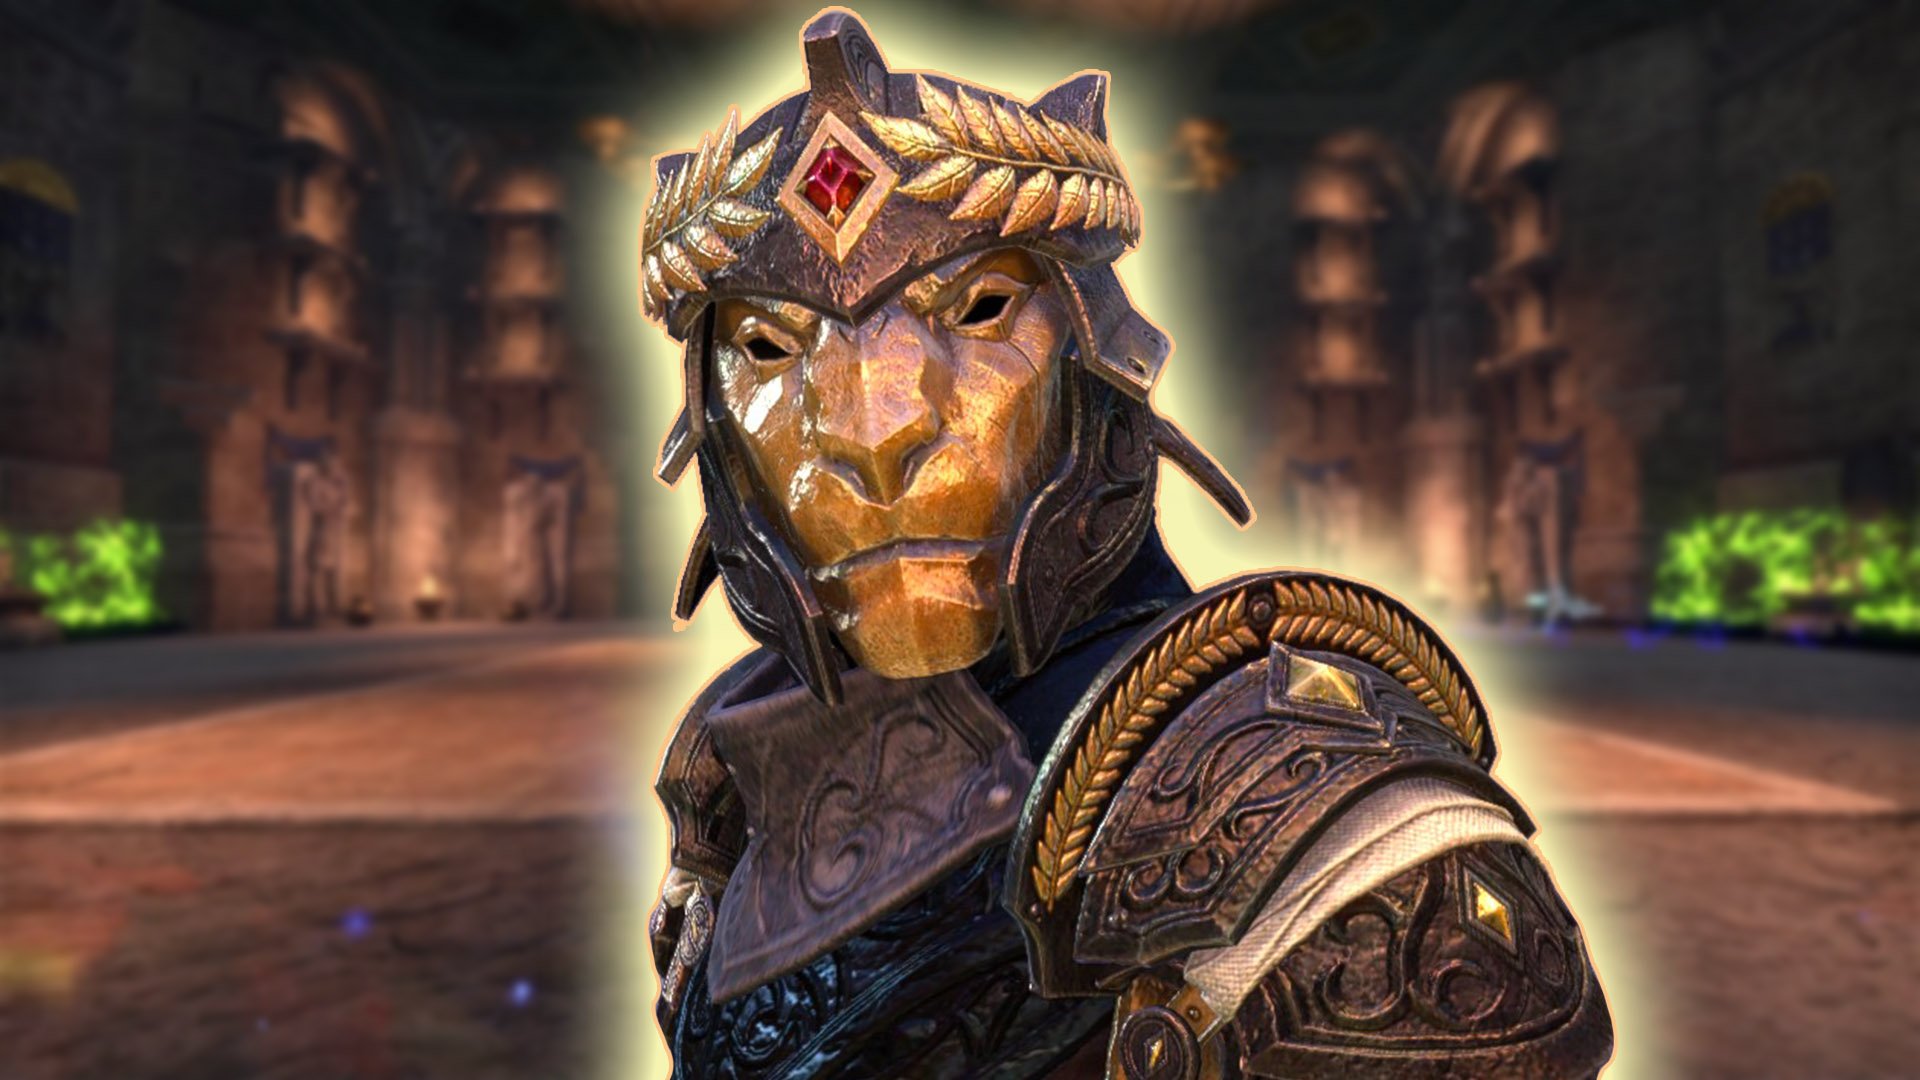
Boss 6 – Orpheon the Tactician (final boss)
ESO Orpheon the Tactician is the final boss of the Lep Seclusa dungeon. He is an arcanist that casts loads of tendrils and other AOE’s at players. The key to this fight is knowing which AOE’s you can stand in and which you can not as there is no way to avoid them all. Dodge roll and block are your friends here.
Short explanation for Orpheon the Tactician fight in Veteran Hard Mode
You must move within the small safe zone that is left by Orpheon the Tacticians Confine ability. Keep attacking Orpheon while he’s vulnerable, otherwise always focus the big Hulk and Wraith adds.
- Abilities you can tank with your face as a DD/Healer.
- Abyssal Reach (giant tendrils), Wing Gust (still should try to avoid them because of the Conduit DoT they leave) and skills cast by the smaller adds.
- Abilities you can stand in but should block as DD/Healer
- All of Alcunars hits from the side, Abyssal Tendril swoops.
- Absolutely never stand in these as DD/Healer:
- Reality Fracture (boss’s heavy attack AOE), Arcane Planemeld/Confine (green walls), Arcane Void (cast by the big Hulk and Wraith adds).
Tank tip: When Orpheon moves the Arcane Planemeld wall, face your back to the direction you’re going and follow the wall while standing in the black area at the edge. This way Orpheon will stay outside of the Planemeld and cast less of his Forbidden Knowledge skill and DD’s will love you as they can damage him better.
- 80% Orpheon casts Arcane Planemeld and moves the fighting area from the center to the right. Summons adds.
- 50% Orpheon casts Arcane Planemeld and moves the fighting area from the right to the left. Summons adds.
- 30% Orpheon casts Arcane Planemeld and moves the fighting area from the left to the right. Summons adds.
- 20% Orpheons execute phase begins meaning he will keep moving his green Arcane Planemeld Wall side to side until he dies.
Orpheon the Tactician Abilities in Hard Mode
Quick Strike. Orpheons light attack that is an AOE cone towards the tank that applies a “Slow Descent” debuff that should reduce your resources.
Reality Fracture. Orpheons Heavy Attack summons a small watcher above his head and targets the tank with AOE. Damage Dealers and Healers should avoid standing on or near the tank as Reality Fracture will hit anyone standing inside the AOE and there is almost no time to react to it.
Abyssal Reach. Two Giant tendrils will slap the ground about every four seconds. The tendrils look menacing but don’t actually do much damage.
Confine. Orpheon the Tactician will confine the fighting area by filling the sides with a black/green wall. This area will move and become smaller.
Abyssal Conjuration. Orpheon targets two players with Abyssal Conjuration and summons Abyssal Tendrils at their locations. We advice you drop the tendrils near the boss so you don’t have to focus them separately. Abyssal Tendrils swirl around with their Tentacle Sweep skill, which does not do much damage when blocked; therefore, blocking is recommended
Arcane Planemeld. When Orpheons health reaches 80%, 50% and 30% health, he will use an Apocryphal Gate to travel to the middle of the arena and become invulnerable. He will summon adds; subsequently, you need to kill them before he returns to the fight.
Forbidden Knowledge. While Orpheon is invulnerable in his Arcane Planemeld phase, he will shoot 11 Forbidden Knowledge damage “balls” at each player in less than three seconds. One dodge roll is enough to avoid the damage from most of them. Just be sure to dodge within the clear area.
Adds during the Orpheon the Tactician Planemeld phase
During the Arcane Planemeld phase Orpheon the Tactician summons one big add; also, it is accompanied by three smaller adds. Tank should always prioritize taunting the bigger Hulk and Wraith adds.
Arcane Hulk: A big bloodknight add that has 3,2 mil health. It cast a large heavy hitting Arcane Void AOE which should always be avoided by Damage Dealers and the Healer.
Arcane Wraith: Same as the bloodknight, the wraith has 3,2 mil health and cast a large heavy hitting Arcane Void AOE which should always be avoided by Damage Dealers and the Healer.
Arcane Ripper, Hound, Hopper: These smaller adds that accompany either the Hulk or Wraith have 493k health and do not cast any special or dangerous abilities.
Add: Alcunar. The giant Gryphon Alcunar will join Orpheon the Tactician; furthermore, it will cast the same skills that you saw already when you fought Noriwen.
The Giant Gryphon Alcunar slaps its wings creating moving Wing Gusts that you should try to avoid as they will deal Conduit shock damage and apply a damaging AOE around your character. He will also randomly Snap, Stomp and Swipe at players near the ledge, but these can be blocked or dodged and generally don’t deal much damage.
-
- Reality Fracture

-
- Abyssal Reach Tendrils

-
- Confine wall

-
- Confine deals increasing damage.

-
- Abyssal Conjuration – Abyssal Tendril

-
- Arcane Planemeld

-
- Forbidden Knowledge

-
- Arcane Planemeld adds

-
- Arcane Hulk – Arcane Void

-
- Arcane Wraith casting Arcane Void

-
- Alcunar during the Orpheon the Tactician fight

Skipping in Lep Seclusa
You are able to skip two of the Lep Seclusa mini- bosses by not aggroing them and just walking past them.
Boss 3 – Siege Master Malthoras
Related Topics:
Links