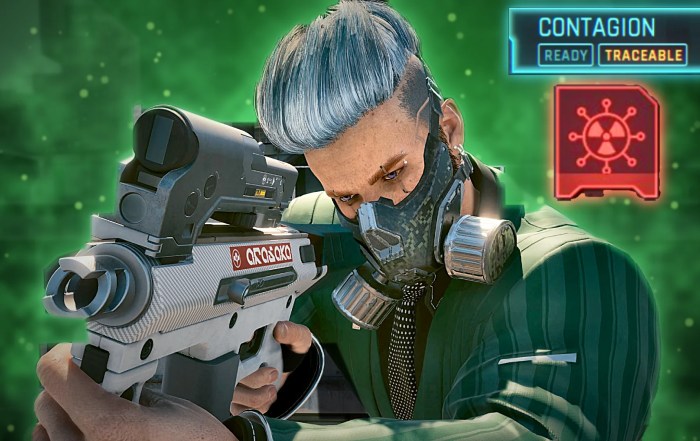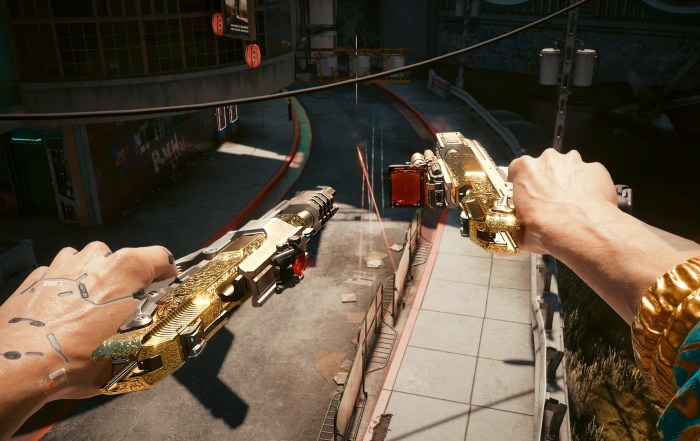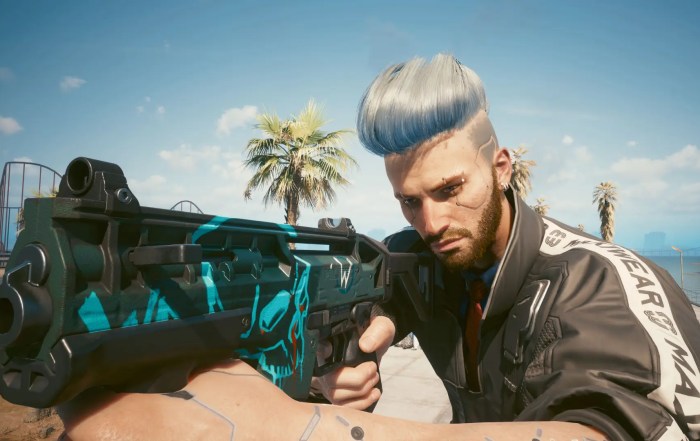

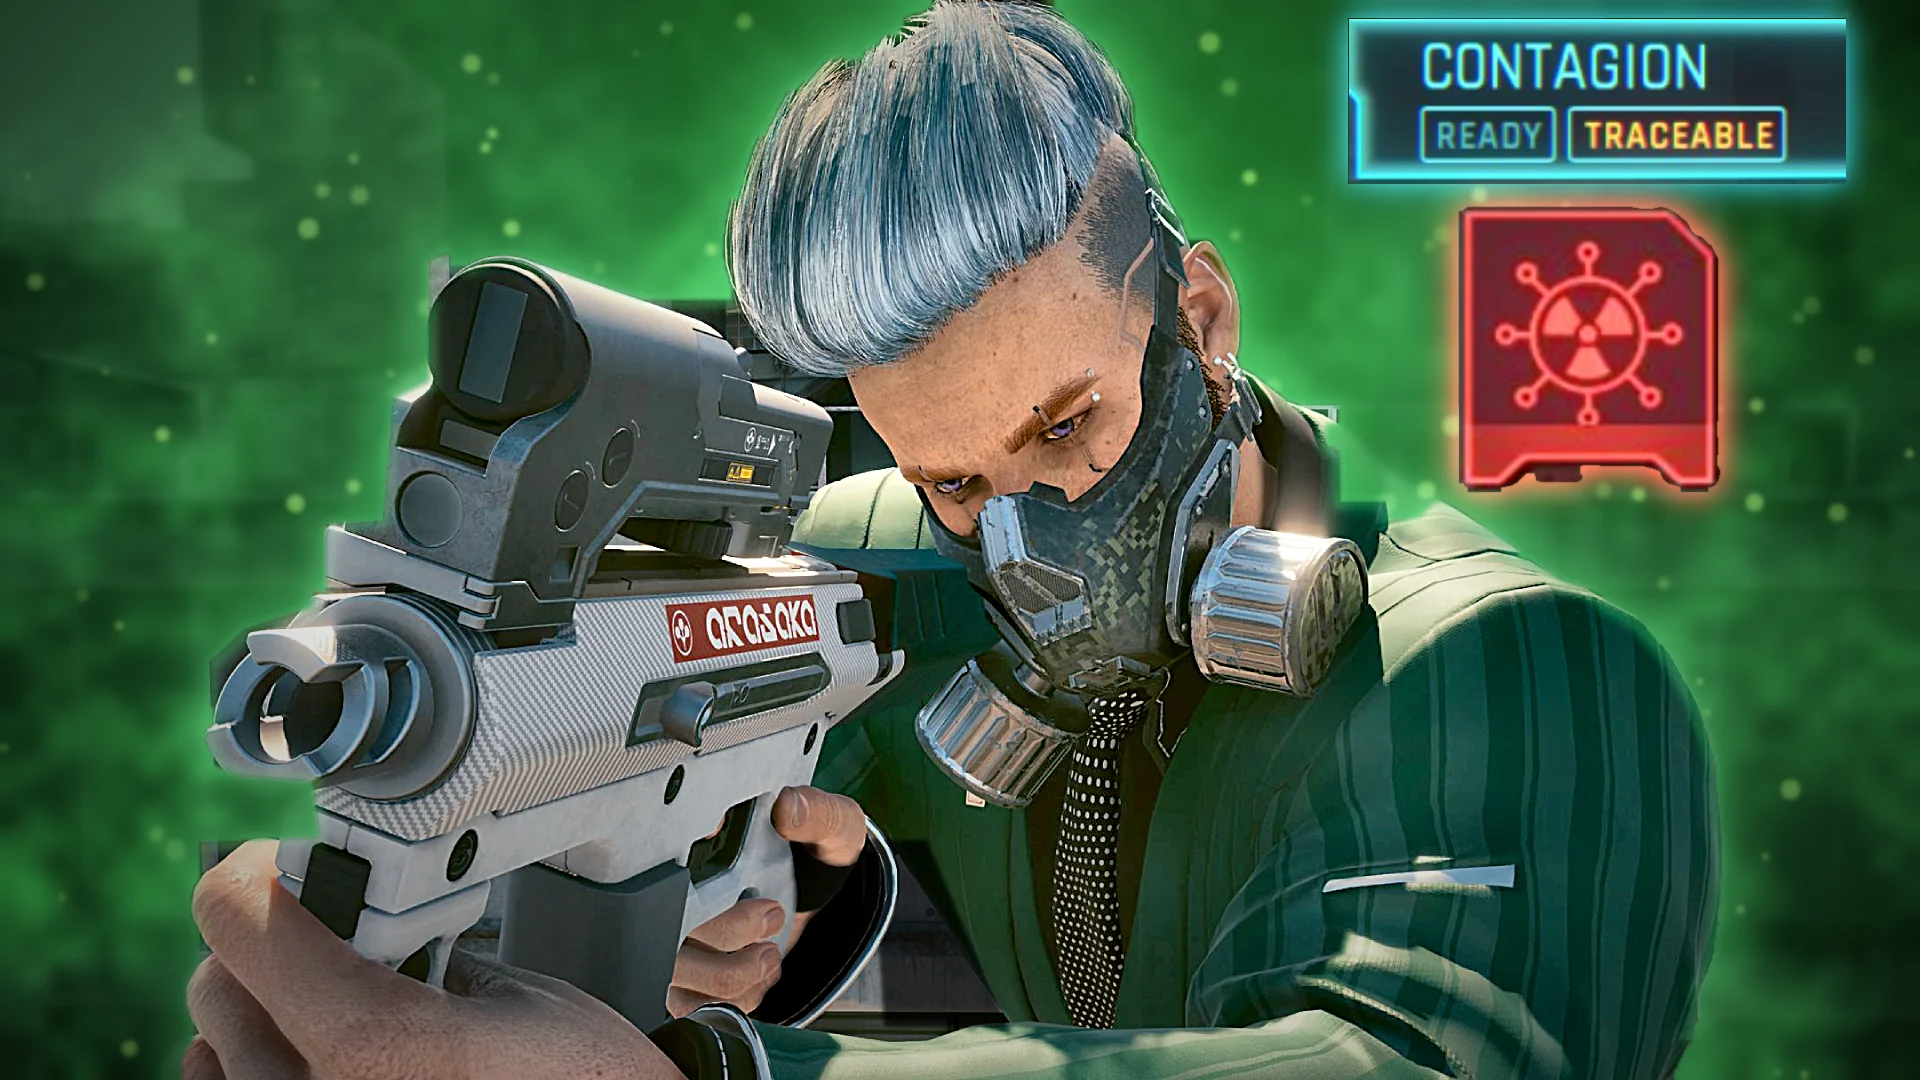
Welcome to the best Contagion Build for Cyberpunk 2077 (Patch 2.5). Contagion infects a whole group with poison, Overheat melts their armor, and the moment fire touches an infected enemy, the poison detonates. I spread it with quickhacks, set it off with the Prototype: Shingen Mark V and the Thermal Monowire, and cut through whatever is left while it burns. Some players call it a Contagion Overheat build, a plague netrunner or a poison netrunner build.
The Contagion Build combines Contagion, Overheat, the Biotech Σ cyberdeck, the Thermal Monowire and the Prototype: Shingen Mark V: poison that jumps from enemy to enemy, Burn that detonates it, Overheat that melts armor on bosses, and +25% Monowire damage against everyone with poison or fire on them.
You can find more builds here on the Cyberpunk 2077 Builds Database page.
Table of Contents for the Contagion Build:
- Build Overview & How To Play
- Attributes
- Perks (Skills)
- Cyberware
- Quickhacks
- Weapons
- Gear
- Skill Progression
- Leveling Tips
- Contagion Build FAQ
Strengths and Weaknesses list for the Contagion Build:
Strengths
Weaknesses
More Netrunner Builds: Want quickhacks that crit through MaxTac? Read my Monowire Build. For Smart guns next to your quickhacks, my Smart SMG Build, and for stealth, my Ghost Netrunner Build.
Cyberpunk 2077 Contagion Build Overview & How To Play

I play this Cyberpunk 2077: Contagion Build as a mid-range build. I upload Contagion on the enemy standing closest to the others, and the poison jumps to up to 4 more enemies within 8 metres. Every enemy it reaches takes more damage from it than the last. Then I set them on fire. Burn or Overheat on an infected enemy makes the poison detonate, and the Prototype: Shingen Mark V puts Burn on up to 4 targets at once with its explosive smart rounds.
Bosses get Overheat instead. Cripple Movement from the Thermal Monowire holds them in place, Overheat melts up to 40% of their armor, and every hit keeps them burning longer. The Biotech Σ makes all of it last longer and hit harder, and adds +25% Monowire damage against every enemy with poison or fire on them.
My Contagion rotation: This is how almost every fight goes for me.
- Close in: Double jump and Air Dash into the group. Proximate Propagation makes quickhacks up to 35% cheaper the closer I am.
- Cripple them: A charged Thermal Monowire swing uploads Cripple Movement for free, and normal swings spread it with Data Tunneling. Crippled enemies stay bunched up.
- Infect: 2x Contagion on the enemy in the middle. It jumps to up to 4 more enemies within 8 metres.
- Shred: Monowire swings on poisoned enemies deal +25% damage with the Biotech Σ, and Siphon refills my RAM on every hit.
- Detonate: Once the whole group is infected, I open fire with the Shingen. Its rounds can Burn up to 4 targets at once, and every Burn detonates the poison. Overheat or an Incendiary Grenade does the same.
- Overclock: When Contagion and Overheat are about to run out, I activate Overclock. The Biotech Σ resets their duration on everyone, and I can keep hacking when the RAM runs dry. Spillover spreads my quickhacks even further, and Smart Synergy makes the Shingen lock on instantly.
Before Overclock: The build works from the moment you have Contagion, Overheat and a Monowire, so from level 10. Long queues and Overclock come later, and they make it stronger, not possible.
No Phantom Liberty?: Jailbreak, Data Tunneling, Chitin and the COX-2 come from Phantom Liberty. Without them, I upload Cripple Movement by hand at the start of a boss fight and use the ProxiShield in place of Chitin. Contagion, Overheat, the Biotech Σ, the Thermal Monowire, the Shingen Mark V and the Divided We Stand are all in the base game.
How To Detonate Contagion
 Contagion is the heart of this build, and the detonation is where the big numbers come from. This is how I set it up:
- Find the middle of the group: Upload Contagion on the enemy with the most others around them. At Tier 5 it spreads to up to 4 enemies within 8 metres, and every enemy it jumps to takes +15% more damage from it.
- Stack it: Contagion stacks twice, so I queue 2 on the same target. The second upload is faster with Hack Queue and Queue Prioritization.
- Wait for the spread: The explosion removes Contagion, so detonating early wastes it. I keep cutting into the poisoned enemies with the Monowire until the whole group has it.
- Set it on fire: Burn or Overheat on an infected enemy makes the poison detonate. I have four ways to do that: the
 Prototype: Shingen Mark V (explosive rounds on up to 4 targets with Targeting Prism), a
 Thermal Monowire swing,
 Overheat, and an Incendiary Grenade.
- Infect the next group: Contagion is gone after the explosion, so I upload it again on the next group. Overheat keeps burning on whoever survived.
Why the Shingen: Overheat and the Monowire set one enemy on fire at a time. The Shingen locks on to several enemies while I aim, so one burst can detonate the poison on 4 of them at once.
What Contagion ignores: Mechs, robots, drones and turrets.  Short Circuit handles those, and so does the
 Yinglong with its Electrical rounds.
My Quickhack Rotation (Groups & Bosses)
Hack Queue, Queue Acceleration and Queue Mastery let me queue 4 quickhacks on one enemy. These are the combos I use:
Why it works:
- Control quickhacks first: Cripple Movement and Cyberware Malfunction are Control quickhacks, so
 Embedded Exploit adds damage to everything after them,
 ICEpick takes 1 RAM off every Combat quickhack, and
 Queue Hack_Root makes the next quickhack of a different category cheaper.
- Contagion before Overheat: The first Overheat detonates the poison on the boss, and the second one keeps them burning while their armor melts. Every hit on a burning enemy extends Overheat a little.
- Biotech Σ: Contagion and Overheat are both Combat quickhacks, so they last 15% longer and their damage over time is 10% higher.
- System Overwhelm:
 System Overwhelm adds +7% quickhack damage for every different quickhack and damage over time effect on the target. Cripple Movement, Cyberware Malfunction, Overheat and Burn all count.
- Queue Mastery: The quickhack that fills the queue costs 50% less RAM, so the last Overheat is half price.
How To Use The Thermal Monowire
The Thermal Monowire is my close-range weapon and my second detonator. It uploads my first quickhack, spreads it, and hits much harder on anyone who is poisoned or burning.
- Slot Cripple Movement:
 Jailbreak lets you slot a Control quickhack into the Monowire.
 Cripple Movement is a Control quickhack, so it goes in. Every charged Strong Attack uploads it for free.
- Spread it with normal swings: With
 Data Tunneling, normal Monowire attacks spread the quickhack to every other enemy they hit at the same time. Crippled enemies can’t run out of Contagion range.
- Hit the poisoned ones: The Biotech Σ adds +25% Monowire damage against enemies with a damage over time effect. Contagion, Overheat and Burn all count, and Cripple Movement adds another +15% melee damage on top.
- Detonate: The Thermal Monowire deals Thermal damage with a chance to Burn. Burn on an enemy with Contagion detonates the poison, so sometimes the Monowire sets it off before I reach for the Shingen.
- Refill RAM:
 Siphon gives RAM back on every Monowire hit, and much more if the enemy has a quickhack on them.
- Finish:
 Finisher: Live Wire is the Monowire Finisher. Crippled enemies are easier to finish, and every Finisher on them gives +5% Health and +2 RAM back.
Why the Thermal Monowire: It is the only Monowire with Burn, and Burn is what detonates Contagion. It is attuned to Cool, so Cool 9 adds +4.5% damage. The Electrifying Monowire hits about as hard, but it can’t set anything off.
How To Use Overclock
 Overclock lets me upload quickhacks without enough RAM, and the missing RAM costs Health instead. I don’t use it to spam damage hacks. I use it to keep Contagion and Overheat on everyone, because the Biotech Σ Mk.4 resets the duration of every quickhack damage over time effect the moment I activate it.
- Activate it when the poison is about to run out: The Biotech Σ resets Contagion and Overheat to full duration on every enemy they are on, and
 Power Surge heals me right away based on my Max RAM.
- Spread everything:
 Spillover gives my quickhacks a 50% chance to spread to another enemy. Contagion spreads on its own, and now Overheat and Cripple Movement do too.
 Race Against Mind adds up to +50% quickhack damage the lower my Health is.
- Shoot:
 Smart Synergy makes Smart weapons lock on instantly during Overclock and deal bonus damage to enemies affected by a quickhack. After a round of Contagion, that is everyone.
- Heal while hacking:
 Sublimation turns every bit of RAM recovery into Health, Siphon included.
 Blood Daemon gives +25 Health for every quickhack still queued on an enemy when they die.
- Last resort: Synapse Burnout kills extend Overclock by 3 seconds. I only chain it when I need one tough enemy dead fast, because Overclock eats Health and this build wants its Health for the front line.
Safety net: Overclock eats Health fast. Countershell kicks in when I lose a big chunk of Health in a short time, the Biomonitor uses my health item below 50%, and the Reflex Tuner slows time when I drop below 25%.
Attributes – Contagion Build
Distributing Attributes correctly for the Contagion Build is important. Attributes dictate the direction of the build and give access to different tiers of perks depending on how many points you invest in each category.
The Cyberpunk 2077 Contagion Build’s primary Attributes are  Intelligence for quickhacks, Overclock and the Smart weapon perks, and
 Technical Ability for the chrome.
 Reflexes goes to 17 for Air Dash,
 Body to 15 for Adrenaline Rush, and
 Cool to 9.
Contagion Build Start Attributes
At the start of the game, select the following Attribute allocation to give us the optimal start for the Contagion Build in Cyberpunk 2077.
| Attribute | Points | Description |
|---|---|---|
|
Intelligence |
+3 |
|
|
Technical Ability |
+2 |
|
|
Body |
+1 |
|
|
Reflexes |
+1 |
|
|
Cool |
None |
|
Max Level Attributes
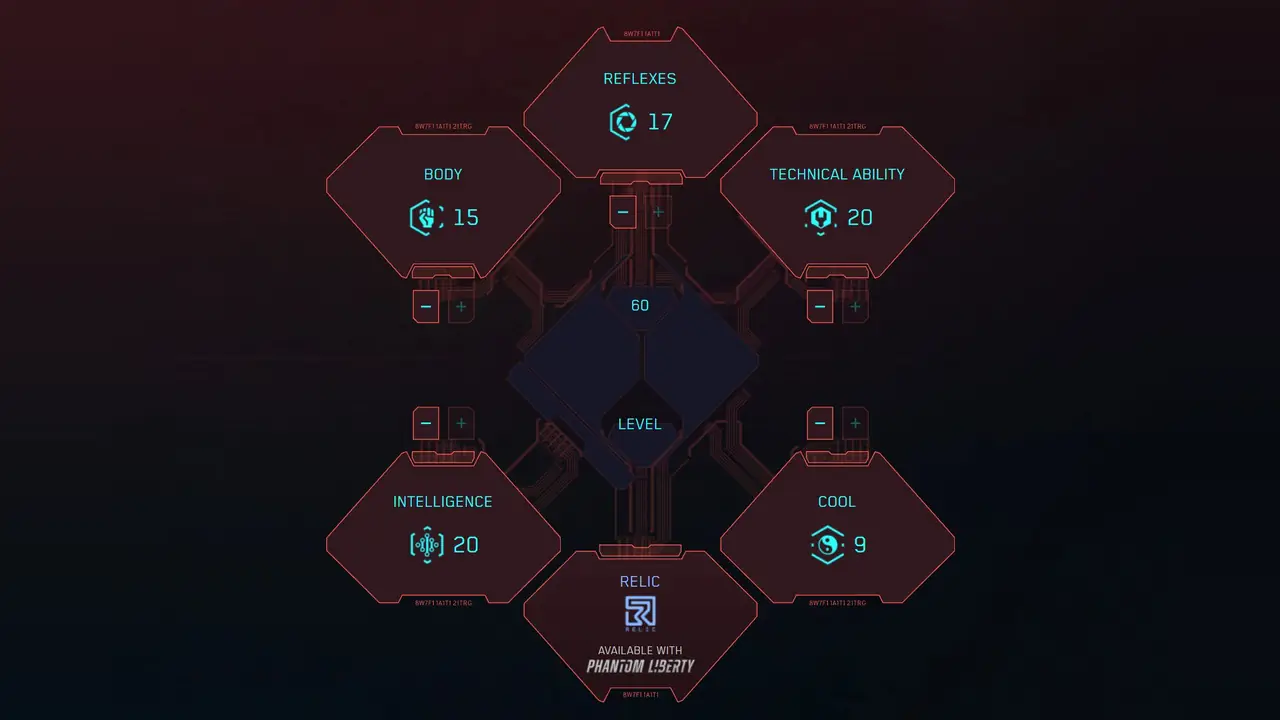
At max level, you want to have the following distribution of Attributes for the Contagion Build in Cyberpunk 2077:
- 20 Intelligence
- 20 Technical Ability
- 17 Reflexes
- 15 Body
- 9 Cool
Why these numbers: Intelligence goes to 20 for Queue Mastery, Spillover and Smart Synergy, and Technical Ability goes to 20 for Edgerunner. Body stops at 15 for Adrenaline Rush, and Reflexes at 15 for Air Dash, with the last 2 spare points on top. Cool goes to 9 for two reasons: with all five Attributes at 9 or higher, Renaissance Punk gives +20 Cyberware Capacity instead of +16, and the Thermal Monowire is attuned to Cool. No Cool perks are needed.
Perks – Contagion Build Cyberpunk 2077
In this section of the Cyberpunk 2077 Contagion Build, I will explain the perks that we use for each attribute.
Perk Points: To get perk points, you can either simply level up or farm Perk Shards. Read our guide on all 13 Perk Shard Locations in Cyberpunk 2077, with map locations, screenshots, and the nearest fast travel point for each shard.
Perk Order: The bold perks are the core of the build, so pick them up before the non-bold ones. While you are leveling, rush Intelligence to 9 for Hack Queue, Embedded Exploit, Siphon and System Overwhelm, then Technical Ability to 9 for All Things Cyber and Renaissance Punk. Intelligence to 15 comes next for Overclock, Queue Acceleration, Finisher: Live Wire and Targeting Prism. After that, Reflexes to 9 for Dash, Body to 15 for Adrenaline Rush, Technical Ability to 15 for License to Chrome and Ambidextrous, and Reflexes to 15 for Air Dash. Queue Mastery, Spillover, Smart Synergy and Edgerunner come last, since they need 20.
Perk Points: This build uses all 80 Perk Points at level 60: 38 in Intelligence, 16 in Technical Ability, 15 in Reflexes and 11 in Body.
Intelligence Perks

The Intelligence Perk-Tree is the heart of the Contagion Build, and we max it out at 20. We take the queue branch on the left, the Overclock branch in the middle, and the Smart weapon branch on the right for the Shingen.
Perk Prioritization: Prioritize perks in bold.
Level 4 Perks
The RAM basics and the start of the queue branch.
| Perk | Description |
|---|---|

|
Highlights nearby Access Points and cameras, and Control and Covert quickhacks uploaded through cameras cost less and last longer. It opens the queue branch. |

|
+35% RAM recovery rate. During Overclock, Sublimation turns that into Health regen too. |

|
Quickhacks cost less RAM the closer you are to the target, up to -35%. I fight at Monowire range, so Contagion and Overheat are cheapest right where I stand. |
Level 9 Perks
Hack Queue and Embedded Exploit, Siphon for the Monowire, and the first Smart weapon perks.
| Perk | Description |
|---|---|

|
+1 Max RAM, then quickhack queues: 2 quickhacks on one enemy, uploaded one after the other, with a faster upload for the second. That is 2 stacks of Contagion in one go. |

|
When an enemy dies, you get back 80% of the RAM of every quickhack still waiting in their queue. Detonations kill enemies before the queue finishes all the time. |

|
+25% RAM recovery rate for each quickhack currently in a queue. |
|
|
+10% RAM recovery rate, then more quickhack damage against enemies affected by Control or Covert quickhacks. Cripple Movement from the Monowire is a Control quickhack, so Contagion and Overheat hit harder after it. |

|
Killing an enemy with a Combat quickhack gives back 25% of the RAM of every quickhack on them. Contagion and Overheat kills count. |
|
|
-1 RAM cost for Combat quickhacks on enemies affected by Control or Covert quickhacks. Every Contagion and Overheat on a crippled enemy is cheaper. |
|
|
Monowire attacks recover RAM, and much more if the enemy is affected by or targeted by a quickhack. With Contagion on the whole group, every swing refills the pool. |
|
|
+7% quickhack damage for each unique quickhack and damage over time effect on the target. Cripple Movement, Cyberware Malfunction, Contagion, Overheat and Burn stack it fast. |

|
+2 RAM for every Smart weapon kill, and if the enemy had quickhacks on them, you also get back 50% of their RAM cost. Every Shingen kill on an infected enemy pays for the next Contagion. |
|
A larger targeting reticle for Smart weapons, then reloading no longer breaks target lock, plus faster lock-on when you hip fire or aim. |

|
More accuracy with Smart weapons for every point of Max RAM in your cyberdeck. |
Level 15 Perks
Queue upgrades, Overclock and everything around it, and Targeting Prism for the Shingen.
| Perk | Description |
|---|---|

|
+1 Max RAM, cheaper device hacks, then +1 queue size and +60% upload speed for quickhacks third or later in the queue. |

|
+50% upload speed for the first quickhack when you have at least 2 queued on an enemy. |
|
|
-1 RAM cost for the first quickhack of each new category that is second or later in the queue. Contagion after Cyberware Malfunction gets it every time. |
|
|
While Overclock is active, you get +25 Health for every quickhack still queued on an enemy when they die. |
|
|
Unlocks the Monowire Finisher. The more quickhacks you have queued on an enemy, the easier it is to trigger, and it restores Health and RAM. Cripple Movement makes it even easier. |
|
|
+10% RAM recovery rate, +10% quickhack damage, then Overclock mode. For 14 seconds you can upload quickhacks without enough RAM, and every missing RAM unit costs Health instead. 30 second cooldown. How to use Overclock. |
|
|
While Overclock is active, all RAM recovery also restores Health. Optimization, Feedback Loop, Siphon and Recirculation now heal you too. |
|
|
While Overclock is active, your quickhacks deal more damage the lower your Health is, up to +50%. Health is checked when the upload starts. |
|
|
Activating Overclock instantly restores Health based on your Max RAM, so every Overclock starts with a heal. |

|
A larger targeting reticle, then switching from aiming to hip fire keeps the lock on headshots and weakspots, and switching between Smart weapons keeps it as well. |

|
Multiple target locks while aiming, and +1 target for all Smart weapons. The Shingen tracks 4 enemies instead of 3, and every one of them can catch fire. |

|
Faster bullets and longer lock-on range for 6 seconds after a Smart weapon kill, stacking 3 times. One detonation, several kills, full stacks. |
Level 20 Perks
Intelligence is at 20, so we take all three capstones.
| Perk | Description |
|---|---|

|
+1 queue size, so 4 quickhacks on one enemy. The last quickhack to fill a queue costs 50% less RAM and locks the queue until everything has uploaded, and you deal more damage against enemies with a locked queue. |
|
|
While Overclock is active, your quickhacks get a 50% chance to spread to another enemy. Contagion spreads on its own, and now Overheat and Cripple Movement do too. |
|
|
While Overclock is active, Smart weapons lock on instantly and deal bonus damage to enemies affected by a quickhack. After a round of Contagion, the Shingen gets the bonus on everyone. |
Technical Ability Perks
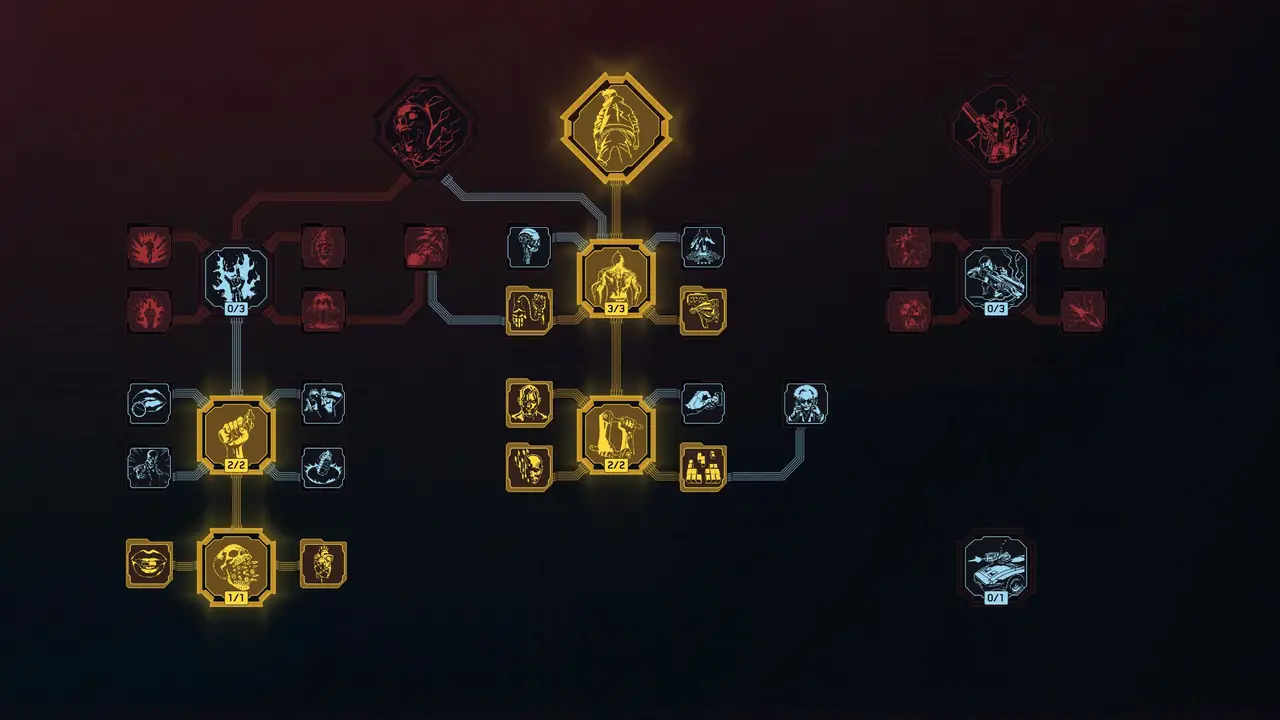
The Technical Ability Perk-Tree powers the chrome and keeps you alive in the middle of the fight. The left branch gives us better health items, and the middle branch handles the cyberware and leads to Edgerunner. Max it out to 20.
Perk Prioritization: Prioritize perks in bold.
Level 4 Perks
The health item perks on the left.
| Perk | Description |
|---|---|

|
+1 health item charge. Every health item also fills your Adrenaline once Adrenaline Rush is unlocked. |

|
+15% recharge speed for health items when you have only used one charge. |

|
+30% health from the final charge of your health item. |
Level 9 Perks
Health Freak on the left, the Cyberware perks in the middle.
| Perk | Description |
|---|---|

|
Faster recharge for health items and grenades, then an instant partial recharge after every kill. Max it out. More grenades means more Incendiary Grenades for detonations. |

|
+10% to all cyberware stat modifiers and -20% Cyberware Capacity cost for Integumentary System and Skeleton chrome. That discount saves about 27 capacity in this build, mostly on Chitin and the Epimorphic Skeleton. Max it out. |

|
Every cyberware gets an additional stat modifier. |

|
+4 Cyberware Capacity for each Attribute at 9 or higher. All five Attributes are at 9 or higher, so that is +20 capacity. This is why Cool sits at 9. |

|
-5% incoming damage while all your Integumentary System and Skeleton slots are filled. This build fills all of them. |
Level 15 Perks
More chrome in the middle.
| Perk | Description |
|---|---|

|
+10% to all cyberware stat modifiers, +40 armor and an extra Skeleton slot. Max it out. |

|
+15% duration for all cyberware effects, so Overclock lasts longer. |

|
A second Hands slot, which holds the Microgenerator next to the Smart Link. |
Level 20 Perks
Technical Ability is at 20, so we take one capstone.
| Perk | Description |
|---|---|

|
Go up to 50 points over your Cyberware Capacity, for -0.5% Max Health per point. Kills can also put you into a Fury state with +10% damage, +30% Crit Chance and +50% Crit Damage, and the further you are over capacity, the higher the chance. This build sits about 23 points over, see the Cyberware section. |
Reflexes Perks
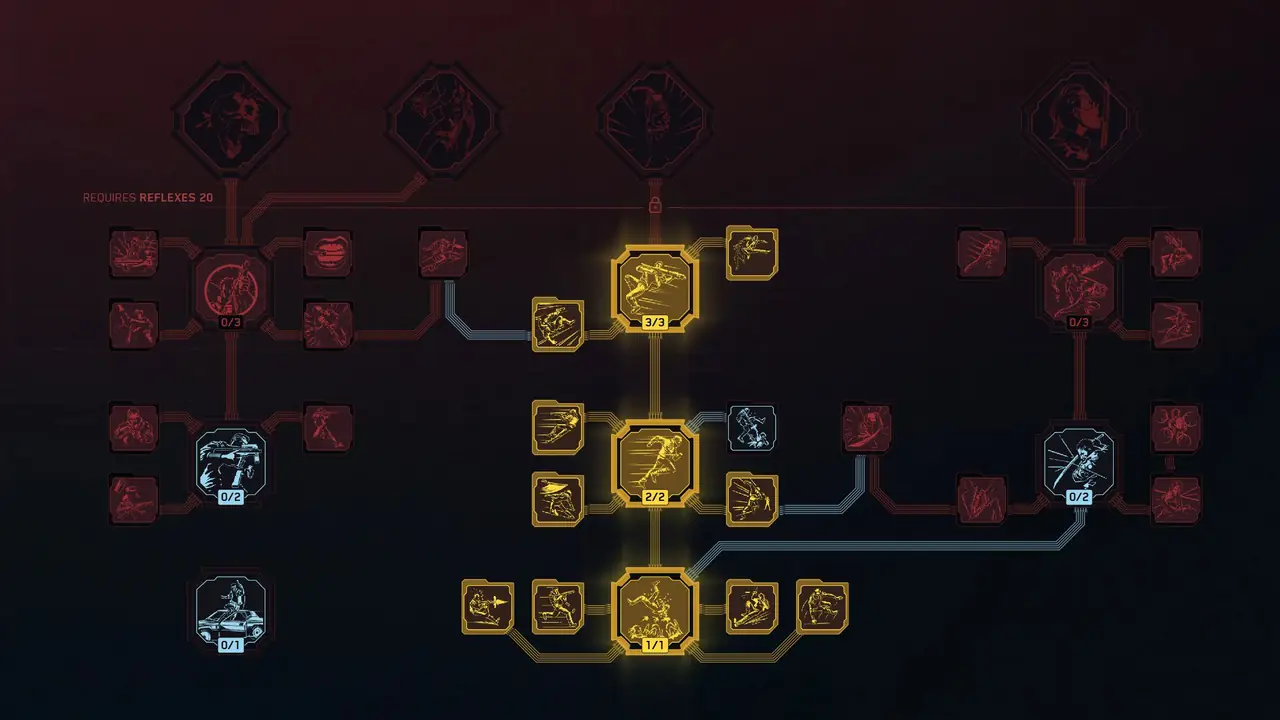
The Reflexes Perk-Tree is only used for its movement branch in the middle. The Monowire and Proximate Propagation want you close, and Dash and Air Dash get you there. Reflexes sits at 17.
Perk Prioritization: Prioritize perks in bold.
Level 4 Perks
Slippery and the movement row behind it.
| Perk | Description |
|---|---|

|
The faster you move, the harder you are to hit. It also opens the movement branch. |

|
Shoot while sprinting, sliding and vaulting. The Shingen keeps firing while I reposition. |

|
Reload while sprinting, sliding and vaulting. |

|
Longer slides. |
|
Faster vaulting and climbing. |
Level 9 Perks
Dash and the perks around it.
| Perk | Description |
|---|---|

|
Rank 1 cuts dodge and dash stamina cost, rank 2 unlocks the Dash itself. Dashing replaces dodging and covers a lot more ground. |

|
+100% Mitigation Chance while dashing. |

|
Shoot while dashing. |

|
+100% Dash range toward enemies. The fastest way into Monowire range. |
Level 15 Perks
Air Dash and the midair perks.
| Perk | Description |
|---|---|

|
Lower dash stamina cost, faster dashes, then the ability to dash in midair. Double jump, Air Dash, and I land right in the group. |

|
Better control in midair. |

|
A big boost to Mitigation Strength while you are in midair. |
Level 20 Perks
We don’t use any level 20 perks. Reflexes sits at 17.
Body Perks
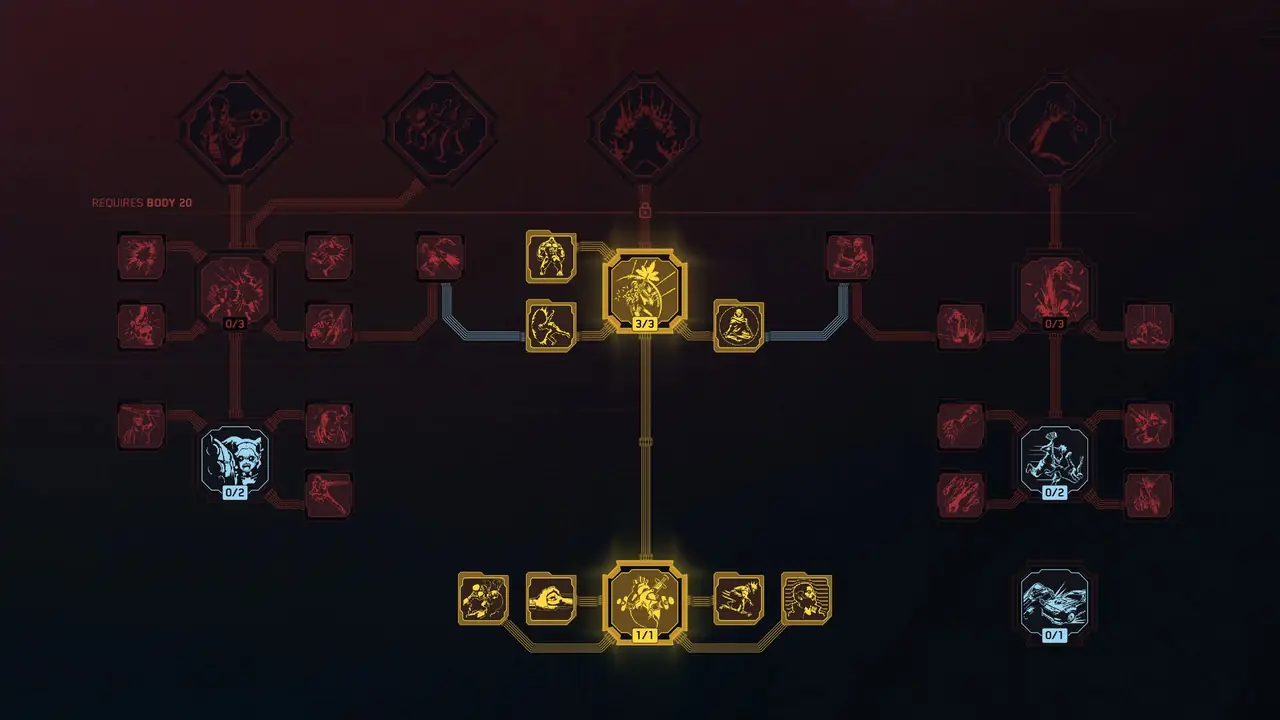
The Body Perk-Tree is only used for its middle branch: health regen and Adrenaline Rush. A netrunner who fights at Monowire range needs a lot more Health than usual, and Body is where it comes from. Body sits at 15.
Perk Prioritization: Prioritize perks in bold.
Level 4 Perks
The health regen row.
| Perk | Description |
|---|---|

|
Unlocks passive health regeneration during combat. Chitin adds +150% Health Regen on top of it. |

|
The lower your health, the faster you regenerate. Overclock drains your Health, and this pulls it back up. |

|
+100% Health Regen while sprinting. |

|
More health regen for each nearby enemy. I fight in the middle of the group, so this works the whole fight. |

|
Using the Blood Pump or a health item gives you a big boost to Mitigation Chance for 1 second. |
Level 9 Perks
We don’t use any level 9 perks. They are all for Body weapons and Blunt weapons.
Level 15 Perks
Adrenaline Rush and the perks that branch off it.
| Perk | Description |
|---|---|

|
+35 max health, +20% to all health regen, then Adrenaline Rush itself. Health items and the Blood Pump now also give Adrenaline equal to 30% of your max health, shown as a yellow second health bar. |

|
+20% movement speed and +10% damage while Adrenaline Rush is active. |

|
Immunity to movement penalties, knockdown and blinding while Adrenaline Rush is active. Bosses can’t knock you out of a quickhack upload. |

|
A 3 second delay before Adrenaline starts decaying. |
Level 20 Perks
We don’t use any level 20 perks. Body sits at 15.
Cool Perks
We don’t spend any Perk Points in Cool. Every perk in the tree is for guns, throwables or stealth. Cool sits at 9 for Renaissance Punk and the Thermal Monowire, see the Attributes section.
 Relic Perks (Phantom Liberty DLC)

The Relic tree runs on Relic points from Phantom Liberty rather than attribute levels, so there are no level tiers here. We spend 8 points across two branches: one for the Monowire, and one to make every hit count.
| Perk | Description |
|---|---|
|
|
Unlocks new abilities for all Arm cyberware. For the Monowire, you can slot a Control quickhack into it, and a charged Strong Attack uploads it at no RAM cost. I slot Cripple Movement. |
|
|
When an enemy is affected by a quickhack you uploaded with the Monowire, normal Monowire attacks that hit them and other enemies at the same time spread the quickhack to those enemies too. One charged swing, one sweep, and the whole group is crippled. |

|
Lets you spot Vulnerabilities in enemy armor and cyberware during combat. Hitting one gives 100% Crit Chance and +25% Armor Penetration, and destroying it sets off an EMP blast in a 3 metre radius. The Shingen locks on to several at once. |

|
Destroying a Vulnerability makes new ones appear more often and grants Crit Damage against them, stacking five times with the effects doubled at max stacks. |
The other 7 Relic points: I leave them unspent. Launch Capacity Override, Limiter Removal and Spatial Mapping are for the Projectile Launch System, Gorilla Arms and Mantis Blades, and Emergency Cloaking and Sensory Protocol need Optical Camo, which this build doesn’t use.
Cyberware for the Contagion Build in Cyberpunk 2077
Damage over time, RAM and staying alive: The Biotech Σ makes Contagion and Overheat last longer and hit harder, the Frontal Cortex keeps my RAM topped up, and the Skeleton, Integumentary System and Circulatory System keep me alive at Monowire range. The Hands hold the Smart Link for the Shingen and the Microgenerator next to it.
Cyberware Capacity: At level 60 you have 201 Cyberware Capacity, plus 15 from the Engineer skill tree and 20 from Renaissance Punk, so 236 in total. Everything marked bold or without a note below costs about 259 at Tier 5++, already including the -20% from All Things Cyber on the Skeleton and Integumentary System.
That is about 23 points over, and Edgerunner lets you go up to 50 over. It costs -0.5% Max Health per point, so about -11% Max Health. Chitin, Body 15 and Adrenaline Rush give a lot more than that back. Edgerunner needs 20 Technical Ability, so until you have it, use the ProxiShield in place of Chitin. That brings you down to about 227, inside the limit.
Once you have collected Capacity Shards, you can go further. I explain the swaps in With all Capacity Shards below.
Stat modifiers: Driver Update gives every piece of cyberware one more stat modifier. I take quickhack damage and Max RAM wherever I get the choice.
Important: Priority Cyberware is marked in bold.
- Operating System (Most Important)
- Frontal Cortex
- Face
- Arms
- Hands
- Skeleton
- Nervous System
- Circulatory System
- Integumentary System
- Legs
- With all Capacity Shards
Operating System
| Cyberware | Description |
|---|---|
|
|

Militech Paraline |
While Overclock is active, Smart weapons and the Monowire deal bonus Electrical damage equal to 60% of their normal damage. Pick it if you play more of the fight in Overclock and want the Shingen to do the killing. You lose all of the Biotech Σ damage over time bonuses. |
Location of items:
- Biotech Σ: Sold by Ripperdocs. The Mk.1 shows up from level 10, and the Mk.4 is the Tier 5 version. Upgrade it to Tier 5++.
- Militech Paraline: You get a Tier 1 version during the intro quest The Rescue, and any Ripperdoc sells it. Upgrade it to Tier 5++.
Frontal Cortex
| Cyberware | Description |
|---|---|
|
+6 Max RAM and +35% upload speed for quickhacks, for only 10 capacity. Faster uploads mean Contagion lands before the group spreads out. |

|
+1 Max RAM, and every kill gives you RAM back. A detonation can kill half a group at once, and every one of those kills refills RAM. |
|
Automatically negates an enemy quickhack, with a 20 second cooldown. I stand in the middle of the fight, and enemy netrunners love that. Only 5 capacity. |
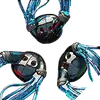
COX-2 Cybersomatic Optimizer |
Your quickhacks can crit, with 100% Crit Chance, for -4 Max RAM. Every Intelligence point also adds +0.5% quickhack damage, so +10% at 20 Intelligence. It costs 50 capacity, so it only goes in once I have all Capacity Shards. |
Location of items:
- Ex-Disk: Any Ripperdoc after level 20, scaling up to Tier 5.
- Memory Boost: Any Ripperdoc after level 5.
- Self-ICE: Any Ripperdoc after level 20.
- COX-2 Cybersomatic Optimizer: Iconic, Dogtown Ripperdocs (Phantom Liberty DLC), also found in Dogtown airdrops.
Face
| Cyberware | Description |
|---|---|

|
When you scan, it highlights every enemy within 19.5 metres for 60 seconds. I see who is standing in the middle of the group before I upload the first Contagion. It is attuned to Cool, so Cool 9 adds a bit of headshot and weakspot damage. Only 8 capacity. |

Kiroshi “Cockatrice” Optics |
+35% Crit Chance for the Monowire and the Shingen. It costs 30 capacity, so I only run it once I have all Capacity Shards. |
Location of items:
- Kiroshi “Clairvoyant” Optics: Any Ripperdoc from level 20. There is also one in the airdrop at Tranquil Terrace in Luxor Heights (Phantom Liberty) after Lucretia My Reflection.
- Kiroshi “Cockatrice” Optics: Iconic, Dogtown Ripperdocs from level 35 (Phantom Liberty DLC), also found in Dogtown airdrops.
Arms
| Cyberware | Description |
|---|---|
|
|
|
Update 2.5 added Glamdocs, so you can give your Monowire a new look at one of the 5 Glamdocs (spray paint icon on the map). It only changes the look, so the Burn stays. How I use it.
Location of items:
- Thermal Monowire: Any Ripperdoc upon reaching level 10.
Hands
| Cyberware | Description |
|---|---|

|
Without it, Smart weapons can’t lock on. +20% target lock duration, +15% Crit Damage with Smart weapons and +2 Max RAM on top, for only 4 capacity. |
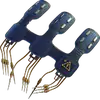
|
Reloading an empty weapon turns the next shot into an electroshock that damages enemies near the impact, and the more bullets you reload, the bigger it gets. When I empty the Shingen into a group and reload, the next burst shocks everyone around the target. |
Ambidextrous gives you the second Hands slot for the Microgenerator.
Location of items:
- Smart Link: Sold by any Ripperdoc, with quality scaling as you level.
- Microgenerator: Sold by any Ripperdoc from level 10 onward.
Skeleton
| Cyberware | Description |
|---|---|

|
+13% Max Health. It gives back what Edgerunner takes, and more. |

|
Taking damage restores RAM, and +2 Max RAM. During Overclock, Sublimation turns that RAM into Health, so getting hit heals you a little. |

|
+16% Mitigation Strength. Slippery, Can’t Touch This, Neofiber and Countershell all give Mitigation Chance, and this makes every one of those mitigated hits hurt less. |
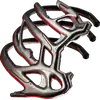
Para Bellum |
+12% Armor. It takes the place of Spring Joints once you have all Capacity Shards. |
License to Chrome gives you the third Skeleton slot. Fill all three for Chrome Constitution.
Location of items:
- Epimorphic Skeleton: Any Ripperdoc upon reaching level 30.
- RAM Recoup: Sold by Ripperdocs across Night City.
- Spring Joints: Any Ripperdoc from level 10, with quality scaling by level.
- Para Bellum: Any Ripperdoc upon reaching level 20.
Nervous System
| Cyberware | Description |
|---|---|
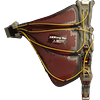
|
+11% Mitigation Chance and +11% Mitigation Strength, so you simply take less damage while standing in the middle of the group. |
|
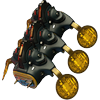
Slows time by 60% for 4.5 seconds when your Health drops below 25%, with a 35 second cooldown. Time to heal, dash out or finish the upload. Only 5 capacity. |
|
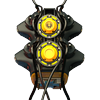
Slows time by 50% for 4.5 seconds when enemy detection reaches 50%. Time to queue the first Contagion before they open fire. Only 5 capacity. |
Location of items:
- Neofiber: Any Ripperdoc after level 20.
- Reflex Tuner: Sold by Ripperdocs, with quality scaling as you level.
- Synaptic Accelerator: Any Ripperdoc from level 10, with quality scaling by level.
Circulatory System
| Cyberware | Description |
|---|---|
|
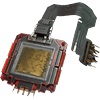
Automatically uses your health item when your health drops below 50%, and +16% health item effectiveness. Overclock drains Health fast, and this catches it. |
|
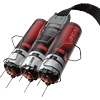
Works as a second health item: 110 health right away, then 23 health per second for 6 seconds. With Adrenaline Rush it also fills your Adrenaline. |
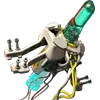
|
+7.5% Health for every kill. A detonation that kills four enemies at once is a big heal. |
Location of items:
- Biomonitor: Sold by Ripperdocs, with quality scaling as you level.
- Blood Pump: Ripperdocs from level 10.
- Heal-on-Kill: Sold by Ripperdocs, with quality scaling as you level.
Integumentary System
| Cyberware | Description |
|---|---|

|
An extremely durable shell under your skin, plus +10% Health Regen for every Body point, so +150% at 15 Body, on top of Painkiller, Comeback Kid and Adrenaline Rush. |
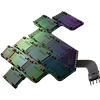
|
+50% Mitigation Chance for 4 seconds when you lose 35% of your Health within 3 seconds. Overclock and boss fights both get you there, and this is the safety net. |
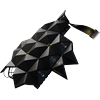
|
+300 Armor for only 5 capacity. It fills the third slot for Chrome Constitution. |
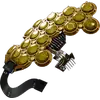
ProxiShield |
The closer an attacking enemy is, the less damage they deal: -20% at 3 m, tapering off to 0% at 6 m. That is exactly where the Monowire fights. My pick in place of Chitin until I have Edgerunner. |
Location of items:
- Chitin: Iconic, Dogtown Ripperdocs (Phantom Liberty DLC), also found in Dogtown airdrops.
- Countershell: Sold by Ripperdocs, with quality scaling as you level.
- Subdermal Armor: You get it during the intro quest The Ripperdoc, and Ripperdocs sell better versions as you level.
- ProxiShield: Sold by Ripperdocs, with quality scaling as you level.
Legs
| Cyberware | Description |
|---|---|
|
Double jump. Double jump, Air Dash, and I land in the middle of the group with the Monowire out. |
Location of items:
- Reinforced Tendons: Any Ripperdoc from level 10.
With all Capacity Shards
Capacity Shards permanently raise your Cyberware Capacity by +2, +3, +4 or +6 each, depending on their tier. They drop from enemies, police scanner activities and airdrops until you have them all: 60 capacity from the base game and 14 more from Phantom Liberty. With all of them, you have 310 Cyberware Capacity, and 360 with Edgerunner.
That is enough room for three more expensive pieces. These are the swaps I make:
| Slot | Swap out | Swap in | Extra capacity |
|---|---|---|---|
| Frontal Cortex | Memory Boost | COX-2 Cybersomatic Optimizer | +32 |
| Face | Kiroshi “Clairvoyant” Optics | Kiroshi “Cockatrice” Optics | +22 |
| Skeleton | Spring Joints | Para Bellum | +7 |
- COX-2 Cybersomatic Optimizer: Quickhacks can crit with 100% Crit Chance, and +10% quickhack damage at 20 Intelligence. Short Circuit and Synapse Burnout always crit.
- Kiroshi “Cockatrice” Optics: +35% Crit Chance for the Monowire and the Shingen.
- Para Bellum: +12% Armor for the front line.
That brings the total to about 320 of 360. You are about 10 points over 310, so Edgerunner only costs about -5% Max Health.
The COX-2 is sold by Dogtown Ripperdocs, the Cockatrice Optics by Dogtown Ripperdocs from level 35, and Para Bellum by any Ripperdoc from level 20.
Quickhacks for the Cyberpunk 2077: Contagion Build
This Contagion Build for Cyberpunk 2077 runs six quickhacks, all at Tier 5++. Contagion and Overheat do the work, Cripple Movement and Cyberware Malfunction set up bosses, and Short Circuit and Synapse Burnout cover what poison and fire can’t.
- Important: The Monowire uploads Cripple Movement for free, so most of your RAM goes into Contagion and Overheat.
- Important 2: How to get Quickhacks for your build.
Contagion Build Quickhacks:
- Contagion (Groups, the core of the build)
- Overheat (Detonator, bosses)
- Cripple Movement (Setup, slotted in the Monowire)
 Cyberware Malfunction (Setup for bosses)
- Short Circuit (Robots, drones and turrets)
 Synapse Burnout (Overclock finisher)
1. Contagion
(Tier 5++): The core of the build. Poison damage over time that spreads to up to 4 enemies within 8 metres, and every enemy it jumps to takes +15% more damage from it. It stacks twice. Burn or Overheat on an infected enemy detonates the poison, which also removes Contagion, so I only set it off once the whole group has it. It doesn’t work on mechs, robots, drones and turrets.
2. Overheat
(Tier 5++): My detonator and my boss killer. Sets the enemy on fire. At Tier 5 it also melts their armor over time, up to -40%, uploading it again extends the duration, every hit on them extends it a little, and every attack on them deals bonus Thermal damage on top. On an enemy with Contagion, it detonates the poison.
(Tier 5++): The one I slot into the Monowire. The enemy can’t move or dodge for 12 seconds, takes +15% melee damage, and is easier to finish. Every Finisher on them gives +5% Health and +2 RAM back. It is a Control quickhack, so Embedded Exploit, ICEpick and Queue Hack_Root all work off it.
(Tier 5++): The opener for bosses. It disables the enemy’s cyberware and raises all damage against them by 15% per stack at Tier 5++, stacking up to 8 times. It is a Control quickhack too, so Contagion and Overheat right after it are cheaper and stronger.
(Tier 5++): Fast and cheap Electrical damage, with extra damage against mechs, robots, drones and turrets. Those are exactly the enemies Contagion can’t touch.
(Tier 5++): My Overclock finisher. It deals more damage for every RAM unit you have spent, and while Overclock is active that bonus goes up by 100%. A kill with it extends Overclock by 3 seconds. I only use it when one tough enemy has to die fast.
The extra slots: The Biotech Σ Mk.4 has 8 slots, so there is room for two more. I put  Ping there, which reveals every enemy and device on the local network before the fight starts. The last slot is free for whatever the gig needs.
How to get Quickhacks in Cyberpunk 2077
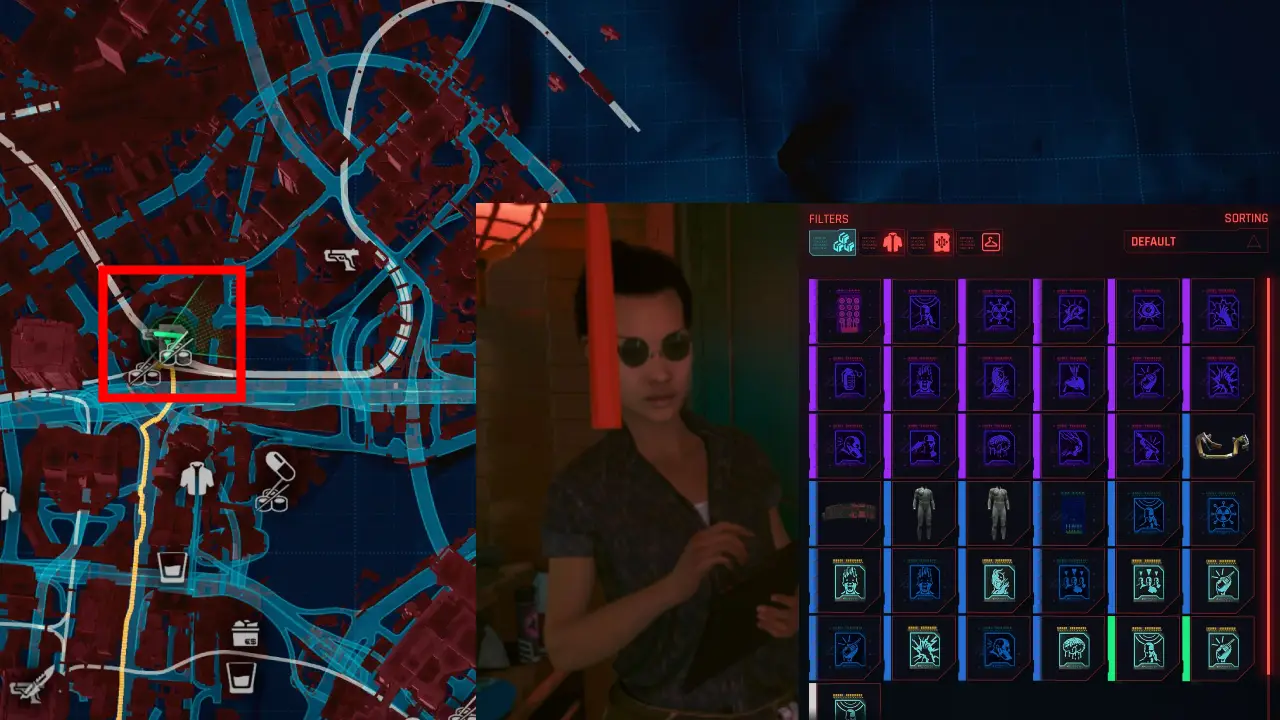
In Night City, quickhack progression is tied to your character level. Vendors, world loot and crafting options scale up every 10 levels.
Netrunner Vendors sell Quickhacks
Netrunner Vendors will sell you Quickhacks depending on your level.
- Tier 1: Level 1-9
- Tier 2: Level 10-19
- Tier 3: Level 20-29
- Tier 4: Level 30-39
- Tier 5: Level 40-44
- Tier Iconic: Level 45-50 (Only in Dogtown)
This means you can keep going back to the same Netrunner vendor when you reach a new level threshold.
Crafting Components
Always hack every Access Point you see. They give you free materials and sometimes even free Quickhacks. Use them to craft and upgrade the quickhacks above.
Weapons for the Contagion Build in Cyberpunk 2077

The Shingen sets them on fire: Quickhacks spread the poison, the Monowire shreds the infected, and the Smart gun detonates them. I carry two Smart weapons for that, plus one for robots and drones.
- Intelligence perks like Targeting Prism, Smart Synergy and Recirculation boost Smart weapons.
- The Smart Link is required, or Smart weapons can’t lock on.
- Burn is what detonates Contagion. Any weapon with Thermal damage and a Burn chance can do it, but only the Shingen does it to several enemies at once.
Upgrade: Weapons can be upgraded when you go to the crafting section and then swap to upgrades.
| Item | Description |
|---|---|
|
Prototype: Shingen Mark V |
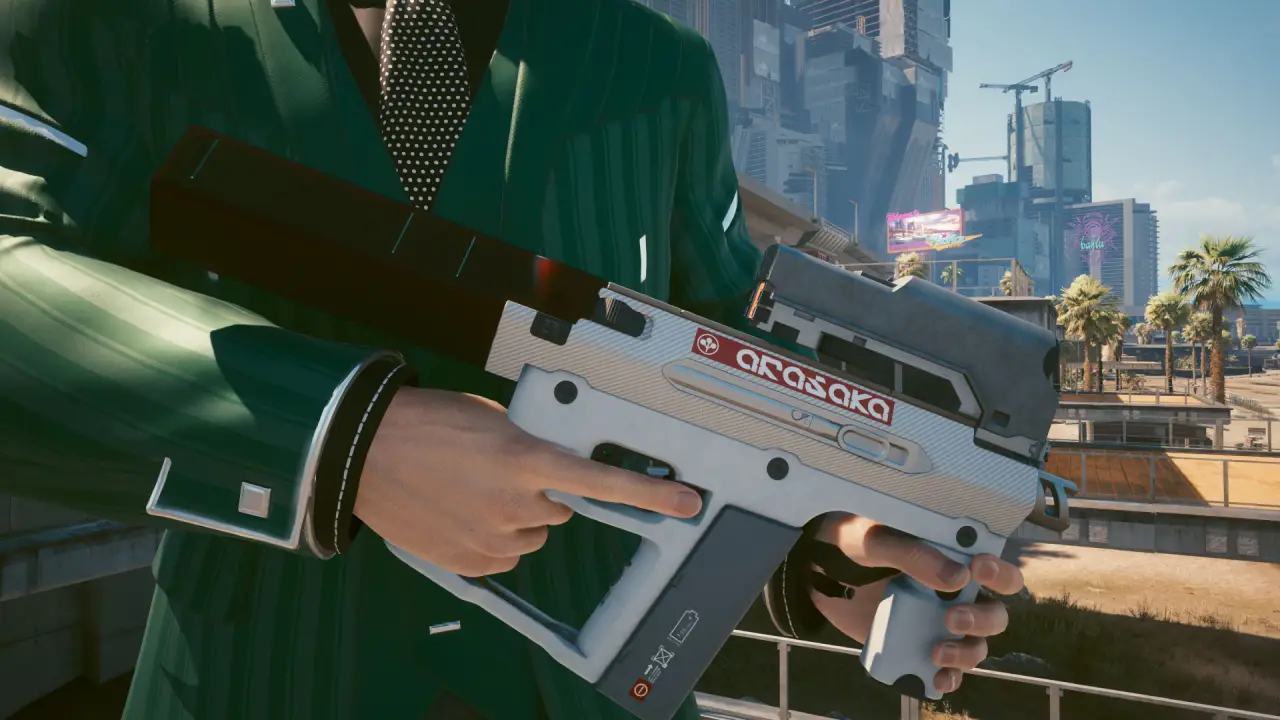
My main gun and my detonator. An Arasaka prototype Smart SMG with explosive rounds that deal Thermal damage with a chance to Burn. It tracks up to 3 targets while aiming, 4 with Targeting Prism, so one burst can set the poison off on the whole group. 30 rounds per magazine. |
Divided We Stand |
The poison rifle. An iconic Smart Assault Rifle with Chemical damage that locks on to up to 5 enemies at once, and its rounds can burst into clouds that Poison everyone inside. It can’t detonate Contagion, but Poison is a damage over time effect, so the Biotech Σ Monowire bonus and System Overwhelm both count it. |
|
Yinglong |
A Kang Tao Smart SMG that adds Electrical damage to every bullet, with a small chance to apply EMP. My pick against drones, turrets and mechs, the enemies Contagion can’t infect. |
Location of items:
- Prototype: Shingen Mark V: In container 667 at the Arasaka Industrial Park in Arroyo, Santo Domingo. See below.
- Divided We Stand: The side job Stadium Love in Rancho Coronado, Santo Domingo. See below.
- Yinglong: Crafting spec from the Suspected Organized Crime Activity Living the Big Life in Wellsprings, Heywood. See below.
Grenades: Incendiary Grenade. Every enemy it sets on fire detonates their Contagion, and Health Freak keeps them coming.
Health item: MaxDOC MK.5 for the big instant heal. The Biomonitor uses it for you when you drop below 50% Health.
Best Smart Weapons for a Contagion Build
Every weapon here works with the Smart Link, Targeting Prism, Smart Synergy and Recirculation. These are my top 3, from best to worst:
- Prototype: Shingen Mark V (Smart SMG): The best Smart weapon for detonating Contagion. Explosive rounds with a chance to Burn on up to 4 tracked targets, so one burst sets off the poison on a whole group. It lies in a container in Santo Domingo. How to get it.
- Divided We Stand (Smart Assault Rifle): The best Smart rifle for a poison build. Locks on to up to 5 enemies, and its Poison clouds stack another damage over time effect on the group. You win it in a shooting contest in Rancho Coronado. How to get it.
- Yinglong (Smart SMG): The best Smart weapon against robots and drones. Electrical damage and EMP for everything Contagion can’t infect. The crafting spec drops in Heywood. How to get it.
Burn is the key: If a Smart weapon has no Thermal damage, it can’t detonate Contagion. That is why the Shingen stays in my first slot, even next to Smart weapons that hit harder.
Prototype: Shingen Mark V (Iconic Smart SMG) – How To Get It
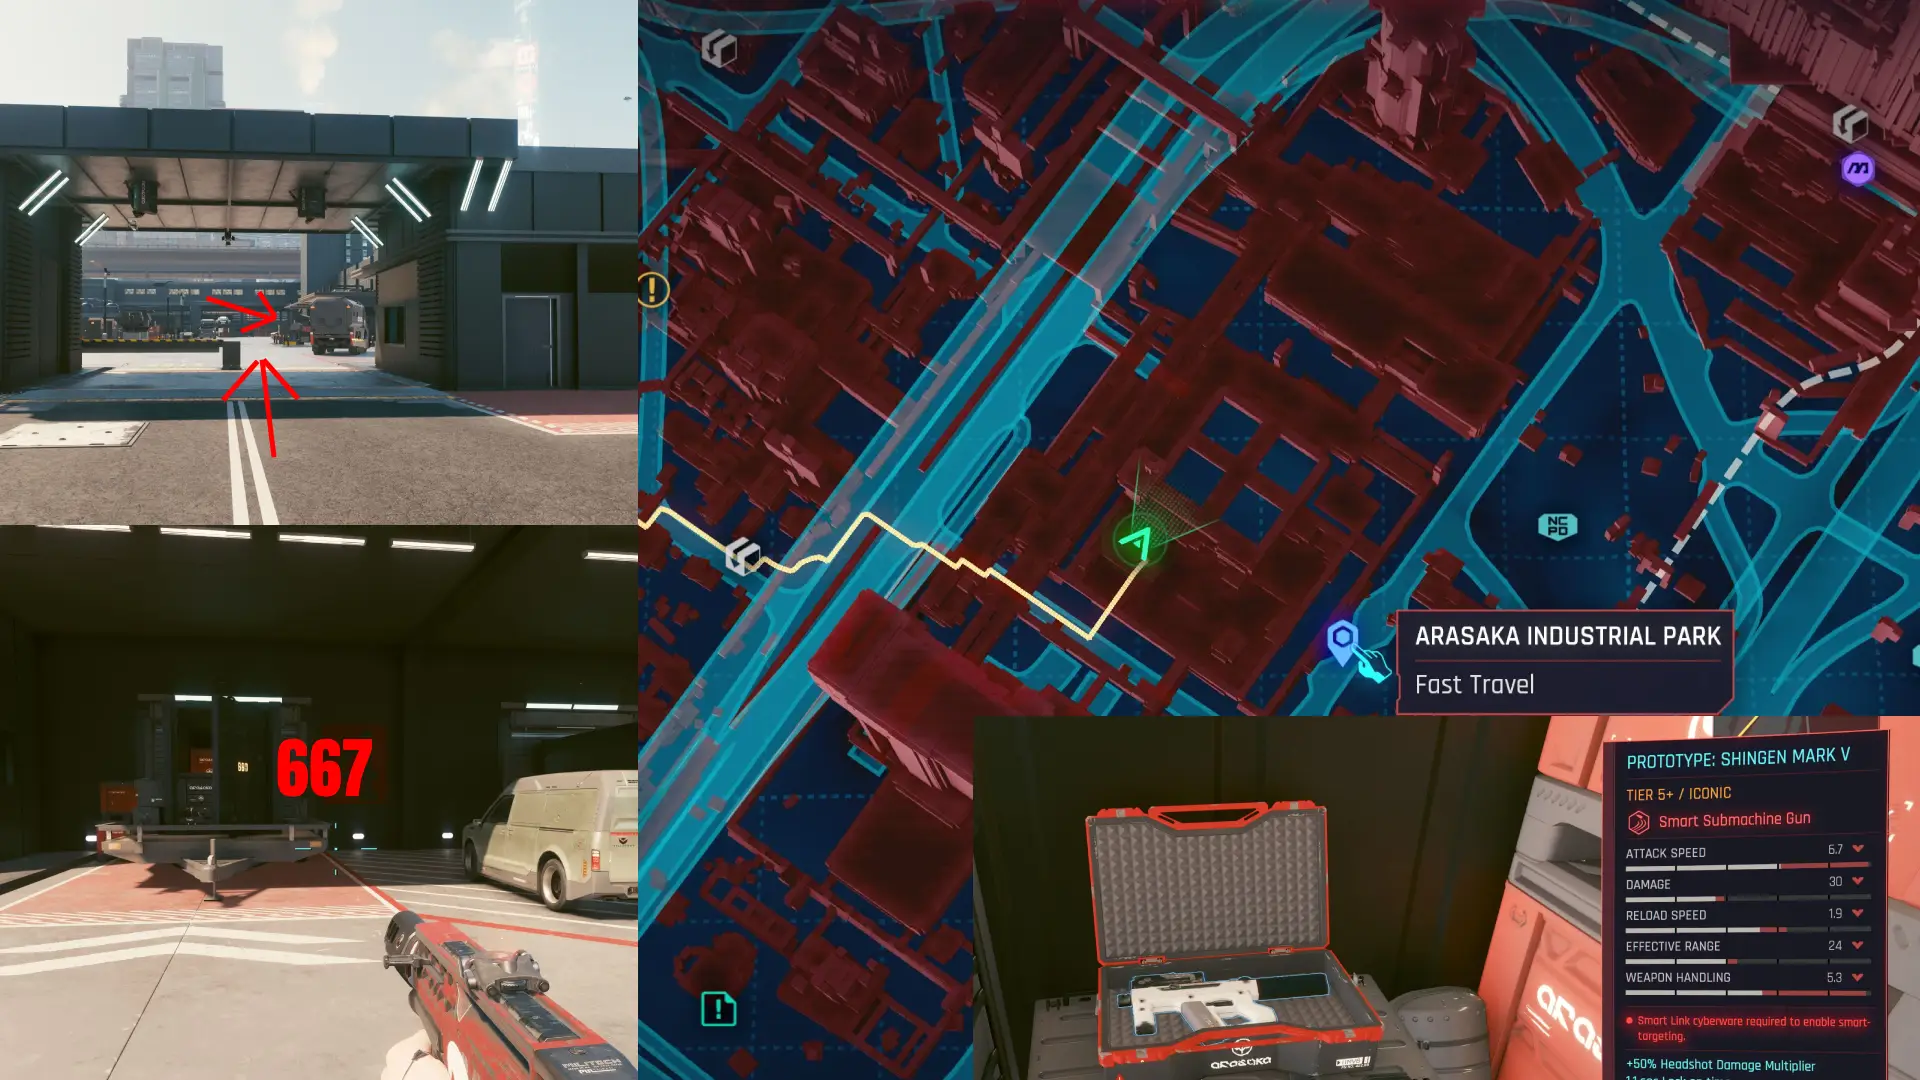
An Arasaka prototype that won’t hit the market for a few years, sitting in a shipping container. It is the gun this build is built around.
- Prerequisites: Santo Domingo has to be open, which happens after Act 1.
- Where: The Arasaka Industrial Park in Arroyo, Santo Domingo.
- How to Get It: It is inside container 667 at the end of the exterior loading dock, west of the warehouse’s main entrance.
- What to Do: The container has a mine inside, so disarm it before you grab the gun. The park is guarded by Arasaka, so either sneak in or pick it up during the main job Gimme Danger, which takes you into the same compound.
- Note: If you missed it, Herold Lowe at the EBM Petrochem Stadium (Phantom Liberty) sells missed iconics.
Divided We Stand (Iconic Smart Assault Rifle) – How To Get It

A 6th Street prize that you can win fair and square, or take by force.
- Prerequisites: Finish the main job Playing for Time.
- Where: The side job Stadium Love on a rooftop in Rancho Coronado, Santo Domingo, where the 6th Street are partying. The job only shows up once you get close.
- How to Get It: Win the shooting contest and take the rifle from the table.
- What to Do: Talk to the 6th Street leader and join the competition. There are 4 stations, and at each one you have 12 seconds to hit 11 targets. You need all 44 to win.
- Note: If you miss a target, you can still fight the gang and loot the rifle instead.
Yinglong (Iconic Smart SMG) – How To Get It

“A genius among smartguns.” The Yinglong handles everything that doesn’t bleed poison.
- Prerequisites: None.
- Where: Wellsprings in Heywood, at the Suspected Organized Crime Activity Living the Big Life.
- How to Get It: Defeat Denzel Cryer, “The Brain”, and loot the crafting spec.
- What to Do: Craft the Yinglong from the spec in your crafting menu, then upgrade it to Tier 5++.
Gear for the Contagion Build in Cyberpunk 2077

Since gear is mostly cosmetic, you can wear whatever you want. All of this build’s defense comes from cyberware instead, mainly Chitin, Neofiber, the Epimorphic Skeleton and Adrenaline Rush.
Change the look of your Monowire: Update 2.5 added Glamdocs, so your Monowire can match your outfit too. Visit one of the 5 Glamdocs (spray paint icon on the map) to give it a new look. It is cosmetic only, so the stats and the Burn stay the same.
For the look, I went for a toxic corpo: a green suit and a gas mask, since I spend every fight standing in my own poison cloud. These are the pieces:
- Face: Old Plastic Gas Mask
- Location: The clothing vendor in Red Peaks, the Badlands.
- Outer Torso: Emerald Pheromone-Infused 2-Piece
- Location: Can be purchased from Satoshi Ueno at Longshore Stacks, Dogtown.
- Legs: NUS Infiltrator Pants
- Location: The clothing vendor on the raised walkway north of Regina Jones in Kabuki, Watson, or Saeko’s in Japantown, near the Sagan & Diamond fast travel point. Update 2.5 added the whole NUS Infiltrator set to the shops.
- Feet: Robust Spunky Monkey Kicks
- Location: Blossoming Sakura Clothier in Westbrook, or Jinguji in Downtown, City Center.
Clothing vendors rotate their stock, so if an item isn’t there, skip 24 hours and check again.
Skill Progression in Cyberpunk 2077
This is often overlooked; in the character menu, you can actually click on “Skill Progression”. This will send you to a very powerful mechanic in Cyberpunk 2077.
By leveling up these trees you gain powerful effects.
For our Cyberpunk 2077: Contagion Build you want to focus on Netrunner, Engineer and Solo. Netrunner is the big one: every quickhack, Monowire kill and Smart weapon kill levels it. At level 20 Smart weapons lock on from 20% further away, at 45 Control quickhacks last 15% longer and Combat quickhacks deal 5% more damage, at 50 Overclock lasts 40% longer, at 55 you lose 10% less Health during Overclock, and at 60 Overclock reveals nearby enemies and lets you hack through cover. Engineer gives you the extra Cyberware Capacity this build counts on, and Solo adds Max Health.
Netrunner (Intelligence)
- Level 5: +5% RAM Recovery Rate
- Level 10: +1 Max RAM
- Level 15: +1 Perk Point
- Level 20: +20% Smart Weapon lock-on range
- Level 25: +5% RAM Recovery Rate
- Level 30: +1 Max RAM
- Level 35: +1 Perk Point
- Level 40: -20% RAM cost for hacking devices/vehicles
- Level 45: +15% Control/Covert duration; +5% Combat hack damage
- Level 50: +40% Overclock duration
- Level 55: -10% Health loss during Overclock
- Level 60: Overclock Mode: Reveals enemies (10m) & hacks through cover
How to Level Up Netrunner (Intelligence)
- Looting Skill Shards from chests and enemies.
- Use offensive, control, or covert quickhacks on enemies during combat.
- Hack environmental objects, security cameras, and devices to distract enemies or trigger explosions.
- Successfully jack into and hack Access Points (Data Terminals) using Breach Protocol.
- Defeat enemies using Smart weapons or the Monowire.
Engineer (Technical Ability)
- Level 5: +15 Armor
- Level 10: +5 Cyberware Capacity
- Level 15: +1 Perk Point
- Level 20: +10% Grenade damage & explosion radius
- Level 25: +25 Armor
- Level 30: +10 Cyberware Capacity
- Level 35: +1 Perk Point
- Level 40: Increased Shock chance when charging Tech weapons
- Level 45: +15% Health Item effectiveness
- Level 50: +30% to all Cyberware stat modifiers
- Level 55: +10% Bolt damage, +40% Bolt burn, Chain Lightning burns
- Level 60: Fury Mode: You occasionally release a massive EMP blast
How to Level Up Engineer (Technical Ability)
- Looting Skill Shards from chests and enemies.
- Defeat enemies using Tech weapons, especially by firing fully charged shots or Bolt shots.
- Get kills using damage-dealing grenades or the Projectile Launch System (PLS) cyberware.
- Craft new weapons, quickhacks, and item components.
- Upgrade weapons and cyberware at Ripperdocs or through your crafting menu.
- Dismantle weapons, armor, and junk items into crafting components.
Solo (Body)
- Level 5: +50 Carrying Capacity
- Level 10: +10 Max Health
- Level 15: +1 Perk Point
- Level 20: +20% Fist/Gorilla Arms damage & speed (Fists bleed)
- Level 25: +100 Carrying Capacity
- Level 30: +15% Max Health
- Level 35: +1 Perk Point
- Level 40: +10% Crit Chance within 5 meters
- Level 45: +25% Strong/Quick Melee damage
- Level 50: +25% Health after performing a Finisher
- Level 55: Adrenaline decays 50% slower, min 10% floor
- Level 60: Berserk Mode: +30% Finisher threshold, +50% Finisher heal, +30% duration
How to Level Up Solo (Body)
- Looting Skill Shards from chests and enemies.
- Defeat enemies using Heavy Weapons (Shotguns, Light Machine Guns, and Heavy Machine Guns).
- Defeat enemies using blunt weapons, Gorilla Arms, or bare fists.
- Force open locked doors, rip heavy turrets from their mounts, and pass physical Body attribute checks in the world.
- Execute physical melee finishers.
Shinobi (Reflexes)
- Level 5: +5% Movement Speed
- Level 10: -5% Dodge/Dash Stamina cost
- Level 15: +1 Perk Point
- Level 20: Better accuracy after dodging/dashing
- Level 25: +5% Movement Speed
- Level 30: -10% Dodge/Dash Stamina cost
- Level 35: +1 Perk Point
- Level 40: Increased Mitigation Chance the faster you move
- Level 45: +25% Fast Attack damage
- Level 50: Sliding & Air Dashing reload 20% of your weapon
- Level 55: Mid-air/Slow-mo: low stamina does not penalize combat
- Level 60: Sandevistan Mode: +40% Crit Chance; No movement Stamina cost
How to Level Up Shinobi (Reflexes)
- Looting Skill Shards from chests and enemies.
- Defeat enemies using blade weapons (Katanas, Machetes, Chainswords, or Mantis Blades).
- Actively dodge, dash, air-dash, slide, and vault while in active combat.
- Defeat enemies using Assault Rifles or Submachine Guns (SMGs), especially while moving at high speeds.
Headhunter (Cool)
- Level 5: -10% Visibility to enemies
- Level 10: +10% Headshot & Vulnerability damage
- Level 15: +1 Perk Point
- Level 20: No weapon sway when crouched
- Level 25: -10% Visibility to enemies
- Level 30: +15% Headshot & Vulnerability damage
- Level 35: +1 Perk Point
- Level 40: Optical Camo is active while grappling enemies
- Level 45: -30% Recovery time after a throw
- Level 50: +30% Crouch walk & sprint speed
- Level 55: Undetected damage bonus lasts 3s in combat
- Level 60: +15% Optical Camo charge on stealth/special kills
How to Level Up Headhunter (Cool)
- Looting Skill Shards from chests and enemies.
- Perform stealth takedowns and neutralizations on unaware enemies.
- Get headshots and hit enemy weakspots using any weapon type.
- Defeat enemies using pistols, revolvers, sniper rifles, precision rifles, or thrown weapons (knives and axes).
- Deal damage and secure kills while crouching or using Optical Camo.
Leveling Tips for the Contagion Build in Cyberpunk 2077
Here are a few general leveling tips for the Contagion Build in Cyberpunk 2077.
- Perfect Start
- How to make Money
- Upgrade Weapons
- How Gear Scaling Works
- How to get Perk Points Fast
- Dogtown Consumables
Perfect Start in Cyberpunk 2077
Here are the steps that I recommend taking with a new Cyberpunk 2077 playthrough.
Starter Build: You can also check out my Cyberpunk 2077 Starter Build that takes you from level 1 to level 15.
- Regular Start (Don’t skip ahead to Phantom Liberty).
- Immediately after the prologue, once you are out of your room and go downstairs before you enter the elevator.
- Weapon Vendor: Buy the Iconic pistol Dying Night.
- Coach Fred: Capacity Boosters (in case you get over capacity so you can still move).
- Buff Routine: Sleep & Shower. This gives you 20% Skill XP acquisition and Health Regen.
- Watson Clean Sweep (NCPD Missions):
- Watson is the first district you play in.
- Clearing all missions takes 1-2 hours. This will give you at least 10 levels, 15 Street Cred and over 150k Eddies Cash.
- Loot all enemies and either disassemble for materials or sell them at the vendor for extra Eddies.
- Get the Fenrir SMG from the monk mission. This SMG is insanely good at the start because it often stuns enemies.
- As soon as Santo Domingo opens after Act 1, grab the Prototype: Shingen Mark V from the Arasaka Industrial Park. It carries this build for the rest of the game.
- Visit a Ripperdoc at level 10: After you have enough money, it’s time to get chromed up.
- Thermal Monowire (Arms): Sold from level 10. Your close-range weapon from here on, and Siphon refills your RAM with it.
- Biotech Σ (Operating System): The Mk.1 is for sale from level 10. Upgrade it as you go, it is the cyberdeck this build ends with.
- Smart Link (Hands): So Smart weapons can lock on.
- Reinforced Tendons (Legs): Allow you to double jump
- Blood Pump (Circulatory System): A second health item.
- Whatever else you can fit!
- Time to start playing for real. The Pickup mission is waiting for you!
How to make Money
It is actually fairly easy to make money in Cyberpunk 2077. The best way to make money is to clear all the NCPD and Cyberpsycho missions in each district. As previously mentioned, clearing most of the Watson district NCPD mission alone already gives you approximately 150k Eddies Cash.
Upgrade Weapons
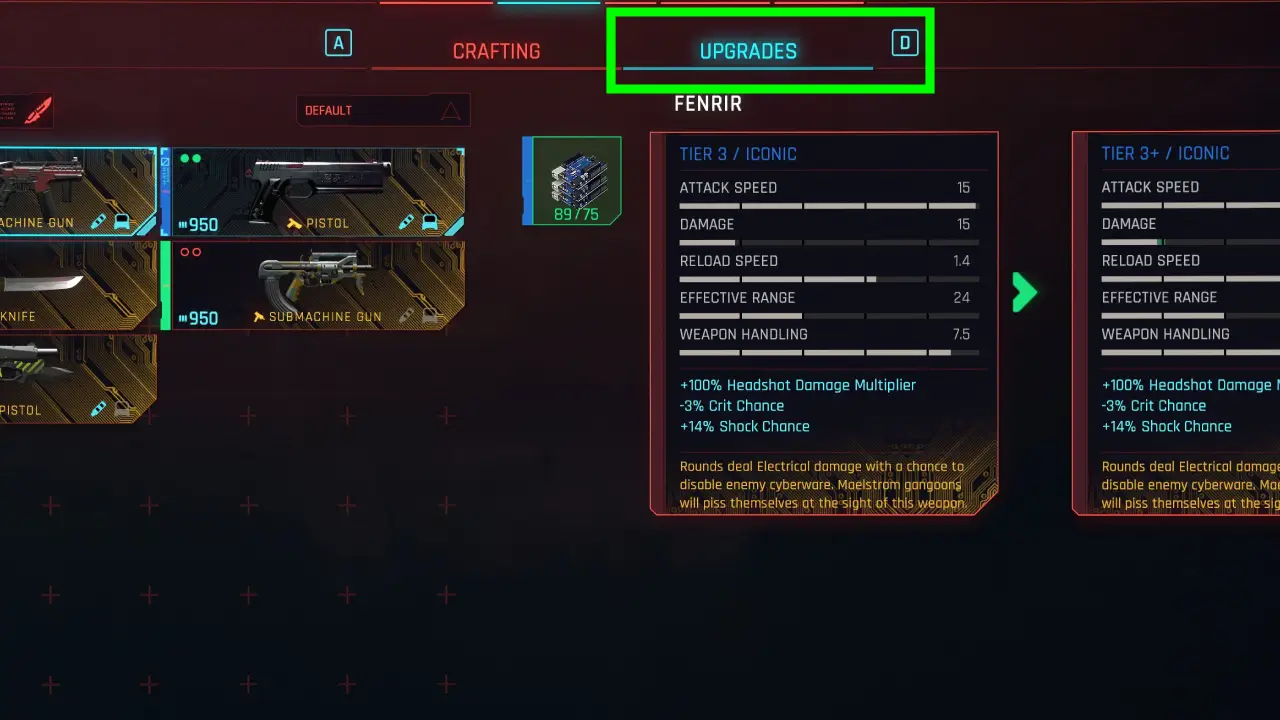
This often gets overlooked, but you can upgrade early-game weapons in Cyberpunk 2077. Go to the crafting section, then move to the Upgrade tab. Here you can upgrade all weapons if you have the necessary crafting components.
Gear Scaling in Cyberpunk 2077
Gear scaling is automated in Cyberpunk 2077. The moment you reach a certain level, you will start finding more and more high-quality items. Meaning the faster you reach a higher level the sooner you will find better gear from chests or enemies. That counts for Gear, Weapons, Cyberware, Outfits, etc.
- Tier 1: Level 1-9
- Tier 2: Level 10-19
- Tier 3: Level 20-29
- Tier 4: Level 30-39
- Tier 5: Level 40-44
- Tier Iconic: Level 45-50
How to get Perk Points in Cyberpunk 2077
You need Perk Points to unlock additional Perks for the Contagion Build in Cyberpunk 2077. Perks are the bread and butter of any CP2077 Build, as they significantly enhance your power.
- You get one Perk Point per character level.
- Skill Progression awards you with Perk Points.
- You can farm up to 13 Perk Shards (10 base game, 3 Phantom Liberty DLC)
Perk Point per Character Level
Not much needs to be said here; leveling up gives you one extra Perk Point.
Skill Progression
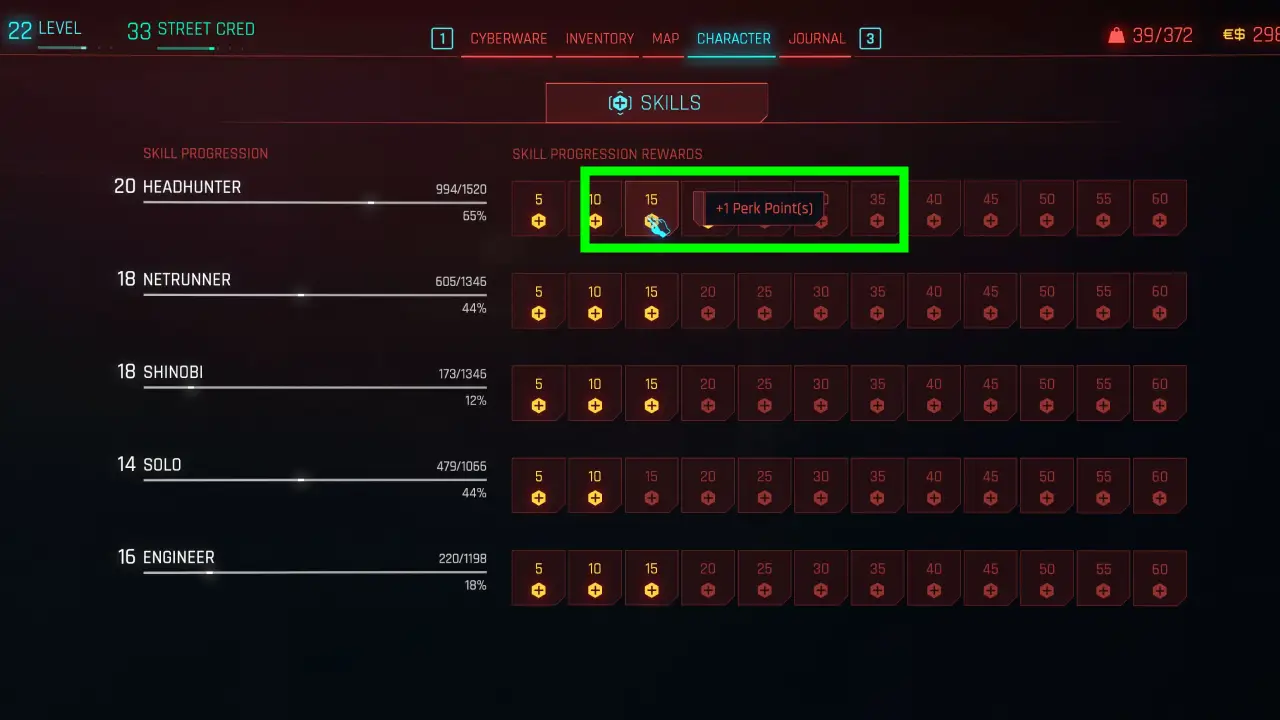
This is often overlooked; the Skill Progression system also awards you Perk Points at 15 and 35. So you can get an additional 10 Perk Points from this.
Character menu > bottom right Skill Progression.
Perk Shards
There are 10 base-game Perk Shards and 3 Phantom Liberty DLC Perk Shards you can collect to earn additional perks in Cyberpunk 2077.
Read Guide: All 13 Perk Shard Locations in Cyberpunk 2077
Here is the full list, click on the hyperlink of each location to see images, it will send you to the full Cyberpunk 2077: Perk Shards Location Guide.
| Shard # | Exact Sub-Location | District | Nearest Fast Travel Point | Source Content |
|---|---|---|---|---|
| 1 | Abandoned Warehouse A B C (Garages) | Watson (Northside) | Offshore Street | Base Game |
| 2 | NCPD Scanner Alert (Car Trunk) | Westbrook (Japantown) | Dark Matter | Base Game |
| 3 | Roadside Crash Site (Billboard/Drone) | The Badlands | Sunset Motel | Base Game |
| 4 | Suspected Organized Crime Activity (NCPD) | The Badlands | Sunset Motel | Base Game |
| 5 | Dead Maintenance Worker at Ventilation Shaft | City Center (Corpo Plaza) | Corpo Plaza Apartment | Base Game |
| 6 | At Memorial Park, in a chest during NCPD Assault | City Center (Corpo Plaza) | Arasaka Tower | Base Game |
| 7 | Gang Activity under Bridge (NCPD) | Heywood (The Glen) | Ventura & Skyline | Base Game |
| 8 | Arasaka Park Entrance Building Upstairs | Santo Domingo (Arroyo) | Arasaka Industrial Park | Base Game |
| 9 | Reported Crime Garage (NCPD) | Santo Domingo (Rancho Coronado) | Woodhaven Street | Base Game |
| 10 | Riverside Garage (NCPD) | Santo Domingo (Arroyo) | Red Dirt Bar | Base Game |
| 11 | “Dog Eat Dog” Starter Quest | Dogtown | Dogtown Entrance | Phantom Liberty DLC |
| 12 | Red Van Junk Shop (Marcin) inside EBM Petrochem Stadium | Dogtown | EBM Petrochem Stadium | Phantom Liberty DLC |
| 13 | Longshore Stacks below Jung Store behind cardboard | Dogtown | Longshore Stacks | Phantom Liberty DLC |
Dogtown Consumables (Phantom Liberty DLC)
During the starter quest of the Phantom Liberty DLC in Cyberpunk 2077 called “Dog Eat Dog” you eventually enter the marketplace area (You can also access the area later at any time). Here you can buy various new stuff that isn’t available in the base game.
Some vendors also sell permanent consumable upgrades, 12k each. Best you go talk to all the vendors in that area and see what they offer.
- Bartender Shop: Dendritic Protoplasma Supplier permanent +1% Ram Recovery Rate.
- Netrunner Shop: Dendritic Protoplasma Supplier permanent +2% Ram Recovery Rate.
- Note: The items are called the same, but they both work, so you get a total of 3% Ram Recovery Rate.
- Food Vendor: Prototype Pseudo Embryonic Cell Builder permanent +2 Health.
- Meds Vendor: Prototype Pseudo Embryonic Cell Builder permanent +3 Health.
- Note: The items are called the same, but they both work, so you get a total of +5 Health.
- Note: You find the Meds vendor on the opposite side of the Netrunner Vendor in a hallway.
- Food Vendor: Military-Grade Lactic Acid Recyclers: +1% Stamina Regen Rate.
- Herold Weapon Vendor: Sells you all the Iconic Weapons you have missed during your playthrough.
- Marcin/ Michal Kicinski Junk Vendor: 1 Perk Shard and 1 Progression Shard of each type.
Additionally, make sure to check all other vendors in Dogtown. For example at the Longshore Stacks fast travel point, you also have vendors that sell you permanent upgrades.
Cyberpunk 2077 Contagion Build FAQ
What is the best Contagion build in Cyberpunk 2077?
Mine combines Contagion and Overheat with the Biotech Σ cyberdeck, the Thermal Monowire and the Prototype: Shingen Mark V. Contagion spreads poison through the group, and Burn from the Shingen, the Monowire or Overheat detonates it. Build overview.
How do you detonate Contagion?
Apply Burn or Overheat to an enemy that has Contagion on them. The poison detonates in an explosion and Contagion is removed, so wait until the whole group is infected. How I detonate it.
Is Contagion good in Patch 2.5?
Yes. At Tier 5 it spreads to up to 4 enemies within 8 metres, every enemy it jumps to takes more damage, and it stacks twice. With the Biotech Σ it lasts 15% longer and ticks 10% harder.
Does Overheat detonate Contagion?
Yes, Overheat and any other source of Burn detonate it. On bosses, I upload Contagion first and then 2x Overheat, so the first one sets off the poison and the second keeps them burning while their armor melts. My rotation.
What is the best cyberdeck for a Contagion build?
The Biotech Σ Mk.4. It gives +15% duration for Combat quickhacks, +10% damage over time from quickhacks, +25% Monowire damage against enemies with a damage over time effect, and activating Overclock resets the duration of your quickhack damage over time effects. Operating System.
What is the best weapon for a Contagion build?
The Prototype: Shingen Mark V. Its explosive smart rounds can Burn up to 4 locked targets at once, and every Burn detonates the poison. Best Smart Weapons.
Where do I get the Prototype: Shingen Mark V?
In container 667 at the end of the exterior loading dock of the Arasaka Industrial Park in Arroyo, Santo Domingo. Disarm the mine inside first. How to get it.
Which quickhack should I put in the Monowire?
Cripple Movement. Jailbreak only takes Control quickhacks, so Contagion and Overheat have to be uploaded by hand. Cripple Movement holds the group in place and makes the Monowire hit harder. How to use the Thermal Monowire.
Does Contagion work on robots and drones?
No. Contagion doesn’t work on mechs, robots, drones and turrets. Use Short Circuit or the Yinglong on those.
Can I play the Contagion Build without Phantom Liberty?
Yes. You lose Jailbreak, Data Tunneling, Chitin and the COX-2, so you upload Cripple Movement by hand and use the ProxiShield in place of Chitin. Contagion, Overheat, the Biotech Σ, the Thermal Monowire and the Shingen are all in the base game.