


Welcome to the best Lucy Build for Cyberpunk 2077 (Patch 2.3). Lucy is one of the most popular characters in Cyberpunk Edgerunners. This build will stay true to her identity as a netrunner in the anime.
The Lucy Build focuses on netrunning, relying on high-grade quickhack combos to annihilate enemies in Cyberpunk 2077.
Table of Contents for the Lucy Build:
- Build Overview
- Attributes
- Perks (Skills)
- Cyberware
- Quickhacks
- Weapons
- Gear
- Skill Progression
- Leveling Tips
- Lucy Character Model Creation
Strengths and Weaknesses list for the Lucy Netrunner Build:
Strengths
Weaknesses
Cyberpunk 2077 Lucy Build Overview
This Cyberpunk 2077: Lucy Netrunner Build focuses on dealing insane damage with quickhacks and maintaining stealth at all times. The Lucy Build also never runs out of RAM, letting you use Quickhacks indefinitely to annihilate enemies. And the best part, they won’t even know when bodies drop dead to the ground because of invisibility kills.
Attributes – Lucy Netrunner Build
Distributing Attributes correctly for the Lucy Netrunner Build is important. Attributes delegate the direction of the build and give access to different tier of perks depending how much points you invest in each category.
The Cyberpunk 2077 Lucy Build’s primary Attribute is  Intelligence. We also invest points in
  Technical Ability,
  Reflexes,
  Cool and
  Body to get some nice extra features for our build.
Lucy Netrunner Start Attributes
At the start of the game, select the following Attribute allocation to give us the optimal start for the Lucy Build (Edgerunner) in Cyberpunk 2077.
| Attribute | Points | Description |
|---|---|---|
|
|
+3 |
|
|
Technical Ability |
+1 |
|
|
Reflexes |
+1 |
|
|
Cool |
None |
|
|
Body |
+2 |
|
Max Level Attributes
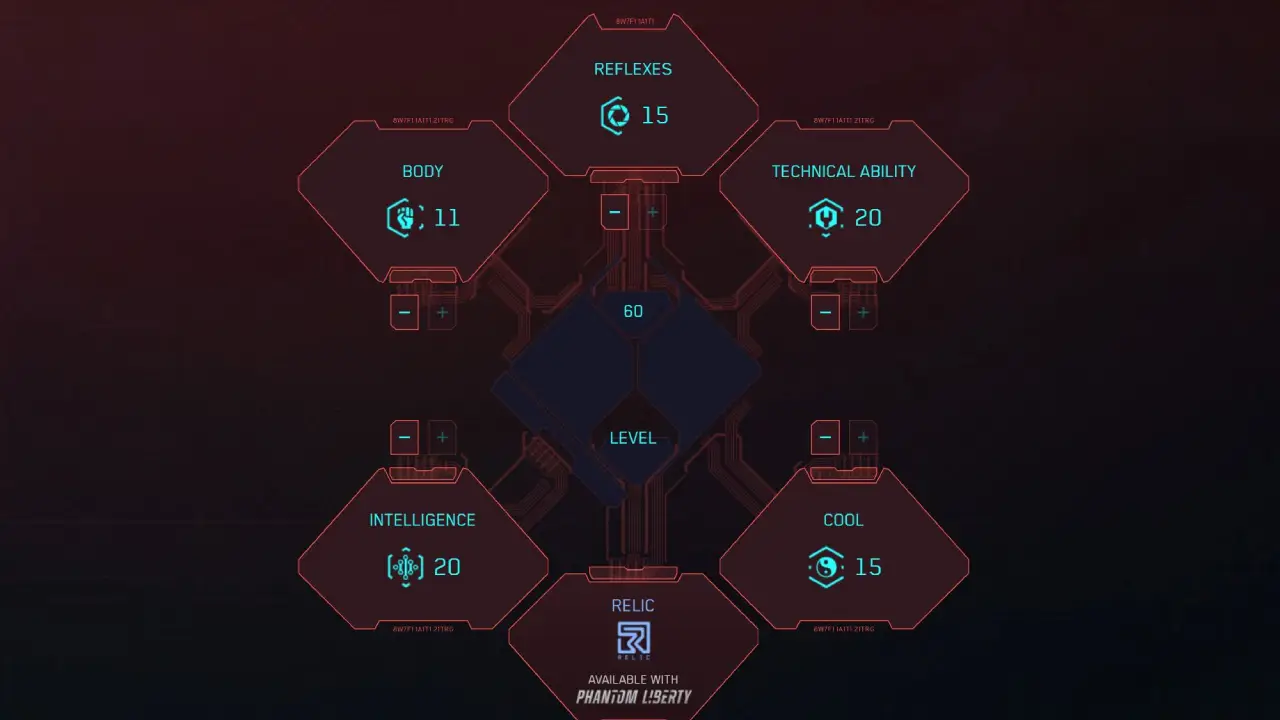
At max level, you want to have the following distribution of Attributes for the Lucy Netrunner Build for Cyberpunk 2077:
 20 Intelligence
- 20 Technical Ability
- 15 Reflexes
- 15 Cool
- 11 Body
Perks – Lucy Build Cyberpunk 2077
In this section of the Cyberpunk 2077 Lucy Build (Netrunner), I will explain the perks that we use for each attribute.
Perk Points: To get perk points, you can either simply level up or farm Perk Shards. Read our guide on all 13 Perk Shard Locations in Cyberpunk 2077, with map locations, screenshots, and the nearest fast travel point for each shard.
Intelligence Perks

The Intelligence Perk-Tree is the bread and butter of our Netrunner Lucy Build in Cyberpunk 2077. It is highly recommended that this tree be prioritized.
Perk Prioritization: Prioritize perks in bold.
Level 4 Perks
The level 4 Perks lay the foundation for our Netrunner Lucy Build in Cyberpunk 2077.
| Perk | Description |
|---|---|

|
Automatically highlights network-connected cameras and access points, while reducing RAM costs for hacks uploaded through them. |

|
Passively boosts your RAM recovery rate by 35%. This is the foundational resource perk for any Netrunner build, ensuring you rarely run dry during prolonged engagements. |

|
Reduces the RAM cost of your quickhacks the closer you are to the target (up to 35%). Highly valuable for aggressive, mobile Netrunners who like to fight in close quarters. |

|
Doubles the duration of Control quickhacks when uploaded to enemies with full health. Perfect for stealth openers or locking down elite threats before they can trigger combat. |

|
Unlocks specialized vehicle quickhacks, allowing you to take remote control, force sudden braking, or trigger self-destruction. Provides excellent tactical options and chaos during high-speed chases. |
Level 9 Perks
Level 9 perks are already very powerful and you will notice a huge boost in performance with your build once you unlock them.
| Perk | Description |
|---|---|

|
Unlocks the ability to queue up to 2 quickhacks on a single target, speeding up the upload of the second hack. This acts as the mandatory mechanical foundation for executing advanced multi-hack combos. |

|
Recovers 80% of the RAM cost for any remaining quickhacks left in a target’s queue when they are eliminated. Guarantees zero wasted memory if an early hack in your queue unexpectedly kills the target. |

|
Grants a temporary 25% RAM recovery speed boost for each quickhack currently waiting in an upload queue. Keeps your resource pool actively regenerating while your offensive combos are deploying. |

|
Significantly increases quickhack damage against targets already affected by Control, Covert, or Distract hacks. Provides a massive damage multiplier for execution-style combat quickhacks. |

|
Instantly clears 100% of enemy trace progress immediately after performing a physical stealth Takedown. Essential for ghost-style Netrunners looking to prevent enemy detection entirely. |

|
Reduces the RAM cost of Combat quickhacks when targeting enemies already impaired by Control or Covert effects. Maximizes resource efficiency when layering multiple debuffs. |

|
Refunds 25% of the total RAM cost of all active quickhacks on a target upon neutralizing them. Highly valuable for sustaining your RAM economy when clearing out dense groups of enemies. |

|
Increases quickhack damage exponentially for each unique effect or damage-over-time status active on the target. This is your primary scaling tool for melting bosses and cyberpsychos with multi-stacking setups. |
Level 15 Perks
At level 15 you get even stronger perks. Now you area already a very powerful Netrunner in Cyberpunk 2077.
| Perk | Description |
|---|---|

|
Expands your max queue size to 3 slots and boosts upload speed for subsequent hacks. Allows you to rapidly overload tough targets before enemy Netrunners can pinpoint your position. |

|
Increases upload speed by 50% for your initial quickhack if multiple hacks are queued up. Ensures your opening tactical strike lands instantly before the target can react or move away. |

|
Unlocks a devastating close-range Monowire Finisher that instantly restores 15% Health and RAM. Provides a crucial hybrid melee option to top off your vitals and resources mid-combat. |

|
Reduces RAM cost for subsequent hacks in a queue if they belong to different categories. Greatly rewards creative players who actively weave together Covert, Control, and Combat hacks. |

|
Unlocks Overclock mode, allowing you to spend Health instead of RAM to cast quickhacks when your pool runs dry. The absolute ultimate power spike for Netrunners, letting you wipe out entire squads in seconds. |
Level 20 Perks
I recommend unlocking level 20 perks only once you get into tougher content. Basically, when you “feel” the game gets difficult. Otherwise, I would first prioritize other trees.
| Perk | Description |
|---|---|

|
Expands your maximum queue to 4 slots, cuts the RAM cost of the final hack in half, and boosts its damage by 50%. The absolute pinnacle of single-target execution and boss-shredding. |

|
Grants a massive 50% chance for your quickhacks to automatically spread to adjacent targets while Overclock is active. Turns single-target status effects into room-clearing, apocalyptic area-of-effect chains. |
Technical Ability Perks

The Technical Ability Perk-Tree is also important; we focus mainly on the perks that give us Cyberware upgrades. This is great for our Cyberpunk 2077: Lucy Build.
Perk Prioritization: Prioritize perks in bold.
Level 4 Perks
We don’t use any level 4 perks.
Level 9 Perks
Level 9 perks offer extra effects for your Cyberware, which is important when you eventually want to min-max a build.
| Perk | Description |
|---|---|

|
Enhances cyberware stat modifiers and reduces capacity costs for Skeleton and Integumentary cyberware. Essential for squeezing in more heavy chrome while heavily amplifying your passive stats. |

|
Grants a permanent boost to your Cyberware Capacity based on how many attributes you have at level 9 or higher. A must-have perk for high-level builds to accommodate costly iconic cyberware. |

|
Adds a secondary stat modifier to all cyberware slots. This allows you to min-max critical passive stats like RAM recovery speed, quickhack damage, or critical hit chance. |

|
Gives you a choice between different stat modifiers whenever upgrading cyberware. Crucial for customizing your build’s passive bonuses and getting the exact rolls you want. |

|
Reduces all incoming damage by 5% if your Skeleton and Integumentary slots are fully occupied. Provides vital survivability, which is especially important when burning health during Overclock. |
Level 15 Perks
The level 15 perks focus on boosting our Cyberware stats more and also grants extra armor as well as some other useful stuff.
| Perk | Description |
|---|---|

|
Boosts all cyberware stat modifiers, grants bonus armor, and unlocks an extra Skeleton slot. Greatly amplifies your defense and passive attribute scaling across all equipped chrome. |

|
Reduces cyberware cooldowns by 15% if all of your available cyberware slots are filled. Extremely helpful for maintaining high uptime on critical utility cyberware and emergency healing items.. |

|
Increases the duration of all active cyberware effects by 15%. Keeps your powerful, short-duration combat cyberware active for longer during intense firefights. |
Level 20 Perks
The level 20 perk we want is Edgerunner, this allows you to go over Cyberware capacity by up to 50 points at the cost of max health. For each point over capacity, you get 0.1% chance to proc Fury mode, which increases your damage output even further and fries any enemy instantly if you crit.
| Perk | Description |
|---|---|
 Edgerunner Edgerunner |
Allows you to exceed your Cyberware Capacity by up to 50 points at the cost of max health, with a chance to trigger a powerful Fury state. When you neutralize an enemy, you get a 0.1% chance for each point you are over capacity that Fury activates: +10% damage, +30% critical chance, +50% critical damage. |
Reflexes Perks
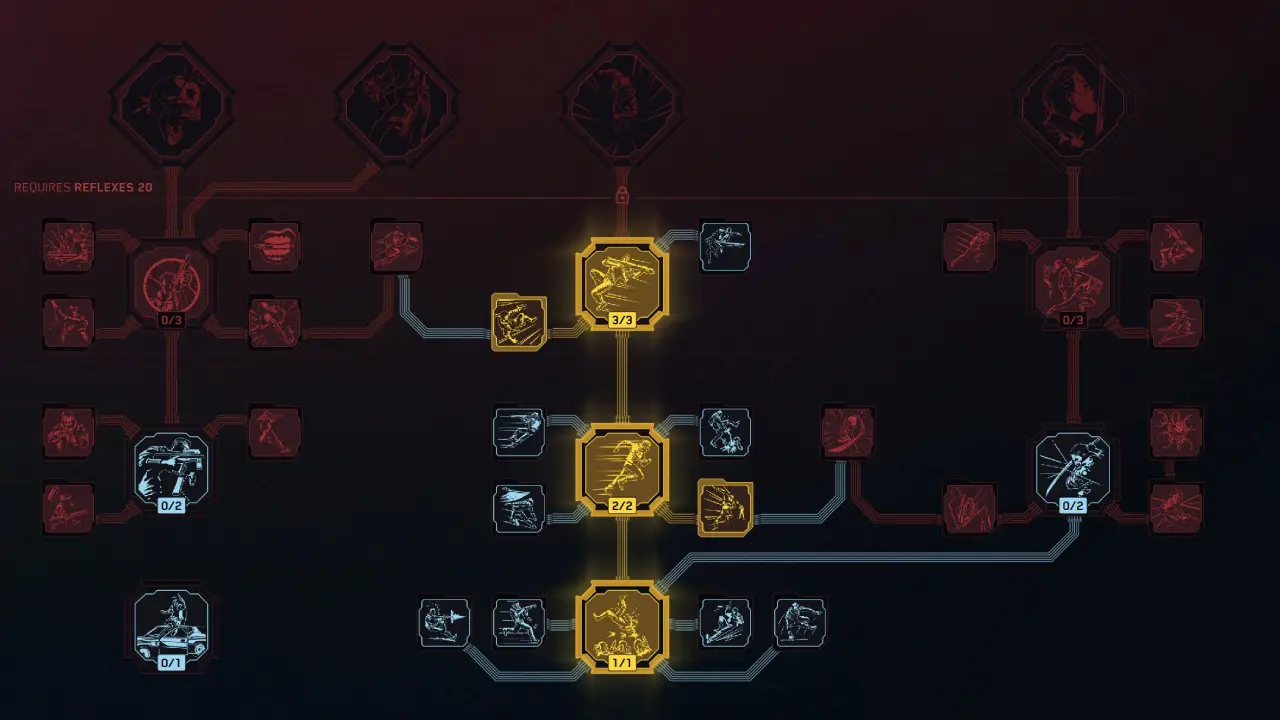
The Reflexes Perk-Tree focuses only on perks that increase our movement. This is great for our Cyberpunk 2077: Lucy Build as netrunning often requires correct positioning.
Perk Prioritization: Prioritize perks in bold.
Level 4 Perks
This will make it harder for enemies to hit us. This gets stronger once we have more movement tech from level 9 and 15 perks.
| Perk | Description |
|---|---|

|
Makes you significantly harder for enemies to hit the faster you move. Excellent for keeping a squishier Netrunner alive while navigating the battlefield out of cover. |
Level 9 Perks
The level 9 perks we use allow you to dash, this will increase your movement by a lot.
| Perk | Description |
|---|---|

|
Replaces your standard dodge with a rapid, distance-covering dash. Exponentially increases your mobility, allowing you to break line-of-sight to drop enemy trace progress or escape bad positioning. |

|
Increases your dash distance when moving directly toward an enemy. Perfect for aggressively closing the gap when you want to transition from hacking to slicing with the Monowire. |
Level 15 Perks
Level 15 perks give us a huge boost to movement. Allowing us to dash in the air while also maneuvering in it. This is great for our Netrunner Lucy Build.
| Perk | Description |
|---|---|

|
Unlocks the ability to dash mid-air and completely negates the stamina cost of regular dashes. Grants supreme evasion and map traversal, letting you dance around gunfire while uploading quickhacks. |

|
Improves mid-air maneuverability and handling. Gives you total control over your movement trajectory while airborne, making it incredibly easy to dodge incoming projectiles or align devastating Monowire drop-attacks. |
Level 20 Perks
We don’t use any level-20 perks.
Cool Perks
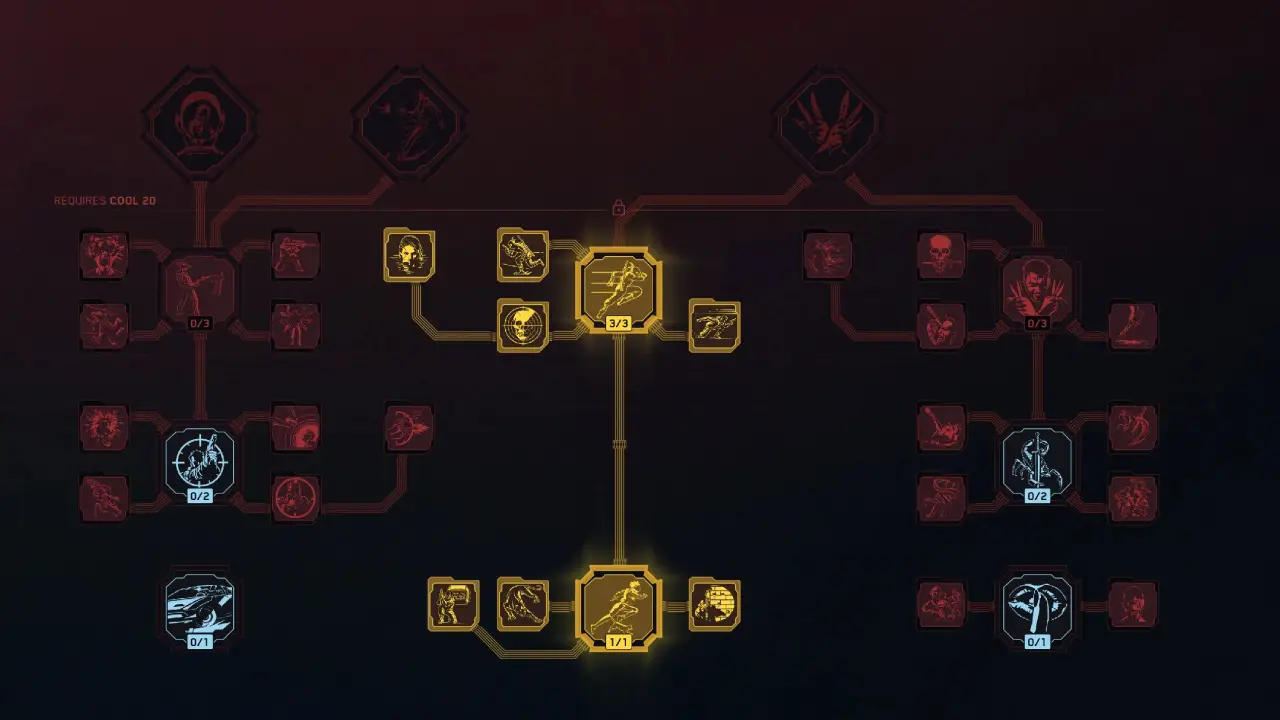
The Cool Perk-Tree increases our stealth capabilities. It will take longer for enemies to spot us and movement during stealth is faster, this is great for our Netrunner Lucy Build.
Perk Prioritization: Prioritize perks in bold.
Level 4 Perks
The level 4 perks make it easier for us to use stealth with our Cyberpunk 2077: Lucy Build.
| Perk | Description |
|---|---|

|
Increases your movement speed and mitigation chance while crouching. Allows you to move swiftly and safely between cover while selecting targets for your quickhacks. |

|
Grants a significant boost to your mitigation chance when aiming from behind cover. Crucial for keeping a squishier Netrunner protected when forced to peek out and line up quickhacks under pressure. |

|
Increases your mitigation chance even further when crouching and remaining completely still. Perfect for staying fully protected while stationary inside access points or managing intense hack queues. |

|
Causes enemies to take much longer to detect you based on your current mitigation chance. Gives you a massive stealth window to slip past guards or drop them before they can fully spot you. |
Level 9 Perks
We don’t use any level 9 perks.
Level 15 Perks
The level 15 perks will make it even harder for enemies to spot us even if we are crouch-sprinting.
| Perk | Description |
|---|---|

|
Boosts crouch movement speed, increases mitigation chance, and unlocks the ability to crouch-sprint. Allows a stealth Netrunner to cross wide-open spaces silently at high speeds without breaking cover. |

|
Substantially increases your mitigation chance while actively crouch-sprinting. Ensures an incredible layer of defensive protection if you are caught moving between hiding spots. |

|
Grants a temporary surge to movement speed, health recovery, and stamina after neutralizing an enemy from stealth. Keeps your stealth momentum high and rewards quick, surgical takedowns. |

|
Drastically cuts the stamina cost of crouch-sprinting while in active combat. Allows you to rapidly reposition, stay low, and evade incoming tracking without instantly draining your stamina pool. |

|
Automatically triggers your Optical Camo cyberware whenever you crouch-sprint or slide. This is the ultimate tool for ghosting right through security checkpoints or completely breaking enemy line-of-sight in a pinch. |
Level 20 Perks
We don’t use any level-20 perks.
Body Perks
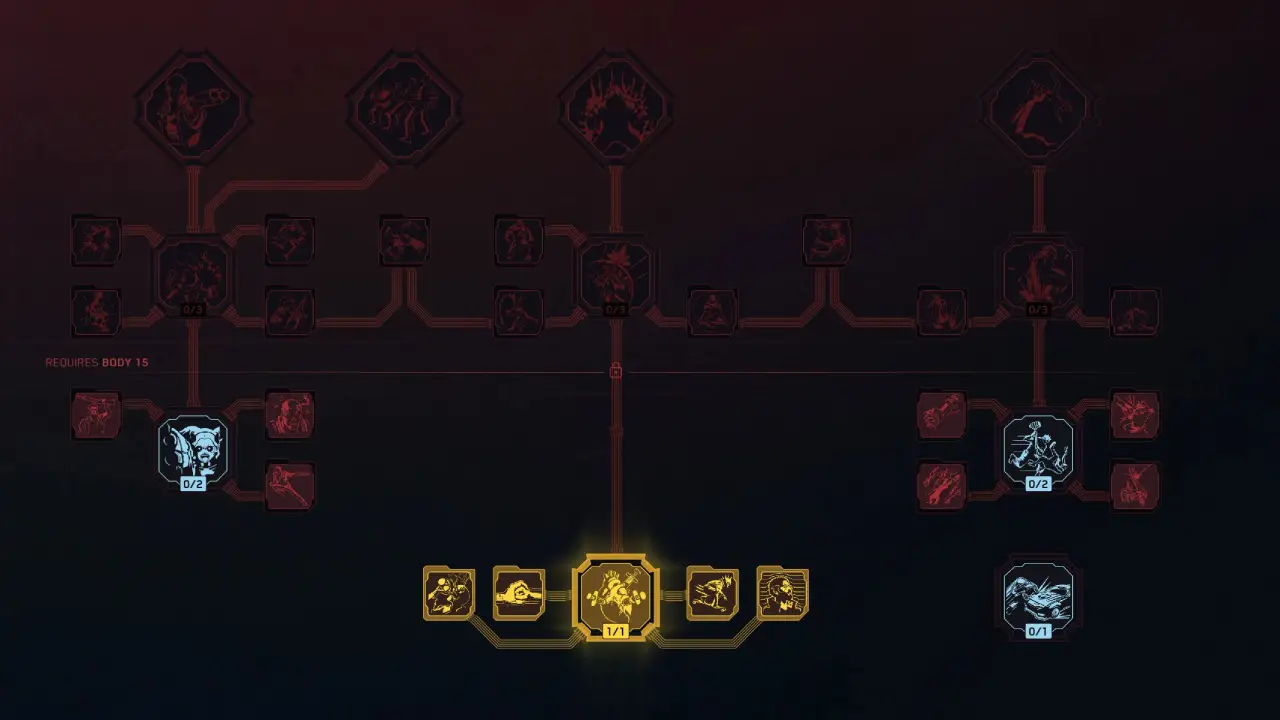
The Body Perk-Tree only uses the basic level 4 perks to give us extra health recovery and mitigation chance.
Perk Prioritization: Prioritize perks in bold.
Level 4 Perks
The level 4 perks give us actual health regen and extra mitigation chance.
| Perk | Description |
|---|---|

|
Unlocks passive, continuous health regeneration while in active combat. This is the absolute keystone survival perk for an aggressive Netrunner, as it directly fuels your health pool when using Overclock. |

|
Boosts your health regeneration rate by 60% while sprinting. Allows you to continuously generate more resource capital for your quickhacks simply by staying on the move. |

|
Increases your health regeneration rate by 10% for every nearby enemy. Greatly improves your survivability when dropped into dense clusters of enemies or forced into close-quarters engagements. |

|
Accelerates your health regeneration rate by 1% for every percent of missing health. Acts as a critical fail-safe that rapidly pumps health back into your pool the lower your vitals drop during intense hacking loops. |

|
Grants a 100% Mitigation Chance for 2 seconds immediately after using a health item or the Blood Pump cyberware. Provides a brief window of total damage reduction to safely step out of cover and refresh your health. |
Level 9 Perks
We don’t use any level 9 perks.
Level 15 Perks
We don’t use any level 15 perks.
Level 20 Perks
We don’t use any level 20 perks.
Relic Perks (Optional – Phantom Liberty DLC)

The  Relic Perk tree works differently from the five standard attribute trees. It was introduced in the Phantom Liberty DLC. The Relic tree doesn’t care about minor stat bumps; it is entirely focused on fundamentally changing how your existing high-tier cyberware functions or adding brand-new active combat mechanics.
In the standard trees, you earn Attribute and Perk points as you level up. The Relic tree completely ignores your character level.
- Availability: Only after you start the Phantom Liberty DLC.
- Unique Currency: It uses Relic Points instead of Perk Points.
- How to Get Them: You are given a handful of points automatically during the main story of the Phantom Liberty DLC. The rest must be found out in the world by hunting down and downloading data from hidden Militech Data Terminals scattered exclusively around Dogtown.
| Perk | Description |
|---|---|

|
Unlocks powerful new mechanical subroutines for all Arm Cyberware. For this Lucy Build, you can slot a Control quickhack directly into your Monowire, uploading it instantly at zero RAM cost during heavy attacks. |

|
Causes normal Monowire attacks to spread uploaded quickhacks to any other enemies caught in the swing radius. Essential for multiplying your status effects across tight groups without draining your RAM pool. |

|
Dramatically upgrades your Optical Camo cyberware, allowing you to activate it mid-combat to completely break enemy line-of-sight and force them to lose track of your location so you can return to stealth. |

|
Triggers a temporary time-slow whenever you are crouched and an enemy begins to spot you. Gives you a crucial, tactical window to slip back into cover or eliminate the target before your presence is fully detected. |

|
Scans and highlights structural weak points on enemy armor and cyberware. Hitting these vulnerabilities grants total armor penetration, guaranteed critical hits, and triggers a damaging micro-explosion upon destruction. |
Cyberware for the Lucy Build in Cyberpunk 2077

Using the correct Cyberware for the Cyberpunk 2077: Lucy Build is important. This will make the build a lot more powerful. However, don’t sweat it if you can’t get all the pieces.
Important: Priority Cyberware is marked in bold and orange.
- Operating System
- Frontal Cortex
- Face
- Arms
- Hands
- Skeleton
- Nervous System
- Circulatory System
- Integumentary System
- Legs
Operating System
| Cyberware | Description |
|---|---|

|
|
Here I will showcase the different tiers and what effects you will gain from the Tetratronic Rippler. I won’t show this for the other items, but this should give you an idea of how items scale with tiers.
Core Stats (Scales from Tier 1 to Tier 5++)
- Base RAM: 5 to 20 units (increases with each upgrade)
- Quickhack Slots: 4 to 8 slots (allows you to equip more hacks)
- Quickhack Queue Size: 1 to 4 slots (allows you to chain multiple hacks on a single target)
Tier-by-Tier Passive Effects
- Tier 2
- Weapon Buff: Deal +15% weapon damage to any enemy currently affected by a non-combat quickhack (such as Ping or Cyberware Malfunction).
- Tier 3
- Combo Damage: Deal +40% damage with Combat quickhacks (like Short Circuit) when you queue them immediately followed by a non-combat quickhack.
- Tier 4
- RAM Boost: Increases the cyberdeck’s base RAM by +4.
- (Note: This bonus increases to +7 RAM at Tier 5+, and +11 RAM at Tier 5++).
- Tier 5
- Overclock Nova: Activating your Overclock ability instantly and automatically uploads Reboot Optics and Weapon Glitch to all enemies within an 8-meter radius, blinding and disarming them.
Location of the item:
- Tetratronic Rippler MK.5: Any Ripperdoc upon reaching level 40.
- Note: Lower Tier variants become already available at lower levels.
Frontal Cortex
| Cyberware | Description |
|---|---|

|
Automatically restores a substantial chunk of RAM whenever your resource pool drops below 20%. Serves as an excellent emergency safety net to prevent you from completely running dry mid-fight. |

|
Permanently expands your Max RAM pool and significantly boosts your quickhack upload speed. Perfect for stacking massive, multi-hack combos onto targets rapidly. |

|
Instantly refunds RAM every single time you neutralize an enemy. Crucial for maintaining a self-sustaining resource economy when clearing out dense groups of mobs. |
Location of items:
- Ram Reallocator: Ripperdoc inside Dogtown once you reach level 30 (Phantom Liberty DLC).
- Ex-Disk: Any Ripperdoc upon reaching level 20.
- Memory Boost: Any Ripperdoc upon reaching level 10.
Face
| Cyberware | Description |
|---|---|

|
Automatically highlights enemy cameras and turrets through solid walls while reducing your scanning time. Pairs beautifully with the Eye in the Sky perk to safely hijack security systems. |
Location of item:
- Kiroshi “Sentry” Optics: Any Ripperdoc already at level 1.
Arms
| Cyberware | Description |
|---|---|
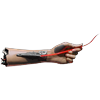
|
Lucy’s iconic signature weapon. It shreds targets with fast, sweeping thermal damage and carries a high chance to apply Burn, while perfectly integrating with your Relic tree to upload free quickhacks on heavy strikes. |
Location of item:
- Thermal Monowire: Any Ripperdoc upon reaching level 10.
Hands
| Cyberware | Description |
|---|---|

|
The only Hands cyberware in the entire game that directly helps with netrunning. At Tier 5, it passively grants +2 Max RAM, increases your Quickhack Damage, and gives you RAM regeneration whenever you neutralize an enemy. |
Location of item:
- Smart Link: Any Ripperdoc upon reaching level 1.
Skeleton
| Cyberware | Description |
|---|---|

|
Substantially increases your melee weapon base damage at the cost of higher stamina consumption. Vital for multiplying the lethality of your Monowire slashes. |
|
|
Significantly increases your maximum health pool. Since the Overclock mechanic forces you to spend health as RAM when empty, expanding your max health directly expands your casting capacity. |
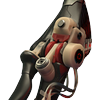
|
Provides a massive, straightforward boost to your overall Armor rating. Helps mitigate incoming physical damage, keeping you resilient during intense combat situations. |

Location of items:
- Dense Marrow: Any Ripperdoc upon reaching level 10.
- Epimorphosis: Any Ripperdoc upon reaching level 30.
- Bionic Joints: Any Ripperdoc upon reaching level 1.
Nervous System
| Cyberware | Description |
|---|---|
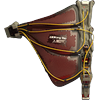
|
Boosts your Mitigation Chance and Mitigation Strength, offering an incredibly reliable layer of defense to reduce incoming damage while dodging out in the open. |
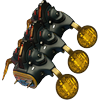
|
Automatically triggers a powerful time-slow effect whenever your health drops below 25%. Gives you a critical baseline fail-safe to react, escape, or pop a heal item in a pinch. |

|
Briefly slows down time the exact moment an enemy begins detecting you. Provides a crucial window for stealth netrunners to slip back around a corner or neutralize the guard before an alarm triggers. |
Location of items:
- Neofiber: Any Ripperdoc upon reaching level 20.
- Reflex Tuner: Any Ripperdoc upon reaching level 1.
- Synaptic Accelerator: Any Ripperdoc upon reaching level 10.
Circulatory System
| Cyberware | Description |
|---|---|
|
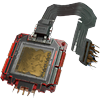
Instantly and automatically activates your equipped healing item whenever your health drops below 35%. This is completely mandatory for Overclock builds, keeping you topped off seamlessly as you burn health for RAM. |
|
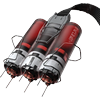
Replaces your standard item consumable with an elite, cybernetic health injector on a cooldown. Combos directly with the Biomonitor to provide massive, automated chunk-healing during heavy quickhack loops. |
|
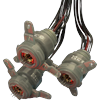
Increases your melee attack speed. Essential for maximizing the swing velocity of your Monowire, allowing you to quickly stack hits and trigger lethal close-quarters execution finishers. |
Location of items:
- Biomonitor: Any Ripperdoc upon reaching level 10.
- Blood Pump: Any Ripperdoc upon reaching level 10.
- Microrotors: Any Ripperdoc upon reaching level 1.
Integumentary System
| Cyberware | Description |
|---|---|

|
Grants active invisibility. Synergizes perfectly with Cool perks like Vanishing Act. |
|
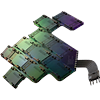
Instantly deploys a massive mitigation chance boost if you suffer a sudden burst of high damage. Excellent for preventing quick burst-damage deaths from elite snipers or bosses. |
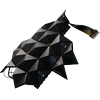
|
Provides a large, flat passive increase to your baseline Armor rating. Offers a fundamental defensive foundation to keep your Netrunner safe against basic gunfire. |
Location of items:
- Optical Camo: Any Ripperdoc upon reaching level 10.
- Countershell: Any Ripperdoc upon reaching level 20.
- Subdermal Armor: Any Ripperdoc upon reaching level 1.
Legs
| Cyberware | Description |
|---|---|
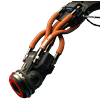
|
Unlocks the double-jump mechanic. Provides peerless vertical mobility to safely scale buildings, escape danger, and comfortably look down over the arena to assign quickhacks. |
Location of item:
- Reinforced Tendons: Any Ripperdoc upon reaching level 10.
Quickhacks for the Cyberpunk 2077: Lucy Build
This Lucy Netrunner Build relies on a specific 4-Quickhack rotation to initiate a self-feeding loop of damage, stealth, and RAM regeneration.
- Important: Quickhacks will cost more RAM if they are higher level. We will only max out our damage Quickhacks, and the others will be lower level so they don’t cost that much RAM to use.
- Important 2: How to get Quickhacks for your build.
Lucy Netrunner Build Rotation:
- Sonic Shock (Tier 3 or 4)
- Short Circuit (Tier 5)
- Reboot Optics (Tier 2)
- Synapse Burnout (Tier 5)
I will only explain and show the Quickhacks we use for this build. You are free to use any other Quickhack along this if you prefer another combo.
1. Sonic Shock

(Tier 3 or 4 Max): Completely hides the target from enemy networks. Tier 3/4 unlocks the cloaking ability, making subsequent quickhacks untraceable. Allies will literally ignore the target being taken down right next to them.
2. Short Circuit
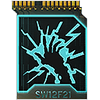
(Tier 5 Iconic): Your primary damage dealer. The Iconic version grants significantly higher damage per stack of Cybermalfunction.
3. Reboot Optics
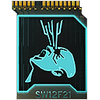
(Tier 2 / Green): Costs only 2 RAM. Used purely to trigger cyberdeck damage bonuses for the preceding Short Circuit and drastically cut the RAM cost of the next hack.
4. Synapse Burnout
(Tier 5): The final heavy hitter. Thanks to skill combos, its high RAM cost is slashed by more than half. This will deal so much damage that anyone will get fried by it.
How to get Quickhacks in Cyberpunk 2077
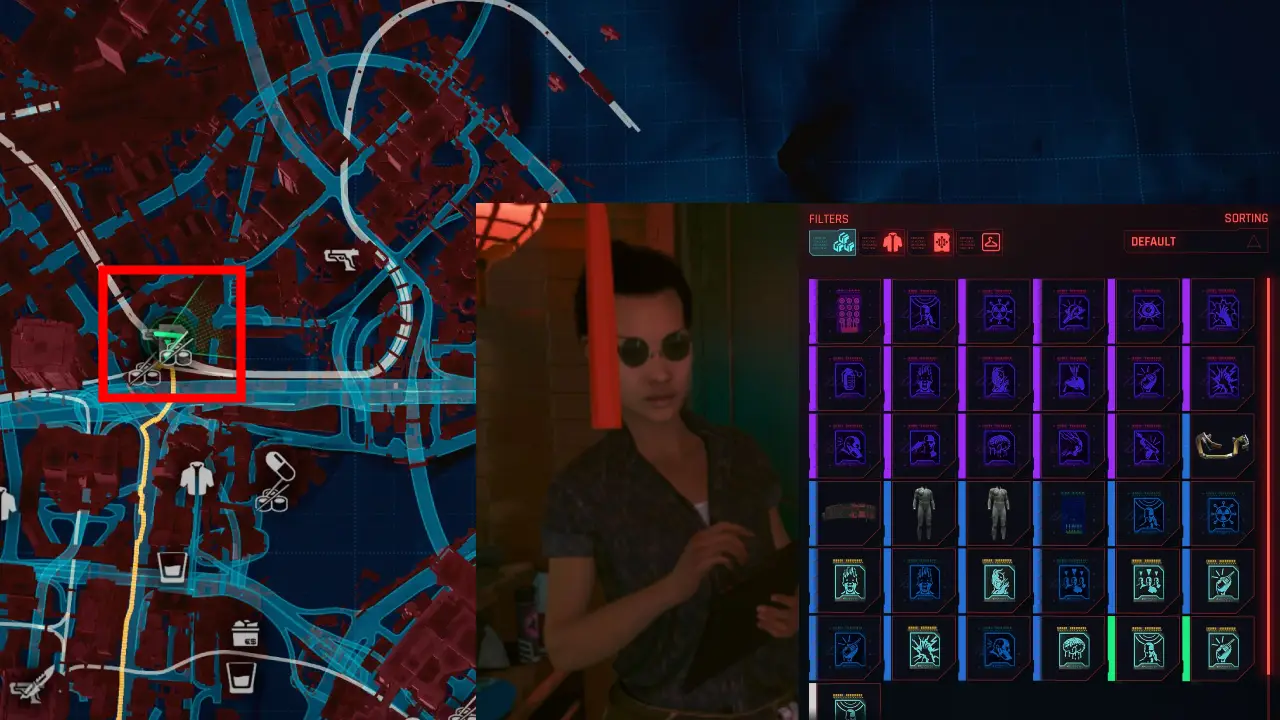
In Night City, quickhack progression is strictly tied to your character level. Vendors, world loot, and crafting options automatically scale up every 10 levels. Use this definitive roadmap to efficiently gear up your Netrunner.
Netrunner Vendors sell Quickhacks
Netrunner Vendors will sell you Quickhacks depending on your level.
- Tier 1: Level 1-9
- Tier 2: Level 10-19
- Tier 3: Level 20-29
- Tier 4: Level 30-39
- Tier 5: Level 40-44
- Tier Iconic: Level 45-50 (Only in Dogtown)
This means you can keep going back to the same Netrunner vendor you choose to get new Quickhacks when you reach a level threshold.
Crafting Components
Always hack every Access Point you see. These will give you free materials and sometimes even free Quickhacks.
Weapons for the Lucy Build in Cyberpunk 2077
This Cyberpunk 2077: Lucy Netrunner Build doesn’t really require weapons because we are killing off all our enemies with Quickhacks. However, here are some good options that you can still use.
Upgrade: Weapons can be upgraded when you go to the crafting section and then swap to upgrades.
| Item | Description |
|---|---|
|
Lucy uses this gun in the Edgerunner Anime. It is a fairly basic gun but you can upgrade it to the highest tier tostill deal good damage. |
|
Iconic pistol that deals high headshot damage and has a fast-fire-rate mode. |
|
One of my favorite weapons that you get very early. Deals electric damage and has a chance to disable enemy cyberware. |
Unity (Power Pistol)
The Unity is a standard, highly reliable base-game pistol (and happens to be V’s canonical favorite handgun). Because it is not an Iconic weapon, there isn’t just one single place to find it.
- Where to Buy: Almost any standard Weapon Vendor in Night City (like the ones in Watson or Heywood) will stock various tiers of the Unity depending on your character level.
- Where to Loot: It is an incredibly common drop from enemies, especially when fighting Valentinos in Heywood or 6th Street members in Santo Domingo.
- Crafting: You will automatically unlock the crafting specs for higher tiers of the Unity as your character levels up.
Dying Night (Iconic Power Pistol)
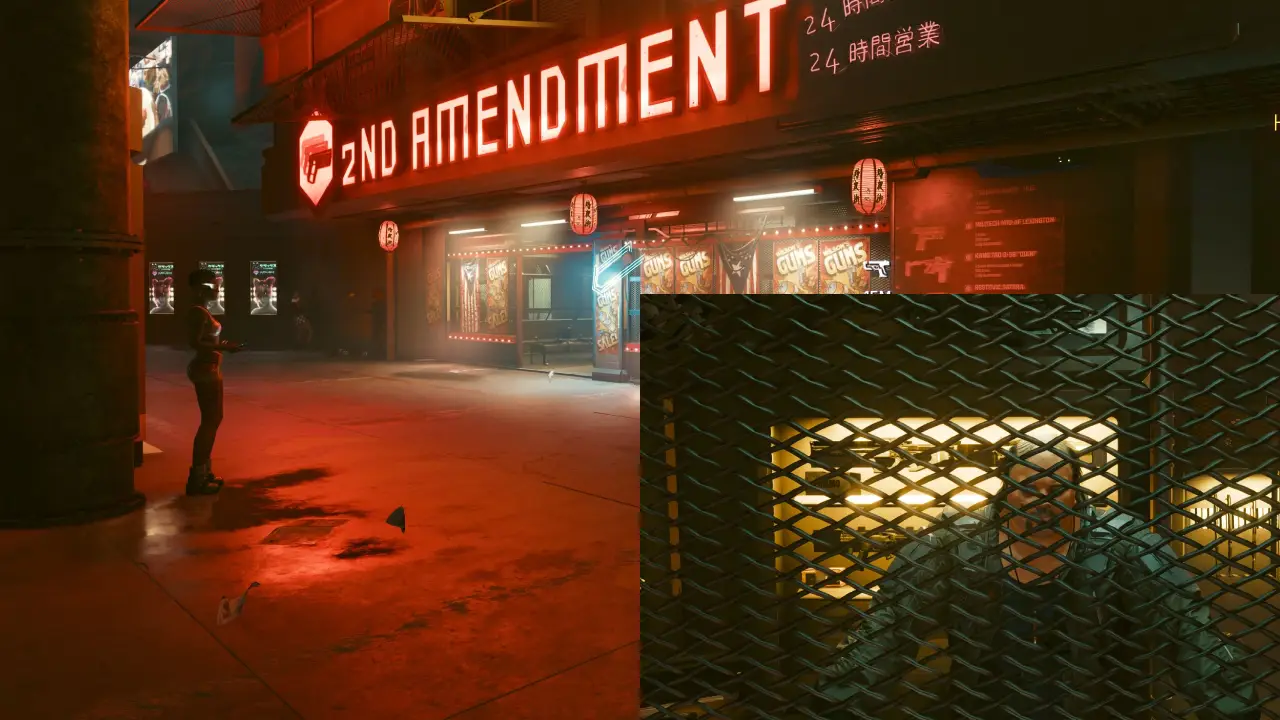
This is an Iconic variant of the Lexington pistol. It features a massive headshot damage multiplier and lightning-fast reload speeds after a headshot. It is practically handed to you at the very beginning of Act 1.
- The Mission: “The Gun” (Side Job).
- How to Get It: Right after waking up in your apartment for the first time and meeting Jackie downstairs, you will get a notification from Wilson, the gunsmith who runs the 2nd Amendment shop in your apartment building (Megabuilding H10).
- What to Do: Walk up to Wilson, open his shop inventory, and look for the Dying Night. It will be listed for 0 Eddies. Just “buy” it for free to add it to your inventory.
- Note: If you somehow miss it or sell it, you can buy missed Iconics from the Black Market vendor in the Dogtown Stadium later in the game.
Fenrir (Iconic Power SMG)
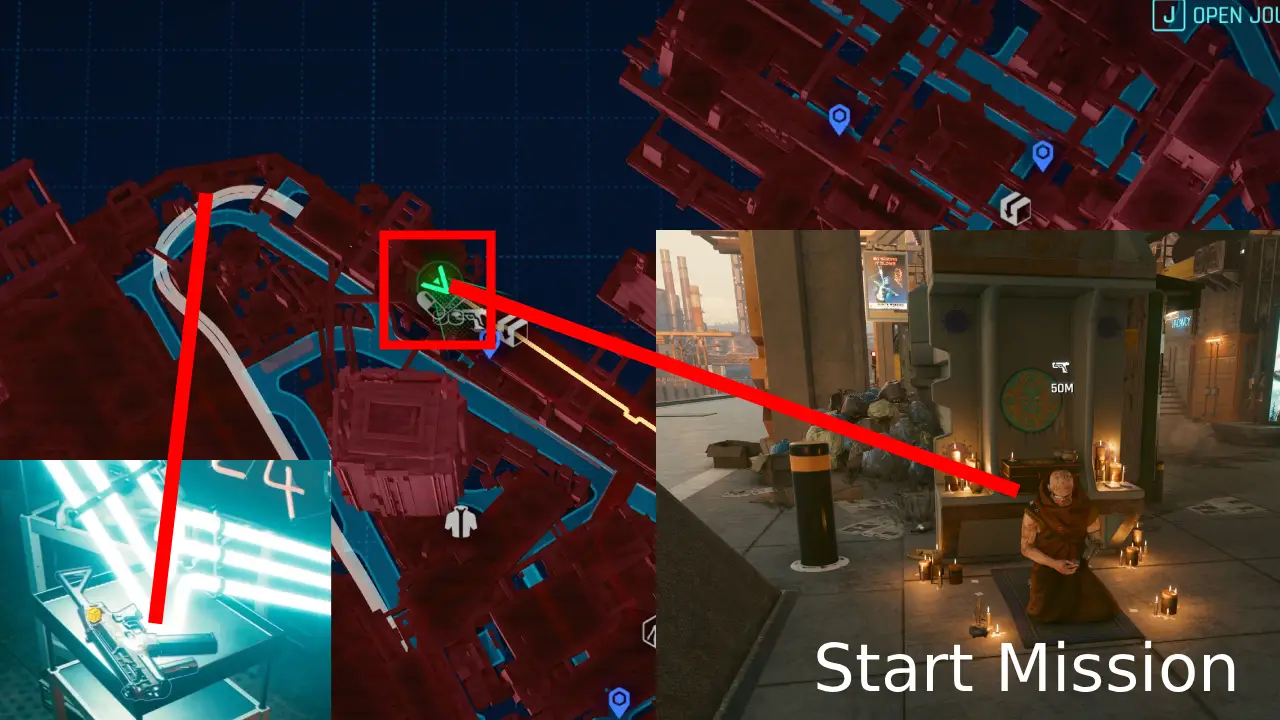
The Fenrir is a heavily modified Saratoga SMG and one of the best early-and endgame weapons. It deals electrical damage and has a high chance to trigger an EMP blast that completely deactivates enemy cyberware.
- The Mission: “Losing My Religion” (sometimes called Sacrum Profanum).
- How to Get It: Head to the northwest docks of Watson (Northside). You will find a Bhikkhu (Monk) who asks you to save his brother from a gang of Maelstrom boosters who have kidnapped him.
- What to Do: Raid the Maelstrom warehouse nearby. You can do this stealthily or guns blazing. Once you clear out the gangleaders inside the main warehouse, look at the metal crate/table directly next to where the captive brother is being held. The Fenrir will be sitting right there next to a computer monitor, bathed in a red neon light.
- Quick Tip: Do not lose or sell Fenrir! Unlike standard weapons, you can use the Crafting > Upgrades menu to level Fenrir up from Tier 2 all the way to Tier 5++ as you progress through the game, keeping it viable for your entire playthrough.
Gear for the Lucy Build in Cyberpunk 2077
Gear doesn’t hold much weight in Cyberpunk 2077. However, there is still some good stuff you can get for the Lucy Build.
- Visit any Netrunner Vendor.
- Buy Visor (Faster Upload Time).
- Buy Netrunner Suit (Quickhack Damage Resistance).
| Item | Desciption |
|---|---|

Lightweight Tungsten-Steel BD Wreath |
+15% Enemy Quickhack Upload Time |

Red Alert Anti-Surge Netrunning Suit |
+15% Quickhack Damage Resistance |
A lower-tier version exists at any Netrunner vendor.
Skill Progression in Cyberpunk 2077
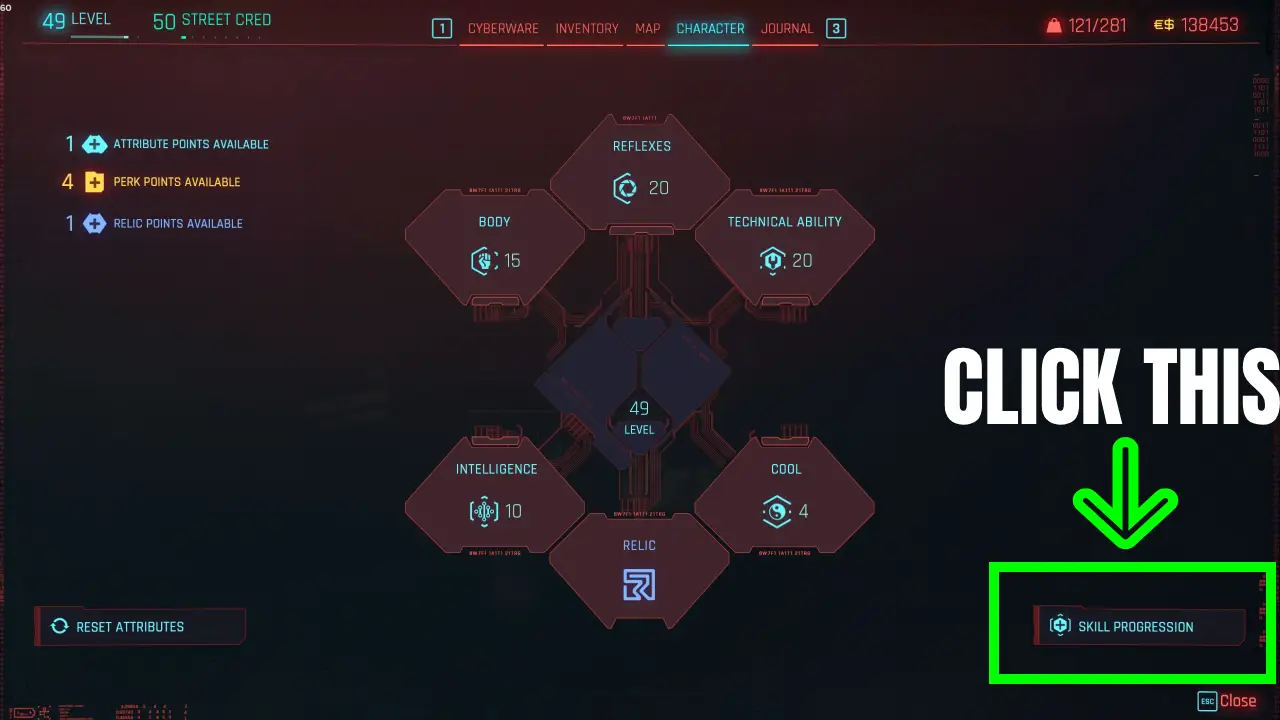
This is often overlooked, in the character menu you can actually click on “Skill Progression”. This will send you to a very powerful mechanic in Cyberpunk 2077. By leveling up these trees you gain powerful effects.
For our Cyberpunk 2077: Lucy Build you want to obviously focus on Netrunner.
Netrunner (Intelligence)
- Level 5: +5% RAM Recovery Rate
- Level 10: +1 Max RAM
- Level 15: +1 Perk Point
- Level 20: +20% Smart Weapon lock-on range
- Level 25: +5% RAM Recovery Rate
- Level 30: +1 Max RAM
- Level 35: +1 Perk Point
- Level 40: -20% RAM cost for hacking devices/vehicles
- Level 45: +15% Control/Convert duration; +5% Combat hack damage
- Level 50: +40% Overclock duration
- Level 55: -10% Health loss during Overclock
- Level 60: Overclock Mode: Reveals enemies (10m) & hacks through cover
How to Level Up Netrunner (Intelligence)
- Looting Skill Shards from chests and enemies.
- Use offensive, control, or covert quickhacks on enemies during combat.
- Hack environmental objects, security cameras, and devices to distract enemies or trigger explosions.
- Successfully jack into and hack Access Points (Data Terminals) using Breach Protocol.
- Defeat enemies using Smart weapons or the Monowire.
Headhunter (Cool)
- Level 5: -10% Visibility to enemies
- Level 10: +10% Headshot & Vulnerability damage
- Level 15: +1 Perk Point
- Level 20: No weapon sway when crouched
- Level 25: -10% Visibility to enemies
- Level 30: +15% Headshot & Vulnerability damage
- Level 35: +1 Perk Point
- Level 40: Optical Camo is active while grappling enemies
- Level 45: -30% Recovery time after a throw
- Level 50: +30% Crouch walk & sprint speed
- Level 55: Undetected damage bonus lasts 3s in combat
- Level 60: +15% Optical Camo charge on stealth/special kills
How to Level Up Headhunter (Cool)
- Looting Skill Shards from chests and enemies.
- Perform stealth takedowns and neutralizations on unaware enemies.
- Get headshots and hit enemy weakspots using any weapon type.
- Defeat enemies using pistols, revolvers, sniper rifles, precision rifles, or thrown weapons (knives and axes).
- Deal damage and secure kills while crouching or using Optical Camo.
Shinobi (Reflexes)
- Level 5: +5% Movement Speed
- Level 10: -5% Dodge/Dash Stamina cost
- Level 15: +1 Perk Point
- Level 20: Better accuracy after dodging/dashing
- Level 25: +5% Movement Speed
- Level 30: -10% Dodge/Dash Stamina cost
- Level 35: +1 Perk Point
- Level 40: Increased Mitigation Chance the faster you move
- Level 45: +25% Fast Attack damage
- Level 50: Sliding & Air Dashing reload 20% of your weapon
- Level 55: Mid-air/Slow-mo: low stamina does not penalize combat
- Level 60: Sandevistan Mode: +40% Crit Chance; No movement Stamina cost
How to Level Up Shinobi (Reflexes)
- Looting Skill Shards from chests and enemies.
- Defeat enemies using blade weapons (Katanas, Machetes, Chainswords, or Mantis Blades).
- Actively dodge, dash, air-dash, slide, and vault while in active combat.
- Defeat enemies using Assault Rifles or Submachine Guns (SMGs), especially while moving at high speeds.
Solo (Body)
- Level 5: +50 Carrying Capacity
- Level 10: +10 Max Health
- Level 15: +1 Perk Point
- Level 20: +20% Fist/Gorilla Arms damage & speed (Fists bleed)
- Level 25: +100 Carrying Capacity
- Level 30: +15% Max Health
- Level 35: +1 Perk Point
- Level 40: +10% Crit Chance within 5 meters
- Level 45: +25% Strong/Quick Melee damage
- Level 50: +25% Health after performing a Finisher
- Level 55: Adrenaline decays 50% slower, min 10% floor
- Level 60: Berserk Mode: +30% Finisher threshold, +50% Finisher heal, +30% duration
How to Level Up Solo (Body)
- Looting Skill Shards from chests and enemies.
- Defeat enemies using Heavy Weapons (Shotguns, Light Machine Guns, and Heavy Machine Guns).
- Defeat enemies using blunt weapons, Gorilla Arms, or bare fists.
- Force open locked doors, rip heavy turrets from their mounts, and pass physical Body attribute checks in the world.
- Execute physical melee finishers.
Engineer (Technical Ability)
- Level 5: +15 Armor
- Level 10: +5 Cyberware Capacity
- Level 15: +1 Perk Point
- Level 20: +10% Grenade damage & explosion radius
- Level 25: +25 Armor
- Level 30: +10 Cyberware Capacity
- Level 35: +1 Perk Point
- Level 40: Increased Shock chance when charging Tech weapons
- Level 45: +15% Health Item effectiveness
- Level 50: +30% to all Cyberware stat modifiers
- Level 55: +10% Bolt damage, +40% Bolt burn, Chain Lightning burns
- Level 60: Fury Mode: You occasionally release a massive EMP blast
How to Level Up Engineer (Technical Ability)
- Looting Skill Shards from chests and enemies.
- Defeat enemies using Tech weapons, especially by firing fully charged shots or Bolt shots.
- Get kills using damage-dealing grenades or the Projectile Launch System (PLS) cyberware.
- Craft new weapons, quickhacks, and item components.
- Upgrade weapons and cyberware at Ripperdocs or through your crafting menu.
- Dismantle weapons, armor, and junk items into crafting components.
Leveling Tips for the Lucy Build in Cyberpunk 2077
Here are a few general leveling tips for the Lucy Build in Cyberpunk 2077.
- Perfect Start
- How to make Money
- Upgrade Weapons
- How Gear Scaling Works
- How to get Perk Points Fast
- Dogtown Consumables
Perfect Start in Cyberpunk 2077
Here are the steps that I recommend taking with a new Cyberpunk 2077 playthrough.
- Regular Start (Don’t skip ahead to Phantom Liberty).
- Immediately after the prologue, once you are out of your room and go downstairs before you enter the elevator.
- Weapon Vendor: Buy the Iconic pistol Dying Night.
- Coach Fred: Capacity Boosters (in case you get over capacity so you can still move).
- Buff Routine: Sleep & Shower. This gives you 20% Skill XP acquisition and Health Regen.
- Watson Clean Sweep (NCPD Missions):
- Watson is the first district you play in.
- Clearing all missions takes 1-2 hours. This will give you at least 10 levels, 15 Street Cred and over 150k Eddies Cash.
- Loot all enemies and either disassemble for materials or sell them at the vendor for extra Eddies.
- Get the Fenrir SMG from the monk mission. This SMG is insanely good at the start because it often stuns enemies.
- Visit a Ripperdoc at level 10: After you have enough money, its time to get chromed up.
- Reinforced Tendons (Legs): Allow you to double jump
- Kerenzikov (Nervous System): Slows Time by 60% for 2s.
- Synaptic Accelerator (Nervous System): Slows time by 20% for 2s when enemy detection reaches 50%.
- Whatever else you can fit!
- Time to start playing for real. The Pickup mission is waiting for you!
How to make Money
It is actually fairly easy to make money in Cyberpunk 2077. The best way to make money is to clear all the NCPD and Cyberpsycho missions in each district. As previously mentioned, clearing most of the Watson district NCPD mission alone already gives you approximately 150k Eddies Cash.
Upgrade Weapons
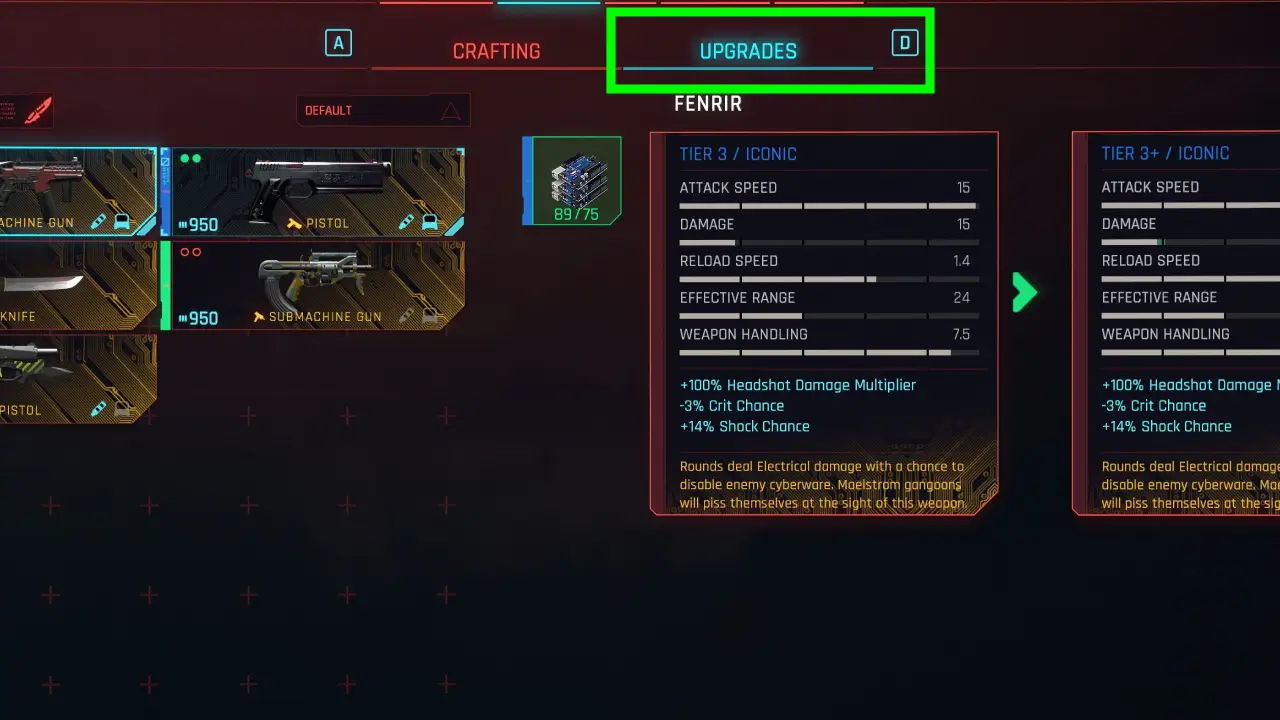
This often gets overlooked, but you can upgrade early-game weapons in Cyberpunk 2077. Go to the crafting section, then move to the Upgrade tab. Here you can upgrade all weapons if you have the necessary crafting components.
Gear Scaling in Cyberpunk 2077
Gear scaling is automated in Cyberpunk 2077. The moment you reach a certain level, you will start finding more and more high-quality items. Meaning the faster you reach a higher level the sooner you will find better gear from chests or enemies. That counts for Gear, Weapons, Quickhacks, Cyberware, Outfits, etc.
- Tier 1: Level 1-9
- Tier 2: Level 10-19
- Tier 3: Level 20-29
- Tier 4: Level 30-39
- Tier 5: Level 40-44
- Tier Iconic: Level 45-50
How to get Perk Points in Cyberpunk 2077
You need Perk Points to unlock additional Perks for the Lucy Build in Cyberpunk 2077. Perks are the bread and butter of any CP2077 Build, as they significantly enhance your power.
- You get one Perk Point per character level.
- Skill Progression awards you with Perk Points.
- You can farm up to 13 Perk Shards (10 base game, 3 Phantom Liberty DLC)
Perk Point per Character Level
Not much needs to be said here; leveling up gives you one extra Perk Point.
Skill Progression
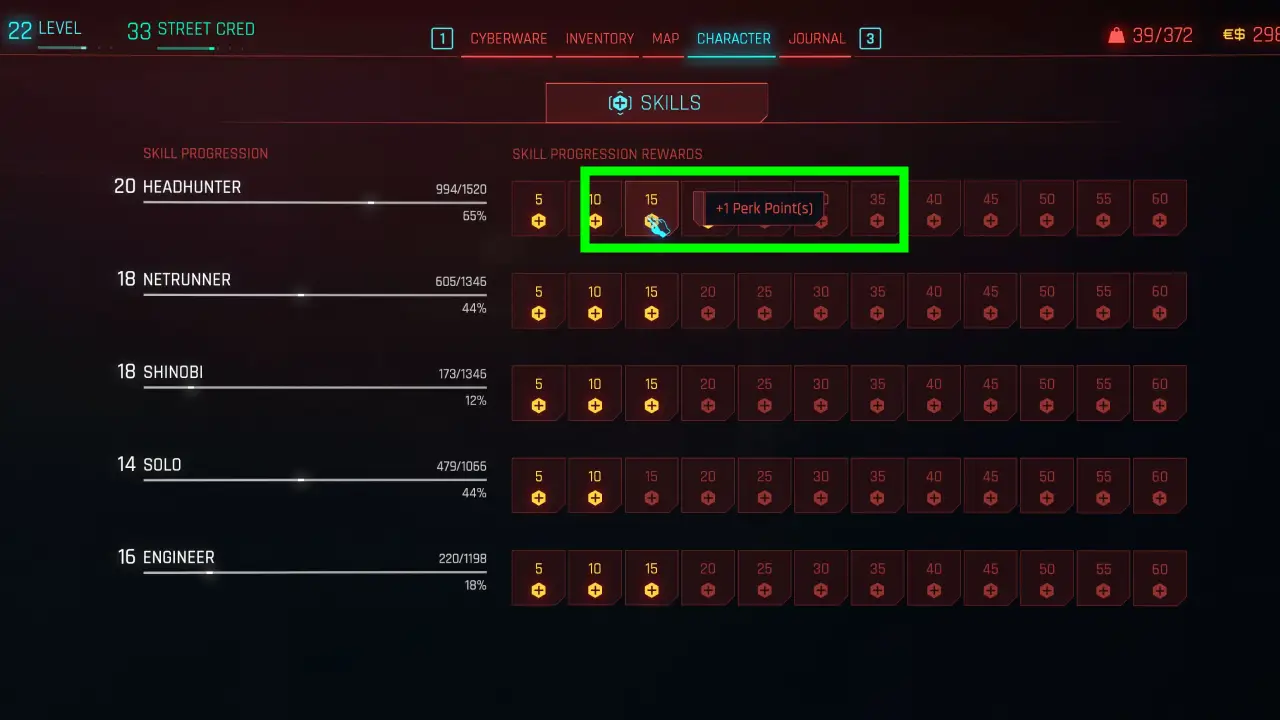
This is often overlooked; the Skill Progression system also awards you Perk Points at 15 and 35. So you can get an additional 10 Perk Points from this.
Character menu > bottom right Skill Progression.
Perk Shards
There are 10 base-game Perk Shards and 3 Phantom Liberty DLC Perk Shards you can collect to earn additional perks in Cyberpunk 2077.
Read Guide: All 13 Perk Shard Locations in Cyberpunk 2077
Here is the full list, click on the hyperlink of each location to see images, it will send you to the full Cyberpunk 2077: Perk Shards Location Guide.
| Shard # | Exact Sub-Location | District | Nearest Fast Travel Point | Source Content |
|---|---|---|---|---|
| 1 | Abandoned Warehouse A B C (Garages) | Watson (Northside) | Offshore Street | Base Game |
| 2 | NCPD Scanner Alert (Car Trunk) | Westbrook (Japantown) | Dark Matter | Base Game |
| 3 | Roadside Crash Site (Billboard/Drone) | The Badlands | Sunset Motel | Base Game |
| 4 | Suspected Organized Crime Activity (NCPD) | The Badlands | Sunset Motel | Base Game |
| 5 | Dead Maintenance Worker at Ventilation Shaft | City Center (Corpo Plaza) | Corpo Plaza Apartment | Base Game |
| 6 | At Memorial Park, in a chest during NCPD Assault | City Center (Corpo Plaza) | Arasaka Tower | Base Game |
| 7 | Gang Activity under Bridge (NCPD) | Heywood (The Glen) | Ventura & Skyline | Base Game |
| 8 | Arasaka Park Entrance Building Upstairs | Santo Domingo (Arroyo) | Arasaka Industrial Park | Base Game |
| 9 | Reported Crime Garage (NCPD) | Santo Domingo (Rancho Coronado) | Woodhaven Street | Base Game |
| 10 | Riverside Garage (NCPD) | Santo Domingo (Arroyo) | Red Dirt Bar | Base Game |
| 11 | “Dog Eat Dog” Starter Quest | Dogtown | Dogtown Entrance | Phantom Liberty DLC |
| 12 | Red Van Junk Shop (Marcin) inside EBM Petrochem Stadium | Dogtown | EBM Petrochem Stadium | Phantom Liberty DLC |
| 13 | Longshore Stacks below Jung Store behind cardboard | Dogtown | Longshore Stacks | Phantom Liberty DLC |
Dogtown Consumables (Phantom Liberty DLC)
During the starter quest of the Phantom Liberty DLC in Cyberpunk 2077 called “Dog Eat Dog” you eventually enter the marketplace area (You can also access the area later at any time). Here you can buy various new stuff that isn’t available in the base game. his will also still be availabl
Some vendors also sell permanent consumable upgrades, 12k each. Best you go talk to all the vendors in that area and see what they offer.
- Bartender Shop: Dendritic Protoplasma Supplier permanent +1% Ram Recovery Rate.
- Netrunner Shop: Dendritic Protoplasma Supplier permanent +2% Ram Recovery Rate.
- Note: The items are called the same, but they both work, so you get a total of 3% Ram Recovery Rate.
- Food Vendor: Prototype Pseudo Embryonic Cell Builder permanent +2 Health.
- Meds Vendor: Prototype Pseudo Embryonic Cell Builder permanent +3 Health.
- Note: The items are called the same, but they both work, so you get a total of +5 Health.
- Note: You find the Meds vendor on the opposite side of the Netrunner Vendor in a hallway.
- Food Vendor: Military-Grade Lactic Acid Recyclers: +1% Stamina Regen Rate.
- Herold Weapon Vendor: Sells you all the Iconic Weapons you have missed during your playthrough.
- Marcin/ Michal Kicinski Junk Vendor: 1 Perk Shard and 1 Progression Shard of each type.
Additionally, make sure to check all other vendors in Dog Town. For example at the Longshore Stacks fast travel point, you also have vendors that sell you permanent upgrades.
Lucy Character Creation in Cyberpunk 2077

There are two ways you can recreate Lucy in Cyberpunk 2077. A closer version of the true Lucy can be made with mods. Here I will show you how to get as close as possible to Lucy without mods:
- Voice Tone: Feminine
- Skin Tone: 1st option
- Skin Type: 04
- Hairstyle: 06 (or 01)
- Hair Color: Bottom row, last option.
- Eyes: 09
- Eye Color: Option 8
- Eyelash Color: Row 5, option 1.
- Nose: 04
- Mouth: 06
- Jaw: 16
- Ears: 04
- Cyberware: Off
- Facial Scars: Off
- Facial Tattoos: Off
- Piercings: Off
- Teeth: 00
- Eye Makeup: 19
- Eye Makeup Color: Row 2, option 1.
- Lip Makeup Style: Off
- Cheek Makeup: Off
- Blemishes: Off
- Nails: Long
- Nail Color: Option 1
- Chest: Default
- Nipples: 02
- Body Tattoos: Off
- Body Scars: Off
- Genitals: Off