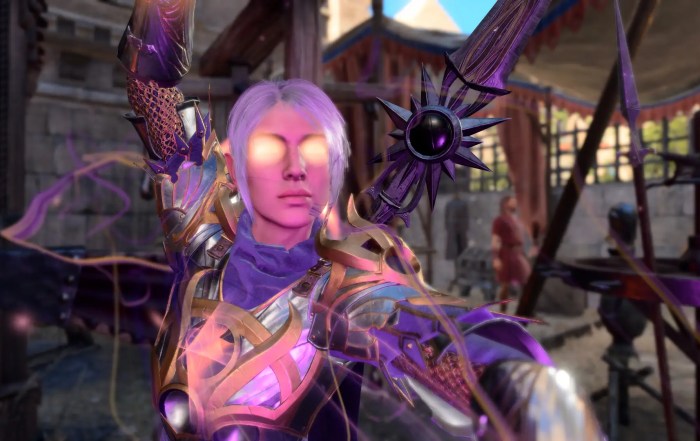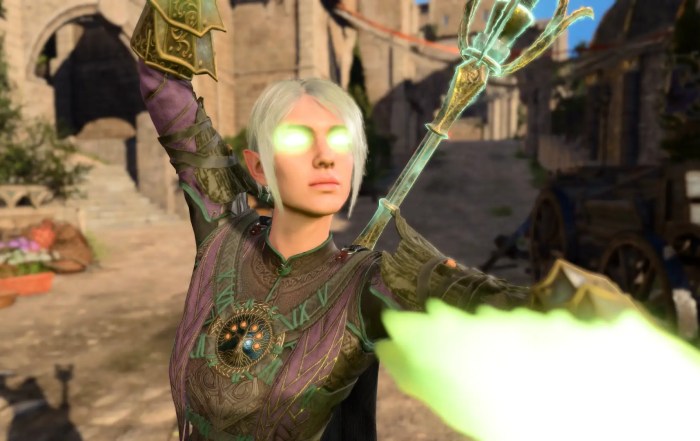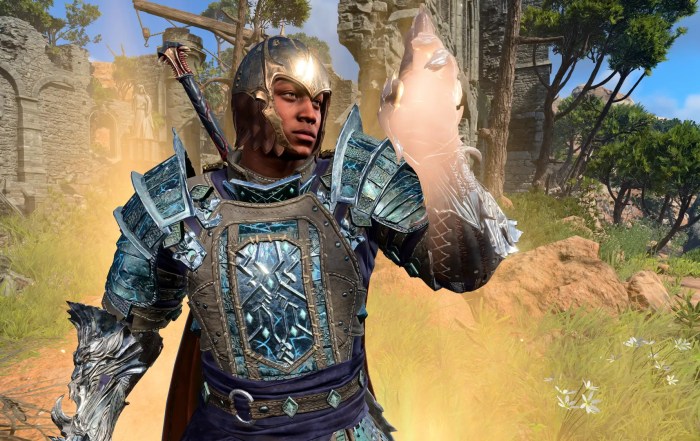
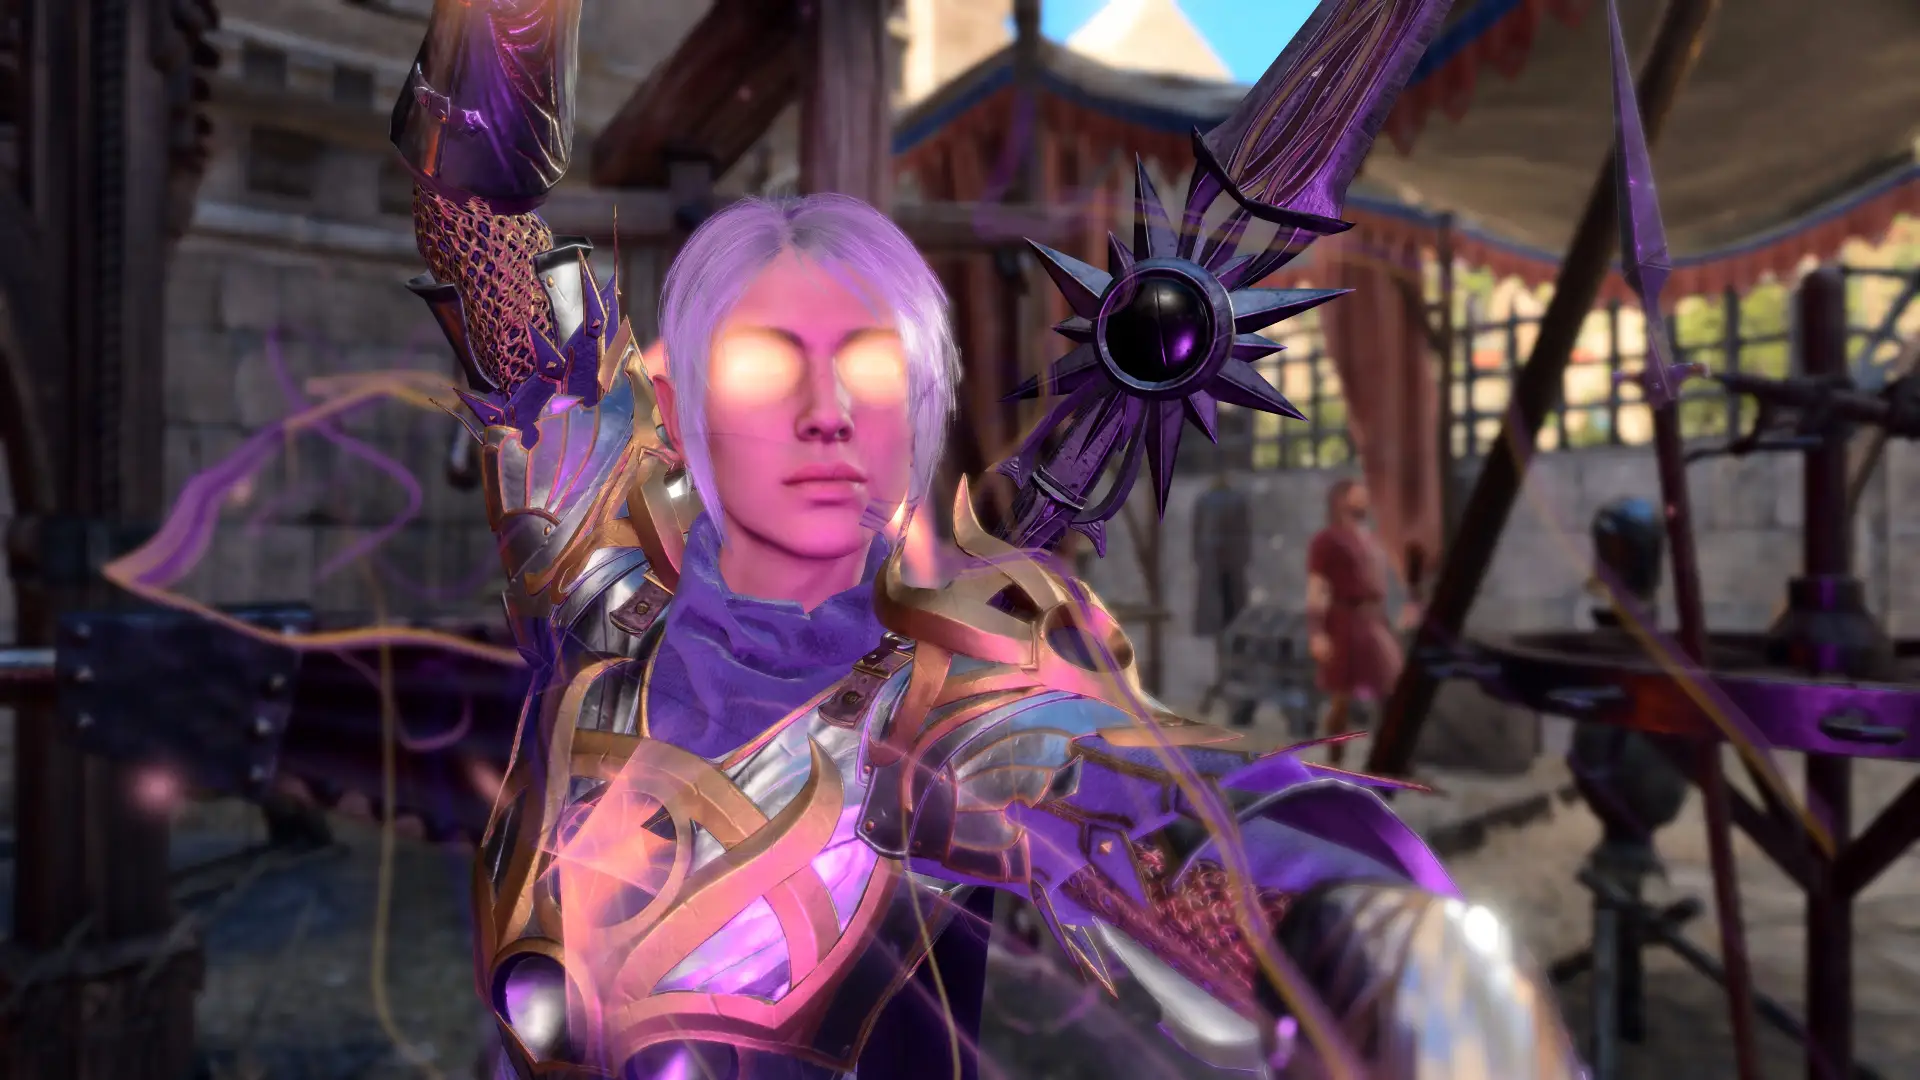
Welcome to the best Shadowheart Trickery Domain Build Guide for BG3. This build is perfect for players who want to fully embrace the Shar-aligned path in Shadowheart’s storyline after the Gauntlet of Shar.

The Dark Justiciar Build works especially well in stealth-focused parties. But it is also has excellent melee damage potential.

We also have a regular Trickery Domain Build that is not centred on Shadowheart and doesn’t use any multiclassing. This build is up to date with the latest version of BG3 (Patch 8). You can find out how this build measures up to other Multiclass Builds on our BG3 Multiclass Builds Tier List.


Table of Contents:


BG3 Shadowheart Trickery Cleric Build Strengths & Weaknesses:

SHADOWHEART TRICKERY CLERIC PROS

  • ALL-ROUNDER
  • VERY HIGH MELEE DAMAGE (LATE-GAME)
  • CAN SUPPORT AND HEAL ALLIES
  • LOTS OF SPELLS = VERSATILE
  • CAN MAKE ALLIES HARDER TO DETECT

SHADOWHEART TRICKERY CLERIC CONS

  • WEAK DURING EARLY-GAME
  • VERY GEAR DEPENDANT
  • A BIT TRICKY FOR BEGINNERS

BG3 Shadowheart Trickery Cleric Build Overview

BG3 Multiclass Explainer:

  • How it works: New classes can be added as you level up. They are added on a level-by-level basis.
  • Example: If you are a level 6 Cleric and decide to add 1 Monk level, you will only get the features of Monk level 1.
  • Example 2: If you want the features of a level 6 Cleric and Monk, you need to be max level and add 6 levels of each class.

Pro Tip: It’s usually best to choose subclasses that work together easily. For example, the Cleric and Monk go well together because they both use Wisdom as their spellcasting attribute.

This means we have to be sure that the payoff of adding new classes to your build is worth it, because every level of a secondary class reduces the highest level we can reach with our primary class.

In this Shadowheart Multiclass Build, we’ll be combining the following classes:

Trickery Domain Cleric

  • The Trickery Domain Cleric forms the core of the build; we’ll take 5 levels from this subclass.
  • It gives you access to a wide range of spells, including damage, support and healing spells.
  • It also allows you to buff allies’ stealth attempts or distract enemies with illusions.

Way of Shadow Monk

  • The Way of Shadow Monk works well with Trickery Domain, giving you more options that play into stealth.
  • You can see in the dark and Hide, Dash or Disengage with a Bonus Action.
  • Later on, you unlock a special weapon action that stuns enemies and lets you attack twice per Action instead of once, effectively doubling your melee damage.

Fighter

  • We’ll take just one level of the Fighter, early on in the game.
  • This unlocks a Fighting Style, which slightly boosts either your attacking or defensive abilities.
  • It also gives you more weapon Proficiencies, unlocking more options in the early and mid game.

Here is a quick overview of which class we pick when:

Shadowheart Trickery Cleric Levelling Progress Overview

  • Level 1: Cleric 1 (Trickery Domain)
  • Level 2: Fighter 1
  • Level 3: Cleric 2
  • Level 4: Cleric 3
  • Level 5: Cleric 4
  • Level 6: Cleric 5
  • Level 7: Monk 1
  • Level 8: Monk 2
  • Level 9: Monk 3 (Way of Shadow)
  • Level 10: Monk 4
  • Level 11: Monk 5
  • Level 12: Monk 6 OR respec to Fighter 0 & Monk 7

BG3 Shadowheart Trickery Cleric Build – First Steps
How to unlock Shadowheart in BG3 inside the pod ship

In this section, we will cover how to recruit Shadowheart and the essential steps to respec her into our powerful Trickery Domain setup. If you’re an experienced player, feel free to skip ahead to the next part.

How to Recruit Shadowheart in Baldur’s Gate 3

Shadowheart is likely the first companion you will encounter after the Nautiloid. While she is easy to find, rescuing her early provides a significant boost to your initial “approval” rating with her.

Step 1: The Nautiloid (Prologue)

  1. In the final room before the helm, you’ll find Shadowheart trapped in a pod.
  2. Go to the small side-room to the east.
  3. Loot the Eldritch Rune from the Dead Thrall.
  4. Insert the Rune into the console next to her pod to free her.
  5. Detailed Guide: How to recruit Shadowheart in BG3.

Step 2: The Ravaged Beach

  1. The Beach: Shadowheart lies unconscious on the sand directly in front of your starting position.
  2. The Dank Crypt: If not found on the beach, she is at the north end at the side-entrance to the Dank Crypt, banging on the stone doors.
  3. The Druid Grove: If you missed her twice, she will be sitting near the training area in the Emerald Grove.

Pro Tip: Rescuing her on the Nautiloid grants an immediate +10 Approval, making it easier to unlock her romance and story beats early.


How to Respec Shadowheart in BG3

Shadowheart starts with a poorly optimised ability distribution and with the wrong subclass, so we need to respec here ASAP. Follow these steps to do that:

Step 1: Unlock Withers (The Dank Crypt)

You need the NPC Withers to change classes. Find him early in Act 1:

Step 2: The Respec Process

Once Withers is at your camp, follow these steps:

  • Character: Ensure you are controlling Shadowheart.
  • Talk to Withers: Select “Can you help me change my class?”
  • Cost: 100 Gold.
  • Class: Cleric
  • Subclass: Trickery Domain

When to Respec? As soon as you have the gold spare. You don’t have to rush it, but as soon as you have done the respec, you’ll be able to easily follow along with the build guide below.


BG3 Shadowheart Trickery Cleric Character Creation (Level 1)
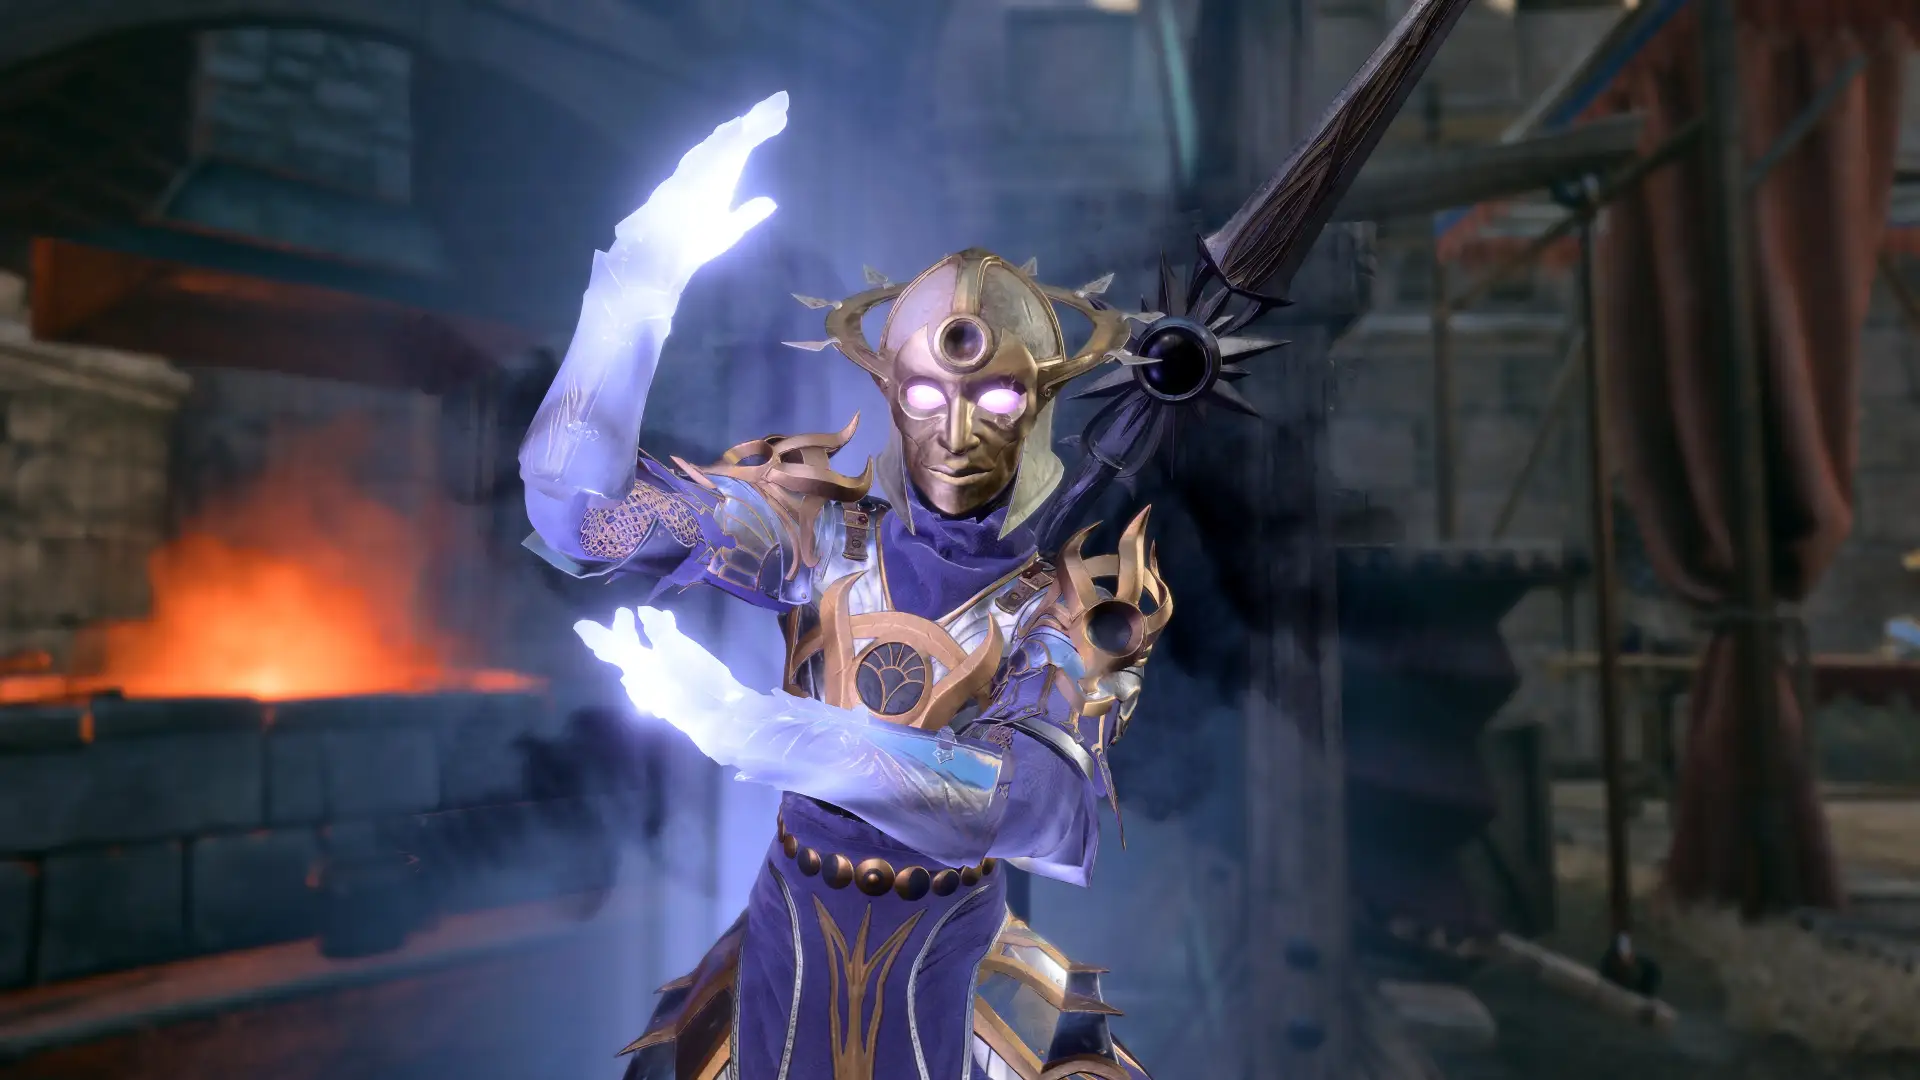
BG3 Shadowheart Dark Justiciar Build Guide

In this section, we will guide you through the best starting choices for creating your BG3 Shadowheart Trickery Cleric Multiclass Build.

Starting Class (Cleric)

We’ll start by choosing the Cleric class. The Druid and Fighter elements of the build will be added later.

The Cleric starts the game with the following features, which we’ll build on over the course of this guide:

Core Cleric Features

  • Item Proficiency – Simple Weapons, Maces, Mourningstars, Light & Medium Armour, Shields
  • Cleric Spellcasting – You can cast spells and cantrips from the Cleric list. To begin with, you can select three Cantrips. When you level up, you will gain access to spells and Spell Slots to cast them with.
  • Subclass Choice – You must choose your Cleric subclass.

We’ll explain what to choose for these options below.


Race: High Half-Elf

Shadowheart is a High Half-Elf. While not ideal, this race does get some useful features that work with Cleric Builds.

High Half-Elf “Wizard” Cantrip (Pick One)

One positive of High Half-Elf is the ability to choose an extra Cantrip from the Wizard list. Since these use Intelligence, avoid damage spells (like Fire Bolt) as they will miss too often.

Instead, pick a Utility spell:

  • Mage Hand: Manipulate objects and levers from a distance.
  • Blade Ward: You take half damage from physical attacks for the next turn. Useful if you can’t make any good attacking or supportive plays on the current turn.
  • Friends: Helps to pass dialogue checks.

More useful Racial Passives

  • Darkvision: Removes attack penalties in dark environments, vital for landing inflict wounds icon bg3 Inflict Wounds and other attacks.
  • bg3 fey ancestry icon Fey Ancestry: You have Advantage on Saving Throws against   Charm and immunity to magical Sleep.
  • civil militia icon bg3 Civil Militia: Grants proficiency with Spears, Pikes, Halberds, and Glaives, as well as Light Armour and Shields.

What is Advantage? When you have Advantage, you roll two dice and take the highest result. This significantly increases your success rate for critical saves and attacks.


Background & Skills

Shadowheart is locked into the Acolyte Background, which gives the following Skill Proficiencies:

Acolyte Background

bg3 insight icon Insight

A Wisdom skill that allows you to read people and situations, sometimes unlocking extra info or rare dialogue options.

bg3 religion icon Religion

An Intelligence skill that can give you more lore information about various locations, or unlock additional dialogue options.

You can manually choose two other Skills in addition to those granted by your Background. These choices are restricted to the Cleric Skill list.

You should get the bg3 medicine icon Medicine skill because it matches our build (we’ll be focusing on Wisdom). You can then choose any other skill from the remaining options.


Ability Points
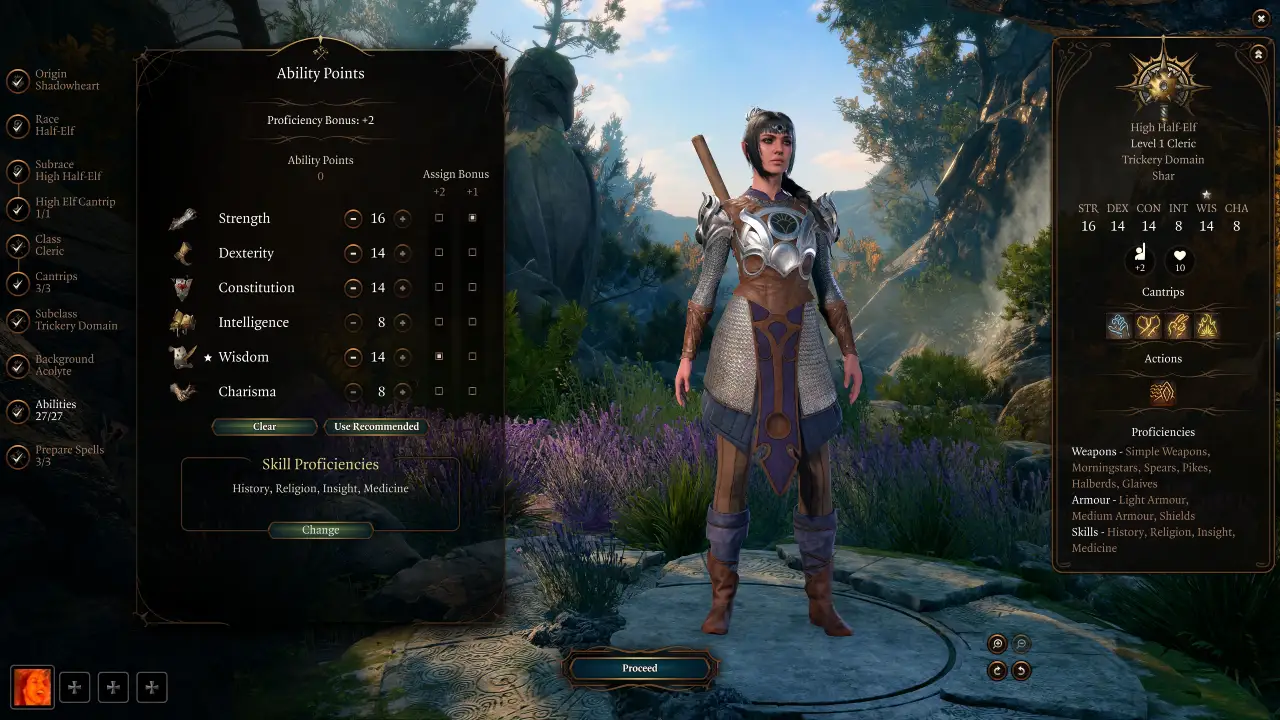
BG3 Shadowheart Trickery Cleric Build level 1

Strength – 16 Points

  • Boosts Shadowheart’s melee attacks.
  • Also boosts jump distance, carry weight and push/throw weight limit.

Dexterity – 14 Points

  • Affects your Initiative (how early you move in the turn compared to other characters).
  • We’ll be using Medium Armour, so increasing Dexterity higher than 14 gives no further benefit to your Armour Class.

Constitution – 14 Points

  • Increases Max HP.
  • Helps you to maintain Concentration Spells when you take damage.
  • Provides some resistance to a wide range of debilitating debuffs.

Intelligence – 8 Points

  • Not relevant for our build.

Wisdom – 14 Points

  • Improves your spell accuracy/success chance.

Charisma – 8 Points

  • Helps with dialogue checks, but low importance for this build.
  • Recommended to use a different character with higher Charisma for dialogue.

Ability Points Why it matters
Strength 16 Boosts melee attacks, jump distance and carry weight.
Dexterity 14 Boosts Initiative and Armour Class. We’ll use Medium Armour, so there’s no AC benefit above 14 Dexterity.
Constitution 14 Increases HP and helps with Concentration checks for spells.
Intelligence 8 Not relevant for our build.
Wisdom 14 Increases the success chance of spells.
Charisma 8 Used for dialogue checks. Low importance for this build. You should use a character with higher Charisma for dialogue.

Important Tips:

  • The “Even Number” Rule: In Baldur’s Gate 3, only even numbers (12, 14, 16) increase your ability modifier. This means an 11 is functionally equivalent to a 10, so we aim for even numbers to maximise efficiency.
    • You can make an exception to this if you plan to take a Feat or get another effect that gives you a +1 or +3 bonus to the Ability in question. But we’re not relying on any of those for this build, so we’re sticking to an even setup.
  • Concentration is Key: Many important Cleric spells (like hold person icon bg3 Hold Person) require Concentration. A high Constitution helps ensure you don’t lose your spell just because you took a hit.

Cantrips

In the Class menu, choose three Cantrips to start with. We recommend getting the following Cantrips:

 Guidance

  • Gives a 1d4 bonus to most non-combat dice rolls. 
  • Can be cast on yourself or allies and activated from within the dice roll screen.

 Toll the Dead

  • Deals 1d8 Necrotic Damage at long range, unless the enemy rolls a successful Wisdom Save.
  • The damage is increased to 1d12 against enemies who are below full health.

 Bursting Sinew

  • Target a corpse and cause it to explode, dealing 1d10 Piercing Damage to nearby enemies who fail the Dexterity Saving Throw.
  • A decent situational AoE option.

Subclass – Trickery Domain

You must choose your Cleric subclass immediately upon performing Shadowheart’s respec. For this build, we are using Trickery Domain, which focuses on stealth and deception.

The Trickery Domain subclass starts with the following features:

Trickery Domain Features

  • bg3 blessing of the trickster icon Blessing of the Trickster – Give a creature bg3 Advantage icon Advantage on Stealth Checks.
  • Trickery Domain Spells – You unlock two spells – they are always prepared:
    • bg3 charm person icon Charm Person – Gain bg3 Advantage icon Advantage on Charisma Checks against a humanoid target, or prevent them from attacking you. The effect is temporary, and the target may turn hostile when it ends (make sure you’re no longer in the vicinity so you don’t get accused).
    • bg3 disguise self icon Disguise Self – Temporarily change your appearance by magical means. Any crimes or transgressions committed when disguised won’t be traced back to you, and you can deal with characters who usually don’t like you (such as a merchant who caught you stealing).
  • More features will be unlocked as you level up.

BG3 Shadowheart Trickery Cleric Build Levelling Guide (2-12)

Now, we are going to look at how to level up your Shadowheart Trickery Cleric Build for Baldur’s Gate 3.

Early-Game Levelling (2-4)

In this section, we’ll cover the first four levels.


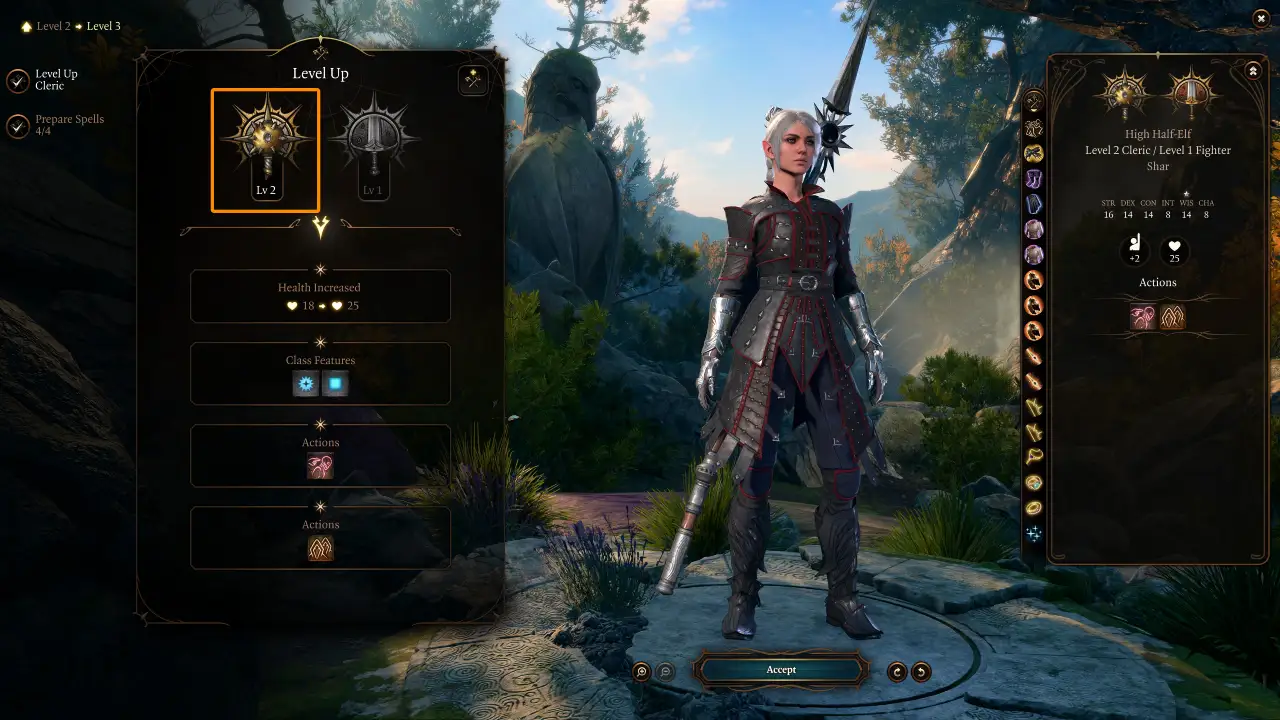
Level 2
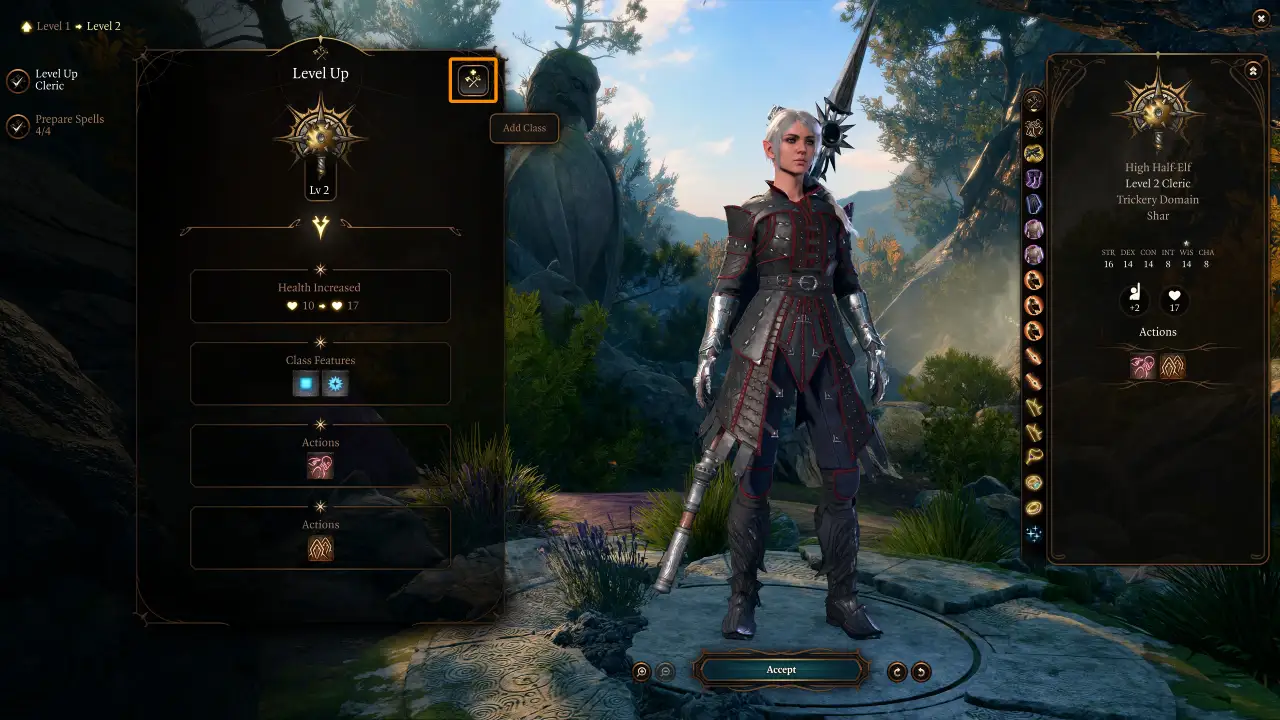
BG3 Shadowheart Trickery Cleric Build level 2

To begin the levelling process, we will add one level from the Fighter class to the build. The image above shows where you must click to add a new class.

The main reason for this is to gain Proficiency with more weapons, adding some extra flexibility in the early game. But you also get a couple of other useful features:

Fighter Class Starting Features

bg3 second wind icon Second Wind

  • Spend a bg3 bonus action icon Bonus Action to heal yourself.
  • Once per Short Rest.

Fighting Style

  • Specialise in a Fighting Style to gain a modest bonus, depending on your choice.
  • I recommend choosing bg3 great weapon fighting icon Great Weapon Fighting, which rerolls damage dice that land on 1 or 2 when using a weapon wielded in both hands. This increases your average damage output.
    • Note: The bonus also applies to versatile weapons like Longswords and Spears, as long as the off hand is empty.

Level 3

BG3 Shadowheart Trickery Cleric Build level 3

We’ll now return to the Cleric class. Make sure you click the Cleric icon before completing your level-up (see the image above).

Trickery Domain Cleric Features

 Turn Undead

  • Attempt to Turn all Undead who can see you, causing them to flee.

bg3 invoke duplicity icon Invoke Duplicity

  • Summon an illusory copy of yourself to distract nearby enemies.
  • Attacks against enemies near the illusion have bg3 Advantage icon Advantage.
  • Enemies may waste their time trying to attack the illusion.

Cleric Spell

You must choose four Cleric spells to prepare. We recommend:

bg3 command icon Command

  • Attempt to force the target to carry out a command on their turn. Some useful options include telling them to stay put and do nothing, drop their weapon, or fall to the ground.
  • While this only lasts for 1 turn, it doesn’t require Concentration, so it can be safely used in conjunction with any spell in the game.

Healing Word

  • Useful for healing yourself or your allies.
  • It’s better than Cure Wounds, despite the latter spell’s slightly higher healing cap, because it can be cast over a distance and only consumes a bg3 bonus action icon Bonus Action.

 Bless

  • Target up to three Allies, giving them a buff on Attack Rolls and Saving Throws.
  • Note that this is a Concentration Spell, so casting it will break any other Concentration effect you have active.
  • Use this when fighting tougher early-game enemies like the Gnolls on Risen Road – it’s going to help a lot while you’re stuck with weak early-game weapons.

Inflict Wounds

  • Deals up to 30 Necrotic damage to an enemy. It can be upcast for more damage later in the game.
  • With the Trickery Domain subclass boosting Necrotic Damage, we’ll be focusing on this spell quite a lot.

Note that unlike many other classes, Clerics automatically learn all Cleric spells at the required level and can swap their prepared spells whenever they want, as long as they are not in combat.

If you don’t know what we mean by terms like Advantage, Concentration or Saving Throw, or want to find out how systems like Stealth work, you will find our BG3 Hidden Mechanics Guide very useful.


Level 4
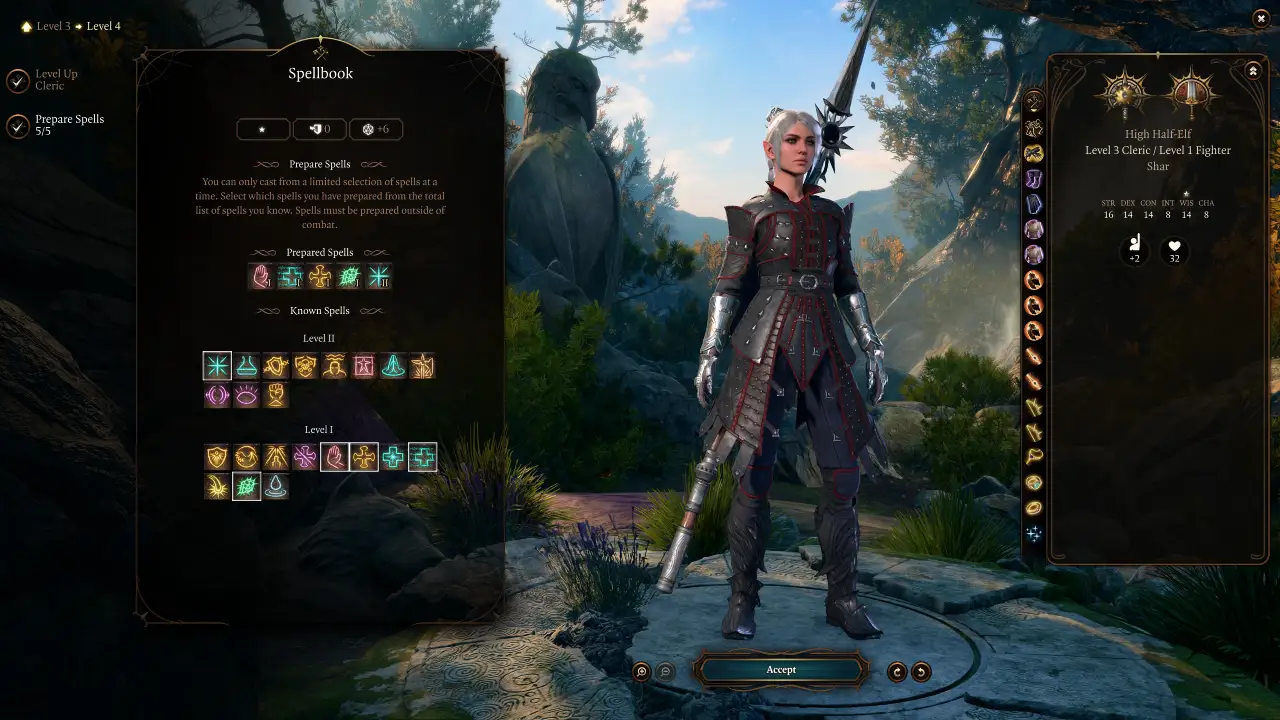
BG3 Shadowheart Trickery Cleric Build level 4

We will add another Cleric level to the build here.

Trickery Domain Spells

You unlock two new Trickery Domain spells, which are automatically learned and always prepared.

bg3 mirror image icon Mirror Image

  • Summon three illusory copies of yourself to distract attackers.
  • Each active copy increases your Armour Class by 3.
  • Whenever you evade an enemy attack, one of the copies disappears.

bg3 pass without trace icon Pass Without Trace

  • Grant yourself and nearby allies a +10 bonus to bg3 stealth icon Stealth checks.

New Cleric Spell

In addition, you can choose another Cleric spell to prepare. You now have access to second-level spells. We recommend:

aid icon bg3 Aid

  • Increase your Maximum HP and that of all nearby allies (party members and summons) by 5. Lasts until the next Long Rest.
  • Later on, you should upcast the spell to get another 5 HP per spell slot level.
  • I recommend casting this spell after every Long Rest.

I also want to draw your attention to the prayer of healing icon bg3 Prayer of Healing spell. This can give your whole party a big heal outside of combat, but since it cannot be used in combat, you should only slot it when you need to use it, then switch back to another spell.


Mid-Game Levelling (5-8)

In this section, we’ll cover the mid-game. At these levels, the Shadowheart Trickery Cleric Build will become much more powerful, gaining access to a wider array of spells and features.

Level 5
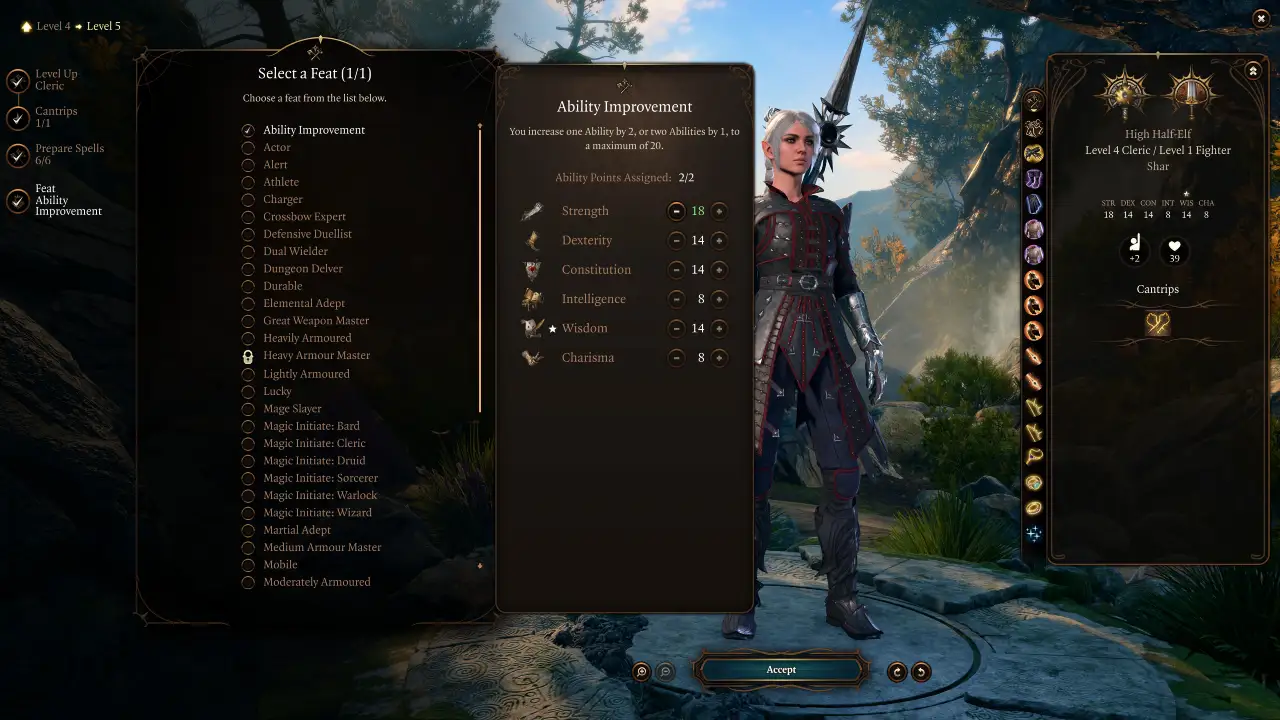
BG3 Shadowheart Trickery Cleric Build level 5

New Cleric Spell

Choose one more Cleric spell to prepare:

hold person icon bg3 Hold Person

  • Freezes the target in place for up to 10 turns (requires Concentration).
  • While active, the target cannot move or attack. Melee attacks against them are guaranteed Critical Hits.

New Feat

You can choose a Feat to make your Shadowheart Trickery Cleric better in combat.

For now, we are going to use Ability Improvement:

  • Gives you two additional Ability Points.
  • Put the points into Strength, bringing your total up to 18.

Level 6

At Level 6, we’ll add one more Cleric level to the build.

Cleric Features

destroy undead icon bg3 Destroy Undead

  • An upgrade to the Turn Undead feature we obtained at Level 2.
  • Undead creatures bg3 turned icon Turned by you will now take 4d6 bg3 radiant icon Radiant Damage.

New Cleric Spell

You now have access to Third-Level spells, and can choose one to unlock. Our recommendation is:

 Spirit Guardians

  • Surround yourself with spirits who follow you around.
  • The spirits attack any enemies who move close to you, dealing Radiant or Necrotic damage.
  • You can deal loads of damage by casting this spell and running around, tapping enemies with the AoE. Just beware of enemy opportunity attacks.

Trickery Domain Spells

The Trickery Domain gives you two more spells that are automatically Prepared at all times.

bg3 bestow curse icon Bestow Curse

  • Choose a curse and attempt to apply it to the target.
  • Curses can grant bg3 disadvantage icon Disadvantage on certain Saving Throws or Attack Rolls, deal extra damage to the target when you attack them, or fill them with dread so they skip a turn.

bg3 fear icon Fear

  • Enemies within a 9m conal AoE must succeed a Wisdom Saving Throw.
  • If they fail the save, they are rendered bg3 fearful icon Fearful.
  • Fearful targets are forced to drop their weapon and flee. They will attempt a new Saving Throw every turn.

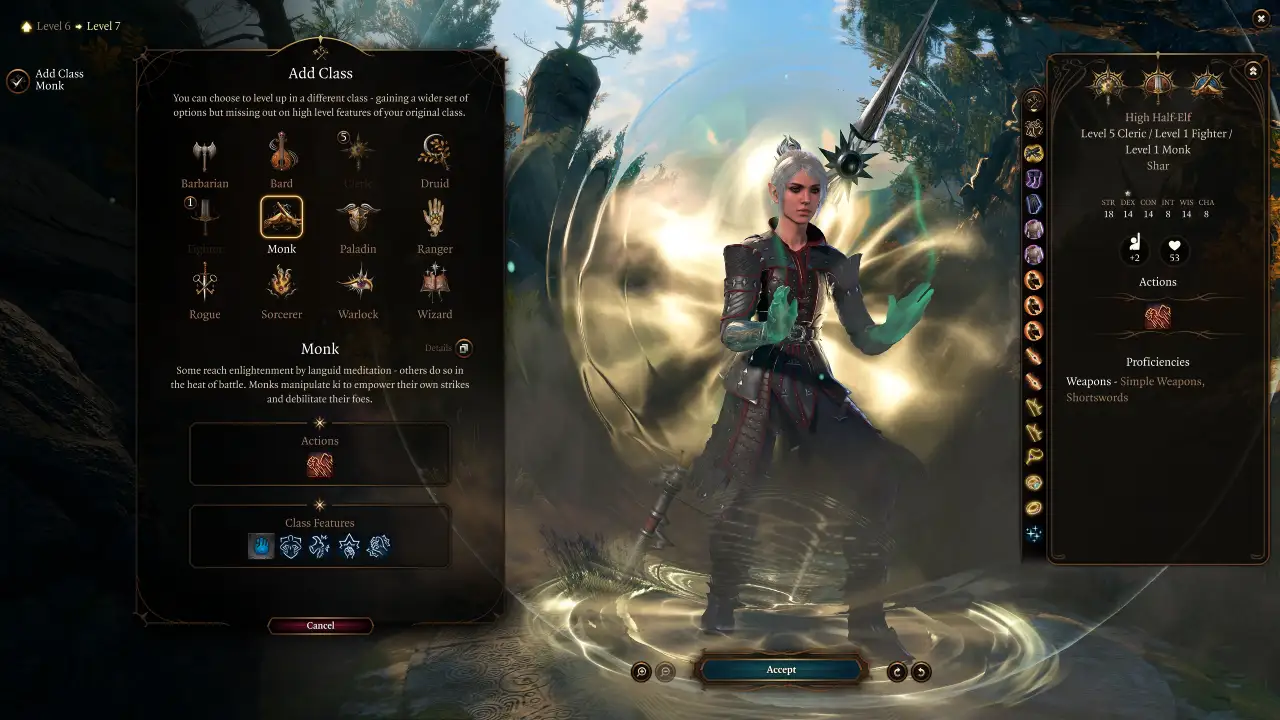
Level 7

BG3 Shadowheart Trickery Cleric Build level 7

We will now add a Monk level to the build.

The first Monk level primarily grants bonuses to unarmed attacks, which we are not using in this build. But later on, we will unlock a range of very useful features for this Shadowheart Dark Justiciar Build.


Level 8
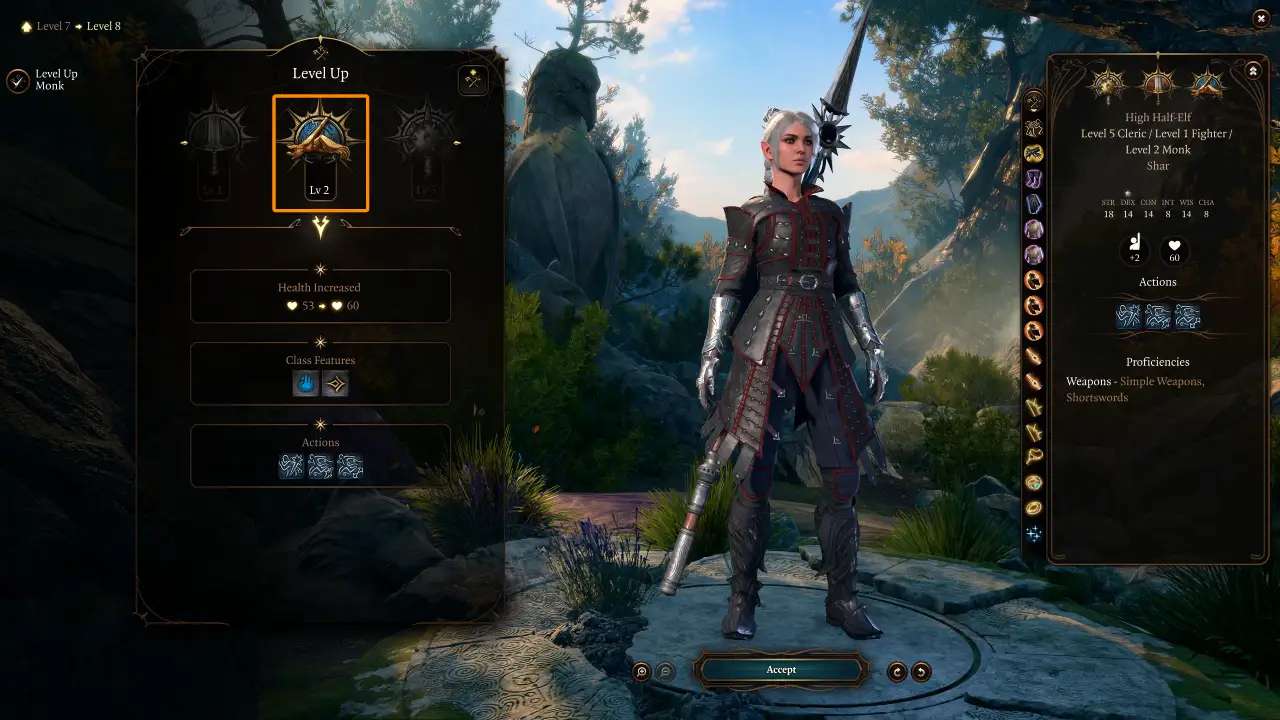
BG3 Shadowheart Trickery Cleric Build level 8

We will continue adding new Monk levels for the rest of the game.

The second Monk level grants:

New Monk Features:

bg3 ki icon Ki Point

  • You’ll get a new Ki Point every time you increase your Monk level.
  • They are used to activate Monk class actions.

bg3 patient defence icon Patient Defence

  • Attack Rolls against you have bg3 disadvantage icon Disadvantage, and you have bg3 Advantage icon Advantage on Dexterity Saving Throws.
  • Lasts for 1 turn. Costs a Bonus Action and a Ki Point.

bg3 step of the wind dash icon Step of the Wind: Dash

  • Double your movement speed. Jump no longer requires a bonus action.
  • Costs a Bonus Action and a Ki Point to activate.

bg3 step of the wind disengage icon Step of the Wind: Disengage:

  • Retreat to safety by Disengaging. Jump no longer requires a bonus action.
  • Costs a Bonus Action and a Ki Point to activate.

Late-Game Levelling (9-12)

As we move into the final few levels for the Shadowheart Trickery Cleric Build, you’ll continue to gain more powerful spells and features.

Level 9
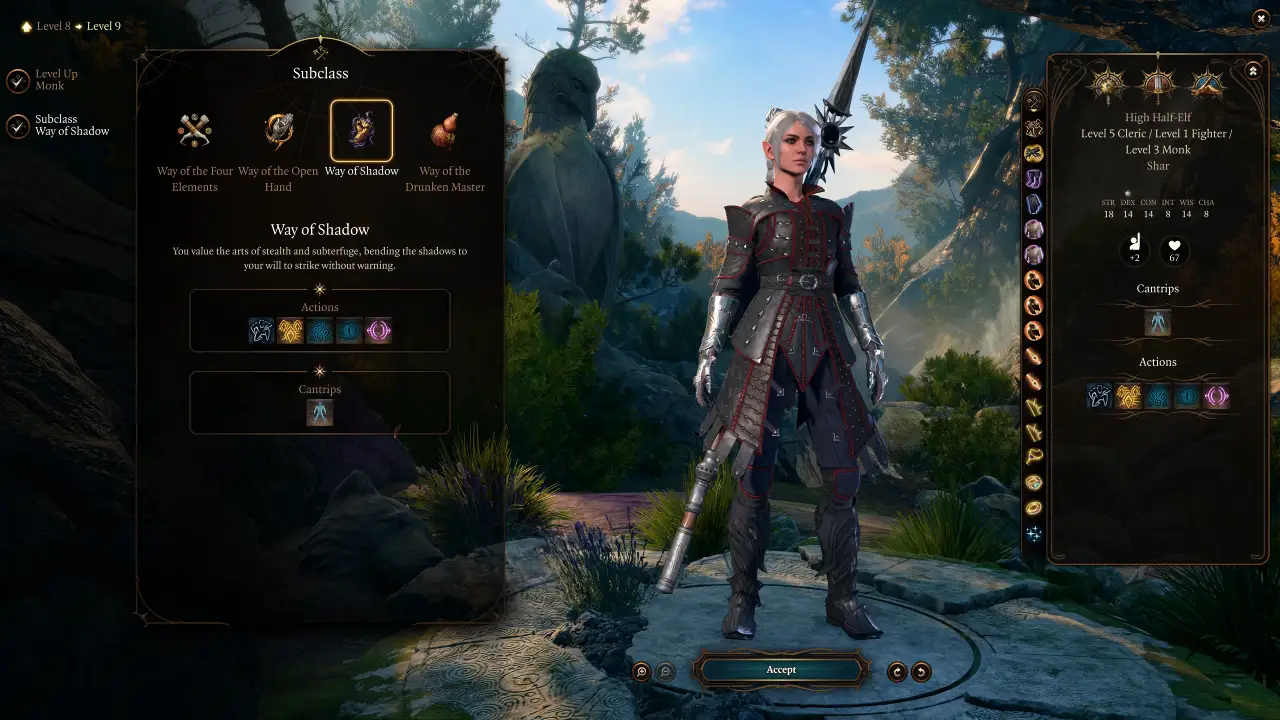
BG3 Shadowheart Trickery Cleric Build level 9

We will add another Monk level, unlocking several new features from the Way of Shadow subclass.

New Monk Features:

bg3 shadow arts hide icon Shadow Arts: Hide

  • Hide using a Bonus Action instead of a full Action.

bg3 pass without trace icon Shadow Arts: Pass Without Trace

  • Call forth a veil of shadows and silence that gives you and all nearby companions a +10 bonus to Stealth Checks.
  • It is better to use the Cleric version of this because it lasts longer.

bg3 darkness icon Shadow Arts: Darkness

  • Create a dark shroud that Heavily Obscures and Blinds creatures within. Creatures cannot make ranged attacks into or out of it.
  • Creatures with magical darkvision (such as that from the Warlock Devil’s Sight invocation) can see through the cloud, though this is quite rare.

bg3 darkvision icon Shadow Arts: Darkvision

  • Grant a creature the ability to see in the dark out to a range of 12m.

bg3 silence icon Shadow Arts: Silence

  • Create a soundproof sphere. All within are Silenced and immune to Thunder damage.
  • Protects you from all hostile effects that rely on sound, such as siren songs.

bg3 minor illusion icon Minor Illusion

  • Create an illusion that compels nearby creatures to investigate.
  • You can remain hidden while casting this Cantrip. It can be cast while you are Silenced.
  • Can be used to gather enemies into one spot and surprise them with a powerful AoE effect.

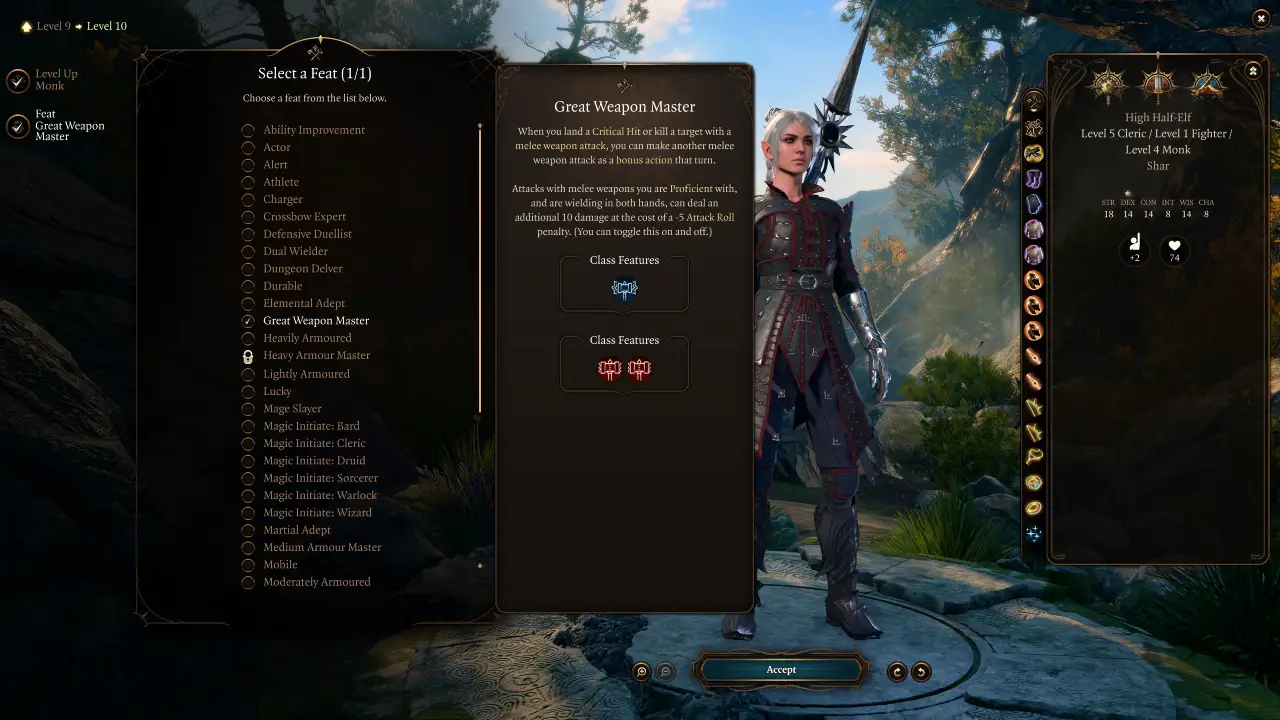
Level 10

BG3 Shadowheart Trickery Cleric Build level 10

The next Monk level allows you to unlock a second Feat.

New Monk Feature

bg3 slow fall icon Slow Fall

  • Reduces your fall damage by half

Choose a Feat – You can choose one more Feat for your Shadowheart Trickery Cleric. Recommended option:

  • Great Weapon Master – Deal +10 bonus damage with weapons equipped in both hands, at the cost of a -5 Attack Roll penalty.
    • This feature can be toggled on or off at will.
    • It is ideal for quickly finishing off weaker enemies, but you might want to turn it off when fighting enemies with a very high armour class value.

Level 11

The next Monk level is very important. It allows you to attack twice per Action and stun enemies with your weapon attacks.

New Monk Features

bg3 extra attack iconExtra Attack

  • Your bg3 action icon Actions now yield two weapon or unarmed attacks instead of one.

bg3 stunning strike unarmed icon Stunning Strike

  • Your weapon attack will stun the target if they fail a Saving Throw.

Level 12

For the final level, we will add one more Monk level to the build.

New Shadow Monk Feature

bg3 shadow step icon Shadow Step

  • Teleport from one shadowy area to another.
  • Afterwards, you have bg3 Advantage icon Advantage on your next melee Attack Roll.

OPTIONAL RESPEC:

  • You can opt to perform a respec here.
  • The purpose of this is to remove the one Fighter level from the build (since we no longer need the extra weapon proficiencies, assuming you are using Shar’s Evening Spear) and replace it with Monk Level 7.
  • This unlocks bg3 evasion iconEvasion and bg3 stillness of mind icon Stillness of Mind, two pretty strong defensive features.
  • The downside is that you will lose your Great Weapons Fighting Style, so your average damage will go down a bit. Both paths seem equally strong, so we included them both.

BG3 Shadowheart Trickery Cleric Build Equipment
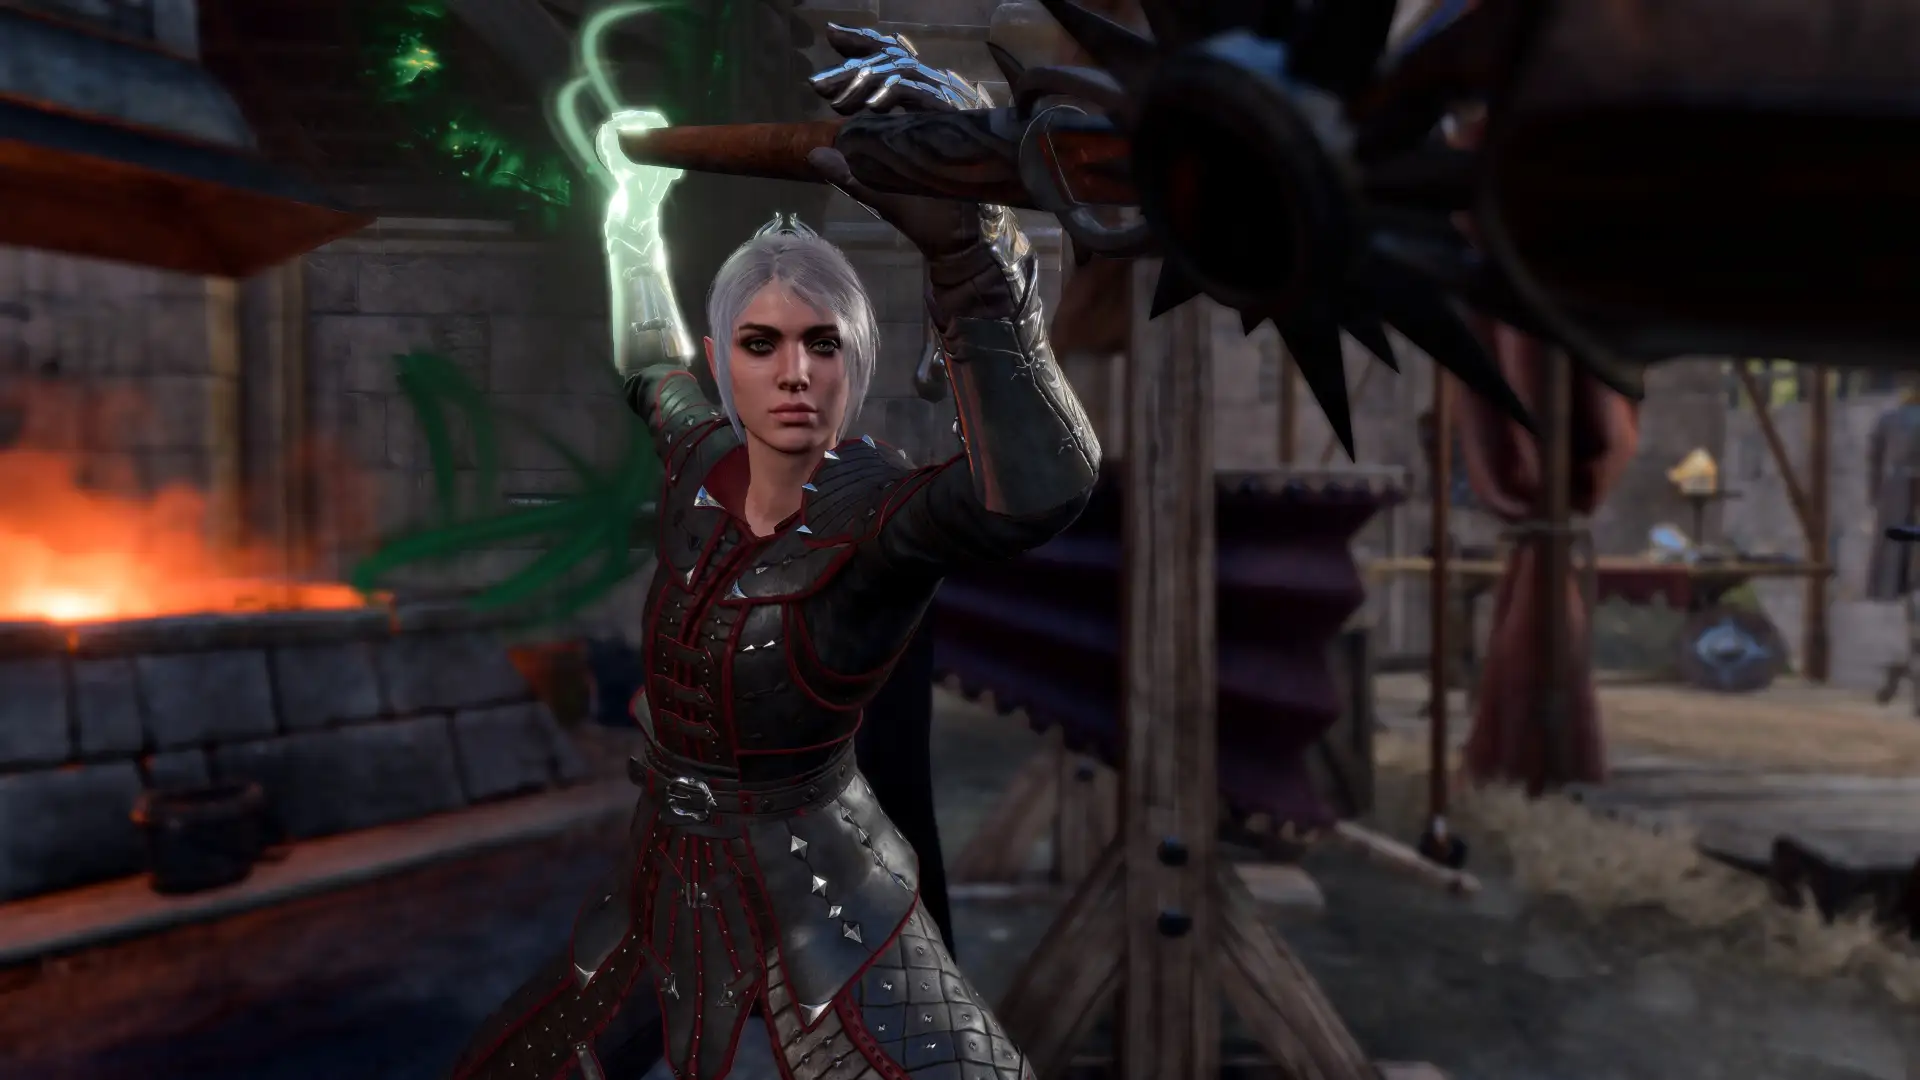
BG3 Shadowheart Trickery Cleric Build Guide

Now, let us take a look at some of the equipment choices you can make for your BG3 Shadowheart Trickery Cleric Build.

Don’t worry if you miss out on some of the items. Just enjoy your playthrough and try to view this as a wishlist rather than a precise blueprint. The names of the most essential, build-defining items are written in Bold Italic.

Some of the items are quite expensive – you may be interested in our BG3 Infinite Gold Guide to help you afford them all.


Early Game Equipment

This is the early-game gear setup that you can use for the Shadowheart Trickery Cleric Build. You don’t need to get all the items, but the build will perform better if you find most or all of them. You can find these items in Act 1 or early Act 2. Essential items are written in Bold Italic.

Slot Icon Item Effects Location
Head bg3 holy lance helm icon Holy Lance Helm
  • Enemies who miss you with an Attack Roll must succeed on a DEX Save or take 1d4 bg3 radiant icon Radiant Damage.
  • +1 to Constitution Saving Throws (helps you to maintain spell concentration)
In a painted chest on the top level of Rosymorn Monastery
Cloak cloak of protection Icon BG3 Cloak of Protection
  • +1 to Armour Class and Saving Throws
Purchased from Quartermaster Talli in Last Light Inn
Chest adamantine scale mail icon bg3 Adamantine Scale Mail
  • Attackers cannot land Critical Hits on you
  • All incoming damage is reduced by 1
  • Your attackers are sent Reeling, reducing their accuracy on subsequent attacks
Crafted at the Adamantine Forge. Requires Mithral Ore and the Scale Mail Mould
Gloves BG3 Swordmaster's Gloves Icon Swordmaster Gloves
  • +1 bonus to Attack Rolls
  • Gives Proficiency with all types of swords
Sold by Dammon at Last Last Light Inn
Boots disintegrating night walkers Icon BG3 Disintegrating Night Walkers
  • You can use bg3 misty step icon Misty Step to teleport.
  • You cannot be slowed by Difficult Terrain.
  • You can use the bg3 boots of speed icon Boots of Speed instead if someone else is already using these. (Given by Thulla in the Myconid Colony for saving her from poison).
Loot from True Soul Nere in the Underdark: Grymforge
Necklace amulet of restoration icon bg3 Amulet of Restoration
  • Can cast Healing Word and Mass Healing Word for free, once each per Long Rest.
  • Excellent combo with Whispering Promise.
  • You should also obtain Broodmother’s Revenge in Act I (looted from Kagha in the Druid Grove) and hold onto it. It will be very strong when combined with another item much later on.
Sold by Derryth Bonecloak in the Underdark, near the Myconid Colony.
Ring 1 BG3 Ring of Protection icon Ring of Protection
  • +1 to Armour Class and Saving Throws
  • Can use Crusher’s Ring instead if you don’t want to do the required quest.
Complete Mol’s quest to steal the sacred idol in the Druid Grove.
Ring 2 the whispering promise Icon BG3 The Whispering Promise
  • When you heal a creature, they are Blessed for 2 turns, giving them a 1d4 bonus to Attack Rolls and Saving Throws.
Sold by either Volo or Grat the Trader.
Melee Weapon phalar aluve Icon BG3 Phalar Aluve
  • The sword can Sing (buffing nearby allied Attack Rolls) or Shriek (debuffing enemies and causing them to take extra bg3 thunder icon Thunder Damage)
Pulled from a rock in the Underdark (requires a successful dice throw)
Ranged Weapon bg3 bow of awareness icon Bow of Awareness
  • +1 bonus to Initiative Rolls, allowing you to move earlier in the turn.
Sold by Roah Moonglow in Shattered Sanctum

Head: bg3 holy lance helm icon Holy Lance Helm

  • Enemies who miss you with an Attack Roll must succeed on a DEX Save or take 1d4 bg3 radiant icon Radiant Damage.
  • +1 to Constitution Saving Throws (helps you to maintain spell concentration)
  • In a painted chest on the top level of Rosymorn Monastery

Cloak: cloak of protection Icon BG3 Cloak of Protection

Chest: adamantine splint armour icon BG3 Adamantine Splint Armour

  • Enemies cannot land Critical Hits on you
  • Reduces all incoming damage by 2
  • Melee attackers are sent Reeling, reducing their Attack Rolls by 1
  • Must be crafted at the Adamantine Forge.

Hands: BG3 Swordmaster's Gloves Icon Swordmaster Gloves

  • +1 bonus to Attack Rolls
  • Gives Proficiency with all types of swords
  • Sold by Dammon at Last Last Light Inn

Feet: disintegrating night walkers Icon BG3 Disintegrating Night Walkers

  • You can use bg3 misty step icon Misty Step to teleport.
  • You cannot be slowed by Difficult Terrain.
  • You can use the bg3 boots of speed icon Boots of Speed instead if someone else is already using these. (Given by Thulla in the Myconid Colony for saving her from poison).
  • Loot from True Soul Nere in the Underdark: Grymforge

Necklace: amulet of restoration icon bg3 Amulet of Restoration

  • Can cast Healing Word and Mass Healing Word for free, once each per Long Rest.
  • Excellent combo with Whispering Promise and Staff of Arcane Blessing.
  • You should also obtain Broodmother’s Revenge in Act I (looted from Kagha in the Druid Grove) and hold onto it. It will be very strong when combined with another item much later on.
  • Sold by Derryth Bonecloak in the Underdark, near the Myconid Colony.

Ring 1: BG3 Ring of Protection icon Ring of Protection

  • +1 to Armour Class and Saving Throws
  • Can use Crusher’s Ring instead if you don’t want to do the required quest.
  • Complete Mol’s quest to steal the sacred idol in the Druid Grove.

Ring 2: the whispering promise Icon BG3 The Whispering Promise

  • When you heal a creature, they are Blessed for 2 turns, giving them a 1d4 bonus to Attack Rolls and Saving Throws.
  • Sold by either Volo or Grat the Trader.

Melee Weapon: phalar aluve Icon BG3 Phalar Aluve

  • The sword can Sing (buffing nearby allied Attack Rolls) or Shriek (debuffing enemies and causing them to take extra bg3 thunder icon Thunder Damage)
  • Pulled from a rock in the Underdark (requires a successful dice throw)

Ranged Weapon: bg3 bow of awareness icon Bow of Awareness

  • +1 bonus to Initiative Rolls, allowing you to move earlier in the turn.
  • Sold by Roah Moonglow in Shattered Sanctum

An important item combo here is the combination of amulet of restoration icon bg3Amulet of Restoration andthe whispering promise Icon BG3The Whispering Promise. This lets you buff allies by healing them, and you can also buff yourself with the same method. Drinking a Healing Potion is a valid way to give yourself the buff.

phalar aluve Icon BG3 Phalar Aluve is an excellent early-game weapon that can either buff your whole party or debuff enemies. Make sure you are wielding it with both hands to get the benefits of your Great Weapon Fighting Style. We’ll be using this weapon until we get Shadowheart’s unique weapon near the end of Act II.

Also notable is the inclusion of defensive items like bg3 holy lance helm iconHoly Lance Helm, cloak of protection Icon BG3Cloak of Protection, andBG3 Ring of Protection iconRing of Protection, all of which make it easier for you to succeed Concentration Saving Throws, which is very important for Clerics like Shadowheart who have a lot of powerful Concentration Spells.


Endgame Equipment

The endgame gear for the Shadowheart Trickery Cleric can be obtained either in late Act 2 or Act 3 of Baldur’s Gate 3. If you manage to complete all the items below, you will be an unstoppable force of power. Essential items are written in Bold Italic.

Slot Icon Item Effects Location
Head helm of balduran Icon BG3 Helm of Balduran
  • You heal by 2HP at the start of each turn. This automatically activates any item effects that trigger on healing.
  • +1 to Armour Class and Saving Throws.
  • You cannot be bg3 stunned icon Stunned.
  • Attackers cannot land Critical Hits against you.
Defeat Ansur beneath Wyrm’s Rock.
Cloak cloak of displacement icon bg3 Cloak of Displacement
  • Attack Rolls against you have bg3 disadvantage icon Disadvantage, unless you have taken damage on the current turn.
Sold at Danthelon’s Dancing Axe in Wyrm’s Crossing.
Chest bhaalist armour icon bg3 Bhaalist Armour
  • +2 to Initiative
  • Enemies within 3m of you take double bg3 piercing icon Piercing Damage.
  • Usually only available if you ally with Bhaal.
  • You can use an exploit to try to obtain it without allying Bhaal. Pickpocket the ghost that spawns (switch character mid-dialogue) while you are being judged by Sarevok.
  • You can instead use bg3 dark justiciar half plate icon Dark Justiciar Half-Plate if you want to fully RP as a Dark Justiciar. But you will do much less damage.
Sold by Echo of Abazigal
Gloves legacy of the masters icon bg3 Legacy of the Masters
  • +2 bonus to Attack Rolls and damage with melee weapons.
  • +1 to Strength Saving Throws.
Sold by Dammon in Act III
Boots disintegrating night walkers Icon BG3 Disintegrating Night Walkers
  • You can use bg3 misty step icon Misty Step to teleport.
  • You cannot be slowed by Difficult Terrain.
Loot from True Soul Nere in the Underdark: Grymforge
Necklace broodmother's revenge icon bg3 Broodmother’s Revenge
  • When you are healed, your next weapon attack deals 1d6 extra bg3 poison icon Poison Damage.
  • Can trigger once per turn. Automatically activated by the helm of balduran Icon BG3 Helm of Balduran.
Loot from Kagha in the Druid Grove, Act I.
Ring 1 the whispering promise Icon BG3 The Whispering Promise
  • When you heal a creature, they are Blessed for 2 turns, giving them a 1d4 bonus to Attack Rolls and Saving Throws.
  • Will be activated on Shadowheart constantly by the helm of balduran Icon BG3 Helm of Balduran.
Sold by either Volo or Grat the Trader.
Ring 2 bg3 band of the mystic scoundrel icon Band of the Mystic Scoundrel
  • After hitting a creature with a weapon attack, you can cast an Illusion or Enchantment spell with a bg3 bonus action icon Bonus Action.
  • Useful for stunning an enemy with hold person icon bg3 Hold Person even if you spent your turn on weapon attacks.
  • If you don’t cast spells often, perhaps try a damage-enhancing option like the bg3 shadow cloaked ring icon Shadow-Cloaked Ring instead.
In a backpack in the Jungle, accessed by winning Akabi’s game (steal his magical ring before playing)
Melee Weapon bg3 spear of evening icon Shar’s Spear of Evening
  • Can cast bg3 darkness icon Shar’s Darkness once per turn.
  • bg3 Advantage icon Advantage on Saving Throws while lightly or heavily obscured.
  • Deal 1d6 bonus damage to enemies who are lightly or heavily obscured.
  • You cannot be bg3 blinded icon Blinded.
  • Can use bg3 edge of darkness icon Edge of Darkness to create a cloud of darkness when you attack. This is actually a small AoE attack that can deal huge damage to nearby enemies (if you have other important items, like the Bhaal Armour).
Awarded to Shadowheart by Shar after killing the Nightsong in Shadowfell.
Ranged Weapon BG3 Hellrider Longbow Icon Hellrider Longbow
  • Increases your Initiative by 3.
  • Attempts to inflict bg3 faerie fire icon Faerie Fire on the first enemy hit by the bow each turn.
Sold by Ferg Drogher near the Requisitioned Barn in Rivington.

Head: helm of balduran Icon BG3 Helm of Balduran

  • You heal by 2HP at the start of each turn. This automatically activates any item effects that trigger on healing.
  • +1 to Armour Class and Saving Throws.
  • You cannot be bg3 stunned icon Stunned.
  • Attackers cannot land Critical Hits against you.
  • Defeat Ansur beneath Wyrm’s Rock.

Cloak: cloak of displacement icon bg3 Cloak of Displacement

  • Attack Rolls against you have bg3 disadvantage icon Disadvantage, unless you have taken damage on the current turn.
  • Sold at Danthelon’s Dancing Axe in Wyrm’s Crossing.

Chest: bhaalist armour icon bg3 Bhaalist Armour

  • +2 to Initiative
  • Enemies within 3m of you take double bg3 piercing icon Piercing Damage.
  • Usually only available if you ally with Bhaal.
  • You can use an exploit to try to obtain it without allying Bhaal. Pickpocket the ghost that spawns (switch character mid-dialogue) while you are being judged by Sarevok.
  • You can instead use bg3 dark justiciar half plate icon Dark Justiciar Half-Plate if you want to fully RP as a Dark Justiciar. But you will do much less damage.Sold by Mystic Carrion in Philgrave’s Mansion
  • Sold by Echo of Abazigal

Hands: legacy of the masters icon bg3 Legacy of the Masters

  • +2 bonus to Attack Rolls and damage with melee weapons.
  • +1 to Strength Saving Throws.
  • Sold by Dammon in Act III

Feet: disintegrating night walkers Icon BG3 Disintegrating Night Walkers

  • You can use bg3 misty step icon Misty Step to teleport.
  • You cannot be slowed by Difficult Terrain.
  • Loot from True Soul Nere in the Underdark: Grymforge

Necklace: broodmother's revenge icon bg3 Broodmother’s Revenge

  • When you are healed, your next weapon attack deals 1d6 extra bg3 poison icon Poison Damage.
  • Can trigger once per turn. Automatically activated by the helm of balduran Icon BG3 Helm of Balduran.
  • Loot from Kagha in the Druid Grove, Act I.

Ring 1: the whispering promise Icon BG3 The Whispering Promise

  • When you heal a creature, they are Blessed for 2 turns, giving them a 1d4 bonus to Attack Rolls and Saving Throws.
  • Will be activated on Shadowheart constantly by the helm of balduran Icon BG3 Helm of Balduran.
  • Sold by either Volo or Grat the Trader.

Ring 2: bg3 band of the mystic scoundrel icon Band of the Mystic Scoundrel

  • After hitting a creature with a weapon attack, you can cast an Illusion or Enchantment spell with a bg3 bonus action icon Bonus Action.
  • Useful for stunning an enemy with hold person icon bg3 Hold Person even if you spent your turn on weapon attacks.
  • If you don’t cast spells often, perhaps try a damage-enhancing option like the bg3 shadow cloaked ring icon Shadow-Cloaked Ring instead.
  • In a backpack in the Jungle, accessed by winning Akabi’s game (steal his magical ring before playing)

Melee Weapon: bg3 spear of evening icon Shar’s Spear of Evening

  • Can cast bg3 darkness icon Shar’s Darkness once per turn.
  • bg3 Advantage icon Advantage on Saving Throws while lightly or heavily obscured.
  • Deal 1d6 bonus damage to enemies who are lightly or heavily obscured.
  • You cannot be bg3 blinded icon Blinded.
  • Can use bg3 edge of darkness icon Edge of Darkness to create a cloud of darkness when you attack. This is actually a small AoE attack that can deal huge damage to nearby enemies (if you have other important items, like the Bhaal Armour).
  • Awarded to Shadowheart by Shar after killing the Nightsong in Shadowfell.

Ranged Weapon: BG3 Hellrider Longbow Icon Hellrider Longbow

  • Increases your Initiative by 3.
  • Attempts to inflict bg3 faerie fire icon Faerie Fire on the first enemy hit by the bow each turn.
  • Sold by Ferg Drogher near the Requisitioned Barn in Rivington.

Shadowheart Trickery Cleric Build Extra Info
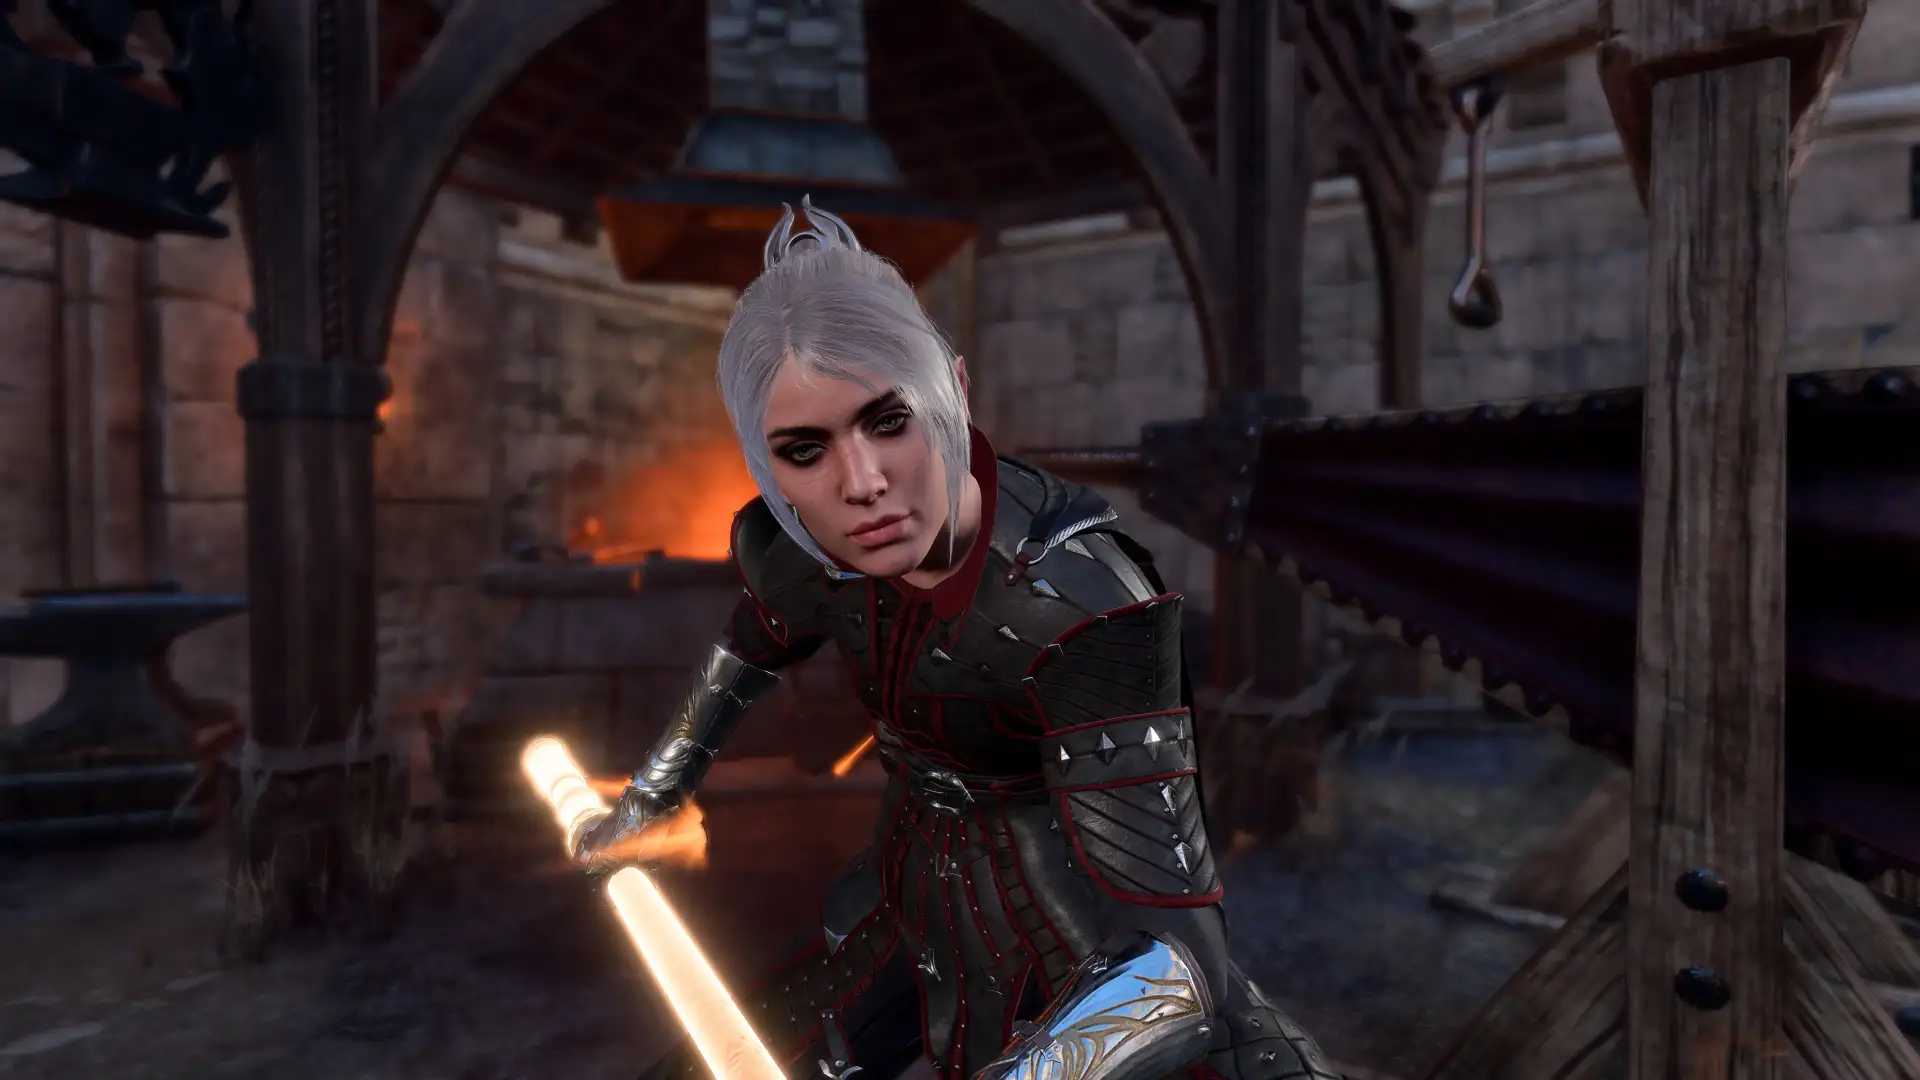
BG3 Shadowheart Trickery Cleric Build

Here is some extra information that will help you to get the most out of this Shadowheart Trickery Cleric Build in Baldur’s Gate 3.

Best Potions and Elixirs for the Shadowheart Trickery Cleric Build

All of these potions are great choices for the Shadowheart Trickery Cleric, and I recommend stockpiling a few of each when you can:

  • bg3 potion of speed icon Potion of Speed – Gives you bg3 hastened icon Haste for 3 turns, granting an extra bg3 action icon Action on each turn. This is ideal for getting the upper hand at the start of combat. Beware that when the effect ends, you’ll become bg3 lethargic icon Lethargic and be forced to skip a turn.
    • To craft: Combine Ashes of Hyena Ear with any Salt.
  • bg3 elixir of bloodlust icon Elixir of Bloodlust – When you kill an enemy, you get an additional bg3 action icon Action.
    • To craft: Combine Ashes of Worg Fang with any Salt.
  • bg3 elixir of hill giant strength icon Elixir of Hill Giant Strength – Increases your Strength Score to 21. Later on, you can get the Cloud Giant version, which increases Strength to a massive 27!
    • To craft: Combine Salts of Hill (or cloud) Giant Fingernails with any Suspension.

Mirror of Loss Choice (Optional)

If you access the Mirror of Loss during your playthrough, you can get two additional ability points to allocate.

It’s best to put the points into Strength to further improve your melee attacks. If you’re usually using the Hill Giant Strength Elixir, you can instead put the points into either Constitution or Wisdom.

To learn more about the Mirror of Loss and how to use it to make your party stronger, see our Mirror of Loss Guide.


How to Play this Shadowheart Trickery Cleric Build

Early in the game, Clerics are quite bad at dishing out damage. We’ve addressed this as much as we can by incorporating a Fighter level for better weapon proficiencies, but it still can’t compare to fully melee-focused classes. Therefore, you will inevitably need to play a more supportive role sometimes, using your magic to heal and support allies or debuff enemies.

Later on, you can get access to some pretty useful damage spells like spirit guardians icon bg3 Spirit Guardians. This magic can cause a lot of problems for enemies in late Act I and early Act II.

When you eventually obtain bg3 spear of evening icon Shar’s Spear of Evening, that is when the build starts to morph into its intended role. If you obtain all of the recommended items, your spear attacks will do significant damage, and you can mess with enemies by teleporting around or creating clouds of darkness to bg3 blinded icon Blind them (while Shadowheart will be immune to blindness).

It’s really important to utilise potions to get the most out of the build. Harvest as many ingredients as you can – hold ALT when exploring to highlight ingredients and other items! Having a good elixir active along with a potion of speed during tricky encounters can more than double your damage per turn.

Finally, you can use this build to enhance a stealthy party. A cool trick is to sneak and then use bg3 minor illusion icon Minor Illusion to lure a group of enemies into one spot. You can then surprise them all with an AoE attack, for example.


Shadowheart Trickery Cleric Build Illithid Powers (optional)
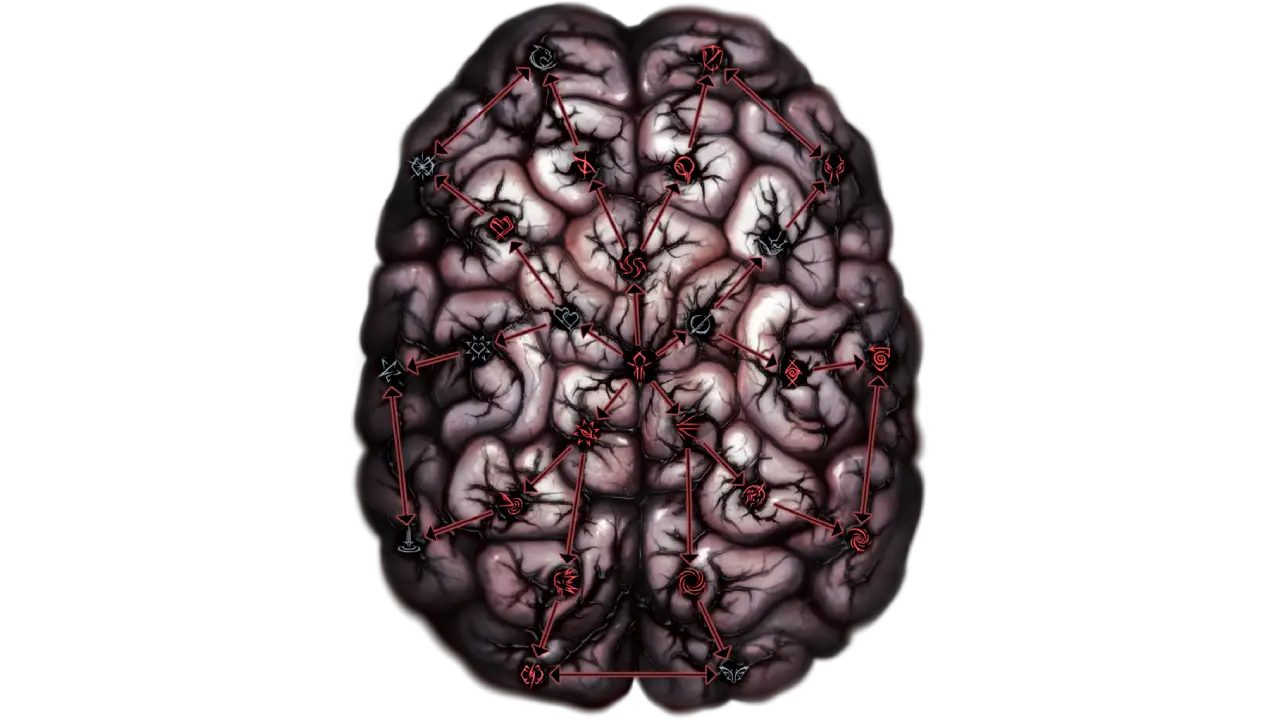
BG3 Illithid Powers Skill tree

Illithid Powers are unlocked later in BG3 when you learn more about Mind Flayers and Tadpoles. By eating Jars of Mind Flayer Parasites you gain one point. This is another optional skill tree that you can get access to if you want. Here are some of the best Illithid Powers for the BG3 Shadowheart Trickery Cleric Build:

 Concentrated Blast

  • Allows you to deal extra damage to a target when you are Concentrating on a spell, potentially also healing if the target is Concentrating too.

 Cull the Weak

  • When you reduce a creature’s hit points below a certain threshold, this power instantly kills it and deals 1-4 Psychic Damage to nearby enemies.
  • This is particularly effective when engaging groups of weaker foes, enabling you to thin their numbers rapidly.

 Fly

  • This can be used to reach hard-to-get-to places or change positions in combat.

 Black Hole

  • This power creates an area-based effect that pulls in and slows targets.
  • It’s particularly useful for crowd control, allowing you to cluster enemies together for area-of-effect attacks or to isolate them from vulnerable allies.

Pro Tip: Try getting the Haste buff from a Potion of Speed or the Haste spell (lets you perform 2 Actions on one turn), then casting Black Hole and then Hunger of Hadar to cause a world of pain for a group of enemies.

 Psionic Backlash

  • This is a top-tier reaction from the Illithid Powers skill tree in BG3.
  • This allows you to deal psychic damage when a nearby enemy casts a spell.
  • This is especially useful if the target is casting a Concentration Spell.
  • The damage from Psionic Backlash can immediately break their Concentration, ending the spell’s effects.

BG3 SHadowheart Death Domain Cleric Build


Shadowheart Trickery Cleric Build FAQs

Here are some frequently asked questions related to the BG3 Shadowheart Trickery Cleric Build. Most of these questions have already been answered in the guide itself.


FAQ: Is Multiclassing Worth It?

Multiclassing in BG3, done correctly, is significantly stronger than using a single class for your build.

Combining several classes that complement each other is essential for proper use of multiclassing. For example, we mixed the Trickery Cleric and the Shadow Monk subclasses because they both feature stealth-oriented features.


FAQ: What roles can the Shadowheart Trickery Cleric fill in my party?

The Shadowheart Trickery Cleric is an all-rounder who leans towards melee damage.

With this setup, Shadowheart has very good single-target damage potential with Shar’s Spear of Evening.

She also has plenty of magic to heal or support allies, and debuff or stun enemies. But of course, builds that focus fully on spellcasting will be even better at this.


FAQ: What Abilities are most important for the Shadowheart Trickery Cleric?

  • Strength is very important for the Shadowheart Trickery Cleric Build. It improves your melee weapon accuracy and damage. It also boosts your carry weight, jumping distance and the maximum amount of weight you can lift, throw or push.
  • Wisdom is quite important. It is used to determine how effective Shadowheart’s spells will be.
  • Constitution and Dexterity are used to defend against enemy attacks and for a variety of Saving Throws. They also help with some other game mechanics, such as Initiative (which character moves first) and Concentration (whether your spell is broken when you take damage).

FAQ: Which Cleric and Monk subclasses should I use?

  • For the Cleric, we are using the Trickery Domain, which gives you extra features themed around stealth and deception.
  • For the Monk, we are using the Way of Shadow, which comes with another set of stealth-focused features.

Related Guides for Baldur’s Gate 3