


Welcome to the best Trickery Domain Cleric Build for Baldur’s Gate 3. For this Cleric build, we’ll be using the Trickery Domain subclass of the Cleric.
For more Cleric builds, visit our BG3 Cleric Builds page or explore the complete BG3 Builds Database. We also have a powerful BG3 Shadowheart Build. You can also check out our BG3 Builds Tier List to see which builds perform best.
Trickery Domain Clerics gain special abilities to manipulate and deceive enemies, and they can help their allies to be more successful at stealth. The Trickery Domain is the default subclass used by Shadowheart, so this is an ideal build if you have her in your party and do not want to change her to a different class or subclass.
Trickery Cleric Build Table of Contents:
- Trickery Domain Build Overview
- Trickery Cleric Character Creation
- Trickery Cleric Build Levelling Progression
- Trickery Cleric Equipment
- Trickery Cleric Build Extras and Tips & Tricks
Trickery Cleric Strengths
Trickery Cleric Weaknesses
BG3 Trickery Domain Cleric Build Overview
In this section, we will summarise the most important aspects of the Cleric class and Trickery Domain subclass, which we are using for this build. If you’re already familiar with how these work, please skip this section.
Cleric Class Overview
The Cleric class is a powerful spellcaster who has some proficiency with weapons. They have access to a wide array of buff, debuff and healing spells, making them one of the best classes in the game for party support. At high levels, they are also good damage dealers thanks to their powerful magic. But in the early game, Clerics aren’t very good at dealing damage and are better off focusing on supporting allies.
Here are the most important aspects of the Cleric Class in BG3:
 Channel Divinity (Level 2) – This is the Cleric’s unique class resource. You will start with one Channel Divinity charge, which is replenished on a Short or Long Rest. You’ll unlock more charges later. These charges are consumed to power unique Cleric Actions, some of which are strong enough to turn the tide of battle. The Cleric Actions you can use depend on your chosen subclass.
- Channel Divinity: Turn Undead (Level 2) – Use a Channel Divinity charge to Turn all nearby undead, forcing them to flee.
- Destroy Undead (Level 5) – An upgrade for Turn Undead. Undead who are Turned will also take 4d6 Radiant Damage.
- Divine Intervention (Level 10) – Call on your deity to grant you a powerful one-time boon. Can either deal massive AoE damage, resurrect and heal all nearby companions, spawn a generous helping of Camping Supplies and Potions, or summon a Legendary Devotee’s Mace that can deal bonus Radiant Damage and heal nearby allies. You can only use this Action once, but if you choose the Mace, you can keep it forever.
Clerics can also use a wide range of spells, which we will detail in the build guide below.
Trickery Domain Subclass Overview
Here are the Trickery Domain Cleric’s defining features:
- Blessing of the Trickster (Level 1) – Grant another creature
 Advantage on Stealth checks.
 - Invoke Duplicity (Level 2) – Distract enemies with an illusion. Allied Attack Rolls within 3 metres of the illusion have Advantage. Costs a Channel Divinity Charge.
- Channel Divinity: Cloak of Shadows (Level 6) – If you are Obscured, you can spend a Channel Divinity Charge to become Invisible.
- Divine Strike: Poison (Level 8) – Once per turn, your weapon attack deals 1d8 additional Poison Damage.

Character Creation (Level 1) – BG3 Trickery Domain Build
In this section, we will guide you through which options to choose in Character Creation for your BG3 Trickery Cleric Build.
Important: You also already have to select your Subclass at level 1; this can be easily overlooked because the game pushes you directly to the main class and then just selects the first option in the subclass menu. Therefore, make sure that you have selected the Trickery Domain subclass. If you missed this (or want to use this build for Shadowheart), then visit Withers in your Camp to respec (you first need to find him in the ruins near the Nautiloid crash site in Act I).
Best Race
First off, it is important to note that you can pick whatever race you want; it won’t affect your gameplay that much. However, there are, of course, slightly better races for our Cleric build in Baldur’s Gate 3. For example, one very useful thing we can get from our race is Longbow Proficiency. The Cleric’s main damage Cantrip is Sacred Flame, which has quite a low success rate, especially in the early game. One way around this is to use a ranged weapon instead, and Longbows have pretty good damage.
Our top 5 picks for the best Cleric race are:
| Race | Strengths | Info |
|---|---|---|
Wood Elf |
|
Wood Elves are a great choice for most build types in BG3, thanks to their superior movement speed. Natural Proficiency in Perception is always useful, and immunity to magical Sleep will help you out a lot, especially in the early game, where enemy mages love to spam this spell.
You can also use a Half Wood-Elf for most of the same benefits. |
Duergar |
|
With their wide choice of armour and weapon proficiencies, and resistances to poison, charm, and paralysis, Duergar are one of the strongest races in BG3.
The only downside of Duergar is their small stature – this reduces their base Movement Speed to 7.5 metres per turn (most races get 9 metres). |
|
High Elf |
|
Very similar to Wood Elf, but missing the Stealth Proficiency and doesn’t get extra Movement Speed.
You can choose an extra Cantrip to learn, which is handy but not super important. |
Githyanki |
|
The Githyanki gives you a good range of weapon Proficiencies and innate access to Enhance Leap and Misty Step, which give you excellent mobility. Astral Knowledge makes your character very versatile with their Skill Proficiencies, as long as you remember to use it.
Additionally, Githyanki get the full benefits from equipping various Githyanki weapons, sometimes granting additional Psychic Damage or special features. |
|
Dragonborn, Any |
|
Dragonborns get access to a special Breath attack they can use once per Short Rest, which deals elemental damage in a directional AoE. They also get 50% Resistance to the same element. The damage element in question depends on which Dragonborn variant you choose.
The Fire and Poison variants are slightly better because many enemies attack with these damage types, making resistance to them more valuable. But don’t let this stop you from using whichever type of Dragonborn you like the most. Since we’ll be spending a lot of time in close range, the Dragonborn Breath attacks can fit in quite nicely with the Cleric playstyle.. |
Cantrips
In the Class menu, you need to choose three Cantrips to start the game with, from four options. We recommend getting the following Cantrips:
- Guidance – This is a great ability for out-of-combat situations, and can be cast either on yourself or on an active ally from within the dice roll screen, letting you gain 1d4 boost to a range of dice rolls.
- Resistance – Bolster the target’s defences, giving them a 1d4 bonus to Saving Throws. This is a Concentration Spell. Can be used in some dialogue encounters in the same way as Guidance, but these are a bit less common.
- Sacred Flame – This is the Cleric’s main damage Cantrip. It suffers from low hit chance because enemies can perform a Wisdom Saving Throw to completely block the damage. Still, there are situations in BG3 where Radiant Damage is really good and I’ve seen this hit for over 80 damage, so it’s worth slotting as long as you know its limitations. Check the hit chance before casting, and if it’s below 70%, check for better options before proceeding.
Spells
You’ll need to choose four Spells to prepare, from a list of 10 known Spells. We recommend choosing the following Spells:
- Guiding Bolt– This is a must-pick because it can deal up to 24 ranged damage right from the start of the game, which is very nice early-game damage. As a bonus, the next person to attack the target will have an Advantage against them.
- Healing Word– Heals the target. This spell is very useful because it can be used at range and it only costs a Bonus Action, so you can attack or cast another spell on the same turn.
- Bane– Imposes a 1d4 debuff to Attack Rolls, Ability Checks and Saving Throws. It can be used against multiple enemies. Targets can roll a Saving Throw to negate the debuff, though.
- Inflict Wounds – Deals up to 30 Necrotic damage to an enemy. It can be upcast for more damage later in the game. The problem with this spell is that it only works in melee range. But it can hit really hard. Only use it when the hit chance is decent (at least 70%), otherwise it becomes another Sacred Flame situation.
If you don’t know what we mean by terms like Advantage, Concentration or Saving Throw, or want to find out how systems like Stealth work, you will find our BG3 Hidden Mechanics Guide very useful.
Subclass – Trickery Domain
Your Trickery Domain subclass grants you a unique Action from the beginning of the game, along with two Domain Spells (which are always prepared and automatically added to your action bar):
- Blessing of the Trickster (Level 1) – Grant another creature Advantage on Stealth checks.
- Domain Spells:
- Charm Person – Attempt to Charm a humanoid, preventing them from attacking you and gaining Advantage on dialogue Charisma checks against them.
- Disguise Self – Magically change your appearance. Most NPCs will not recognise you. This is temporary and can be undone at will.
Background & Skills
This build will have very good Wisdom and decent Dexterity, so it’s best to pick a Background that aligns with that. The most obvious choice is Folk Hero, which gives us Animal Handling and Survival, both Wisdom Skills, but you can deviate from this if you want to.
This Cleric Build features high Wisdom and Dexterity scores, so it is best to play to our strength and focus on Skills that align with these Abilities.
For our Background, we chose Folk Hero, which gives the following Skill Proficiencies:
 Animal Handling (WIS) – Your character is better at taming and communicating with animals. This is a Skill roll that appears in dialogue in some situations, and can open up alternative dialogue options when successful.
- Survival (WIS) – Impacts your chance to successfully identify buried treasure when exploring the wilds.
You can choose two more Skills from a limited list of Cleric Skills. Of the available options, we recommend choosing these:
- Insight (WIS) – Helps you read NPC’s behaviour and detect lies and hidden details.
- Medicine (WIS) – Occasionally used in dialogue to heal or soothe injured characters.
If you chose the Human race, you get one more unrestricted skill pick. If this applies to you, I recommend selecting ![]() Acrobatics (DEX) for your final skill, which will make your character more resistant to enemy attempts to push you (it can be life-saving, because the AI loves to push characters off ledges).
Acrobatics (DEX) for your final skill, which will make your character more resistant to enemy attempts to push you (it can be life-saving, because the AI loves to push characters off ledges).
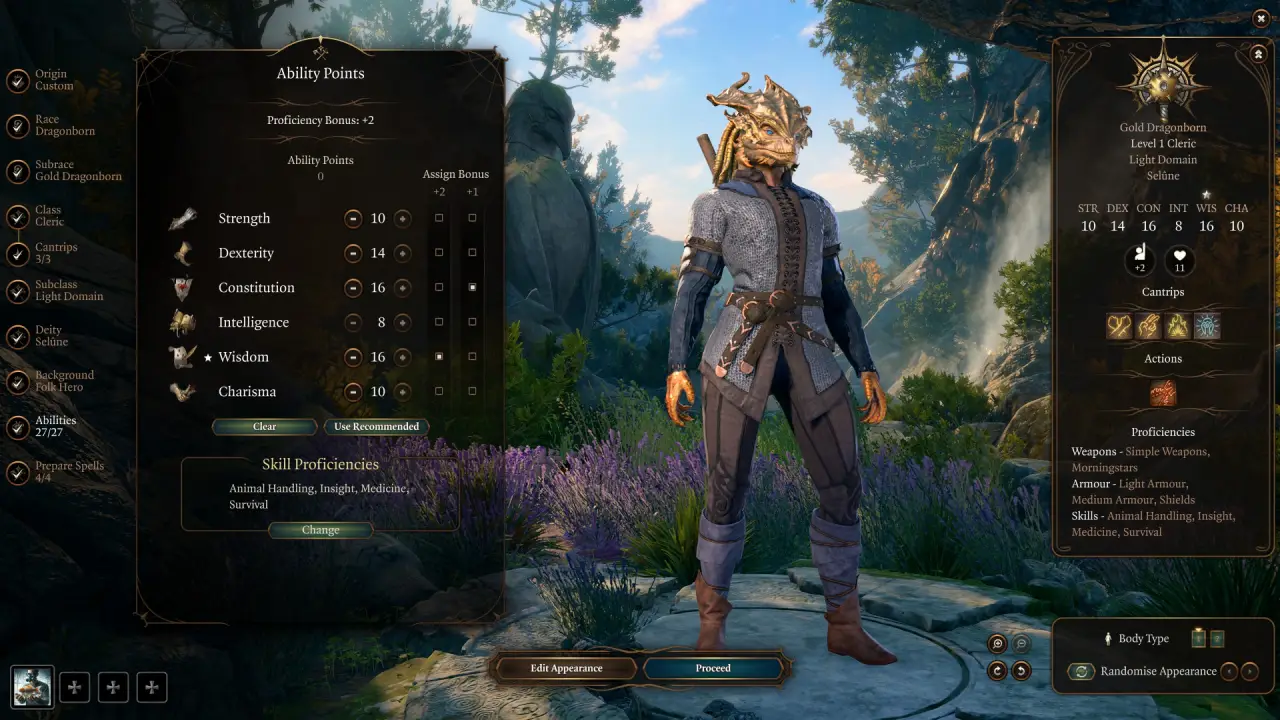
Abilities
The most important attribute for this build is Wisdom, which will be used as our Spellcasting Attribute. This means that the accuracy and efficacy of our Spells are determined by your Wisdom Modifier, so we’re focusing on Wisdom as much as we can.
Next up is Constitution. This gives you more HP, lets you Resist a lot of debilitating debuffs that you’ll encounter throughout your playthrough, and gives you better odds at maintaining Concentration on a Spell when you take damage.
Dexterity also needs to be mentioned. It gives us some extra Armour Class, but we are going to be wearing Medium Armour for this build, which limits the Armour benefit from Dexterity to +2. You get 1 AC per Dexterity Modifier, and 1 Dexterity Modifier per 2 points of Dexterity above 10, so we’ll be setting our Dexterity to 14. There’s little point in going any higher than this for this build.
As for the rest of your Attributes, we recommend having Strength at 10 because you may sometimes attack with a melee weapon in a pinch, and Charisma at 10 because it means you won’t be debuffed in (most) dialogue dice rolls. We don’t have any use for Intelligence, so we’re leaving that at 8 points.
This gives us:
- 10 Strength
- 14 Dexterity
- 16 Constitution
- 8 Intelligence
- 16 Wisdom
- 10 Charisma
(Most important Abilities are bolded)
Trickery Domain Cleric Levelling Guide
In this section, we have provided a step-by-step guide for levelling up your Trickery Cleric, including recommendations at each level for any choices that need to be made, such as Spell and Feat selection.
Early-Game Levelling Guide – BG3 Trickery Cleric
We’ll start with the early-game levelling process, at Levels 2-4.
Level 2 – Trickery Cleric Build BG3 for PC/PS5
At Level 2, you’ll gain a new Spell Slot for your Trickery Cleric Build in Baldur’s Gate 3, allowing you to cast an extra spell between Long Rests.
You’ll also unlock a special type of ability specific to the Cleric – Channel Divinity Actions.
Channel Divinity Actions have their own number of uses, separate from Spell Slots. To begin with, you only have one use, which can be replenished by either a Short or Long Rest.
With the Trickery Domain Cleric, you’ll unlock the following Channel Divinity Actions at Level 2:
- Channel Divinity: Turn Undead – Use a Channel Divinity charge to Turn all nearby undead, forcing them to flee.
- Invoke Duplicity – Distract enemies with an illusion. Allied Attack Rolls within 3 metres of the illusion have Advantage. Costs a Channel Divinity Charge.
Level 3 – Trickery Cleric Build BG3
At Level 3 for your Trickery Cleric Build, you unlock another First Level Spell Slot, as well as two Second Level Spell Slots.
There are a couple of Second Level Spells that would be great to prepare at this point:
- Aid – Heals your allies within 9 metres for 5HP, and also increases their maximum HP by 5, until the next Long Rest. Use this after every Long Rest to improve your party’s health. Later on, you can upcast the spell to increase the effect by 5HP per spell level.
- Spiritual Weapon – Conjure a spectral weapon that can attack enemies. The really useful thing about this is that it has Resistance to all damage, and yet the enemy AI tends to waste a lot of time attacking the summoned weapon. This is an underrated spell and a really good way of distracting the attention of enemies away from you and your party.
You’ll also unlock a couple of new Trickery Domain Spells, which are spells that the Cleric will always have prepared (i.e they automatically go on your action bar without needing to choose them):
- Mirror Image – Create 3 illusory copies of yourself to distract attackers. Whenever you take damage, one copy is destroyed. Each remaining copy increases your Armour Class by 3.
- Pass Without Trace – You and nearby allies have a +10 bonus to Stealth Checks. Requires Concentration.
To learn more about stealth and how to successfully steal items without getting caught, check our BG3 Stealing and Pickpocketing Guide.
Also, keep in mind that some of the First Level Spells you already knew can now be upcast to Second Level, improving their effects but consuming a second-level spell slot instead.
Level 4 – Trickery Cleric Build Baldur’s Gate 3 for PC/PS5
As with all classes in Baldur’s Gate 3, at Level 4, you’ll need to choose a Feat for your Trickery Cleric Build. Feats are powerful passive effects for your character that can enable a specific build or simply boost your stats. We strongly recommend choosing Ability Improvement, which will give you two additional Ability Points. Put them both into Wisdom, which should allow you to reach 18 Wisdom, improving your Spellcasting ability.
You’ll also gain another First Level and Second Level Spell Slot, and you’ll need to choose another Cantrip. We’ll pick up ![]() Thaumaturgy, which occasionally is useful in dialogue checks.
Thaumaturgy, which occasionally is useful in dialogue checks.
Finally, we need to choose two more spells at this point. We recommend:
- Prayer of Healing – Heals all visible allies within 9 metres by 2d8 HP. This is particularly useful when your entire party is damaged and needs healing. It can only be used outside of combat, however.
- Hold Person – Hold a humanoid creature, making it unable to move and act. At the end of each turn, the creature can try to free itself with a Saving Throw. This is a Concentration Spell. Melee attacks against the stunned creature are guaranteed crits, so this is especially good when combined with a melee heavy hitter in your party, like Karlach, Laezel or any other Fighter/Barbarian/Paladin.
Mid-Game Trickery Domain Cleric Levelling Guide
We’ll now go through the mid-game levels, 5-8.
Level 5 – Trickery Cleric Build Baldur’s Gate 3
At Level 5, your Trickery Cleric’s Spellcasting ability further improves.
You’ll unlock two Third Level Spell Slots. While this build is quite flexible and it’s up to you which spells you choose here, we recommend taking a close look at the following options:
- Glyph of Warding – Inscribe a circle of arcane glyphs on the ground that trigger a magical effect when stepped on by an enemy. Only one glyph can be active at a time. Deals great AOE damage, and targets who perform a Saving Throw will still take half of the damage. You can place the glyph underneath an enemy to trigger it immediately. This can deal a lot of damage to your allies, so be careful when placing it!
- Revivify – Revive a companion. They return to life with 1 hit point. You no longer need to worry about carrying around a stack of Revivification Scrolls, as this spell has the same effect!
You’ll also unlock two more Trickery Domain Spells at Level 5:
- Bestow Curse – When casting this spell, you can choose from a variety of debuffs to apply on the target:
- Fill them with Dread, forcing them to succeed a Wisdom Saving Throw each turn, or else skip their turn.
- Cause them to take an extra 1d8 Necrotic Damage from your other attacks and spells.
- Give them
 Disadvantage on Attack Rolls
 - Give them Disadvantage on Ability rolls, either Strength, Dexterity, Constitution, Intelligence, Wisdom or Charisma.
- Fear – Force all creatures in the target area to pass a Wisdom Saving Throw. If they fail, they become Feared for 2 turns and must drop their weapon and flee.
Level 6
At Level 6, the Trickery Cleric Build gains a couple of new features:
- An extra Channel Divinity Charge, allowing you to use two Channel Divinity Actions per Short/Long Rest.
- Channel Divinity: Cloak of Shadows – If you are Obscured, you can spend a Channel Divinity Charge to become Invisible.
- Another Third Level Spell Slot, giving you three in total.
- Prepare one more Spell. We recommend:
- Spirit Guardians – Surround yourself with spirits who follow you around. The spirits attack any enemies who move close to you, dealing Radiant Damage or Necrotic Damage. The Radiant version of this spell is especially strong in Act II, as many of the enemies there are Vulnerable to damage of that type.
Level 7
At Level 7, you unlock the following:
- One Fourth Level Spell Slot, and the ability to Prepare Fourth Level Spells.
- Two more Spells from your chosen Domain (always Prepared). The Trickery Domain Cleric gets:
- Dimension Door – Teleport yourself and one adjacent ally to a visible destination within 18 metres.
- Polymorph – If the target fails a Wisdom Saving Throw, they are polymorphed into a harmless sheep with 3 HP for 5 turns. If the sheep’s HP is reduced to zero, they return to their original form with the same HP they had before they were transformed. This is a funny spell to use, but other stuns like Hold Person are generally better since you can safely damage the target without ending the stun.
- Prepare one more Cleric spell of your choice. We recommend:
- Guardian of Faith – Summon a guardian at the target location. They are immobile, but will automatically attack enemies within 3 metres, dealing 20 Radiant Damage per attack (halved if the target succeeds a Dexterity Save). Every time the guardian deals damage, they take the same amount of damage. Correct placement is really important with this spell – try to put it in a chokepoint that enemies must pass through, or next to an enemy who is also immobile or tends to linger in the same place for some other reason.
Level 8
At Level 8, you unlock:
- Divine Strike: Poison (Level 8) – Once per turn, your weapon attack deals 1d8 additional Poison Damage.
- Another Fourth Level Spell Slot, giving you two in total.
- Choose another Feat. Get Ability Improvement and improve your Wisdom to 20.
- Choose two more spells. We recommend:
- Freedom of Movement – Grant yourself or an ally immunity to magical sources of paralysis and restraint, and prevents Difficult Terrain from slowing them down. Also immediately cures any Stun. Lasts until the next Long Rest.
- Death Ward – The next time the target drops to 0 HP, they will heal to 1 HP instead of being Downed. This spell isn’t amazing, and we will replace it soon. But for now, it is the best remaining option.
While your Cantrips still suffer from a fairly poor hit chance with Cleric, keep an eye out for opportunities where they’re likely to hit so you can make use of the new Potent Spellcasting buff.
Late-Game Trickery Domain Cleric Levelling Guide – BG3
We’ll now go through the late-game levelling up process for this Baldur’s Gate 3 Trickery Domain Cleric Build. This section covers levels 9-12.
Level 9
At Level 9, your Trickery Cleric’s spellcasting continues to improve, as you can now access even more powerful spells. Here you’ll unlock:
- Another Fourth Level Spell Slot, giving you three in total.
- One Fifth Level Spell Slot, and the ability to prepare Fifth Level Spells.
- Two more Domain Spells from your subclass. Trickery Domain Cleric gets:
- Dominate Person – Force a humanoid creature to fight alongside you. Each time they take damage, they make a Wisdom Saving Throw against your domination. The spell can last for up to 10 turns if no successful Saving Throws are performed and your Concentration remains unbroken. Allies cannot be dominated.
- Seeming – Basically an upgraded version of Disguise Self, Seeming also lets you disguise your other party members. Everyone is given a random appearance, but the individual recipients of the spell’s effect can then use an Action to change to a desired appearance.
-
- Prepare one more spell, plus another one to replace Death Ward from Level 8:
- Mass Cure Wounds – Heals allies within 18 metres by 3d8 HP each. Can provide a strong heal to many creatures at once.
- Insect Plague – Locusts attack everyone within a 12 metre area, dealing 4-40 Piercing Damage per turn, making the area Difficult Terrain, and imposing Disadvantage on Perception Checks. The damage is halved on targets that roll a Constitution Save. This is one of the strongest spells in the Cleric arsenal – it’s especially effective when placed in chokepoints, and can turn a difficult battle in your favour.
Level 10
At Level 10, the Trickery Domain Cleric unlocks a unique single-use feature to invoke the aid of their god. You gain:
- Another Fifth Level Spell Slot, giving you two in total.
- Choose one more Cantrip. We already picked up the most important Cantrips, so you can choose whatever you like here.
- Divine Intervention – Once per character, invoke your god’s aid. When activating this, you can choose from:
- Sunder the Heretical – Deal 8-80 Radiant Damage to a group of enemies.
- Arm Thy Servant – Grants you a Legendary weapon.
- Opulent Revival – Resurrect fallen Companions with half health and restore nearby allies as if they had Long Rested.
- Golden Generosity – Provides a rich bounty of Potions and Camp Supplies.
- Prepare one more Spell. We recommend:
- Flame Strike – Call forth a pillar of divine fire from the heavens, dealing 5d6 Fire Damage and 5d6 Radiant Damage to everyone in a 3 metre radius. Damage is halved for targets who make a Dexterity Saving Throw. Use this when you need quick AOE burst damage – it’s basically an upgrade of the Glyph of Warding that we’ve been using for that purpose up until now.
Divine Intervention is a potentially good passive for helping you out in a pinch. But beware that this can only be used once per character. There is no way to recharge the ability.
Level 11
At Level 11, you don’t gain any new class abilities, but you do get access to Sixth Level Spells, the most powerful tier of magic in Baldur’s Gate 3.
You’ll gain one Sixth Level Spell Slot, and as usual, you’ll be able to prepare one more Spell.
If no one else in your party has the ![]() Heroes’ Feast spell, then get this on your Cleric. It puts an extremely strong buff on you and your party, providing the following benefits until the next Long Rest:
Heroes’ Feast spell, then get this on your Cleric. It puts an extremely strong buff on you and your party, providing the following benefits until the next Long Rest:
- Immune to Poison and Disease
- Cannot be Frightened
- Extra 12 HP
- Advantage on Wisdom Saving Throws
You should ideally make it a habit to cast both Heroes’ Feast and an upcast version of ![]() Aid on your party after every Long Rest, to get everyone nicely buffed up.
Aid on your party after every Long Rest, to get everyone nicely buffed up.
If someone else has Heroes’ Feast covered already, consider the ![]() Heal spell. This is a single-target burst heal that is guaranteed to restore 70 HP, avoiding the RNG of other healing spells.
Heal spell. This is a single-target burst heal that is guaranteed to restore 70 HP, avoiding the RNG of other healing spells.
Level 12
If you’ve reached this point, then you have finished levelling up your Trickery Domain Cleric to max level. Congratulations!
At Level 12, you can choose one more Feat for your Trickery Cleric Build. Picking up ![]() War Caster is a good idea, as it gives you
War Caster is a good idea, as it gives you ![]() Advantage on Concentration Checks. Since the Cleric often spends a lot of time in close proximity to enemies while also spellcasting, this is really helpful for making your Concentration Spells more resilient. As a bonus, War Caster also lets you zap enemies who get too close with lightning.
Advantage on Concentration Checks. Since the Cleric often spends a lot of time in close proximity to enemies while also spellcasting, this is really helpful for making your Concentration Spells more resilient. As a bonus, War Caster also lets you zap enemies who get too close with lightning.
You can also choose one more Spell to prepare.
If you didn’t already get the ![]() Heal spell mentioned at Level 11, you might want to grab that now.
Heal spell mentioned at Level 11, you might want to grab that now.
Alternatively, you could pick ![]() Planar Ally, which allows you to summon a Djinni, Deva or Cambion to fight for you. These powerful summoned creatures can help turn tough battles in your favour. If not killed, your summon will return to their home plane the next time you Long Rest.
Planar Ally, which allows you to summon a Djinni, Deva or Cambion to fight for you. These powerful summoned creatures can help turn tough battles in your favour. If not killed, your summon will return to their home plane the next time you Long Rest.

Cleric Build Equipment for Baldur’s Gate 3
In this section, we will outline the best equipment recommendations for your Trickery Cleric. We have included both an early game and a late game section for equipment, so you can use this build no matter how far through the game you are.
Don’t worry if you don’t have all of the listed equipment, and feel free to try out different items and combinations too – this is just a guideline and the build can still work great with some of the equipment changed.
Early-Game
Early-Game equipment is available in Act I and the earlier parts of Act II. It is generally less powerful than the late-game version of the build, however there are still some really handy items that you can find fairly early on in your BG3 playthrough.
You can check below the table for more detailed information about each item, including how to obtain them.
| Slot | Icon | Item | Effects | Location |
|---|---|---|---|---|
| Head |  |
Wapira’s Crown |
|
Reward from Zevlor for completing the Save the Refugees quest |
| Cloak |  |
Cloak of Protection |
|
Purchased from Quartermaster Talli in Last Light Inn |
| Chest |  |
Adamantine Scale Mail |
|
Crafted at the Adamantine Forge. Requires Mithral Ore and the Scale Mail Mould |
| Gloves |  |
Hellrider’s Pride |
|
Carried by Zevlor. Can be bought, stolen or looted from him, or earned as a quest reward |
| Boots |  |
Vital Conduit Boots |
|
Sold by A’jak’nir Jeera in Crèche Y’llek |
| Necklace |  |
Pearl of Power Amulet |
|
Sold by Omeluum in the Myconid Colony |
| Ring 1 | Ring of Protection |
|
Awarded by Mol for completing the quest to steal the Sacred Idol | |
| Ring 2 |  |
The Whispering Promise |
|
Sold by either Volo or Grat the Trader. |
| Main Weapon |  |
The Blood of Lathander |
|
Found in the secret area in Rosymorn Monastery (see below) |
| Shield |  |
Shield of Devotion |
|
Sold by Quartermaster Talli in Last Light Inn |
| Second Weapon |  |
Spellthief* |
|
Sold by Arron in the Druid Grove |
Wapira’s Crown
Whenever you heal another creature, you also gain 1d6 HP. This is a decent early game heal and it’s basically free. Even though the Trickery Domain Cleric isn’t focused on healing, it can still make for a decent healer when needed, so this item is a good fit. You get Wapira’s Crown as a reward from Zevlor for doing the Save the Refugees quest, provided you accept the monetary reward. It is inside the sack he gives you.
Adamantine Scale-Mail
The Adamantine Scale-Mail is a very strong piece of Medium Armour that can be obtained fairly early in the game. It reduces all incoming damage by 1, prevents you from receiving Critical Hits, and debuffs enemies who attack you. To craft it, you need to go to the Grymforge, find the Scale-Mail Mould and some Mithral Ore, then activate the Adamantine Forge with these components slotted into place.
Hellrider’s Pride
With Hellrider’s Pride, whenever you heal another creature they get the Blade Ward condition for 2 turns, giving a 50% resistance to Bludgeoning, Slashing and Piercing damage. They are carried by Zevlor in the Druid Grove. You can get them as a reward for finishing the Investigate Kagha quest. Alternatively you may buy them from him or steal them via pickpocketing.
Vital Conduit Boots
The Vital Conduit Boots give you 8 Temporary HP whenever you cast a spell that requires Concentration. The Cleric has many such spells, so these boots are a really good fit. They are sold by A’jak’nir Jeera in Crèche Y’llek at the end of Act I. To find this area, you need to take the Mountain Pass route to Act II and explore the Rosymorn Monastery.
Cloak of Protection
The Cloak of Protection is a simple defensive item that gives you a +1 bonus to your Saving Throw rolls and your Armour Class, making you a little more resistant to a variety of attacks and hostile effects. It is sold by Quartermaster Talli in Last Light Inn, in Act II.
Pearl of Power Amulet
The Pearl of Power Amulet lets you restore a spell slot of first, second or third level, once per Long Rest. This is particularly handy in the early game when you don’t have a huge number of spell slots available. It is sold by Omeluum in the Myconid Colony, in the Underdark. To trade with them, you must first finish their quest to help them investigate the parasite.
The Whispering Promise
The Whispering Promise is another item that gives a very nice extra buff with healing spells. Whenever you heal a creature, they get the Blessed buff for 2 turns, giving them a 1d4 bonus to Attack Rolls and Saving Throws. This item can appear in several locations:
- Purchase from Volo in the Druid Grove (later on he can be found in your camp after you rescue him from the goblins)
- Purchase from Grat the Trader in the Goblin Camp
- Purchase from Roah Moonglow in either Shattered Sanctum (Act I) or Moonrise Towers (Act II)
If the item isn’t available in any of these vendors, you can do a Long Rest to reset their wares. You don’t need to use any camp supplies when doing a Long Rest for this purpose.
Ring of Protection
The Ring of Protection basically does the same thing as the Cloak of Protection, giving a +1 bonus to Saving Throws and Armour Class. You get it as a reward from Mol for completing the quest to steal the Sacred Idol, in the Druid Grove.
The Blood of Lathander
A legendary mace with a +3 bonus to its Attack Rolls and Damage, The Blood of Lathander will also heal you when you reach 0 HP, once per Long Rest, and lets you cast a weaker version of the Sunbeam spell, which can be a big help in Act II for dealing very high damage to groups of shadow-cursed undead enemies.
Obtaining the Mace requires you to fully explore the Rosymorn Monastery and enter the secret area by solving the statue puzzle, near where you meet Vlaakith’s projection. It is protected by a trap, which you can either disable by collecting the Ceremonial Weapons found in the Monastery, or you can take it without disabling the trap, in which case you should ensure the character who grabs it has a self-teleport ability like Misty Step, and give everyone a Potion of Speed to make sure they can escape from the Monastery in time.
Shield of Devotion
A good early-to-mid-game shield, the Shield of Devotion grants you an extra level 1 Spell Slot and lets you use your Reaction to try to knock over an enemy who hit you with a melee attack. It also grants you a unique version of the Aid spell, however this version only casts on you and not on your team, and it will not stack with the normal version. Be careful when using this, as it will replace the buff you have from the normal version of Aid.
The Shield of Devotion is sold by Quartermaster Talli in Last Light Inn, in Act II.
Spellthief
A handy Longbow for an early-game spellcaster, Spellthief can restore a Level 1 Spell Slot once per Long Rest, by landing a Critical Hit with the weapon. It is sold by Arron in the Druid Grove.
If you don’t have Proficiency with Longbows then you can substitute this for a different ranged weapon that’s more suited to your character.
Late-Game
Late-Game Equipment is found in Act III and the latter parts of Act II; however, some items from the early-game may also find their way onto this list if they are powerful enough to remain competitive with items found in the latter parts of the game.
At this stage of the game, we are mainly focusing on finding items that improve our Spell Save Difficulty Class – increasing this stat means that enemies need to roll a higher number to succeed on a Saving Throw against our spells.
However, most items that improve this stat are fairly light on the defensive side; therefore, we have included a couple of optional items that you can use instead if you’re struggling to stay alive with the optimal setup.
| Slot | Icon | Item | Effects | Location |
|---|---|---|---|---|
| Head |  |
Hood of the Weave |
|
Sold by Mystic Carrion in Philgrave’s Mansion |
| Cloak |  |
Cloak of the Weave |
|
Sold by Helsik at the Devil’s Fee, once her special stock has been unlocked. |
| Chest | |
Adamantine Scale Mail |
|
Crafted at the Adamantine Forge. Requires Mithral Ore and the Scale Mail Mould |
| Gloves |  |
Helldusk Gloves |
|
Defeat Haarlep and loot the gloves from him |
| Boots |  |
Helldusk Boots |
|
In a locked Gilded Chest on the top floor of Wyrm’s Rock Fortress |
| Necklace |  |
Amulet of the Devout |
|
Found in the main offering chest in the basement of Stormshore Tabernacle |
| Ring 1 |  |
Ring of Feywild Sparks |
|
Looted from Auntie Ethel in Act III |
| Ring 2 | Ring of Protection |
|
Awarded by Mol for completing the quest to steal the Sacred Idol | |
| Main Weapon | |
The Blood of Lathander |
|
Found in the secret area in Rosymorn Monastery |
| Shield |  |
Viconia’s Walking Fortress |
|
Looted from Viconia DeVir in the Cloister of Sombre Embrace |
| Second Weapon | |
The Dead Shot |
|
Sold by Fytz the Firecracker in Stormshore Armoury |
Hood of the Weave
The Hood of the Weave grants a +2 bonus to your Spell Save DC and Spell Attack Rolls, making all of your spells more likely to succeed at damaging or applying a condition to their target. It is sold by Mystic Carrion in Philgrave’s Mansion in Act III.
Cloak of the Weave
The Cloak of the Weave gives you another +1 bonus to Spell Save DC and Spell Attack Rolls, making it even harder for enemies to resist the effects of your spells. Once per Short Rest, you can absorb half of the next elemental attack that targets you, and imbue your next outgoing attack with 1d6 of the same element.
The Cloak of the Weave is sold by Helsik at the Devil’s Fee, once her special stock has been unlocked.
Armour of Agility (Alternative Armour)
The Armour of Agility will solve any problems presented by having a low armour class. It has a base Armour Class of 17, and your Dexterity Modifier will also be added to your Armour Class (which will be +2 if your Dexterity is still at 14). As an extra bonus, you get +2 added onto all of your Saving Throw rolls, making for a decent all-round defensive armour. This item is sold by Gloomy Fentonson in Stormshore Armoury, in Act III.
Helldusk Gloves
The Helldusk Gloves are important because they give another +1 bonus to Spell Save DC and Spell Attack Rolls. Your weapon attacks will also do 1d6 extra Fire Damage with these gloves equipped. They are dropped by Haarlep in the House of Hope.
Helldusk Boots
With the Helldusk Boots equipped, you cannot be forcibly moved by hostile spells or actions, and you are immune to being slowed down by Difficult Terrain. You can also use your Reaction to automatically succeed a failed Saving Throw. These effects are especially good for your Trickery Domain Cleric, as they are very likely to be the spellcasting core of your party, and the Helldusk Boots will make it much harder for enemies to prevent you from casting spells.
The Helldusk Boots can be found in a locked Gilded Chest on the top floor of Wyrm’s Rock Fortress. Take the boots before Gortash’s Coronation to avoid making nearby NPCs hostile.
Amulet of the Devout
The Amulet of the Devout adds another +2 bonus to Spell Save DC. It also grants an extra Channel Divinity Charge. Found in the main offering chest in the basement of Stormshore Tabernacle. Beware that looting it will curse your character, so come prepared with some way to cleanse curses, or be prepared to deal with the curse’s consequences when looting this item!
Amulet of Greater Health (Alternative Amulet)
If you’re struggling with survivability, then the Amulet of Greater Health is the solution to your troubles. It improves your Constitution to 23, which will have the side effect of considerably improving your max HP, too. You also get Advantage on Constitution Saving Throws (which you may or may not already have from the Armour of Landfall).
Can be stolen from a trapped pedestal in the Archive of the House of Hope.
Ring of Feywild Sparks
You might be a little confused about why we’re recommending this ring here, since its stated purpose is to buff Tides of Chaos, a Wild Magic Sorcerer feature. The reason is that this ring has a hidden +1 bonus to Spell Save DC that’s not included in the tooltip.
The Ring is looted from Auntie Ethel in the cellar of The Blushing Mermaid, in the Lower City (Act III).
Shar’s Spear of Evening (Alternative Weapon)
If you’re using this build for Shadowheart and you get Shar’s Spear of Evening, then you might want to keep and use the weapon for RP purposes – it’s also a decent weapon.
Shadowheart Story Spoiler Warning:
Shadowheart must be in the party to get the weapon – she gets it as a reward for siding with Shar during the Chosen of Shar quest in the Gauntlet of Shar, Act II. Make sure Shadowheart has the Spear of Night in her possession before proceeding to the final part of this quest. It is found at the end of the Silent Library, earlier in the Gauntlet of Shar, on the lower level near where you participate in Shar’s Trials.
If you do not side with Shar, you instead get Selune’s Spear of Night, which gives you different abilities but is still a good weapon and worth considering.
Viconia’s Walking Fortress
The strongest shield in the game, Viconia’s Walking Fortress gives you a +3 boost to Armour Class, lets you knock over your melee assailants and deal Force Damage to them (using a Reaction), gives you Advantage on Saving Throws against Spells, gives all enemy Spell Attack Rolls against you Disadvantage, gives you access to the Warding Bond spell and the Reflective Shell action.
This shield is looted from Viconia DeVir in the Cloister of Sombre Embrace, in Act III.
The Dead Shot
The Dead Shot reduces the Attack Roll number needed to crit with the bow by 1, and doubles your Proficiency Bonus when attacking with the bow (effectively improving your accuracy). It is sold by Fytz the Firecracker in Stormshore Armoury, Lower City.
Trickery Cleric Extra Info
Here is some additional info that will help you to get the most out of this Trickery Domain Cleric Build in Baldur’s Gate 3.
How to Play the Trickery Cleric – BG3
Early-Game
For the first few levels, Clerics can feel quite weak because they do poor damage in melee and their main Cantrip (![]() Sacred Flame) is prone to failure. During these levels, its best to use your magic to support your team with support spells like
Sacred Flame) is prone to failure. During these levels, its best to use your magic to support your team with support spells like ![]() Bless and
Bless and ![]() Healing Word. The Trickery subclass grants you the
Healing Word. The Trickery subclass grants you the ![]() Invoke Duplicity action, allowing you to give
Invoke Duplicity action, allowing you to give ![]() Advantage on Attack Rolls for your whole party when placed close to enemies.
Advantage on Attack Rolls for your whole party when placed close to enemies.
When you’re not casting spells, use your ranged weapon to deal damage from afar. If your chosen race has Proficiency with ![]() Longbows or
Longbows or ![]() Heavy Crossbows, try to get your hands on one of these, as they deal good early-game damage. But you can use a standard bow if not. When Concentrating on a spell like
Heavy Crossbows, try to get your hands on one of these, as they deal good early-game damage. But you can use a standard bow if not. When Concentrating on a spell like ![]() Bless, try to stay safe from enemy attacks by using distance and sight obstructions to prevent them from hitting you. This minimises the chance that your Concentration will be broken. Watch the terrain, too – stepping on a puddle of poison can be enough to break your Concentration if you are unlucky!
Bless, try to stay safe from enemy attacks by using distance and sight obstructions to prevent them from hitting you. This minimises the chance that your Concentration will be broken. Watch the terrain, too – stepping on a puddle of poison can be enough to break your Concentration if you are unlucky!
One good single-target damage spell Clerics can use from the beginning of the game is ![]() Inflict Wounds. This spell also scales really well with upcasting, so you can keep using it for burst damage for most of the game.
Inflict Wounds. This spell also scales really well with upcasting, so you can keep using it for burst damage for most of the game.
From Level 3 onwards, begin casting ![]() Aid after every Long Rest to boost your team’s max HP.
Aid after every Long Rest to boost your team’s max HP.
Mid-Game
When you reach level 5, you begin to unlock some much stronger damage spells like ![]() Glyph of Warding and
Glyph of Warding and ![]() Spirit Guardians. You can also upcast
Spirit Guardians. You can also upcast ![]() Aid progressively higher as you level up, adding another 5 HP per Spell Slot Level. I recommend doing this after every Long Rest to make your party more resilient.
Aid progressively higher as you level up, adding another 5 HP per Spell Slot Level. I recommend doing this after every Long Rest to make your party more resilient.
![]() Spirit Guardians creates an AoE of Radiant or Necrotic Damage that follows your Cleric around. You can cast the spell and run through a crowd of enemies, hitting all of them. Just beware of opportunity attacks.
Spirit Guardians creates an AoE of Radiant or Necrotic Damage that follows your Cleric around. You can cast the spell and run through a crowd of enemies, hitting all of them. Just beware of opportunity attacks.
From Level 8 onwards, you get the ![]() Divine Strike feature, infusing 1d8 bonus damage into your weapon attacks once per turn. This is helpful on those turns when casting a spell isn’t possible or appropriate.
Divine Strike feature, infusing 1d8 bonus damage into your weapon attacks once per turn. This is helpful on those turns when casting a spell isn’t possible or appropriate.
Late-Game
At Level 9, you unlock ![]() Insect Plague, a huge AoE that deals heavy damage and slows enemies down significantly.
Insect Plague, a huge AoE that deals heavy damage and slows enemies down significantly.
If you collect the equipment recommended in the guide above, you will find that your Spells and Cantrips succeed more reliably thanks to your boosted Spell Save DC. You should now be able to make much more reliable use of your debuff and control spells like ![]() Hold Person.
Hold Person.
At Level 11, you should be upcasting ![]() Aid to Level 5 and combining it with the
Aid to Level 5 and combining it with the ![]() Heroes’ Feast spell to give a massive 33-point HP boost to your party.
Heroes’ Feast spell to give a massive 33-point HP boost to your party.
The playstyle of the Cleric stays rather similar throughout your playthrough. You are using your Concentration spells to control the battlefield, while sometimes using an AoE spell or single-target burst spell. On the remainder of your turns you are using your weapons to chip away at enemies, and staying out of the way of enemy attacks to keep your spell Concentration safe. In the Late-game, you have much stronger spells to use, but the core playstyle remains the same.
Mirror of Loss
If you successfully acquire a buff from the Mirror of Loss during your playthrough, you should put the extra points into Wisdom. This will improve your spellcasting.
If you don’t know what the Mirror of Loss is or how to use it, you may be interested in our Mirror of Loss Guide. The Mirror can give up to three additional Ability Points to all members of your party, making it very strong.
Trickery Domain Cleric Build Illithid Powers (optional)

Illithid Powers are unlocked later in BG3 when you learn more about Mind Flayers and Tadpoles. By eating Jars of Mind Flayer Parasites you gain one point. This is another optional skill tree that you can get access to if you want. Here are some of the best Illithid Powers for the BG3 Cleric Build with the Trickery Domain subclass:
- Concentrated Blast: Allows you to deal extra damage to a target when you are Concentrating on a spell, potentially also healing if the target is Concentrating too.
- Cull the Weak: When you reduce a creature’s hit points below a certain threshold, this power instantly kills it and deals 1-4 Psychic Damage to nearby enemies. This is particularly effective when engaging groups of weaker foes, enabling you to thin their numbers rapidly. You have quite a few AoE spells, which are pretty good at activating this effect.
- Fly: This can be used to reach hard to get to places or change positions in combat.
- Black Hole: This power creates an area-based effect that pulls in and slows targets. It’s particularly useful for crowd control, allowing you to cluster enemies together for area-of-effect attacks or to isolate them from vulnerable allies.
- Psionic Backlash: This is a top-tier Reaction from the Illithid Powers skill tree in BG3. This allows you to deal Psychic Damage when a nearby enemy casts a spell. This is especially useful if the target is casting a Concentration Spell. The damage from Psionic Backlash can immediately break their Concentration, ending the spell’s effects.
Other Baldur’s Gate 3 Builds
- Druid Build – Circle of the Moon
- Bard Build – College of Lore
- Ranger Build – Hunter
- Monk Build – Way of Shadow
- Monk Build – Way of the Four Elements
- Monk Build – Way of the Open Hand
- Necromancer Build – Necromancy
- Fighter Build – Battle Master
- Barbarian Build – Berserker
- Warlock Build – Great Old One
- Cleric Build – Light Domain
- Rogue Build – Thief
- Sorcerer Build – Wild Magic
- Wizard Build – Evocation School
- Paladin – Oath of Ancients
- More Baldur’s Gate Guides & Builds
If you want to check out the map of Baldur’s Gate 3, please visit the Baldur’s Gate 3 Interactive Map.