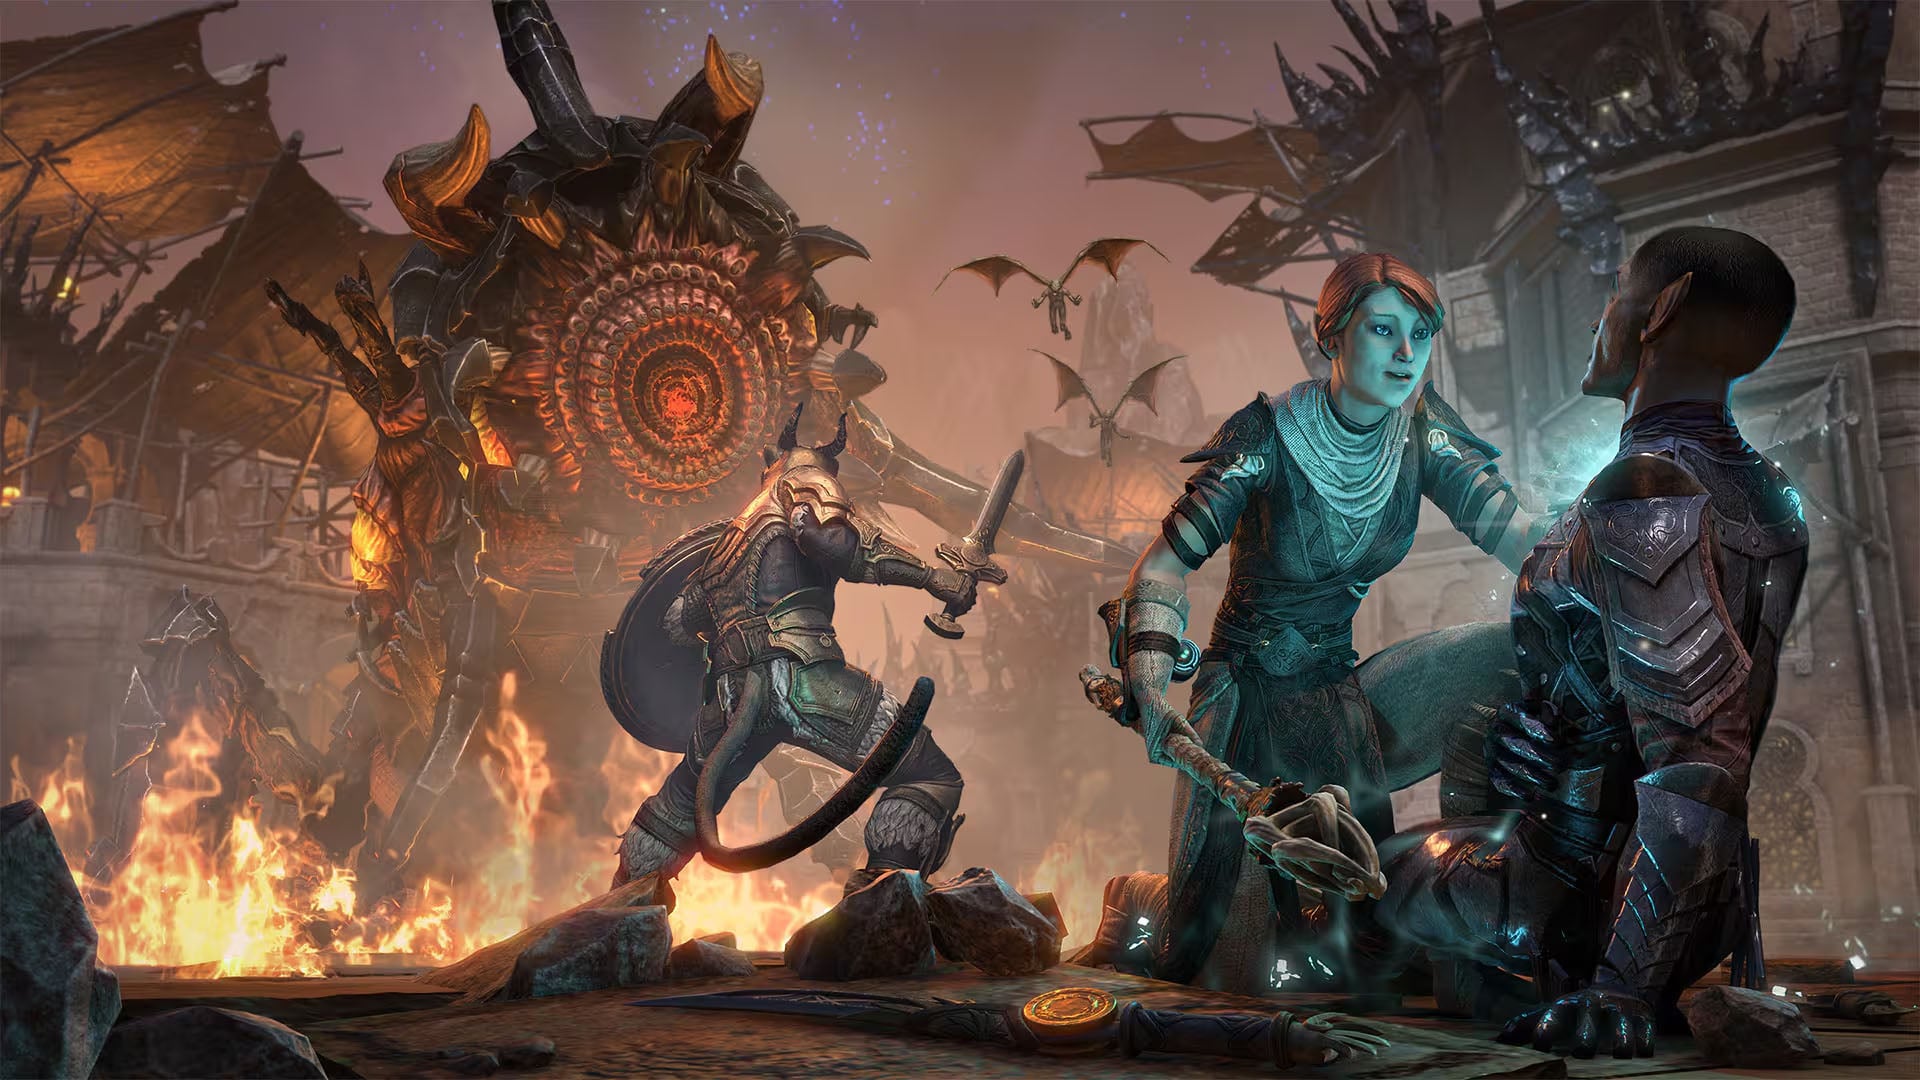
The ESO Night Market is ESO’s first event zone, introduced in Update 49 as part of Season Zero. It appears within Fargrave’s interplanar bazaar for a limited time, offering challenging group content across three dangerous districts. Every boss encounter and puzzle in the zone is covered here, from the open-world Brazen tier up to the Opulent Ordeal trial. If you’re trying to find your way into the Night Market Zone, read our How to Get to the Night Market Guide.
This guide is a work in progress. If you know how to complete the puzzles or want to add any information, please join our Community Discord and write in the AlcastHQ feedback channel!
Table of Contents
- How ESO Night Market Bosses Work
- Night Market Boons
- District Breakdown
- Skittering Precinct
- Sorrow’s Friend
- The Parch
- ESO Opulent Ordeal Trial
- All ESO Night Market Oddities ( Puzzles)
How Night Market Bosses Work
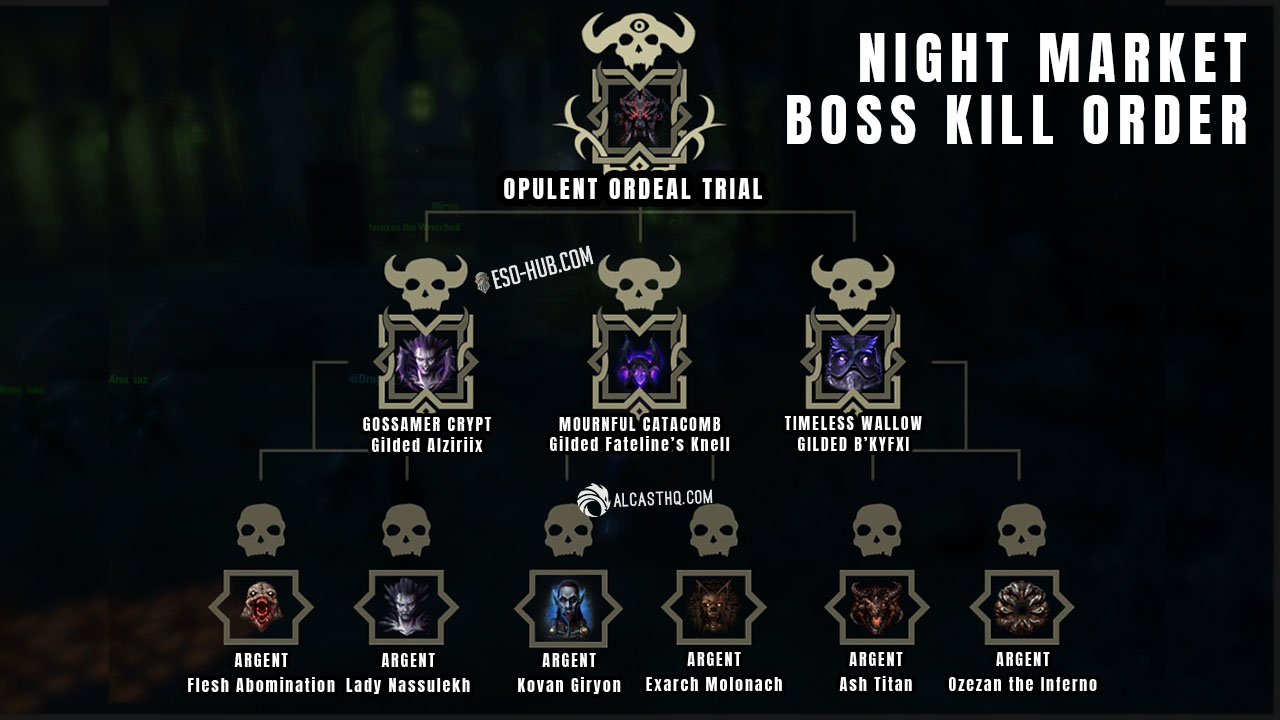
ESO Night Market Boss Kill Order
The Night Market uses a hierarchical tier system where defeating lower-tier bosses unlocks access to higher-tier bosses. Every Night Market district unlocks the next tier boss the same way. Kill 2x Brazen Bosses = Argent Boss Spawns
District Breakdown: Bosses, Events, Oddities and Boons

Each of the three Night Market districts has a unique theme, set of bosses, public events and environmental puzzles known as Oddities.
- Brazen: Kraohl the Defiler, Khephidaen, Votary of Velidreth, Dranos Velador
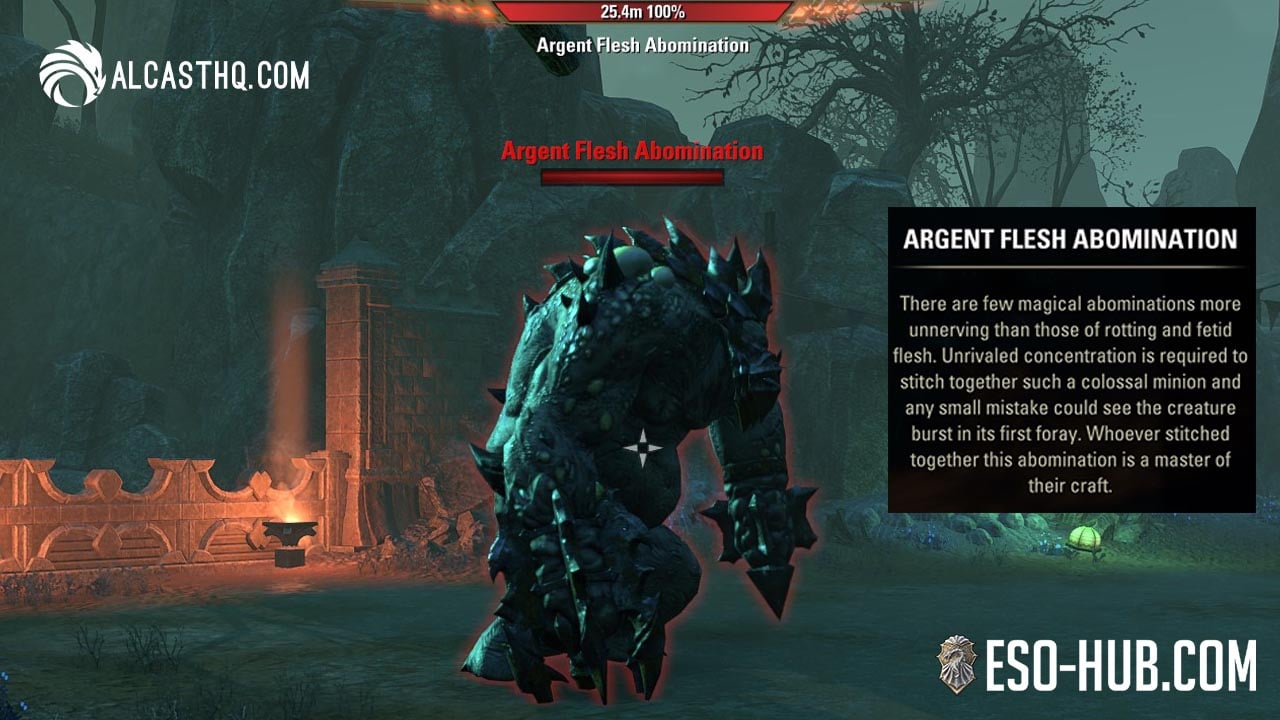
- Argent: Flesh Abomination, Lady Nassulekh
- Calamitous: Roksa the Warped
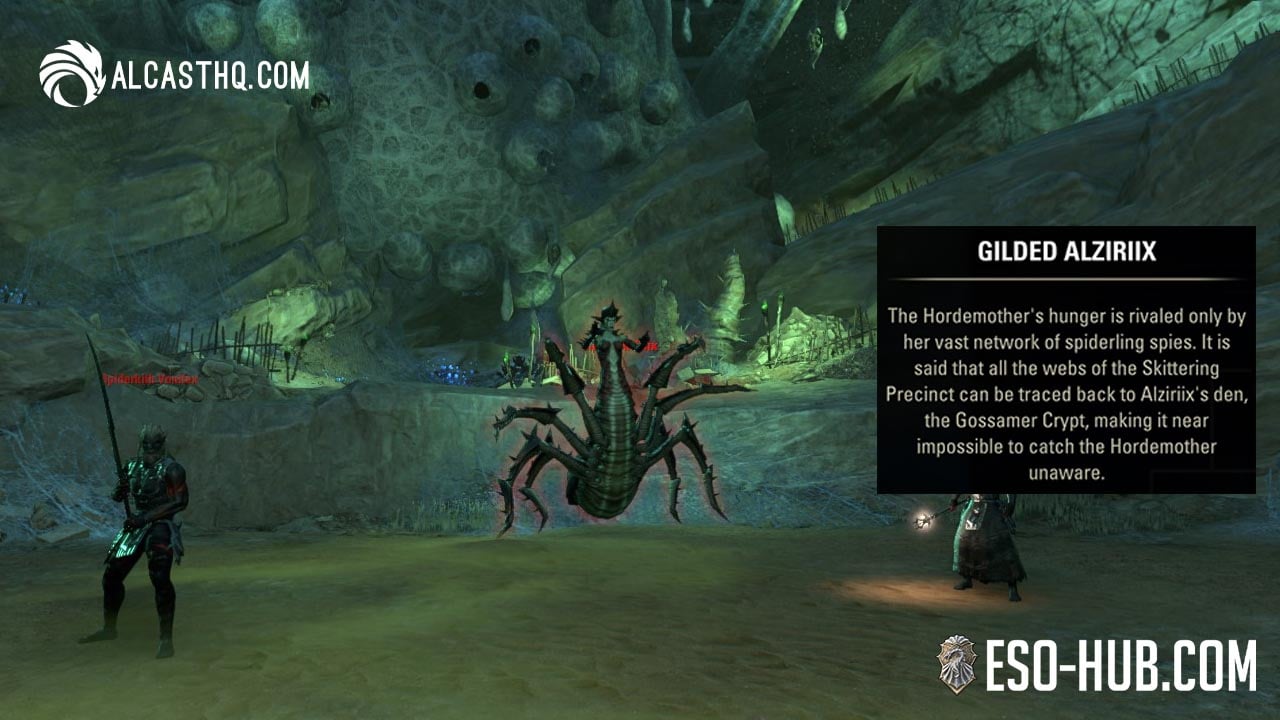
- Gilded: Alziriix (Gossamer Crypt)
- Skirmish: Brood Skirmish (defeat the Hordemother)
- Oddities: 4 Arachnid Invasions (Not Today, Spiders achievement)
- Race: Rapid Extermination
- Brazen: Kynmarcher Strix, Plague of Crows, Murklight, Scavenging Maw
- Argent: Kovan Giryon, Exarch Molonach
- Calamitous: Wailing Bedina
- Gilded: Fateline’s Knell (Mournful Catacomb)
- Skirmish: Descender Skirmish (defeat the Spiral Descender)
- Oddities: 4 Guiding Lights (Bright Minds achievement)
- Race: Void Collapse
- Brazen: Taupezu Azzida, Sellistrix, Doyelmish Ironheart, Incineration Beetle
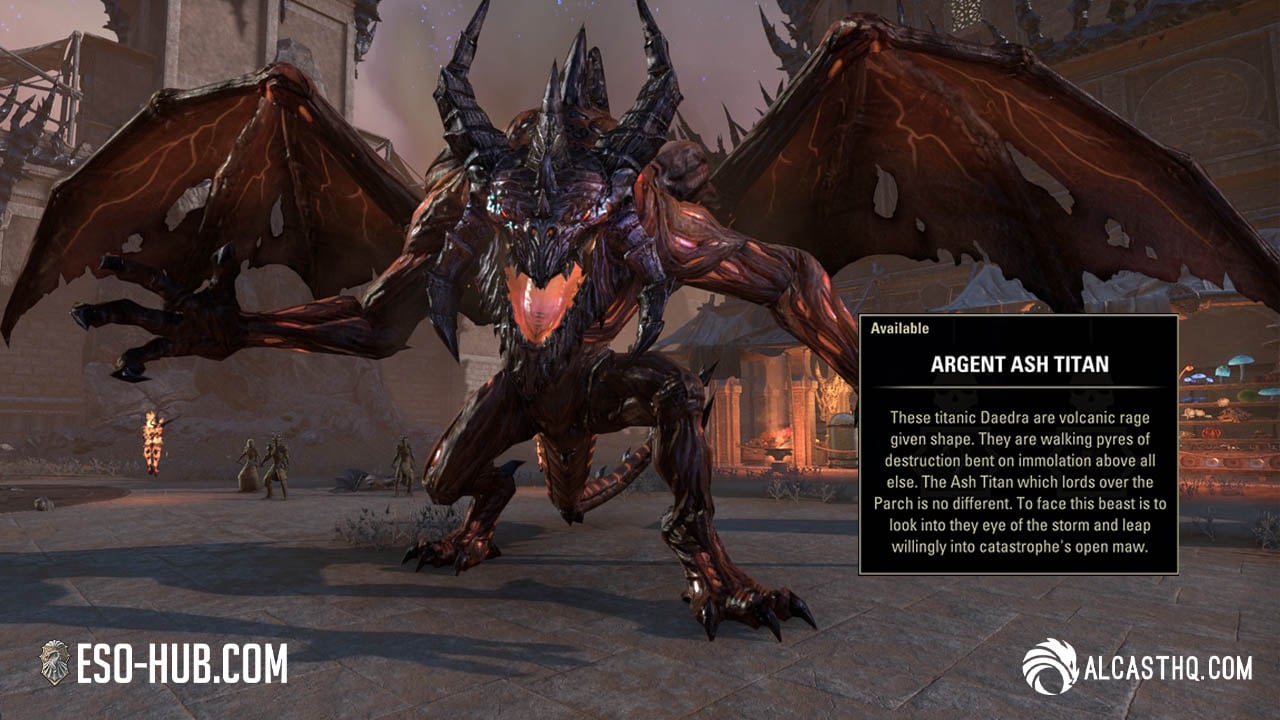
- Argent: Ash Titan, Ozezan the Inferno
- Calamitous: Dunegorger
- Gilded: B’Kyfxi (Timeless Wallow)
- Skirmish: Ritual Skirmish (defeat Zephyra and Levinda)
- Oddities: 3 Boulder Dashes (Boulder Bouncer achievement)
- Race: Unstable Creatia
| Skittering Precinct | Sorrow’s Friend | The Parch | |
|---|---|---|---|
| Kraohl the Defiler, Khephidaen, Votary of Velidreth, Dranos Velador | Kynmarcher Strix, Plague of Crows, Murklight, Scavenging Maw | Taupezu Azzida, Sellistrix, Doyelmish Ironheart, Incineration Beetle | |
| Flesh Abomination, Lady Nassulekh | Kovan Giryon, Exarch Molonach | Ash Titan, Ozezan the Inferno | |
| Roksa the Warped | Wailing Bedina | Dunegorger | |
| Gilded | Alziriix (Gossamer Crypt) | Fateline’s Knell (Mournful Catacomb) | B’Kyfxi (Timeless Wallow) |
| Opulent | Web Eater, Arid Varlet, Knightshade (fought together as a 12-player trial encounter) | ||
| Skirmish | Brood Skirmish (Hordemother) | Descender Skirmish (Spiral Descender) | Ritual Skirmish (Zephyra and Levinda) |
| Oddities (Puzzles) | 4 Arachnid Invasions | 4 Guiding Lights | 3 Boulder Dashes |
| Race | Rapid Extermination | Void Collapse | Unstable Creatia |
Night Market Boons
Skittering Precinct Overview
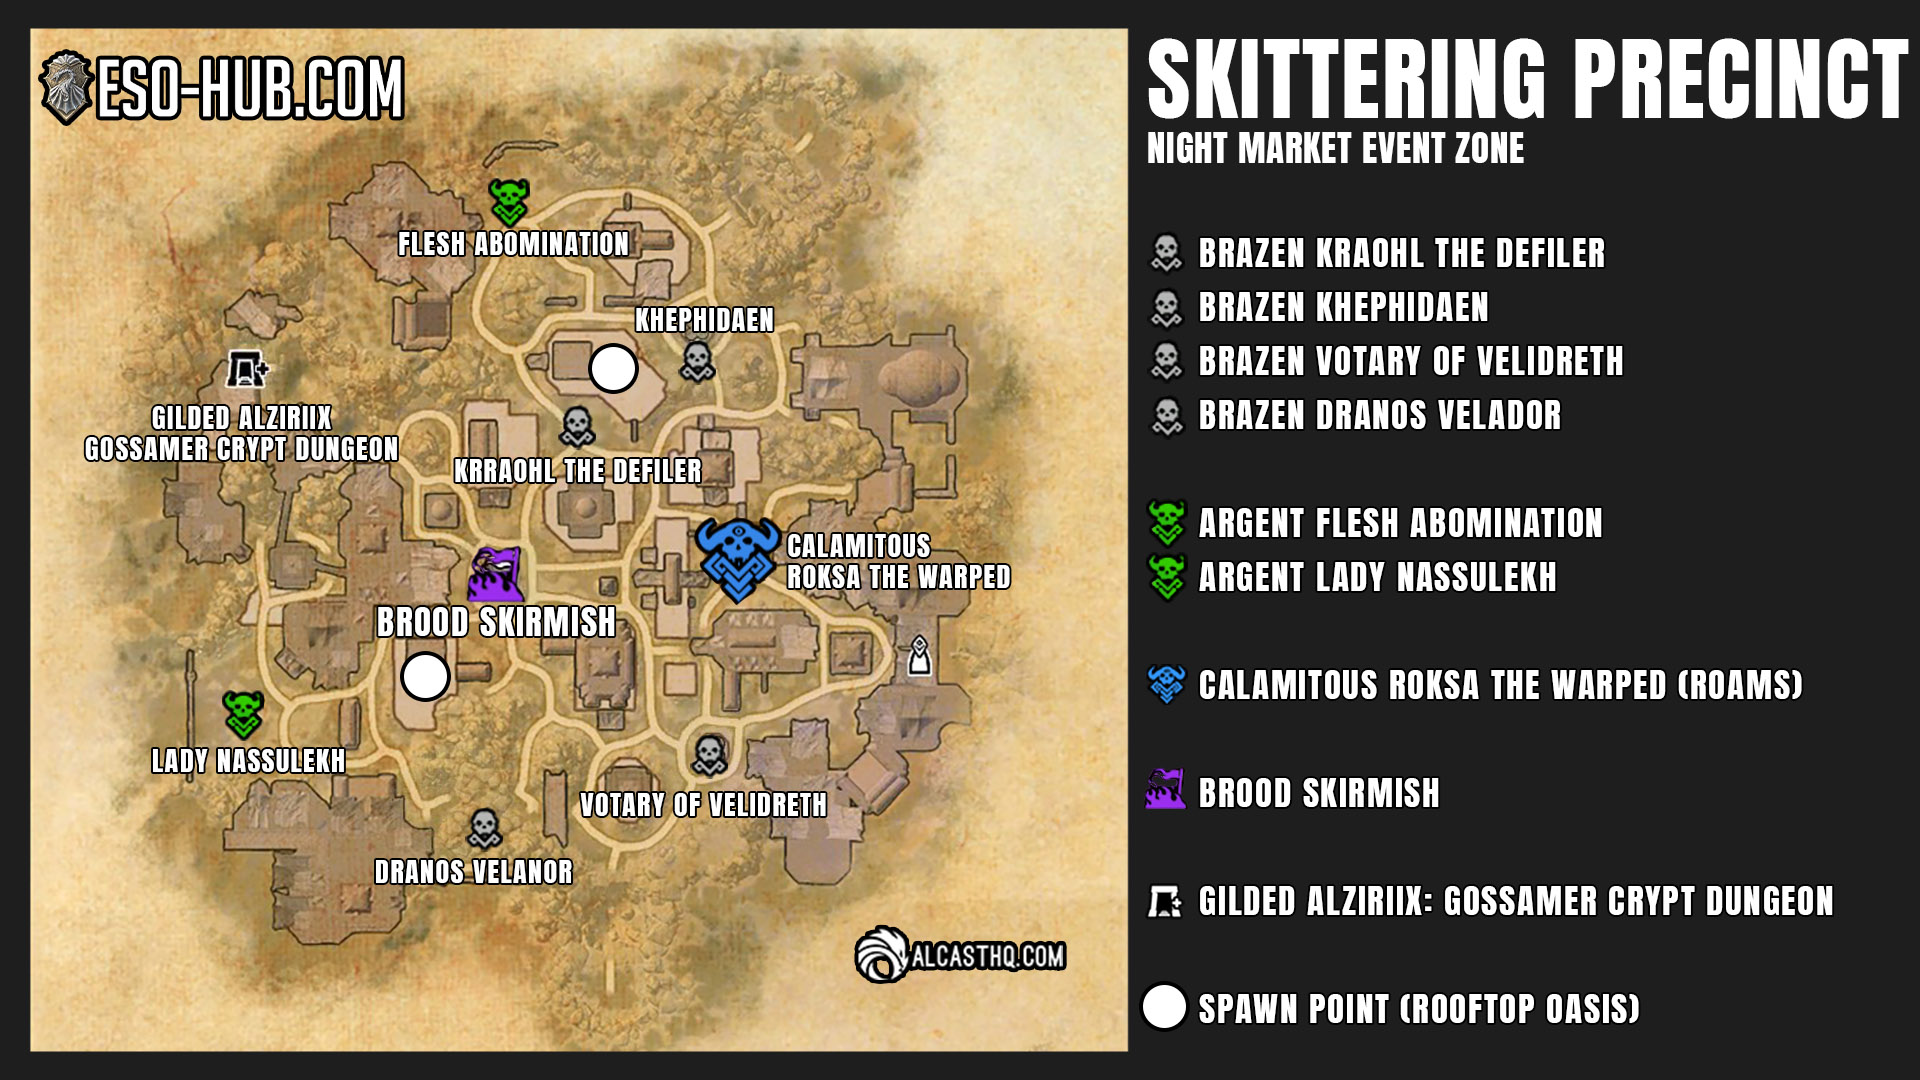
All Skittering Precinct Boss Spawn locations on map
The Skittering Precinct is the Night Market’s spider-themed district. Its traversal challenge is grapple points that let you reach elevated areas once you have the Egg of Arac relic. The relic also breaks web barriers blocking treasure chests and heavy sacks. The district’s Gilded dungeon is the Gossamer Crypt.
- Brazen: Kraohl the Defiler, Khephidaen, Votary of Velidreth, Dranos Velador
- Argent: Flesh Abomination, Lady Nassulekh
- Calamitous: Roksa the Warped
- Gilded: Alziriix (Gossamer Crypt)
- Skirmish: Brood Skirmish (defeat the Hordemother)
- Oddities: 4 Arachnid Invasions (Not Today, Spiders achievement)
- Race: Rapid Extermination

Public Event: Brood Skirmish
ESO Night Market Skirmishes are on a timer. You can check the time by pressing F5 on PC (the boss overview/faction scores view). The Brood Skirmish activates in the central fountain courtyard of the Skittering Precinct. You will see red mist in the air when it starts.
Boon on completion: Healthy Bargain (+25% Max Health, 60 min)
Arachnid Invasions Oddity
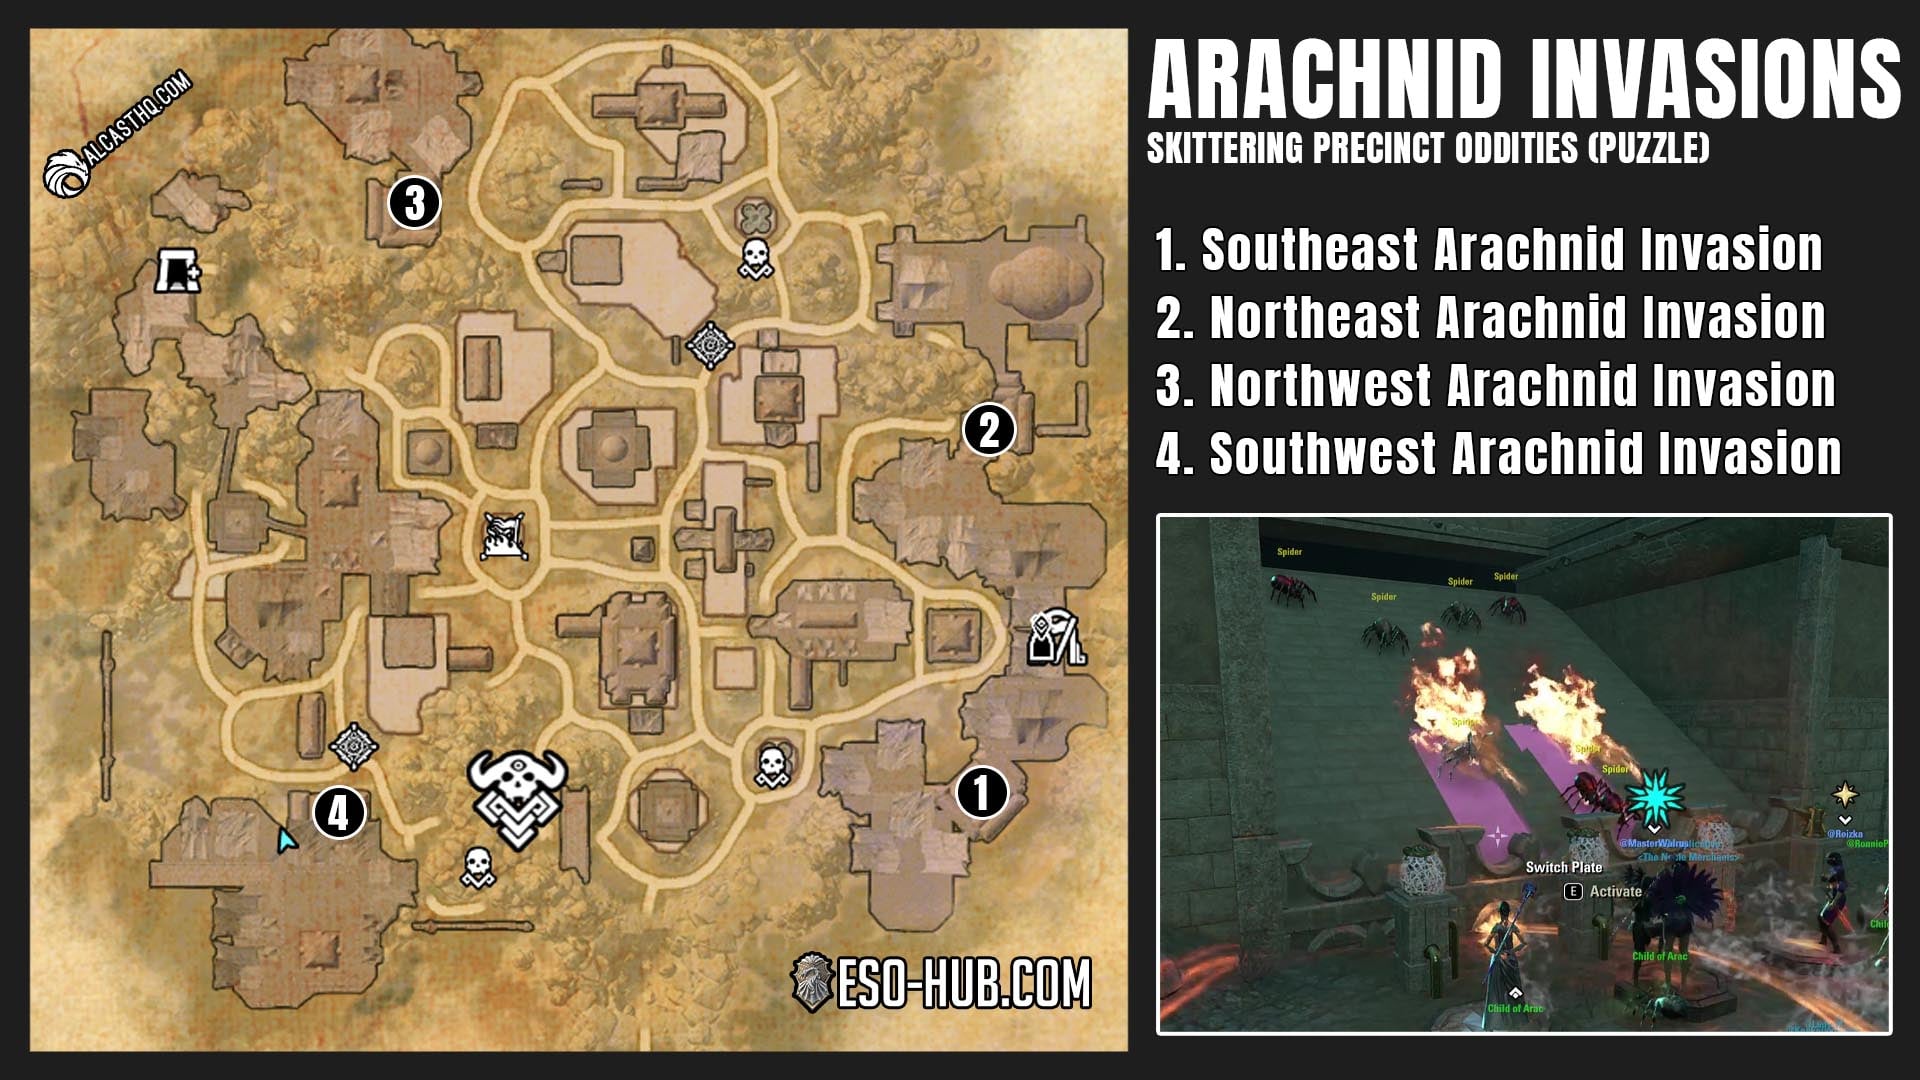
Skittering Precinct Arachnid Invasions locations in the Night Market
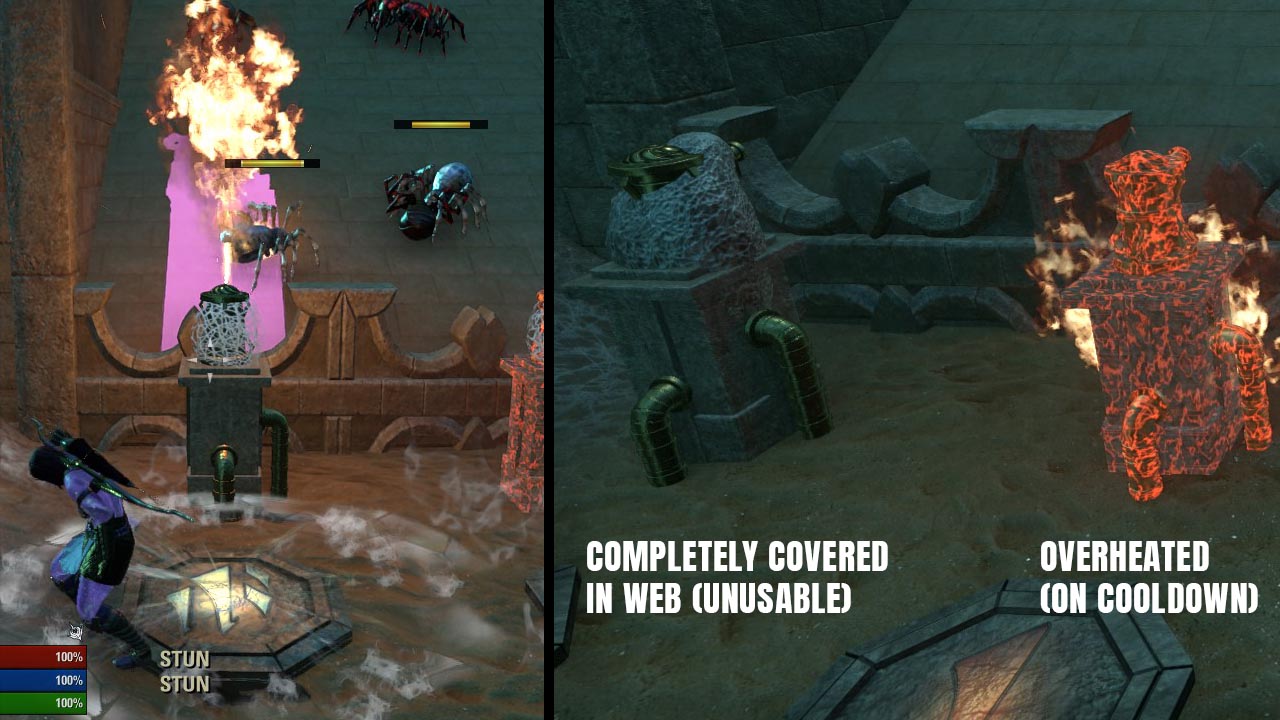
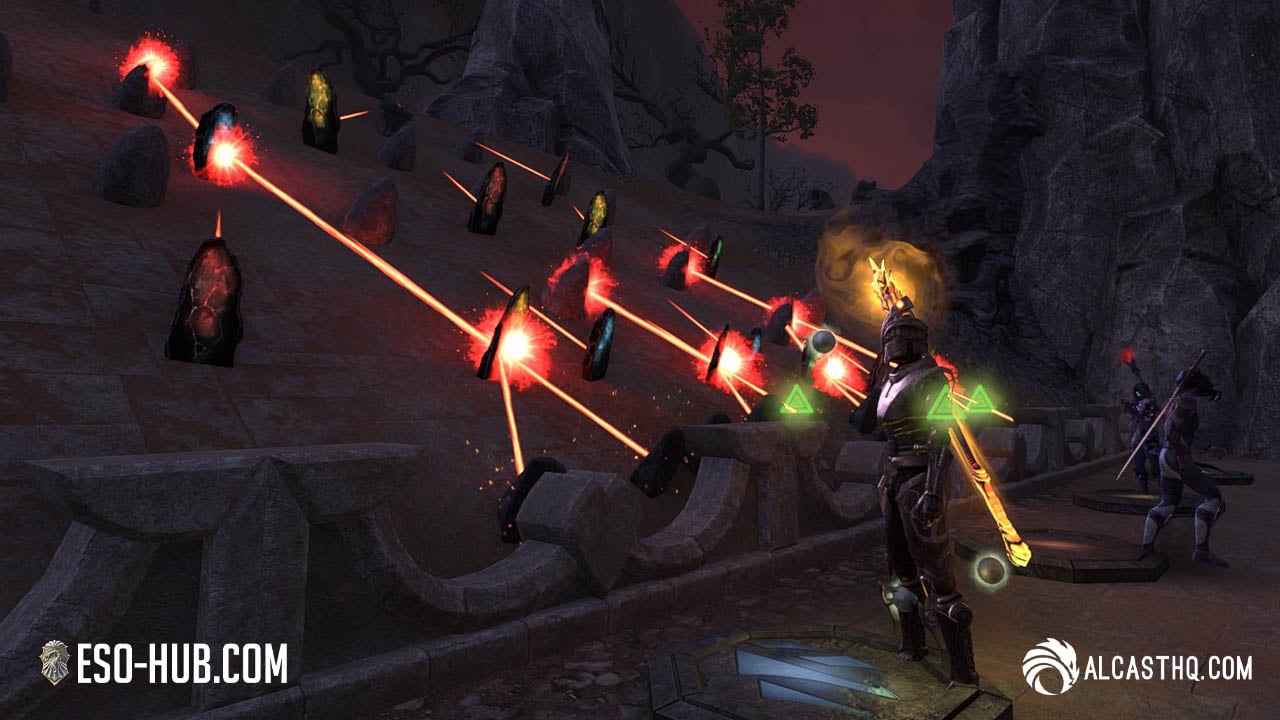
Skittering Precincts Arachnid Invasion is a tower defense minigame found at four locations across the Skittering Precinct. Spiders come down on four lanes toward mounted flamethrowers and your job is to keep the flamethrowers alive until the invasion is repelled. If two flamethrowers get fully covered in web making the Switch Plate unusable, the activity fails.
Boon on completion: Flame Aura (9,000 Flame Damage every 1s within 6 meters, 15 min)
Daring Race: Rapid Extermination
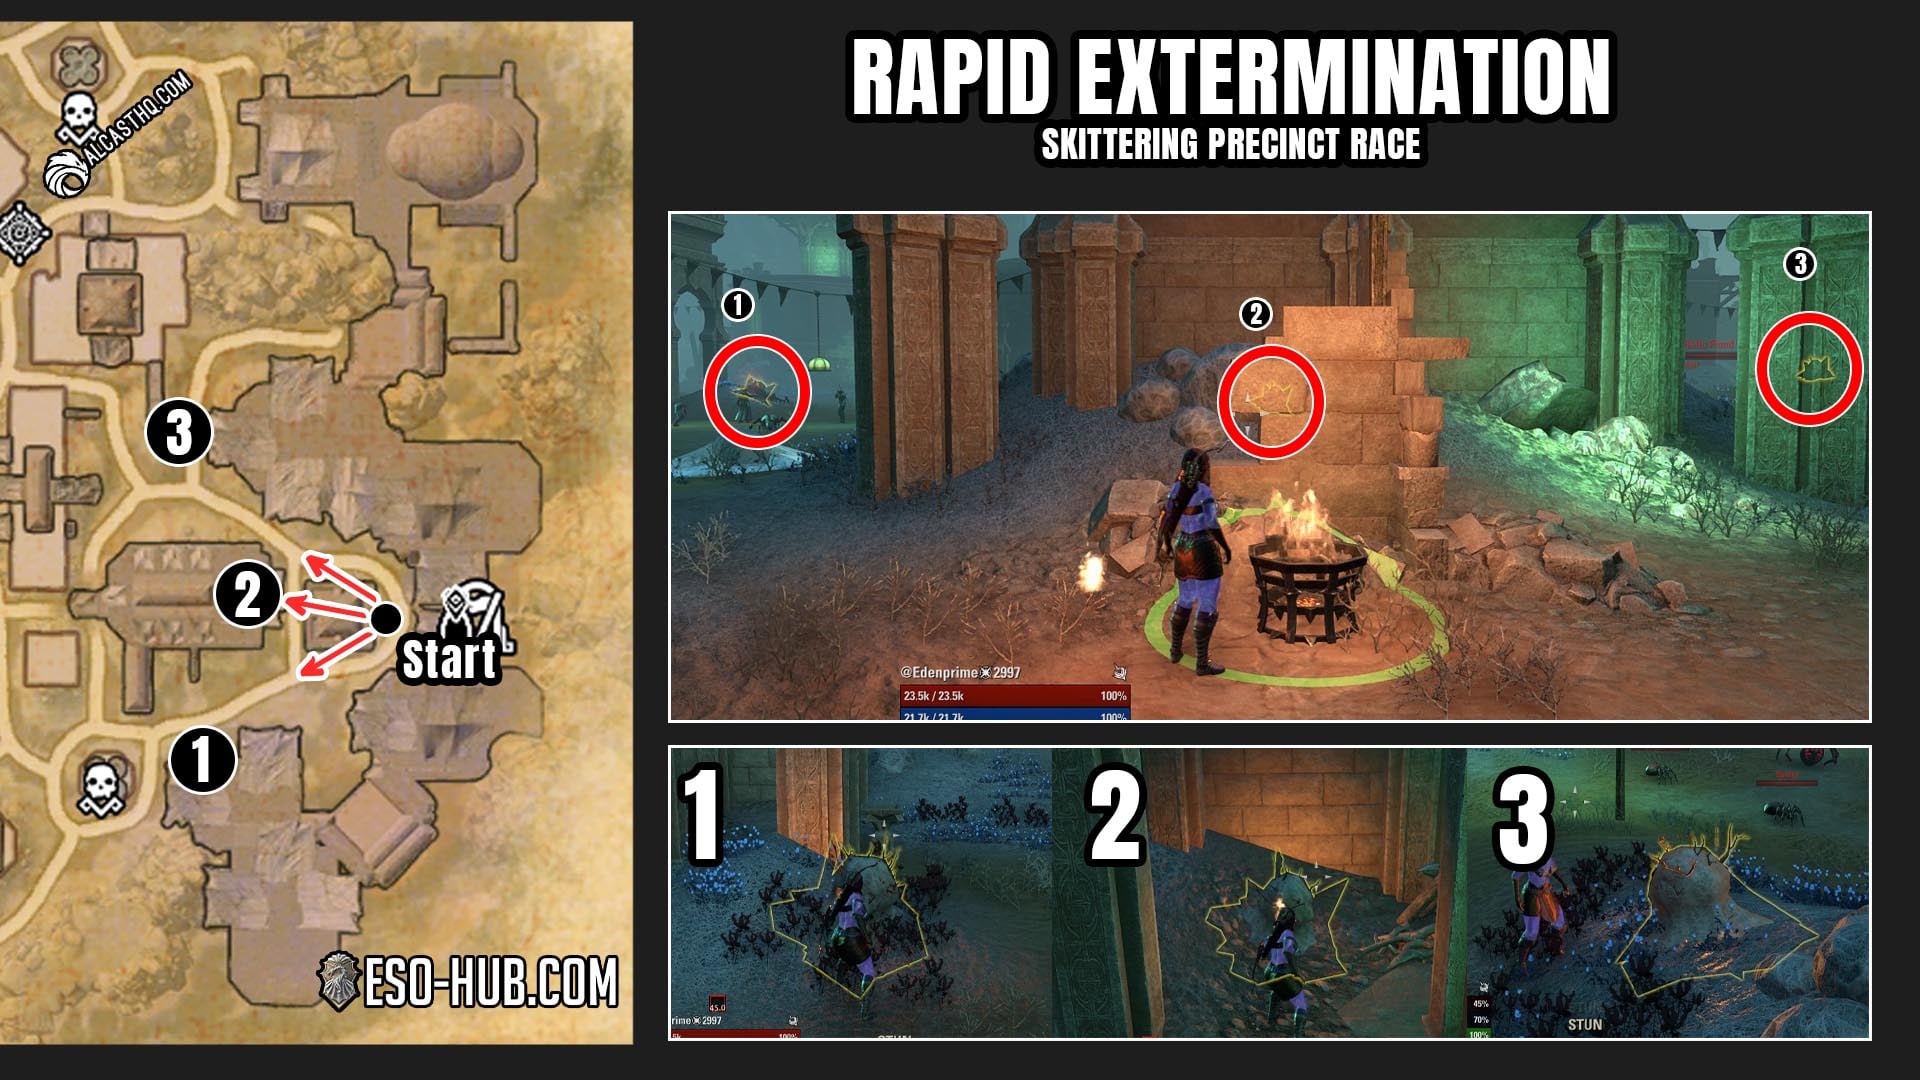
Rapid Extermination is a timed race in the Skittering Precinct district of ESO’s Night Market. A brazier near the district entrance holds a flame essence that you carry to spider nests nearby. You get 12 seconds per flame pickup before it burns out and three nests to destroy in total.
Boon on completion: Arac’s Sacrifice (a spider follows you; when it dies, activate a synergy for 60,000 Poison Damage; corpse deals 8,500 Poison Damage/s for 30s, 15 min)
Sorrow’s Friend Overview

All Sorrow’s Friend Boss Spawn locations on map
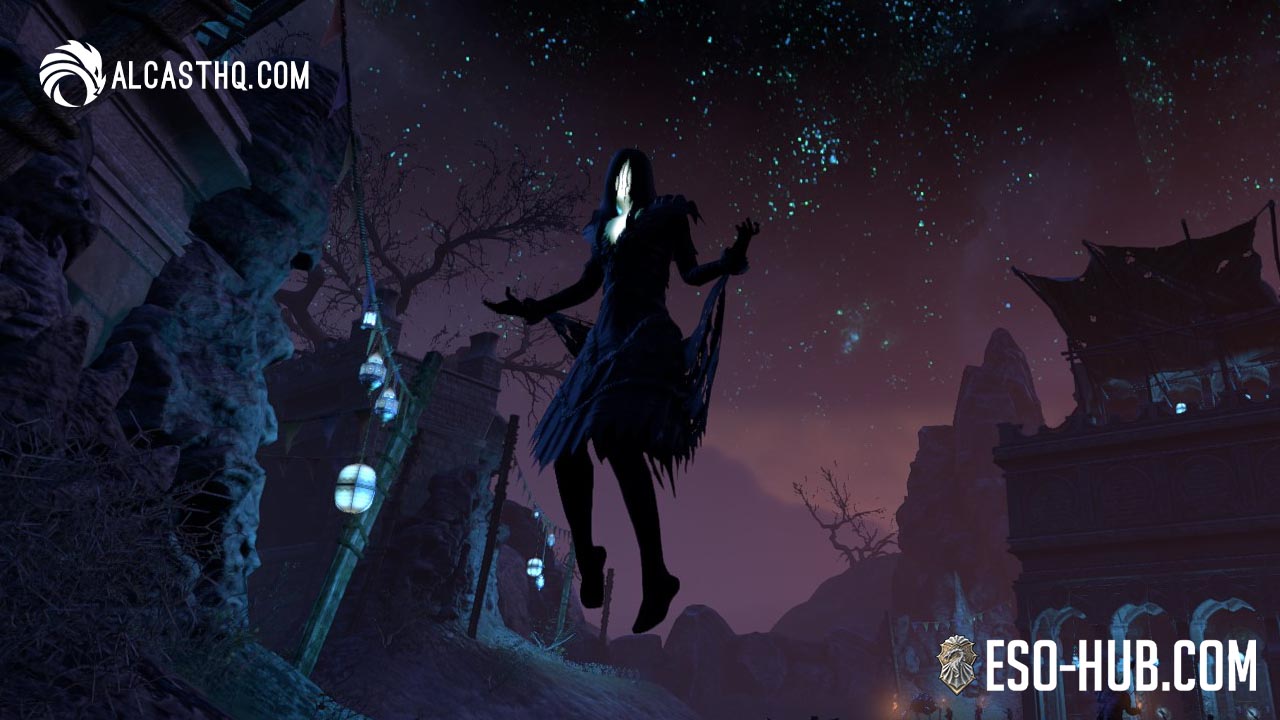
Sorrow’s Friend is the Night Market’s eclipse and undead-themed district. Its traversal challenge is the Baleful Darkness, patches of shadow that damage and kill you unless you carry the Gleaming Lamp relic to push them back. The district’s Gilded dungeon is the Mournful Catacomb.
Sorrow’s Friend
- Brazen: Kynmarcher Strix, Plague of Crows, Murklight, Scavenging Maw
- Argent: Kovan Giryon, Exarch Molonach
- Calamitous: Wailing Bedina
- Gilded: Fateline’s Knell (Mournful Catacomb)
- Skirmish: Descender Skirmish (defeat the Spiral Descender)
- Oddities: 4 Guiding Lights (Bright Minds achievement)
- Race: Void Collapse
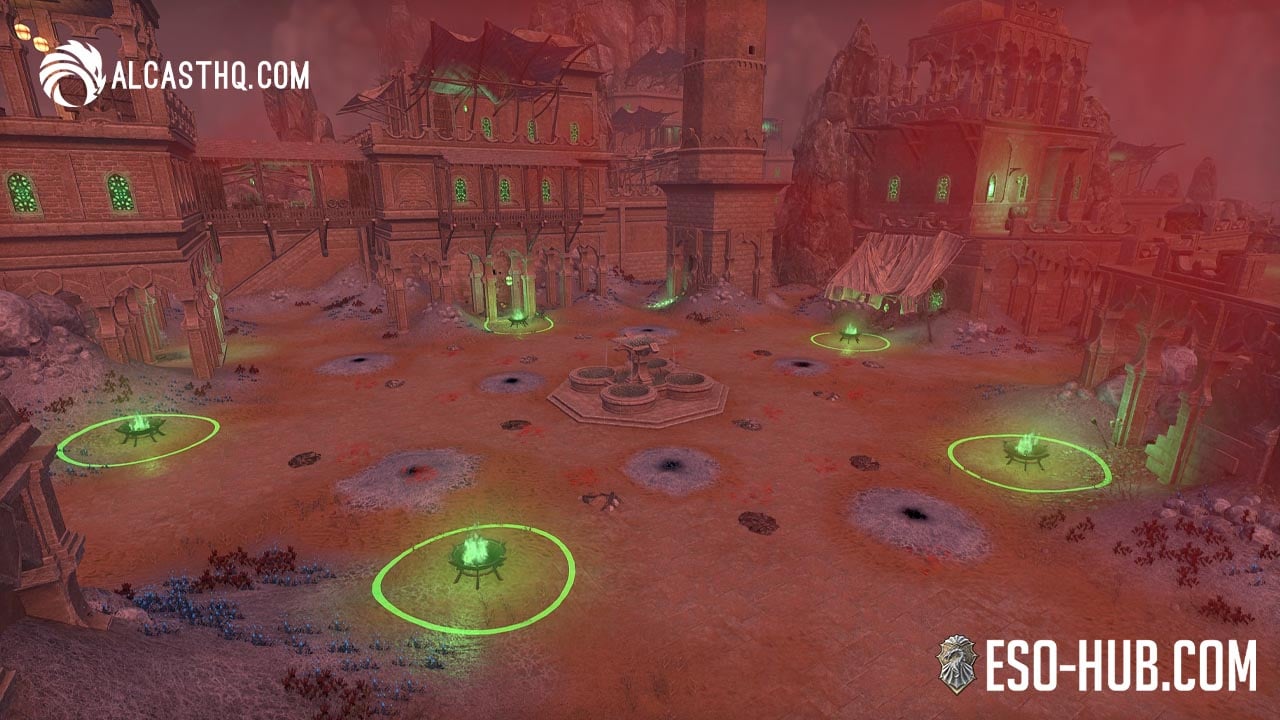
Public Event: Descender Skirmish
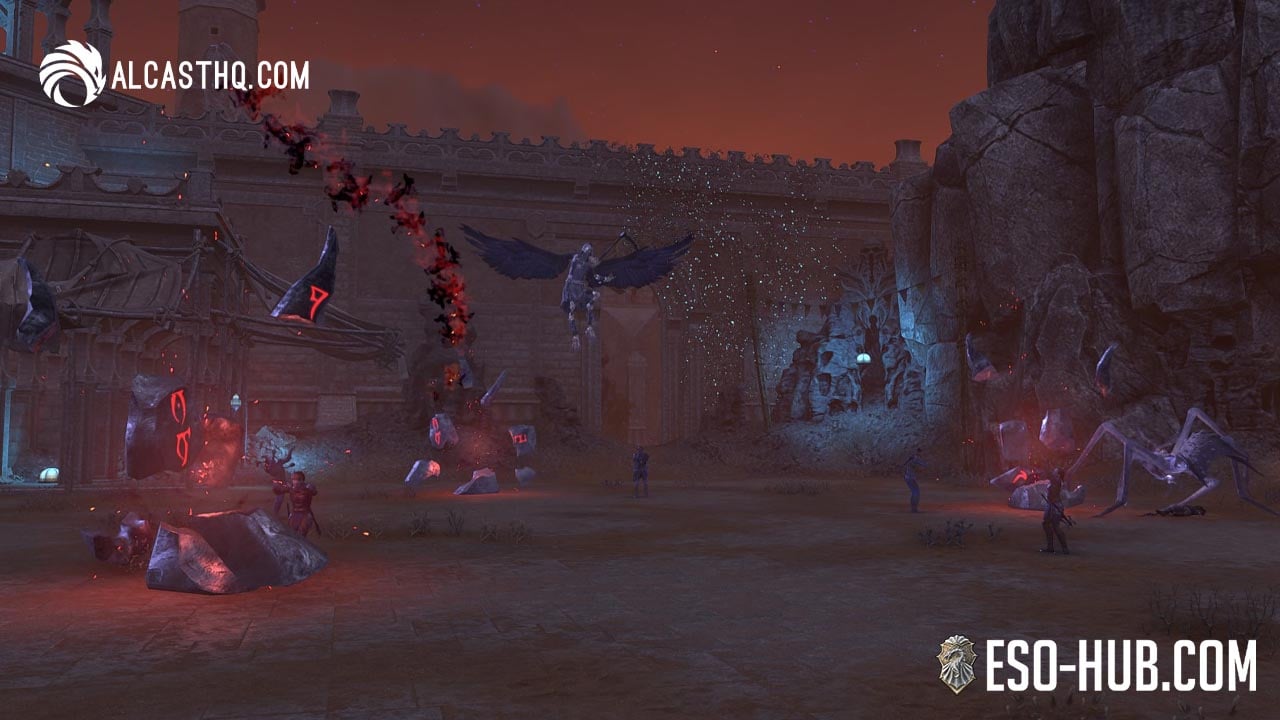
ESO Night Market Skirmishes are on a timer. You can check the time by pressing F5 on PC (the boss overview/faction scores view). The Descender Skirmish activates in the center of Sorrow’s Friend. The sky turns red with lightning flashes when the event is active.
Boon on completion: Valued Mark (+25% Magicka and Stamina Recovery, 60 min)
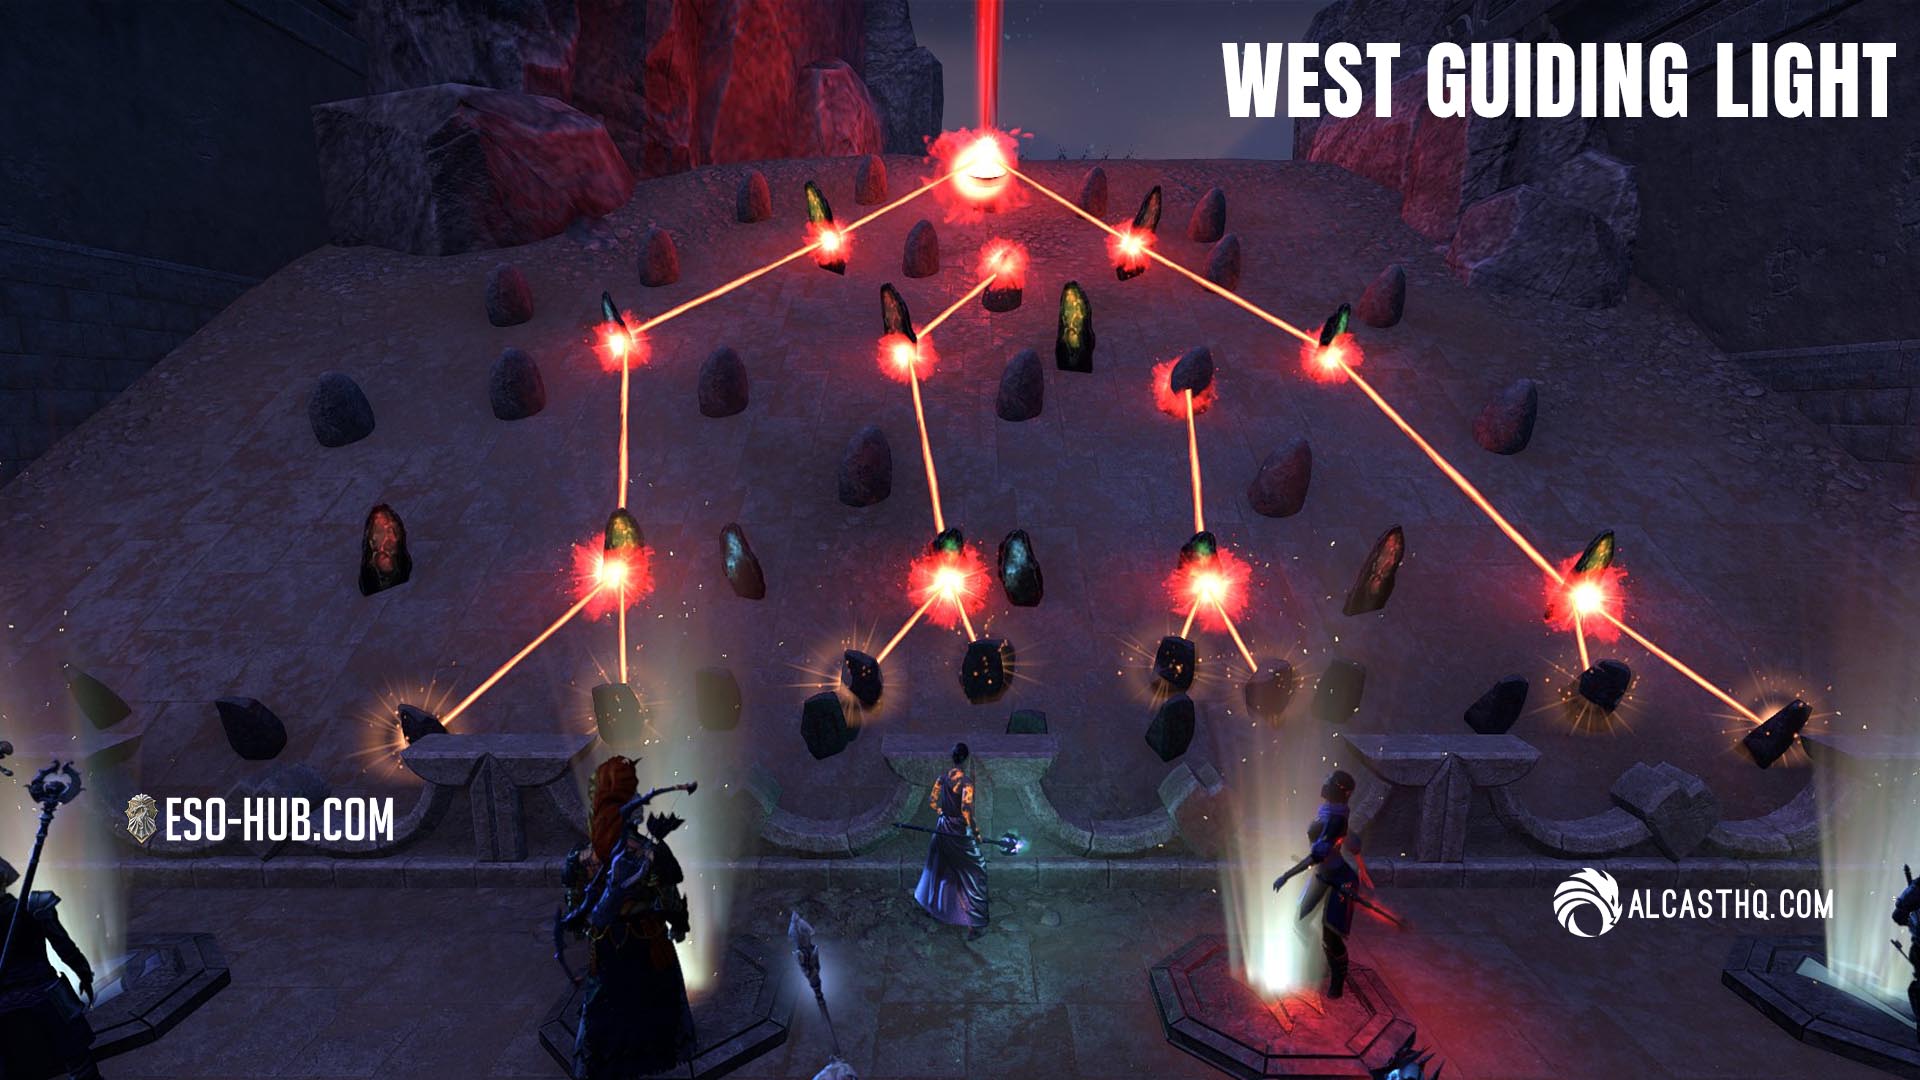
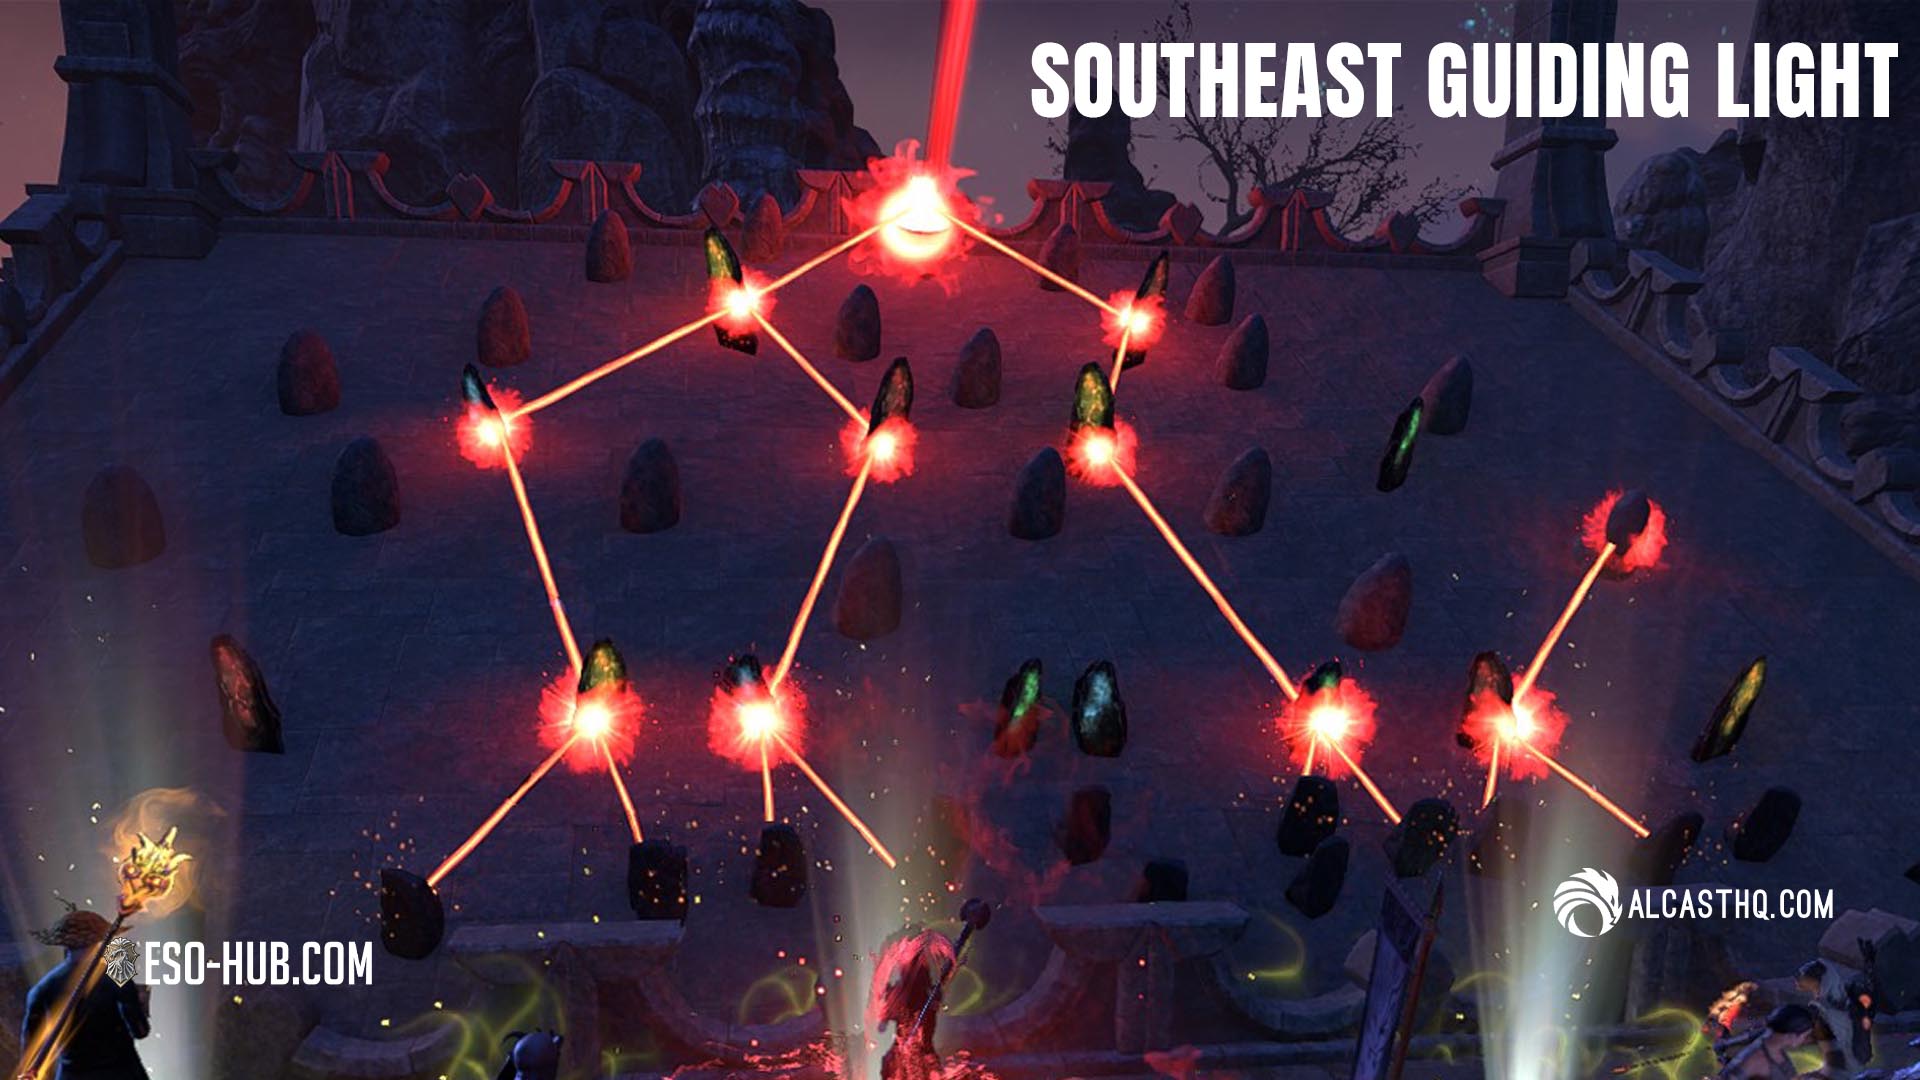
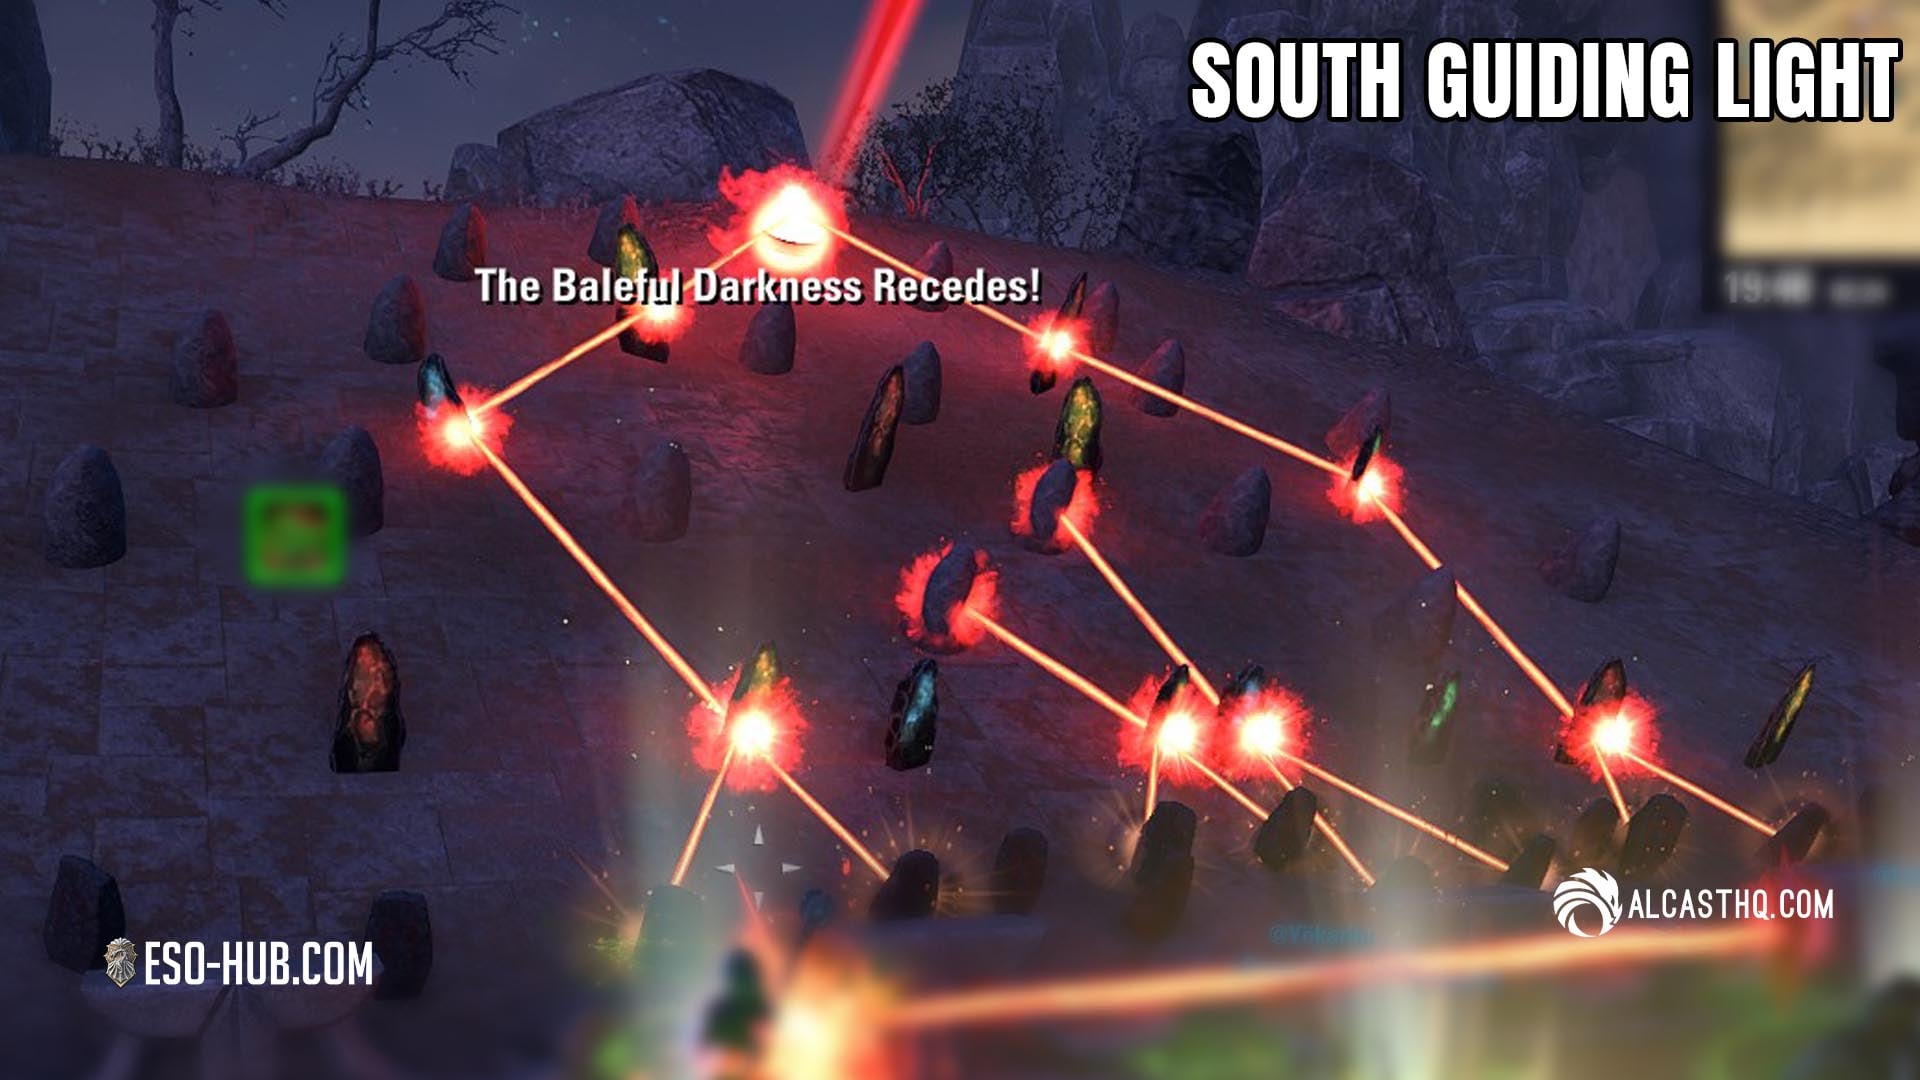
Guiding Light Oddity
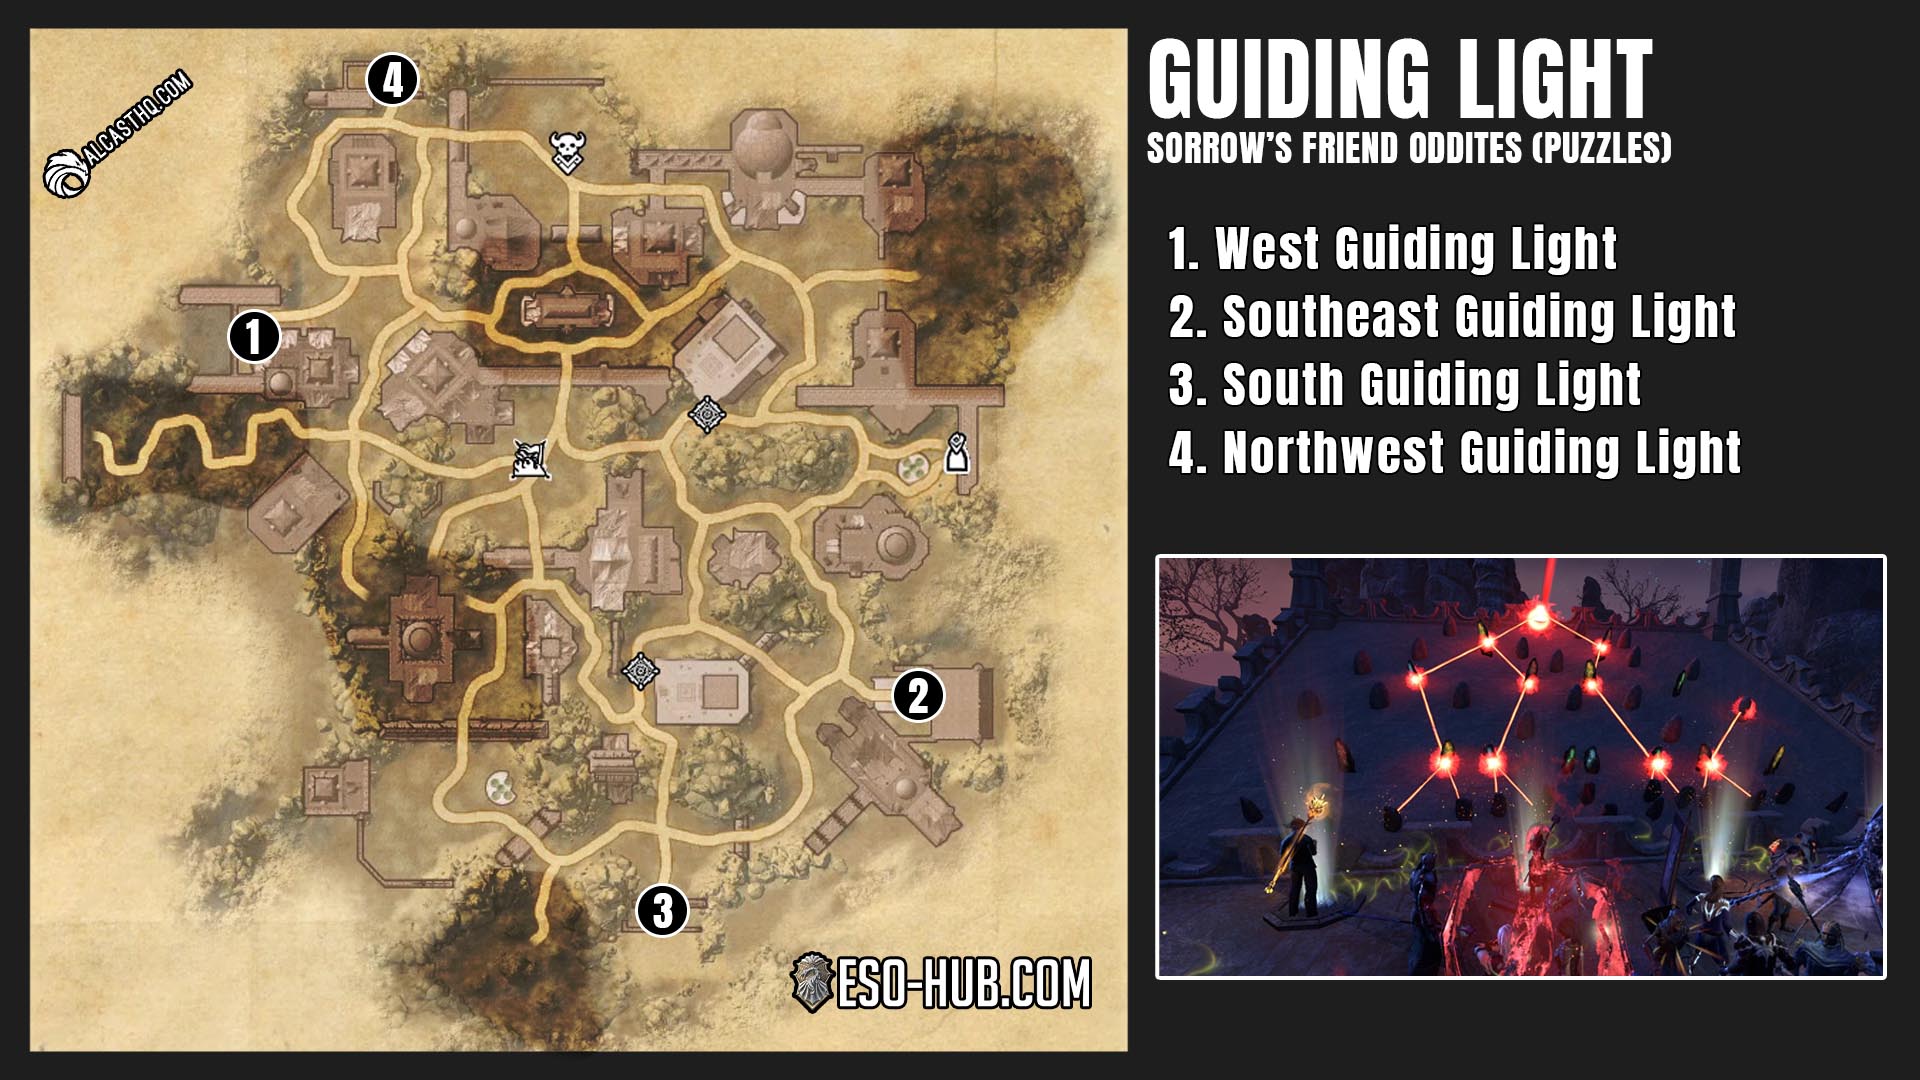
Sorrow’s Friend has four light beam puzzles across the district. Each one randomizes when it activates. This is the trickiest oddity in the Night Market.
Boon on completion: Agonizing Tether (a fiery tether deals 1,000 Flame Damage every 0.3s to enemies between you and a red soul gem; gems spawn every 15s and last 12s, 15 min)
Daring Race: Void Collapse
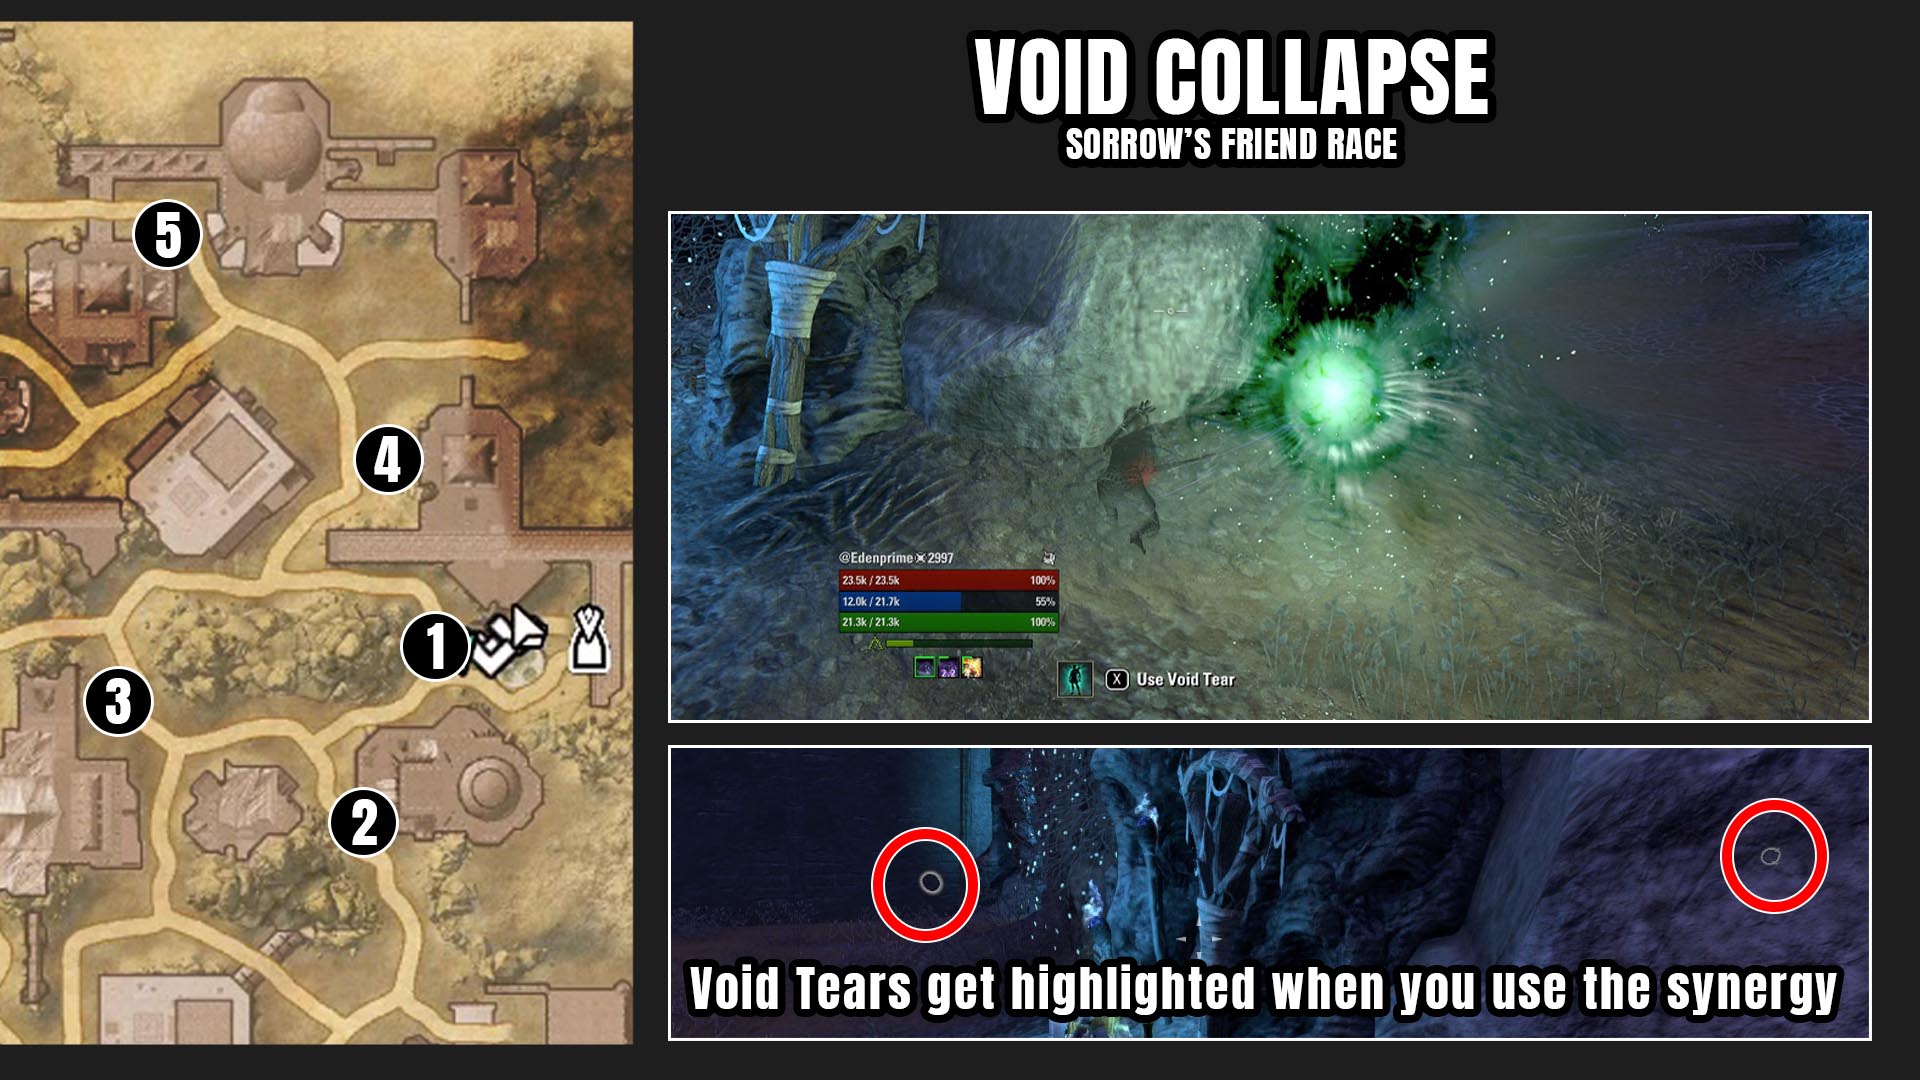
Void Collapse is a timed race to collect all 5 green Void Tears in the Sorrow’s Friend district of ESO’s Night Market before the timer runs out.
Boon on completion: Void Escape (summon a void portal every 15s to teleport away from enemies, 15 min)
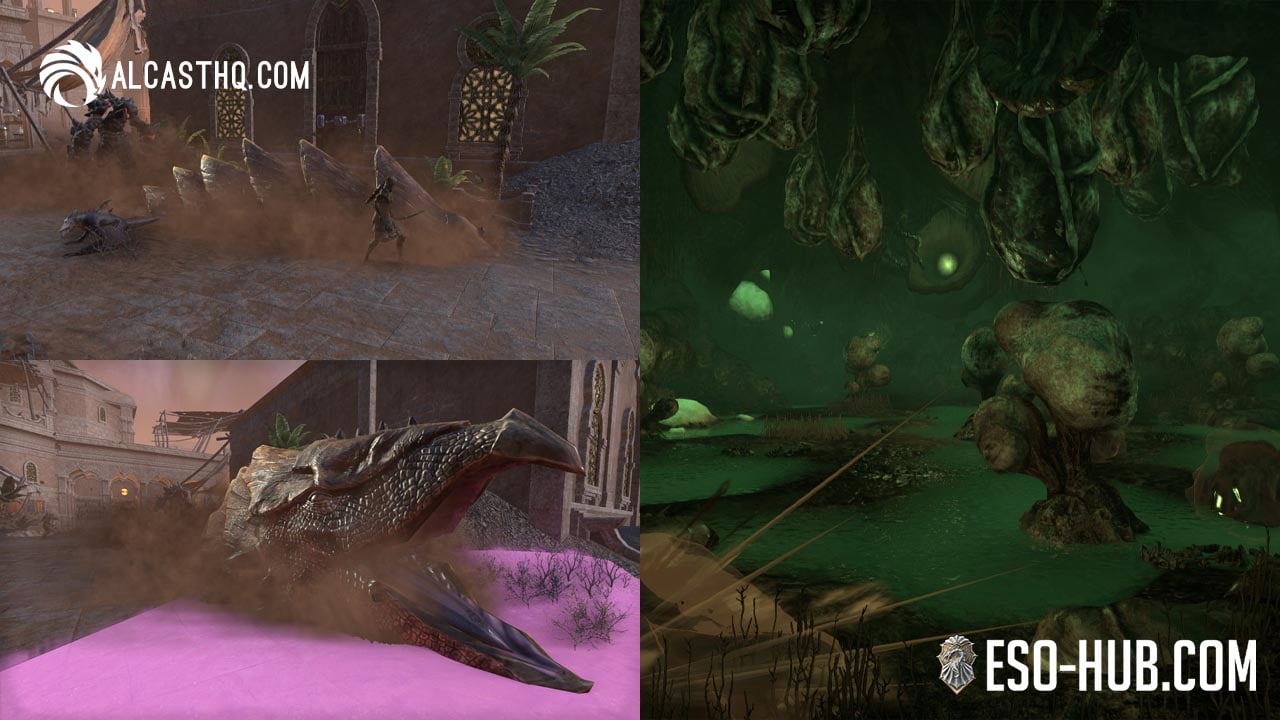
The Parch Overview
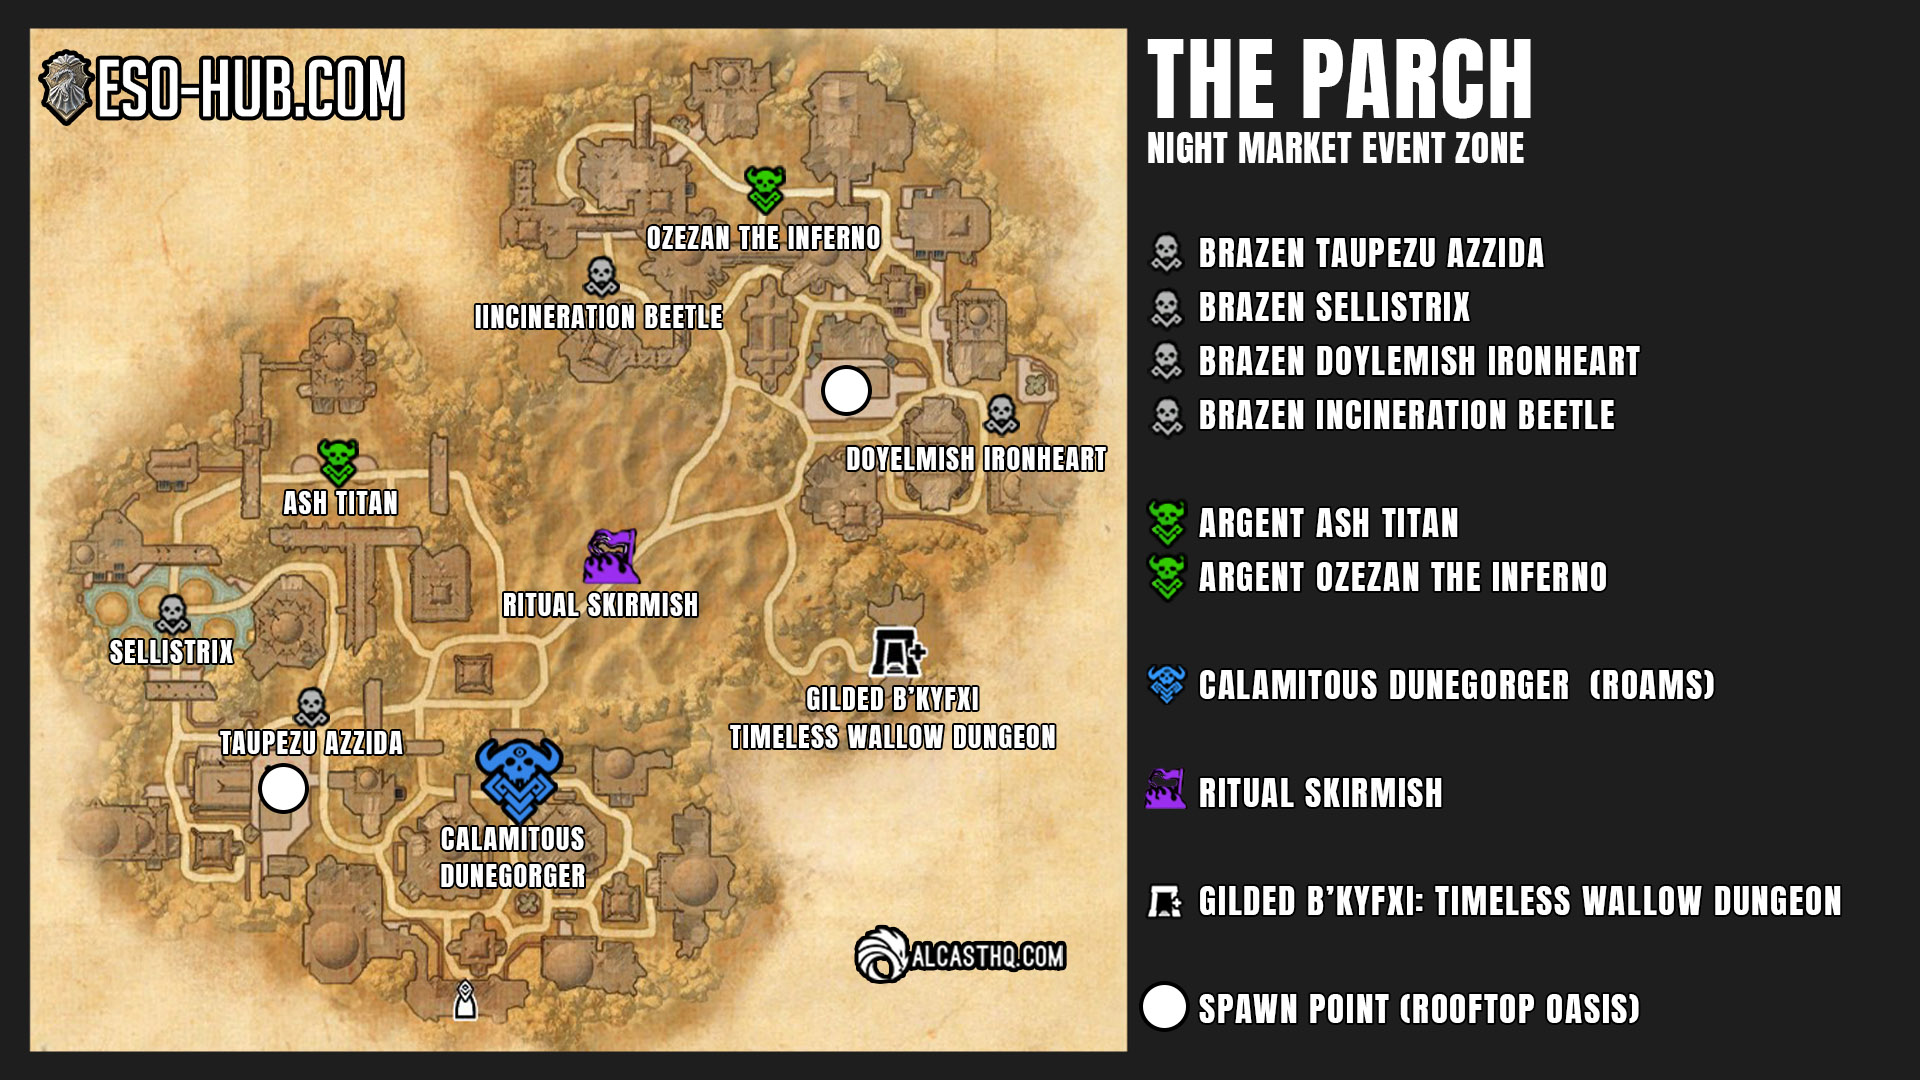
All The Parch Boss Spawn locations on map
The Parch is the Night Market’s desert-themed district. Its traversal challenge is perpetual sandstorms that block certain paths until you acquire the Windglass relic to navigate through them safely. The district’s Gilded dungeon is the Timeless Wallow.
The Parch
- Brazen: Taupezu Azzida, Sellistrix, Doyelmish Ironheart, Incineration Beetle
- Argent: Ash Titan, Ozezan the Inferno
- Calamitous: Dunegorger
- Gilded: B’Kyfxi (Timeless Wallow)
- Skirmish: Ritual Skirmish (defeat Zephyra and Levinda)
- Oddities: 3 Boulder Dashes (Boulder Bouncer achievement)
- Race: Unstable Creatia
Public Event: Ritual Skirmish
ESO Night Market Skirmishes are on a timer. You can check the time by pressing F5 on PC (the boss overview/faction scores view). The Ritual Skirmish activates in the desert center of The Parch. Clouds and rain appear across the district when it is active.
Boon on completion: Golden Spurs (+20% Speed, +25% gold from enemies, 60 min)
Boulder Dashes Oddity

Pinball-style redirection puzzle. Boulders spawn from black gates. Your goal is to guide them into glowing golden gates by activating colored floor buttons that trigger bouncing plates.
Boon on completion: Boulder Bash (bashing sends a boulder forward dealing 30,000 Earth Damage and stunning enemies, 15 min)
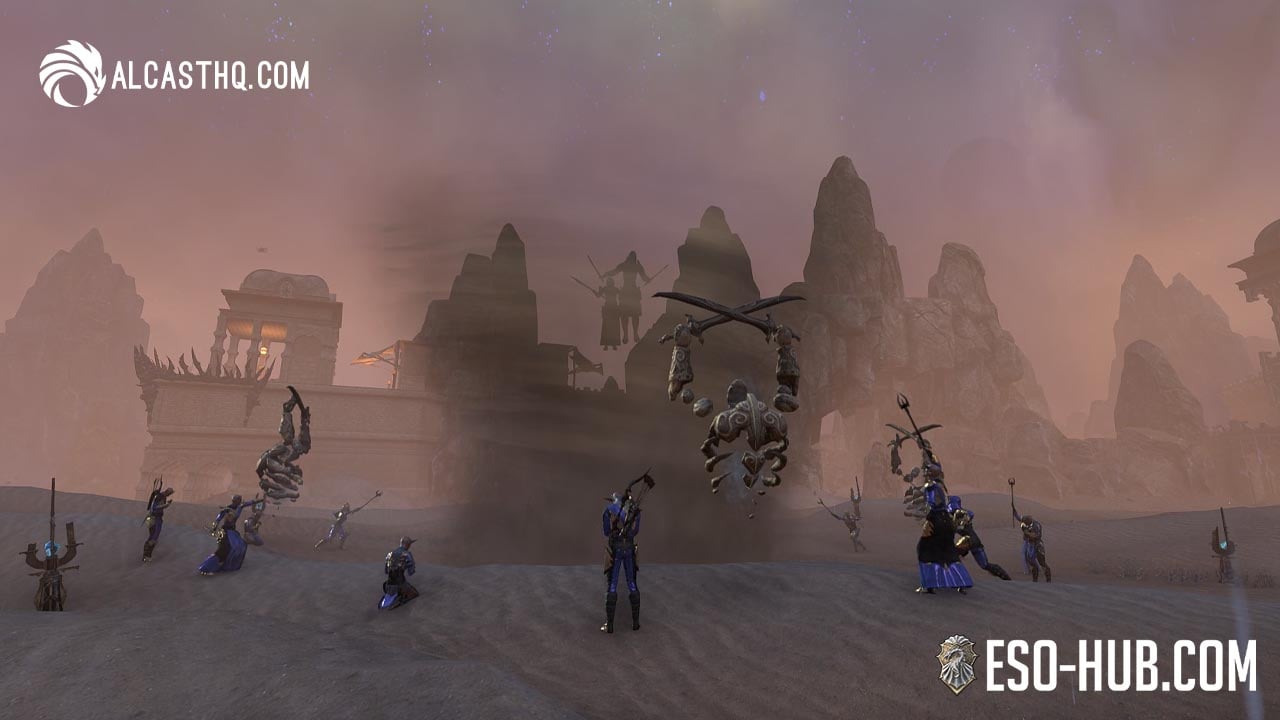
Daring Race: Unstable Creatia
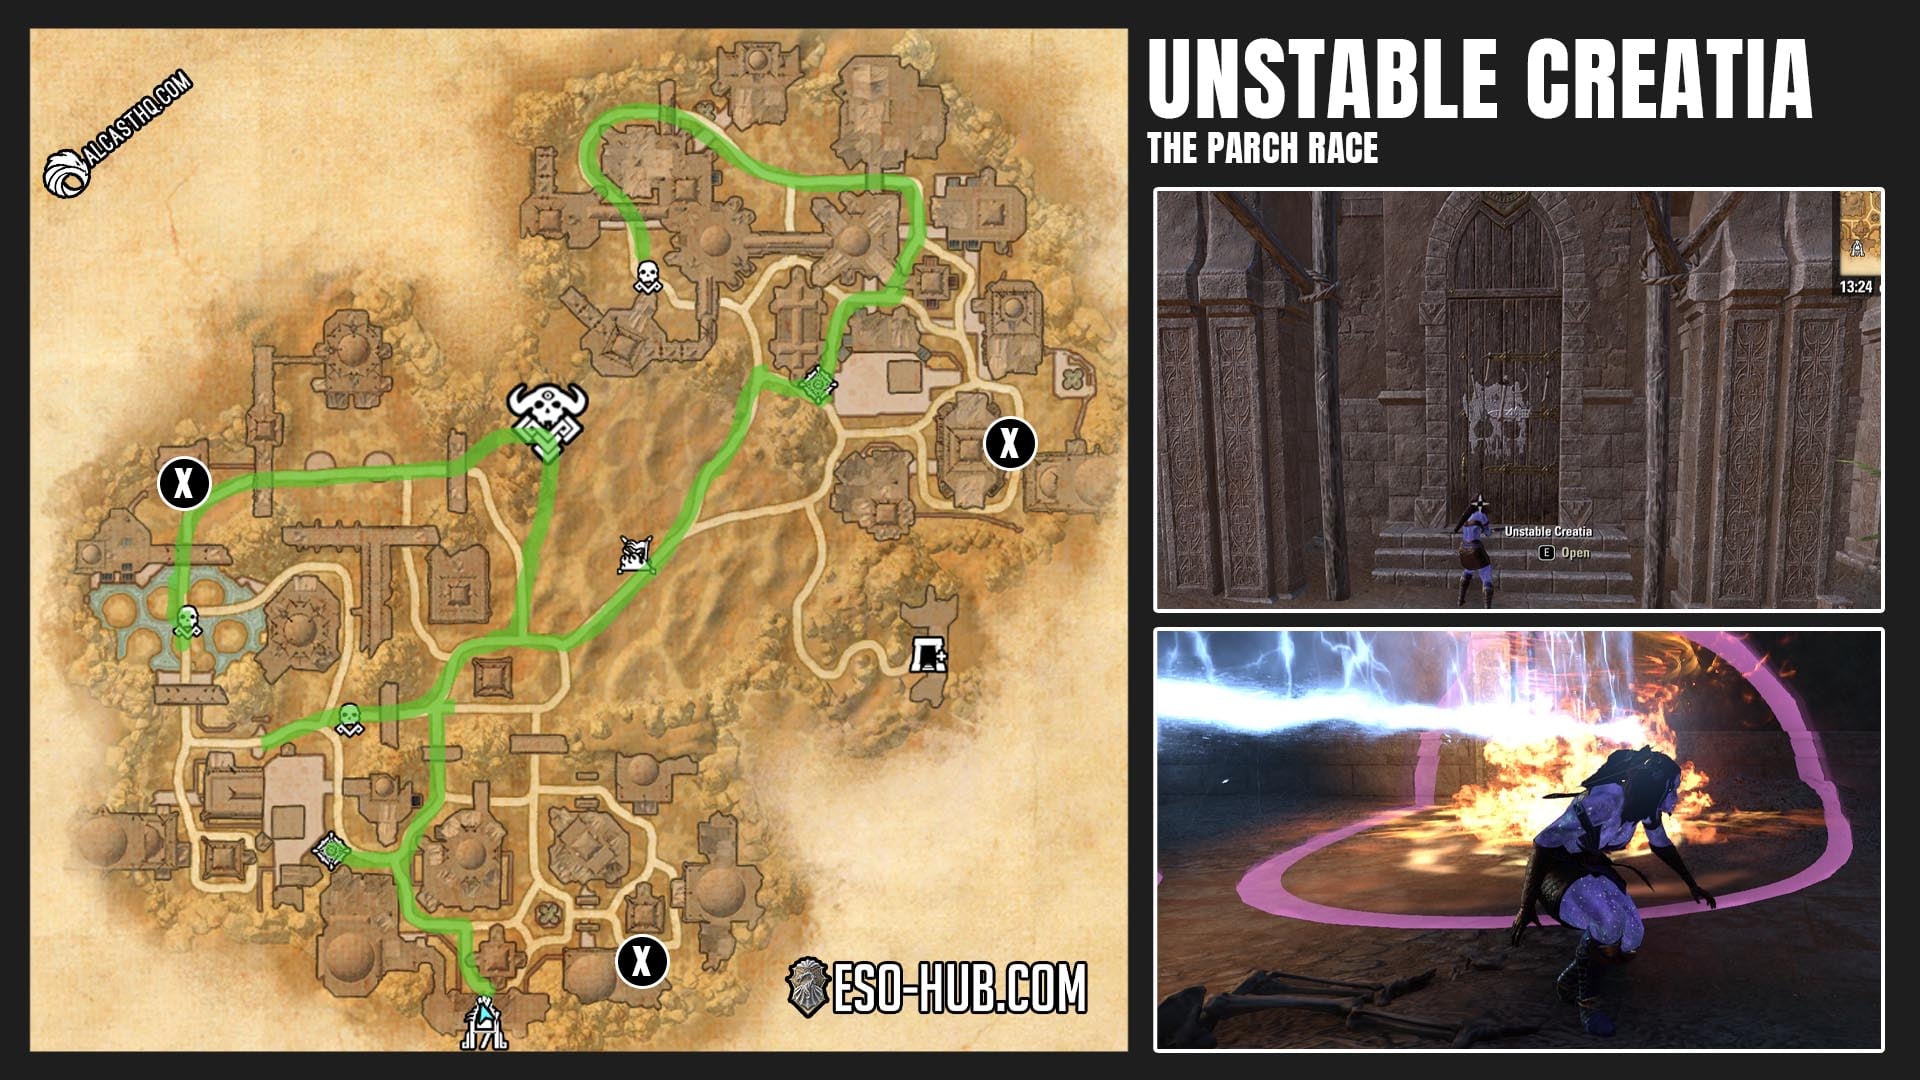
Unstable Creatia is a lightning “obstacle course” race in The Parch district of ESO’s Night Market. Unlike the other two races, you enter through doors marked with a white skull to an area with no enemies. This is the easiest race to complete solo.
Boon on completion: Tempest (summon a Tempest Caller dealing 6,000 Shock Damage to nearby enemies plus lightning strikes within 25m; 24s cooldown, 15 min)
A race across the dunes and debris of The Parch.
ESO Opulent Ordeal Trial
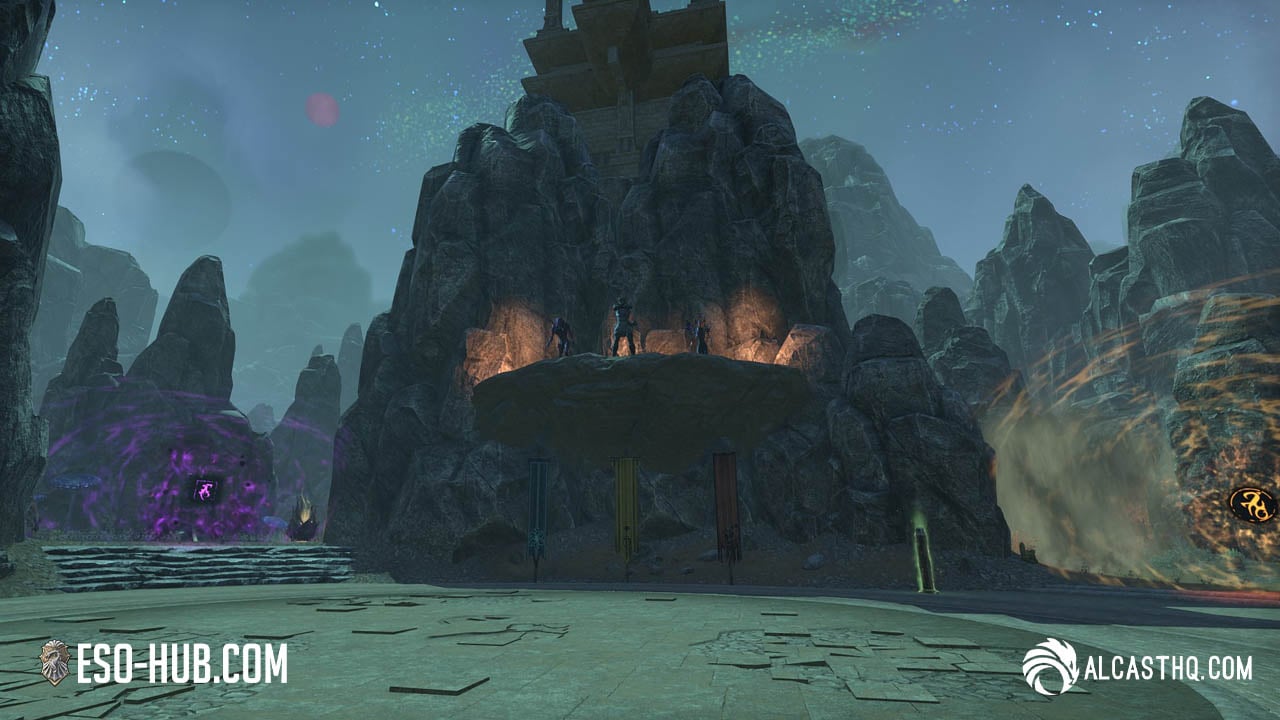
Opulent Ordeal Trial in Night Market
The Opulent Ordeal is the Night Market’s 12-player trial encounter and the final tier on the boss hierarchy. To enter, every member of your group needs all three Opulent Key Fragments (one from each district’s Gilded boss).
- Keys are consumed after the encounter is completed
- Running it again requires a full clear of all Argent and Gilded bosses.
- Fully detailed District Relic and Boss kill order guide, see our ESO Night Market Progression Guide.
Trial Bosses
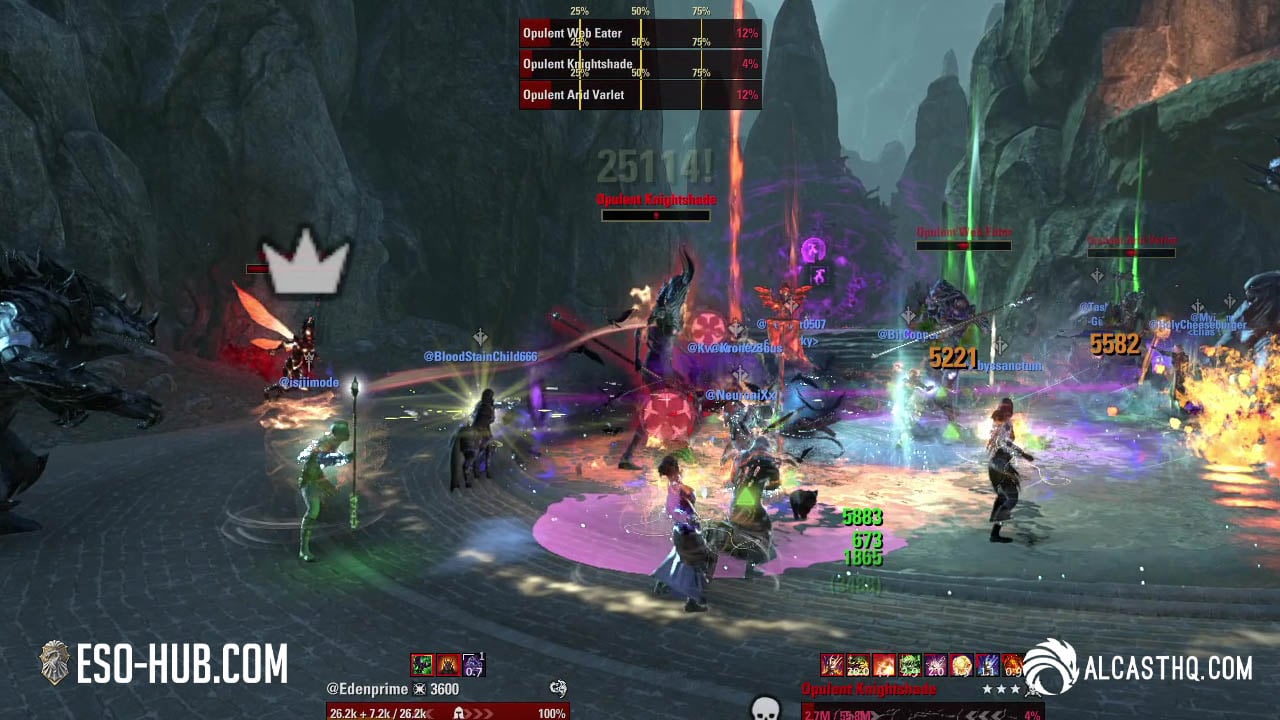
You fight all three bosses at the same time
- Opulent Web Eater: Cobweb theme (Skittering Precinct)
- Opulent Arid Varlet: Drylands theme (The Parch)
- Opulent Knightshade: Eclipse theme (Sorrow’s Friend)
| Boss | District Theme |
|---|---|
| Opulent Web Eater | Cobweb (Skittering Precinct) |
| Opulent Arid Varlet | Drylands (The Parch) |
| Opulent Knightshade | Eclipse (Sorrow’s Friend) |
How the Fight Works
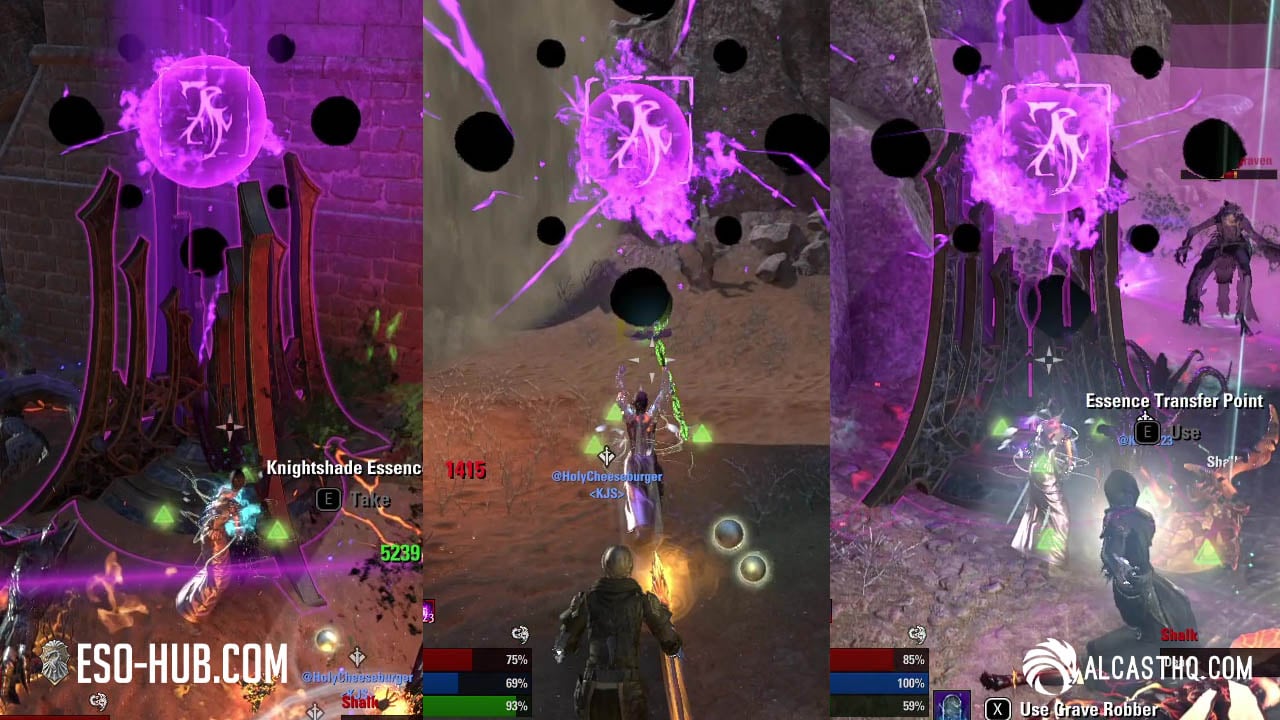
You pickup the “ball” and deliver to it to the next team in a different area
The encounter uses a “relay system” where three teams run relics to the next team in district-themed side-areas. Each area adds its own mechanics to the main encounter:
- Cobweb area: Spider pull mechanic. Players get pulled toward the boss.
- Drylands area: Flame shapers that need to be killed by entering their sand vortex.
- Eclipse area: Veiled Execution mechanic with Incandescent Pods.
After all of the relay phases are done, all three bosses engage simultaneously.
Trial Achievements
- Opulent Eradicator: Defeat all 3 Opulent bosses.
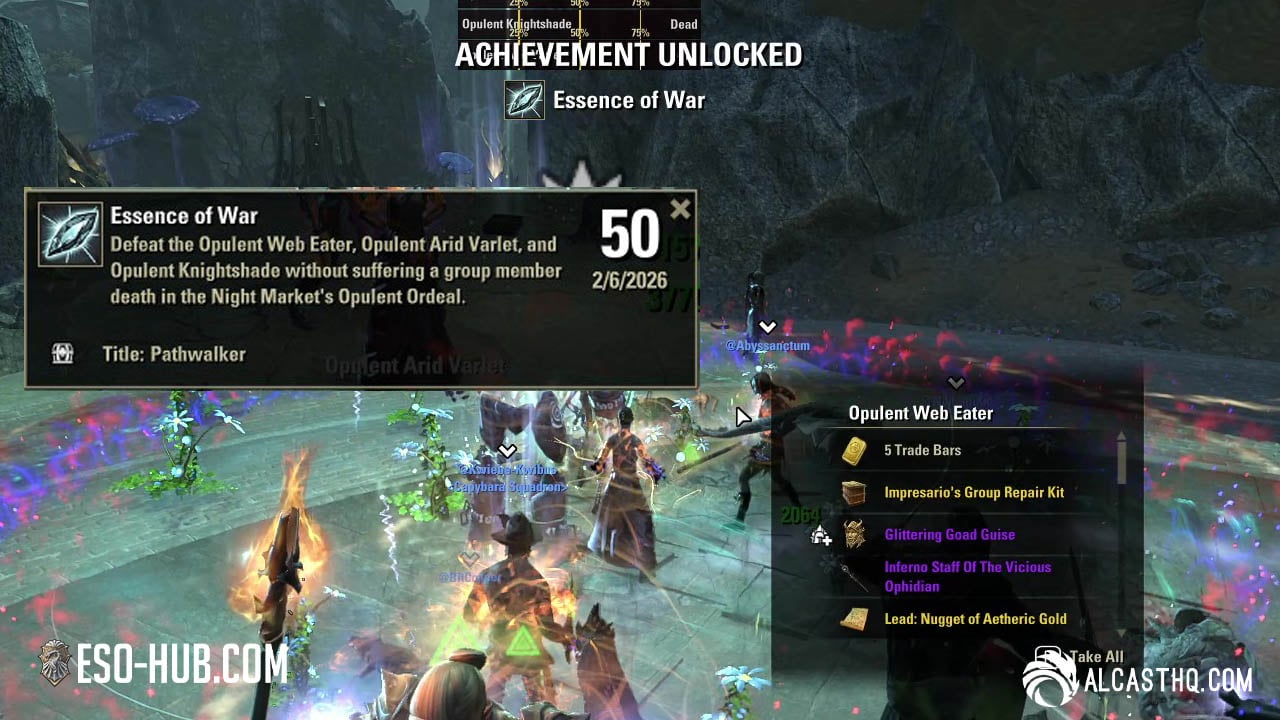
- Essence of War: Complete with no deaths. Rewards the Pathwalker title.
- Affinity for Everything: Complete with each affinity active (Cobweb, Drylands, Eclipse).
All ESO Night Market Puzzles (Oddities)
The Night Market has 11 oddities spread across its three districts. In-game they are called Oddities. Each district has its own puzzle type with a different mechanic. Completing all puzzles in a district earns a district-specific achievement, and completing all three district achievements earns the Puzzle Lord meta-achievement.
- Skittering Precinct: 4 Arachnid Invasions (Not Today, Spiders achievement)
- Sorrow’s Friend: 4 Guiding Lights (Bright Minds achievement)
- The Parch: 3 Boulder Dashes (Boulder Bouncer achievement)
- All districts combined: 11 Oddities total (Puzzle Lord achievement)
| District | Oddity Type | Count | Achievement |
|---|---|---|---|
| Skittering Precinct | Arachnid Invasion | 4 | Not Today, Spiders |
| Sorrow’s Friend | Guiding Light | 4 | Bright Minds |
| The Parch | Boulder Dash | 3 | Boulder Bouncer |
| All districts | All Oddities | 11 | Puzzle Lord |
Puzzle Lord is also part of the Night Marketeer meta-achievement, which requires eight total achievements and rewards the Interplanar Victor title.
Puzzle Tips
- Puzzles have a 5 minute cooldown. If a puzzle location is inactive when you arrive, check back later or move on to the next one.
- Completing oddities are one of several sources for stacking boons alongside bosses, races and Faceted enemies.