


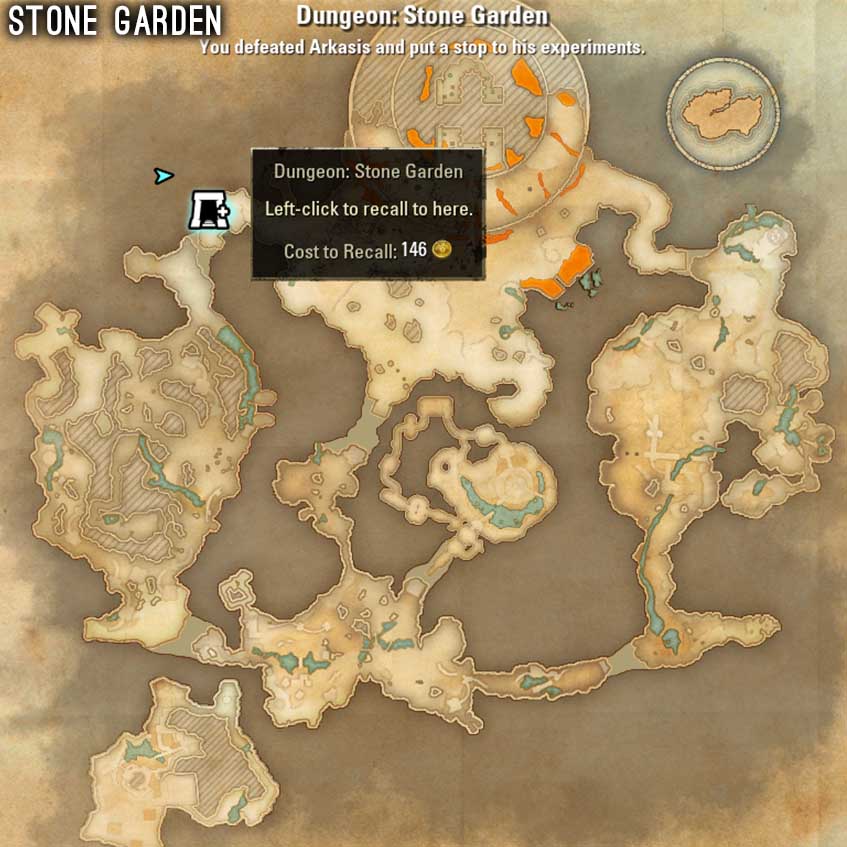
Welcome to the ESO Stone Garden Guide. The Stone Garden Dungeon is located in Blackreach which is below Western Skyrim, the dungeon is part of the Stonethorn DLC which is part of the Greymoor Chapter. In the Stone Garden Dungeon you will encounter a total of 3 bosses and a few trashpacks.
Note:
- This dungeon has a hardmode for each boss
- Special potions can be crafted inside the dungeon to boost your stats
- You can/must transform into a Werewolf Behemoth
Story: What terrible works has the Mad Alchemist Arkasis concocted from within his secret laboratory? The dark creations of the Stone Garden, found deep within the caverns of Blackreach, are like nothing you’ve ever faced before. You and your party must confront the evil genius and his horrifying experiments, lest new monsters rise from the depths!
Table of Contents:
Rewards & Loot in Stone Garden
Sets in Stone Garden
There is a total of 3 different sets plus a Monster Set that drops in the Stone Garden Dungeon.
- Light: Elemental Catalyst
- Medium: Kraglen’s Howl
- Heavy: Arkasis’s Genius
- Monster Set: Stone Husk
Rewards from Stone Garden
- Title: The “True Genius” title is obtained by completing the “True Genius” achievement in Stone Garden.
- Title: The “Pinnacle of Evolution” title is obtained by completing the “Triple Checked” achievement in Stone Garden.
- Momento: Juggling Potion Bottles Memento: Obtained by completing the Stone Garden Conqueror achievement.
The Stonethorn DLC comes with two dungeons: Castle Thorn and Stone Garden.
- Dye: Hazardous Chartreuse: Obtained by completing the Stonethorn Delver achievement.
- Non-Combat Pet: Energetic Dwarven Shock-Spider: Obtained by completing the Stonethorn Explorer achievement.
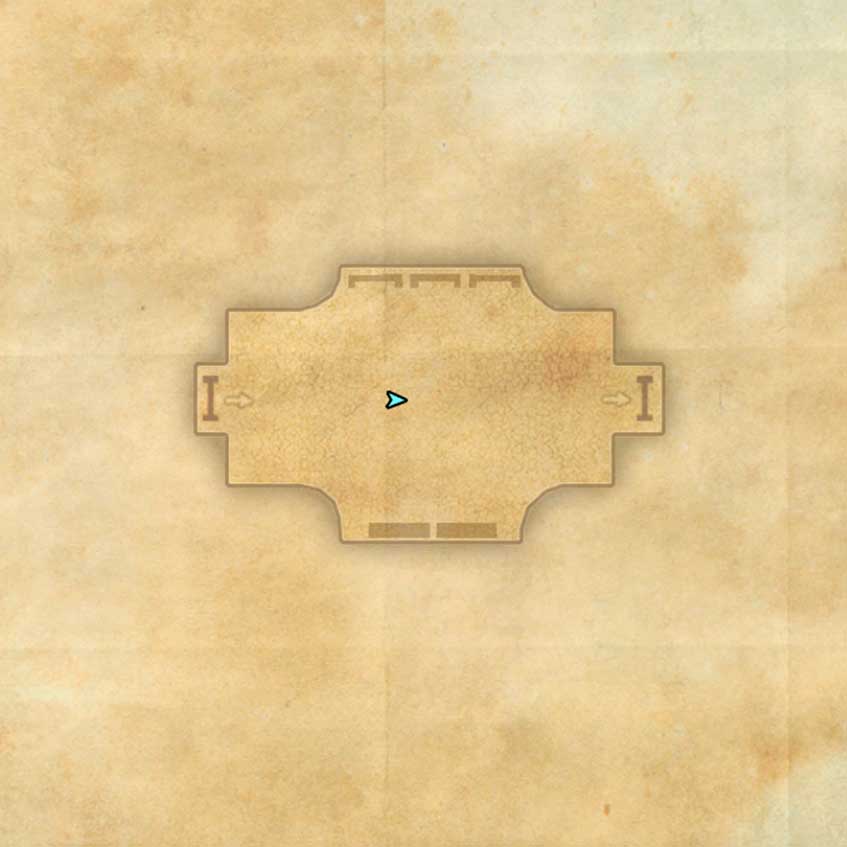
Stone Garden Maps
Here you can find all the maps of the ESO Stone Garden dungeon.


Bosses in Stone Garden
The Stone Garden Dungeon has a specific hardmode for each boss. In the table below you can find the health of each boss.
| Boss | Health | Health Hardmode | Adds |
| Exarch Kraglen | 5’263’123 | 10’526’246 | None |
| Stone Behemoth | 5’263’123 | 18’947’242 | Multiple Stone Husks |
| Arkasis The Mad Alchemist | 7’983’105 | 18’744’993 | Multiple Monsters & Stone Husks |
Werewolf Behemoth Skills
In the Stone Garden Dungeon in ESO you turn into a Werewolf Behemoth. I would recommend reading through the skills here because so you know what they do. It is important that you keep using skills to also generate Ultimate faster, especially on the last boss.
- Skill 1: Vicious Bite = Taunt
- Skill 2: Rampage = Gap Closer
- Skill 3: Bonecrusher = Interrupt & Stun (To interrupt Stone Husk on the last boss)
- Skill 4: Thunderous Stomp = Forward Stone Cone Ranged Attack (To destroy shock orbs on the last boss)
- Skill 5.1: Bestial Frenzy = Heal
- Skill 5.2: Hircine’s Howl = Frost Breath & Damage Reduction
- Ultimate: Lead The Pack = Powerful AoE Attack & Crazy Ultigen & Resets timers

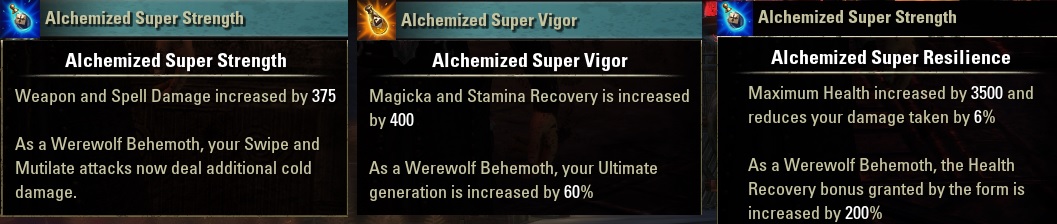
Alchemy Equipment
In the Stone Garden Dungeon you can find three special rooms with an enemy monster called “Bloodknight” that you can kill and then loot their essence. Once you obtained that essence you can create a powerful mixture to enhance your stats.
Requirement: You need the passive Laboratory Use from the Alchemy Skilltree to unlock this option. If you don’t meet the requirement you could choose the other option, which will also increase your stats but just for a smaller amount.
Room 1
- Ingredients: Bloodknight Ichor + 13 Stinkhorn
- Enhancement: Alchemized Super Strength = 375 Weapon & Spell Damage + Werewolf Behemoth Swipe damage boost.
Room 2
- Ingredients: Bloodknight Organ + 13 Spider Eggs
- Enhancement: Alchemized Super Vigor = 400 Magicka & Stamina Recovery + Werewolf Behemoth 60% faster Ultimate regen
Room 3
- Ingredients: Bloodknight Brain + 13 Luminous Russula
- Enhancement: Alchemized Super Resilience = 3500 Health + 6% damage reduction + Werewolf Behemoth 200% Health Recovery
Boss Fights Stone Garden
There is a total of three boss fights in the Stone Garden Dungeon, each of the bosses has its own hardmode.

First Boss – Exarch Kraglen
Boss Health: [HP: 5’263’123 Mio] – [Hardmode HP: 10’526’246 Mio]
You can activate hardmode on this boss, increasing the difficulty.
Exarch Kraglen has a few mechanics that you have to be aware of, the scream mechanic being the most important one, because it drains your resources and reduces them.
Note: Blood Rage is the only important mechanic int his fight, if you fail to interrupt you will most likely not make it.
Blood Rage: This is the most important mechanic, Exarch Kraglen will scream and knock you back if you are too close. It will also drain your resources and reduce your resources if you fail to interrupt. The chance to interrupt is very short, I recommend using Crushing Shock for magicka setups and Venom Arrow for stamina setups to interrupt it as fast as possible.
Charge: Exarch Kraglen will glow red and charge a player, you have to block the charge otherwise you will die.
Stomp: Exarch Kraglen will use an AoE stomp that will oneshot you if you are in it. After the stomp several craters will appear that you have to avoid to not take damage and get stunned.
Slash: Exarch kraglen will start channeling an attack on a player (usually tank), you can dodge roll this attack or just block it, but it deals massive damage

Second Boss – Stone Behemoth
Boss Health: [HP: 5’263’123 Mio] – [Hardmode HP: 18’947’242 Mio]
The second boss is called Stone Behemoth and he also has a few adds that will spawn later on that have very annoying resource draining mechanics. There is also a lot of enemy AoE mechanics that you have to avoid, which can end in complete chaos.
Note: The Mad Alchemist throws different mixtures onto the boss, if the boss is on fire, fire mechanics will happen. If the boss is on ice, ice mechanics will happen.
Essence Explosion: From the to time the Stone Behemoth will take out his heart (essence) and it will explode, dealing massive AoE damage. You can dodge roll the attack, or if you are far enough or stand behind him you should also not get hit. Blocking and shielding also helps to reduce the damage.
Fire: The Stone Behemoth will place fire AoEs on the ground that you have to avoid.
Fire Smash: The Stone Behemoth is burning and he smashes his fists together which results in a huge AoE explosion. The tank can just block this but the healer and damage dealers should move out of it or shield up and block, otherwise it is pretty much a one shot.
Ice: The Stone Behemoth will place ice AoEs on the ground that snare and root you.
Ice Smash: The Stone Behemoth smashes his fists together which results in a huge ice explosion, stunning you. Make sure to break free once you got stunned.
Magicka Drain: After a while a Stone Husk add will spawn on the side and it starts spamming a blue beam with a big blue AoE that drains your Magicka. By placing the boss close to the wall of the monsters, you can cleave them down or focus, whatever you prefer. Just be aware, they do respawn after a while. Our group saved Ultimates for when an add spawns so we can burn it down fast.

Final Boss – Arkasis the Mad Alchemist
Boss Health: [HP: 7’983’105 Mio] – [Hardmode HP: 18’760’296 Mio]
This boss fight is very difficult, especially on hardmode difficulty. It will take a while to get used to it because you also need to understand how the Werewolf Behemoth skills work, like I explained above. This is important because the phase where we turn into a Werewolf Behemoth and fight against Stone Husks is the most difficult phase. That means every player needs to understand the Werewolf Behemoth skills, otherwise you will wipe.
Phases
- 100% – 60% = Human Arkasis + adds
- 60% = Werewolf Behemoth vs Stone Husk
- 60% – 20% = Human Bossfight + adds (+ Poison Bottles)
- 20% = Werewolf Behemoth vs Stone Husk (+swap mechanic)
- 40% – 0% Evolved Arkasis + adds (+ Shock AoE kite phase)
Purge: The skill Efficient Purge is mandatory in this fight to purge things like poison or stuns.
-Human Arkasis Phase-
Heavy Attack: Arkasis will channel a Heavy Attack that you have to dodge roll as tank, it deals massive damage.
Fire Geysir: The boss will place fire bottles on the ground that will shoot out fire AoEs, make sure to avoid these, constant movement is key in this fight.
Fire Dagger: Arkasis will light up his dagger, when he does a light attack a fire AoE will come out of it that bounces off walls etc. This attack also applies a heavy fire DoT on the tank.
Adds: There are 3 different adds that spawn during the Arkasis phases, always focus them, that way they die fast and won’t enrage. If the adds are alive for too long they will enrage and cause a lot of damage on the tank. Dodge roll the charged heavy attacks from the adds.
Poison Bottles: In the 2nd round from 60% to 20% Arkasis will have an extra mechanic where he throws poison bottles that will spray poison AoE over the floor, you can block this mechanic. It deals a lot of damage, you have to make sure to not get hit by two at the same time, if you don’t block it you will also get stunned.
-Werewolf Behemoth Phase-
In this phase everyone has to transform into a Werewolf Behemoth and you need to be aware what each of the skills do, like I explained above. Each player has to take one of the Stone Husks and take him into one of the four corners of the arena. So you are responsible for your Stone Husk. There is one mechanic where the Stone Husk will kinda look into the air and poison balls start shooting down, you HAVE TO interrupt this with the 3rd Werewolf Behemoth skill as fast as possible, otherwise the whole group will wipe.
There will also be shock balls that spawn from time to time, use the 4th Werewolf Behemoth skill to destroy these from range. Always keep the 5th skill up, because it heals you!
During the 2nd Werewolf Behemoth phase there will be one additional mechanic where the enemy will start to glow yellow, that means you have to SWAP your enemy with your buddy. Use the charge skill to swap the enemy and then taunt it. If you don’t swap you will get oneshot after some time.
-Evolved Arkasis Phase-
In this last phase, Arkasis turns into a lightning form. All the old mechanics from his human form still apply but now there will also be new mechanics.
Lightning AoE: He throws shock bottles into the air that will explode and leave lightning AoE on the ground that follows you around. You have to kite these till they disappear, once they disappear you can resume the fight. Someone occasionally will get pinned to the ground during this phase, you gotta remove the spear via synergy button to get the player free, otherwise he will die in the shock aoe.
Conal Lightning: He will do a conal lighning attack from time to time, this is only really an issue for the tank as the other players stand behind the boss. This can and should be interrupted.
Mage’s Wrath: Like a Sorcerer, he uses Mage’s Wrath that will hit all players and knock them down, make sure to break free fast.
Whirlwind AoE: The boss walk up to a random player and will do a whirlwind AoE attack, you can block this.
Full Veteran & Hardmode Run
This is the full veteran run with hardmode in the Stone Garden Dungeon for The Elder Scrolls Online.
Timestamps for bosses:
- 01:34 Boss 1 Exarch Kraglen
- 08:35 Boss 2 Stone Behemoth
- 19:33 Boss 3 Endboss Arkasis The Mad Alchemist
The build I was using in this run is the Magicka Nightblade PvE Build.
Solo Stone Garden Run
This is a full solo run of the Stone Garden Dungeon in normal mode which is part of the Stonethorn DLC in the Greymoor Chapter. I used my Solo Magicka Sorcerer build for this solo run.