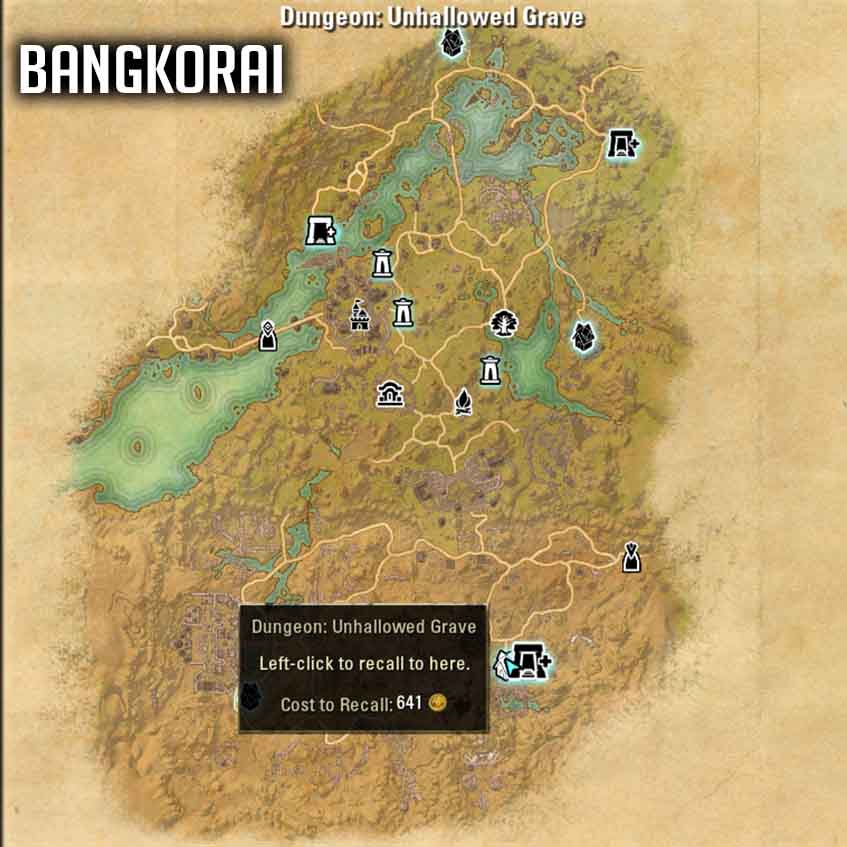
Welcome to the Unhallowed Grave Guide for ESO. The Unhallowed Grave Dungeon is located in the Greymoor zone, the dungeon is part of the Harrowstorm DLC. In the Unhallowed Grave Dungeon you will encounter a total of five bosses and a few trashpacks.
Note: We will also take a look on how you can enter the secret room called “Voria’s Sanctum”. That is basically the unique Unhallowed Grave Secret!
Story: What lies buried beneath the sands of Bangkorai? Delve into this ancient tomb and confront the merciless graverobbers who have cut a bloody path to its dark heart, seeking lost secrets and forbidden powers.
Table of Contents:
- Rewards & Loot
- Boss Fights
- Full Run Video with Timestamps
- Full Solo Run Video
- SPOILER Secret Room Voria’s Sanctum – How to
Rewards & Loot – Unhallowed Grave Dungeon
Sets in Unhallowed Grave
There is a total of 3 different sets plus a Monster Set that drops in the Unhallowed Grave Dungeon.
- Light: Draugrkin’s Grip
- Medium: Aegis Caller
- Heavy: Grave Guardian
- Monster Set: Kjalnar’s Niightmare
Rewards from Unhallowed Grave
- Head Marking: Bloodrune Face Markings
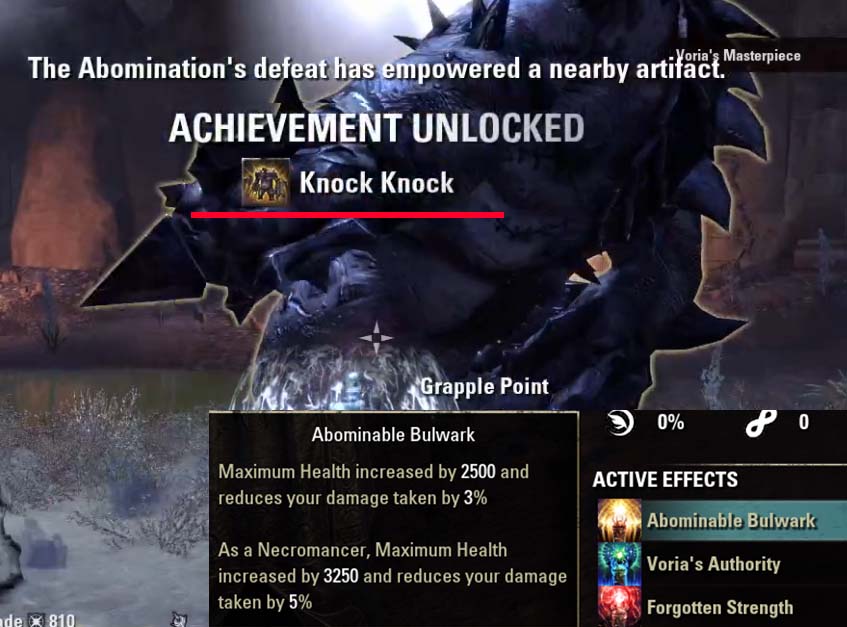
- Knock Knock Achievement – Gain entry to Voria’s Sanctum in Unhallowed Grave and defeat the beast within.
- Body Marking: Bloodrune Body Markings
- Unhallowed Grave Conqueror Achievement – Defeat Hakgrym the Howler, the Keeper of the Kiln, the Eternal Aegis, Ondagore the Mad, and Kjalnar Tombskald in Veteran Unhallowed Grave.
- Title: Sanctifier
- Skull Smasher Achievement – In Veteran Unhallowed Grave, defeat Kjalnar Tombskald after destroying Kjalnar’s Skull Totem
- Title: Bonecaller’s Bane
- In Defiance of Death Achievement – Defeat all encounters in addition to Hakgrym the Howler, the Keeper of the Kiln, the Eternal Aegis, Ondagore the Mad, and Kjalnar Tombskald after destroying his unholy totem in Veteran Unhallowed Grave within 30 minutes, and without suffering a group member death. Access to Voria’s sanctum is not required.
Rewards from both Dungeons
The Harrowstorm DLC comes with two dungeons: Unhallowed Grave and Icereach Coven.
- Emote: Wickerman Mishap
- Harrowstorm Explorer Achievement – Enter either Icereach or Unhallowed Grave for the first time.
- Dye: Frozen Blood
- Harrowstorm Delver Achievement – Complete both Icereach and Unhallowed Grave in Veteran.
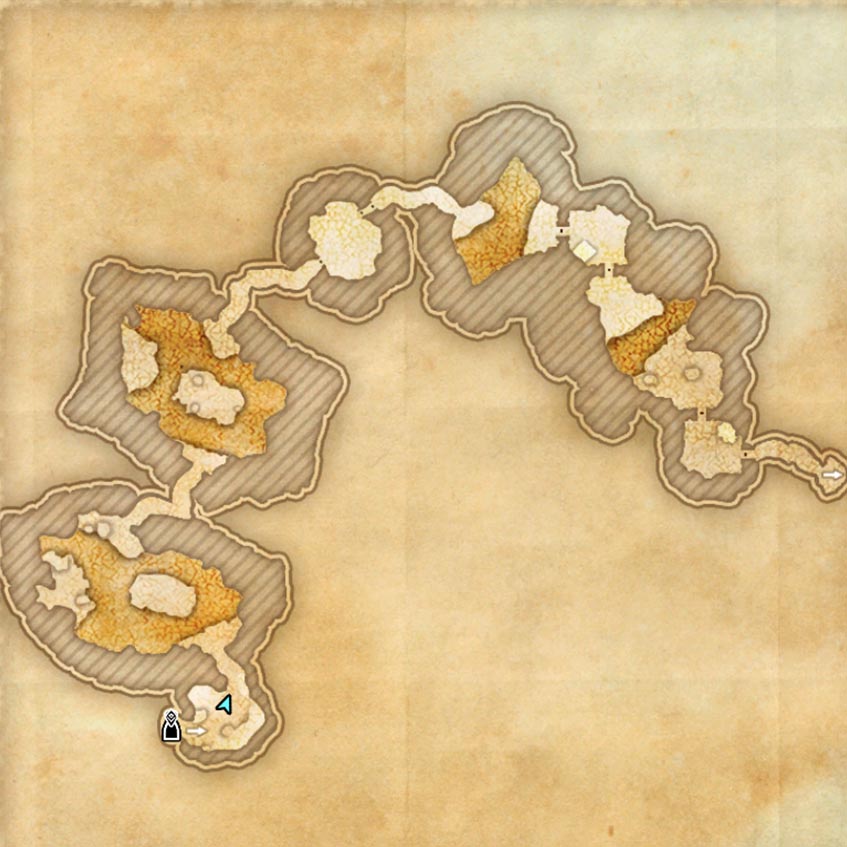
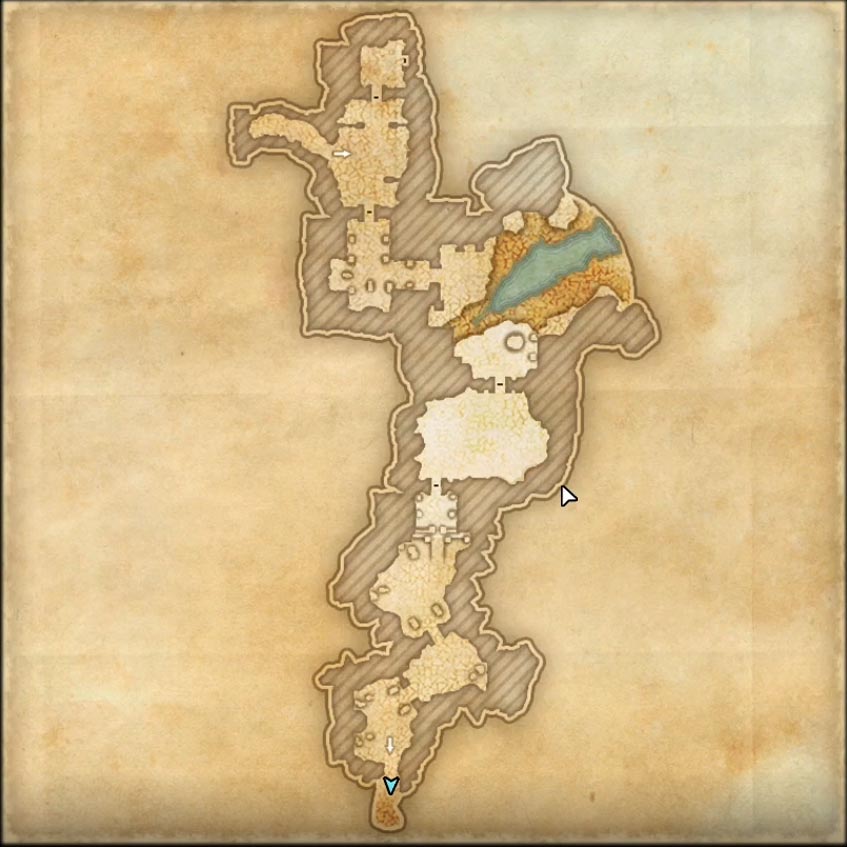
Unhallowed Grave Maps
Boss Fights
First Boss Hakgrym the Howler
Boss Health: [HP: 4’060’124 Mio]
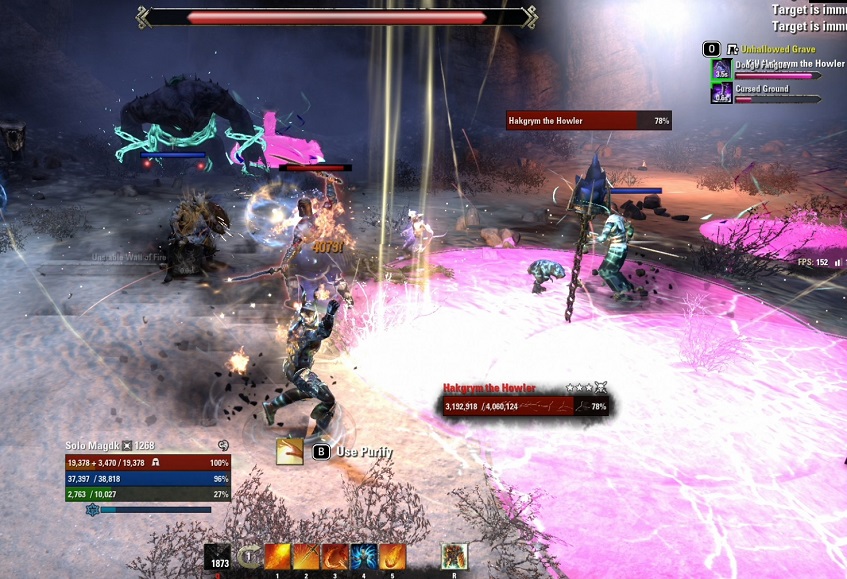
Hakgrym the Howler is the first boss of the Unhallowed Grave dungeon and he is fairly difficult. His Heavy Attack hits like a truck and there are a lot of AoEs that you have to avoid. There is also smaller adds that spawn from time to time, you should kill them as fast as possible because they are annoying and deal quite a bit of damage.
Heavy Attack
The tank has to be careful with the enemies Heavy Attack, it deals a lot of damage and if you fail to block it you will also get knocked down. The Heavy Attack is easy to recognize, the boss charges up his weapons for around 1,5 seconds before he hits you, so you can easily block or preferably dodge roll it.
AoEs
There will be plenty of enemy AoEs on the ground such as Crystals popping up that you have to move out of before they explode (Like the Nerien’eth Monster Set). There is also a slow moving AoE that will go into 4 different directions that you have to avoid. These AoEs don’t instantly kill you, but if you get hit at the same time by two things you are probably going to die.
Woeful Totem
Hakgrym will spawn a Woeful Totem after a while, you have to focus it because you want to destroy the Totem as fast as possible. If it stays up for too long it will start shooting orbs at the group that deal a lot of damage.
Flesh Abomination
At 60% and 30% the boss will unleash the chained Flesh Abomination, focus it so it dies as fast as possible. From time to time the Flesh Abomination will smash its fists into the ground, you will see when the big red AoE will appear. Move out of it to avoid damage, the AoE field will stay there after impact so make sure to not walk into it. The AoE field will stay there even after you killed the Flesh Abomination.
Werewolf Behemoth
After you got Hakgrym the Howler to 50k health, he will transform into a Werewolf Behemoth! He will regain health up to 50% and he starts to immediately go into a bloodrush charging from one side to the other. Avoid this as it deals an insane amount of damage, he will do this a few times before he starts attacking you again directly. New adds will spawn that have to be taunted because they deal a lot of damage, focus them and kill them as fast as possible so you can deal with the Werewolf once he is finished with charging.
The Werewolf will smash his fists into the ground similar to how the Flesh Abomination did, after the smash the crystal AoE will immediately pop up. Make sure to keep movement up so you don’t get any damage from these enemy abilities.
Second Boss Keeper of the Kiln
Boss Health: [HP: 4’511’248 Mio]
Keep of the Kiln is the second boss of the Unhallowed Grave dungeon, there will be a lot of adds that spawn so AoE damage is important and there is an unique mechanic with grappling hooks that you have to master to get through this boss. If you fail to use the grappling hooks mechanic properly your group will wipe.
Heavy Attack
The boss has a very powerful Heavy Attack that you can block (as tank) or preferable dodge roll. This sometimes can be hard to see when there is several adds that are also present during the later stages of the fight, so be aware of the Heavy Attack.
Adds
There is A LOT of adds that will spawn, especially if you have high dps. I recommend saving your Ultimates for when the adds spawn so you can nuke them all.
Archers
There are Archers on top that can get very annoying because they keep spamming Light Attacks. You can kill them if you want or ignore them, just be aware that they will keep damaging you.
Flames are rising in the vents!
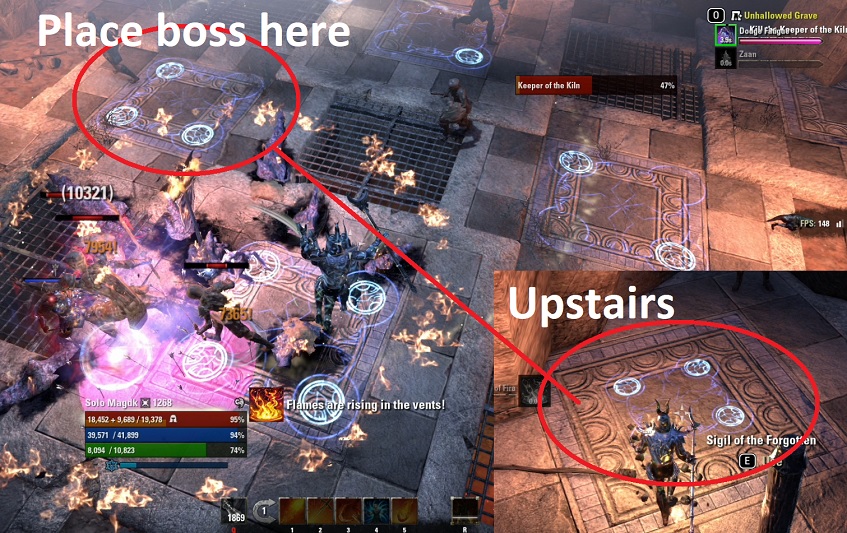
After a while you will see a notification saying “Flames are rising in the vents!”, the boss will put a redish shield around her that way you can also see that the mechanic starts. Now you have to grapple hook your way to the top. There is three grappling hooks that you can pick, the tank should keep the boss busy at the ground, whereas the other 3 group members should grapple to the platform.
- Platform right
- Platform left
- Platform middle
Each of the 3 group members should pick a side and grapple up there as soon as this mechanic starts. Only one of the three group members will see a blue Sigil on top that you can activate. Once activated the tank downstairs will see the Sigil light up that is the correct one and can bring the boss to that position (as fast as possible). For the boss to stomp his sword into the ground you need to deal damage to him (Once the damage shield of the boss reaches 0 he will stab). If you have too much damage that might happen too soon, which is a problem when the boss isn’t yet positioned. Once the boss is on the platform and used the stab mechanic the vents will stop from rising and you can go back to business as usual till the mechanic happens again.
Third Boss Eternal Aegis
Boss Health: [HP: 3’542’594 Mio]
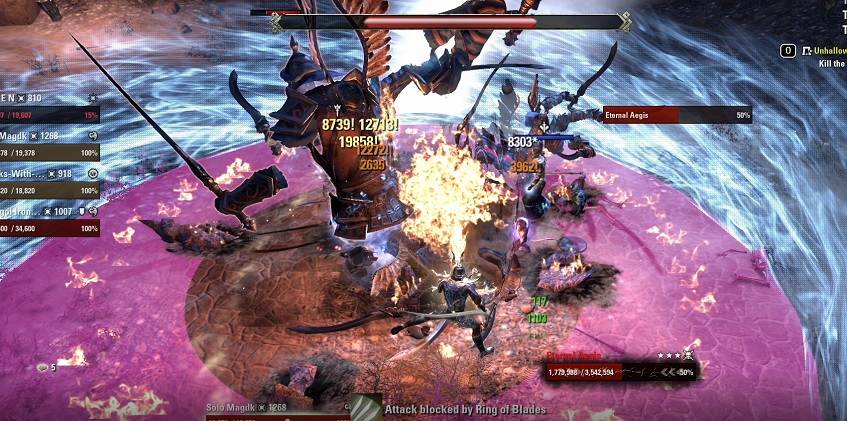
Eternal Aegis is the third boss of the Unhallowed Grave dungeon. The faster you dps the boss here the more adds will spawn. You can stay inside the circle of the boss and you will not receive any damage from his AoE.
Heavy Attack
The boss has a powerful Heavy Attack that the tank has to block or preferable dodge roll.
Adds
Adds will spawn throughout the fight, the faster you dps him the more will spawn because you push his health to the next threshold. The adds don’t do a lot of damage and usually if you stay inside the boss and place all your AoE damage they will immediately die after spawning because they have very low health.
AoE Circle
The boss will start to activate a huge blueish AoE around him. Now you could run away till he is done with the mechanic. However, as you can see in the picture there is a safe zone in the inside. I recommend just staying there and place all your AoEs and so on in the middle, that way the spawning adds that will keep coming are going to instantly die too, you can basically ignore the adds AoE damage.
Fourth Boss Ondagore the Mad
Boss Health: [HP: 6’014’998 Mio]
Ondagore the Mad is the fourth boss in the Unhallowed Grave dungeon. This bossfight will be quite long due to a phase where you have to grapple your way through the arena. Once you begin the fight the outside area will be unreachable because there is a poison field covering it that will immediately kill you.
Adds
There are Ghosts that will spawn sometimes, they should easily die in the AoE damage that you put onto the boss so they are not that big of a problem. However, there is also a Colossus that spawns, make sure to focus him so he dies as fast as possible! He also does a charge Heavy Attack, if you are unsure whether the tank already taunted him, make sure to dodge roll just in case so you don’t get hit in the face!
Grapple Hook Phase
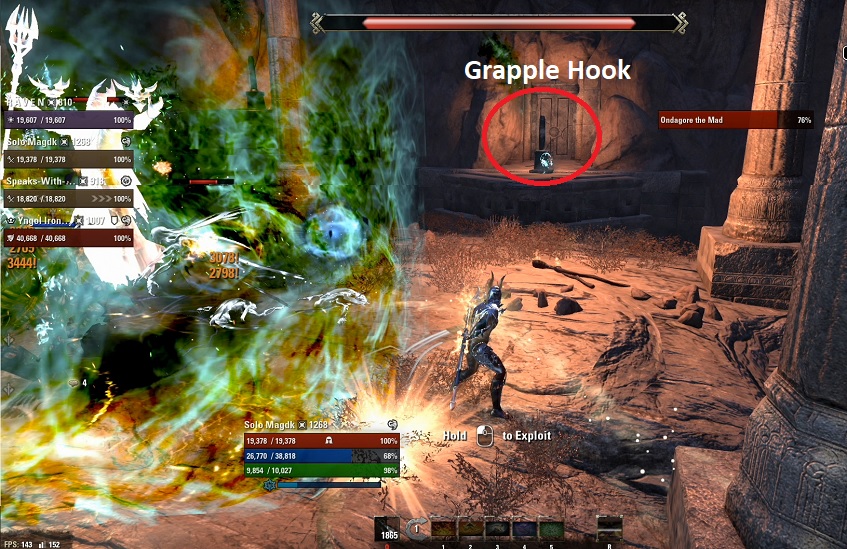
At around 80% and 35% the boss will pull the poison from the outside area into the middle, covering him so he can’t take damage. Now you have to grapple your way to the outer area to kill all the ghosts that showed up there. Once the ghosts are all dead the boss will place the poison once again in the outer area and you have to grapple your way back into the middle to continue with the boss fight!
Make sure to decide where you grapple with the whole group first, because you will still receive a bit of damage and if you have no healing abilities with you, you could die alone!
Explosion Phase
At around 50% and 15% the boss will start to glow white and cast a mechanic, you have to make sure to hide behind the pillars that are in the middle zone. Once the explosion happens you will be save there.
Four Ghosts will spawn, this explosion phase will keep going as long as not all the Ghosts are dead. So you have to make sure to stay behind the pillars because of the explosion and kill the ghosts in the meantime.
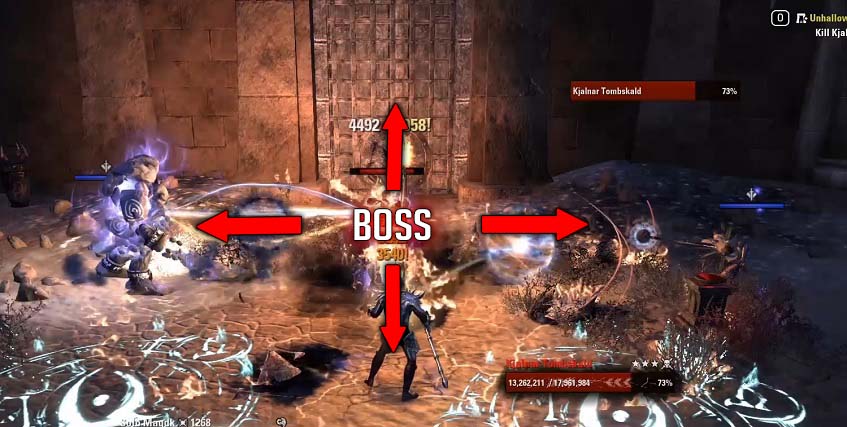
Final Boss Kjalnar Tombskald
Boss Health: [HP: 8’553’326 Mio]
Kjalnar Tombskald is the final boss of the Unhallowed Grave dungeon.
Heavy Attack
Once again, the boss has a powerful Heavy Attack that the tank has to block or preferably dodge roll. It has the same animation as the first boss in the dungeon.
Ghost hand stun
From time to time he will cast a ghost hand that will push you up and pull you down, so you are stunned or immobilized for a short duration.
Tornado
He will do a AoE Tornado that is very easy to avoid. However, at the same moment there is also skeleton parts that will be placed around him similar in a minefield. They will disappear after a while, but if you get caught in them they will do damage and snare you.
Summoning Fields
This is the most dangerous mechanic of the fight because you will have to spread out. The boss will start casting a blue flame in his hand that will shoot out magic balls to the edge of the arena. The damage dealers have to go there and take care of these fields. There is two fields with each three small skeletons. You can root or snare them but make sure to NOT allow them to get to the summoning fields, if they do they will enrage and function as a bomber that will blow you up.
There is also a big Skeleton that will appear that the tank or the healer has to try to snare or root so it can’t go to the middle. If it reaches the middle it will refill its health bar to the max. If that happens not too bad but the tank will have a lot more pressure on him because that big Skeleton also hits like a truck. But always focus the small bombers first!
The lower your overall dps, the more this phase will happen because it is on a timer.
Check out one of the videos below to get a good idea on how this mechanic works!
50% Big Papa
At 50% Kjalnar Tombskald will summon Big Papa the skelly in the oilfield. You can not damage him but you have to be aware of the AoEs he is casting on you. There is a frost breath that you have to block or shield yourself through and there is a fire AoE that he places on someone.
It would be best if the tank keeps an eye on him and calls the mechanics if possible so people know when to block or shield.
Also on this bossfight nothing really one shots you, but there a combination of different things is what kills you here.
Ground AoE Spikes
From time to time he will carve his sword into the ground and it will shoot spikes towards you, try to shield or heal yourself or block them to avoid unnecessary damage. Each player will get the spikes, if you stack all of the spikes will hit you and you are going to die.
Therefore it is important to spread out like in the picture below.
Final Boss Hardmode
Boss Health: [HP: 17’961’984 Mio]
The hardmode with Kjalnar Tombskald is a bit more tricky as everything deals way more damage and the mobs and the boss also have way more health than before. There is only one new mechanic, the cages.
Cages
The boss will hold both his hands up and cages will appear below each player. Do not stand between the cages as they will explode after a short while and you will die.
Full Veteran & Hardmode Run
Timestamps for bosses in the Unhallowed Grave:
- 00:21 Boss 1 Hakgrym the Howler
- 05:43 Boss 2 Keeper of the Kiln
- 11:15 Boss 3 Eternal Aegis
- 10:55 Boss 4 Ondagore the Mad
- 16:30 Boss 5 HM Kjalnar Tombsklad
Full Solo Run
In this solo run I used my Solo Magicka Sorcerer Build.
How to open Voria’s Sanctum in Unhallowed Grave
You might have heard about the Unhallowed Grave Secret and wonder what it is? After touching the door that says “Voria’s Sanctum”, it knocks you back and you are like??. Voria’s Sanctum is the hidden secret in Unhallowed Grave. To enter Voria’s Sanctum you are required to complete a few steps, including killing additional bosses that are not part of the main dungeon, they are hiding! We are looking for two additional bosses called Nabor the Forgotten and Voria the Hearth-Thief. After you managed to find and kill these two bosses, you are allowed to enter the Voria’s Sanctum to meet her so called “Voria’s Masterpiece” and nuke it into heaven. After you killed Voria’s Masterpiece, you will get the “Knock Knock” Achievement.
Step 1 Find Nabor the Forgotten
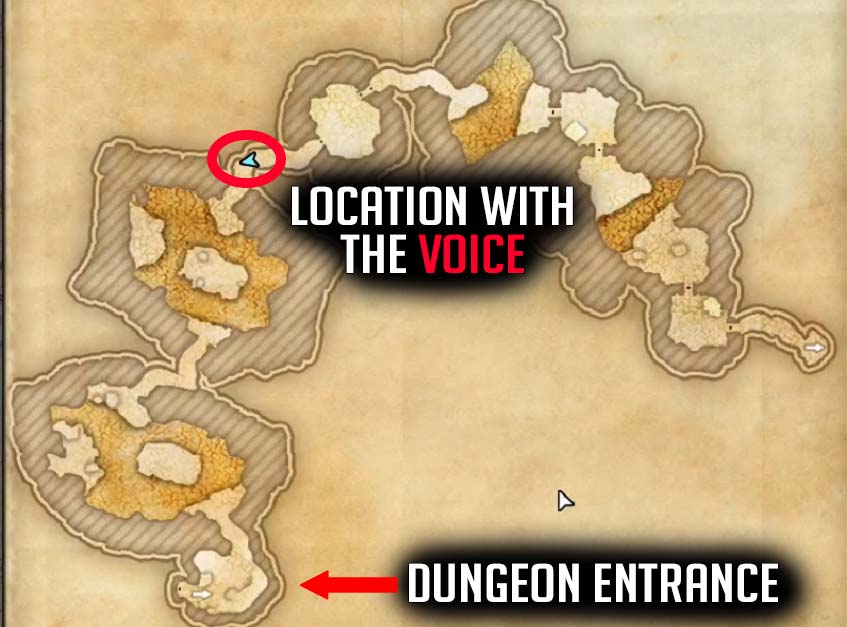
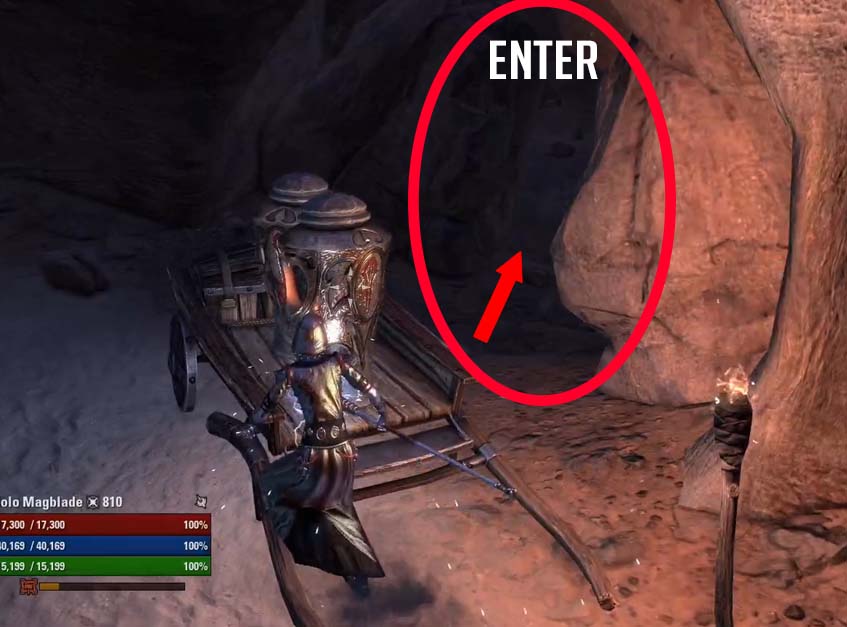
You can do this on the way or after you completed the dungeon. The steps are the same no matter what, lets get started! The first hidden area is basically almost at the beginning of the dungeon. Once you reach the point shown on the map (red circle) you will hear a voice “You must find me, I suffer, please”.
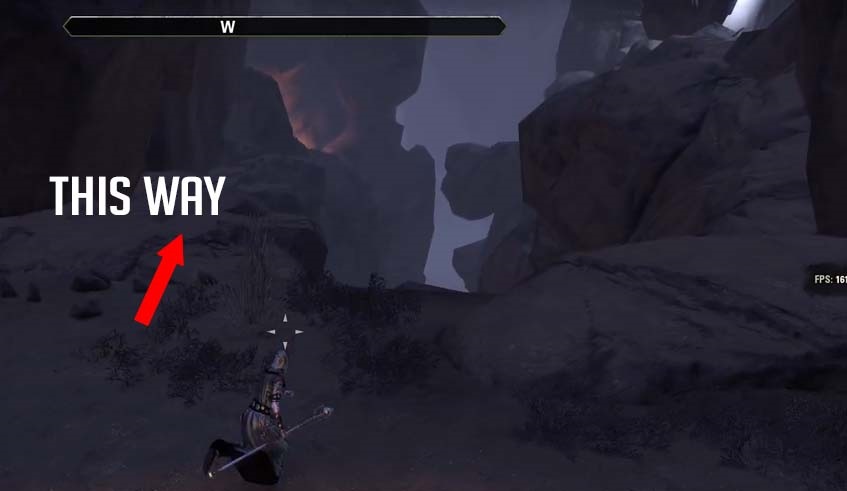
The area can’t be found on the normal map, so it might look like there is no way, but there is one!
Once you enter, the voice tells you “Don’t leave me down here, please.” Keep following the path, follow the cracks in the walls till you enter another big room. From there on you want to continue your way on the left side and keep going. It can be a bit tricky to get over some of the stones, but you want to keep going till you reach a door, it will open and you meet the hidden boss Nabor the Forgotten. Once you are close to Nabor the Forgotten he will say: “That’s it. You’ve made it this far. What’s a little further?”
You have to use the grapple point to make your way to the boss. Once you stand next to him he will say: “Yes! Your death for a life. My life!” And the fight will immediately begin.
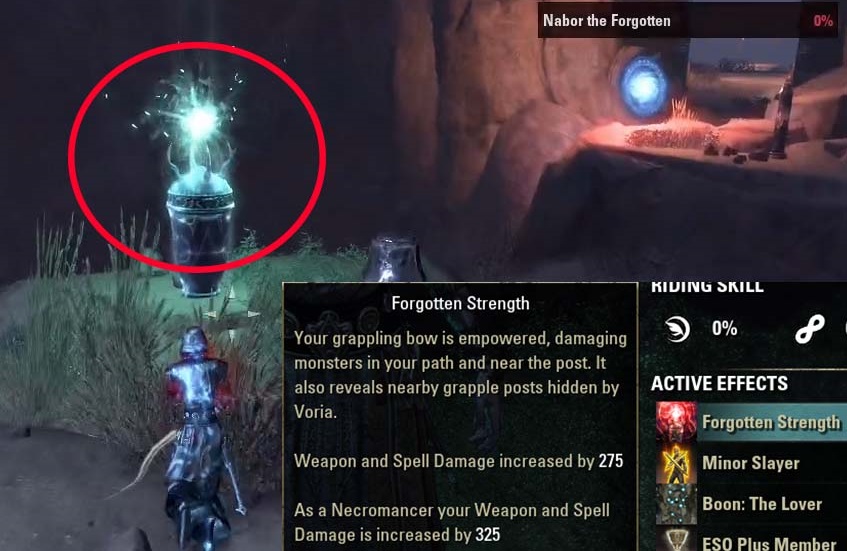
After you defeated Nabor the Forgotten, a text will pop up “Nabor’s defeat has empowered a nearby artifact.” On the way out you want to touch the glowing artifact, once you touched it you will get a specific buff on your character called Forgotten Strength. The buff gives you the following:
- Your grapping bow is empowered, damaging monsters in your path and near the post. It also reveals nearby grapple posts hidden by Voria.
- Weapon and Spell damage increased by 275.
- As a Necrnomancer your Weapon and Spell Damage is increased by 325.
Step 2 Find Voria the Hearth-Thief
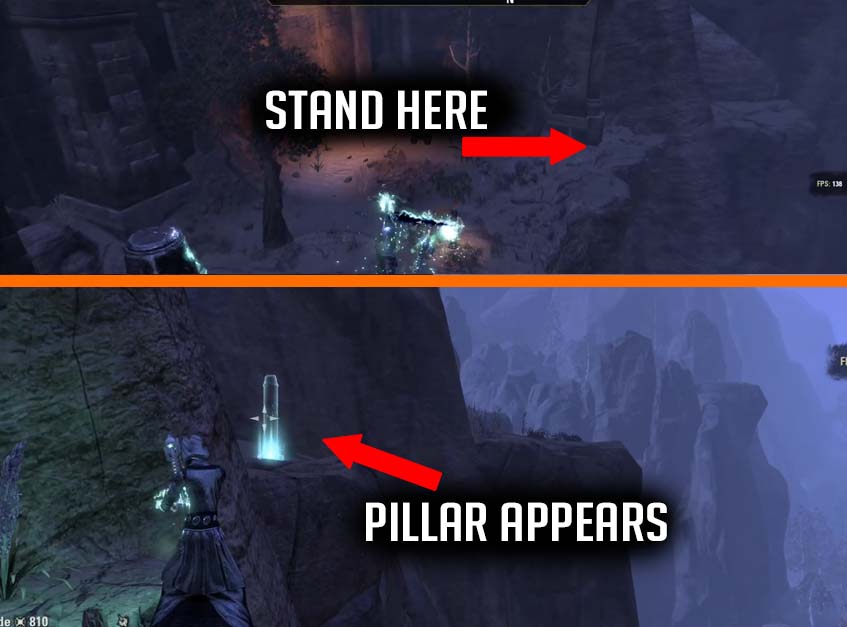
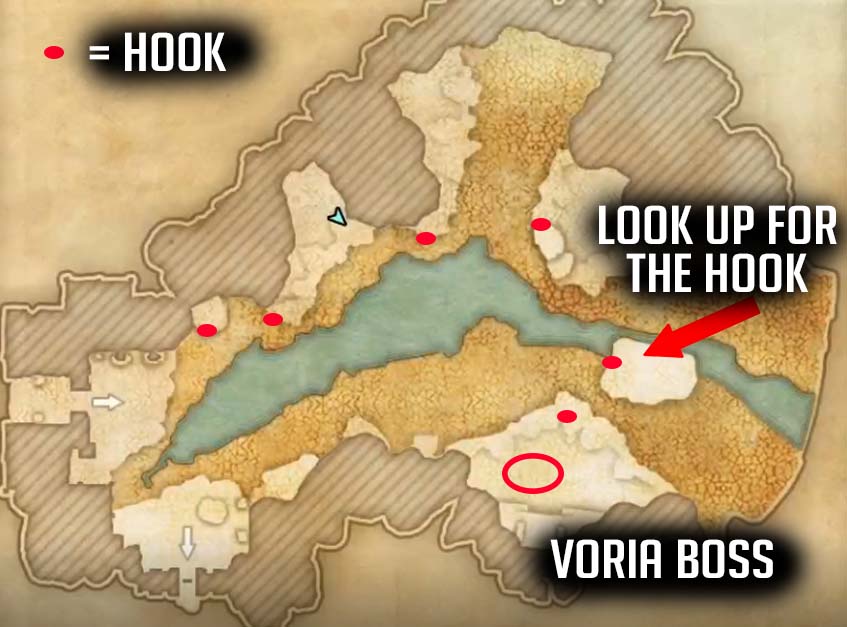
After you picked up the buff, you can either walk back or take the portal, it will bring you back to the hidden entrance. Now you want to make your way to the Eternal Aegis Boss room like you can see on the map below. Infront of the Eternal Aegis Boss room you can find a grappling hook. You have to stand close to the edge like shown in the picture below to reveal the hidden grappling hook.
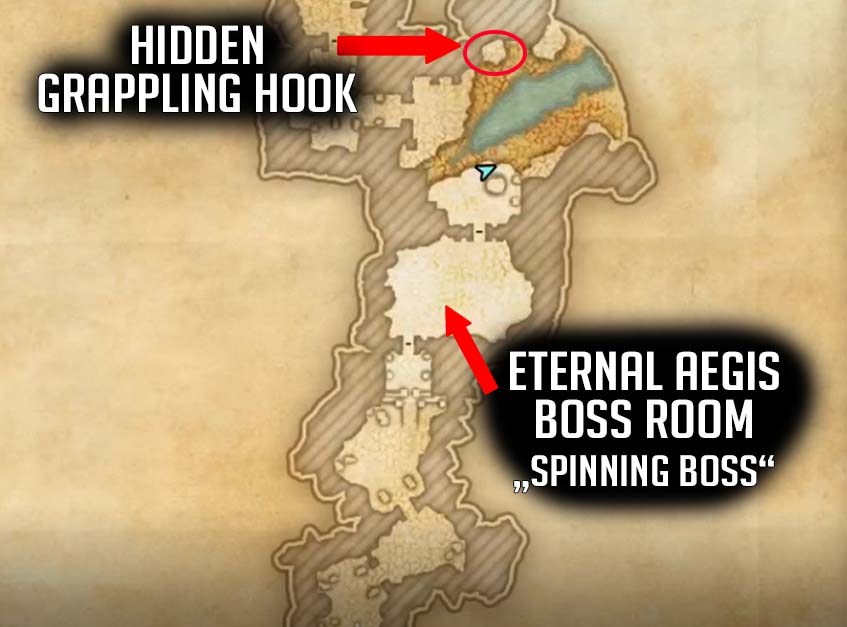
Now keep following the way, more grappling hooks will be revealed when you get close to the edges. Before you reach the boss you might think there is no way over that cliff, look up and you will see there is a hook in the big piece of stone. You have to grapple the hook and immediately grapple the next hook on the other side.
Once you get to the first platform of the boss area, Voria the Hearth-Thief will say: “More oafish trespassers. Can you not see that I’m on the brink of discovery?”. After yiou made your way to the main platform where you meet her, she will say: “My research nears its end, as do you, it seems.” She will teleport and the fight can begin!
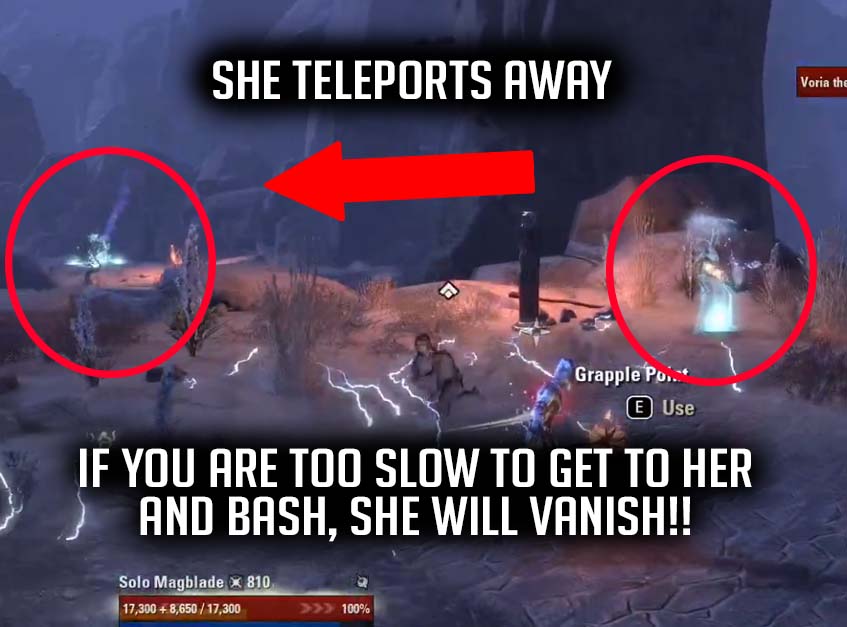
At 75% Voria will teleport herself to the other platform where you came from. Now you have to hurry and get there to interrupt her. She is basically trying to teleport away, if you are too slow and fail to get to her in time, she will vanish and you have to RESTART the dungeon and the whole process again! So take your legs, hook them up and hurry!
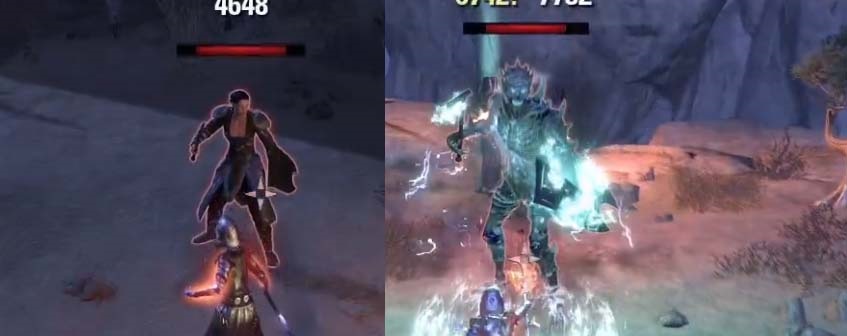
After a while she will transform into a Bone Goliath, careful! At around 40% she will transform back into her original form and teleport back where the fight started, same thing here, you have to hurry otherwise she will escape!
Step 3 – Open the Voria’s Sanctum Door
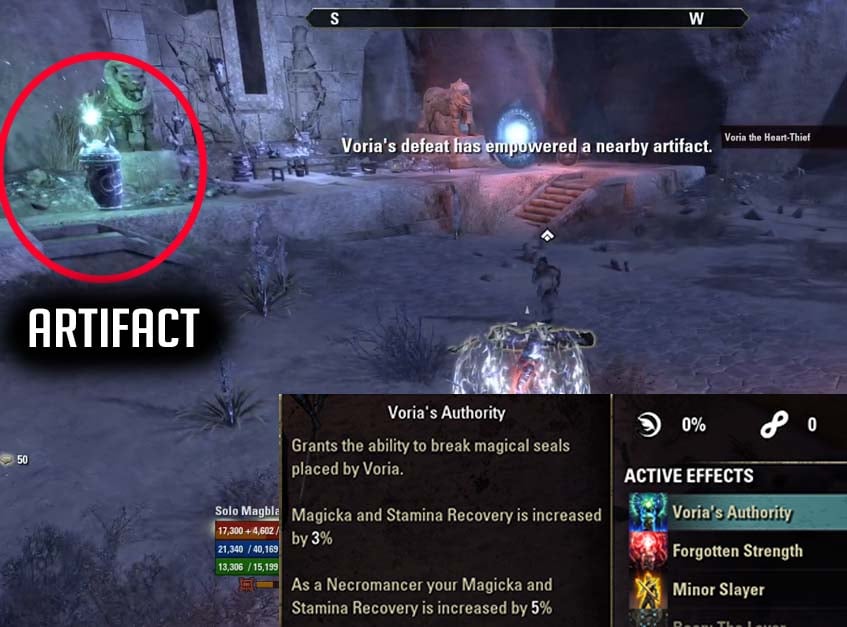
After you killed her, a text will pop up and say: “Voria’s defeat has empowered a nearby artifact”. make sure to go activate the artifact to get the new buff called “Voria’s Authority. The buff gives you the following effects:
- Grants the ability to break magicl seals placed by Voria (aka the door that we couldn’t open!).
- Magicka and Stamina Recovery is increased by 3%.
- As a Necromancer your Magicka and Stamina Recovery is increased by 5%.
Now that you have the ability to open the door that leads to Voria’s Sanctum, you want to go back to the sealed door to finally open it and see what is inside!
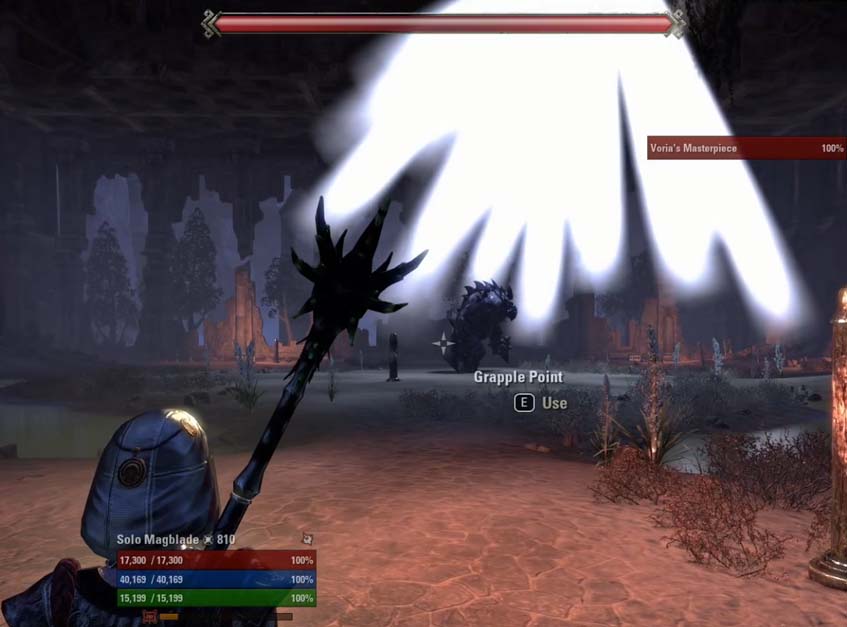
Once you are inside you will find big papa in there. The boss is called Voria’s Masterpiece. Make sure to not step into the greenish swampwater, it will deal damage to you. You can also use the grapple hooks again to increase your mobility.
Note: The green blobs can be killed by using the grapple hooks to grapple through them.
After you killed the boss the secret is finished and you will be awarded with the “KNOCK KNOCK” achievement, congrats! Another artifact got empowered, you can also activate it and get the last of three buffs called “Abominable Bulwark”. The buff gives the following effects:
- Maximum Health increased by 2500 and reduces your damage taken by 3%.
- as a Necromancer, Maximum Health increased by 3250 and reduces your damage taken by 5%.
You can use all these buffs to gain an advantage against the last boss!


