


Welcome to our Soulframe Crypt of the Circade Guide. In this guide, we will explain what the Crypt is in Soulframe, where you can find it, and how to enter it.
This guide is up to date with Soulframe Preludes 11.
Table of Contents:
- What is the Crypt of the Circade?
- Where to Find the Crypts
- Tips for Completing Crypts
- How to Solve the Secret of the Crypt
- Is it Worth Farming the Crypt?
- Related Guides
What Is the Crypt of the Circade in Soulframe?
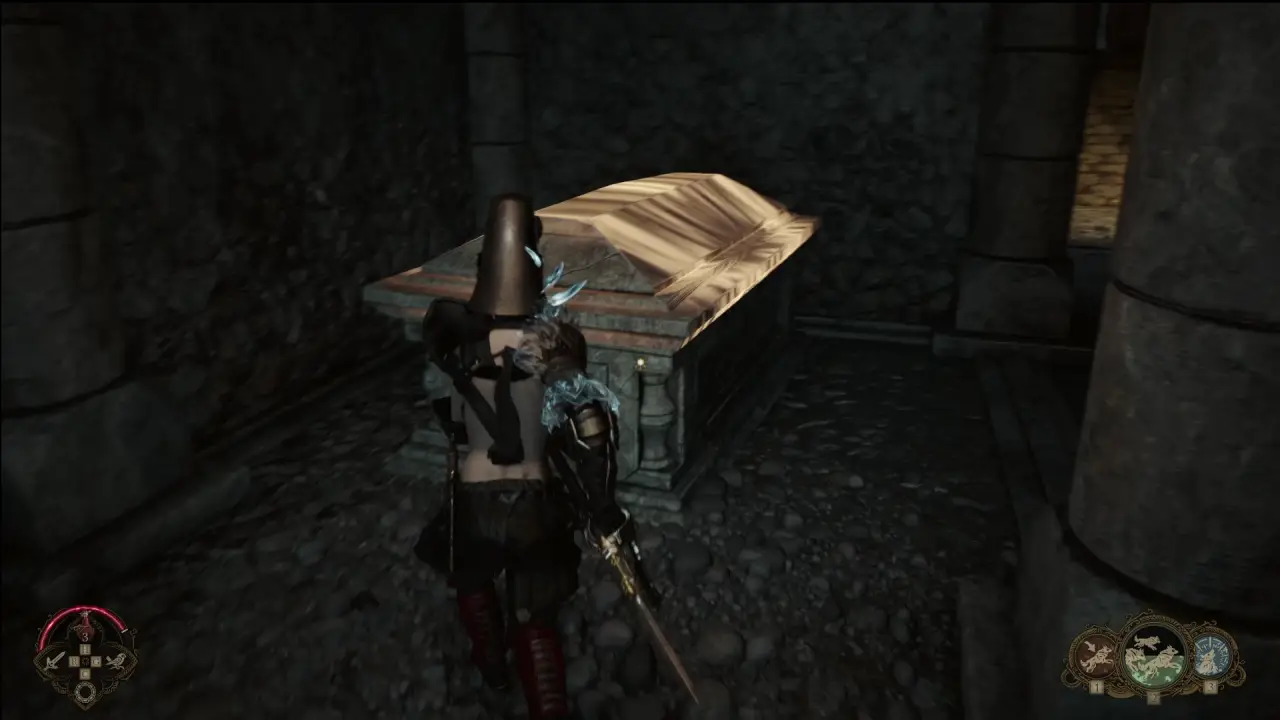
The Crypt is a special dungeon in Soulframe. You can enter the Crypt from specific locations on the map if you have a Crypt Key in your inventory. Crypts are partially randomised, but the first and last rooms are always the same. Crypts contain stone sarcophagi, most of which are broken, but a few of which can be looted for item fragments and rare crafting materials.
Crypts contain ghostly enemies that cannot be found in other locations, and they sometimes feature traps or puzzles that must be passed to reach the end. The final room of the Crypt always contains a boss fight with the Circade. There are also several hidden puzzles centred around the Crypt, which can be solved to unlock the powerful Triune Talisman and Circade armour pieces.
Crypts can be played either solo or by grouping up with other players.
Where to Find the Crypts in Soulframe
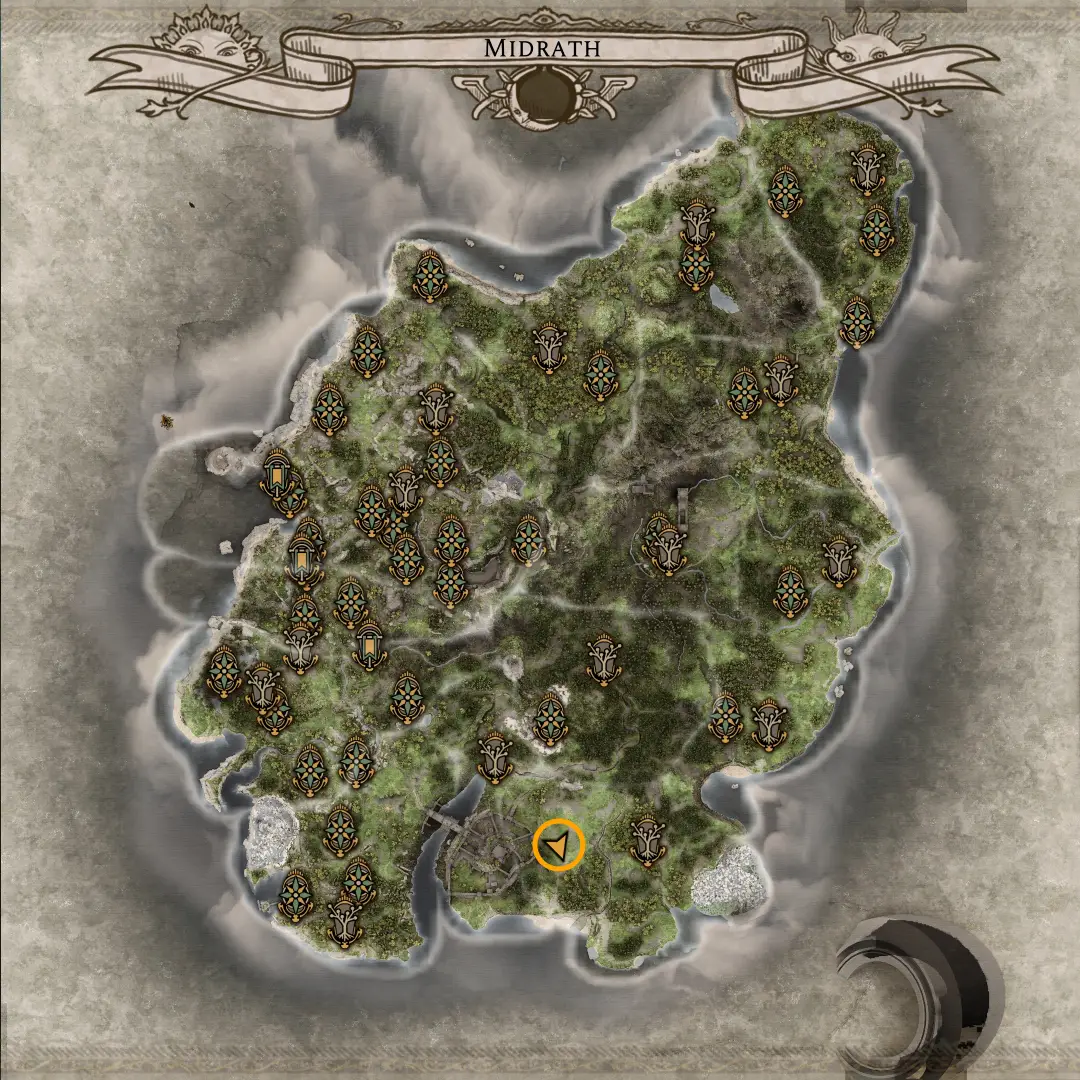
There are currently two locations on the Soulframe map that allow you to enter the Crypts. The Crypt dungeon is the same no matter which entrance you use, so you should just use the nearest entrance.
The first entrance is in the graveyard in the north-eastern area of the map. The second entrance is in the graveyard in the southern area. See the images below for precise map locations.

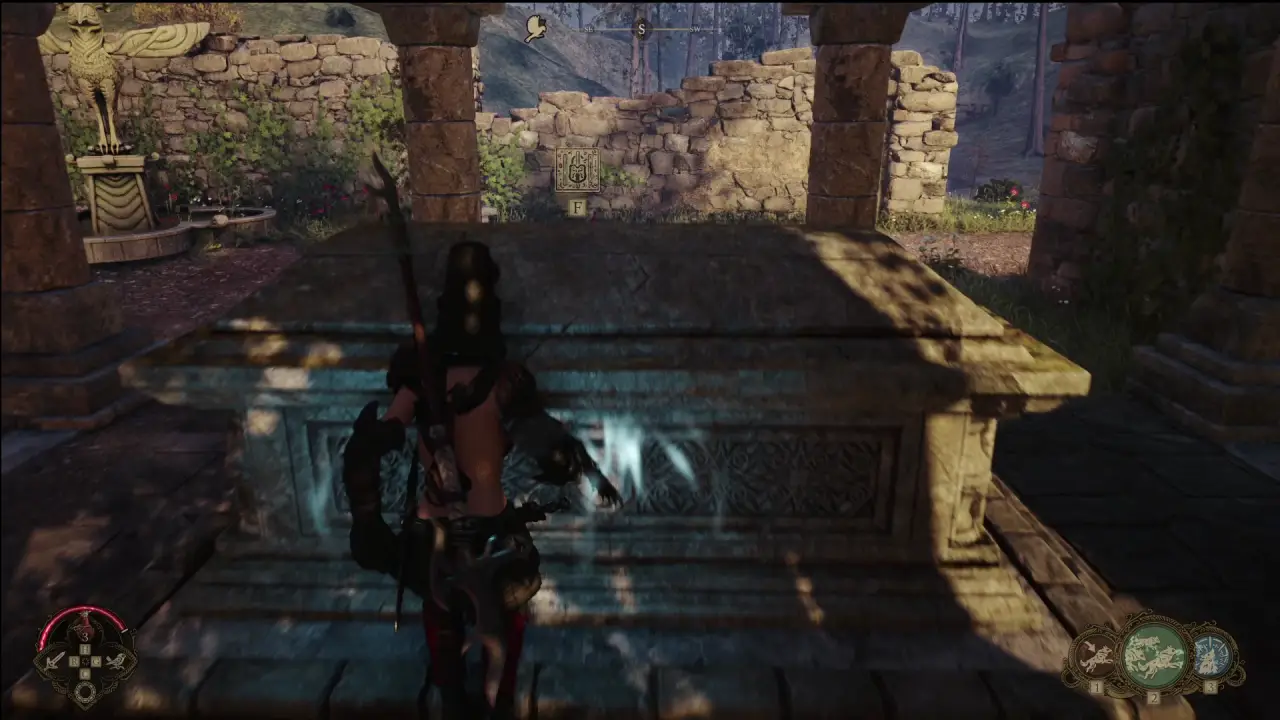
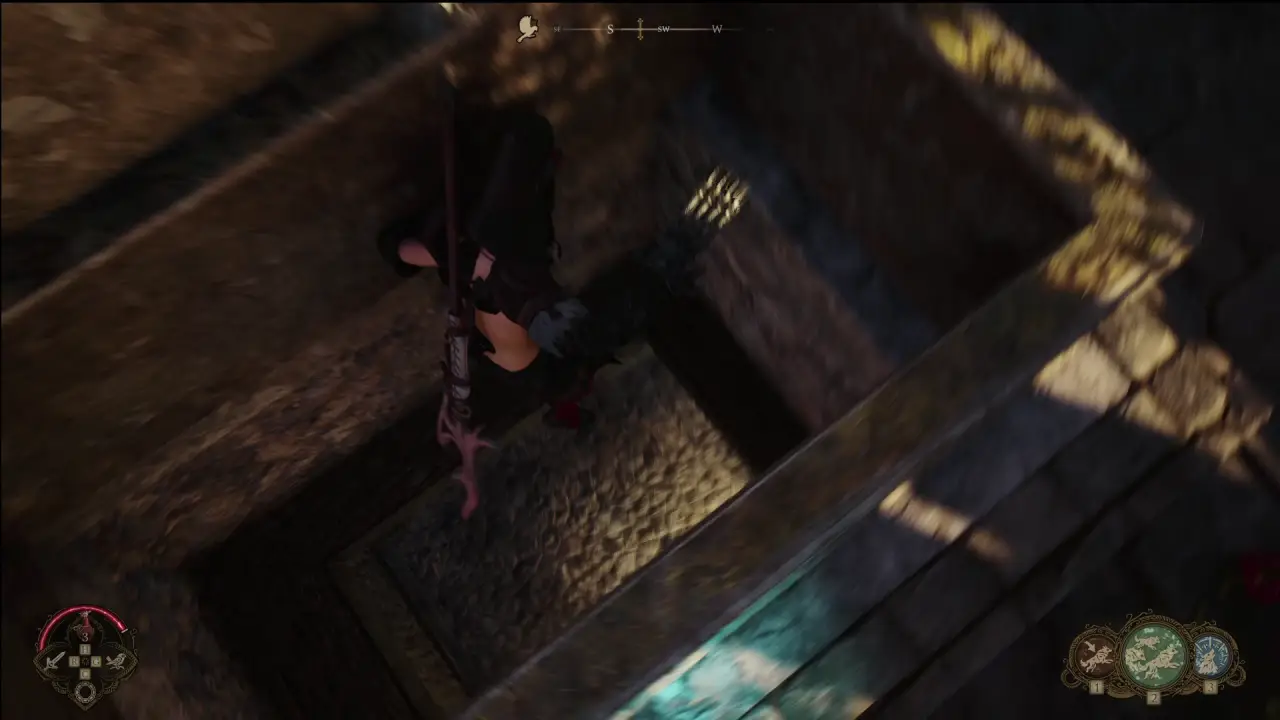
The graveyards contain a large stone sarcophagus that you can interact with to open (if you have a Crypt Key). Jump into the sarcophagus after opening it, and you will fall into the Crypt below. You’ll take a small amount of falling damage, unless you break your fall by performing an attack on your way down (I’m not sure if this is a bug, but you can currently prevent all falling damage in Soulframe by performing an attack just before you land).
How to Find Crypt Keys in Soulframe
As mentioned above, you need a Crypt Key in your inventory to open Crypts. These can be a bit tricky to obtain, making them quite rare.
Crypt Keys in Soulframe have a chance to drop whenever you defeat a Bannaret or an Ode’n Knight. Make sure you loot the boss and any nearby chests. Farming faction Tales (two or three stars) is a good way to encounter Bannarets frequently.
Tips for Completing Crypts in Soulframe
Here are some tips, tricks and general advice for completing (or farming) the Crypt in Soulframe:
- Level Up First – You don’t need to level your Pact up fully, but at least unlock all three of your Skills before venturing into the Crypt. Some enemies, particularly the final boss, will be quite difficult to fight at a low level.
- Don’t Take Risks – Soulframe usually allows you to respawn as a Sparrow when your character dies, flying to your body to revive and pick up where you left off. This is not an option in the Crypt. If you die here, you will be kicked out, and all progress will be lost. When you return to the Crypt you’ll have to start from the beginning. Therefore, it makes sense to play more cautiously than usual and prioritise staying alive.
- Take plenty of healing – On a similar note, you should ensure that you have sufficient healing before entering the Crypt. Ensure you have all five Healing Flasks filled (treasure chests and some enemies will drop them when looted). Some Pacts, particularly Oscelda, have ample self-healing abilities, which make the Crypts significantly easier.
- Use Magic Armour – Armour in Soulframe has three stats – Physical, Magic and Stability. In Crypts, it is good to have a decent amount of Magic defense, since most enemies in the Crypt deal magical damage. The final boss often places a DoT (Damage over Time) effect on you that deals heavy magic damage. You don’t need to focus completely on Magic Armour, but you should at least ensure that your Armour stats are quite balanced before venturing into the Crypt.
- Use Spirit Vision – The Crypt contains some secrets that can only be identified with Spirit Vision (hold E on PC). It will also highlight loot, including the sarcophagi that can be looted. There is no cost for using Spirit Vision, so I recommend holding the button down whenever you are exploring, to ensure you don’t miss anything.
A special mention should be made for the final boss of the Crypt, the Circade. This is a ghostly knight who can surprise you by gliding and striking quickly. Sometimes he will place a magical DoT on you, which hurts quite a lot. When this happens, play it safe for a few seconds and heal up. As long as you go in prepared, the boss isn’t too difficult. The Circade is also at the centre of a rather complex hidden puzzle in the Crypt, something that many players miss completely because it is only hinted at by a note that drops when you defeat the Circade. We’ll explain that more below.
How to Solve the Secret of the Crypt
This is a very complicated process with multiple steps, so I have broken them down into subsections below.
Step 1 – Get the Totems
As mentioned above, it is recommended to use Spirit Vision frequently when exploring the Crypt, as this will help you to spot hidden details that are crucial for unravelling the secrets hidden by the Crypt.
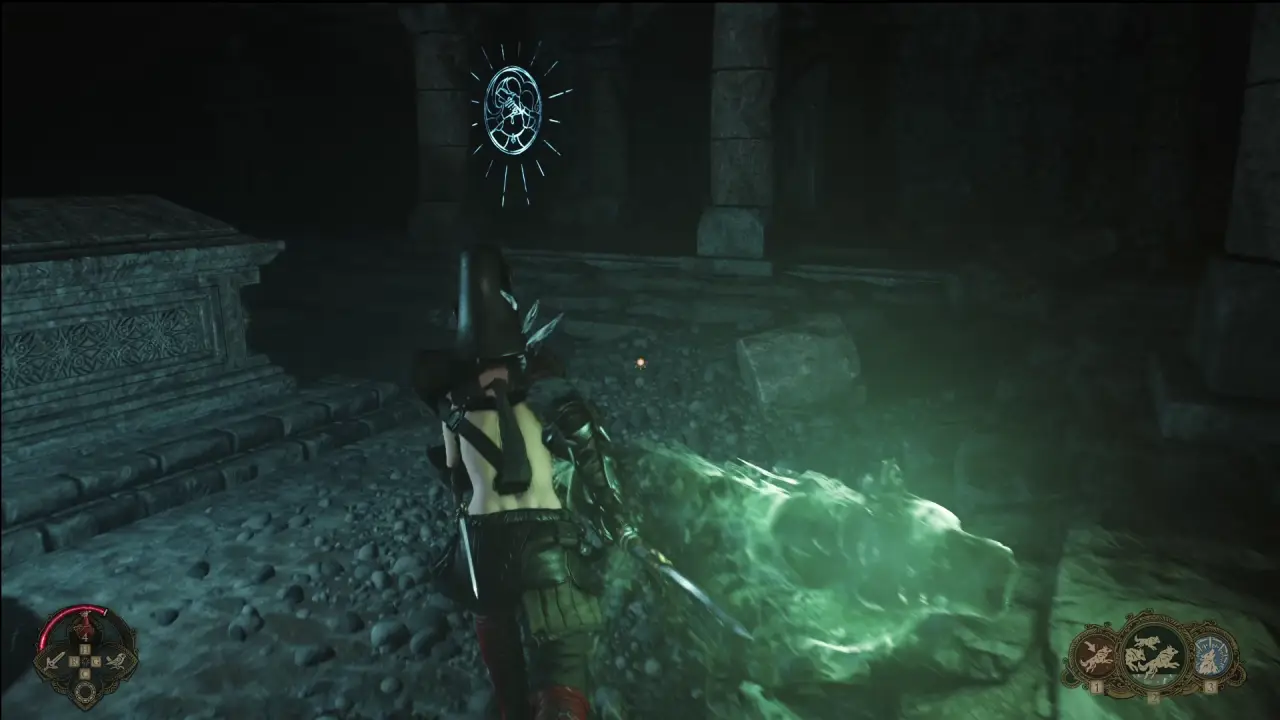
Specifically, you are looking out for large glowing sigils on the walls of the Crypt. They only glow when viewed in Spirit Vision! Take note of their location before engaging the boss in combat.
Usually, when you defeat the final boss, he just drops a note, and nothing happens. But if you defeat him next to one of the glowing sigils, you’ll be able to interact with the Sigil to earn a totem and get some lore in your Codex. This process must be repeated two more times in subsequent Crypt runs, so that you have a totem from each Sigil colour (Red, Green and Blue). Depending on the layout of the Crypt, you may need to lure the boss through several rooms to get him to the Sigil.
Step 2 – Triune Talisman
The Totems each have a time of day associated with them (for example, the Midnight Totem).
You need to wear these Totems at their associated time of day while exploring the overworld (not in a dungeon). Doing so will cause the Circade to ambush you. Defeat him again to earn a fragment of the Triune Talisman.
Repeat with the other two Talismans (the Circade cannot spawn more than once per in-game day, though). After doing this with all three totems, you will have three fragments of the Triune Talisman.
Visit your blacksmith in Nightfold to craft the Triune Talisman. This is a neat item, granting you a +1 boost to Courage, Grace and Spirit. But that’s not the end of the matter. Once you have the Triune Talisman, equip it and return to the Crypt.
Step 3 – Open the Secret Door
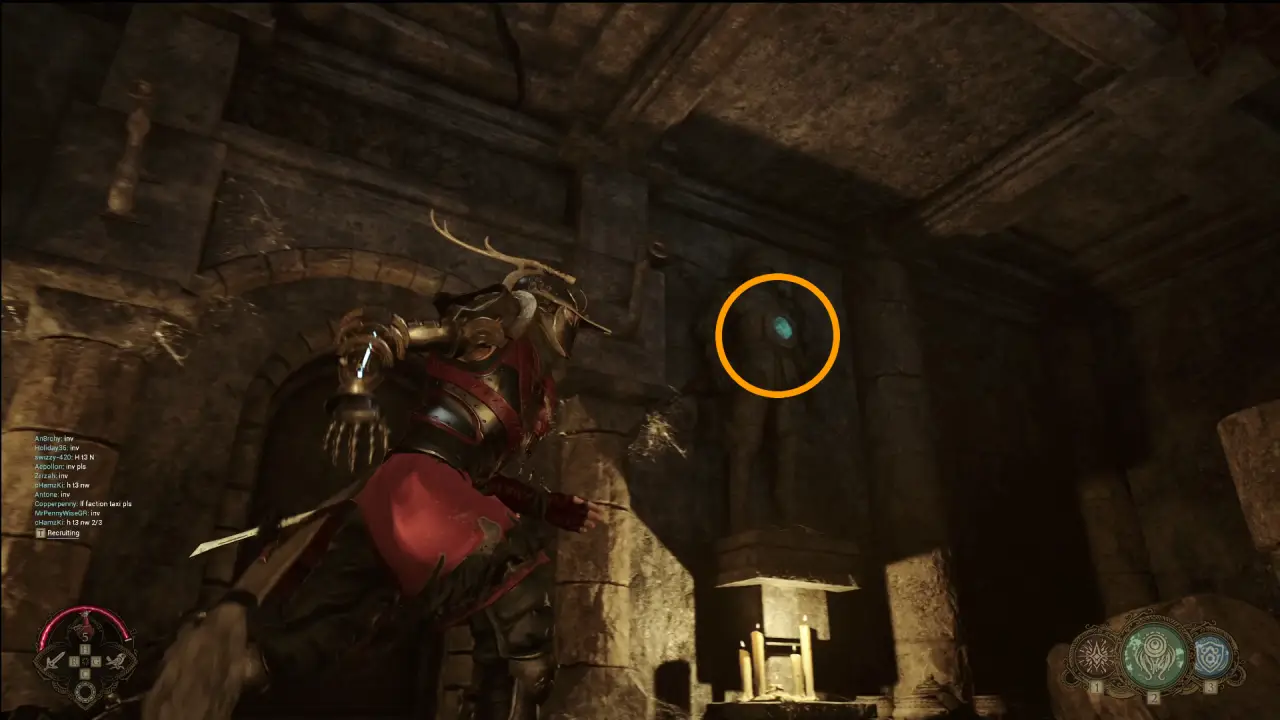
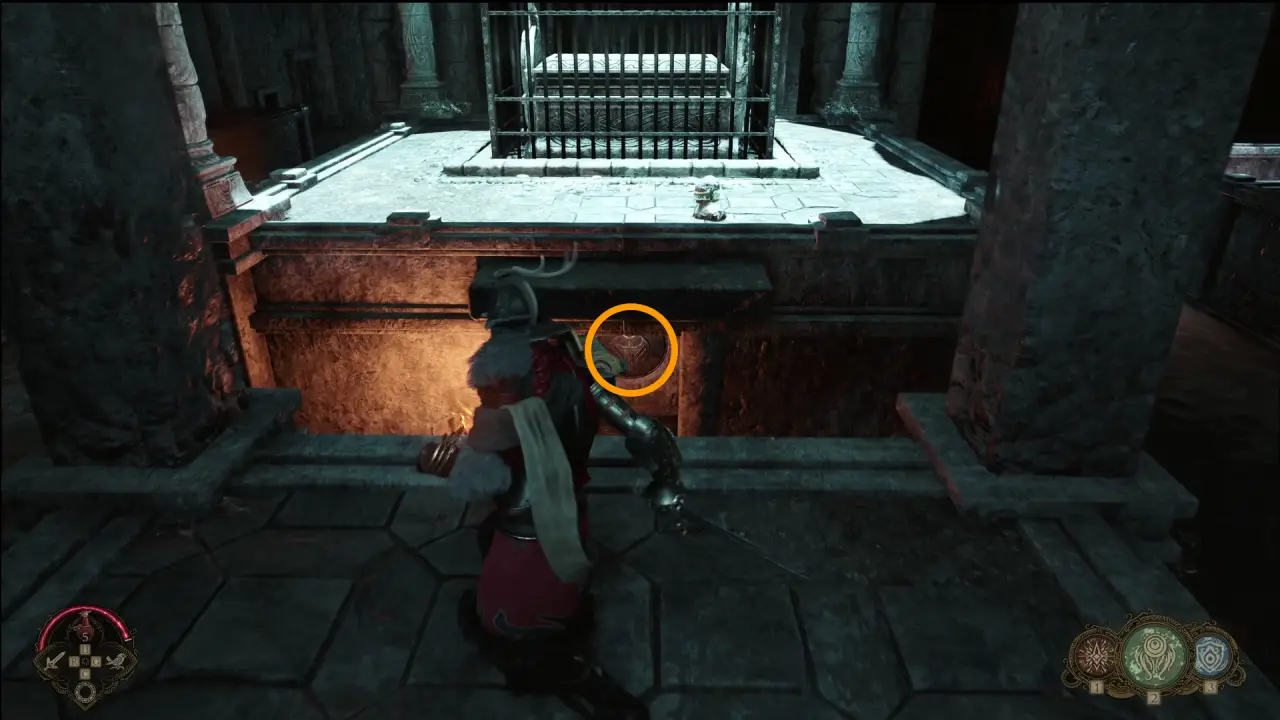
Return to the Crypt with your new Triune Talisman equipped, and make your way to the final boss room again. Defeat the boss as usual. Now, if you look around the room, you will notice lots of small blue crystals, ten in total. If you use your Spirit Vision, one of the crystals should have a symbol projected on it. This symbol corresponds to a number between 0 and 9.
Figuring this part out originally required community members to work together; because your Triune Talisman only allows you to see the symbol associated with one crystal, players had to share notes to figure out which symbol was associated with each crystal. They then had to decode the symbols to determine which number was associated with each, and then they had to figure out the correct order based on the hints discovered after collecting all three coloured sigils from earlier.
Luckily, that hard work has already been done, so we can skip all of the bother and just show you the correct order.
First Crystal

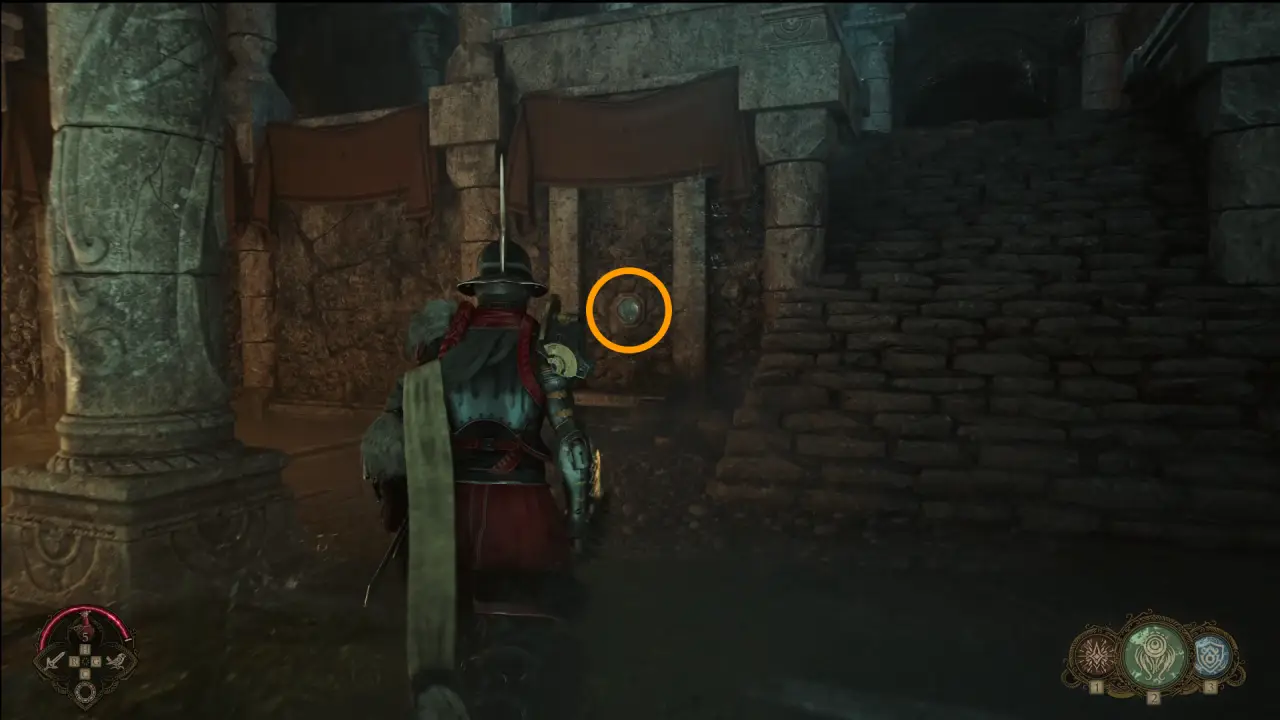
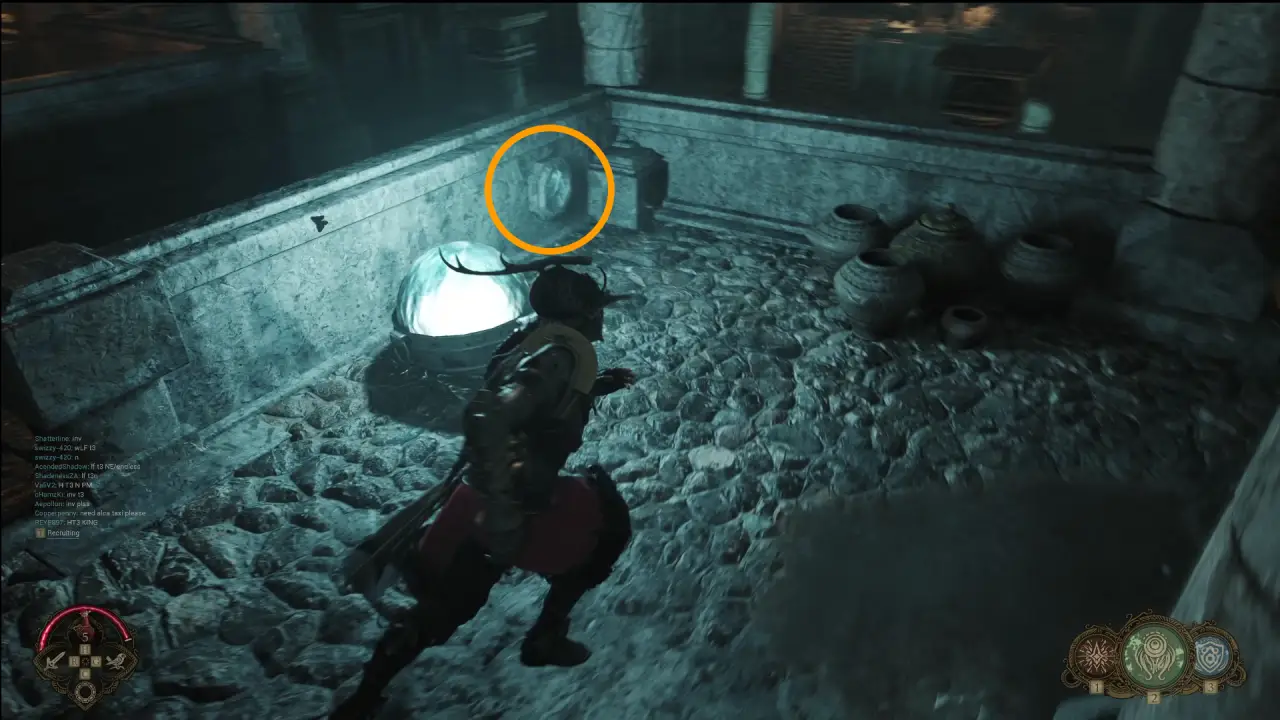
Above the central door on the ground floor (behind where the Circade spawns), flanked by two statues. Hit the crystal once with a ranged projectile. Since this is the first crystal, it’s fine to throw your melee weapon to hit this one. But do not throw at any crystals after this one, because it’s possible for the game to register two hits, breaking the order. You’ll need to use a ranged weapon, a magick weapon, a spell or a melee attack (all crystals except for the first one can be reached with melee attacks, some of them require a jump).
When you successfully hit a crystal, you’ll hear a distant clanging noise, a bit like a distorted church bell.
Second Crystal
Turn left from the first crystal, and look to the left of the stairs.
Third Crystal
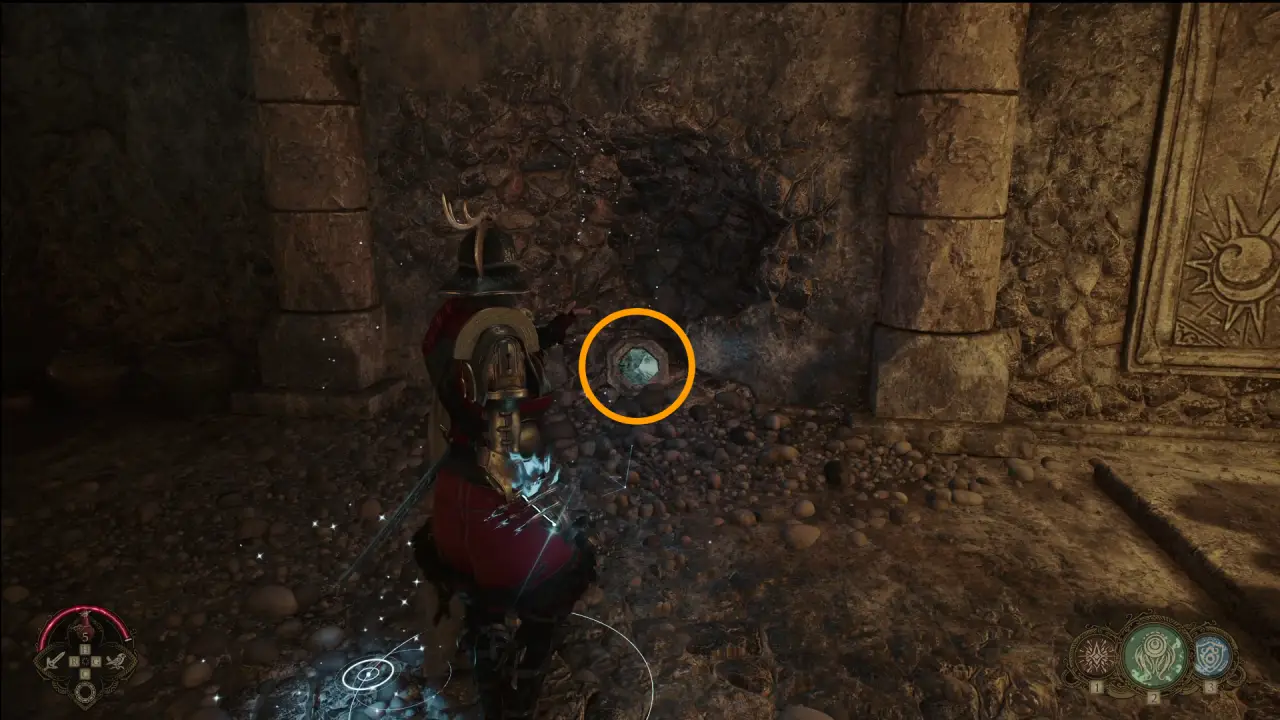
Run up the stairs from the Second Crystal. Turn right. You will come to a crystal in a crater in the wall.
Fourth Crystal
Turn around and jump down to the ground floor, running past the locked door. The next crystal is on a corner pillar to the right of the locked door.
Fifth Crystal
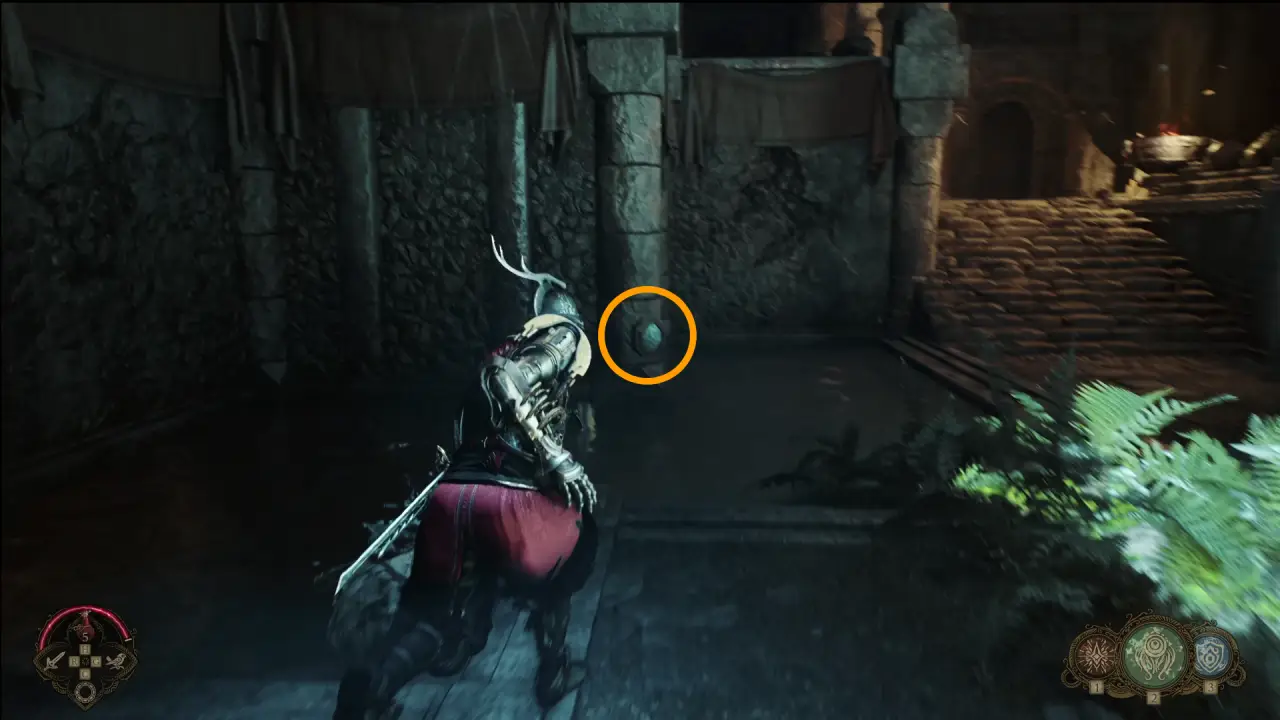
Go back up the same stairs as with the Third Crystal. At the top, turn left. The next crystal is on the low wall, between the glowing orb and the corner of the wall.
Sixth Crystal
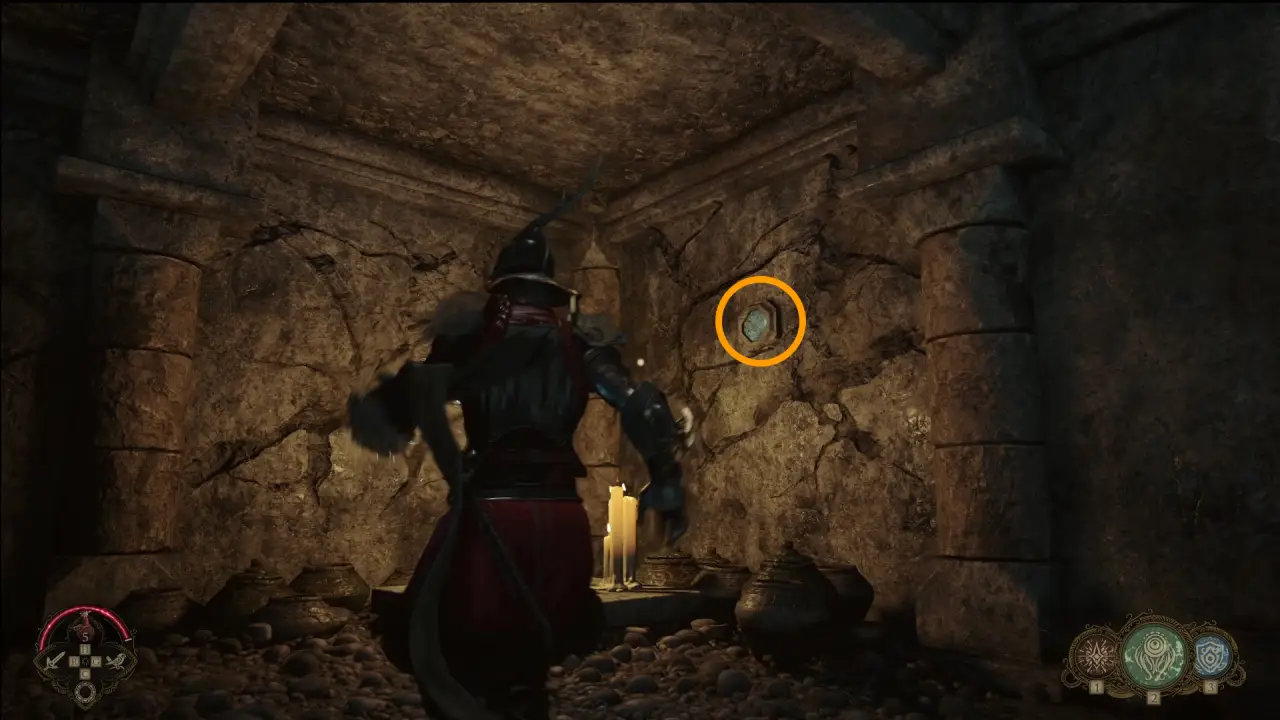
Turn around from the Fifth Crystal and go to the corner of the room. The next crystal is on the wall, above some candles. You can jump to hit it with a melee attack.
Seventh Crystal
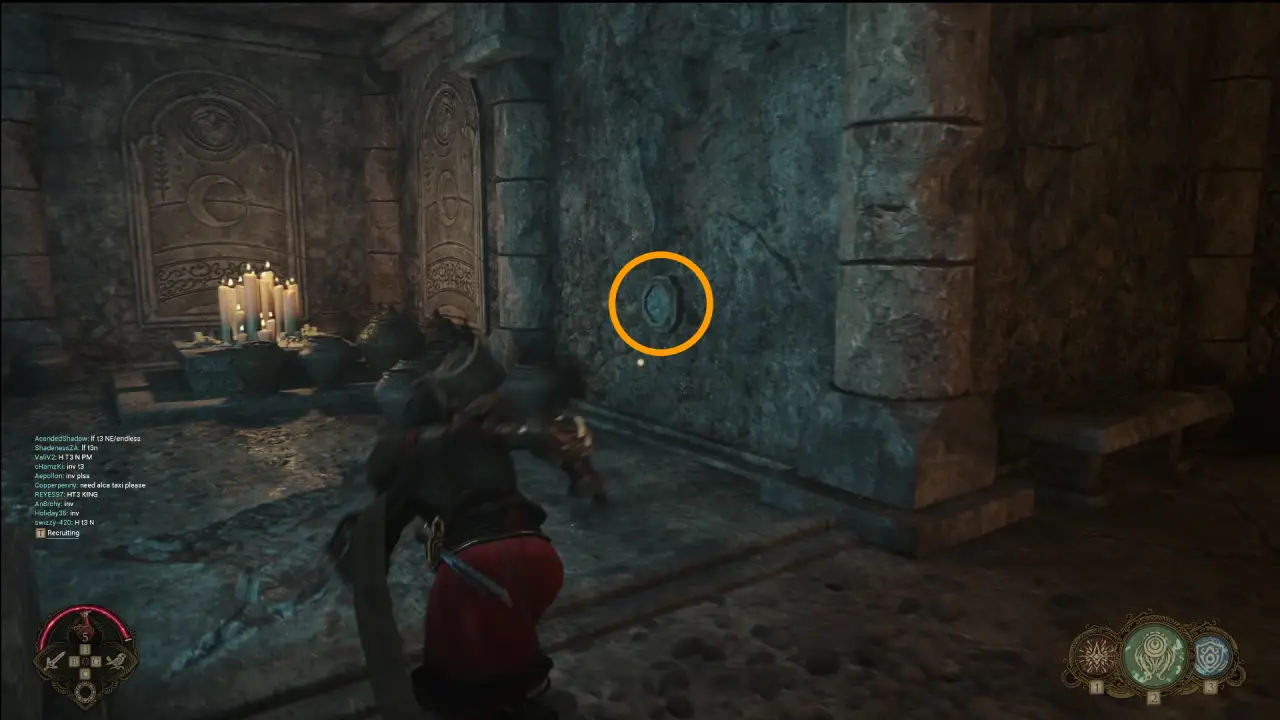
Continue around the top floor in the same direction (counterclockwise). The next crystal is on the wall near the ground level, near some pots.
Eighth Crystal
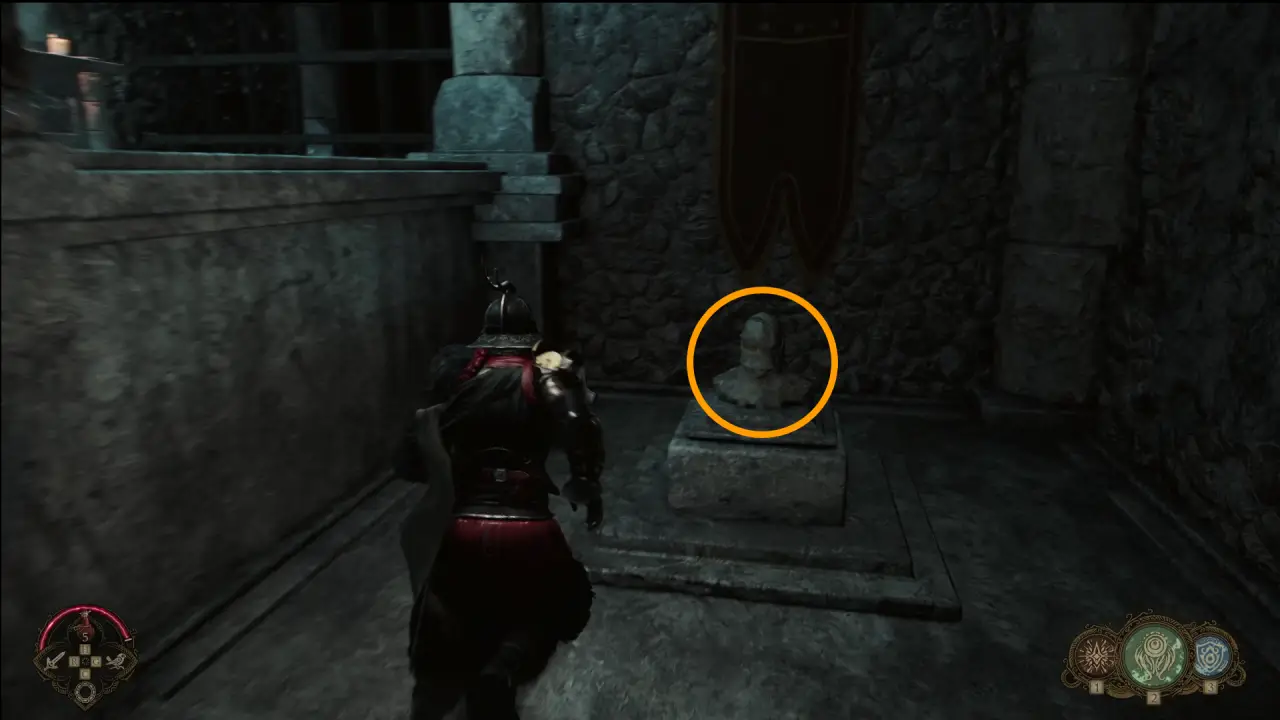
Turn around, facing back towards the Sixth Crystal. You will see the next crystal on the statue’s chest.
Ninth Crystal

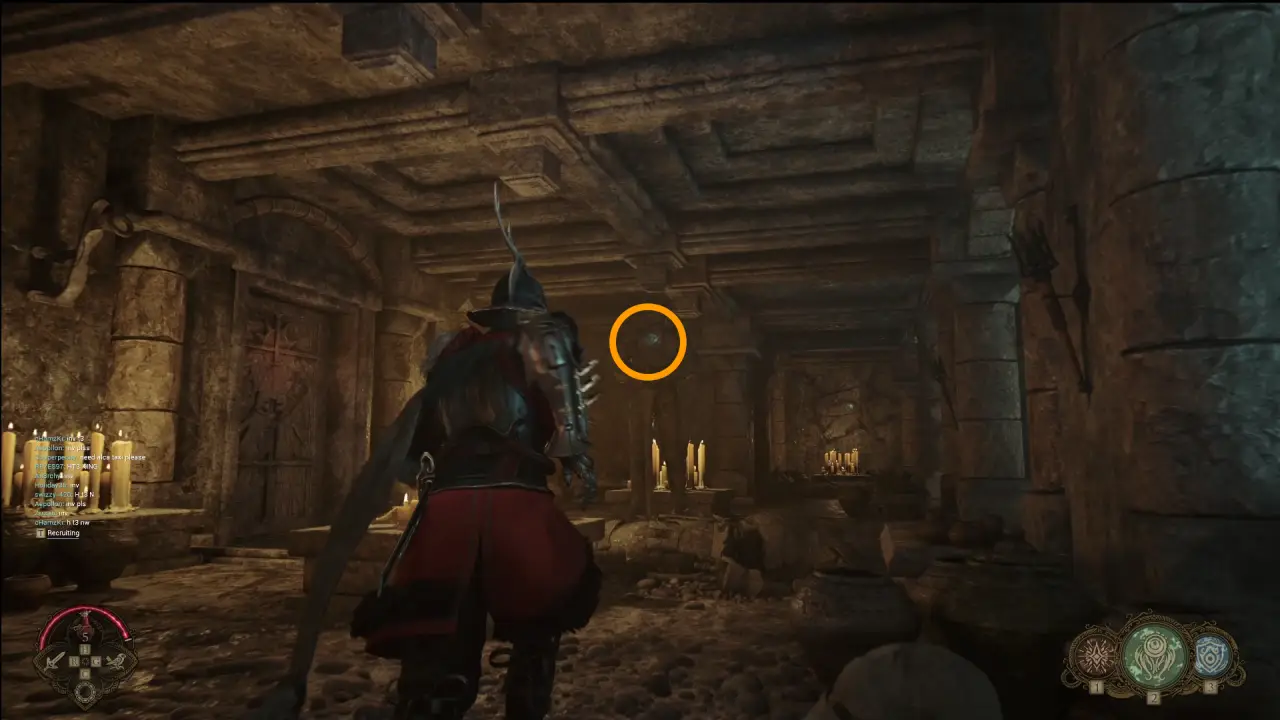
Run counter-clockwise around the top level, nearly to the opposite side. You will come to a corner that’s cluttered with a lot of jars. On top of the low wall behind the jars, you will see the next crystal.
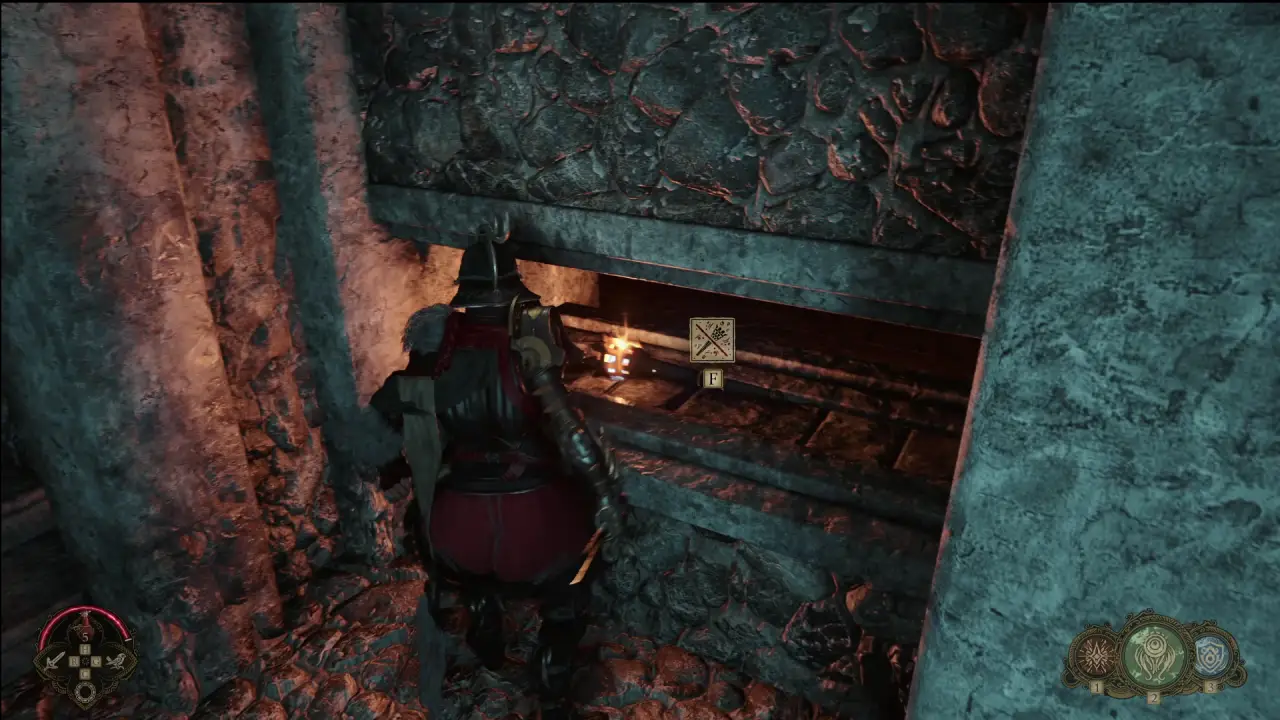
Tenth Crystal
Retrace your steps part of the way towards the Eighth Crystal. You will see one more crystal on the chest of a raised statue, to the right of a sealed door. This is the final crystal. Hit it and stand on the pressure plate. If you hit them in the correct order with no mistakes, the sealed door should open up.
Once you’ve opened this secret door, proceed inside. You only have to solve one more puzzle to get the Circade armour set.
Step 4 – Solve the Final Puzzle
Important: You can click on the images in this section to view a larger version.
Proceed into the area you just opened up. You will enter a large, dark room with several doors around the edges, some of which are locked. To complete the puzzle, we’ll need to open all of these doors.
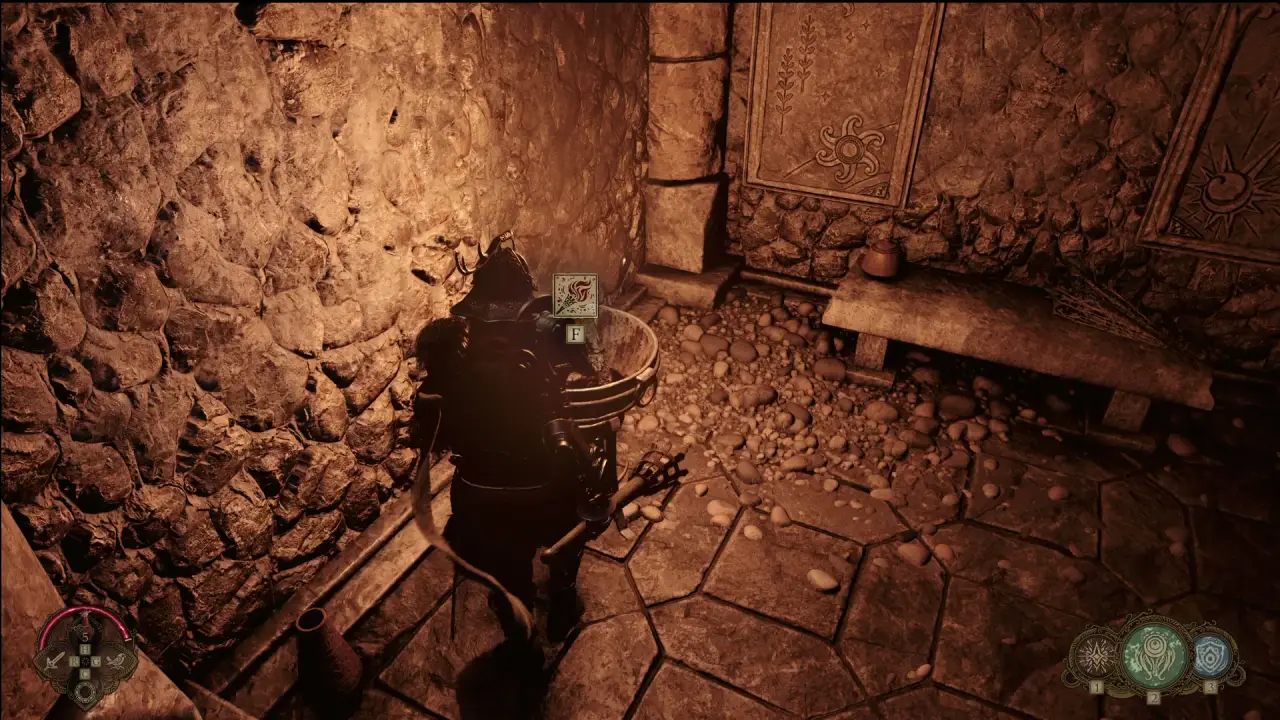
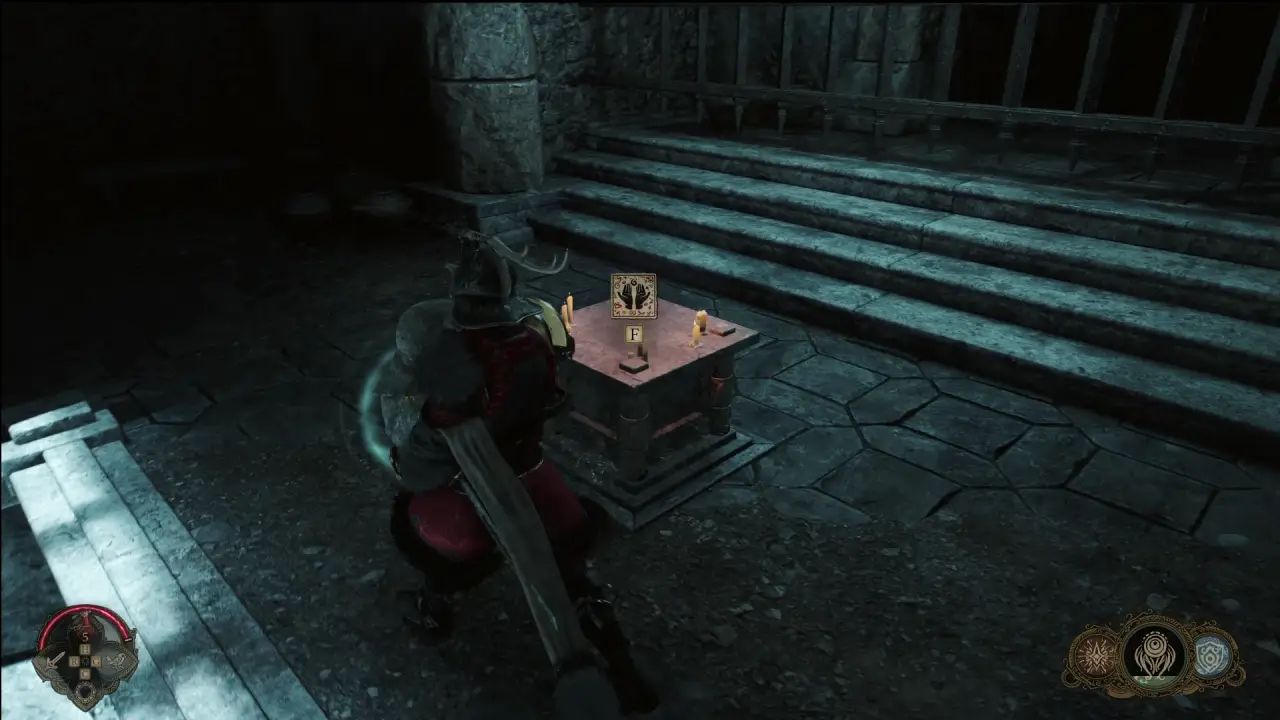
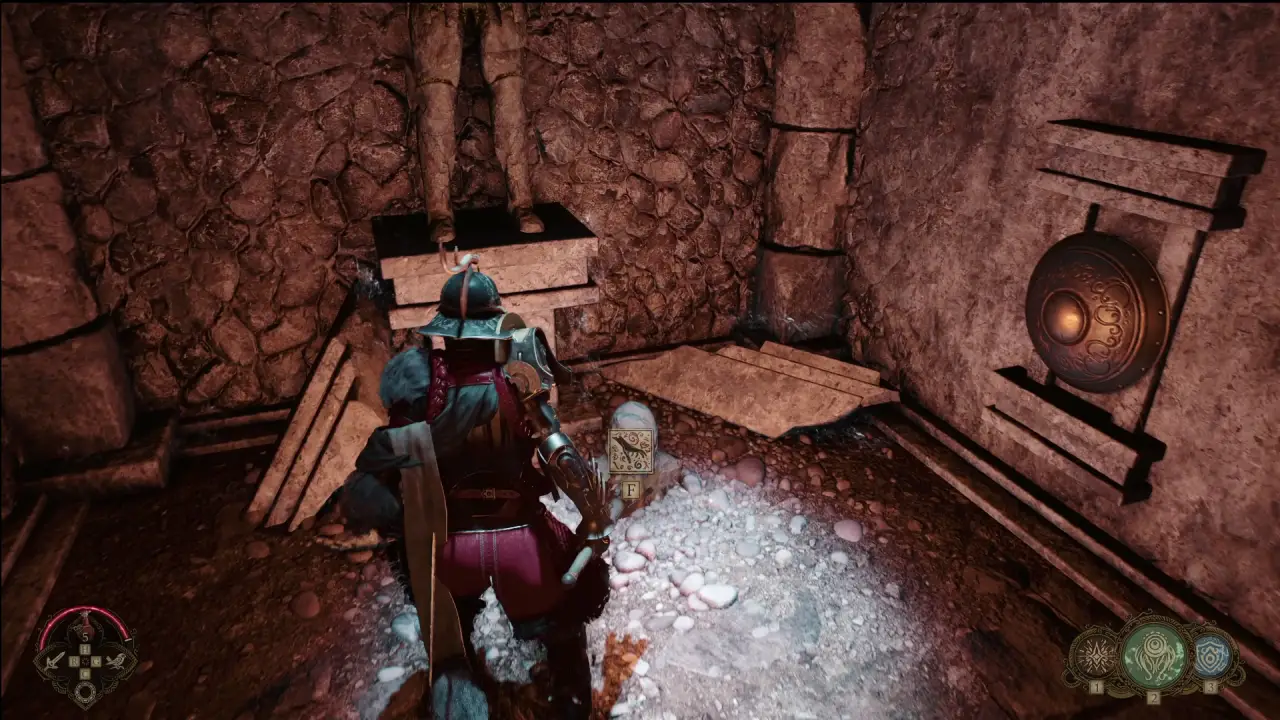
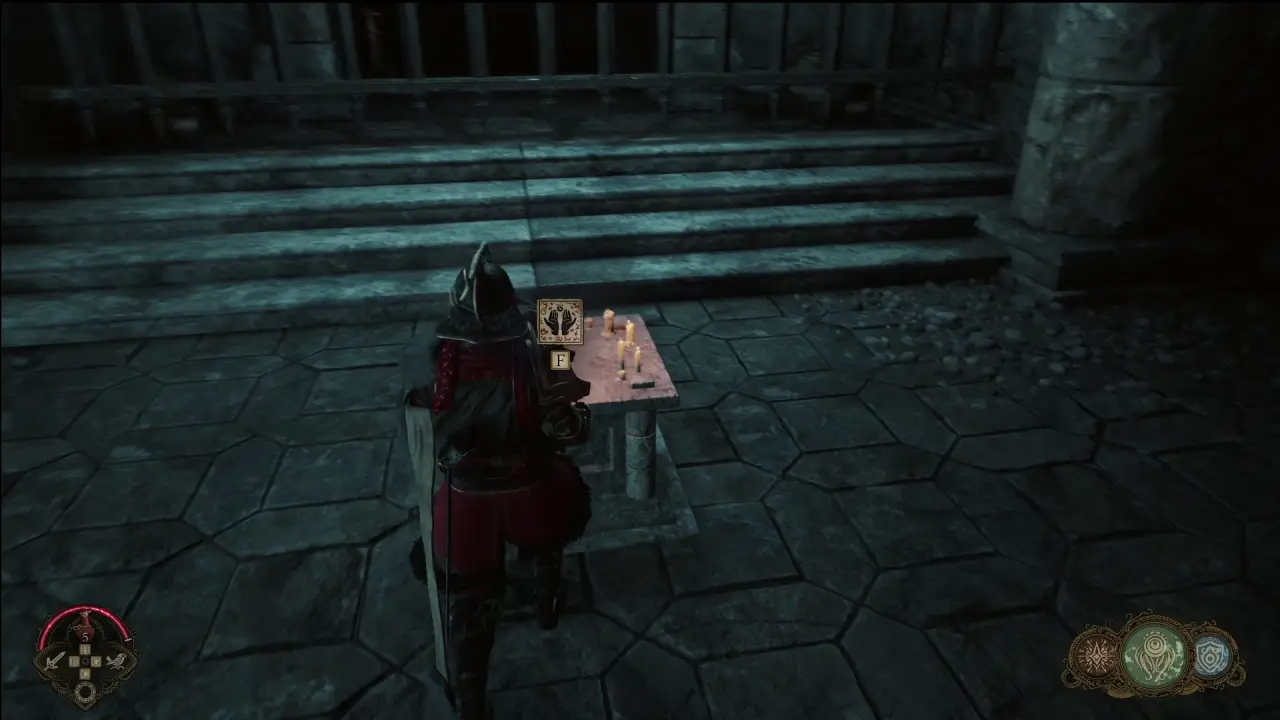
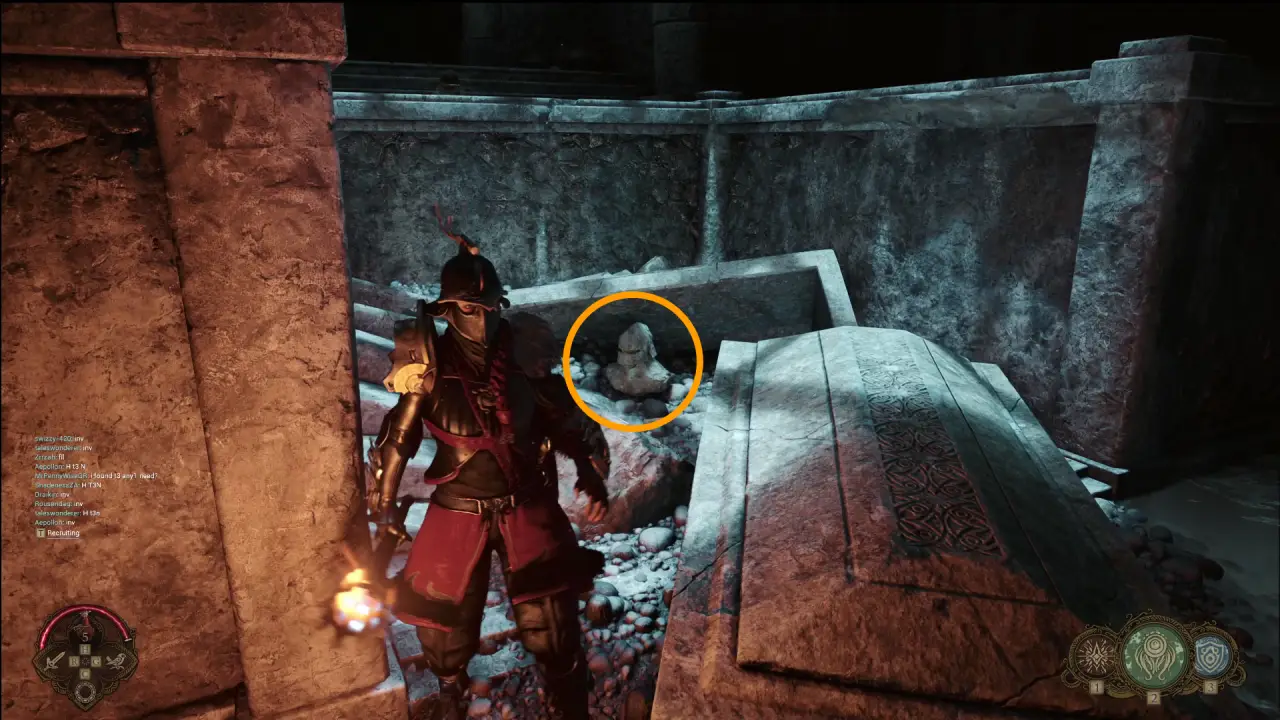
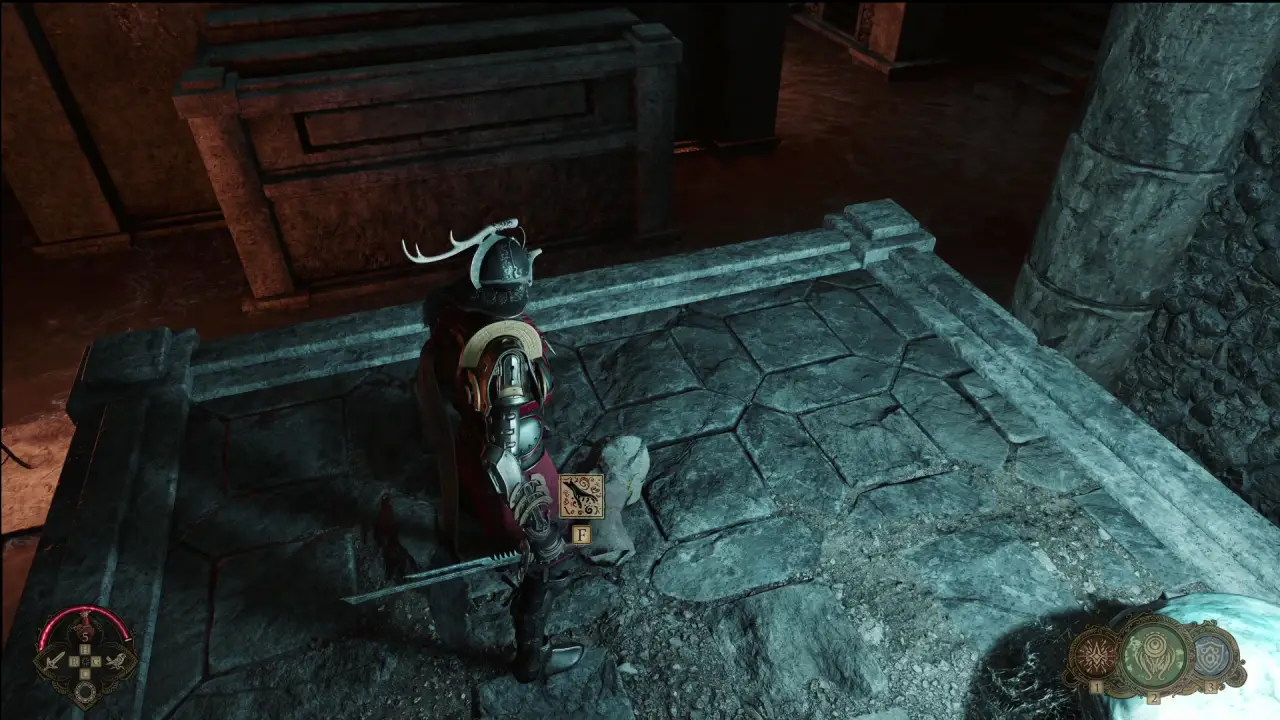
First, go all the way to the rear-right corner of the room. You will find a stone bust on a pedestal. Pick it up and carry it to the pedestal next to the locked door on the right side of the room. There are a few lit candles on the pedestal, making it easier to find.
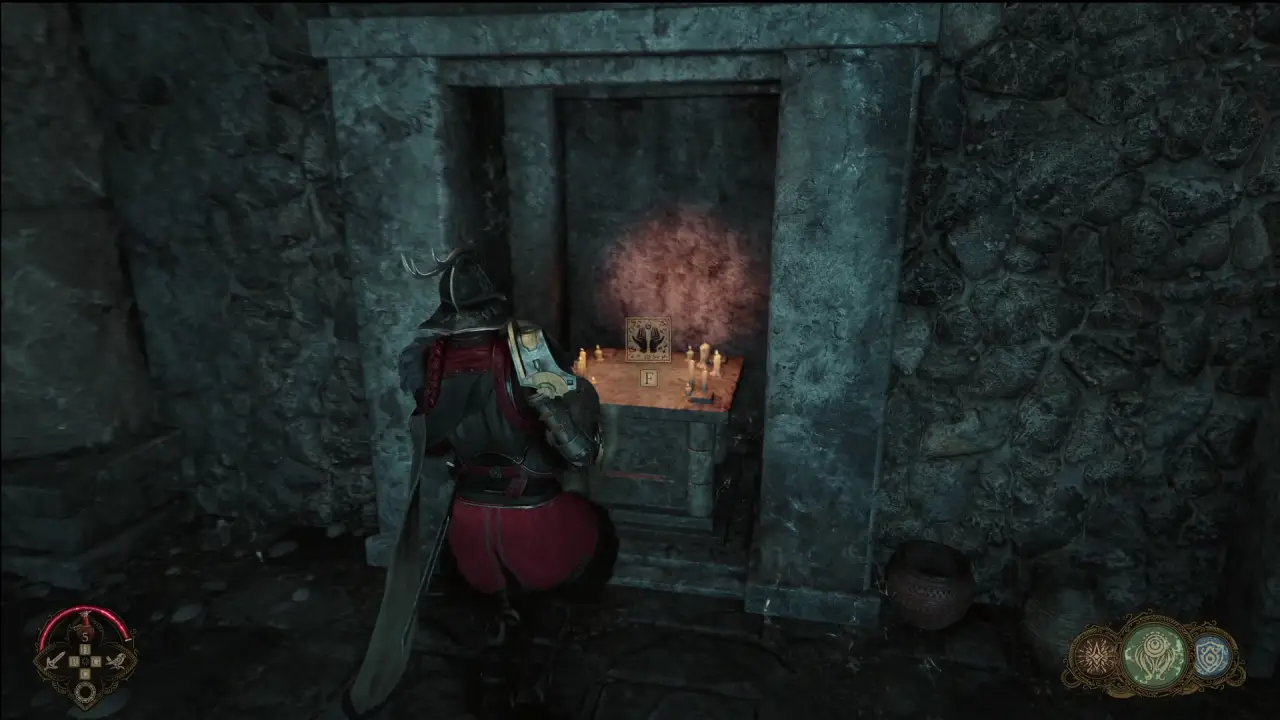
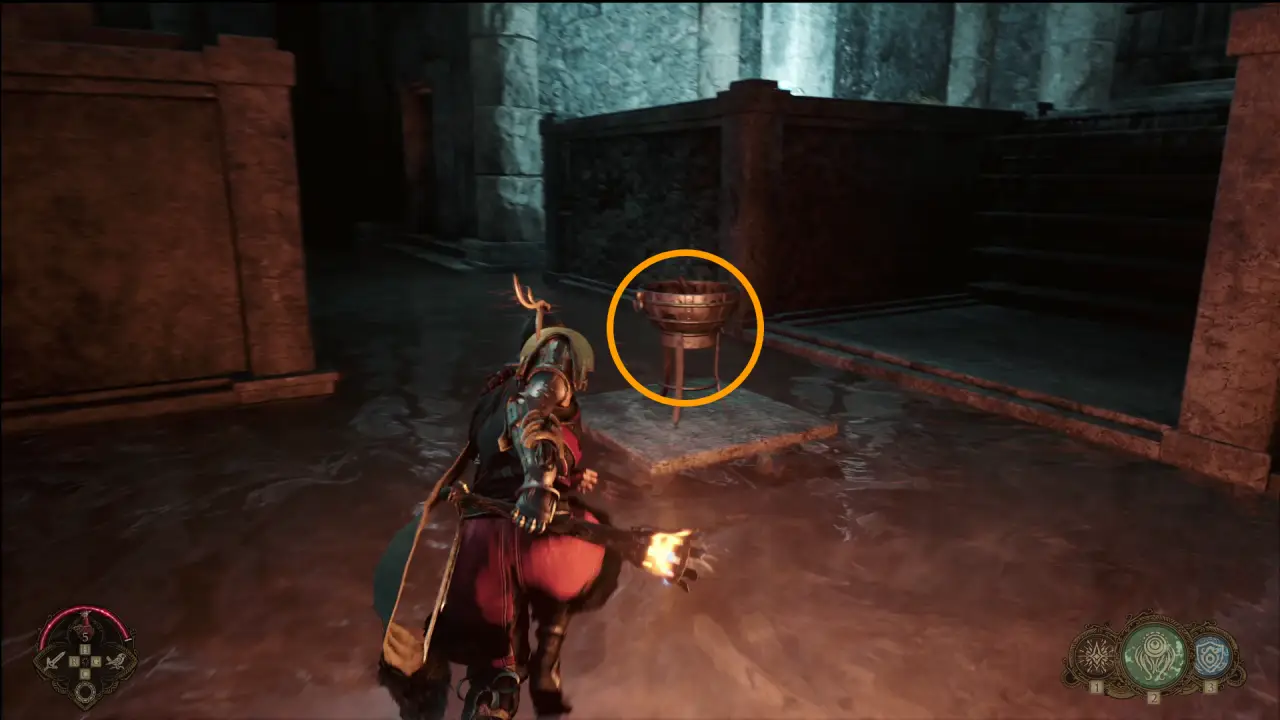
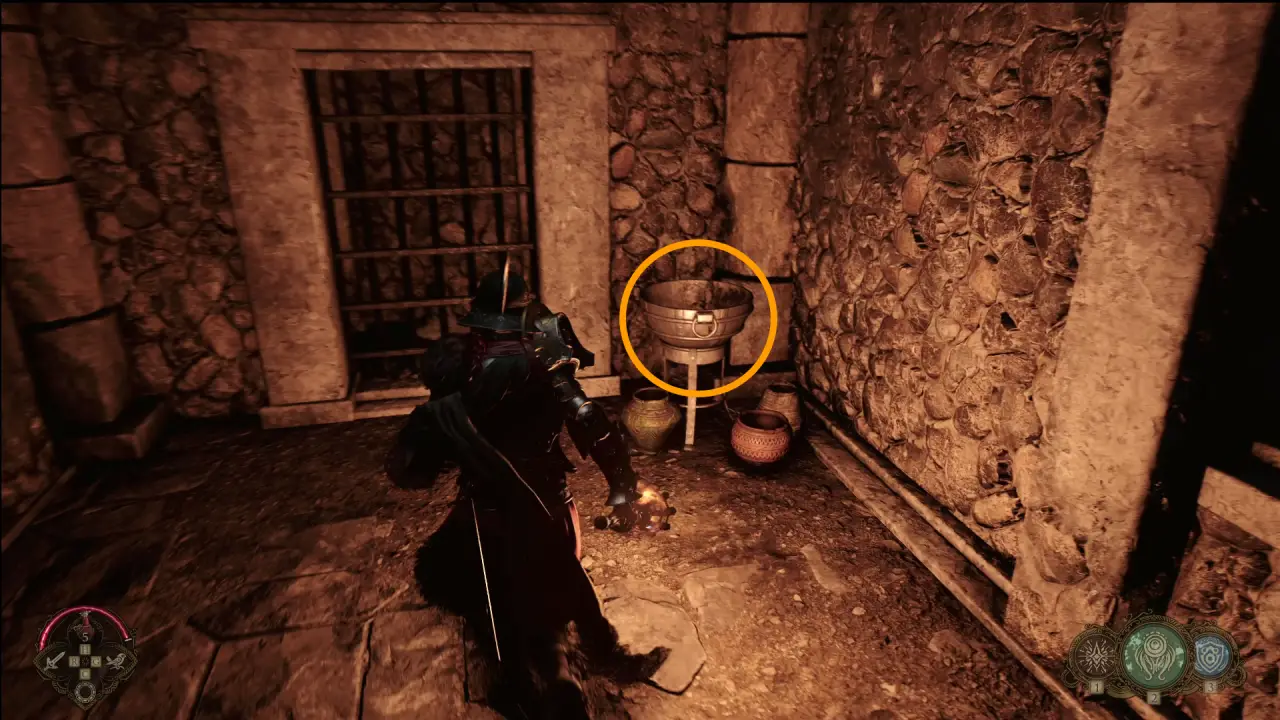
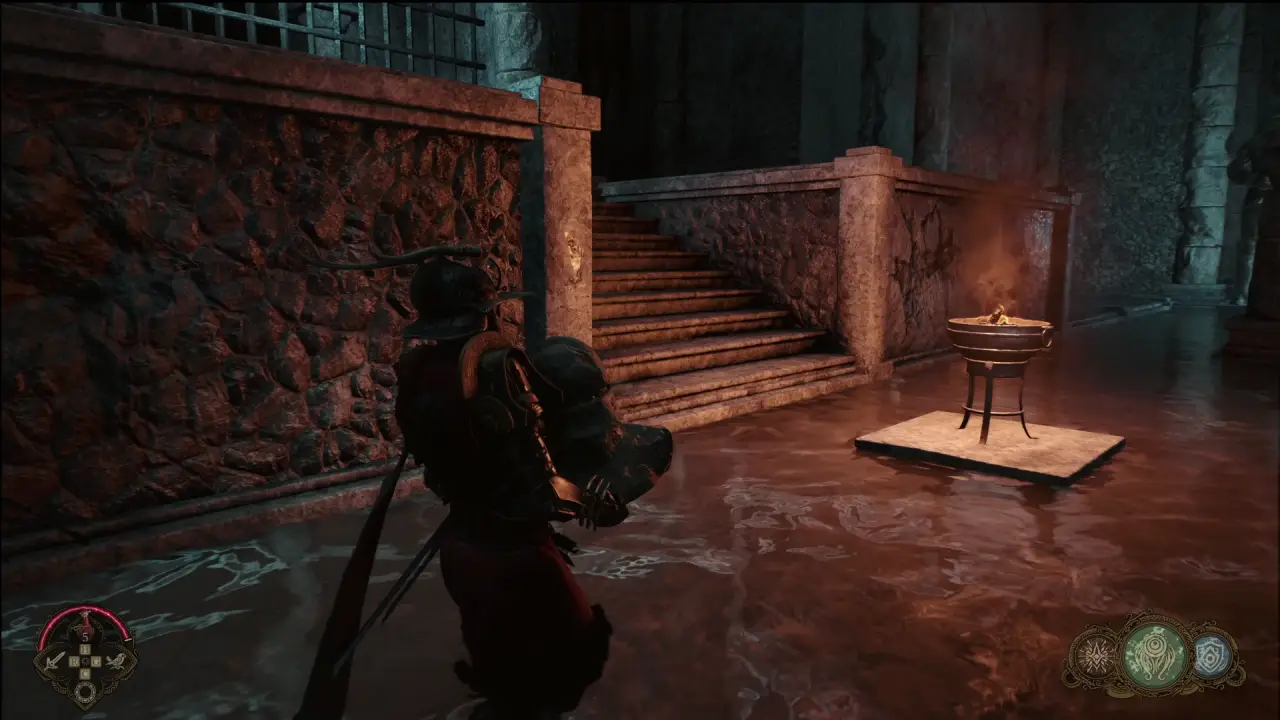
The door next to the pedestal will now open. Enter the room, and you will find a brazier filled with unlit torches. Pick one up and take it with you. Take the torch to the opposite side of the large room, where there is one lit brazier. Interact with the brazier to light your torch.
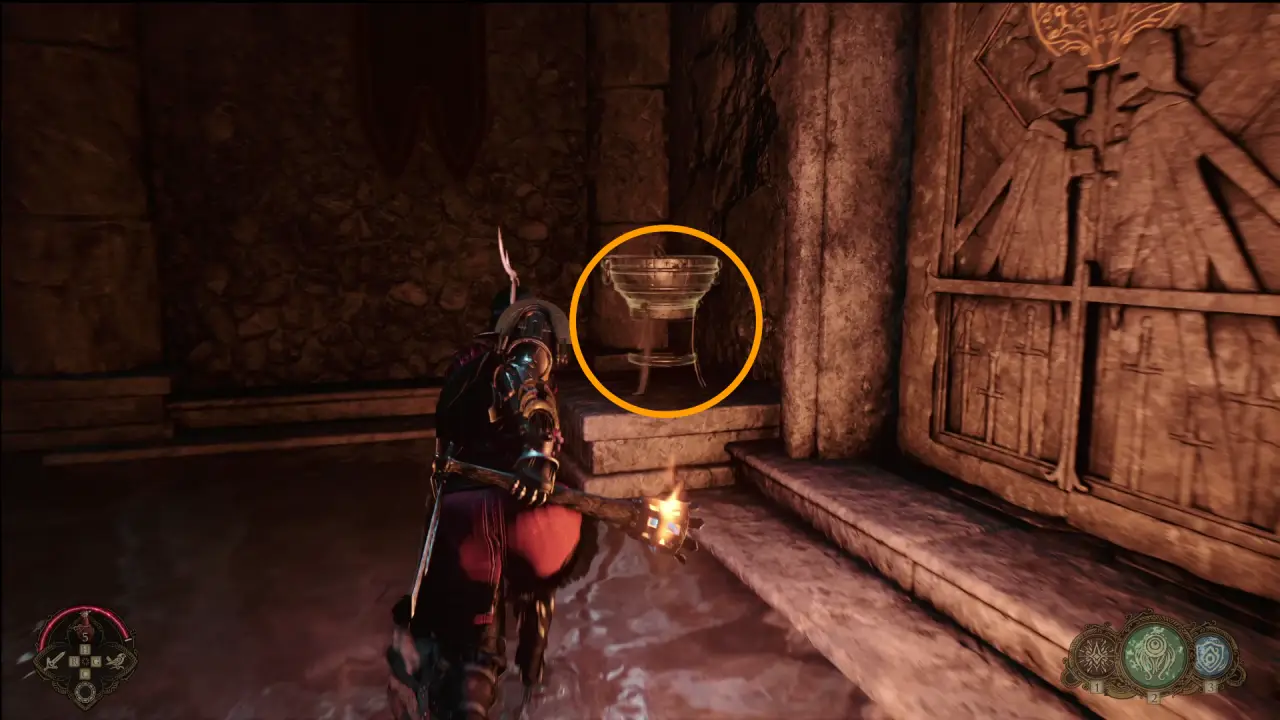
There are several braziers to light in the large room, each of which will unlock a door. Take a careful look around the room and make sure you light all of them – if you miss one, it might cause confusion later on.
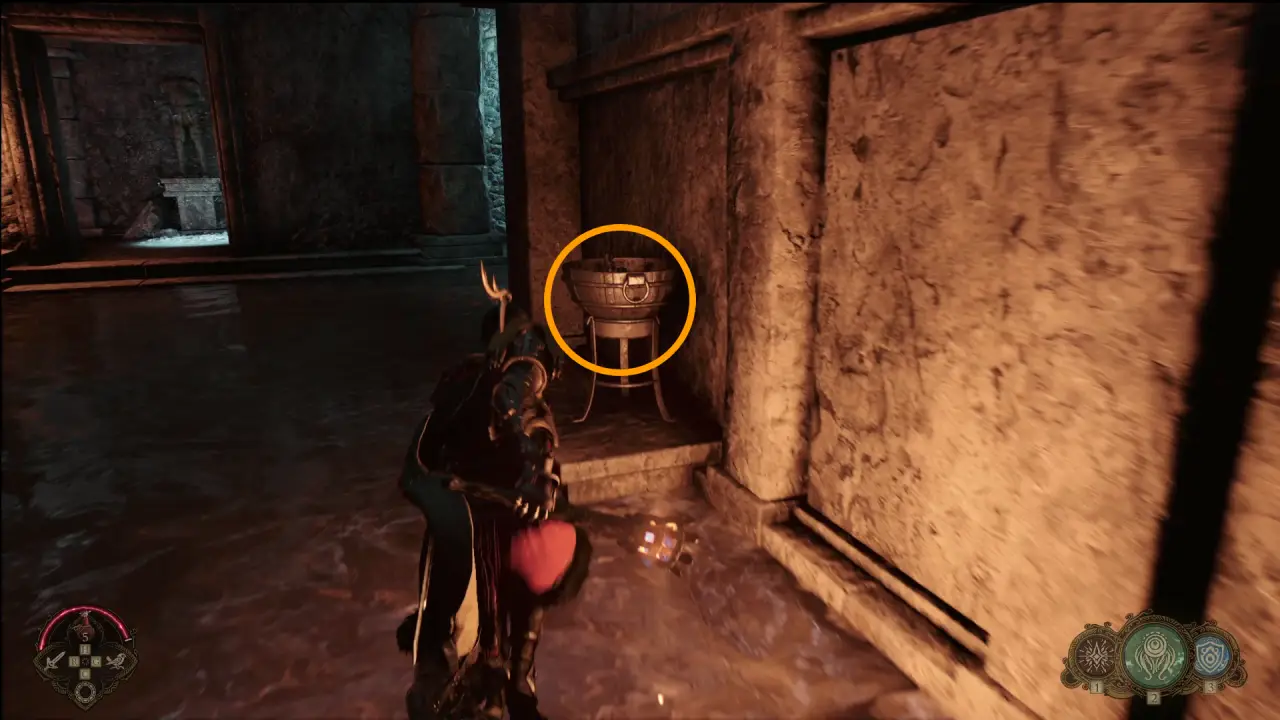
The first brazier is on the right side of the room – you walked past it earlier on the way to get the statue head. The second brazier is in the rear right corner of the room. The third brazier is at the back of the room, in the centre.
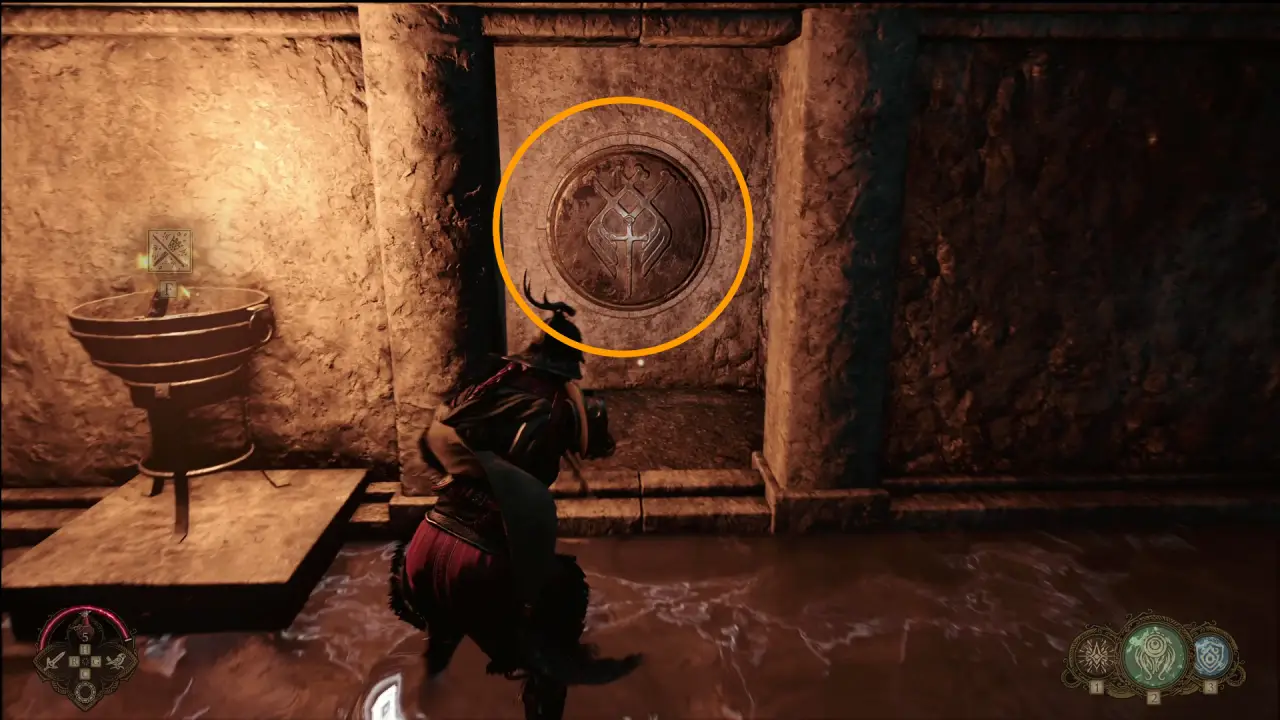
To light the fourth brazier, you must stand on the pressure plate at the rear left corner of the room. This will open a small room with a gap in the wall. Place your torch in the gap, then run around to the other side of the wall (through the waterfall). Pick up the torch and light the brazier to reveal another statue head. Put the torch down somewhere by pressing R – you can get stuck in the tiny room with the statue head if you take the torch there.

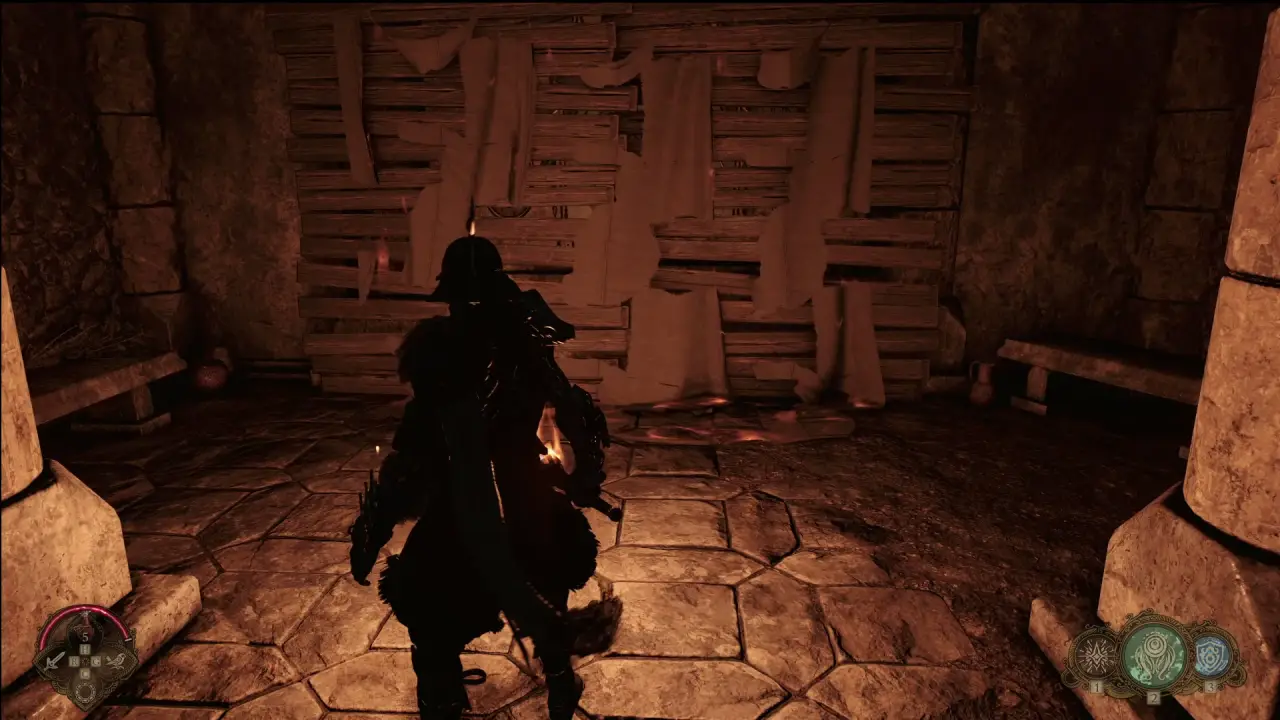
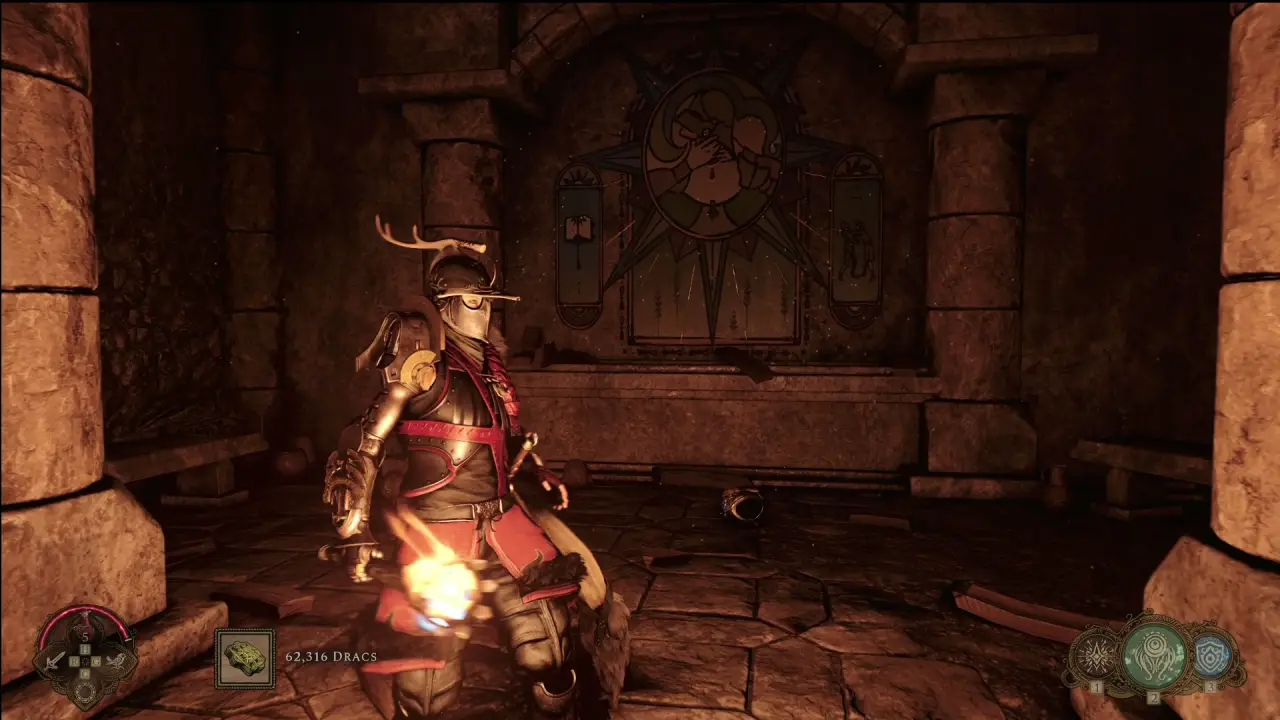
Pick up the statue bust by the fourth brazier. Turn right and walk up the stairs that opened up when we lit the brazier. Up here, you will find a pedestal to place the bust. This opens the large nearby gate. Retrieve your torch, then enter the dark room behind the gate. Attack the large cloth with your torch to burn it, revealing the mosaic behind it.
Head back to the second brazier, in the rear-right corner of the main room. Next to it is a small room that opened when we lit the brazier. Pick up the bust inside the room. Carry it to the first brazier, then up the stairs to your left. At the top of the stairs is a pedestal where you can place this bust. Retrieve your torch and destroy the cloth behind the gate that just opened, revealing a second mosaic.
Reaching the third and final mosaic is a bit more complicated. First, find the final statue bust, which is sitting inside a ruined sarcophagus on the left side of the room. Pick it up, then take it to the pedestal near the right-side gate (the last one we opened). Drop the statue on the floor somewhere near the pedestal.
Run to the back of the room, and look on the inner wall, next to the third brazier that we lit earlier. There is a pressure plate on the wall. Attack it with any weapon, which will temporarily press it down, causing two bridges to appear overhead. Quickly run back to the bust and carry it across to the middle platform. You won’t have enough time to carry it across the second bridge in one trip.
Leave the bust on the ground above the second brazier. Jump across to the platform where the final pedestal is. From here, you should be able to hit the pressure plate with a ranged or throw attack. Do that, then jump back to your statue bust. Quickly pick it up, then carry it across the bridge. Deposit the bust on the final pedestal, opening the gate. As before, retrieve your torch and burn the cloth to reveal the mosaic. You should be able to jump/climb up with the torch, without needing to activate the bridges again – this is not possible when carrying the statue because it is too heavy.


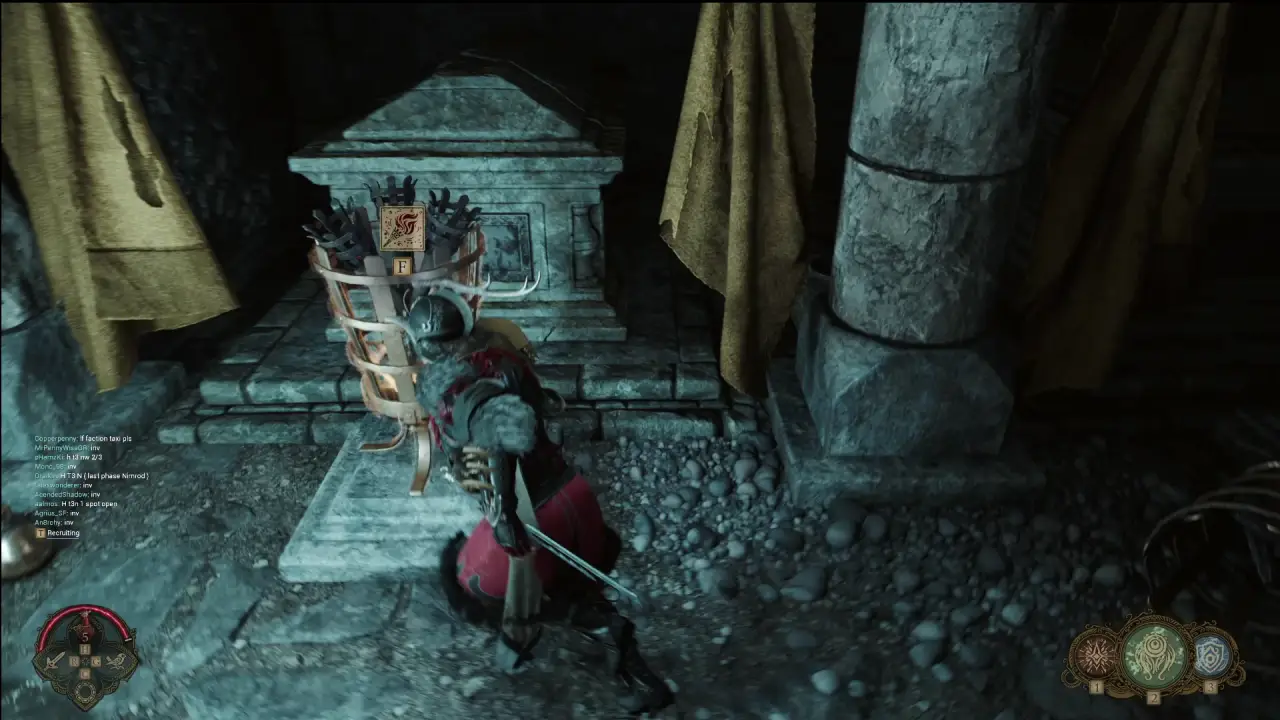
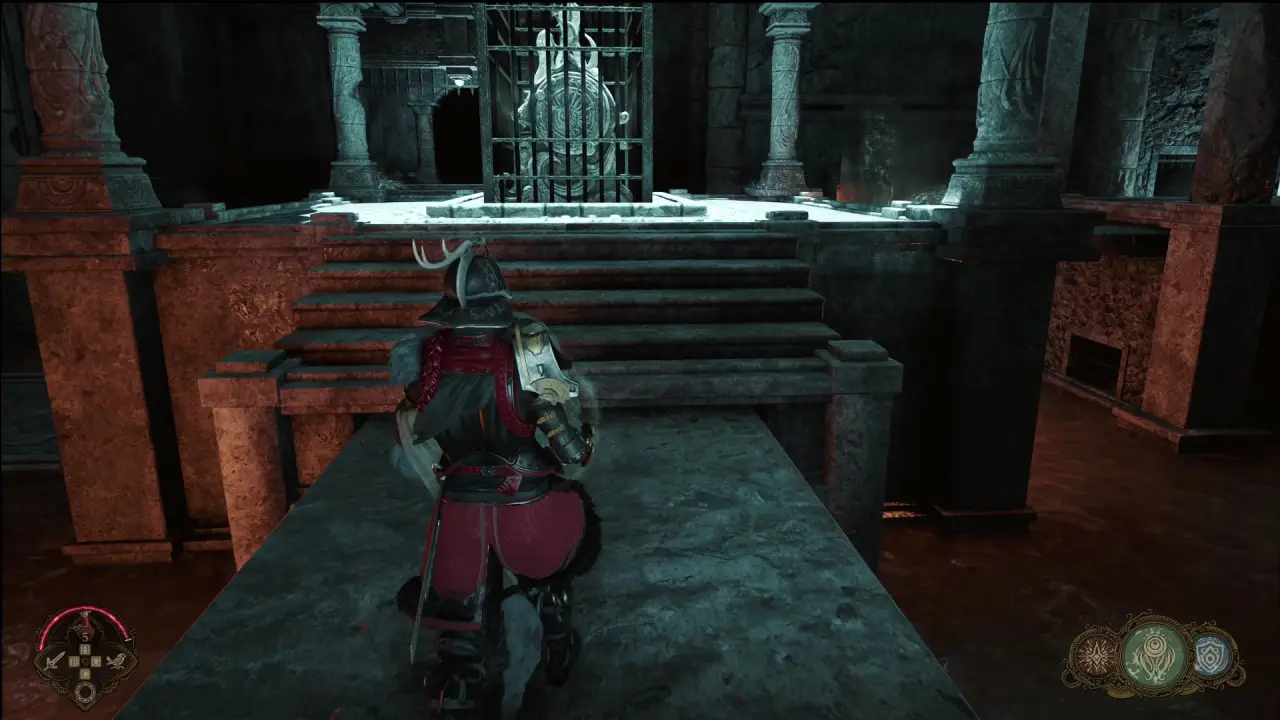
Please note that the braziers and mosaics above can be activated in a different order from what is written above. Once all three mosaics are revealed, return to the caged coffin in the middle of the room. The cage will be moved away, allowing you to open the coffin. Do this, and a small cutscene will play out, after which you will receive the full Circade armour set. Unlike most armour sets in Soulframe, you do not need to craft them. You can go straight to your armoury in Nightfold and equip them from there.
You have now uncovered everything in the Circade, but you can keep farming it for resources like Gossamer Quartz if you like.
Is It Worth Farming the Crypt in Soulframe?
While completing the puzzles mentioned above gives you some nice one-time rewards, is the Crypt of the Circade useful as a farming spot?
In my experience, it is only useful if you are looking for a couple of specific crafting materials – Gossamer Quartz and Sappheline. These are both rare materials that can also drop from bosses and from rare treasure chests (the chests with a flower painted on them).
But each sarcophagus you loot in the Crypt is guaranteed to contain one of these items. If you are short on one or both of these items, then the Crypt is a good way to get some more, and earn some Dracs and item fragments in the process.
The downside to this farm is its inconsistency. Each run through the Crypt has a partially randomised layout. Sometimes the Crypt contains several sarcophagi to loot, but sometimes it only contains one (a couple of times I even had a Crypt with none at all). This inconsistency means that I only advise farming the Crypt if you are looking for something that drops there with very high frequency, like Gossamer Quartz or Sappheline. For more general fragment, material and XP farming, it is much more efficient to grind Faction Tales and loot everything along the way.
I hope you liked this guide about the Crypt of the Circade in Soulframe.
More Soulframe Guides:
How to Find the Blacksmith and Craft Items in Soulframe
Welcome to our Soulframe Crafting Guide. On this page, we will explain how crafting works in Soulframe, including how to recruit Tuvalkane the Blacksmith to [...]
How to Heal in Soulframe
In this quick guide, we will explain how you can heal your character in Soulframe. This is a problem that beginners can run into in [...]
How to Unlock New Pacts (Classes) in Soulframe
One of the first questions on the lips of many new Soulframe players is "Can I unlock more Pacts, or am I stuck with the [...]

Find a Relic of Old ‘fore the Ode – Soulframe Quest Guide
Soulframe has a few quest objectives that are written in a rather cryptic or archaic manner, something that can be a little confusing for new [...]
Soulframe Crypt of the Circade Guide – All Puzzles Solved
Welcome to our Soulframe Crypt of the Circade Guide. In this guide, we will explain what the Crypt is in Soulframe, where you can find [...]

What Are Spectre Strikes in Soulframe?
Spectre Strikes are a special attack that you can use in Soulframe to deal extra damage to enemies. Many newer players see Spectre Strikes mentioned [...]