

Welcome to the Lair of Maarselok Veteran Guide for ESO. The Lair of Maarselok Dungeon is located in the east of the Grathwood zone, the dungeon is part of the Scalebreaker DLC. In the Lair of Maarselok Dungeon you will encounter a total of five bosses and a few trashpacks. The first two bosses are faily easy and then it becomes more and more difficult and sometimes also a bit confusing. But don’t worry, I will guide you through the bossfights!
Story: Neighboring Elsweyr, Grahtwood’s Elden Root tree is threatened by a deathly corruption that originates from the nearby jungles of Tenmar and the Lair of Maarselok. Grahtwood’s protectors have tried and failed to destroy the Dragon at the center of the blight, so a truce has been called between the forest spirit Selene and her captor, the warlock Carindon. Together, and with your help, they must attempt to save the Elden Root tree before the corruption can spread.
Rewards & Loot in Lair of Maarselok
Sets in Lair of Maarselok
There is a total of 3 different sets plus a Monster Set that drops in the Lair of Maarselok Dungeon.
Rewards in Lair of Maarselok
- Momento: Corrutpion of Maarselok – Complete the veteran mode of the dungeon.
- Title: Guardian of the Green – Complete the following achievements: Lair of Maarselok Conqueror, Selene’s Savior, These Colors Don’t Run, Weed Eater
- Title: Z’en’s Redeemer – Complete the Hardmode from the Lair of Maarselok Dungeon.
Rewards from both Dungeons
- Outfit Style: Dread-Aurelian Mask – Acquired by entering one of the two dungeons of Scalebreaker DLC.
- Outfit Style: Dread-Aurelian Shoulder – Acquired by completing both Scalebreaker dungeons on veteran.
- Furniture: Behold Khunzar-ri’s Guile – Acquired by completing both Scalebreaker dungeons on normal.
Boss Fights – Lair of Maarselok
Now I will be explaining all the bossfights of the Lair of Maarselok Dungeon on veteran including hardmode. In this dungeon you are fighting the last boss several times, or more so his minions actually, but the last boss is basically constantly loosing health because you are beating his minions.
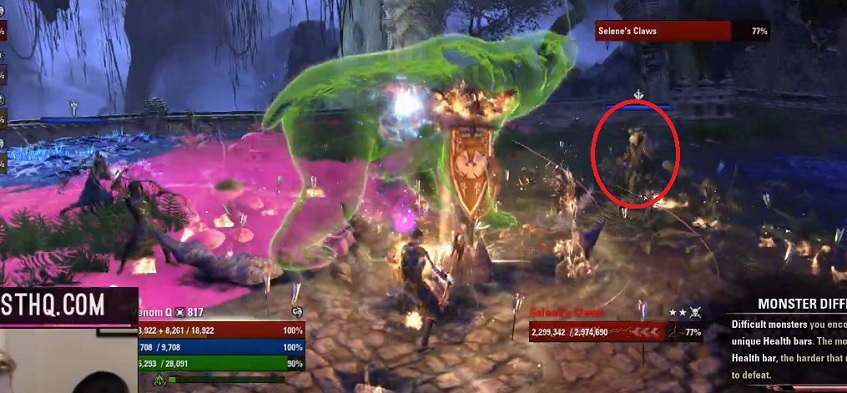
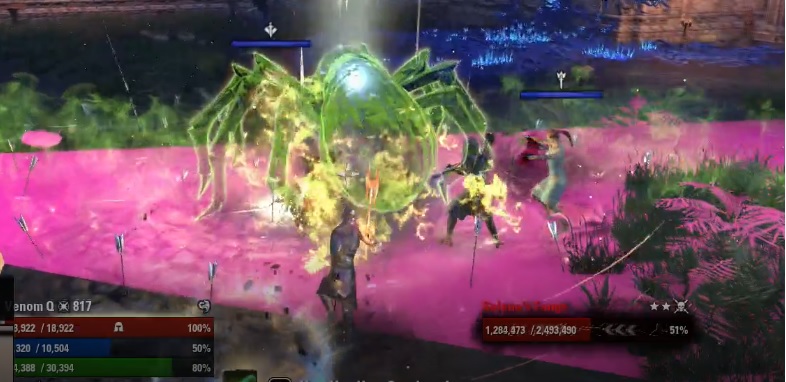
First Boss Selene’s Claws & Fangs – Lair of Maarselok
Boss Health: [HP: 2’974’690 & 2’493’490 Mio]
Selene is summoning a green Bear and after that a green Spider. You have to defeat them to continue your journey through the dungeon. This boss should not cause too much problems, the tank has to make sure to face the bosses away from the group. That way the group can damage the boss from its back and is save from the enemy cleave attacks. There are a few AoEs hitting the ground from time to time but you can easily avoid them by stepping a bit to the side.
Selene will also throw a poison cone towards the group, you can either dodge roll or block/ shield the damage.
Second Boss Azureblight Lurcher – Lair of Maarselok
Boss Health: [HP: 2’460’134 Mio]
This time you are fighting against a Azureblight Lurcher, but technically you are fighting Maarselok himself already. You need to kill the Azureblight Lurcher a few times to drain health from Maarselok. In this bossfight the tank should once again face the boss away from the group. This time there is a lot more AoE fields on the ground that people have to be aware of and avoid if possible. From time to time Maarselok will do a huge line AoE with his fire breath, it is pretty easy to avoid but sometimes can be a bit tricky if there is a lot of other AoE on the ground.
Also make sure to pull in all the adds that spawn and kill them, otherwise they will overrun you at some point.

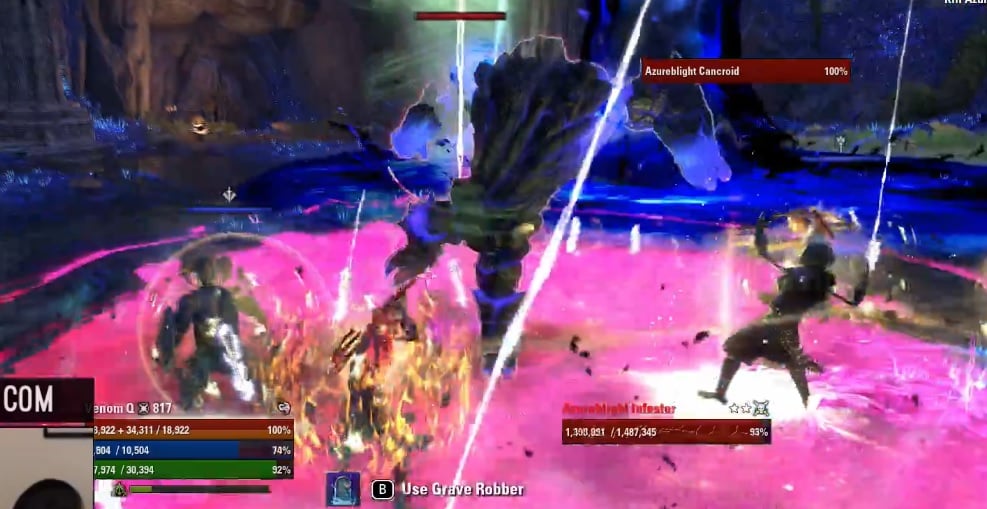
Third Boss Azureblight Cancroid – Lair of Maarselok
Boss Health: [HP: 2’974’690 Mio]
Here it starts to get tricky, the Azureblight Cancroid is a bit harder then the previous boss fights, but once you figured out how it works it should also not be an issue. The mainboss here is the Tree in the middle, he can’t be damaged unless you activate a certain mechanic. So make sure to focus the Lurcher, once the Lurcher is dead you can pick up a synergy and bring it to the tree, once activated the Tree will loose his shield and then can be damaged, make sure to save Ultimates and your burst for this phase, because the lower your dps, the more you have to repeat this.
The Lurcher will do a huge stomp AoE from time to time, you can block the impact hit but it would be better if you do not get hit in the first place. Now the most important thing, after the stomp there is a huge blue glowing circle on the ground that is NOT telegraphed but does a lot of damage to you, you need to make sure to AVOID it, otherwise you will die. The tank has to make sure to bring the Lurcher to the edge of the circle so your damage dealers can stay in save area and damage him once again.
- If your DPS is too low, a lot of Stranglers will spawn and they do really good damage to your group. If that is the case, make sure to kill them before they kill you.
- There is also bugs hitting you from time to time, but they do not that much damage.
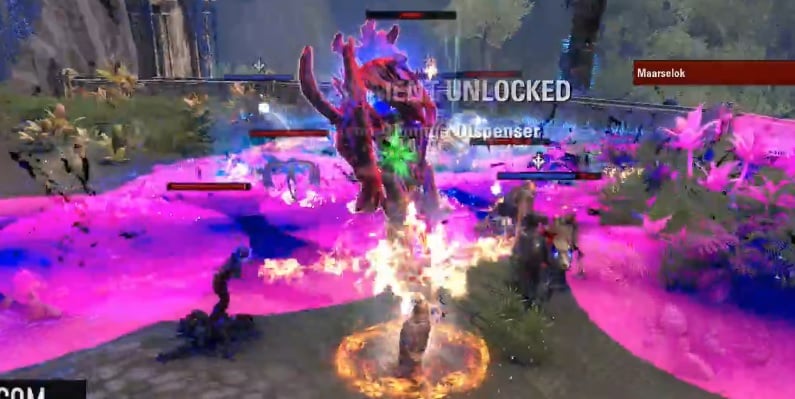
Fourth Boss Maarselok – Lair of Maarselok
Boss Health: [HP: 25’089’756 Mio]
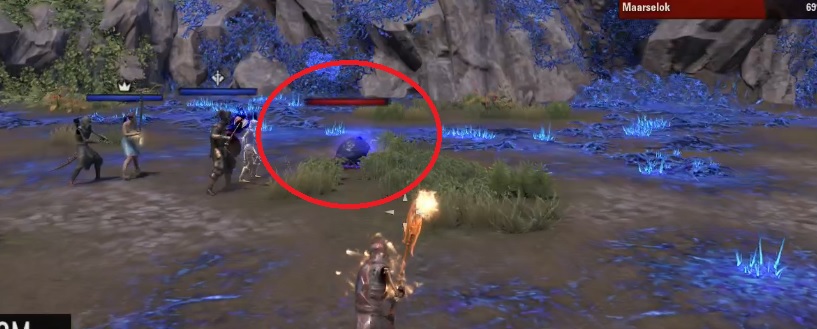
This boss is very tricky and can be quite confusing at the beginning. The main goal here is to protect Selene which is casting green spiders that go up a wall to hit Marselook, once enough spiders crawled up the wall Marselook will come down and you can damage him. Stranglers will spawn throughout the whole fight that need to be focused and killed as fast as possible, if they are not killed they are pulling down the green spiders that walk up the wall.
The next thing is the Azureblight Hoarvor that tries to get to Selene and stun her. Your tank has to make sure to pull away that Hoarvor, if a player goes near the Hoarvor it also explodes instantly. Sometimes there is also a dog that spawns, the tank has to make sure to keep him busy till after the Maarselok damage phase, that is when you want to kill him.
There are also a lot of exploisons on the ground that you need to avoid and from time to time Maarselok will target someone and cast a shout at him, you can block that.

Final Boss – Maarselok & Selene
Boss Health: [HP: 25’089’756 Mio]
Because you already fought the boss several times, Maarselok will have 12’544’878 health left when you start this fight, which is about 50% of his total health.
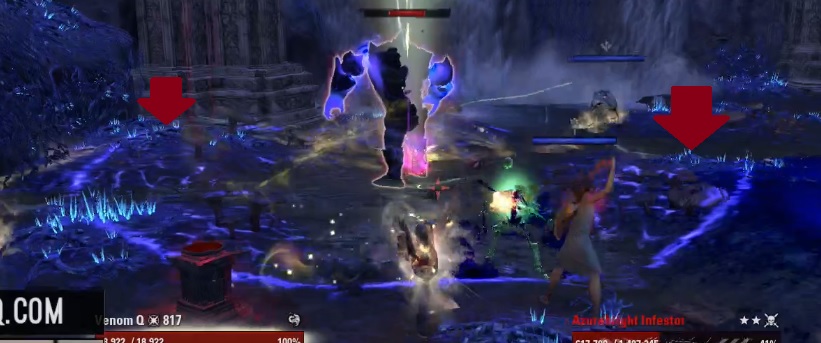
There is quite a few mechanics here that need to be taken care of. First off, the boss is flying from one side to the other, everything in its path will die. Make sure to stand towards the edge of the arena or dodge roll enough to avoid damage. There are also AoE fields that you have to avoid or block the initial hit, plus the boss will do a sweeping fire breath from time to time that you have to dodge roll in the right moment to not take any damage. The boss will also do a knockback shout, wing slap and head knock attack that you need to avoid, which is not that hard to do.
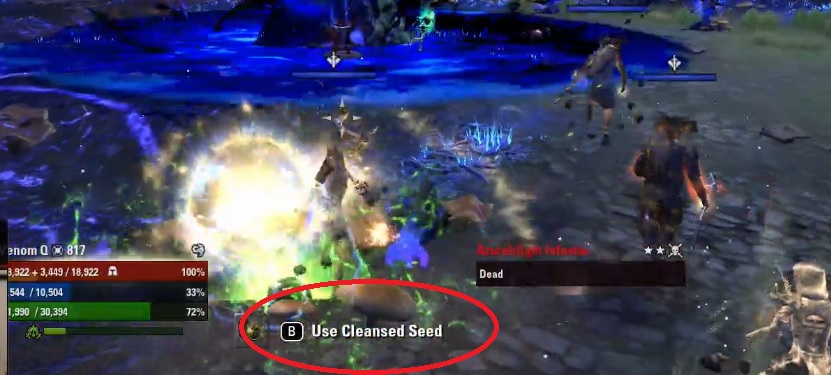
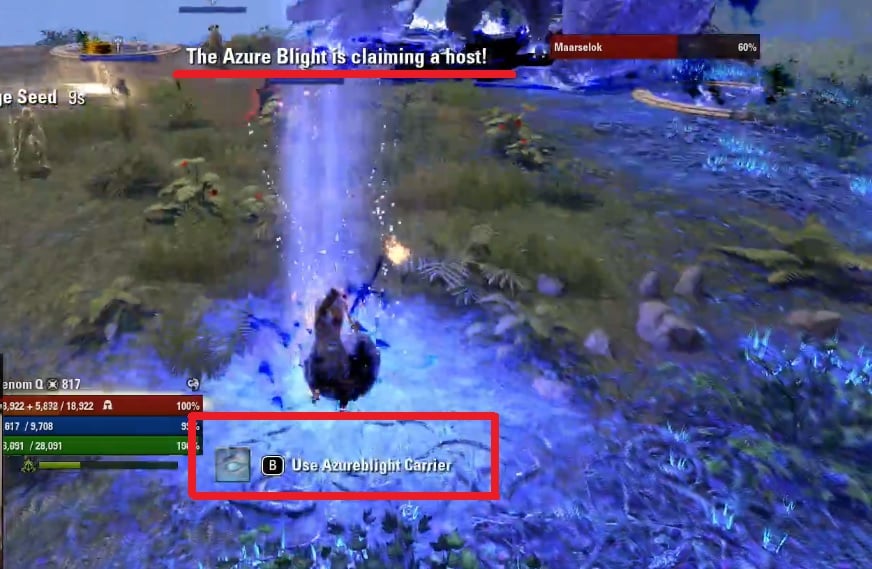
The boss will also place the Azureblight Seed on you, once you get this blue glowing debuff on you, you need to go to one of the green glowing platforms and cleanse it via the synergize button.
Final Boss Hardmode Lair of Maarselok
Boss Health: [HP: 25’089’756 Mio]
Once you activate hardmode, the health of Maarselok will jump back up to 17’562’829 health, which is about 69% of is full health.
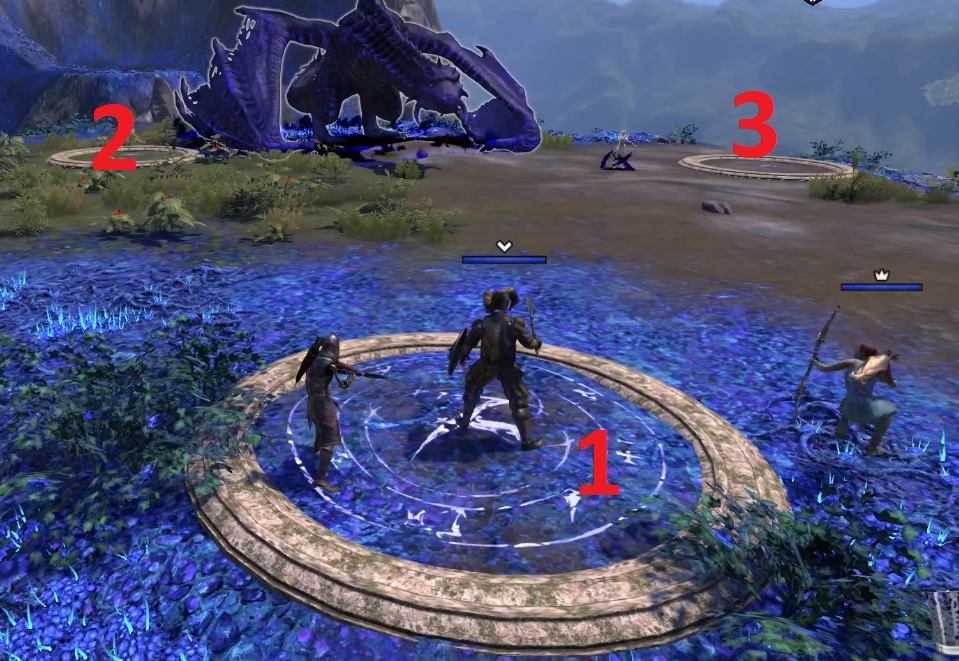
The main difference in the hardmode is, with the Azureblight seed like you can see in the image, the two damage dealers and the healer have to synergize the seed and one of the tree platforms will glow up. Three player will see the same platform and one player will see a “fake” platform. The player with the fake platform then has to go to the platform that was shown to the other 3 players. If you pick the fake platform you will die.
So if all 3 players (2 Damage Dealers and Healer) see platform 3, that means the tank got the fake one and needs to go to platform 3 too. If the two Damage Dealers see platform 2 and the healer sees platform 1, that means that the platform 1 is fake and the healer needs to go to the platform 2 to cleanse.
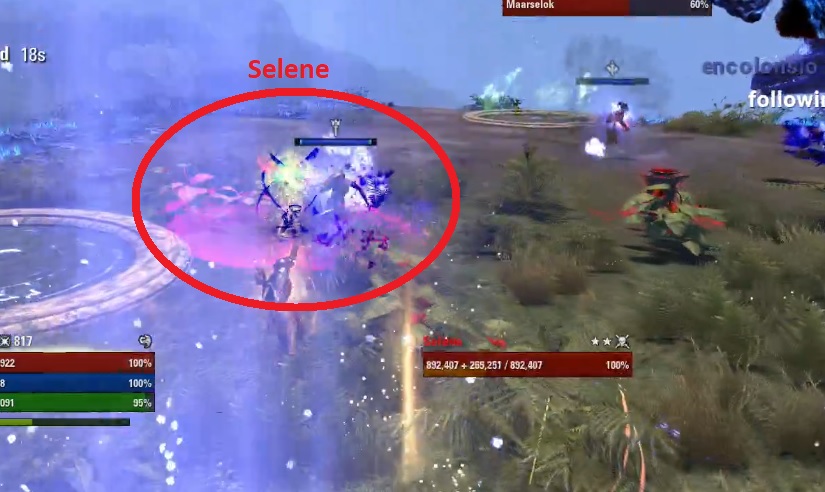
Before you go cleanse you need to stun Selene. If you fail to do that before you cleanse, you will die. Selene has a decent sized shield around her, once you stunned her you are save to cleanse the seed. Selene will also shoot green bubbles to the group, you can interrupt this to stop it. Also more adds will spawn compared to the non hardmode fight.
Selene will once again do her poison cone like in the first boss encounter, make sure to dodge roll or block it. There is also plenty of adds that spawn, the tank should pull them together so you can AoE them down pretty fast. Selene is also very hard to spot so make sure you always know where she is to interrupt and when the seed mechanic happens.
Full Veteran & Hardmode Run
Timestamps for bosses:
- First Boss – Selene’s Claws, Selene’s Fangs
- Second Boss – Azureblight Lurcher
- Third Boss – Azureblight Cancroid
- Fourth Boss – Maarselok
- Final Boss & Hardmode – Maarselok