

Welcome to the ESO Fang Lair Guide. The powerful necromancer Orryn the Black has discovered the long-abandoned Dwarven ruins of Fang Lair. The cunning mage seeks neither treasure nor fame, but an ancient legacy lost for centuries. Deep within the halls of the ancient city lay the bones of the great dragon Thurvokun, who claimed the site as his own millennia ago. Should Orryn’s nefarious plan succeed, he will gain control of a powerful and dangerous creature: a reanimated undead dragon!
You can find several Bosses in the Fang Lair Dungeon, I will explain all of them:
- Lizabet Charnis (Necromancer)
- Cadaverous Bear (Skeletal Bear)
- Caluurion (Lich)
- Ulfnor (Skeleton)
- Thurvokun (Skeletal Dragon) & Orryn the Black (Necromancer)
Table of Contents
- Trash Monsters
- First Boss – Lizabet Charnis (Necromancer)
- Second Boss – Cadaverous Bear (Skeletal Bear)
- Third Boss – Caluurion (Lich)
- Fourth Boss – Ulfnor (Skeleton)
- Final Boss – Thurvokun (Skeletal Dragon) & Orryn the Black (Necromancer)
- Gameplay
Trash Monsters – Fang Lair Guide
There are a few trash monsters in the Fang Lair dungeon, but really only the Bone Colossus is dangerous.
Bone Colossus
There is really only one dangerous trash mob in this dungeon, the Bone Colossus. The tank has to make sure to taunt it as soon as possible. The Colossus usually does his heavy attack at the start when you enter the actual fight, try to dodgeroll the attack, because even when you block it takes about half of your HP away on the tank. If you get hit by this as a healer or damage dealer you will get oneshot, no matter what.
First Boss – Lizabet Charnis (Necromancer)
Lizabeth Charnis is the first boss in the Fang Lair Dungeon. Here you do not really fight the boss itself but more so the trash that she will spawn. There will be a few waves of mobs that you need to kill, nothing special. Make sure that the tank taunts the small Colossus that spawn, they can hit quite hard and the group also should be careful of the ice AoEs that the Ghosts will shoot around. You will also see Skulls that randomly fly into one direction, make sure to avoid them, otherwise you will get a lot of damage and be knocked down.
Second Boss – Cadaverous Bear (Skeletal Bear)
Cadaverous Bear is the second Boss in the Fang Lair Dungeon. There is the Cadaverous Bear (Main Boss), Tiger and Guar (Two Mini Bosses) and 3 small Wolves (Small adds that explode). The Wolves are running after random players and explode when they are close enough doing a lot of damage. The Wolves & Tiger can not be taunted, so a player who has aggro shouldn’t panic and stay close to the group.
After 30s both mini bosses start their special mechanic Tiger jumps on someone and eats (must be interrupted or just killed in 30s before he does this mechanic) and the Guar spits poison around him (nothing dangerous) After you “kill” a mini boss they will respawn after some time. There can be “flowers” in this room that explode when you are close to them and put a huge DoT on you.

Third Boss – Caluurion (Lich)
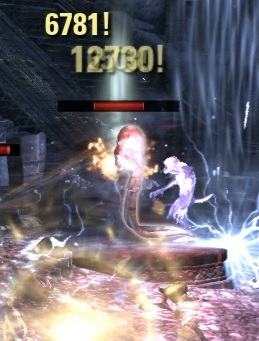
Caluurion is the third boss in the Fang Lair Dungeon, the boss will always stay in the middle of the room (unless you walk out of his range while you taunted him), so the tank basically has to stand next to him. Players need to make sure to avoid his AoE attacks, which should not be too hard as most of his attacks have a delay attached to it before explosion.
After a while Caluurion will activate one of his relics that are located more towards the outside of the area. Depending on which totem gets activated, you will either get Poison AoE fields, Shockfields or add spawns. Make sure not to overlap in this part of the fight, especially when you have the shock AoE fields, because their damage stacks. Kill the totem as soon as possible to remove the effect. If the relic is not being killed, the boss will become damage immune after a while. Other than that there is nothing really too dangerous on this bossight.
Fourth Boss – Ulfnor (Skeleton)
Ulfnor is the fourth boss of the Fang Lair Dungeon. There will be a lot of fire damage on this bossfight, so be careful if you are a vampire. The tank has to be careful, his heavy attack hits for quite a lot. Most of his attacks are avoidable, he spawns small fire AoEs on the ground and they will launch into a straight line towards the outside of the arena. He will also shoot 3 fire AoEs sometimes that bounce off the wall and apply a fire DoT on players that got hit, you can purge this.
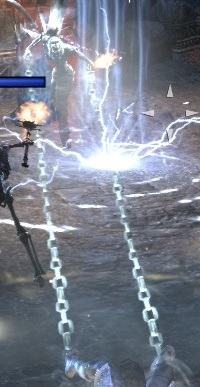
Sometimes the Ghost over ulfnor will disappear into the ground and show up somewhere close to the edge of the area and pull a player to him with chains. Make sure to call out when you are affected by this, the player that is being chained can not do anything till the chains break. You can damage the ghost, once he reaches zero health the chains will break. If you are too slow doing this then Ulfnor will slowly get to the player and basically impale him, which will result in instant death. While the chain is active on one player, he can not take any damage, so you are save from fire AoEs and other stuff roaming around.
Other than that there are not really more mechanics to the fight, most important is just that you break the chain as soon as possible.
Last Boss – Thurvokun (Skeletal Dragon) & Orryn the Black (Necromancer)
Thurvokun is the final boss of the Fang Lair Dungeon. Non-Hardmode is fairly easy compared to Hardmode. You will only be fighting the skeletal Dragon, the Necromancer will interact in the fight but he can not be damaged. Make sure to have someone with an interrupt ability because the Necromancer will sometimes channel an attack that shoots skulls at players that deal a lot of damage, but it can be interrupted.
The skeletal Dragon will also spawn Shalks that snare you if you stay too close to them, so make sure to keep distance. They can be rooted and die fairly fast because they have low HP. Also make sure to be careful fo the growing poison pool that Thurvokun spawns, if you stand in it you will almost immediately die.
At 85%, 75%, 65% and 55% the Necromancer will activate one of the crystals on the edge of the area. Once activated you have to make sure to kill the crystal as soon as possible, if the crystal is not being killed, adds will keep spawning. Once all four crystals are destroyed the next phase will begin.
The Necromancer will teleport to one of the sides of the area and summon ghosts. The ghosts can not be damaged and will oneshot you if you touch them. A friendly yellowish glowing NPC will come to your aid and spawn a barrier to protect you from the ghosts, make sure to stand behind that barrier when the ghosts pass through. This will be repeated till Thurvokun reaches almost 0% HP.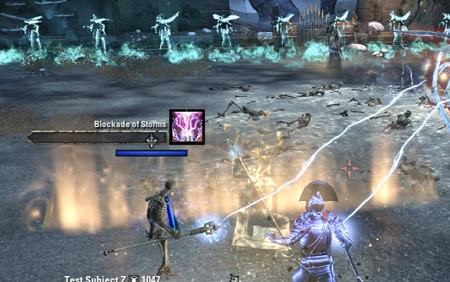
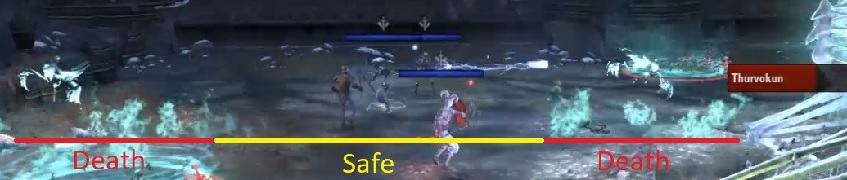
Now you will notice, the boss is not deadish. The next phase begins, the Necromancer will heal Thurvokun up to about half health and now it will get tricky. Ghosts will randomly spawn on one side, not the full line will be covered anymore, now you can find gaps in the ghostwall but there will be no friendly NPC that will spawn a barrier. They will keep spawning during this phase, it is your number one priority to look out for the Ghosts and find gaps in the ghostwall to walk through, if you get hit by a ghost you will instantly die.
The last mechanic you need to look out for, at some point Thurvokun will walk towards one of the walls and scream, then he will walk up the wall. You have to make sure to break free from the fear. After that yellow circles will spawn in the area, each player has to get one of them. After a while Thurvokun will spit a poison ball to each of the players, if you did manage to cleanse yourself on one of the yellow circles you will receive zero damage. If not, instant death.
As you can see there is a lot of mechanics that you need to get used to, the ghosts being the most dangerous one, especially in the execute phase.
Boss Mechanics:
- Necromancer Channel Attack
- The Necromancer teleports into the battlefield and starts channeling an attack that shoots skulls at players, you can interrupt him.
- Shalk
- The Skeletal Dragon will raise his head and then spit on the ground, spawning one shalk that does snare if you stay too close to it. The snare is very strong. You can root the shalk.
- Poison Field
- Thurvokun will drop a small Poison AoE on the ground that will grow over time. The damage is very high so make sure to avoid this Poison AoE.
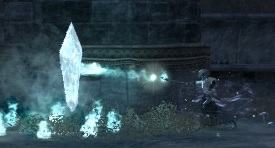
- Crystals
- At 85%, 75%, 65% and 55% the Necromancer will activate one of the crystals on the edge of the area. Once activated you have to make sure to kill the crystal as soon as possible, if the crystal is not being killed, adds will keep spawning.
- Adds that spawn from the crystal
- Most adds are not really doing a lot of damage. However, the main issue with those adds is that they are rooting you all the time. So it might be hard to keep up your stamina, which can be a problem when you get rooted right next to the growing poison pool.
- Ghost waves pre-execute phase
- The Necromancer will teleport to one of the sides of the area and summon ghosts. The ghosts can not be damaged and will oneshot you if you touch them. A friendly yellowish glowing NPC will come to your aid and spawn a barrier to protect you from the ghosts, make sure to stand behind that barrier when the ghosts pass through. This will be repeated till Thurvokun reaches almost 0% HP.
- Thurvokun Poison Bomb
- Thurvokun will walk towards one of the walls and scream, then he will walk up the wall. You have to make sure to break free from the fear. After that yellow circles will spawn in the area, each player has to get one of them. After a while Thurvokun will spit a poison ball to each of the players, if you did manage to cleanse yourself on one of the yellow circles you will receive zero damage. If not, instant death.
Last Boss – Thurvokun Hardmode
Now the real fun begins. Thurvokun Hardmode fight is a lot more difficult than non-hardmode. The fight is similar, but you will get additional adds. Now every time the Necromancer uses a crystal, you will aditionally get a Colossus that spawns instantly, if the crystal is not killed fast enough, a second one will spawn and so on. And they are very dangerous as their charge attack will oneshot everyone except a blocking tank, so I highly recommend focusing this mob along with the crystal. In the execute phase you will also get Colossus every time you drop him to a certain HP %.
Ghosts will randomly spawn on one side, not the full line will be covered anymore, now you can find gaps in the ghostwall but there will be no friendly NPC that will spawn a barrier. It is prolly the number one reason why you will wipe on this phase, always make sure to have someone that calls out that new ghosts spawn so people can instantly find holes in the ghostwall and walk towards it. I recommend walking towards the ghosts so you can pass through as soon as possible, this is also safer because sometimes you get rooted or have to dodgeroll and so on and if you are already though then one less thing to worry about for the next 10 seconds.
Boss Mechanics:
- Necromancer Channel Attack
- The Necromancer teleports into the battlefield and starts channeling an attack that shoots skulls at players, you can interrupt him.
- Shalks
- The Skeletal Dragon will raise his head and then spit on the ground, spawning two shalks that do snare if you stay too close to them. The snare is very strong. You can root the shalks.
- Poison Field
- Thurvokun will drop a small Poison AoE on the ground that will grow over time. The damage is very high so make sure to avoid this Poison AoE.
- Crystals
- At 85%, 75%, 65% and 55% the Necromancer will activate one of the crystals on the edge of the area. Once activated you have to make sure to kill the crystal as soon as possible, if the crystal is not being killed, adds will keep spawning.
- Adds that spawn from the crystal
- Most adds are not really doing a lot of damage. However, the main issue with those adds is that they are rooting you all the time. So it might be hard to keep up your stamina, which can be a problem when you get rooted right next to the growing poison pool.
- Ghost waves pre-execute phase
- The Necromancer will teleport to one of the sides of the area and summon ghosts. The ghosts can not be damaged and will oneshot you if you touch them. A friendly yellowish glowing NPC will come to your aid and spawn a barrier to protect you from the ghosts, make sure to stand behind that barrier when the ghosts pass through. This will be repeated till Thurvokun reaches almost 0% HP.
- Ghost waves execute phase
- The Necromancer will heal Thurvokun up to about half health and now it will get tricky. Ghosts will randomly spawn on one side, not the full line will be covered anymore, now you can find gaps in the ghostwall but there will be no friendly NPC that will spawn a barrier. They will keep spawning during this phase, it is your number one priority to look out for the Ghosts and find gaps in the ghostwall to walk through, if you get hit by a ghost you will instantly die.
- Thurvokun Poison Bomb
- Thurvokun will walk towards one of the walls and scream, then he will walk up the wall. You have to make sure to break free from the fear. After that yellow circles will spawn in the area, each player has to get one of them. After a while Thurvokun will spit a poison ball to each of the players, if you did manage to cleanse yourself on one of the yellow circles you will receive zero damage. If not, instant death.
- Colossus pre-execute phase
- Now every time the Necromancer uses a crystal, you will aditionally get a Colossus that spawns, if the crystal is not killed fast enough, a second one will spawn and so on.
- They are very dangerous as their charge attack will oneshot everyone except a blocking tank, so I highly recommend focusing this mob along with the crystal.
- Colossus execute phase
- Once Thurvokun has healed back up, in addition to all other mechanics that are present in the non-Hardmode, you will also get a Colossus spawn at 40%, 30%, 20% and 10%.
Gameplay
Fang Lair Dungeon Veteran No Death Run
Fang Lair Starved Scarabs Fang Lair Achievement
Fang Lair Nonplussed Achievement
Fang Lair Minimal Animosity Achievement
Fang Lair Horrific Halitosis Achievement