


Welcome to the Best BG3 Lae’zel Build. In this guide, we will explain how to create a powerful build for Lae’zel in Baldur’s Gate 3, suitable for all difficulties. We’re going to use the Champion subclass of the Fighter for this build, due to its especially high damage potential. This build works great regardless of whether you have Lae’zel as your origin character or a recruitable companion, and it works for both PC and Console (PS5 and Xbox Series X/S).
Please visit our Best BG3 Builds overview page for more builds, or check out our Best BG3 Fighter Build with the Battle Master subclass. If you are interested in builds for the other members of your party, check our BG3 Origin & Companion Builds category page. To get an overview of all classes, please visit the BG3 Classes overview page.
Table of Contents for the BG3 Lae’zel Build:
- Introduction to the Lae’zel Build
- Lae’zel Build Character Creation
- Lae’zel Build Levelling Progression
- Endgame Respec
- Lae’zel Best Equipment
- Lae’zel Build Extra Info
BG3 Lae’zel Build Overview
Before we get started with our BG3 Lae’zel Build, we will have a quick look at the Fighter Class and the Champion subclass, which we will be using for this build. We’ll also explain how to recruit Lae’zel and how to respec her (which is strongly recommended because her starting Ability Distribution has some issues). If you are already familiar with this info, please skip this section.
Fighter Class Summary
Here is a quick summary of the most important aspects of the Fighter class.
 Second Wind (Level 1) – Spend a Bonus Action to heal yourself for (1d10 + Fighter Level). Recharges on all Short and Long Rests.
- Action Surge (Level 2) – Gain an extra Action on your current turn. Recharges on all Short and Long Rests.
- Extra Attack (Level 5) – Your Actions now yield two weapon attacks, rather than one.
- Indomitable (Level 9) – When you fail a Saving Throw, you can roll again and use the new result instead. Once per Long Rest.
- Improved Extra Attack (Level 11) – Your Actions now yield three weapon attacks.
These Actions and Passive Features allow the Fighter to make more weapon attacks than any other class in the game, making them an excellent damage dealer, especially when wielding a heavy-hitting melee weapon.
Champion Subclass Summary
The Champion is one of the simplest (but by no means weakest) subclasses in the game, and you unlock its most important feature right away at Level 3.
- Improved Critical Hit (Level 3) – Reduces the number required to roll a Critical Hit by 1. This can stack with similar effects.
- Remarkable Athlete: Jump (Level 7) – Increases your Jump distance by 3m.
- Remarkable Athlete: Proficiency (Level 7) – Adds half of your Proficiency Bonus to Strength, Dexterity and Constitution checks that you aren’t already Proficient with.
- Extra Fighting Style (Level 10) – The Champion can choose an extra Fighting Style.
How to Recruit Lae’zel in BG3
If you’re a first-time player, this section contains mild spoilers.
You will first encounter Lae’zel during the prologue when escaping from the Nautiloid. However, you’ll be separated from her at the end of this segment.
You can find Lae’zel again quite quickly after spawning on the beach in Act I. Go through or around the crashed Nautiloid and head north towards the Druid Grove. You will find Lae’zel in a cage being watched by two Tieflings, directly west of the Refectory Ruins. When you get close enough, she will link with you telepathically via the Mind Flayer Tadpoles, demanding that you get rid of the Tieflings and set her free. You can either convince the Tieflings to leave or kill them and then set Lae’zel free by using a ranged attack on the bottom of the cage. She will then engage you in conversation, and you can then recruit her to your party or to your camp.
You can also set Lae’zel free without speaking to the Tieflings by attacking the bottom of the cage, but this will cause them to become hostile to you and Lae’zel, and a battle will ensue.
Also note that the Tieflings can become hostile if you let Lae’zel out, even if you persuaded them to go away. To avoid this, wait a few seconds until they have moved out of line of sight before opening the cage.
How (and Why) to Respec Lae’Zel in BG3
To follow this build guide precisely, you will need to respec Lae’zel. This is because her starting Ability Distribution is not optimal and makes her slightly weaker. It is up to you when you do this, but I recommend getting it done by the time you reach Level 4. Here is a quick tutorial in case you don’t know how to respec Lae’zel in BG3:
- Recruit a full party, then head to the Refectory Ruins, roughly north of where you washed up on the beach. Enter the ruins either by brute force, stealth or persuading the bandits outside.
- Fight your way through and find the Skull Lever to open the secret door to gain access to the Dank Crypt. If you can’t find the Skull Lever, you can instead go back outside and head to the side-entrance mentioned above. You’ll need to Lockpick your way through if you go this way.
- Once inside the Dank Crypt, head to the room with the skeletons and open a second secret door. This will cause several skeletons to attack you.
- Defeat the skeletons and head into the small room you opened. Interact with the big coffin and you will meet a friendly but mysterious skeleton called Withers.
- After you leave the Dank Crypt, Withers will join your camp.
- Once he is in your camp, speak to him as Lae’zel and ask him to change your class. This costs 100 gold.
- This will reset Lae’zel’s stats, allowing you to change anything except her Background and appearance. Choose the Fighter class, then proceed with the per-level guidelines later in the guide.
If you don’t find Withers in the Ruins, he will eventually show up at your camp anyway. But this is the quickest way to recruit him.
Lae’zel Build Character Creation (Level 1) for BG3
In this section, we will go over the ideal starting point at level 1 for this BG3 Lae’zel build. This is important as it effectively serves as the foundation for the rest of the build. If you start with Lae’zel as your origin character, you’ll easily be able to replicate the suggested setup at the start of the game.
If you instead recruit Lae’zel as a companion, she’ll start with slightly different abilities that are suboptimal. We strongly recommend visiting Withers in your camp with Lae’zel selected to respec her level 1 attributes to those mentioned below. See the above section about the Respec for more information.

Race
Lae’zel is a Githyanki. While probably not the absolute best race in BG3 for a melee fighter, Githyanki is still one of the better options, which is handy since it is not possible to change Lae’zel’s race without using a mod.
The most useful thing about the Githyanki race is arguably not any passive features they have, but their ability to get the full benefits from various Githyanki equipment found in the world, typically looted from other Gith characters. An example of such an item is the Soulbreaker Greatsword, which deals extra ![]() Psychic Damage on every strike when wielded by a Githyanki.
Psychic Damage on every strike when wielded by a Githyanki.
Gith also receive the following benefits at all times:
- Astral Knowledge
- Gain Proficiency with all Skills belonging to a selected ability, once per Long Rest.
- Githyanki Psionics
- Mage Hand (Level 1) – Conjure a magical hand that can grab objects from afar.
- Enhance Leap (Level 3) – Greatly increases your jumping distance, allowing you to outmanoeuvre your enemies and reach unreachable heights.
- Misty Step (Level 5) – Teleport to a visible location within 18 metres.
Background and Skills
Lae’zel is locked into the Soldier Background, which gives her Proficiency in the following Skills:
- Athletics (STR) – Makes Lae’zel better at shoving enemies with the Push Action, and also helps her to resist being shoved by enemies.
- Intimidation (CHA) – Helps Lae’zel to cow some characters into doing what she wants in certain dialogue options. This won’t really do anything if you tend to use another character for dialogue, though.
Besides these two Skills sourced from Lae’zel’s Soldier Background, you can also select two other Skills to be Proficient with. Most of these are Wisdom or Intelligence Skills, which this build is not specialising in very much so they aren’t great fits. But these are the options we have, so it’s better than nothing. I prefer ![]() Perception and
Perception and ![]() Survival, which will both help you to spot more hidden details in the world. But you can pick other options if you prefer (
Survival, which will both help you to spot more hidden details in the world. But you can pick other options if you prefer (![]() Acrobatics isn’t required because it mostly does the same thing as
Acrobatics isn’t required because it mostly does the same thing as ![]() Athletics, which we already have).
Athletics, which we already have).

Abilities
As a front-line fighter, Lae’zel needs to be strong and durable, so we want to have our Strength and Constitution as high as possible at Level 1.
These are the only two skills that are vital for this build. In many of our other builds, we recommend putting a few points in Dexterity for your Armour Class. This is less of an issue here because Heavy Armour gains no AC bonus from your Dexterity Modifier. However, we still put some points into Dexterity because it also increases your Initiative, meaning that Lae’zel is more likely to move before enemies on each turn, as well as giving a bonus to Dexterity-based Skills and some Saving Throws. You could put these points into another Skill like Wisdom, though, and it wouldn’t be too much of a big deal.
Distribute your Ability points to look like this:
- Strength – 16
- Dexterity – 14
- Constitution – 16
- Intelligence -8
- Wisdom – 10
- Charisma – 10
Bold Abilities are essential for the build, while the others can be safely tweaked if you want.
Fighting Style
For this build, we’re going to concentrate on Great Weapons, so we recommend choosing the Fighting Style that matches that. ![]() Great Weapon Fighting will automatically reroll a damage die that rolls a 1 or a 2 (once per attack), which helps to ensure we don’t deal terrible damage on any of our weapon attacks.
Great Weapon Fighting will automatically reroll a damage die that rolls a 1 or a 2 (once per attack), which helps to ensure we don’t deal terrible damage on any of our weapon attacks.
Levelling Guide for the BG3 Lae’zel Build
In this section, we will walk you through every level up for Lae’zel in BG3. The Champion subclass is very linear, so there aren’t many choices to make as you level up, making this section simpler than in many of our other builds.
Level 2
At Level 2, Lae’zel unlocks ![]() Action Surge. This allows you to gain an extra
Action Surge. This allows you to gain an extra ![]() Action on the same turn, so you can make an additional attack. This is particularly useful for finishing off an enemy before they have a chance to take their turn. Action Surge can only be used once per Short Rest.
Action on the same turn, so you can make an additional attack. This is particularly useful for finishing off an enemy before they have a chance to take their turn. Action Surge can only be used once per Short Rest.
Action Surge is a huge deal at this level because most other enemies won’t be able to activate a second action. Ensure you have this ready to go before the start of a tough fight. This can turn the fight in your favour when you can destroy a dangerous enemy quickly.
Level 3
At Level 3, it’s time to select Lae’zel’s subclass. For this build, we are using the Champion subclass.
The Champion immediately gains ![]() Improved Critical Hit, reducing the Attack Roll required for a Crit by 1. At this stage of the game, this reduces it from 20 to 19, effectively doubling your crit chance.
Improved Critical Hit, reducing the Attack Roll required for a Crit by 1. At this stage of the game, this reduces it from 20 to 19, effectively doubling your crit chance.
Level 4
At Level 4, you need to choose a Feat for Lae’zel.
We recommend choosing Ability Improvement and increasing your Strength to 18. This will improve your Attack Rolls and damage output with melee weapons, helping to boost your overall damage. It also boosts some less important things, such as your Jump Distance, Carrying Capacity and the maximum weight for the Throw and Shove actions.
Level 5
At Level 5, Lae’zel will gain an ![]() Extra Attack. This means that every
Extra Attack. This means that every ![]() Action will now grant you two weapon attacks, instead of the usual one.
Action will now grant you two weapon attacks, instead of the usual one. ![]() Bonus Actions and
Bonus Actions and ![]() Reactions are unaffected by this change.
Reactions are unaffected by this change.
This is very powerful and hugely increases your damage potential per turn.
You can use this in combination with your ![]() Action Surge to make four weapon attacks in a single turn – perfect for when you need a heavy burst of damage.
Action Surge to make four weapon attacks in a single turn – perfect for when you need a heavy burst of damage.
Level 6
Unlike other classes, the Fighter can choose an extra Feat at Level 6.
Take Ability Improvement again, and improve your Strength to 20.
This gives you the best possible Attack Rolls, meaning your attacks will generally hit more often.
Level 7
At Level 7, Lae’zel gains a couple of fairly minor passive features:
- Remarkable Athlete: Jump – Increases your Jump distance by 3m.
- Remarkable Athlete: Proficiency – Adds half of your Proficiency Bonus to Strength, Dexterity and Constitution checks that you aren’t already Proficient with.
Level 8
At Level 8, you can choose another new Feat for Lae’zel in BG3.
Now get the Savage Attacker feat. This is one of the best Feats in the game for melee damage dealers. Whenever you make a melee weapon attack, you will roll the damage die twice and use the highest result. This considerably increases your average damage output.
Level 9
At Level 9, you get the ![]() Indomitable passive. Once per Long Rest, this lets you automatically reroll a Saving Throw that you failed.
Indomitable passive. Once per Long Rest, this lets you automatically reroll a Saving Throw that you failed.
Level 10
At Level 10, the Champion can choose another Fighting Style. Two options are decent here, depending on your preferences:
- If you prefer more ranged damage potential, then choose the Archery style for a +2 bonus to Ranged Attack Rolls.
- If you would prefer better defences, then get the Defence style, which gives you +1 extra Armour Class whenever you are wearing Armour (which is probably all the time)
Level 11
Your Extra Attack from Level 5 is now upgraded to ![]() Improved Extra Attack, which lets Lae’zel make two bonus attacks each turn. Attacking three times per turn is obviously a very powerful effect, and gives the Fighter great damage potential in the latter parts of Baldur’s Gate 3.
Improved Extra Attack, which lets Lae’zel make two bonus attacks each turn. Attacking three times per turn is obviously a very powerful effect, and gives the Fighter great damage potential in the latter parts of Baldur’s Gate 3.
When you use your Action Surge, you can make six attacks on a single turn, and that’s without accounting for Bonus Actions and other buffs such as Haste (we’ll discuss these in the Potions section later in the guide).
Level 12
This is the highest level in Baldur’s Gate 3 – once you reach this point, you have finished levelling up Lae’zel.
At Level 12, you will unlock one final Feat.
We recommend choosing the Great Weapon Master Feat. This lets you make an extra attack as a ![]() Bonus Action after landing a Critical Hit or killing an enemy while wielding a 2-handed weapon in Baldur’s Gate 3. There’s also an option to add +10 damage to your attacks in exchange for a -5 penalty on your Attack Rolls, which can be toggled off. This is good for quickly dispatching enemies with weak defences, but against tougher enemies, you’ll probably want to turn it off.
Bonus Action after landing a Critical Hit or killing an enemy while wielding a 2-handed weapon in Baldur’s Gate 3. There’s also an option to add +10 damage to your attacks in exchange for a -5 penalty on your Attack Rolls, which can be toggled off. This is good for quickly dispatching enemies with weak defences, but against tougher enemies, you’ll probably want to turn it off.
- Great Weapon Master: Bonus Attack: When you land a Critical Hit or kill a target with a melee weapon attack, you can make another melee weapon attack as a bonus action that turn.
- Melee Attack Bonus: -5: You take a -5 penalty to Attack Rolls you make with Heavy melee weapons
- Melee Damage Bonus: +10: You have a +10 bonus to damage rolls you make with Heavy melee weapons.
Endgame Respec For Lae’zel
With this build, it is most optimal to do a second respec at some point in Act III. The reason for this becomes clear in our Late-Game Equipment section below – we are using the Gauntlets of Hill Giant Strength, which sets Lae’zel’s Strength Ability score to 23, with the option of also using the Amulet of Greater Health, which sets her Constitution to 23 if you decide to use this too.
Whether you use one or both of these items, since they set Lae’zel’s Strength and/or Constitution to 23 regardless of what it otherwise would be, this means you can redistribute all of the points you put into these Abilities during the initial Level 1 respec and subsequent level-ups.
Therefore, when you’ve obtained one or both of the items and equipped them on Lae’zel, I recommend doing a second Respec. Do everything the same as before, except you can redistribute the Ability points and Ability Improvement Feats to other Abilities. For example, you could put the points into Dexterity to improve Lae’zel’s Initiative Rolls, into Constitution (if you decide to only use the Gauntlets of Hill Giant Strength) to improve her HP, into Wisdom to improve some of her Skills and Saving Throws, or into Charisma to make her better at persuading and intimidating people..
Important Clarification: Do not do the endgame respec before you have the Hill Giant Strength Gauntlets!

Best Equipment for Lae’zel in BG3
In this section, we will list the best equipment for Lae’zel. We have provided both an early-game and a late-game version of the list, so you can begin using this build early in the game instead of having to wait until Act III.
We have also included information about each item below the tables, such as how to obtain the item and any other notable information.
Don’t worry if your set-up is not exactly the same as one of those outlined below – the build will still work fine if you’re missing some of the items. Also, don’t be afraid to experiment with new items if you find something else that you like.
Early Game Equipment
Early-game equipment is found in either Act I or the earlier parts of Act II.
| Slot | Icon | Item | Effects | Location |
|---|---|---|---|---|
| Head |  |
Grymskull Helm |
|
Looted from Grym in the Adamantine Forge |
| Cloak |  |
Cloak of Protection |
|
Purchased from Quartermaster Talli in Last Light Inn |
| Chest |  |
Adamantine Splint Armour |
|
Must be crafted at the Adamantine Forge. |
| Gloves | Gloves of the Growling Underdog |
|
Looted from Dror Ragzlin’s treasure crates in the Shattered Sanctum. | |
| Boots |  |
Boots of Genial Striding |
|
Purchased from Blurg in the Myconid Colony, in the Underdark |
| Necklace |  |
Amulet of Misty Step |
|
Located in a chest in the Defiled Temple, near the Ogre called Polma. |
| Ring 1 |  |
Ring of Protection |
|
Steal the Sacred Idol in Druid Grove (quest) |
| Ring 2 |  |
Crusher’s Ring |
|
Looted from Crusher in the Goblin Camp. |
| Main Weapon |  |
Blooded Greataxe |
|
Purchased from either Grat the Trader in the Goblin Camp or Roah Moonglow in Shattered Sanctum |
| Second Weapon | Any Ranged Weapon |
|
N/A |
Grymskull Helm
The Grymskull Helm prevents enemies from landing Critical Hits on Lae’zel, which is a very useful defensive bonus. You also have a 50% resistance to Fire damage when wearing it. It is looted from Grym in the Adamantine Forge area of Grymforge.
Cloak of Protection
The Cloak of Protection is one of the earliest cloaks available in the game, and provides a modest defensive buff – you gain a +1 bonus to your Armour Class and Saving Throws when wearing it. It can be purchased from Quartermaster Talli in Last Light Inn.
Adamantine Splint Armour
The Adamantine Splint Armour is a very powerful armour piece that can be obtained fairly early in the game, and will probably last you until well into Act III. It reduces all incoming damage by 2, and sends your melee attackers Reeling for 2 turns, giving them a -1 penalty to Attack Rolls for every turn of Reeling remaining. This armour must be crafted at the Adamantine Forge, by finding the Splint Mould and some Mithral Ore – both can be found in the vicinity of the Adamantine Forge.
Gloves of the Growling Underdog
The Gloves of the Growling Underdog give you Advantage on your Attack Rolls when you are surrounded by 2 or more foes. Advantage means that you will roll 2 dice for your Attack Roll and use the one that rolled with the highest number, considerably improving your chances of a good roll. You also get a +1 bonus to Strength Saving Throws. These gloves can be looted from Dror Ragzlin’s treasure crates in the Shattered Sanctum.
Boots of Genial Striding
The Boots of Genial Striding prevent difficult terrain (such as spikes, mud and grease) from reducing your Movement Speed. However, beware that these boots will not negate any other harmful effects from a surface, such as damage from spikes or the chance to slip over when walking on ice. They can be purchased from Blurg in the Myconid Colony, in the Underdark (Act I).
Amulet of Misty Step
The Amulet of Misty Step grants you access to the Misty Step spell, which allows you to teleport to a visible location within 18 metres, for a Bonus Action. This is great for quickly closing the gap to an enemy so you can get into melee where this build is at its strongest, or for escaping from a bad situation. The Amulet is located in a chest in the Defiled Temple, near the Ogre called Polma.
Important: When Lae’zel reaches Level 5, she will unlock Misty Step due to being Githyanki. At this point, you can give this amulet to one of your other party members and equip something else on Lae’zel.
Crusher’s Ring
Crusher’s Ring simply increases your Movement Speed by 3 metres per turn. This is another useful item for closing the gap to enemies quickly so that you can spend your turns dealing melee damage instead of running between targets. The ring is looted from Crusher in the Goblin Camp.
Ring of Protection
The Ring of Protection has the same effect as the Cloak of Protection – it improves your Armour Class and Saving Throws by +1. It is awarded to you by Mol for completing the quest to steal the Sacred Idol in the Druid’s Grove.
Blooded Greataxe
We recommend the Blooded Greataxe because it is a highly damaging weapon that can be obtained very early in the game. Greataxes in general are excellent DPS weapons since they come with a 1d12 die, the largest damage die in the game for weapons. The Blooded Greataxe grants your melee weapon attacks an extra 1d4 Slashing Damage whenever you are below 50% Health. In the hands of a strong melee class like the Champion, this weapon will carry you well into Act II even if you’re a complete beginner at the game.
This weapon can be purchased from either Grat the Trader in the Goblin Camp or Roah Moonglow in Shattered Sanctum. If the weapon does not appear in their wares, try Long Resting which will reshuffle the vendor items. You don’t need to spend any camp supplies on a Long Rest for this purpose.
Any Heavy Crossbow or Longbow
Our ranged weapon isn’t the focus of this build – you should aim to be in melee as much as possible because this is where the Champion excels. Having said that, it still makes sense to have a decent ranged weapon as a backup for those turns when you simply cannot reach an enemy to make melee attacks. You can use any ranged weapon here, but the best options are a Heavy Crossbow or a Longbow.
- Heavy Crossbows have the highest base damage of any Ranged Weapon, but decrease your Initiative score, meaning you are less likely to take your turn before other characters
- Longbows do slightly less damage but do not reduce your Initiative
Late Game Equipment
Late Game equipment can be found in the latter parts of Act II, and Act III. This is the most powerful version of the build, with access to the best items in the game.
| Slot | Icon | Item | Effects | Location |
|---|---|---|---|---|
| Head |  |
Helm of Balduran |
|
Defeat Ansur the dragon below Wyrm’s Crossing. See below for more details. |
| Cloak |  |
Cloak of Elemental Absorption |
|
Looted from an Opulent Chest inside Ketheric Thorm’s Chambers |
| Chest |  |
Armour of Persistence |
|
Buy from Dammon in the Forge of the Nine |
| Gloves |  |
Gauntlets of Hill Giant Strength |
|
Taken from a pedestal in the archive of the House of Hope. |
| Boots |  |
Boots of Persistence |
|
Buy from Dammon in the Forge of the Nine |
| Necklace |  |
Amulet of Greater Health |
|
Can be taken from a pedestal in the archive of the House of Hope. |
| Ring 1 | |
Ring of Protection |
|
Steal the Sacred Idol in Druid Grove (quest) |
| Ring 2 |  |
Killer’s Sweetheart |
|
Found inside the Self-Same Trial in the Gauntlet of Shar. |
| Main Weapon |  |
Balduran’s Giantslayer |
|
Looted from Ansur in the Dragon’s Sanctum |
| Second Weapon | Any Ranged Weapon |
|
N/A |
Helm of Balduran
The strongest helmet in BG3, the Helm of Balduran prevents enemies from landing Critical Hits on you, prevents you from being Stunned, heals you for 2 HP per turn, and gives a +1 bonus to Armour Class and Saving Throws. Obtaining this item is a multi-stage process – we wrote a detailed guide on how to find it.
Cloak of Elemental Absorption
Once per Short Rest, the Cloak of Elemental Absorption will absorb elemental damage, and infuse your next attack with 1d6 of that damage type. This is a fairly minor effect, but it can still generate a nice damage boost. It can be looted from an Opulent Chest inside Ketheric Thorm’s Chambers in Moonrise Towers.
Armour of Persistence
Another powerful armour piece, the Armour of Persistence reduces all incoming damage by 2, and passively grants Resistance (1d4 bonus to all Saving Throws) and Blade Ward (50% resistance to bludgeoning, slashing and piercing damage). Note that gaining the Resistance and Blade Ward conditions from other sources will have no effect, as these buffs cannot stack with themselves.
The Armour of Persistence is purchased from Dammon in the Forge of the Nine in the Lower City, Act III.
Gauntlets of Hill Giant Strength
The Gauntlets of Hill Giant Strength increase your Strength to 23, and give you a +1 bonus to Strength Saving Throws. This will increase your damage and accuracy with Strength-based attacks, most notably your melee weapon. The gloves can be taken from a pedestal in the archive of the House of Hope.
Boots of Persistence
The Boots of Persistence permanently grant the wearer Freedom of Movement and Longstrider, improving your movement speed and preventing you from being slowed by difficult terrain, entangled, paralysed or magically restrained. This reduces the amount of ways that enemies can try to stun or immobilise Lae’zel. These boots can be purchased from Dammon in the Forge of the Nine in the Lower City, Act III.
Amulet of Greater Health
The Amulet of Greater Health sets your Constitution to 23 and gives Advantage on Constitution Saving Throws. A higher Constitution means more HP. Can be taken from a pedestal in the archive of the House of Hope.
Note: You could argue that it’s overkill to have both the Gauntlets of Hill Giant Strength and the Amulet of Greater Health equipped on the same character – it really depends how buffed up you want to make Lae’zel. If you want, you can give this item to another character in your party and equip another Amulet on Lae’zel.
Killer’s Sweetheart
With the Killer’s Sweetheart ring equipped, once per Long Rest, you gain a guaranteed Critical Hit on your next attack after killing an enemy. This item would be better if it could be triggered more frequently, but it’s still a useful effect. It is found inside the Self-Same Trial in the Gauntlet of Shar.
Balduran’s Giantslayer
A Legendary Greatsword, Balduran’s Giantslayer is arguably the strongest melee weapon in the game. It doubles the damage bonus from your Strength Modifier when attacking (if you have the Gauntlets of Hill Giant Strength, this improves a +6 modifier to +12). It grants you Advantage when attacking large, huge or gargantuan enemies, and once per Short Rest allows you to enlarge yourself, gaining extra damage, Temporary HP and Advantage on Strength checks.
Balduran’s Giantslayer is looted from Ansur in the Dragon’s Sanctum. To find out how to access the Dragon’s Sanctum, follow this guide on How to find the Helm of Balduran – both items are located in the same room.
Silver Sword of the Astral Plane (Alternative)
If Balduran’s Giantslayer is aready being used by another party member, or you want a more thematic weapon for Lae’zel, then the Silver Sword of the Astral Plane is another great choice.
It deals 1d4 extra Psionic Damage when used by a Gith, has a +3 enchantment to buff its damage and accuracy considerably, gives you Advantage on Intelligence, Wisdom and Charisma Saving Throws, immunity to being Charmed, Resistance to Psychic Damage, and access to the Soulbreaker Action, which can stun enemies.
That’s a lot of extras packed into one sword, and while it still comes out a little weaker than the Balduran’s Giantslayer overall, it’s still an excellent option for Lae’zel.
If you want to use the Silver Sword of the Astral Plane, you can get it with the following methods:
- Show the Orphic Hammer to Kith’rak Voss in Act III (or kill & loot him)
- During the Deal with the Devil quest, don’t sign the contract but lie to Voss. He will give you the sword, but only if you can pass a DC30 Deception check.
- You can obtain the sword in Act I by using a spell like Heat Metal to disarm Voss before engaging the Githyanki Patrol in conversation near the mountain pass. This has a very low success chance due to Voss being much higher level than you, and sometimes he seems to drop only a Githyanki Crossbow or nothing at all, so this method is frustrating, can take a lot of reloads, and we don’t recommend doing this unless you really want to cheese the game.
Lae’zel Build Extra Info
Below are some extra pieces of information that can help you get the most out of this Lae’zel Champion build.
BG3 Lae’zel Build Tips & Tricks

The Champion Fighter is probably the simplest setup in the game. Its simplicity means it is very beginner-friendly. Give Lae’zel a decent weapon, and she will hit hard without you having to use any special abilities or strategies.
Having said that, Fighters (and especially the Champion) can feel surprisingly weak in the very early part of Baldur’s Gate 3. This is because they specialise in melee and don’t have many ways to contend with ranged enemies. You can counteract this problem by utilising line of sight to advance on ranged enemies without getting shot at. You should always ensure that either your Champion or someone else in your party closes down ranged enemies, unless your party has enough ranged damage to quickly snipe them from a distance.
Once you hit Level 5 and unlock your first Extra Attack, Lae’zel becomes much more powerful. Getting a good set of heavy armour, like the Adamantine Splint Armour, will also help a lot. Fighters tend to take more hits than other party members because they spend the most time in the thick of melee combat. While Barbarians can Enrage to half all physical damage done to them, Fighters have no such resistance by default, making good armour essential.
To maximise Lae’zel’s mobility and damage output, I highly recommend using the Potion of Speed and Elixir of Bloodlust (explained below).
Overpowered Potions for the Champion Build
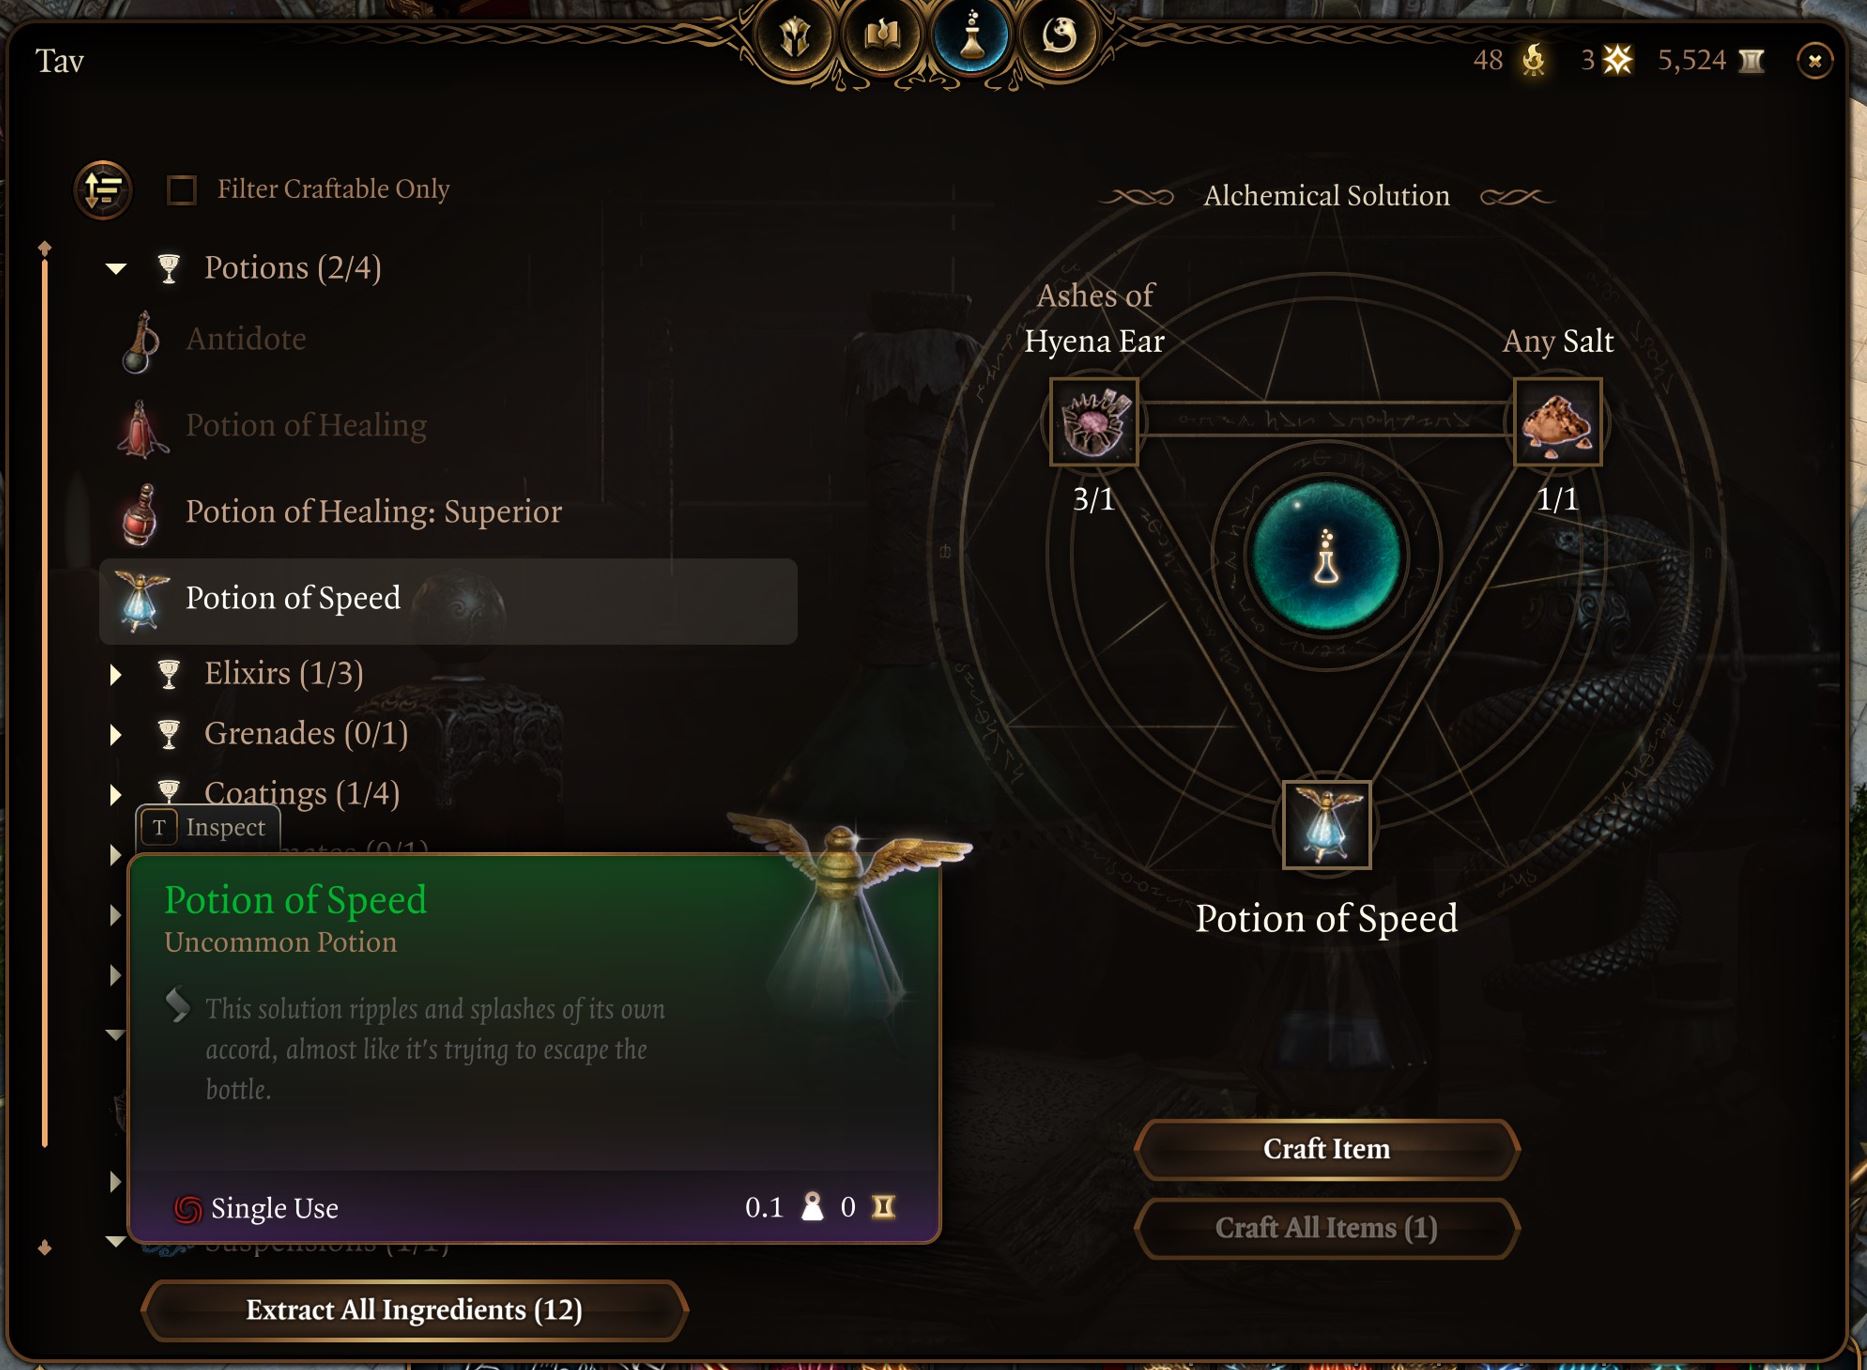
The ![]() Potion of Speed is arguably the most powerful potion in Baldur’s Gate 3. It doubles your Movement Speed and gives you an
Potion of Speed is arguably the most powerful potion in Baldur’s Gate 3. It doubles your Movement Speed and gives you an ![]() extra Action each turn.
extra Action each turn.
One drawback of this potion is that when it expires, your character will be ![]() Lethargic for one turn, unable to move or take any
Lethargic for one turn, unable to move or take any ![]() Actions. So you should be careful not to have your character stranded in a dangerous position when the potion runs out!
Actions. So you should be careful not to have your character stranded in a dangerous position when the potion runs out!
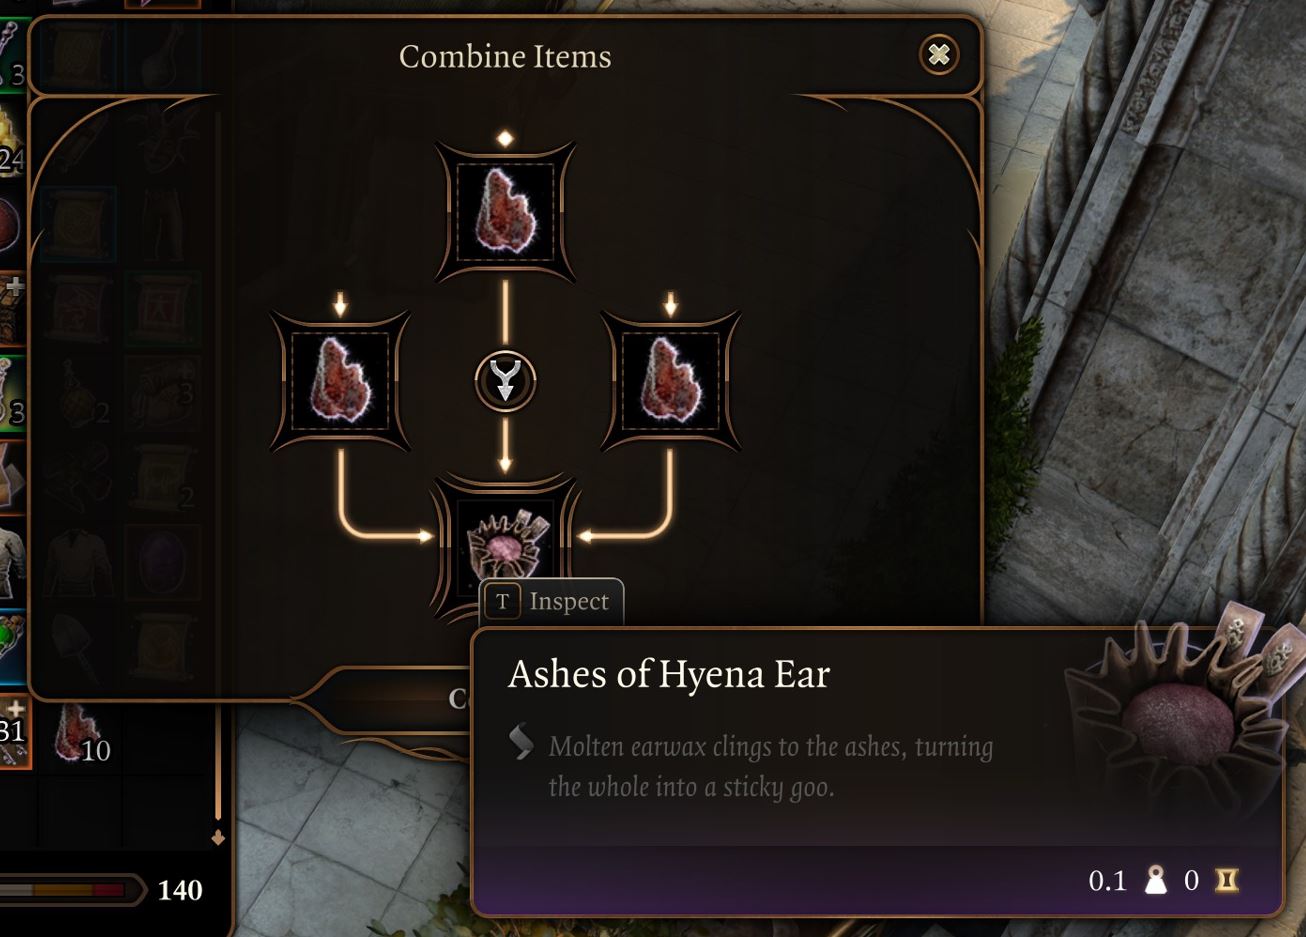
You can craft the Potion of Speed in the alchemy menu by combining ![]() Ashes of Hyena Ear with any Salt. Create ashes, salts and other alchemy concentrates by combining three of the same ingredients together – for example, combining three
Ashes of Hyena Ear with any Salt. Create ashes, salts and other alchemy concentrates by combining three of the same ingredients together – for example, combining three ![]() Hyena Ears will create
Hyena Ears will create ![]() Ashes of Hyena Ear.
Ashes of Hyena Ear.
Hyena Ears can normally be looted from either Hyenas or Gnolls – you can find a lot of them around the Risen Road in Act I, for a good supply of them, which should last you a while.
You can combine this with the ![]() Elixir of Bloodlust. Elixirs and Potions can be stacked with each other, but you can only have one Elixir active at a time. Potions tend to expire after a few turns, whereas Elixirs last until your next Long Rest, unless you drink a different Elixir in the meantime.
Elixir of Bloodlust. Elixirs and Potions can be stacked with each other, but you can only have one Elixir active at a time. Potions tend to expire after a few turns, whereas Elixirs last until your next Long Rest, unless you drink a different Elixir in the meantime.
The ![]() Elixir of Bloodlust grants your character another
Elixir of Bloodlust grants your character another ![]() Action when you kill an enemy. This effect can only trigger once per turn. Combined with the
Action when you kill an enemy. This effect can only trigger once per turn. Combined with the ![]() Potion of Speed, this gives you two additional attacks if you defeat an enemy on your turn.
Potion of Speed, this gives you two additional attacks if you defeat an enemy on your turn.
It can be crafted by combining ![]() Ashes of Worg Fang with any Salt.
Ashes of Worg Fang with any Salt. ![]() Worg Fangs are looted from Worgs, the beasts usually kept by Goblins.
Worg Fangs are looted from Worgs, the beasts usually kept by Goblins.
This is an OP alchemy combo that you can use to turbocharge the Lae’zel’s mobility and damage output in tough fights!
BG3 Lae’zel Best Party Composition
Lae’zel has a Lawful Evil moral alignment at the start of the game. While you can use any party composition with Lae’zel, you’ll have an easier time with characters who match up with her alignment. This leaves the following four options as the most obvious choices:
- Astarion (Neutral Evil) – Astation and Lae’zel get on quite well due to their similar moral alignment. They also have some funny interactions, as Astarion finds Lae’zel’s over-the-top domineering of Faerun’s inhabitants quite amusing.
- Minthara (Lawful Evil) – Minthara can be recruited in Act II if she survives Act I (for this, you need to side with her and attack the Druid Grove, then avoid conflict with her in the aftermath). As a Lolth-Sworn Drow, she has perhaps the most evil inclination of any recruitable character in BG3. However, she isn’t comically evil; she is simply from a culture with a very strict hierarchy where violence and repression of the weak are normal behaviour. Minthata and Lae’zel both have a Lawful Evil inclination, so they work well in the same party.
- The Dark Urge (Chaotic Evil) – The Dark Urge is only available if chosen as your origin character at the start of the game. Unlike other Origins, Dark Urge is fully customisable. While Lae’zel doesn’t exactly approve of the Dark Urge’s very inefficient method of violence, she has more pressing things to worry about, and she fits easily into a Dark Urge-led party.
- Shadowheart (Neutral Evil or True Neutral) – At the start of the game, Shadowheart and Lae’zel really hate each other, and you might have to intervene to prevent all hell from breaking loose. But once you overcome these problems, the two characters get along just fine. Lae’zel fits most easily into an evil-aligned party, and Shadowheart fits easily into pretty much any moral alignment due to her very neutral starting point and branching story.
Lae’zel Build Illithid Powers (optional)

Illithid Powers are unlocked later in BG3 when you learn more about Mind Flayers and Tadpoles. By eating Jars of Mind Flayer Parasites you gain one point. This is another optional skill tree that you can get access to if you want. Here are some of the best Illithid Powers for Lae’zel:
- Mind Blast: A conal blast of Psychic Damage that can also stun several targets at once. If you are outnumbered by several advancing enemies, then Mind Blast can help to swing things back in your favour.
- Cull the Weak: When you reduce a creature’s hit points below a certain threshold, this power instantly kills it and deals 1-4 Psychic Damage to nearby enemies. This is particularly effective when engaging groups of weaker foes, enabling you to thin their numbers rapidly.
- Fly: This can be used to reach hard to get to places or change positions in combat.
- Mind Sanctuary: This creates an area that allows all within to use Actions and Bonus Actions interchangeably. This typically means you can deal more damage, since you can use your Bonus Action as a normal Action. However, enemies who are inside the area will also enjoy its benefits. Be careful with your placement so that your party gets buffed by the Mind Sanctuary and not the enemies!
- Psionic Backlash: This is a top-tier Reaction from the Illithid Powers skill tree in BG3. It allows you to deal Psychic Damage when a nearby enemy casts a spell. This is especially useful if the target is casting a Concentration Spell. The damage from Psionic Backlash can immediately break their Concentration, ending the spell’s effects.