


Welcome to the best BG3 Hexblade Build for the Warlock class. For this build, we’ll be using the Hexblade subclass of the Warlock, which significantly enhances your melee abilities and allows you to raise fallen enemies as a spirit that can absorb health from your foes.
For more Warlock builds, visit our BG3 Warlock Builds page or explore the complete BG3 Builds Database. We also have an optimized BG3 Wyll Build. You can also check out our BG3 Builds Tier List to see which builds perform best.
The Warlock class is a Charisma-based Spellcaster with access to a wide range of Spells and Cantrips; it has the unique ability to replenish some of its spell slots with a Short Rest rather than a Long Rest.
Table of Contents:
- Introduction to the Hexblade Build
- Hexblade Build Character Creation
- Hexblade Warlock Levelling Guide
- Hexblade Warlock Best Equipment
- Hexblade Warlock Build Extras
Before we proceed, here is a quick look at the main Strengths and Weaknesses of the Hexblade Warlock in Baldur’s Gate 3:
Hexblade Strengths
Hexblade Weaknesses

BG3 Hexblade Build Overview
Bound by a pact to an all-powerful patron, Warlocks trade their loyalty for supernatural abilities and unique magic.
Warlock Class Summary
Here are the most important features of the Warlock Class in Baldur’s Gate 3:
- Warlock Spell Slots (Level 1) – These replace the standard Spell Slots used by other classes. Warlock Spell Slots are replenished on both Short and Long Rests, rather than just Long Rests. They automatically upcast your spells to the highest available level, up to Fifth Level. The downside is that you can hold a much smaller amount of Warlock Spell Slots; two for most of the game, then three at max level.
- Eldritch Invocations (Level 1) – Powerful passive effects that can be unlocked by Warlocks as they level up. Helps to customise your build and can synergise with certain playstyles and spells.
- Pact Boon (Level 3) – Choose a unique Pact Boon that will grant you new effects as you level up.
- Mystic Arcanum (Level 11) – Gain one Sixth Level Spell. It does not consume a Spell Slot when cast, but can only be used once per Long Rest. This is the Warlock’s only access to Sixth-Level Magic.
Hexblade Subclass Summary
Similarly, here is a quick overview of the Hexblade subclass:
 Hex Warrior (Level 1) – Gain Proficiency with Medium Armour, Shields and Martial Weapons.
- Bind Hexed Weapon – Bind to your currently equipped weapon. Its damage becomes magical, and you cannot drop or throw it. You gain Proficiency with the weapon type if you didn’t already have it, and your Charisma Modifier is added to Attack Rolls, instead of the usual Strength or Dexterity. Attacks with the weapon have a chance to apply Hexblade’s Curse to the target.
- Hexblade’s Curse (Level 1) – Manually apply Hexblade’s Curse to the target. When attacking a target afflicted with your Hexblade Curse, you add your Proficiency to Damage Rolls, and the Attack Roll required to land a Critical Hit is reduced by 1. If the cursed target dies, you regain HP equal to (Warlock Level + Charisma Modifier). You can manually apply the Curse once per Short Rest. Applications via your Bound Weapon are unlimited.
- Accursed Spectre (Level 6) – Spend a Reaction to raise a Cursed Spectre from a slain enemy to fight by your side. The size of the fallen enemy determines how powerful the spectre will be. Doesn’t work on constructs, elementals, oozes, plants or undead.
- Armour of Hexes (Level 10) – When a creature afflicted with your Hexblade’s Curse attacks you, you can spend a Reaction for a 50% chance to nullify the damage.
Hexblade Warlock Build Character Creation (Level 1) for BG3
In this section, we’ll go over the Character Creation options for this BG3 Hexblade Warlock Build, namely the Background, Race, Skills, Abilities, Subclass, Spells and Cantrips.
Top 5 Hexblade Races in BG3
This table shows the top 5 races for the Hexblade Warlock in BG3 :
| Race | Strengths | Info |
|---|---|---|
Half Orc
|
|
Gets an additional damage die when landing a Critical Hit with a melee weapon (3 dice instead of the usual 2). This makes for a nice boost to your melee damage potential.
You also get Darkvision, Intimidation Proficiency (fits especially well since the Hexblade Warlock has high Charisma) and can resist being downed once per Long Rest. |
Wood Elf
|
|
Wood Elves are a great choice for most build types in BG3, thanks to their superior movement speed. Natural Proficiency in Perception is always useful, and immunity to magical Sleep will help you out a lot, especially in the early game, where enemy mages love to spam this spell. |
|
Zariel Tiefling |
|
Gets Resistance to Fire Damage, Darkvision, and unlocks the Searing Smite and Branding Smite spells after a few levels up.
These Smite Spells won’t cost a Spell Slot when used, making them useful for augmenting your weapon attacks with extra damage. Use them when fighting an especially tough or dangerous enemy. |
Githyanki |
|
Githyanki have excellent mobility thanks to Enhance Leap and Misty Step, allowing you to relentlessly pursue ranged enemies.
Additionally, Githyanki get the full benefits from equipping various Githyanki weapons, sometimes granting additional Psychic Damage or special features. |
|
Dragonborn, Any |
|
Dragonborns get access to a special Breath attack they can use once per Short Rest, which deals elemental damage in a directional AoE. They also get 50% Resistance to the same element. The damage element in question depends on which Dragonborn variant you choose.
The Fire and Poison variants are slightly better because many enemies attack with these damage types, making resistance to them more valuable. But don’t let this stop you from using whichever type of Dragonborn you like the most. The Dragonborn’s breath attacks work well with the Hexblade’s melee playstyle. |
Don’t worry if you don’t want to go with any of these races. Your chosen race is of fairly low importance in Baldur’s Gate 3, and the build will still work fine if you just choose your favourite race.
Background & Skills
Choose the Entertainer Background during Character Creation. This will give you Proficiency with:
- Acrobatics (DEX) – Helps your character to resist being shoved.
- Performance (CHA) – Used in some dialogue checks, usually to impress or distract NPCs.
You can choose two more Skills from a limited selection of Warlock Skills. We recommend the following options:
- Deception (CHA) – Trick NPCs into doing what you want in some dialogue checks.
- Intimidation (CHA) – Frighten NPCs into going along with your wishes. This can sometimes prevent combat if successful.
- If you chose the Half-Orc race, you will already have this Skill, so choose something else.
If you chose to be a Human, you get one extra (unrestricted) Skill pick. I’d suggest using this on ![]() Persuasion, another Charisma Skill. But it’s up to you.
Persuasion, another Charisma Skill. But it’s up to you.
Abilities
As previously mentioned, Charisma is the most important ability for the Warlock, since it’s used for your Spellcasting and therefore your damage output. The other important Abilties are Constitution, which boosts your HP, helps you to maintain Concentration on spells when you take damage, and makes it easier to resist a variety of hostile debuffs. We’ll also put some effort into Dexterity, but since we’ll be making use of the Hexblade’s Medium Armour Proficiency, there’s no need to increase this higher than 14 (Medium Armour’s Dexterity Modifier Bonus is capped at +2).
Your ability distribution should look like this:
- 10 Strength
- 14 Dexterity
- 16 Constitution
- 8 Intelligence
- 10 Wisdom
- 16 Charisma
Essential Abilities are in bold. The others can be tweaked if you want.

Cantrips
You need to select two starting Cantrips for your Hexblade Warlock Build in BG3. Cantrips are generally weaker than Spells, but they do not consume any Spell Slots when cast, meaning you can cast them an infinite amount of times between rests, and can spam them every turn if you need.
We recommend choosing the following two Cantrips to start with:
- Booming Blade – Attack with your weapon. If successful, you also place a debuff on them that deals Thunder Damage if they move anywhere on their turn.
- Eldritch Blast – Deals 1-10 Force Damage at long range. This is very handy because you can keep using it every turn, making for a reliable damage source for the early game. Use it if you can’t get to any melee targets on your current turn.
Spells
Finally, you need to choose 2 Spells to start your adventure with. It’s important to note that the Warlock only starts with One Warlock Spell Slot. This is different to the Spell Slots used by other classes, because it can be replenished by a Short Rest instead of a Long Rest. However, it basically means that it’s only possible to cast one Spell per fight at the beginning of the game, so you may feel a little weak at first. This increases to two Slots at Level 2, but you won’t get a third until Level 11. This means you must make it through most of the game with effectively six spells per Long Rest (eight if you have a Bard in your party who uses the ![]() Song of Rest)
Song of Rest)
We recommend choosing the following two Spells for now:
- Hex – Cause the enemy to receive 1-6 Necrotic Damage whenever you attack it. This is a Concentration Spell, so it can last for up to 10 turns, but the effects will be broken if you cast another Concentration Spell or fail a Concentration Check after taking damage. If the affected target dies, you can use Reapply Hex to apply it to another enemy without using another Spell Slot.
- Important: This Hex is a different effect from the Hexblade’s Curse, and both can be active on the same target simultaneously.
- Wrathful Smite – Infuse your weapon attack with extra Psychic Damage. The target must pass a Wisdom Save or be Frightened for 2 turns. This uses both an Action and a Bonus Action.
Hexblade Warlock Levelling Guide
Here is a full levelling guide for our Hexblade Build.
Early-Game Hexblade Warlock Levelling Progression
We’ll start with levels 2-4.
Level 2 – Hexblade Warlock Build for Baldur’s Gate 3
When you reach Level 2 with your BG3 Hexblade Warlock Build, you will gain another Warlock Spell Slot, allowing you to cast two Spells between Short Rests.
You’ll also need to choose two ![]() Eldritch Invocations. These are special abilities that let you further customise your Warlock build. We recommend choosing the following two options:
Eldritch Invocations. These are special abilities that let you further customise your Warlock build. We recommend choosing the following two options:
- Agonising Blast – Adds your Charisma Modifier to the damage of your Eldritch Blast, considerably improving its damage.
- Devil’s Sight – Allows you to see in all darkness, both magical and natural, up to a distance of 24 metres. This is an upgrade from Superior Darkvision, which only allows you to see through natural darkness.
Finally, you’ll be able to unlock one more Spell at Level 2. I recommend ![]() Armour of Agathys. This spell gives you 5 THP (temporary HP, effectively a damage shield on top of your standard HP). It retaliates against enemies who hit you with a melee attack, dealing 5
Armour of Agathys. This spell gives you 5 THP (temporary HP, effectively a damage shield on top of your standard HP). It retaliates against enemies who hit you with a melee attack, dealing 5 ![]() Cold Damage to them. For now, this is quite weak, but the THP and Cold Damage will increase by +5 every time your Warlock Spell Slots level up. Remember to cast the spell before you enter combat; otherwise, you’ll waste a turn.
Cold Damage to them. For now, this is quite weak, but the THP and Cold Damage will increase by +5 every time your Warlock Spell Slots level up. Remember to cast the spell before you enter combat; otherwise, you’ll waste a turn.
Level 3 – Hexblade Warlock Build
At Level 3 with your Hexblade Warlock Build, you need to choose a Pact Boon from your Patron. We recommend going for Pact of the Tome.
For now, the Pact of the Tome just gives us some pretty rubbish Cantrips (![]() Guidance is good, but someone else in your party probably has it). But at Level 5, you’ll get three Spells that are much more useful.
Guidance is good, but someone else in your party probably has it). But at Level 5, you’ll get three Spells that are much more useful.
The reason we’re not going with Pact of the Blade is that we already get all of the same bonuses from our Hexblade subclass, so it’s pretty much redundant.
Finally, you’ll be able to unlock a Second Level Spell at Level 3. We recommend choosing ![]() Branding Smite, which allows you to infuse your weapon attack with extra
Branding Smite, which allows you to infuse your weapon attack with extra ![]() Radiant Damage.
Radiant Damage.
Level 4 – BG3 Hexblade Warlock Build
As with all classes in Baldur’s Gate 3, at Level 4, you’ll need to choose a Feat for your Warlock Build. Feats are strong passive bonuses for your character that can help to define your build or just boost stats.
It’s best to get the Ability Improvement Feat, which gives you an extra 2 Ability Points to assign. Put both of the points into Charisma, which will take you up to 18. This will add 1 point to your Charisma Modifier, boosting your spellcasting and your weapon attack rolls.
You can also choose one more Cantrip and one more Spell (First or Second Level).
For the Cantrip, we already chose all of the important ones, so it’s up to you which one you want to get.
You can unlock another spell. I recommend choosing ![]() Misty Step, which allows you to teleport to a visible location within 18 metres. This only uses a Bonus Action, so you can still attack or cast a spell on the same turn. This does wonders for your mobility and is great for quickly advancing or retreating. Just be careful not to burn all your Spell Slots on it – only use it when really needed!
Misty Step, which allows you to teleport to a visible location within 18 metres. This only uses a Bonus Action, so you can still attack or cast a spell on the same turn. This does wonders for your mobility and is great for quickly advancing or retreating. Just be careful not to burn all your Spell Slots on it – only use it when really needed!
Mid-Game Hexblade Build Levelling Guide
We’ll now look at levels 5-8 for the BG3 Hexblade Warlock Build.
Level 5 – Hexblade Warlock Build for BG3 – PS5/PC
At Level 5, your Hexblade Warlock Build in Baldur’s Gate 3 will unlock several more abilities that make it considerably stronger.
Firstly, you’ll need to choose one more Eldritch Invocation. Get Mire the Mind, which gives you access to ![]() Slow, a great debuff spell that reduces enemy Movement Speed and effectively means they can only do one thing per turn.
Slow, a great debuff spell that reduces enemy Movement Speed and effectively means they can only do one thing per turn.
You can choose another Spell too – this time you’re able to select a Third Level Spell. We recommend choosing ![]() Hunger of Hadar, which creates a very nasty AOE that Blinds, slows and deals
Hunger of Hadar, which creates a very nasty AOE that Blinds, slows and deals ![]() Cold Damage every turn to anyone within, and will sometimes deal
Cold Damage every turn to anyone within, and will sometimes deal ![]() Acid Damage to enemies who end their turn in the area. This works very well for area denial or in a chokepoint position.
Acid Damage to enemies who end their turn in the area. This works very well for area denial or in a chokepoint position.
Those are all the things you can choose at this level, but you get plenty of other stuff:
- You get the Extra Attack passive, which lets you make two weapon attacks with your Actions, rather than one. This is very important and greatly increases your melee damage potential.
- You earn 3 new spells from your Pact of the Tome. They can be used once per Long Rest:
- Animate Dead – Use a corpse to create an undead minion to fight for you.
- Haste – A very good Concentration Spell that gives the target an extra Action each turn, an increased Movement Speed and
 Advantage on Dexterity Saves. Be careful, though: when the effect ends, the beneficiary will be Lethargic for one turn, preventing them from moving or acting.
 - Call Lightning – Another excellent Concentration Spell. This one allows you to call down a large AoE Lightning Strike, dealing Lightning Damage to all enemies within. If you maintain Concentration, you can repeat the effect each turn without spending another Spell Slot.
-
- Your Cantrips become more powerful at this level. Most notably, Eldritch Blast will now consist of two blasts, both of which are buffed by the Eldritch Invocations we picked at Level 2. You can aim both of the blasts at the same target, or one target each.
- Your Warlock Spell Slots are improved, too. You’ll now always be able to cast Warlock Spells at their third level.
Level 6
At Level 6, your Hexblade Warlock gains access to one of its most important passives. You unlock the following features:
- Accursed Spectre – Spend your Reaction to summon a spirit from a fallen enemy. The power of the spectre depends on the size of the corpse raised:
- Feeble Spectre – Tiny and Small enemies become a Feeble Spectre. They have 11 HP and cannot heal you, so you shouldn’t bother raising them.
- Mundane Spectre – Medium enemies become a Mundane Spectre. They have 21 HP.
- Primordial Spectre – Enemies who were large or above will become a Primordial Spectre. They have 33 HP and can use Reap Soul to deal very heavy damage to enemies.
- You can choose one more Warlock Spell. I like the Vampiric Touch spell. It deals Necrotic Damage to enemies and heals you for half of the damage done.
Level 7
At Level 7, your Hexblade Warlock build will unlock:
- Improved Warlock Spell Slots – Most of your Warlock spells have become stronger. You always cast Warlock Spells at Fourth Level.
- Access to a selection of Fourth Level Spells.
- Unlock one more spell. We recommend taking Staggering Smite, which infuses your melee attack with Psychic Damage and has a chance to Stagger the target. Staggered enemies cannot take Reactions and have
 Disadvantage on Attack Rolls and Ability Checks.
 - Additionally, you get another Eldritch invocation. We’ve got all of the useful ones so far, so you can choose anything you want for this.
Level 8
At level 8, you’ll receive:
- Another Feat choice. Take Ability Improvement, and use it to improve your Charisma to 20. This will improve your spells and weapon attacks.
- One more spell to choose from. Dimension Door is a great utility spell, allowing you to teleport yourself and one adjacent ally to another location that’s visible to you. You can use this to get out of trouble, or get into an advantageous position (i.e. high ground).
- Alternative option: If your mobility feels fine already, choose Blight instead. This is a single-target spell that deals a hefty chunk of Necrotic Damage at a range of up to 9 metres. Enemies can roll a Consitution Saving Throw, but even if they succeed the spell will still apply half of its damage.
- Alternative option: If your mobility feels fine already, choose
Late-Game Hexblade Warlock Levelling Guide
Now we’ll go over the late-game section of the BG3 Hexblade Warlock Guide, covering levels 9-12.
Level 9
At Level 9, you gain access to more powerful magic. You unlock:
- Improved Warlock Spell Slots – Most of your Warlock spells have become stronger. You always cast Warlock Spells at Fifth Level.
- Access to a selection of Fifth Level Spells.
- Proficiency Bonus increased to +4
- Choose an additional Edritch Invocation. We recommend going for Minions of Chaos, which allows you to cast the Conjure Elemental, adding another summonable creature to the battle alongside your Spectre.
- Choose one more spell to unlock. The Hexblade Warlock gets access to Banishing Smite, a powerful smite spell that infuses your melee attacks with up to 50 Force Damage (100 if it Crits!). It also Banishes the target from combat for 2 turns if they have under 50 HP remaining after the hit.
Keep using your Smite spells to deal extra damage to foes with your melee attacks, and remember to combine them with your Hexblade Curse to increase your Critical chance against your target.

Level 10
At level 10, you gain an extra defensive buff unique to the Hexblade Warlock. Here you unlock:
- Armour of Hexes – When a Hexed enemy attacks you, you can use your Reaction for a 50% chance to negate all of their damage.
- Choose one more spell to unlock – Here, I recommend Hold Monster. This spell allows you to completely Paralyse a target, preventing them from moving or acting. Your melee attacks against a held target will also be guaranteed Critical Hits. This can last for up to 10 turns, but in practice, this is unlikely because it requires continued Concentration, and the victim will attempt a new Saving Throw against the effect every turn.
- You also get to select another Cantrip. You can pick whatever you like.
Level 11
At Level 11, you can finally access Sixth Level Spells, the most powerful tier of magic in Baldur’s Gate 3 for your Hexblade Warlock Build. However, Warlocks are more limited in this regard than other “full spellcaster” classes. You only get one such spell, and you can only cast it once per Long Rest.
At Level 11, you unlock:
- Mystic Arcanum – Your patron bestows upon you a magical secret called an arcanum. Choose one 6th Level spell from the Warlock Spell list. You can cast your arcanum spell once without expending a spell slot. You must finish a long rest before you can do so again. I recommend choosing one of the following two options, depending on your party’s needs:
- Create Undead – Summon a powerful mummy from a corpse. It has 93 HP, and its attacks deal heavy Bludgeoning and Necrotic damage. I typically find this to be the most useful spell, and it fits the theme of this build perfectly.
- Circle of Death – Deals up to 48 Necrotic Damage in a large (9 metre) radius. If you think your party would benefit more from extra AoE damage, then you can choose this instead. I’m not a big fan of this spell because the damage can sometimes be disappointing, and the huge radius is an overkill in my opinion. But it’s not a bad spell, either, so give it a try if you want.
-
- You can also learn another spell. We recommend Cone of Cold, which allows you to send forth a long cone of Cold Damage, dealing up to 64 damage to each enemy in the area. This is a good fit for us, since we’re fighting in close quarters most of the time. Watch out for situations when you have several enemies standing in a line in front of you.
- Scaling Cantrips – Your Cantrips gain an additional damage die. Eldritch Blast instead gets an extra projectile, now giving you three in total.
Level 12 – Max Level Hexblade Warlock Build for Baldur’s Gate 3
If you reached this point, then you have finished levelling up your BG3 Hexblade Warlock Build to max level. Congratulations! For reaching Level 12, you’ll get:
- One more Feat to choose from.
- I recommend Savage Attacker, which allows you to roll damage dice twice and choose the highest result (on melee weapon attacks).
- Unlock one more spell. We’ve got all of the most important spells now, so choose your favourite from the remaining options.
- Lastly, you also get another Eldritch Invocation
- Choose Lifedrinker. This adds your Charisma Modifier as bonus Necrotic Damage to all of your melee attacks. If you’ve followed the build correctly, this will be +5 bonus damage on all your melee attacks, which is a huge buff.
- Choose

Hexblade Warlock Build Equipment for Baldur’s Gate 3
Now, let us take a look at some of the equipment choices you can make for your BG3 Hexblade Warlock Build. All of the items here are pretty easy to get, except the Adamantine Scale Mail and Disintegrating Night Walkers, which require a bit of a trek to reach and a boss fight for each item.
I recommend focusing on gathering this gear fairly early on in your playthrough, as it will make your Hexblade Warlock significantly stronger.
Early Game Equipment
This is the early-game gear setup that you can use for your Hexblade Warlock. You don’t need to get all the items, but the build will perform better if you find most of them. You can find these items in Act 1 or early Act 2.
| Slot | Icon | Item | Effects | Location |
|---|---|---|---|---|
| Head |  |
Haste Helm |
|
Found inside a Wooden chest, next to a cart, near the Blighted Village Waypoint. |
| Cloak |  |
Cloak of Protection |
|
Purchased from Quartermaster Talli in Last Light Inn |
| Chest |  |
Adamantine Scale Mail |
|
Crafted at the Adamantine Forge. Find the Scale Mail Mold and some Mithral Ore nearby, then put them in the forge. |
| Gloves | Gloves of the Growling Underdog |
|
Found in Dror Ragzlin’s treasure stash | |
| Boots |  |
Disintegrating Night Walkers |
|
Looted from True Soul Nere in Underdark – Grymforge |
| Necklace | Broodmother’s Revenge |
|
Looted from Kagha | |
| Ring 1 |  |
Crusher’s Ring |
|
Looted from Crusher. You can also try to steal the ring when in dialogue with him. |
| Ring 2 |  |
Caustic Band |
|
Sold by Derryth Bonecloak in the Underdark |
| Melee Weapon |  |
Blooded Greataxe |
|
Buy from Roah Moonglow in Shattered Sanctum |
| Ranged Weapon | Any |
|
N/A |
Everything here, apart from the Cloak of Protection, can be gathered fairly quickly in Act I. The hardest item to get is the Adamantine Scale Mail, as it’s a bit of a trek to get there and you need to defeat the Grym boss, but it’s well worth the effort as this is one of the strongest defensive armours in the game, and you can already get it by around level 4.
The purpose of this setup is to give you strong defence, high mobility and great early-game damage potential. The explanation below details how these items work together:
Defensive Items
- Cloak of Protection
- Adamantine Scale Mail
The Adamantine Scale Mail does most of the heavy lifting here, with a high Armour Class and giving you immunity to Critical Hits. The Cloak of Protection is the icing on top, with a bit of extra Armour Class.
Mobility Boosters
- Haste Helm
- Disintegrating Night Walkers
- Crusher’s Ring
Haste Helm and Crusher’s Ring work together to give you heaps of extra Movement. The Disintegrating Night Walkers stop you from being pinned down by a variety of enemy and ground effects, and let you use the Misty Step spell for free once per Short Rest. With this combination of items, you can quickly get right into melee, and should have the mobility to escape easily if you overcommit.
Attacking Items
- Blooded Greataxe
- Caustic Band
- Broodmother’s Revenge
- Gloves of the Growling Underdog
The Blooded Greataxe forms the base of your attacking output. It’s one of the best weapons available in the first half of the game, just in terms of its raw damage output. Usually, Warlocks cannot use Greataxes. But the Hexblade Warlock allows you to Bind to any weapon, and wield it with Charisma rolls instead of Strength. Make sure you Bind to the weapon after getting it, otherwise it won’t work properly! The Caustic Band adds 2 Acid Damage onto your already powerful melee attacks.
The Broodmother’s Revenge Necklace adds 1d6 extra Poison damage to your next attack whenever you are healed. Try to activate this as often as possible by applying your Hexblade Curse to enemies and then killing them, which gives you HP back every time you do it.
Finally, the Gloves of the Growling Underdog tie all of this together by giving you excellent accuracy, by allowing you to make Attack Rolls with an Advantage when you are outnumbered in melee. Just be careful not to go too crazy with this, you get the buff with 2 adjacent enemies, and there is no added benefit to being foolhardy and diving into the middle of the enemy ranks.
Endgame Equipment
The endgame gear for the Hexblade Warlock can be obtained either in late Act 2 or Act 3 of Baldur’s Gate 3. If you manage to complete all the items below you will be extremely strong. But view it more as a wishlist rather than a completely rigid blueprint – there’s always room for experimentation and personal playstyle, and depending on your choices in the game, you might not be able to get every item on the list in every playthrough.
| Slot | Icon | Item | Effects | Location |
|---|---|---|---|---|
| Head |  |
Mask of Soul Perception |
|
Looted from a locked gilded chest in Helsik’s Room, upstairs in the Devil’s Fee |
| Cloak | Cloak of Displacement |
|
Sold by Entharl Danthelon in Wyrm’s Crossing | |
| Chest | |
Adamantine Scale Mail |
|
Crafted at the Adamantine Forge. Find the Scale Mail Mold and some Mithral Ore nearby, then put them in the forge. |
| Gloves | Legacy of the Masters |
|
Sold by Dammon in Act Three. Won’t be obtainable if Dammon died in Act I or II. | |
| Boots |  |
Helldusk Boots |
|
Dropped by Haarlep in the House of Hope. |
| Necklace | Broodmother’s Revenge |
|
Looted from Kagha | |
| Ring 1 | |
Caustic Band |
|
Sold by Derryth Bonecloak in the Underdark |
| Ring 2 |  |
Ring of Regeneration |
|
Sold by either Rolan or Lorroakan in Sorcerous Sundries. If Lorroakan is dead but Rolan is alive, you can pickpocket it from Rolan in Ramazith’s Tower. |
| Melee Weapon | Sword of Chaos |
|
Looted from Sarevok in the Murder Tribunal. | |
| Ranged Weapon | Any |
|
N/A |
This equipment setup is designed to make you very resilient and tough to hit in combat, while also making your attacks very accurate and very deadly. Remember to combine your attacks with your Smite Spells to further enhance their damage.
Defensive Items
- Cloak of Displacement
- Adamantine Scale Mail
- Helldusk Boots
- Ring of Regeneration
The Ring of Regeneration’s 1d4 healing is nice, however the main reason we are using it is also for an attacking synergy, as it will activate Broodmother’s Revenge every turn. Cloak of Displacement is a slight upgrade vs the Cloak of Protection, but you can still use the latter if you don’t have the Cloak of Displacement. The Adamantine Scale Mail is good enough to keep using for the entire duration of the game.
Attacking Items
- Sword of Chaos
- Caustic Band
- Broodmother’s Revenge
- Legacy of the Masters
- Mask of Soul Perception
The Sword of Chaos deals good damage to enemies, with bonus Necrotic damage added on top. The best thing about this weapon is that it heals you when you hit an enemy. Combined with all of the other sources of healing that the Hexblade gets, and the defensive items mentioned above, this is going to make you a really tough nut to crack. The combination of the Broodmother’s Revenge and Caustic Band adds additional bonus damage to your attacks.
Hexblade Build Extra Info
Below is some extra information that will help you get the most out of the Hexblade Build.
Overpowered Potion Combo for BG3 Hexblade Build
The ![]() Potion of Speed is arguably the most powerful potion in Baldur’s Gate 3. It doubles your Movement Speed and gives you an
Potion of Speed is arguably the most powerful potion in Baldur’s Gate 3. It doubles your Movement Speed and gives you an ![]() extra Action each turn.
extra Action each turn.
One drawback of this potion is that when it expires, your character will be ![]() Lethargic for one turn, unable to move or take any
Lethargic for one turn, unable to move or take any ![]() Actions. So you should be careful not to have your character stranded in a dangerous position when the potion runs out!
Actions. So you should be careful not to have your character stranded in a dangerous position when the potion runs out!
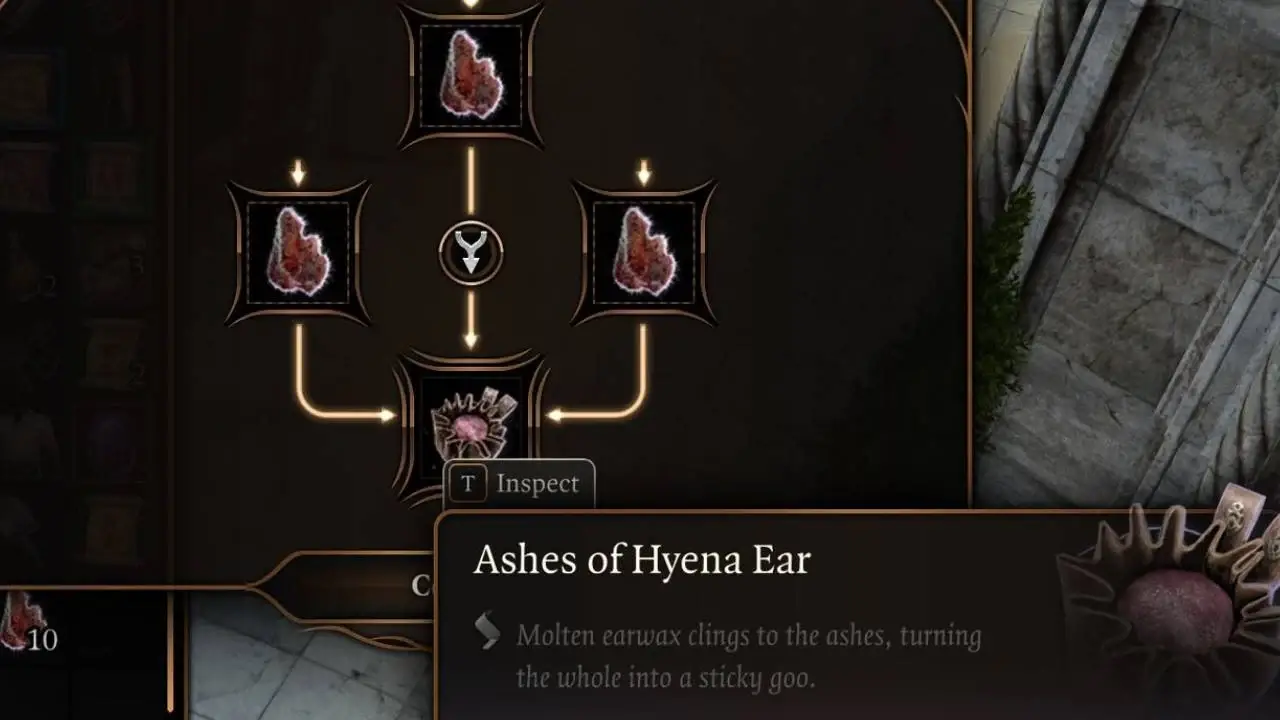
You can craft the Potion of Speed in the alchemy menu by combining ![]() Ashes of Hyena Ear with any Salt. Create ashes, salts and other alchemy concentrates by combining three of the same ingredients together – for example, combining three
Ashes of Hyena Ear with any Salt. Create ashes, salts and other alchemy concentrates by combining three of the same ingredients together – for example, combining three ![]() Hyena Ears will create
Hyena Ears will create ![]() Ashes of Hyena Ear.
Ashes of Hyena Ear.
Hyena Ears can normally be looted from either Hyenas or Gnolls – you can find a lot of them around the Risen Road in Act I, for a good supply of them, which should last you a while.
You can combine this with the ![]() Elixir of Bloodlust. Elixirs and Potions can be stacked with each other, but you can only have one Elixir active at a time. Potions tend to expire after a few turns, whereas Elixirs last until your next Long Rest, unless you drink a different Elixir in the meantime.
Elixir of Bloodlust. Elixirs and Potions can be stacked with each other, but you can only have one Elixir active at a time. Potions tend to expire after a few turns, whereas Elixirs last until your next Long Rest, unless you drink a different Elixir in the meantime.
The ![]() Elixir of Bloodlust grants your character another
Elixir of Bloodlust grants your character another ![]() Action when you kill an enemy. This effect can only trigger once per turn. Combined with the
Action when you kill an enemy. This effect can only trigger once per turn. Combined with the ![]() Potion of Speed, this gives you two additional attacks if you defeat an enemy on your turn.
Potion of Speed, this gives you two additional attacks if you defeat an enemy on your turn.
It can be crafted by combining ![]() Ashes of Worg Fang with any Salt.
Ashes of Worg Fang with any Salt. ![]() Worg Fangs are looted from Worgs, the beasts usually kept by Goblins.
Worg Fangs are looted from Worgs, the beasts usually kept by Goblins.
This is an OP alchemy combo that you can use to turbocharge the Hexblade’s mobility and damage output in tough fights!
Warlock Build Tips & Tricks for BG3
While the Warlock in BG3 is often easier to play as a full spellcaster, the Hexblade subclass allows you to instead utilise the class as a potent melee damage dealer with the ability to curse enemies and heal itself. In the early-game, I strongly recommend going after the equipment mentioned in the equipment section, as it’s going to make things significantly easier for your Warlock.
Your Spell Slots are usually best used on Smite Spells, but always be on the lookout for good opportunities to use them in other ways, for example casting Cone of Cold against a dense group of enemies in a tight space.
You can double your damage output and movement speed with the Haste buff. One easy way to get the Haste buff is to drink a Potion of Speed, but the Haste spell lasts for longer. From Level 5 onwards, this will allow you to make four attacks per turn, instead of two. You can potentially increase this even further by making use of the Elixir of Bloodlust, which gives you an additional Action on your current turn when you slay an enemy (limited to once per turn). If you manage to pull this off, you get six weapon attacks in one turn (or five if you’re playing on Honour mode).
Remember to keep using your Hexblade Curse. Ensure you Bind to your weapon to allow it to apply Hexblade Curses. Once bound, it has a 20% chance per hit to apply it. You can also manually apply the curse by spending a Bonus Action. You are more likely to Crit against cursed enemies, pumping your damage potential up even further. You also heal yourself when they die.
From Level 6 onwards, remember that you can raise Spectres from fallen enemies. Go for large 0r larger enemies to get the powerful Primordial Spectre. The great thing about the Spectres is that they heal you for a portion of their damage output.
Hexblade Warlock Build Illithid Powers (optional)

Illithid Powers are unlocked later in BG3 when you learn more about Mind Flayers and Tadpoles. By eating Jars of Mind Flayer Parasites you gain one point. This is another optional skill tree that you can get access to if you want. Here are some of the best Illithid Powers for the BG3 Warlock Build with the Hexblade subclass:
- Concentrated Blast: Allows you to deal extra damage to a target when you are Concentrating on a spell, potentially also healing if the target is Concentrating too. Ideally you will spend a lot of time Concentrating on either Hex or an AoE like Hunger of Hadar, so you should be able to get good use from this.
- Cull the Weak: When you reduce a creature’s hit points below a certain threshold, this power instantly kills it and deals 1-4 Psychic Damage to nearby enemies. This is particularly effective when engaging groups of weaker foes, enabling you to thin their numbers rapidly.
- Fly: This can be used to reach hard to get to places or change positions in combat. Use this to keep your Warlock safe from enemy attacks, so your Concentration won’t get disrupted as easily.
- Black Hole: This power creates an area-based effect that pulls in and slows targets. It’s particularly useful for crowd control, allowing you to cluster enemies together for area-of-effect attacks or to isolate them from vulnerable allies. Try getting the Haste buff from a Potion of Speed or the Haste spell (lets you perform 2 Actions on one turn), then casting Black Hole and then Hunger of Hadar to cause a world of pain for a group of enemies.
- Psionic Backlash: This is a top-tier reaction from the Illithid Powers skill tree in BG3. This allows you to deal psychic damage when a nearby enemy casts a spell. This is especially useful if the target is casting a Concentration Spell. The damage from Psionic Backlash can immediately break their Concentration, ending the spell’s effects.
Other Baldur’s Gate 3 Builds
- Druid Build – Circle of the Moon
- Bard Build – College of Lore
- Ranger Build – Hunter
- Monk Build – Way of Shadow
- Monk Build – Way of the Four Elements
- Monk Build – Way of the Open Hand
- Necromancer Build – Necromancy
- Fighter Build – Battle Master
- Barbarian Build – Berserker
- Cleric Build – Light Domain
- Rogue Build – Thief
- Sorcerer Build – Wild Magic
- Wizard Build – Evocation School
- Paladin – Oath of Ancients
- More Baldur’s Gate Guides & Builds
If you want to check out the map of Baldur’s Gate 3, please visit the Baldur’s Gate 3 Interactive Map.