

Welcome to the ESO Tempest Island Guide for both Normal and Veteran mode. The Tempest Island dungeon is located in Malabal Tor, in the Aldmeri Dominion, one of the major factions in The Elder Scrolls Online.
This dungeon has 6 bosses: 3 main bosses, 3 mini-boss encounters and trashmob packs. (Trashmob = Enemies that can add to the difficulty and liveliness of a dungeon/trial and are fillers in-between bosses)
If you have more questions, you can also ask someone in our community partner discord about this Tempest Island Dungeon Guide!
The Story in Tempest Island
This island has been taken over by the Maormer, which perform their storm magic on this island. They have allied with the lamias in order to continue their attacks on the coast of Valenwood. Help Battlereeve Alduil and his Dominion soldiers to defeat them.
Table of Contents:
- Sets
- Trashmobs
- Maps
- Boss Fights
- Hardmode
- Full Run Tempest Island (Video)
Sets in Tempest Island
3 different sets drop in Tempest Island, plus a Monster Set.
- Light: Overwhelming Surge
- Medium: Storm Master
- Heavy: Jolting Arms
- Monster Set: Stormfist (Veteran only)
Trashmobs
- Lamia, Lamia Curare, Lamia Domina: Generic Trahsmob.
- Maomer/Sea Viper fighters: Generic Trashmob.
- Storm Atronachs: Generic Trashmob.
Boss Map & Treasure Chests
Here you can find the Bosses, Heavy Sacks and Treasure Chest locations in the Tempest Island Dungeon. See the maps below.
(click to enlarge)

Tempest Island Bosses
In the table below you can find all the bosses from the ESO Tempest Island Dungeon.
| Boss | Health | Adds |
| Sonolia the Matriarch | 1,745,443 | Lamias and Maormer |
| Valaran Stormcaller | 1,912,769 | None |
| Yalorasse the Speaker | 1,745,443 | Maormer |
| Stormfist | 3,007,499 | Maomer and Storm Atronachs |
| Commodore Ohmanil | 1,745,443 | Maormer |
| Stormreeve Neidir | 4,703,728 (5,409,287) |
None |
Bosses
Sonolia the Matriarch
This is a Mini Boss in Tempest island. She has some Sea Vipers and Lamias aiding her. She actually is the Matriarch and leader of the lamias that have sided with the Sea Vipers.
Adds: These should have priority for the group, as they will attack relentlessly and will make your life so much harder. Focus on them before you focus the boss. The tank can assist in pulling them in, especially the ranged adds, additionally to having the Matriarch face away from the group.
Heavy Attack: Like most bosses, this mini-boss does a Heavy Attack which must be blocked, otherwise it will cause a decent amount of damage and knock you down.
Resonate: Screaming at the one holding agro, this is a cone-shaped AoE that can disorientate the target, though you can break free from this. It causes a lot of damage, so should always be blocked! You can also move out of it, but the safest way would be to block. Since this can cause a lot of damage though, people with low health should try and avoid standing in it altogether.
Valaran Stormcaller

Valaran Stormcaller is the first major boss in Tempest Island that you will encounter and a Maormer storm mage, but he doesn’t have a lot of health.
Lightning Storm: Upon entering combat, there will be a huge AoE in the area, the so-called Sudden Storm, or Lightning Storm. Standing in there can easily be avoided, while still damaging the boss, but it also won’t kill you instantly if you stand in it for a few seconds.
Chain Lightning: The target and nearby allies will be targeted with a lightning strike from time to time, increasing his defenses. Since it only does some minor damage, it isn’t necessary to avoid it.
Crushing Blow: This is the bosses heavy attack. Has to be blocked, otherwise it will knock you back. Causes a decent amount of damage, so be careful!
Summon Lightning Avatar: From time to time the boss calls forth a Lightning Avatar, aiding him in trying to defeat you. It should be taunted by the boss, so it dies in the group’s AoE.
Enervating Bolt: This deals a moderate amount of lightning damage and stuns you, if you don’t avoid it. Unfortunately, this can happen to anyone in the group, so make sure that your health is not dropping too much.
Yalorasse the Speaker

The second Mini-Boss in Tempest island isn’t particularly hard. As she is accompanied by adds, these need to be taken down first. The archer can be pulled in by the tank, so that it will also die in the group’s AoE.
Quick Strike: This Heavy Attack can and should be blocked, otherwise you won’t be stunned, but thrown down to the ground. Causes a moderate amount of damage.
Quick Shot: This is a Whirlwind attack. The boss spins around herself and causes a lot of damage to anyone standing close by. This should be avoided and blocked, if you can’t avoid it!
Lightning: This is an AoE spell which she will cast from time to time. It causes only slight damage, but should still be avoided!
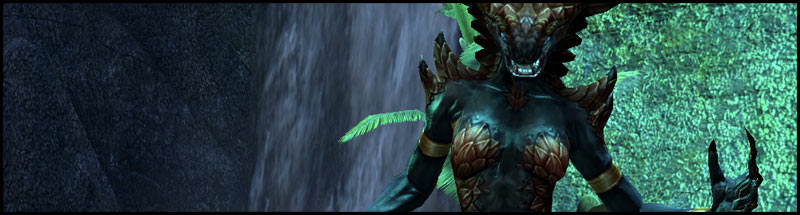
Stormfist
The Stormfist boss in Tempest Island is the first encounter with quite a lot of health and a somewhat challenging mechanic.
Fist: If the tank continues tanking bosses faced away from the group, this shouldn’t be too much of a problem for melee characters, but otherwise this AoE will affect everyone standing close to the tank. It’s a hand that will spawn from the ground, crushing everyone who is inside it. Can be blocked and the stun can be broken free from.
Burst: At times the boss will burst with energy and send forth smaller pools of lightning. These should be avoided, as they will cause a large amount of damage!
Summon: The boss will also call smaller versions of himself from time to time, which should be taunted by the tank immediately. If you have one of them on you, just run towards the tank so that they can taunt it off you quickly.
Stomp: A large AoE will form under the boss while he raises his foot. Run out of it as quick as possible, otherwise you will be thrown into the air and stunned. Causes a lot of damage!
Impending Storm: At around 25% health, the boss will start to enrage like most Storm Atronachs. He will burst into an AoE of constant lightning, causing a lot of damage. Focus the boss in this phase and try to kill it as quick as possible!
Commodore Ohmanil

This is the last mini-boss in Tempest Island that you will have to face before you can reach the final boss. What makes this encounter hard is the fact that you can’t first kill all the adds. You will have to kill all the adds together with the boss.
The tank can make the group’s life easier by stacking everything on the boss, otherwise the group will have to take the adds out before they will face the boss.
Ethereal Grip: One random group member will be caught in a purple storm orb. This will incapacitate the player, but will not cause any damage.
Uppercut: This is the bosses Heavy Attack and deals a lot of damage, but can be blocked. Ideally, the tank will receive this, but since there’s a lot happening in the beginning of the fight, it never hurts to have a look out for any heavy attack directed at you!
Stormreeve Neidir – Tempest Island Endboss
The last and final boss in Tempest Island, Stormreeve Neidir is no joke. This boss requires coordination and many people will probably already have either experienced a whole group wiping on it, or one person constantly dying to the mechanic of this fight.
Here I will explain how to best combat these mechanics!
Sparking Strike: I will start with the worst ability, as this is what will define the entire strategy to the boss. This is a large AoE that she summons and which should be avoided at all costs, especially on veteran, otherwise it will kill you. The best way to combat this as a ranged player is to stand at exactly the outer edge of the cast, so that you can easily get out of the AoE, but also won’t get charged by her, which I will explain next.
Charge: This will happen if a player stands too far away. This can be tactically used by the tank to reposition her, but otherwise everyone should be standing at a distance where she doesn’t charge. That is pretty much exactly the radius of her Sparking Strike. On veteran this can be a one-shot mechanic.
Gust of Winds: This is a very annoying mechanic, but will unfortunately happen through the entire fight. If a wind hits you, it will make you topple and you will lose the control of your character for a few seconds. If this happens while Sparking Strike and it pushes you back into the AoE, you will be dead. At least on veteran.
Lightning Strike: Dealing a moderate amount of damage, her melee attack goes to the one holding the agro, ideally the Tank.
Electro Shock: Randomly she will send out a lightning shock to a random player. This can be blocked, but will cause a lot of damage if it isn’t blocked. Additionally, the gusts of wind this can kill players, too.
Best here is to stand in a circle, so that you will know who she targets. Just don’t stand in each other!
Hardmode Stormreeve Neidir
Increased Health & Damage: Hardmode doesn’t have more mechanics, but it does a lot more damage, and her health is increased quite a bit!
Skipping in Tempest Island


There’s two minor skips available in this dungeon. One by the beach and another one by the boss.
- The one by the beach requires no one to have the quest, because for the quest you must clear the entire beach of lamias.
- The one almost at the summit requires you to stealth. If you fail that, you will pull the atronachs and eventually the group.
Video Gameplay
- 1st Boss: Sonolia the Matriarch – 2:00
- 2nd Boss: Valaran Stormcaller – 4:50
- 3rd Boss: Yalorasse the Speaker – 8:05
- 4th Boss: Stormfist – 9:15
- 5th Boss: Commodore Ohmamil – 11:00
- Endboss: Stormreeve Neidir (Endboss) – 13:34
Related Topics:
Magicka DPS Sets
Stamina DPS Sets
Beginner Tanking Guide
ESO Item Sets
Undaunted Beginner Guide
Animation Cancelling Beginner Guide