


Welcome to the Moongrave Fane Veteran Guide for ESO. The Moongrave Fane Dungeon is located in the south-eastern Elsweyr zone, the dungeon is part of the Scalebreaker DLC. In the Moongrave Fane Dungeon you will encounter a total of five bosses and a few trash packs. There is also a special mechanic with a cube that you need to heavy attack and place on platforms to open doors.
Story: Deep within the ancient ruins of Moongrave Fane, a former member of the Dragonguard and his fellow vampires of the Hollowfang Clan have felled and captured a Dragon. However, they wish to do more than simply destroy the humbled beast, as the clan prepares a ritual to drain the Dragon of its blood and gain its terrible power!
Rewards & Loot in Moongrave Fane
Sets in Moongrave Fane
There is a total of 3 different sets plus a Monster Set that drops in the Moongrave Fane Dungeon.
Rewards from Moongrave Fane
- Non-Combat Pet: Undaunted Porter Scamp – Complete the veteran mode of the dungeon.
- Title: Chevalier – Complete the following achievements: Moongrave Fane Conqueror, Drunk on Power, Escape the Grave, Blood Rush.
- Title: Hollowfang Exsanguinator – Complete the following achievement: Drunk on Power.
Rewards from both Dungeons
- Outfit Style: Dread-Aurelian Mask – Acquired by entering one of the two dungeons of Scalebreaker DLC.
- Outfit Style: Dread-Aurelian Shoulder – Acquired by completing both Scalebreaker dungeons on veteran.
- Furniture: Behold Khunzar-ri’s Guile – Acquired by completing both Scalebreaker dungeons on normal.
Boss Fights in Moongrave Fane
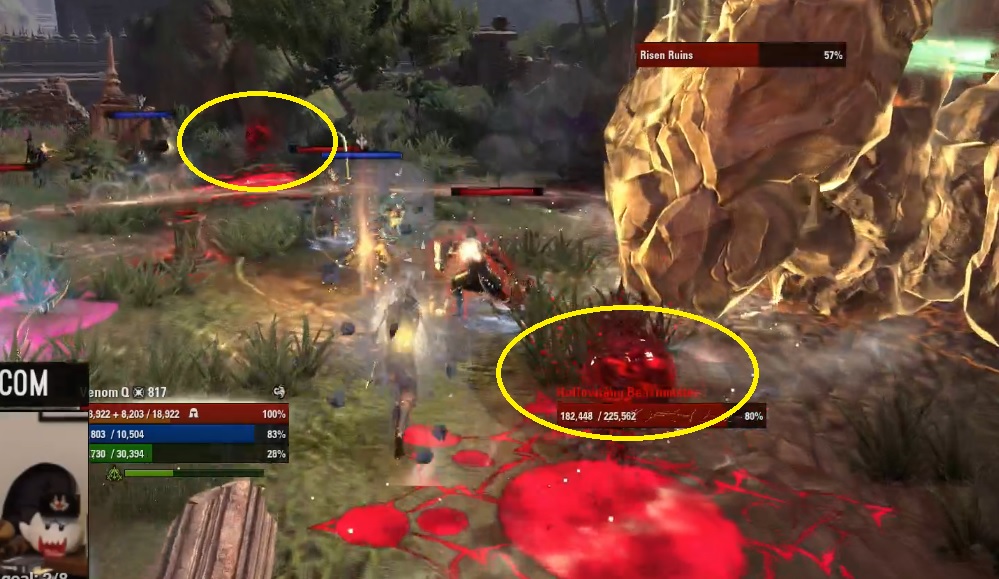
First Boss Risen Ruins – Moongrave Fane
Boss Health:[HP: 2’974’690 Mio]
The first boss is fairly easy, make sure to damage him as much as possible before he goes into a stone-throwing phase where the boss shines goldish. If that happens, the two damage dealers need to go to the red orbs and heavy attack them. That way the red orb will burst open and spray some sort of blood over the boss, removing his immunity to damage. Other than that there is also a phase where he does a stomp attack that deals decent AoE damage. Make sure to have some sort of healing up during this phase, dodge roll, or block the incoming stones.
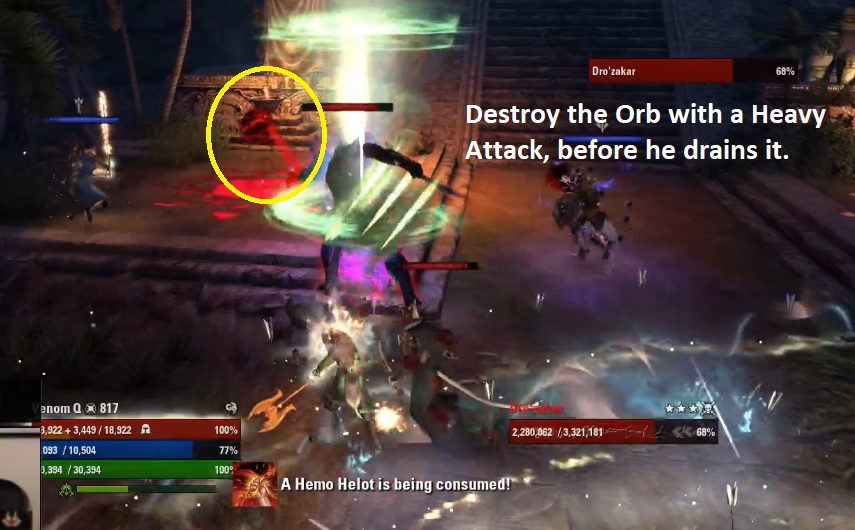
Second Boss Dro’Zakar – Moongrave Fane
Boss Health: [HP: 3’321’181 Mio]
The tank has to make sure to turn Dro’Zakar away from the group to avoid cleave damage. Next up he also has an AoE attack phase similar to the first boss in vet Maw of Lorkhaj. Make sure to spread out correctly to not overlap the damage. Dro’Zakar also has a Wrecking Blow attack that takes him about two seconds to charge, I recommend dodging the attack.
After you damage Dro’Zakar for a bit he will go to one of the red orbs and start draining it to regain power. What you have to do as showcased in the picture, heavy attack the red orb that he tries to drain. That way you break his draining process, and after that damage the boss again.
Mobs will spawn throughout the whole fight, the tank can pull them in, that way they should easily die with your AoE damage, you can also focus them if you want.

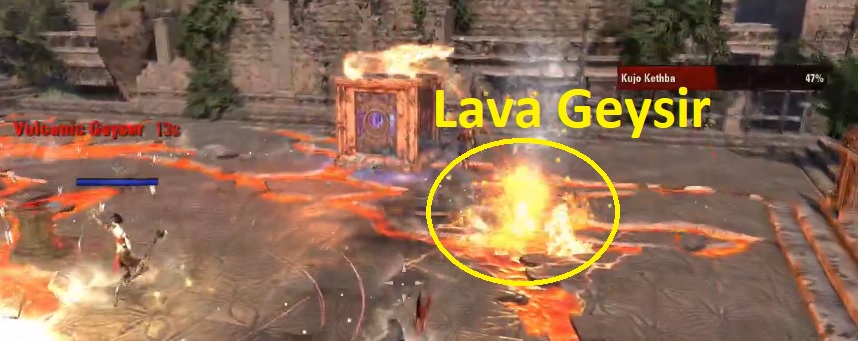
Third Boss Kujo Kethba – Moongrave Fane
Boss Health: [HP: 3’321’181 Mio]
The main mechanic of this boss has to do with the Lava Geysir. From time to time a Lava Geysir will erupt that you have to cover with the cube that you can heavy attack for a long push or light attack for a shorter push. The Lava does a lot of damage so you need a lot of healing, dodge roll or shield yourself.
The tank has to make sure to face the boss away from the group because there is a lot of cleave damage in front of the boss. Adds that spawn can be pulled towards the boss, that way they die from AoE damage. There is also a lot of AoE damage on the ground that you can easily avoid.

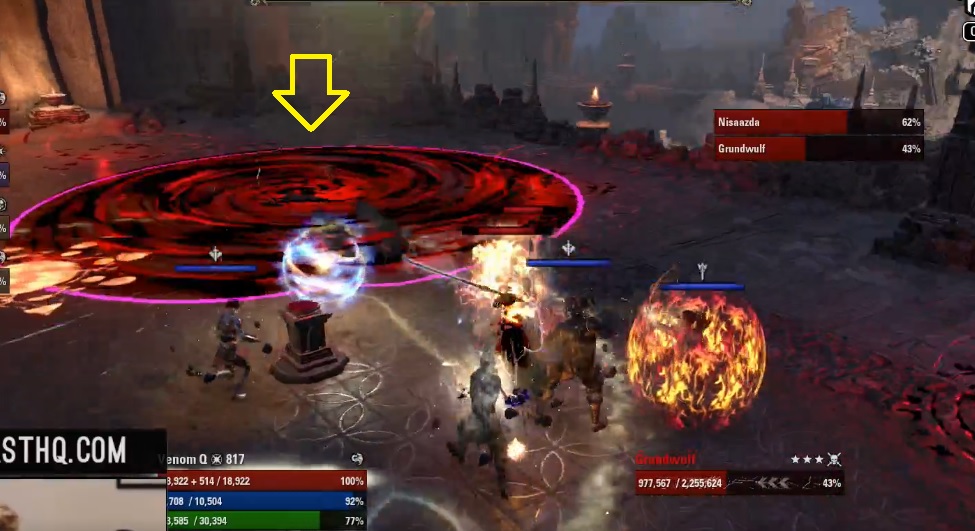
Fourth Boss Nisaazda & Grundwulf – Moongrave Fane
Boss Health: [HP: 2x 2’255’624 Mio]
Here you fight two bosses at the same time, try to stack the Grundwulf on Nisaazda, that way you can cleave both bosses at the same time. There is a few dangerous AoE effects that can hit you but they are easy to avoid. This boss should be dead pretty fast and not cause a lot of trouble.
Nisaazda is summoning Sangiin’s Thirst, you can use the summoning field in the middle, once the red orb appears heavy attack it to interrupt the summoning.
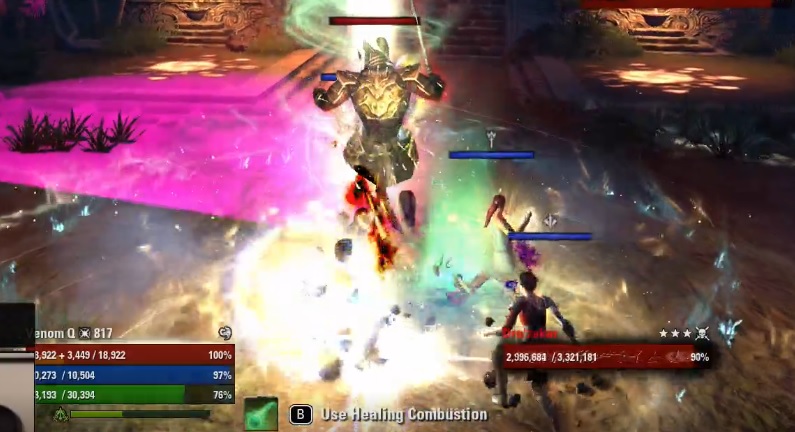
Final Boss Grundwulf – Moongrave Fane
Boss Health: [HP: 5’879’660 Mio]
The Non-Hardmode fight is not that challenging, the tank needs to keep the boss stationary so the damage dealers can attack him from behind. The boss might turn around to cast a AoE spell that can easily be avoided. There is also a lot of cleave damage from the boss, which should not cause any issues if the boss is faced away from the group. Fire AoEs will be placed on the ground from the dragon, make sure to block the impact hit and avoid them.
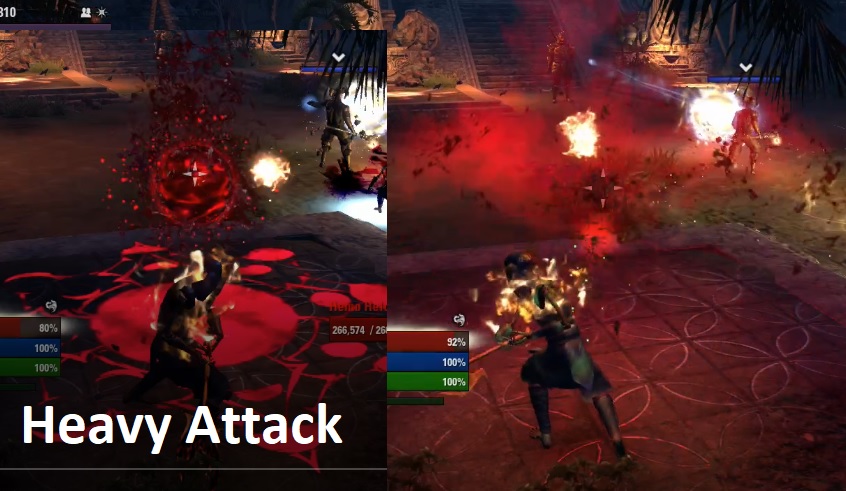
The boss will go behind the cube from time to time to restore energy, you have to heavy attack the cube away from the boss, so he gets hit by the flames of the dragon, weakening him.
There are also pillars that spawn and will drain you, you have to go hug them till they vanish. They apply heal absorption on you so make sure to have a shield on you to avoid death by DoTs from that pillar. Heal absorption negates all healing on you in case you did not know.
Final Boss Hardmode – Moongrave Fane
Boss Health: [HP: 15’287’116 Mio]
This hardmode is really difficult, there is a lot of incoming damage and healing absorption. Like always, the tank has to face the boss away from the group and avoid all AoE damage on the ground. The bosses heavy attacks also deal an insane amount of damage to the tank. At some point in the fight, a second big add will spawn that you also should focus on as fast as possible.
There are plenty of mechanics in this boss fight. From time to time ghosts with a red bubble around them will spawn, the tank has to taunt them so they get close to him. A big bat with a red bubble will spawn that will follow one of the damage dealers. Bring the big bat to the tank and once they are all stacked, the second damage dealer has to heavy attack the red orb, that way you spray the blood over them and they loose their red shield and die really fast.
Next up, the boss will go behind the cube from time to time, if that happens you need to heavy attack the cube to push it away because then Grundwulf gets hit by the fire and gets weakened. Be careful, if the cube is close to the edge of the arena, it might get stuck. Never heavy attack the cube unless the boss goes behind it, otherwise it also applies a big debuff on you that can kill you.
There are also pillars that spawn and will drain you, you have to go hug them till they vanish. They apply heal absorption on you so make sure to have a shield on you to avoid death by DoTs from that pillar. Heal absorption negates all healing on you in case you did not know.
The boss has two specific heavy attacks, a short and a long one. You can take the hit from the short one, but you have to dodge roll the longer heavy attack Grundwulf does, sometimes the animations are a bit wonky, so you need to get used to the two different heavy attacks.


Full Veteran & Hardmode Run
Timestamps for bosses:
- First Boss – Risen
- Second Boss – Dro’Zakar
- Third Boss – Kujo Kethba
- Fourth Boss – Grundwulf & Nisaazda
- Final Boss & Hardmode – Grundwulf