


“Spellbinder”
Type: Group Cyrodiil 12 Players
Table of Contents
- Introduction
- Resource Management
- PVP Group Setup
- Gear
- Skills
- Rotation and Combos
- Champion Points
- Important Info (Food, Mundus, Race, Potions, Passives, Attributes)
- Update Log
Introduction
Welcome to the Magicka Sorcerer Support Cyrodiil Group Build “Spellbinder” for Elder Scrolls Online. Make sure to bookmark the link as I will keep updating the build for each new Update of ESO. The Spellbinder Build is optimized for Organized Group Play of 12 in Cyrodiil.
This build is Support Role oriented.
As a result, we make use of a variety of different sets to complete our Group Composition.
We use a 5-1-1 light Setup with :
- Willpower
- Snow Treaders
- Symphony of Blades
- Perfected Grand Rejuvenation (Master Resto)
- Perfected Mender’s Ward (Blackrose Resto)
And one of the following sets :
- Sanctuary
- Gossamer
- Hollowfang Thirst
- Hiti’s Hearth
- Meritorious Service
- The Worm’s Raiment
- Curse Eater
I am considering switching :
- Gossamer and Hollowfang Thirst on two Healer Setups
- Robes of Transmutation x2 on two Support Setups
As a result, Healers would benefit from stats like Max Magicka and Spell Damage to boost their Healing Potential while Supports would get Magicka Recovery bonuses to increase their Sustain and allow them to Purge more. I just need to test if it’s possible to maintain a solid uptime of Trans on a Support Setup while bringing a solid amount of Purges when needed.
Consider using Curse Eater only if you don’t want to use the Snow Treaders or if you are low on Purges that night. Otherwise, you should be allright.
With the Greymoor Chapter and the Treaders now being part of our arsenal, the need for purges has decreased drastically. As a result, our Support players can focus more on different tasks.
Just like the MagDK Support Role, The Magsorc can also cover an “Offensive” or “Defensive” role. This build will cover mainly the Offensive aspect.
You should have a Defensive Magsorc only if you already have an Offensive one.
What does this mean exactly ?
Offensive
- Good use of Streak during an engagement to lockdown packs of enemies.
- Good use of Mystic Orb right after streaking.
Defensive
- Spamming Cleanse when under enemy or siege pressure
- Reapplying Siege Weapon Shield as we move under siege damage
- Using Lighting Flood from range during an engagement
The main difference is that the Offensive role is all over the place while the Defensive Sorc stays with the raid and acts as a backup in case the other one dies.
If one sorc dies, the other one covers all responsibilities and uptimes as best as he can.
The goal is to provide some redundancy in the raid and not fall apart simply because one player dies or disconnects.
On a different note, since the Scalebreaker update, Mutagen was changed into Radiating Regeneration which affects 3 targets for 10 seconds. Every Magicka Spec in a raid should use this actively.
With the Greymoor Chapter, we now make good use of Illustrious Healing with the Perfected Grand Rejuvenation staff which increase sustain provided to the raid even more by both Supports and Healers.
Even if the Treaders now negate a ton of Roots and Snares, Cleanse is still extremely important to get ride of Siege and hard CCs as we disengage and as we kite.
One of the reason why Magsorc has an edge on any other class is Power Surge which was also changed to affect 6 targets and triggers upon critical healing with the Scalebreaker patch.
This last skill will proc off any Healing Skill mentioned above and will maintain you on top of the healing meter.
We also apply Healing Ward with the Perfected Mender’s Ward which increase healing taken by 30% for 2 seconds when one or two players are stuck behind.
We use Siege Weapon Shield anytime our group stays stationary for a few seconds and backup Cleanse for kiting and heavy siege situations.
Last and not the least, we provide even more sustain by casting Mystic Orb during the kiting phase.
This is just a quick introduction of how useful this Support role is in a group environment. We will cover the other skills in the Rotation and Combos section.
*** IMPORTANT *** : This build requires a Stam Support who provides an uptime of 90%+ on Major Expedition and Minor Expedition with Charging Maneuver.
- Optimized for Organized Group Play of 12 in Cyrodiil
- Double Resto Staves Setup
- Light Armor
- Amazing Synergies
- Best Mobility
- Best Off Healing
- Good Sustain
- Great Crowd Control
Resource Management
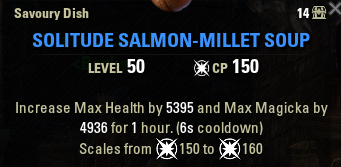
Artaeum Pickled Fish Bowl is the Food we use with this setup. If you don’t have the budget, you can consider using Solitude Salmon-Millet Soup instead.
If you cover the Defensive role, use Orzorga’s Red Frothgar instead to increase your sustain allowing you to Purge more.
The Combustion Synergy from Energy Orb, The Worm’s Raiment buff always active, optimized uptime on Hollowfang Thirst and Symphony of Blades, between 6 to 10 layers of Illustrious Healing with the Perfected Grand Rejuvenation always active, Resto heavy attacks and potions are our major sources of sustain.
Using a Synergy Cooldown tracking addon such as RDK Group Tools helps to make good use of energy orbs.
Consider slotting Dark Conversion for additional Magicka sustain.
- Energy Orbs
- Resto Heavy attacks
- Master Resto Staff
- Wormcult
- Hollowfang
- Symphony
- Potions
PvP Setup

This screenshot was taken with Sanctuary and our food buff.
Gear Setups
| Gear | Set | Type | Trait | Enchantment |
| Chest | Sanctuary | Light | Impenetrable | Tri-Stat |
| Belt | Sanctuary | Light | Impenetrable | Tri-Stat |
| Shoes | Snow Treaders | Medium | Impenetrable | Tri-Stat |
| Pants | Sanctuary | Light | Impenetrable | Tri-Stat |
| Hands | Sanctuary | Light | Impenetrable | Tri-Stat |
| Head | Symphony of Blades | Heavy | Impenetrable | Tri-Stat |
| Shoulder | Symphony of Blades | Light | Impenetrable | Tri-Stat |
| Necklace | Willpower | Jewelry | Arcane | Magicka Recovery |
| Ring | Willpower | Jewelry | Arcane | Magicka Recovery |
| Ring | Sanctuary | Jewelry | Arcane | Magicka Recovery |
| Weapon 1 | Perfected Grand Rejuvenation | Resto Staff | Powered | Absorb Magicka |
| Weapon 2 | Perfected Mender’s Ward | Resto Staff | Powered | Absorb Stamina |
| Gear | Set | Type | Trait | Enchantment |
| Chest | Gossamer | Light | Impenetrable | Tri-Stat |
| Belt | [Gossamer | Light | Impenetrable | Tri-Stat |
| Shoes | Snow Treaders | Medium | Impenetrable | Tri-Stat |
| Pants | Gossamer | Light | Impenetrable | Tri-Stat |
| Hands | Gossamer | Light | Impenetrable | Tri-Stat |
| Head | Symphony of Blades | Heavy | Impenetrable | Tri-Stat |
| Shoulder | Symphony of Blades | Light | Impenetrable | Tri-Stat |
| Necklace | Willpower | Jewelry | Arcane | Magicka Recovery |
| Ring | Willpower | Jewelry | Arcane | Magicka Recovery |
| Ring | Gossamer | Jewelry | Arcane | Magicka Recovery |
| Weapon 1 | Perfected Grand Rejuvenation | Resto Staff | Powered | Absorb Magicka |
| Weapon 2 | Perfected Mender’s Ward | Resto Staff | Powered | Absorb Stamina |
| Gear | Set | Type | Trait | Enchantment |
| Chest | Hiti’s Hearth | Light | Impenetrable | Tri-Stat |
| Belt | Hiti’s Hearth | Light | Impenetrable | Tri-Stat |
| Shoes | Snow Treaders | Medium | Impenetrable | Tri-Stat |
| Pants | Hiti’s Hearth | Light | Impenetrable | Tri-Stat |
| Hands | Hiti’s Hearth | Light | Impenetrable | Tri-Stat |
| Head | Symphony of Blades | Heavy | Impenetrable | Tri-Stat |
| Shoulder | Symphony of Blades | Light | Impenetrable | Tri-Stat |
| Necklace | Willpower | Jewelry | Arcane | Magicka Recovery |
| Ring | Willpower | Jewelry | Arcane | Magicka Recovery |
| Ring | Hiti’s Hearth | Jewelry | Arcane | Magicka Recovery |
| Weapon 1 | Perfected Grand Rejuvenation | Resto Staff | Powered | Absorb Magicka |
| Weapon 2 | Perfected Mender’s Ward | Resto Staff | Powered | Absorb Stamina |
| Gear | Set | Type | Trait | Enchantment |
| Chest | Hollowfang Thirst | Light | Impenetrable | Tri-Stat |
| Belt | Hollowfang Thirst | Light | Impenetrable | Tri-Stat |
| Shoes | Snow Treaders | Medium | Impenetrable | Tri-Stat |
| Pants | Hollowfang Thirst | Light | Impenetrable | Tri-Stat |
| Hands | Hollowfang Thirst | Light | Impenetrable | Tri-Stat |
| Head | Symphony of Blades | Heavy | Impenetrable | Tri-Stat |
| Shoulder | Symphony of Blades | Light | Impenetrable | Tri-Stat |
| Necklace | Willpower | Jewelry | Arcane | Magicka Recovery |
| Ring | Willpower | Jewelry | Arcane | Magicka Recovery |
| Ring | Hollowfang Thirst | Jewelry | Arcane | Magicka Recovery |
| Weapon 1 | Perfected Grand Rejuvenation | Resto Staff | Powered | Absorb Magicka |
| Weapon 2 | Perfected Mender’s Ward | Resto Staff | Powered | Absorb Stamina |
| Gear | Set | Type | Trait | Enchantment |
| Chest | Meritorious Service | Light | Impenetrable | Tri-Stat |
| Belt | Meritorious Service | Light | Impenetrable | Tri-Stat |
| Shoes | Snow Treaders | Medium | Impenetrable | Tri-Stat |
| Pants | Meritorious Service | Light | Impenetrable | Tri-Stat |
| Hands | Meritorious Service | Light | Impenetrable | Tri-Stat |
| Head | Symphony of Blades | Heavy | Impenetrable | Tri-Stat |
| Shoulder | Symphony of Blades | Light | Impenetrable | Tri-Stat |
| Necklace | Willpower | Jewelry | Arcane | Magicka Recovery |
| Ring | Willpower | Jewelry | Arcane | Magicka Recovery |
| Ring | Meritorious Service | Jewelry | Arcane | Magicka Recovery |
| Weapon 1 | Perfected Grand Rejuvenation | Resto Staff | Powered | Absorb Magicka |
| Weapon 2 | Perfected Mender’s Ward | Resto Staff | Powered | Absorb Stamina |
| Gear | Set | Type | Trait | Enchantment |
| Chest | The Worm’s Raiment | Light | Impenetrable | Tri-Stat |
| Belt | The Worm’s Raiment | Light | Impenetrable | Tri-Stat |
| Shoes | Snow Treaders | Medium | Impenetrable | Tri-Stat |
| Pants | The Worm’s Raiment | Light | Impenetrable | Tri-Stat |
| Hands | The Worm’s Raiment | Light | Impenetrable | Tri-Stat |
| Head | Symphony of Blades | Heavy | Impenetrable | Tri-Stat |
| Shoulder | Symphony of Blades | Light | Impenetrable | Tri-Stat |
| Necklace | Willpower | Jewelry | Arcane | Magicka Recovery |
| Ring | Willpower | Jewelry | Arcane | Magicka Recovery |
| Ring | The Worm’s Raiment | Jewelry | Arcane | Magicka Recovery |
| Weapon 1 | Perfected Grand Rejuvenation | Resto Staff | Powered | Absorb Magicka |
| Weapon 2 | Perfected Mender’s Ward | Resto Staff | Powered | Absorb Stamina |
| Gear | Set | Type | Trait | Enchantment |
| Chest | Curse Eater | Light | Impenetrable | Tri-Stat |
| Belt | Curse Eater | Light | Impenetrable | Tri-Stat |
| Shoes | Snow Treaders | Medium | Impenetrable | Tri-Stat |
| Pants | Curse Eater | Light | Impenetrable | Tri-Stat |
| Hands | Curse Eater | Light | Impenetrable | Tri-Stat |
| Head | Symphony of Blades | Heavy | Impenetrable | Tri-Stat |
| Shoulder | Symphony of Blades | Light | Impenetrable | Tri-Stat |
| Necklace | Willpower | Jewelry | Arcane | Magicka Recovery |
| Ring | Willpower | Jewelry | Arcane | Magicka Recovery |
| Ring | Curse Eater | Jewelry | Arcane | Magicka Recovery |
| Weapon 1 | Perfected Grand Rejuvenation | Resto Staff | Powered | Absorb Magicka |
| Weapon 2 | Perfected Mender’s Ward | Resto Staff | Powered | Absorb Stamina |
Where can I get the gear?
Sanctuary: The Banished Cells I, The Banished Cells II
Gossamer: Cradle of Shadows
Hiti’s Hearth: Icereach
Hollowfang Thirst: Moongrave Fane
Meritorious Service: Imperial City
The Worm’s Raiment: Vault of Madness
Curse Eater: Cyrodiil
Snow Treaders: Mythic Item, Antiquities, Scrying, Excavation
Willpower: Imperial City
Symphony of Blades: vDepths of Malatar
Perfected Grand Rejuvenation: Veteran Dragonstar Arena
Perfected Mender’s Ward: Veteran Blackrose Prison
Skills


| Resto Staff Mainbar | Resto Staff Off Bar |
| Slot 1: Power Surge | Slot 1: Streak |
| Slot 2: Siege Weapon Shield | Slot 2: Mystic Orb |
| Slot 3: Cleanse | Slot 3: Lightning Flood |
| Slot 4: Radiating Regeneration | Slot 4: Hardened Ward |
| Slot 5: Illustrous Healing | Slot 5: Ward Ally |
| Ultimate: Absorbption Field | Ultimate: Absorbption Field |
Skills Explanation
- Power Surge: One of the best source of Healing.
- Cleanse: Debuffs removal and Burst Heal.
- Radiating Regeneration: Healing Over Time per Target.
- Illustrous Healing: Healing Over Time Ground Effect.
- Streak: Gap Closer, Lockdown, Escape Tool.
- Mystic Orb: Damage and Sustain Synergy.
- Lightning Flood: Damage Synergy.
- Ward Ally: Source of Major Vitality.
- Absorbtion Field: Negate Spells, Remove Ground Effects, Heals the raid.
Rotation and Combos
Prebuffing Phase
With a Warden casting Expansive Frost Cloak to apply Major Resolve on the whole group, you don’t need to run Boundless Storm.
Before any engagement, you want to make sure to maintain the following buffs and abilities :
- Healing: Power Surge
- One cast ahead of the group: Illoustrious Healing
- One or two casts: Radiating Regeneration
Offensive window
In a magicka group focus, the leader will usually start an engagement by doing a countdown of Proximity Detonation. As you hear the countdown, cast Power Surge.
Cast Illoustrious Healing once and Radiating Regeneration a few times, then Streak toward the biggest pack of enemies before the leader even calls for it.
You have to anticipate the direction ahead of time so I recommend this role to be covered by somebody with experience who has played with the leader for quite some time and is used to his calls.
The goal is to land shortly before the Proximity Detonation of Damage Dealers explodes.
Finally, cast Mystic Orb or reposition yourself if your direction was wrong.
Ultimate
The way you use your ultimate depends of the amount of Negates available in the raid.
3 Negates
- One Stamsorc Support
- One Magsorc Support Offensive
- One Magsorc Support Defensive
The Magsorc Support Offensive has to be in the rotation for Offensive Negate with another Sorc, doesn’t matter which one. Then the remaining one is not part of the rotation and save for Counter.
2 Negates
- One Stamsorc Support
- One Magsorc Offensive
The Stamsorc Support saves for counter and the Magsorc Support Offensive uses Negate offensively.
The main reasoning behind this is that the Magsorc Support covering an offensive role will often streak right where the action is and put himself in a situation where an enemy Negate could be dropped right on top of him.
As a result, we assign the role of Counter-Negate to a Sorc who has less chances to be Negated.
No matter the amount of Negates in your raid, make sure that if only one Negate is up, that Sorc has to save for Counter until somebody else is back up. This includes Magsorc Damage Dealer with Negate backbar.
I highly recommend downloading and installing RDK Group Tools to track ultimates in your group.
You can also join my Discord server and read the RDK Group Tools configuration guide in the #rdk lobby.
Kiting Phase
When the leader calls to move away in a direction after an engagement, move back toward your group as fast as possible while spamming Cleanse.
During the kiting phase, when not under heavy pressure, cast Illoustrious Healing ahead of your group, then use Radiating Regeneration a few times.
Also cast Siege Weapon Shield when stationary for a few seconds, especially inside a keep or an outpost.
Finally, when people call for help or when you see them in danger, cast Ward Ally to proc Major Vitality and increase their healing taken, combined with the burst healing from Healers. If more than two are stuck, spam Cleanse instead.
Defensive Role
As pointed out earlier in the build, you can also play a Magsorc Support defensively. The skills on your bars remain the same but some of them are used as a back up only. In case the Offensive Sorc dies or disconnects.
Skills like Mystic Orb and Streak are used offensively only as backup.
Your main focus should be Cleanse, Siege Weapon Shield, Lightning Flood, Ward Ally (different morphs of this skill stack together) and Mystic Orb for the sustain during the kiting phase.
If the other Magsorc becomes unavailable, you take over his role on everything described above.
Champion Points
Below you can find the Champion Points setup for this build. Work your way from top to bottom in your allocation. For more information on Champion Points, please visit the Champion Points Overview Page on ESO-Hub.com.
Important:
- Warfare Tree: This tree gives you a mix between damage, healing and damage mitigation.
- Fitness Tree: This tree gives you extra health, sustain and defensive buffs.
- Craft Tree: This tree is mostly optional, nothing really “impacts” combat, therefore you can pick whatever you prefer, or use the preset below.
- Perks: Hovering over each perk will give you insights on what it does. Presets are also provided for each of the allocations below.
Click the tab below to open the allocation.
Important Info
Buff-food
Artaeum Pickled Fish Bowl

Solitude Salmon-Millet Soup
Orzorga’s Red Frothgar

Mundus Stone
The Atronach.
Consider using The Steed (Increased Movement Speed by 10%) if you struggle to keep up with your group.
Race
Breton
Potions
Immovability Potions
(CC Immunity, Health, Magicka)
(Bugloss, Namira’s Rot, Columbine)

Passives
- Dark Magic: Unholy Knowledge, Blood Magic, Persistence, Exploitation
- Daedric Summoning: Rebate, Power Stone, Daedric Protection, Expert Summoner
- Storm Calling: Capacitor, Energized, Amplitude, Expert Mage
- Restoration Staff: Essence Drain, Restoration Expert, Cycle of Life, Absorb, Restoration Master
- Light Armor: Grace, Evocation, Spell Warding, Prodigy, Concentration
- Heavy Armor: Resolve, Constitution, Juggernaut
- Medium Armor: Wind Walker, Athletics
- Undaunted: Undaunted Command, Undaunted Mettle
- Assault: Continuous Attack, Reach, Combat Frenzy
- Support: Magicka Aid, Combat Medic, Battle Resurrection
- Racial: All
- Alchemy: Medicinal Use