Welcome to the Black Gem Foundry Dungeon Guide ESO! This guide is your essential resource for mastering Black Gem Foundry on Veteran Hard Mode. We’ll cover every difficult mechanic and how to survive them. Black Gem Foundry’s entrance is located in southern Solstice northwest of the Shell-Tide Village wayshrine.
This dungeon was released alongside Naj-Caldeesh in the Fallen Banners Dungeon Update, continuing the Season of the Worm Cult saga.
Black Gem Foundry features 6 bosses (3 main, 3 optional mini-bosses) and numerous trash packs. If you have more questions, you can also ask someone in our community partner discord about this Black Gem Foundry Dungeon Guide!
Table of Contents:
- Introduction & Lore
- Black Gem Foundry Sets & Rewards
- Trashmobs
- Gem Mining & Hidden Buffs in Black Gem Foundry
- Black Gem Foundry Boss Fights: Detailed Strategies
Introduction & Lore

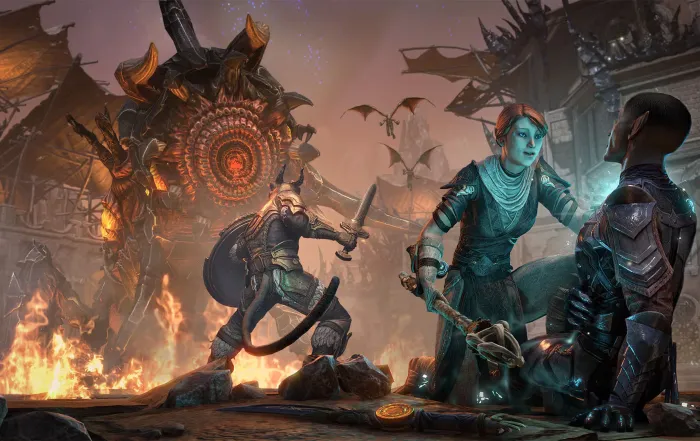
Welcome to the Black Gem Foundry, a new four-player dungeon in The Elder Scrolls Online introduced with Update 47’s Feast of Shadows DLC. Located in the treacherous pathways of Coldharbour, this infernal armory forges deadly weapons and armor from black soul gems. These sinister armaments steal life essence with every strike, and you must stop these operations to save Nirn.
Lore, Setting, and Story Overview of Black Gem Foundry
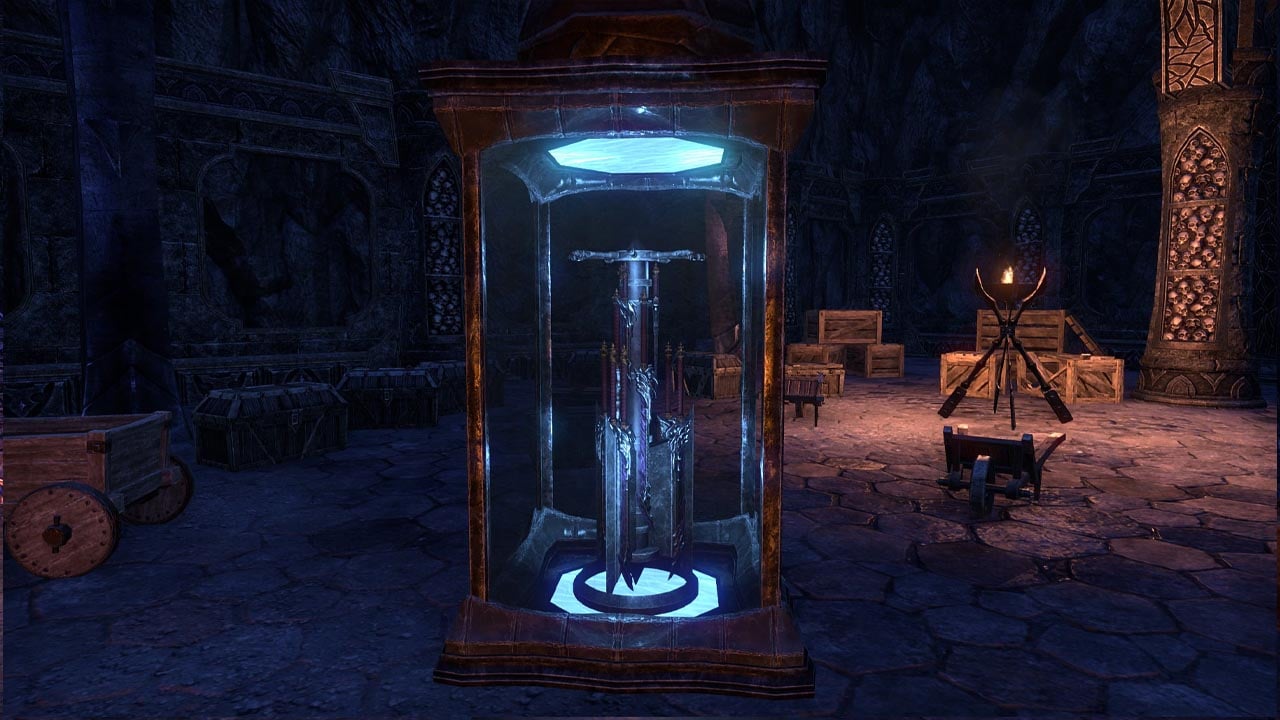
Blades made of gems that can instantly trap the soul of its victim, empowering it further.
The Black Gem Foundry is a twisted mine and foundry built by High Soulbinder Vykand on a massive deposit of black soul gems. She plans to supply the Worm Cult with soul-trapping weapons for an invasion along the Writhing Wall.
A scholar named Dalenor the Summoner, initially hired to summon Atronachs to power the forges, discovered Vykand’s plan to soul trap him. After a narrow escape, he now needs your help to enter the foundry and shut it down, freeing his Atronach friends who are being bled to power the forges.
Dungeon Difficulty & Requirements (Normal, Veteran, Hard Mode Explained)
Black Gem Foundry can be completed on both Normal and Veteran difficulties. Completing it on Veteran unlocks additional challenges and achievements, including specific Hard Mode encounters for each boss within the dungeon. This guide will help you understand the Black Gem Foundry mechanics for all difficulties.
- Normal Mode
- Difficulty: Easiest.
- Requirements: Level 10+, flexible group composition.
- Veteran Mode
- Difficulty: Significantly harder than Normal.
- Requirements: Level 50 (CP 160 recommended for base game, CP 300+ for DLC dungeons). Requires a dedicated tank, healer, and two DPS.
- Veteran Hard Mode (HM)
- Difficulty: Highest. activated within Veteran mode on the final boss. Most new dungeons have Hard Mode on each main boss.
Gear Sets & Unique Rewards in Black Gem Foundry
Unique Item Sets & their Bonuses
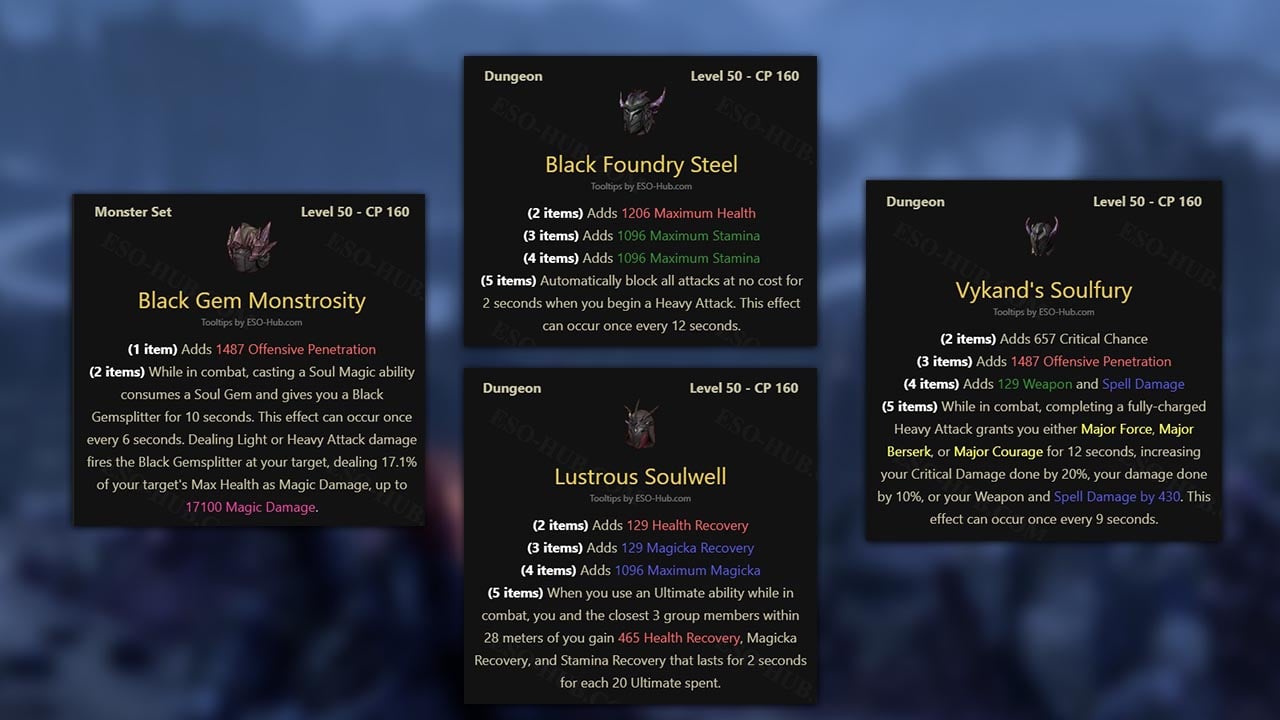
Black Gem Foundry introduces four new ESO gear sets, including Black Gem Monstrosity Monster Set. Each of the Black Gem Foundry sets below drops from the dungeons bosses and chests. Specifically, weapons and jewelry pieces are only found by defeating the final boss and with good luck, from chests.
- Light: Vykand’s Soulfury
- (2 items) Adds 657 Critical Chance
(3 items) Adds 1487 Offensive Penetration
(4 items) Adds 129 Weapon and Spell Damage
(5 items) While in combat, completing a fully-charged Heavy Attack grants you either Major Force, Major Berserk, or Major Courage for 12 seconds, increasing your Critical Damage done by 20%, your damage done by 10%, or your Weapon and Spell Damage by 430. This effect can occur once every 9 seconds.
- (2 items) Adds 657 Critical Chance
- Medium: Lustrous Soulwell
- (2 items) Adds 129 Health Recovery
(3 items) Adds 129 Magicka Recovery
(4 items) Adds 1096 Maximum Magicka
(5 items) When you use an Ultimate ability while in combat, you and the closest 3 group members within 28 meters of you gain 465 Health Recovery, Magicka Recovery, and Stamina Recovery that lasts for 2 seconds for each 20 Ultimate spent.
- (2 items) Adds 129 Health Recovery
- Heavy: Black Foundry Steel
- (2 items) Adds 1206 Maximum Health
(3 items) Adds 1096 Maximum Stamina
(4 items) Adds 1096 Maximum Stamina
(5 items) Automatically block all attacks at no cost for 2 seconds when you begin a Heavy Attack. This effect can occur once every 12 seconds.
- (2 items) Adds 1206 Maximum Health
- Monster Set: Black Gem Monstrosity (Veteran only)
- (1 item) Adds 1487 Offensive Penetration
(2 items) While in combat, casting a Soul Magic ability consumes a Soul Gem and gives you a Black Gemsplitter for 10 seconds. This effect can occur once every 6 seconds. Dealing Light or Heavy Attack damage fires the Black Gemsplitter at your target, dealing 17.1% of your target’s Max Health as Magic Damage, up to 17100 Magic Damage.
- (1 item) Adds 1487 Offensive Penetration
Collectibles
Slippery Soul Gem Memento
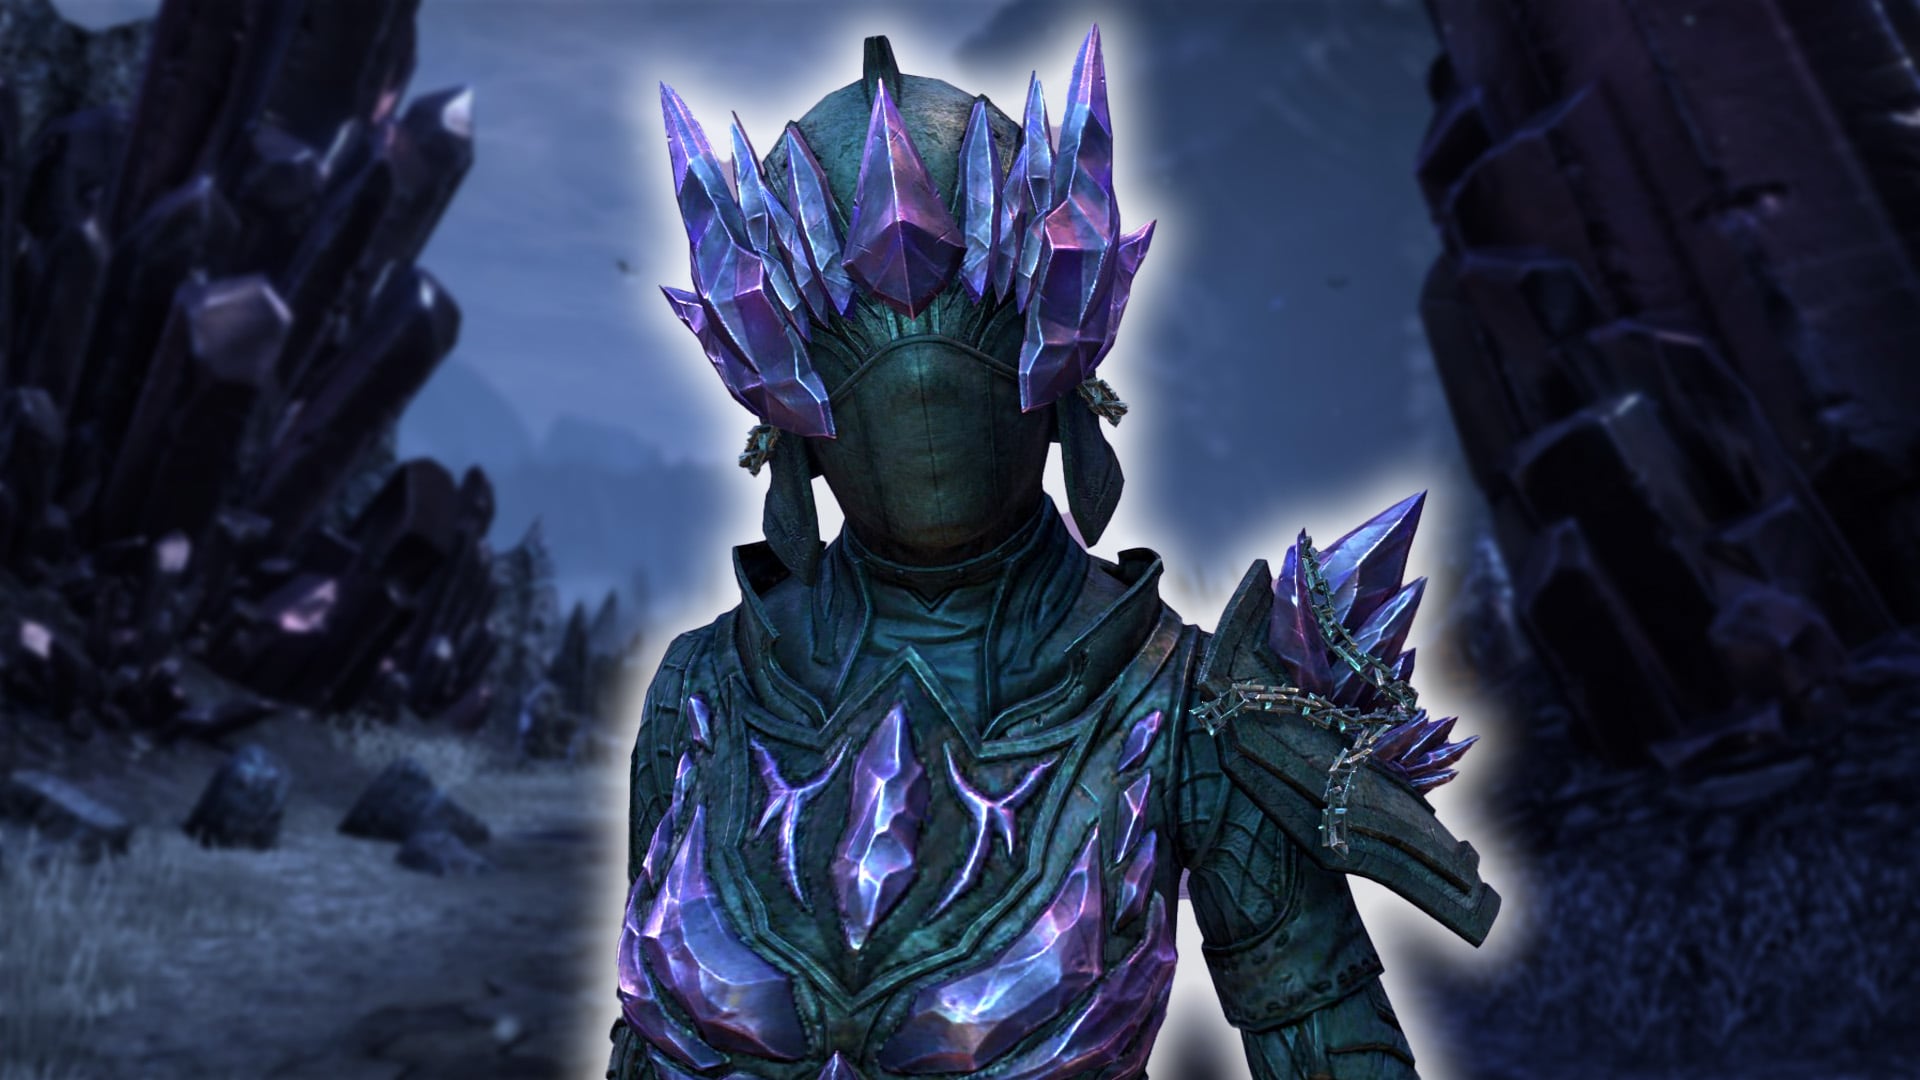
- Skin: Xanmeer Defender (Obtained by completing “Feast of Shadows Delver“)
- Dye: Weathered Keystone Green (Obtained by completing “Temple Hero” and “Mining Tunes“)
- Skill Style: Fire Rune, Dazzling White (Obtained by completing “Black Gem Foundry Vanquisher“)
- Memento: Slippery Soul Gem Tooltips by ESO-Hub.com (Obtained by completing “Naj-Caldeesh Conqueror“)
- Furnishings:
- Trophy: Black Gem Monstrosity (Obtained by completing Black Gem Foundry on normal)
- Bust: Black Gem Monstrosity (Obtained by completing Black Gem Foundry on veteran)
- Coldharbour Archway, Grand can be bought from Undaunted Quartermaster for 25,000 Gold after completing the Black Gem Foundry Vanquisher achievement
- Titles:
- Illustrious (Obtained by completing “Dispersive Defeat“)
- The Brilliant (Obtained by completing “Cut Above the Rest“)
- Foundry’s Foil (Obtained by completing “Black Gem Foundry Champion“)
Images of all the collectibles you can get from Black Gem Foundry


Trashmonsters in Black Gem Foundry

Kozell, Quarry Overseer titan spawns before first boss after you have killed most of the smaller adds. The titan doesn’t do a lot of damage, it mainly jumps and slams and breathes cold fire.
Many of the bigger adds in Black Gem Foundry can apply the Essence Leech debuff to their target which drains your health (and stacks, draining it even more). Tank needs to taunt all bigger adds so dd’s and healer doesn’t get the Essence Leech debuff.
- Kozell, Quarry Overseer: A large Titan add that appears before the first boss. It uses jumps, slams, and cold fire breath.
- Soulbinder Adds: Watch out for Soulbinder Acid Archer Tyrants who apply the high damage, stacking Essence Drain/Leech DoT.
- Galvanizing Imps: These use a Charged Lightning Heavy Attack (Chain Lightning). Prioritize killing them or stun them and make sure everyone Blocks the attack.
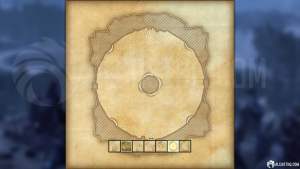
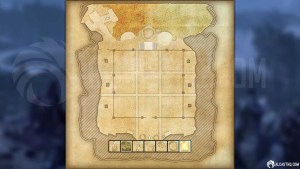
Black Gem Foundry Maps
Here you can find all the different maps from Black Gem Foundry as you progress through the dungeon.
-

- Black Gem Foundry Map 1

-
- Black Gem Foundry Map 2
-
- Black Gem Foundry Map 3
-
- Black Gem Foundry Map 4
-
- Black Gem Foundry Map 5

-
- Black Gem Foundry Map 6
-
- Black Gem Foundry Map 7
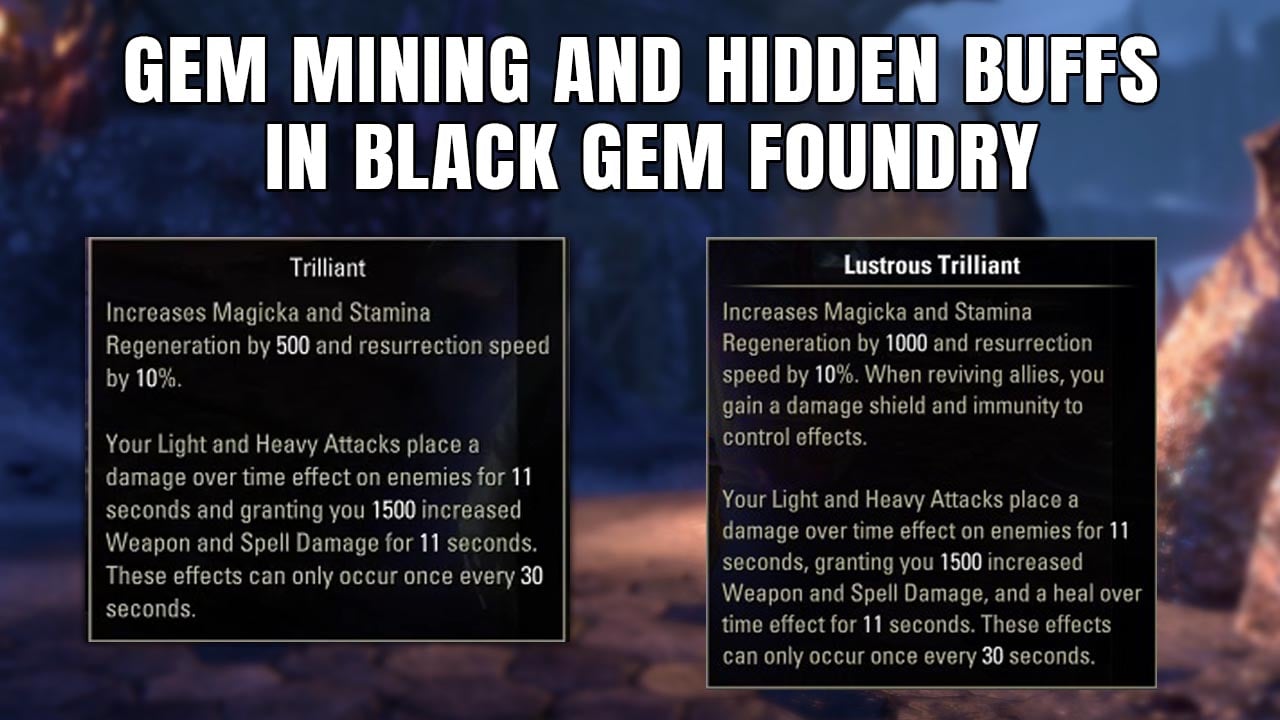
Gem Mining & Hidden Buffs in Black Gem Foundry
Black Gem Foundry features an optional, powerful Gem Mining mechanic, similar to Stone Garden. By engaging with this system, your group can craft and upgrade a special wrist cuff that grants powerful buffs.
- Find the Essences: Defeat the three optional secret bosses (Prospector Lyrakta, Gemcarver Hynax, and Misura) to collect their Superior Daedric Essence.
- Mine the Gems: Find and mine Potent Black Gems scattered throughout the dungeon.
- Craft the Cuff: Take the essences to a Jewelry Crafting Station within the dungeon to fill the gems and craft a special wrist cuff.
Craftable Buffs (Improved with Jewelry Crafting Lvl 49 + 10 Rubedite Ingots)
The buffs’ quality is tied to your Jewelry Crafting skill line. A higher skill level unlocks the “Lustrous” version.
- Cabochon: Significantly increases your Magicka and Stamina Regeneration.
- Cabochon: 500 Magicka and Stamina Regeneration
- Lustrous Cabochon: 1000 Magicka and Stamina Regeneration.
- Pendeloque: Adds increased resurrection speed and with the better version you also get a damage shield, with crowd control (CC) immunity when reviving allies.
- Pendeloque: 10 % increased resurrection speed.
- Lustrous Pendeloque: 10 % increased resurrection speed and a damage shield,with crowd control (CC) immunity when reviving allies.
- Trilliant: Applies a damage over time effect with your Light and Heavy Attacks and gives you 1,500 Weapon and Spell Damage for 11 seconds. The better version also grants a heal over time effect.
- Trilliant: Your Light and Heavy Attacks place a damage over time effect on enemies for 11 seconds and granting you 1500 increased Weapon and Spell Damage for 11 seconds. These effects can only occur once every 30 seconds.
- Lustrous Trilliant: Your Light and Heavy Attacks place a damage over time effect on enemies for 11 seconds, granting you 1500 increased Weapon and Spell Damage, and a heal over time effect for 11 seconds. These effects can only occur once every 30 seconds.
Black Gem Foundry Boss Fights: Detailed Strategies

Black Gem Foundry features six bosses in total: three main bosses required to complete the dungeon, and three optional “secret” bosses. Below you can find a list of all the bosses in Black Gem Foundry along with their health pools on Normal, Veteran and Veteran Hard Mode difficulty.
| Boss | Health |
|---|---|
 Boss 1: Prospector Lyrakta (optional) |
|
|
|
Boss 3: Gemcarver Hynax (optional) |
|
|
|

|
|
|
|
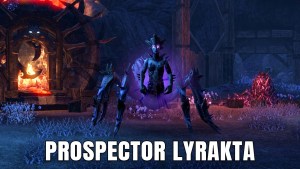
Boss 1: Prospector Lyrakta (Optional)

Prospector Lyrakta is the first optional secret boss encountered in the Black Gem Foundry dungeon. This spiderkith daedra is found in a hidden room within the first map of the dungeon.
Prospector Lyrakta is a quite straightforward fight as she uses regular Spiderkith Daedra attacks that you might be familiar with. The most dangerous mechanic in this fight comes from the Soulbinder Acid Archer Tyrant adds she summons. These Soulbinder adds apply Essence Drain damage over time effect which can stack and kill dd’s and healers if tank does not taunt the add. Either Burn the boss down quickly or kill the Soulbinder Archers.
Prospector Lyrakta summons adds when her health reaches: 75%, 59% and 25%.
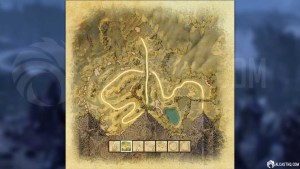
Prospector Lyrakta Hidden Entrance location on map:
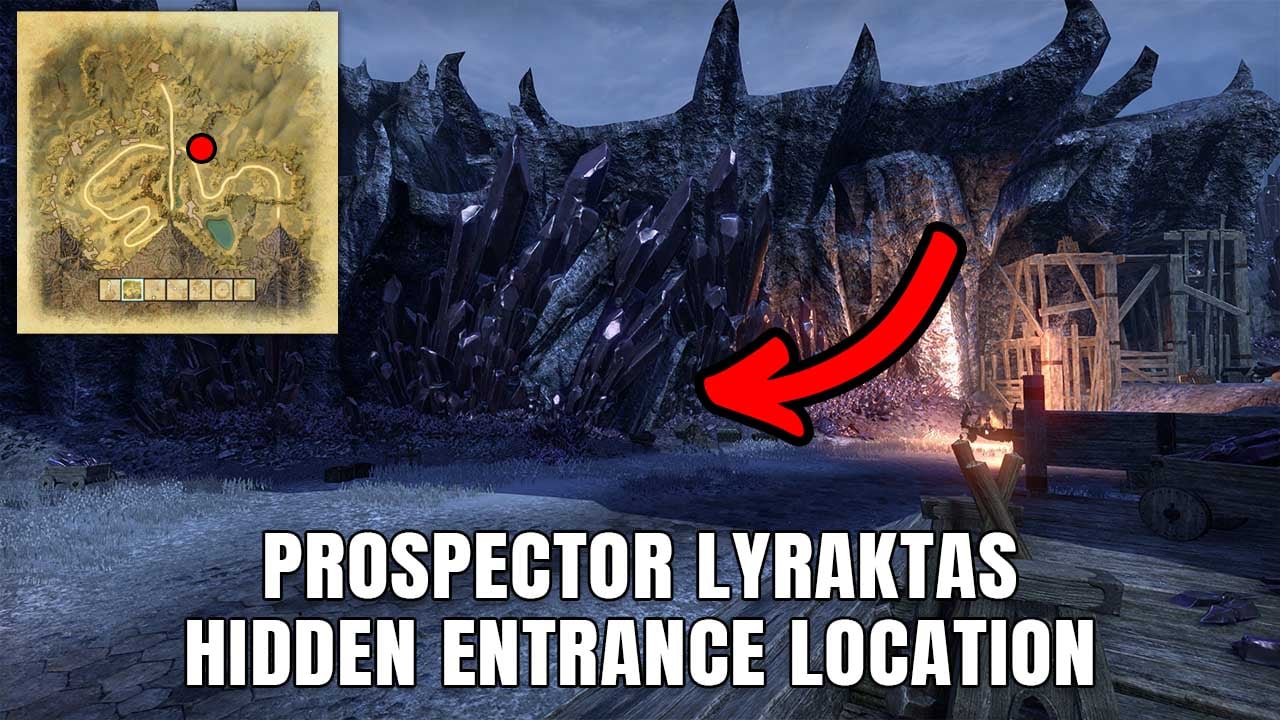
Prospector Lyraktas hidden entrance location on map
All of Prospector Lyrakta’s Abilities listed and how to deal with them
We’ve compiled this list of Prospector Lyrakta’s abilities:
| Prospector Lyrakta Abilities | Ability Descriptions and how to deal with them |
|---|---|
| Grappling Web | Pulls you to herself and applies a snare. Move further away from the boss. |
| Daedric Explosion |
An explosion similar to other spider Daedra that triggers when players get close. Block or move away from it. |
| Spider Slash | |
| Spider Swarm | Summons Spiderlings. |
| Strike |
The boss’s Light Attack. |
Prospector Lyrakta’s Adds
| Prospector Lyrakta Adds | Ability Descriptions and how to deal with them |
|---|---|
| Soulbinder Acid Archer Tyrant |
|
| Spiderling | Nothing Special |
| Shackled Titan | Nothing Special |
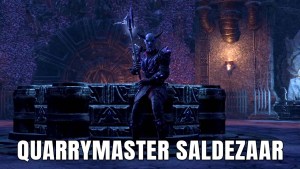
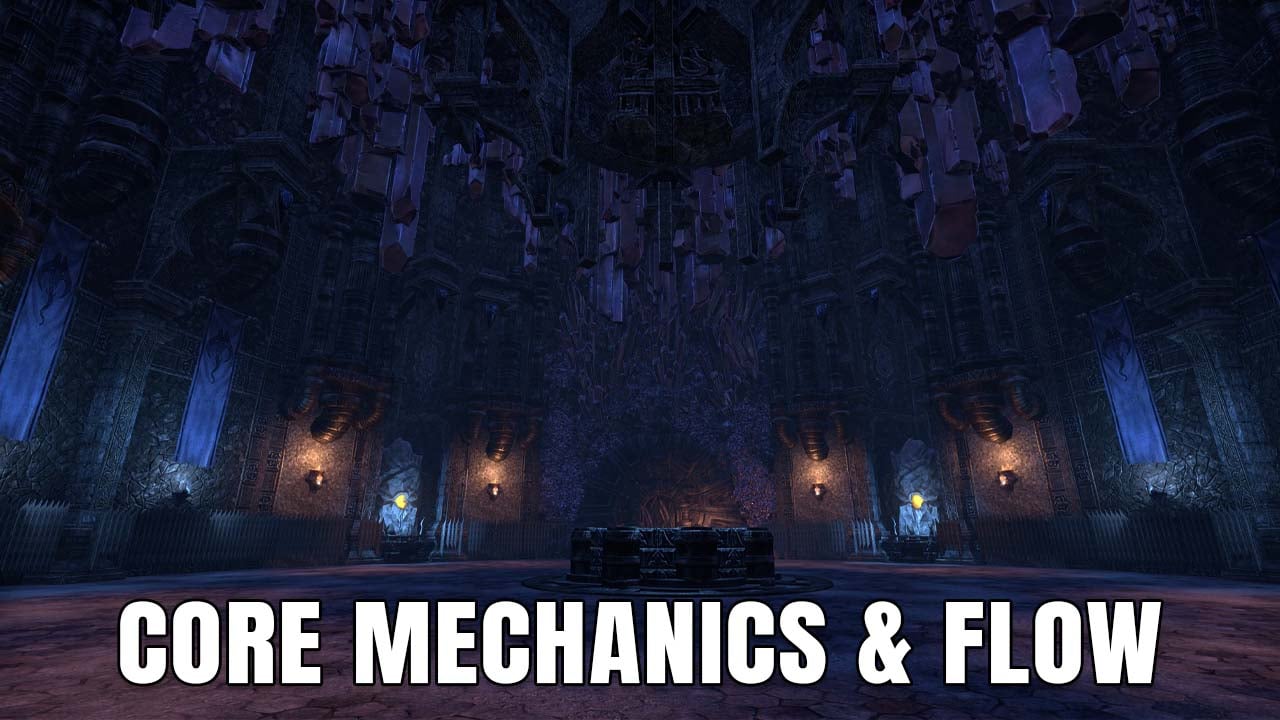
Boss 2: Quarrymaster Saldezaar

Quarrymaster Saldezaar is the first main boss in the Black Gem Foundry dungeon. He makes you focus on managing the fighting area and using his own skills to cleanse effects.
Quarrymaster Saldezaar: Core Mechanics & Flow
Deadly Perimeter
Quarrymaster Saldezaar Deadly Perimeter on the edges
We’ll start with the Deadly Perimeter: when you enter the fight with Quarrymaster Saldezaar, the sharp gems in the middle and on the sides will be shown red. The red disappears, but the sharp gems will stay and damage you if you stand in them. This is important to remember during the fight.
Giant Atronachs

Activated Giant Stone Atronachs
At times during the fight Quarrymaster Saldezaar will activate Giant Atronachs on either the sides (Pulverizing Slam) or the middle (Agitating Rumble). The red area won’t be a one-shot but it’s best to move to the safe area asap.
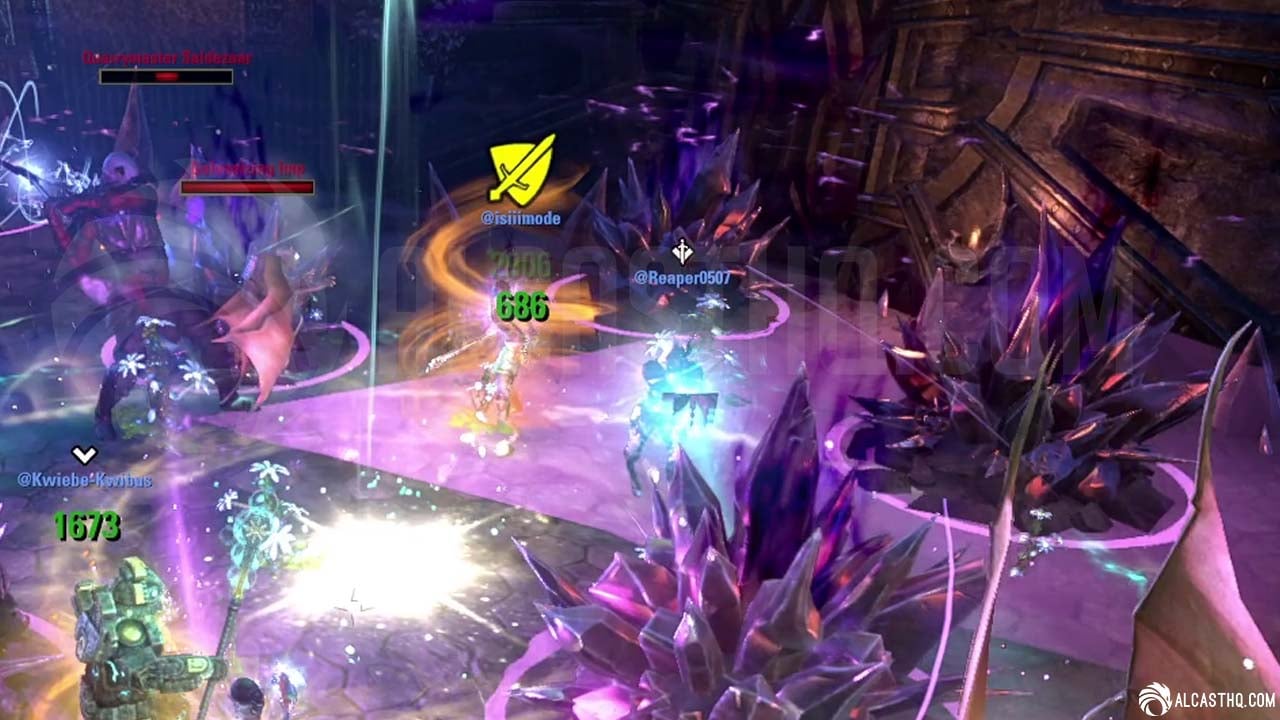
Galvanizing Imps
Galvanizing imp
You should always prioritize killing Galvanizing Imps as they spawn and block their heavy attack. Galvanizing Imps Heavy Attack that hits everyone around the target with chain lightning (similar to Xoryn in Lucent Citadel).
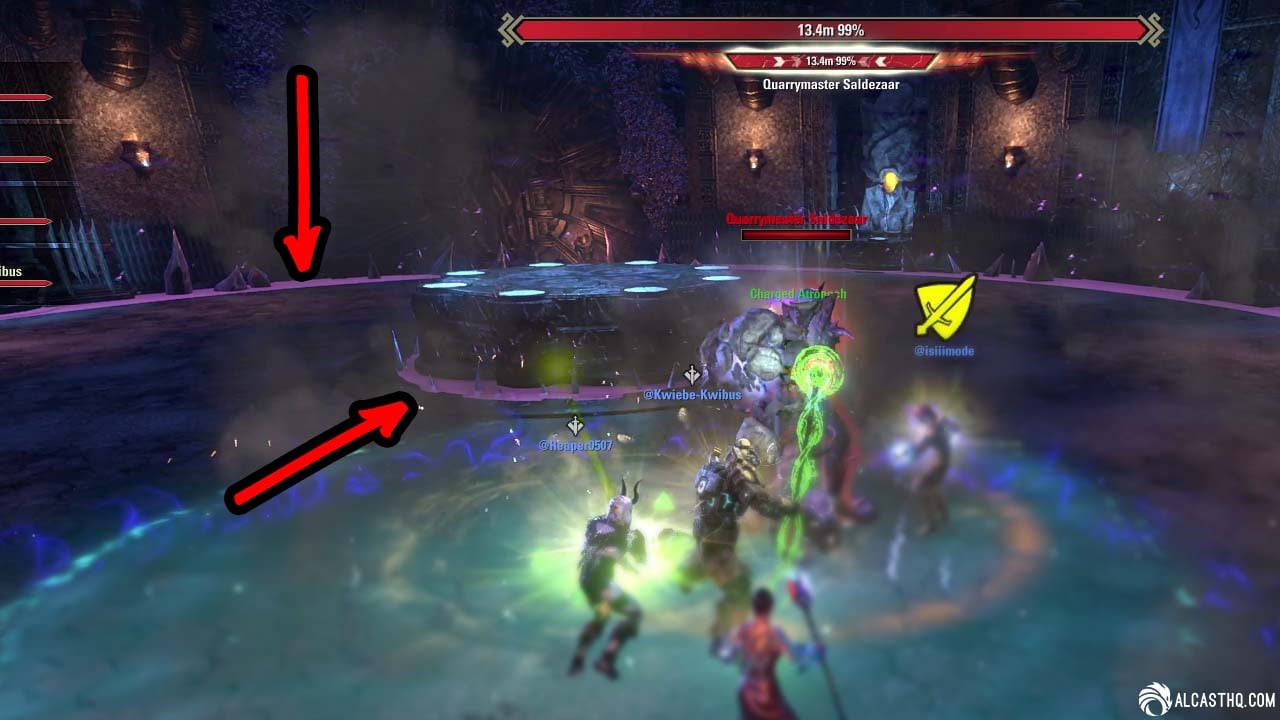
Rupture
Rupture with the safe spot on the inside ring
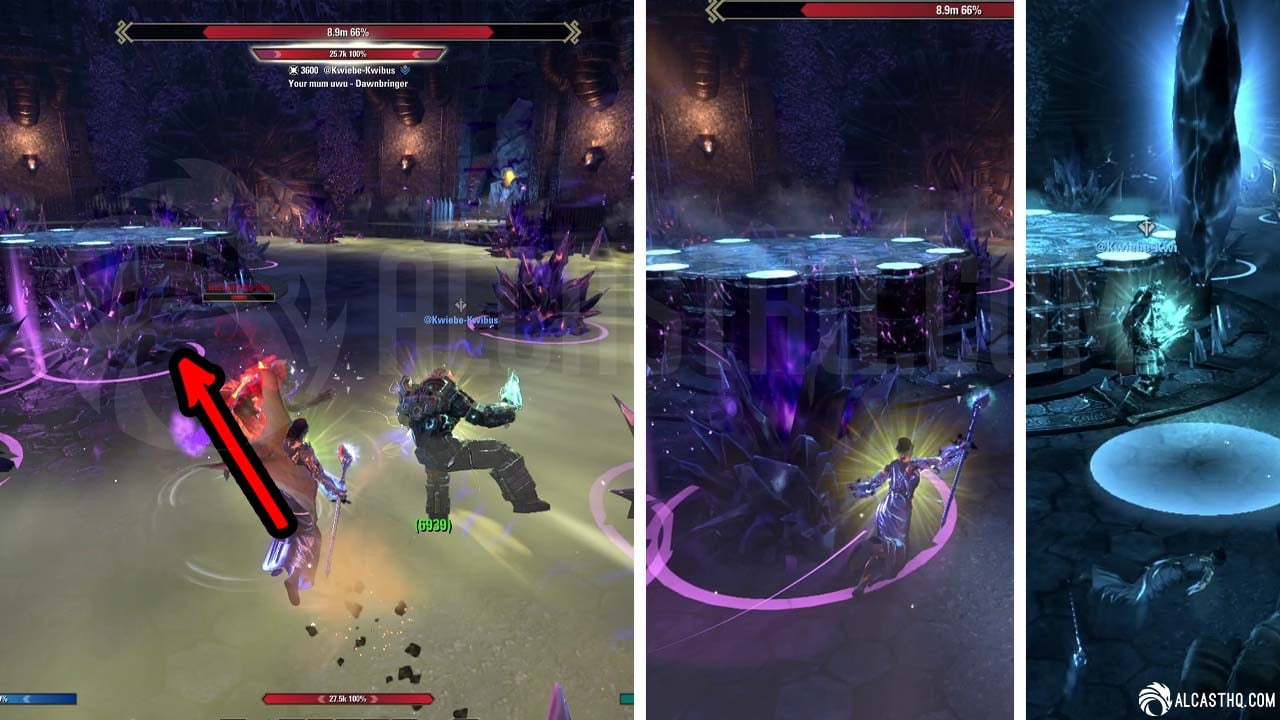
Rupture with the safe spot on the outside ring done wrong.
When the bosses health reaches 65% and 30% (in Hard Mode) he casts Rupture forcing you to go either to the outside ring or the inside ring (shown in yellow) and after a moment, he will fling you towards the opposite side. If you touch any object while being flung, you will die. You can clear Black Gems from the ground by pointing his Galvanizing Blow cone attack at them.
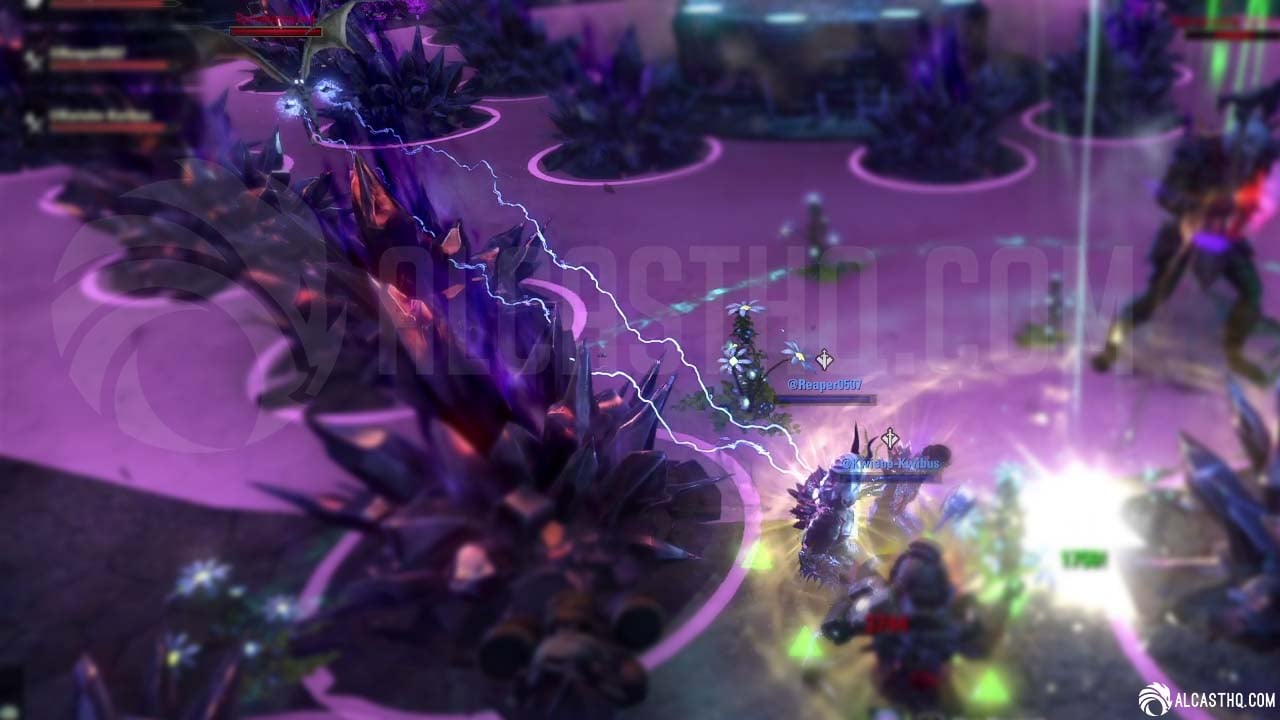
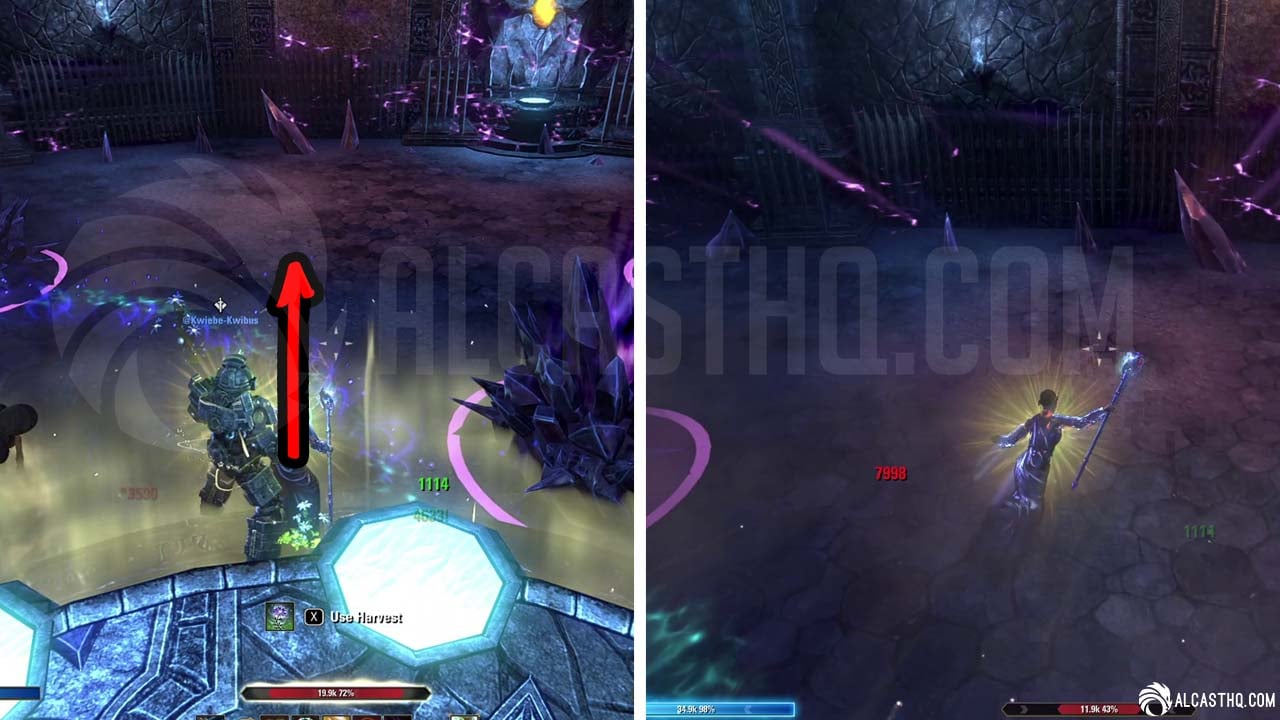
Seismic Splinters
Black Gem Splinters show up as crystals on your characters back
Occasionally Quarrymaster Saldezaar casts Seismic Splinters which first appears as red AOE’s around each player, then the gems fall down and leaves your character with Black Gem Splinters damage over time effect. You can cleanse it in three ways:
- Stand in the bosses Galvanizing Blow cone attack
- Gt hit by the Galvanic Charge (boss charges to the furthest player).
- Push the boss to 65% and 30% so it casts Rupture which cleanses the dot from everyone.
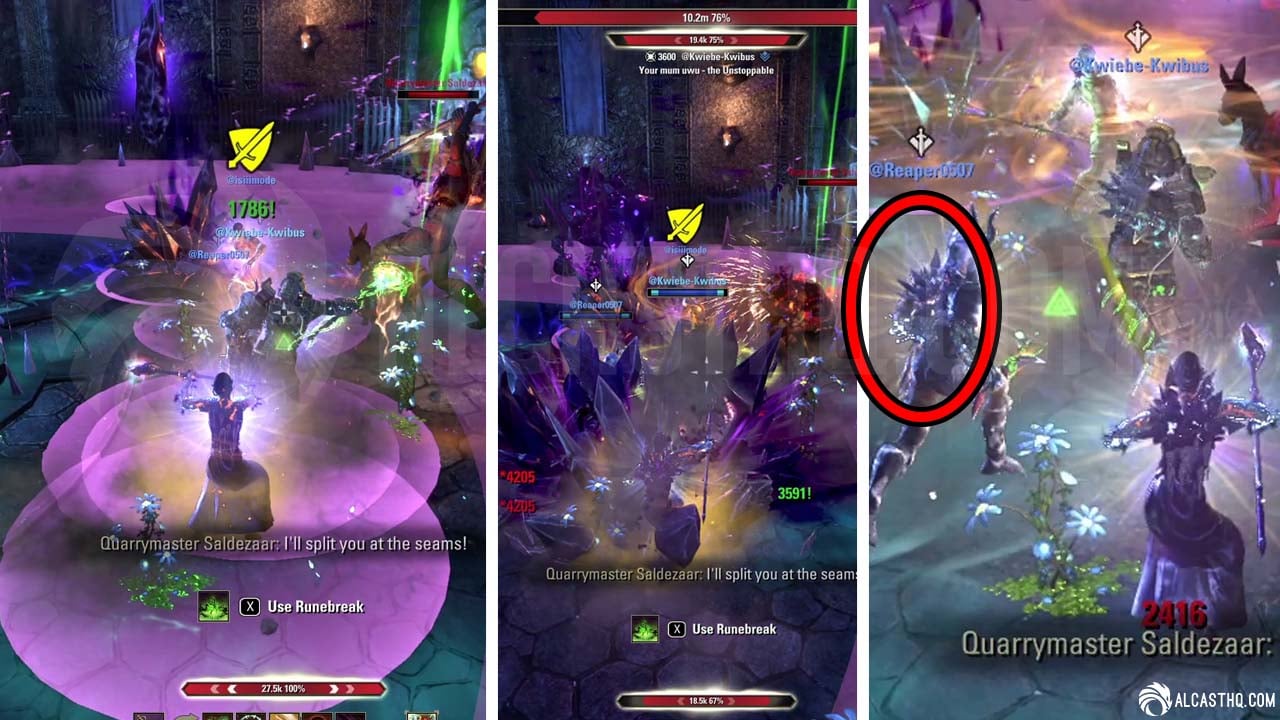
Galvanizing blow
Galvanizing Blow
Galvanizing blow cone attack can be used to cleanse the Black Gem Splinters dot and destroy the Black Gems on the ground by aiming it at the group/Gems. You should always try to make sure that you have a clear path from the middle to the edge for when the boss casts Rupture.
Execute phase
There are no new mechanics in the execute!
Common Mistakes & How to Avoid Them

Galvanizing Imps kills everyone with high damage.
Solution: Prioritize killing the adds or stun them when they start casting Charged Lightning. You can also block the damage.
Black Gem Splinters kills everyone.
Solution: Go stand in the bosses Galvanizing Blow.
All of Quarrymaster Saldezaar’s Abilities listed and how to deal with them
We’ve compiled this list of Quarrymaster Saldezaar’s abilities so you can see what killed you and possibly learn how to prevent it from happening again.
| Quarrymaster Saldezaar Abilities | Ability Descriptions and how to deal with them |
|---|---|
| Essence Leech | Damage over time effect on the tank. Heal or cleanse. |
| Galvanic Charge | The boss charges at the furthest player, deals moderate damage and also cleanses the Black Gem Splinters Dot Effect. |
| Galvanizing Blow | A shock cone attack that cleanses Black Gem Splinters dot. |
| Hack | Boss’s Light Attack. |
| Rupture | At 65% and 30% health (in Hard Mode) the boss casts Rupture forcing you to go either to the outside ring or the inside ring (shown in yellow) and after a moment, he will fling you towards the opposite side. Make sure the path is clear. You can clear Black Gems from the ground by pointing Galvanizing Blow cone attack at them. |
| Savage Strike | A Heavy Attack that applies the Trauma healing absorb debuff to the tank. Heal the tank. |
| Seismic Splinters | These first appears as red AOE’s under each player, then the gems fall down and leaves your character with Black Gem Splinters damage over time effect. |
| Black Gem Splinters |
A Damage over time effect that increases. You can cleanse it in several ways: Stand in the bosses Galvanizing Blow cone attack or get hit by the Galvanic Charge. Additionally Rupture cleanses the dot from everyone. |
| Summon Imp | Summons a Galvanizing Imp. |
| Deadly Perimeter | Environmental hazards that do damage when you stand in them or touch them while getting pulled by Rupture. |
| Falling Debris | Environmental damage from falling objects. Move out of the red areas or block. |
Quarrymaster Saldezaar’s Adds
Prioritizing Quarrymaster Saldezaar’s Galvanizing Imp add is important so you don’t get too many of them casting their Charged Lightning at the same time.
| Quarrymaster Saldezaar Adds | Ability Descriptions and how to deal with them |
|---|---|
| Galvanizing Imp | Spawns based on a percentage of the boss’s health.
|
| Giant Stone Atronach |
|
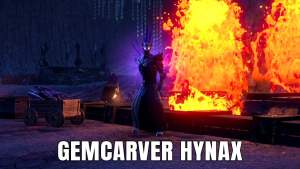
Boss 3: Gemcarver Hynax

Gemcarver Hynax is the second optional secret boss in Black Gem Foundry, located after Quarrymaster Saldezaar. The Gemcarver Hynax boss doesn’t have any notable mechanics, other than kill the adds as they spawn if they overwhelm your group.
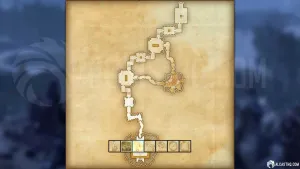
Gemcarver Hynax Hidden Entrance location on map:
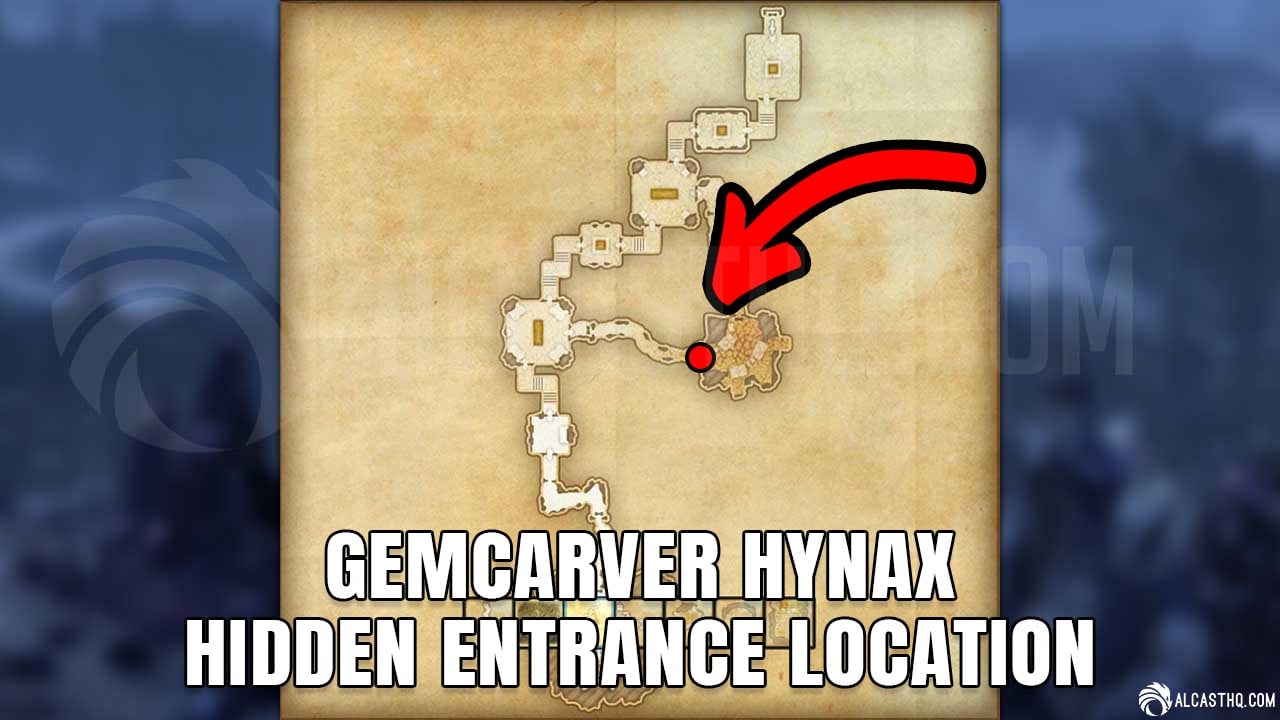
Gemcarver Hynax Hidden Entrance location on map
All of Gemcarver Hynax Abilities listed and how to deal with them
We’ve compiled this list of Gemcarver Hynax’s abilities:
| Gemcarver Hynax Abilities | Ability Descriptions and how to deal with them |
|---|---|
| Staff Smash | Heavy Attack that Applies Essence Drain and Essence Leech. |
| Flare | Light Attack |
| Firestorm | |
| Summon Stone Atronachs | |
| Summon Storm Atronach |
Gemcarver Hynax’s Adds
| Gemcarver Hynax Adds | Ability Descriptions and how to deal with them |
|---|---|
| Lesser Stone Atronach | |
| Lesser Storm Atronach |
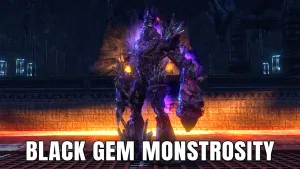
Boss 4: Black Gem Monstrosity

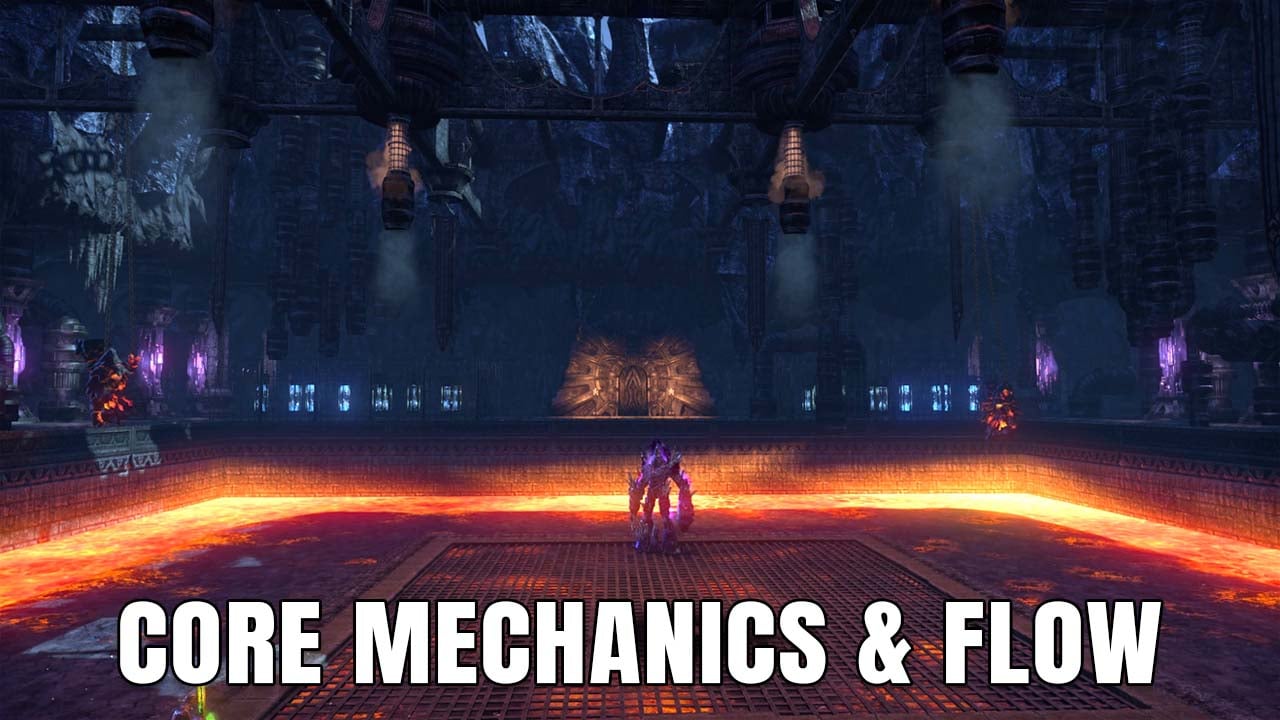
The Black Gem Monstrosity is the second main boss in the Black Gem Foundry. This is a predictable fight and can be made easier with positioning of the boss and the group.
Black Gem Monstrosity: Core Mechanics & Flow
Lapidating Bash
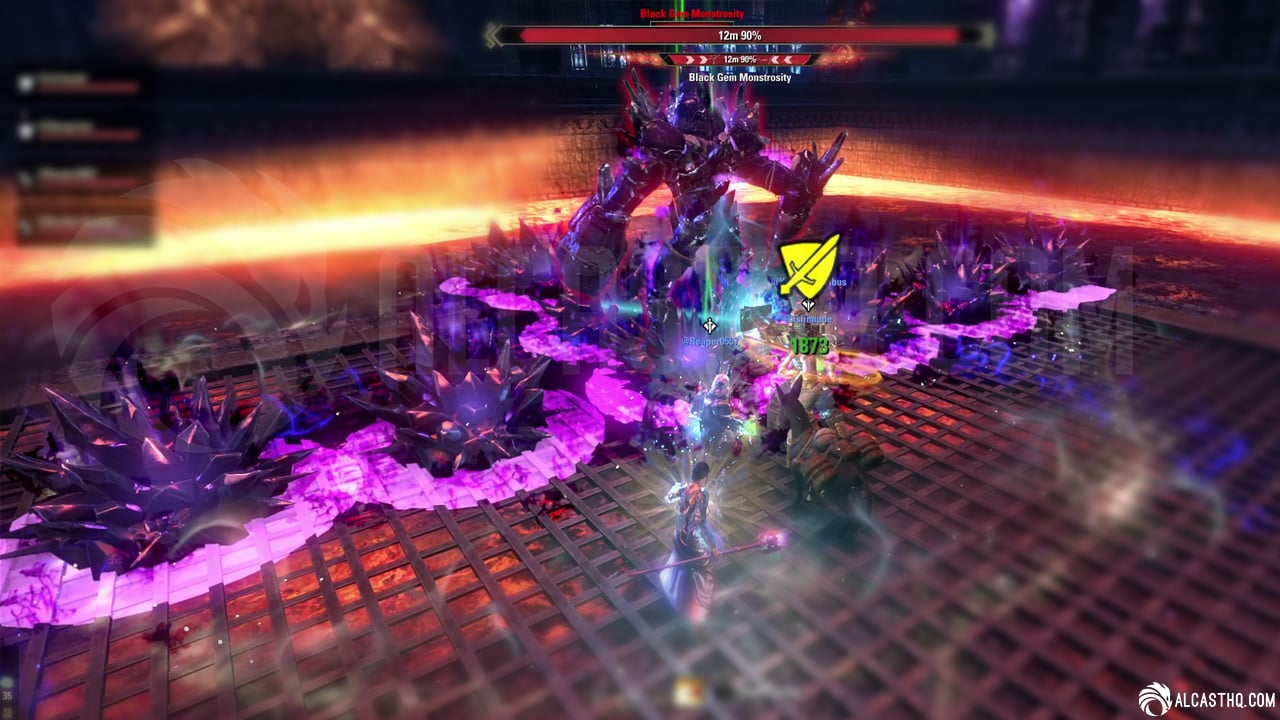
Lapidating Bash and Black Gem Cluster AOEs
There are only a couple of mechanics you really have to pay attention even though the arena has lava, adds and a lot of chaos. You start the fight by your tank positioning the boss near the edge so his heavy attack (Lapidating Bash) creates the T-shape of Black Gem Cluster AOE’s to it’s sides and towards the edge, leaving the middle area clear.
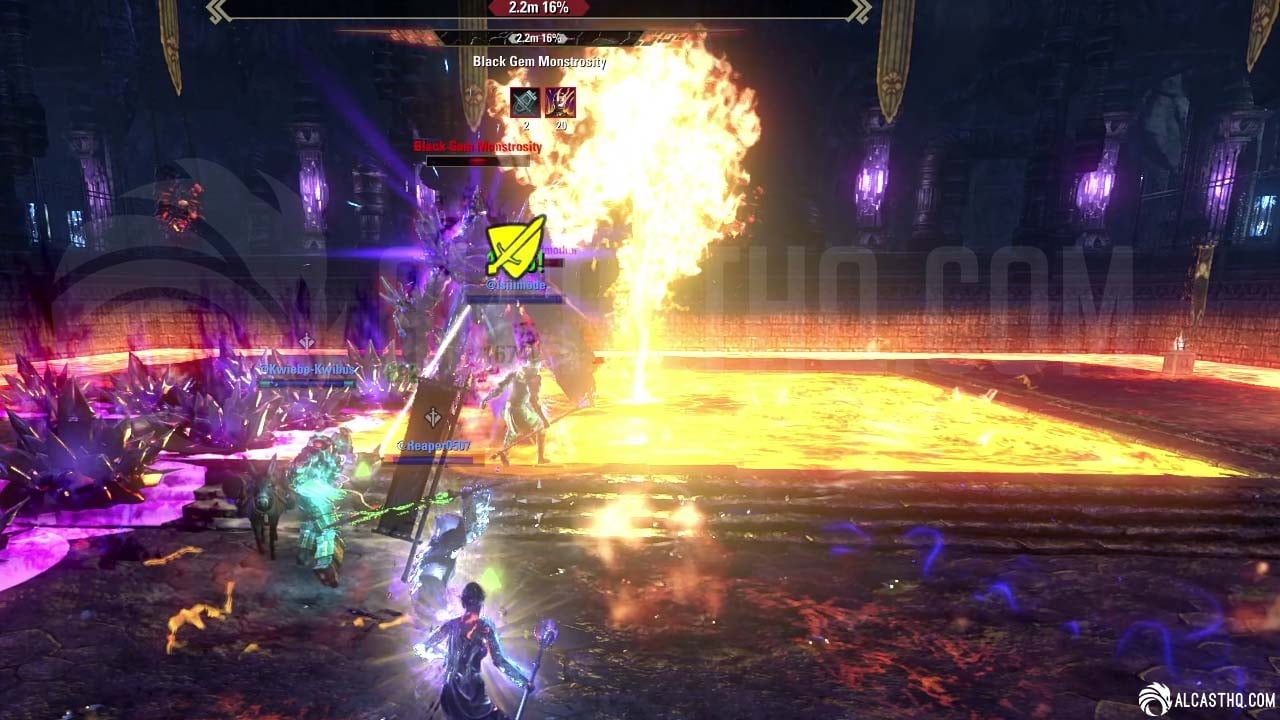
Lava Phase

Soulbinder Pyromancer and the lava wall it casts (four red aoe’s).
At 80% health Black Gem Monstrosity will start his Lava Phase by bleeding the iron atronachs that are dangling from the ceiling. He creates lava on the edges, disappears to the side and summons adds. A Soulbinder Pyromancer spawns on an edge and will keep casting Flame Walls that you need to avoid, dodge or block.
The boss will come back once you have killed the Soulbinder Pyromancer add so always prioritize it. You should try to stack as many adds as possible to the Soulbinder Pyromancer so they can die to cleave.
The lava phases will repeat when the boss’s health reaches 50% and 35%.
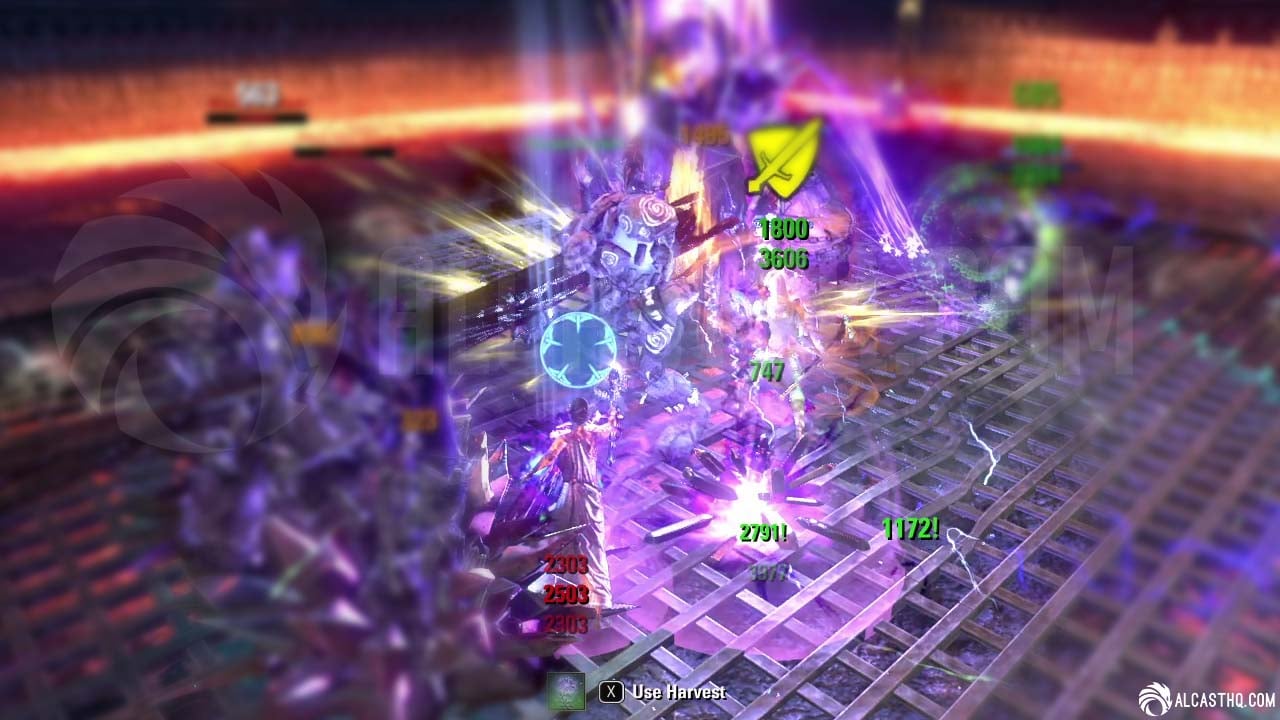
Black Gem Shards (Small Atronachs) and Soul Focus Beam
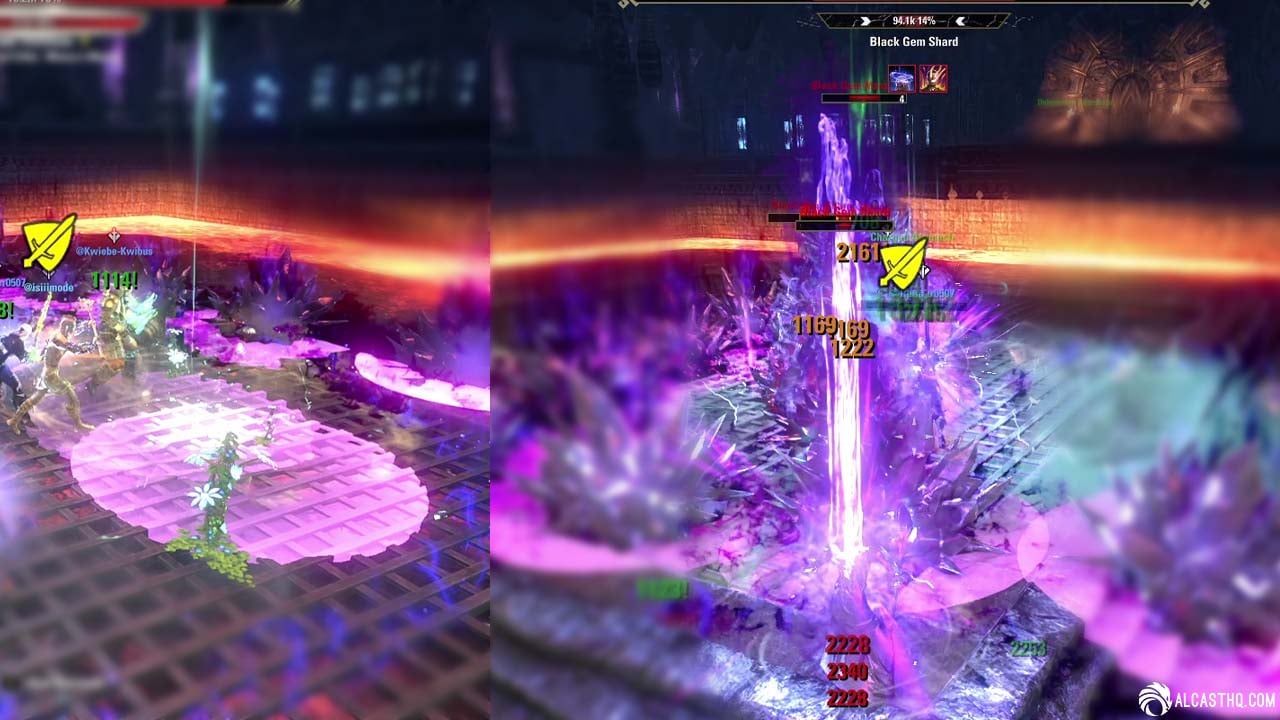
Black Gem Shards appearing (on the left) and showing how to use the Soul Focus Beam to kill them.
Once you have killed the Soulbinder Pyromancer add, Black Gem Monstrosity will create Black Gem Shards (Small Glass Atronachs) adds and reappear from a large AOE. Everyone in your group should stack up until the small AOE’s appear and then either block or move out. This ensures the Atronach adds are close to each other and can easily killed with the Soul Focus beam.
After summoning the adds the boss will target the furthest player from itself with a Soul Focus beam that you need use to kill the Black Gem Shard Atronach adds as they take reduced damage from players. You should have your healer be the furthest one and make sure the Atronachs are inside the beam so your dd’s can continue to deal damage to the boss and possible left over adds. Damage of the beam is shared with everyone standing in it so it’s best if at least the tank stands on it.
Black Gem Barrage
Black Gem Barrage shoots Black Gems at a targeted player who needs to keep moving to avoid the damage.
Occasionally the Black Gem Monstrosity casts Black Gem Barrage. One player gets marked with a blue circle above their head and starts getting barraged with Black Gems that create small AOE’s under their feet. Keep moving until it ends and don’t touch the Black Gem AOE’s as they explode and deal a lot of damage.
Execute phase 35%
Heated Center in execute phase
The Execute phase starts at 35% where Black Gem Monstrosity will now choose to either fill the edges with lava or heat the center area making them unusable. The boss will not disappear during the execute, but will still use Transference to disappear and reappear from an AOE area that you need to block or move out of to avoid knock back. Good luck!
Common Mistakes & How to Avoid Them
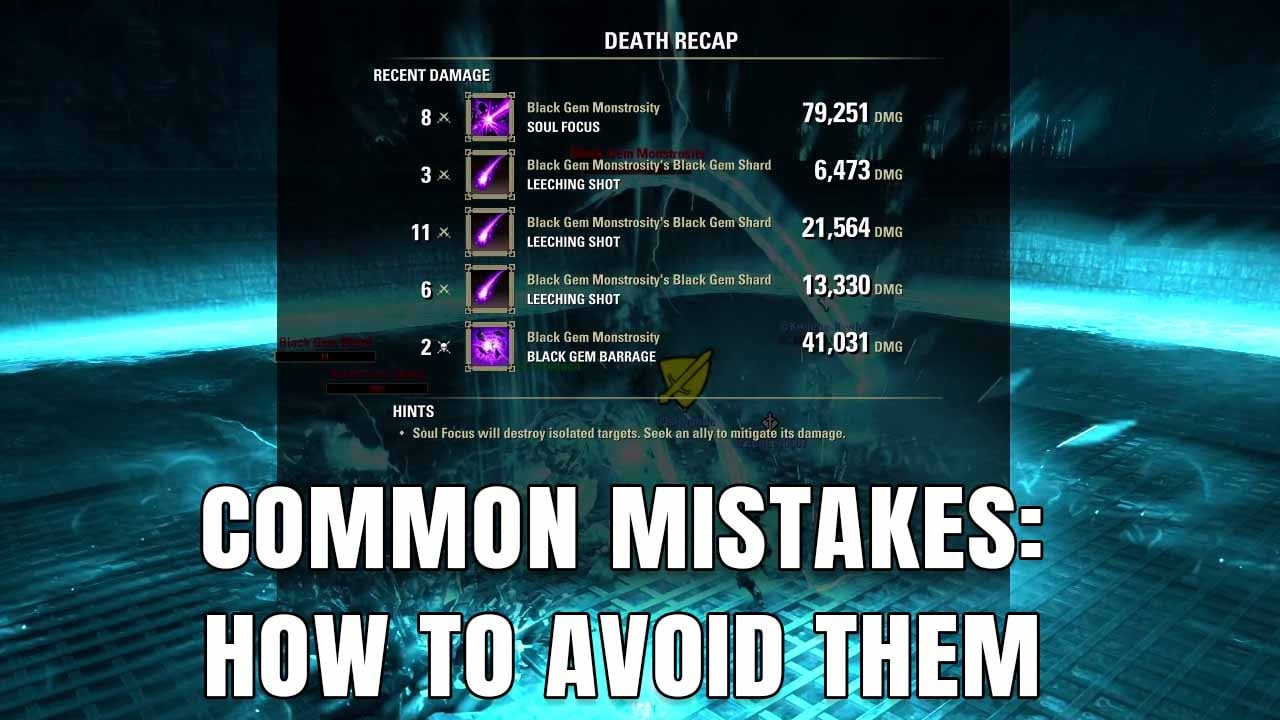
Some common mistakes happen very easily as the Black Gem Monstrosity fight has a lot of things happening at the same time and can seem chaotic. If you are unsure what you died to, check your death recap (T keybind on PC) while you’re dead.
Can’t kill Black Gem Shard atronachs and their leeching shot kills everyone. Most likely people in your group are standing too far away from each other when the adds spawn, making it very difficult to kill them with the Soul Focus beam.
Solution: Pay attention to the Soulbinder Pyromancer add during the lava phase and once it dies, stack up by standing on top of each other and move out only after the AOE’s appear.
All of Black Gem Monstrosity Abilities listed and how to deal with them
We’ve compiled this list of Black Gem Monstrosity’s abilities:
| Black Gem Monstrosity Abilities | Ability Descriptions and how to deal with them |
|---|---|
| Lapidating Bash | A Heavy Attack that does a line of Black Gem Cluster AOE’s in a “T-shape” when he smashes down. The lines always go to the bosses sides and in front. Keep the Boss aligned with the edge to keep the middle fighting area clear. |
| Lapidating Strike | Light attack. |
| Lava Phase | At 80%, 50% and 35% Black Gem Monstrosity creates lava on the edges, disappears and summons adds. A Soulbinder Pyromancer spawns on an edge and will keep casting Flame Walls that you need to avoid, dodge or block. Kill this add and the boss will come back. The boss will reappear from a large AOE. |
| Transference | Boss disappears and reappears on a large AOE summoning Black Gem Shard Atronach adds. Move away from the AOE or block it, otherwise you will get knocked back. |
| Soul Focus | Boss targets the furthest player from itself with a beam that you can use to kill the Black Gem Shard Atronach adds. You should have your healer be the furthest one and make sure the Atronachs are inside the beam. Damage of the beam is shared with everyone standing in it so have your tank stand inside it. |
| Black Gem Barrage | One player gets marked and will start get barraged with Black Gems that create small aoe’s under their feet. Keep moving until it ends and don’t touch the Black Gem AOE’s. |
| Essence Siphon | Shoots a black gem at a player that applies a resource drain debuff. |
| Lava | Don’t stand in it |
Black Gem Monstrosity Adds
Mos of these adds you will not need to think too much about and can be cleaved while killing the Soulbinder Pyromancer. The only add with “real” mechanics is the Black Gem Shards (Glass Atronachs) that you need to kill with a beam.
| Black Gem Monstrosity Adds | Ability Descriptions and how to deal with them |
|---|---|
| Black Gem Shards (Small Glass Atronachs) | Black Gem Monstrosity casts a small AOE under players which summons Black Gem Shards Atronach adds. The boss also casts a Soul Focus beam to the furthest player that you need to align so the small atronachs are inside it. The adds adds will cast Soul Sap that you should block or shield. When the small atronach die they use Shard Explosion, that will Stun and knock you back if you don’t block it. Even blocking it will still cause a stagger (which drops block). |
| Soulbinder Pyromancer | Casts Flame Wall while alive, which you need to either move away from, dodge through or block. The boss comes back when the Soulbinder Pyromancer dies. |
| Coldharbour Voidmother | |
| Daedroth | |
| Shade | |
| Simulacrum | |
| Soulbinder Archer | |
| Soulbinder Forger | |
| Banekin | |
| Storm Atronach |
Boss 5: Misura, Assistant to the High Soulbinder (Optional)
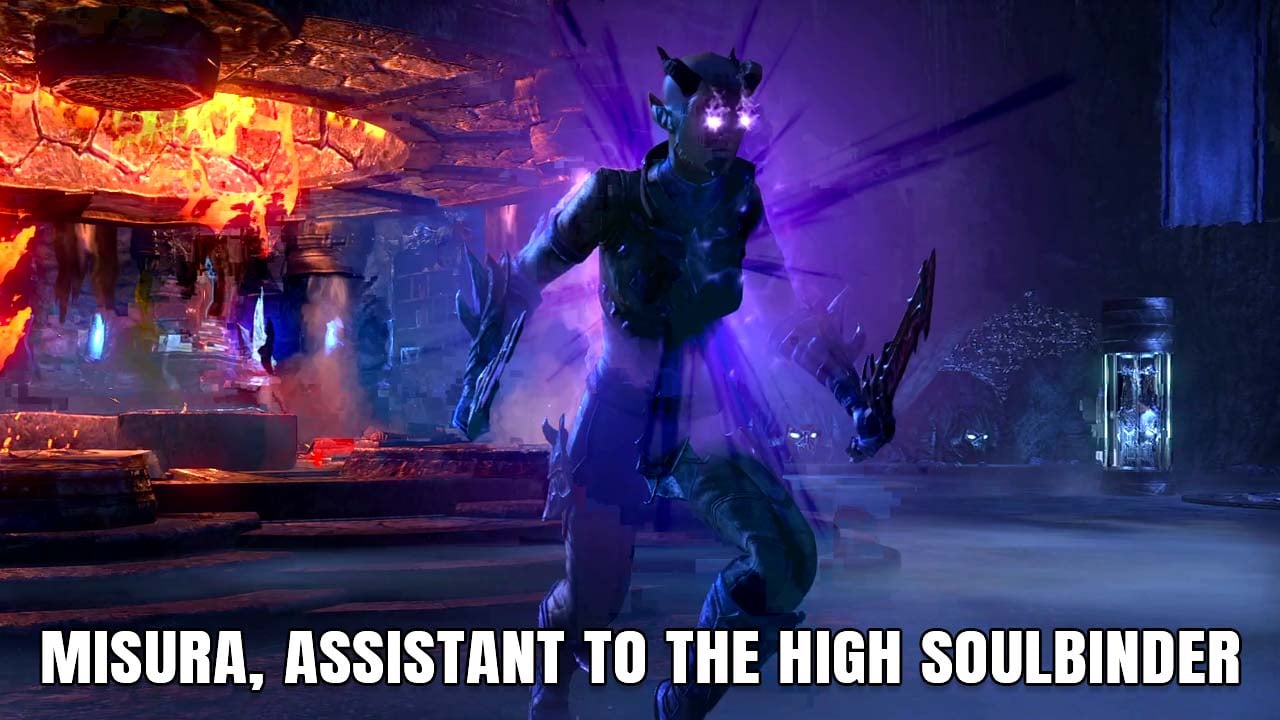
Misura, Assistant to the High Soulbinder is the final optional secret boss in Black Gem Foundry. She is a Nightblade that has a one dangerous skill that you should avoid: She casts an AOE that when it explodes can kill damage dealers instantly. Either block or move away from it.
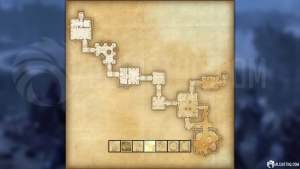
Misura, Assistant to the High Soulbinder Hidden Entrance location on map:
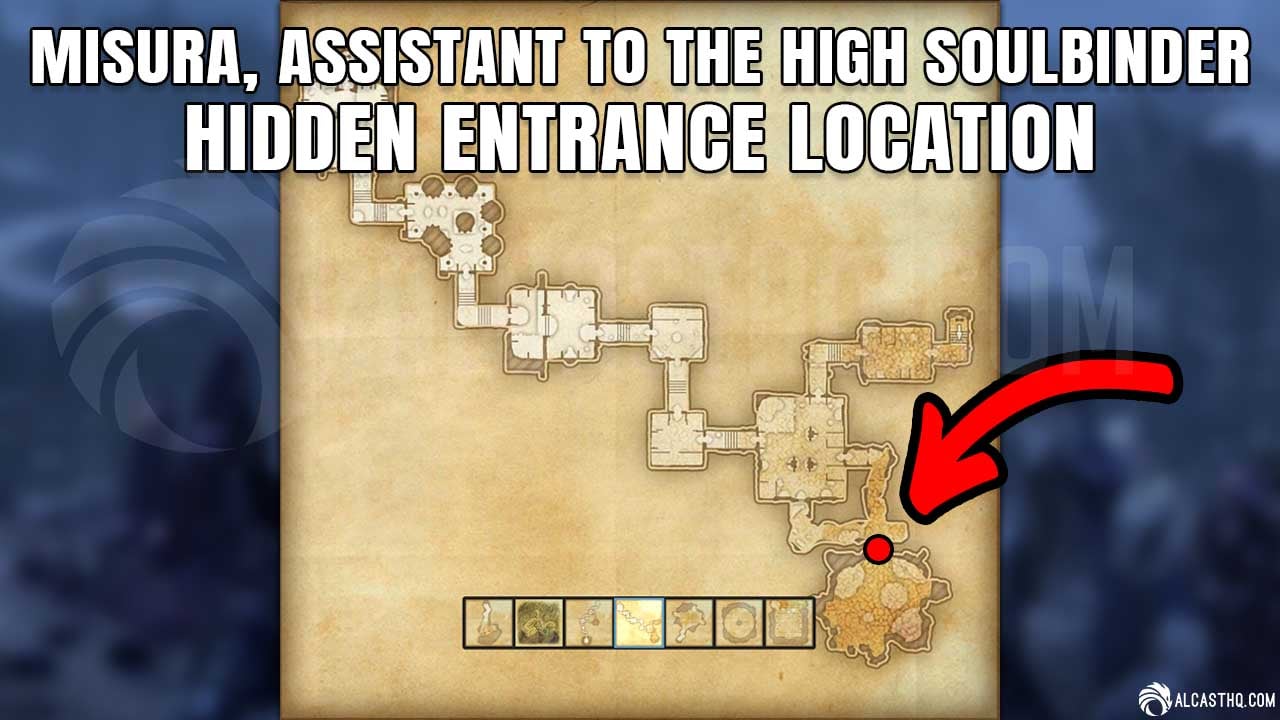
Misura, Assistant to the High Soulbinder Hidden Entrance location on map
All Misura, Assistant to the High Soulbinder Abilities listed and how to deal with them
We’ve compiled this list of Misura, Assistant to the High Soulbinder abilities
| Misura, Assistant to the High Soulbinder Abilities | Ability Descriptions and how to deal with them |
|---|---|
| Shadow Slice | Ranged Light Attack |
| Shadow’s Gift | AOE attack. |
| Slice | Melee Light Attack |
| Summon Adds | |
| Teleport Strike | Teleports to the furthest player. |
Misura, Assistant to the High Soulbinder Adds
| Misura, Assistant to the High Soulbinder Adds | Ability Descriptions and how to deal with them |
|---|---|
| Soulbinder Subordinate Conjurer | |
| Soulbinder Subordinate Forger |
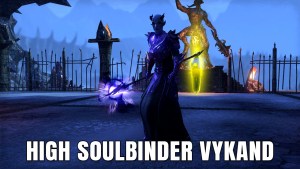
Boss 6: High Soulbinder Vykand (Final Boss)

This fight against High Soulbinder Vykand in the Black Gem Foundry is mainly a puzzle requiring group communication and managing three colored adds (Red, Green, Yellow). Once you grasp these simple rules and communicate with your group, the fight gets much easier.
High Soulbinder Vykand: Core Mechanics & Flow
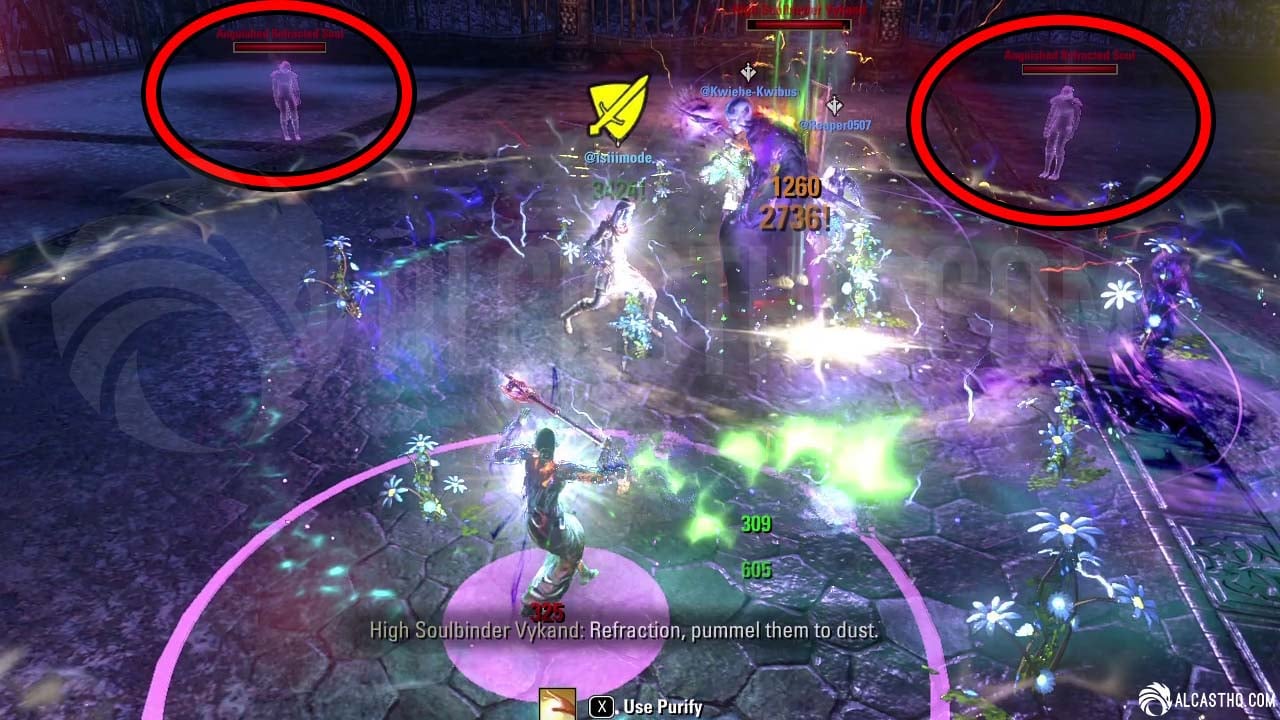
Soulbinding Slam and Soul Essences
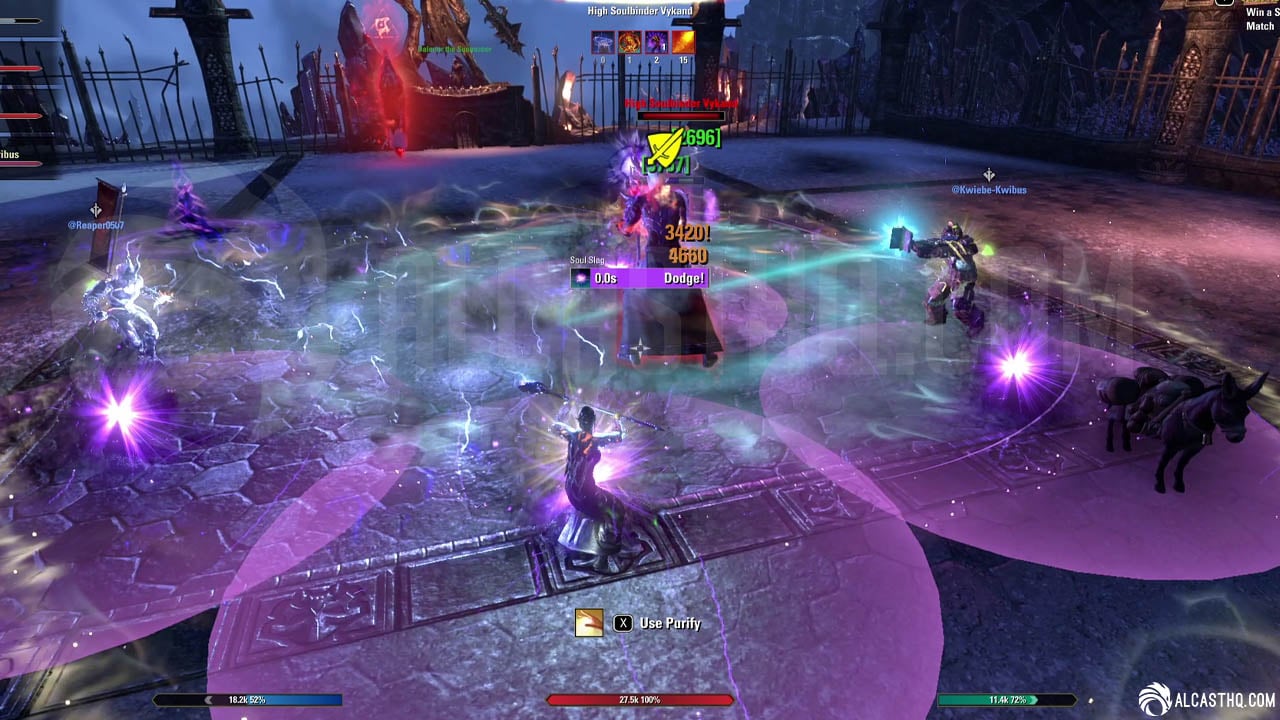
Soulbinding Slam heavy attack animation
The first mechanic you will most likely encounter is High Soulbinder Vykands Heavy Attack called Soulbinding Slam. The Slam will create small AOE:s under each player that you need to move away from.Moving out too slowly will leave a Soul Essence on the ground. The Soul Essence will do different things based on which color it takes during the fight:
- Red: Tethers to a player and after a moment fires a line of red damage. Stay in place and block.
- Yellow: These charge at a player, so try to move out of their way or dodge them.
- Green: If too many of these are around they can instantly kill the group after they charge up and “bombard” the players. You can dodge the bombardment.
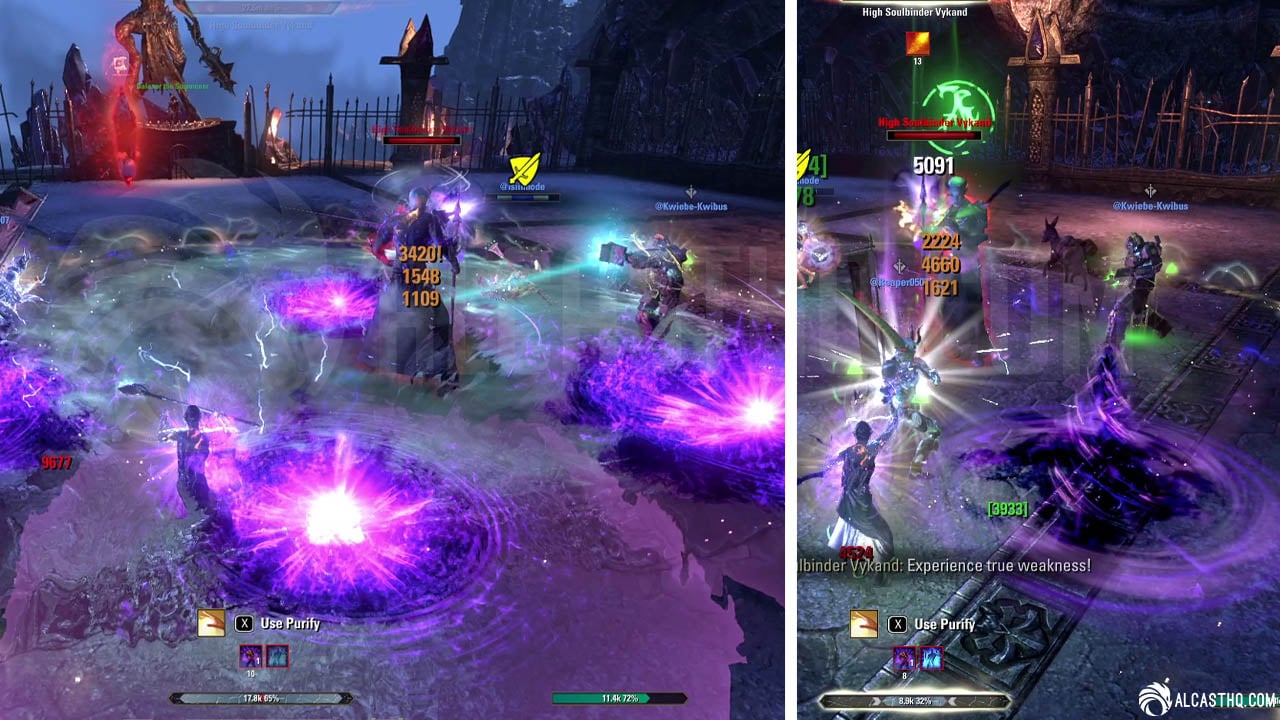
Moving out too late from the Soulbinding Slam
Different colours/mechanics of the Soul Essence
Acute Enervation
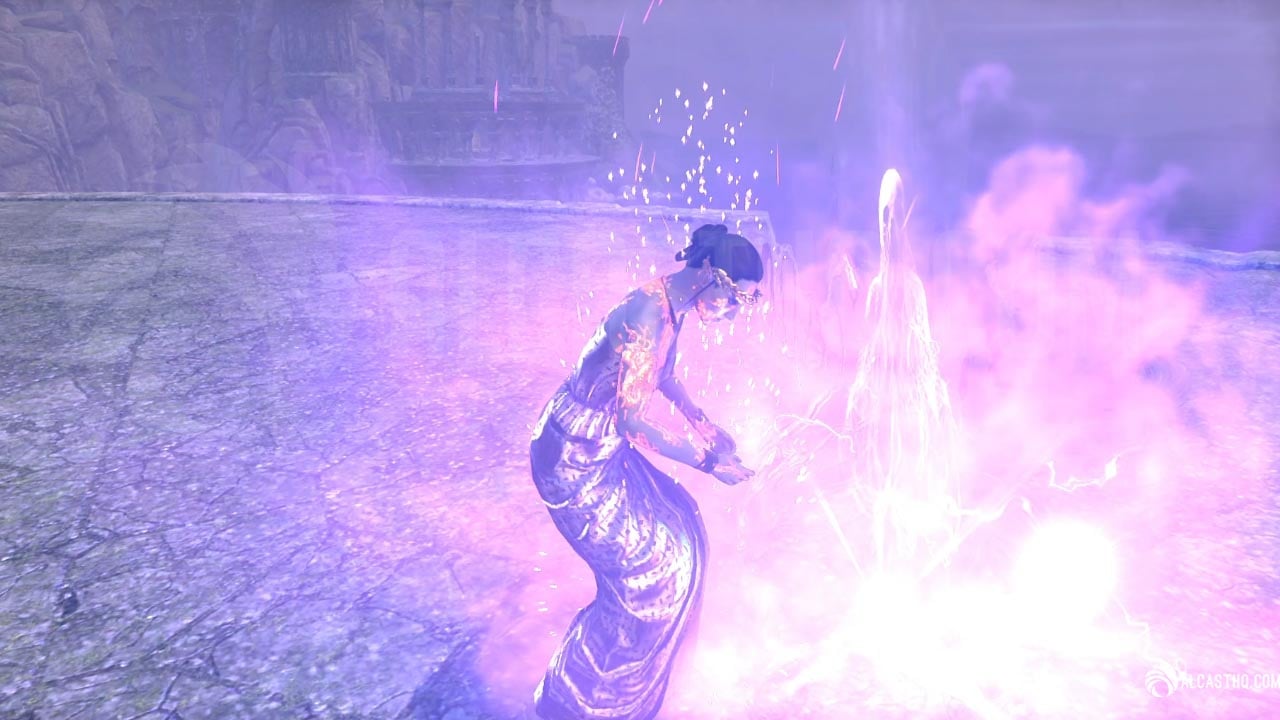
The next mechanic you will most likely see is the Acute Enervation. High Soulbinder Vykand chooses a player and creates small adds that you need to kill before the circle around the player is fully red. Acute Enervation will instantly jump to another player and you need to kill the adds again. It will not jump to a third player.
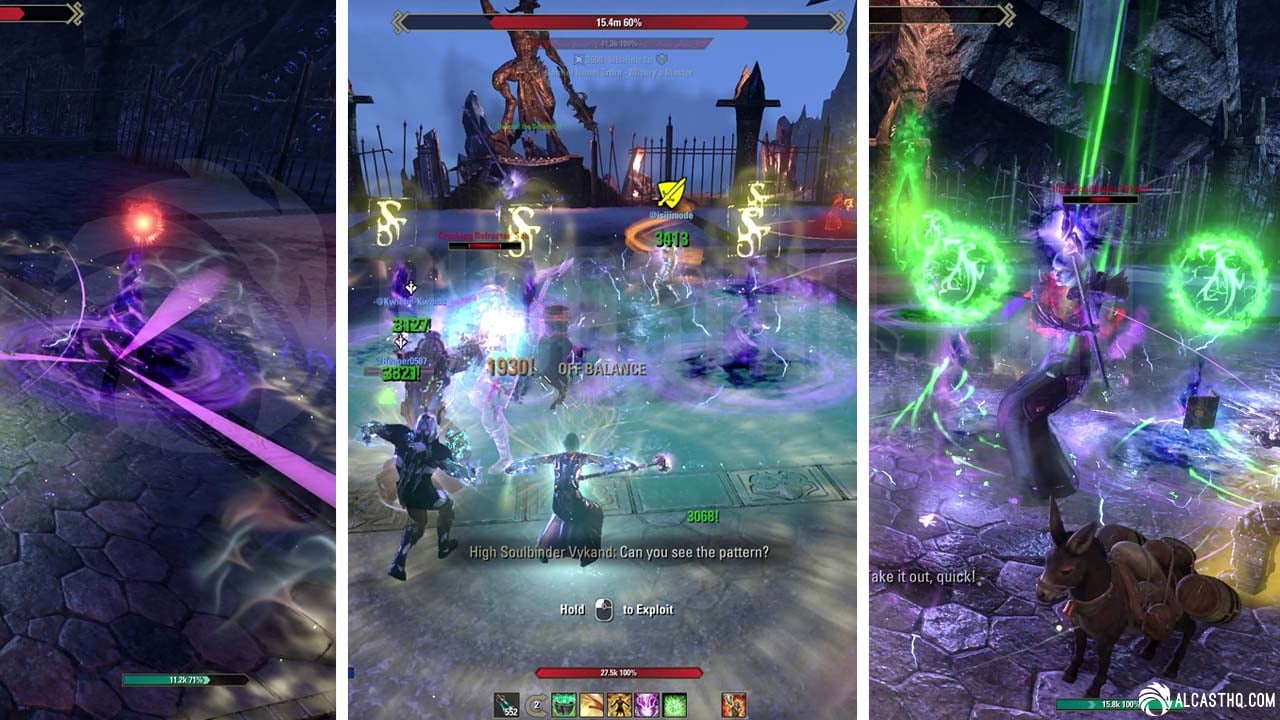
Refraction Color Puzzle
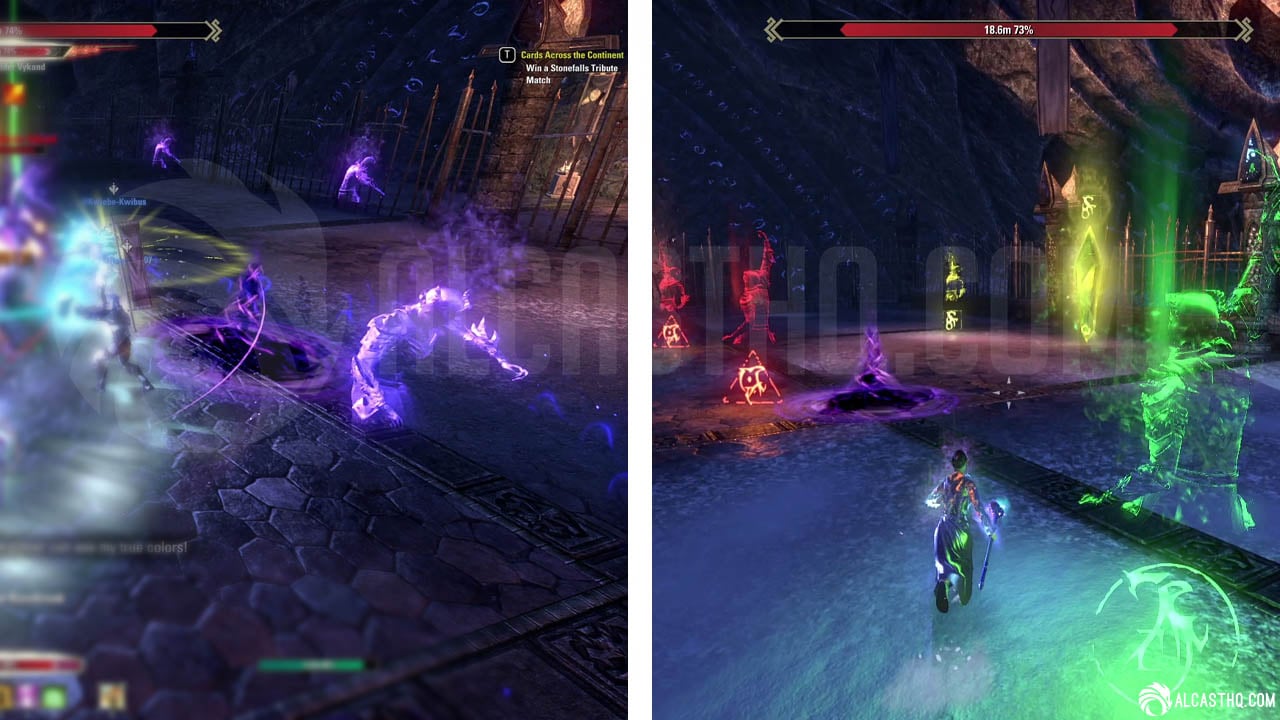
Next the boss will most likely cast purple translucent refractions. You need to run through them to show their color. After your group has revealed them, the boss will cast two colors around him. Each one of your group members must go to the third colored add that isn’t shown. If you do not stand on the correct color, you will die.
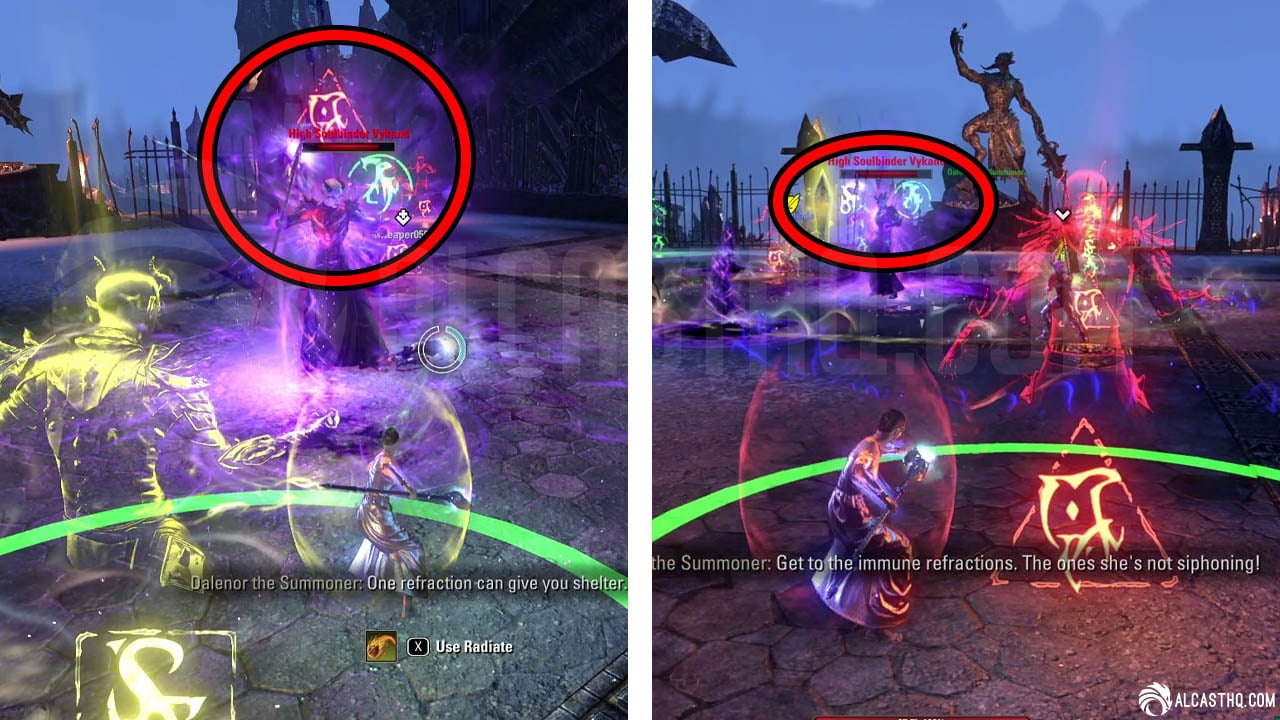
Standing on the Correct Refraction add
Ominous Vision & Annihilation
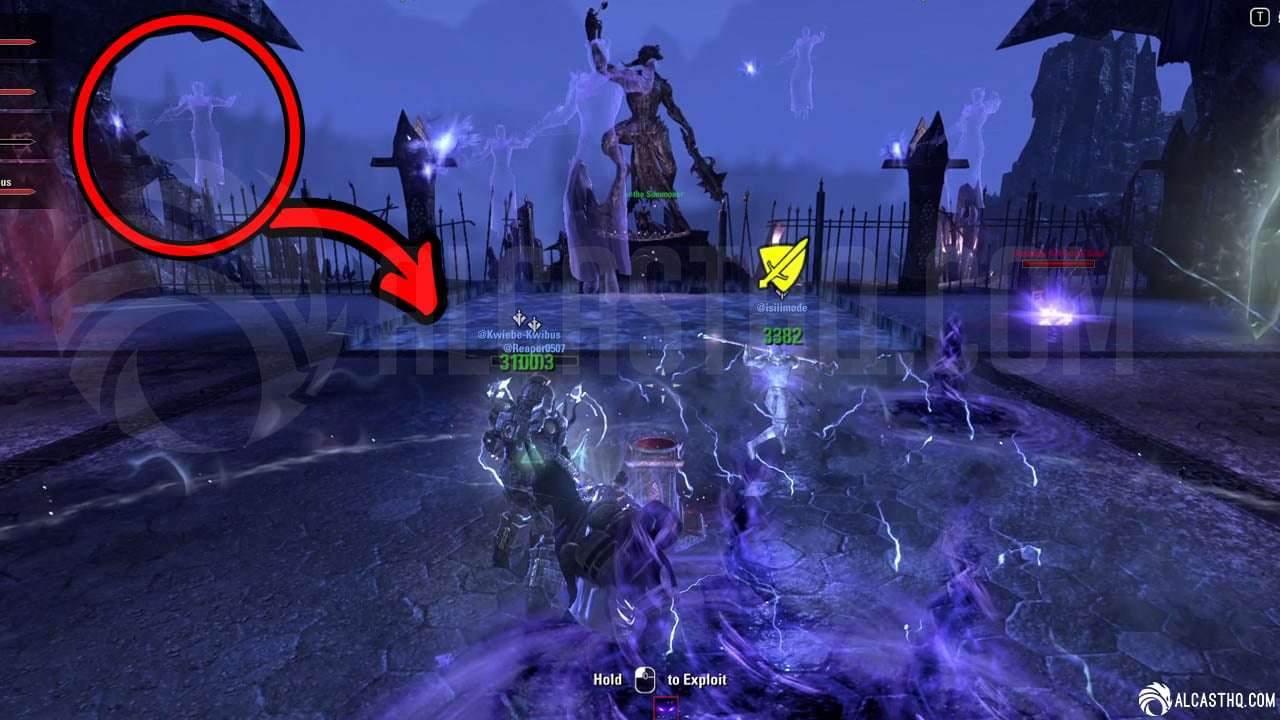
Ominous Vision “pointing forward” animation and safe spot at the exit
And now the most fun puzzle mechanic that requires some group communication! At 60% (and periodically after that) High Soulbinder Vykand will cast Ominous Vision to each of the group members. This vision will show you an animation and a safe tile that you have to move to or you will die. Remember your animation and the safe platform, as the boss will next cast Annihilation showing everyone the same animations without showing the safe spot. If your animation is shown, you must tell your group where to go.
You can choose to give the animations different names, assign numbers to the platforms, use North/East or whatever your group remembers the best. In the image below, I was shown the “pointing forward” animation and the exit platform.
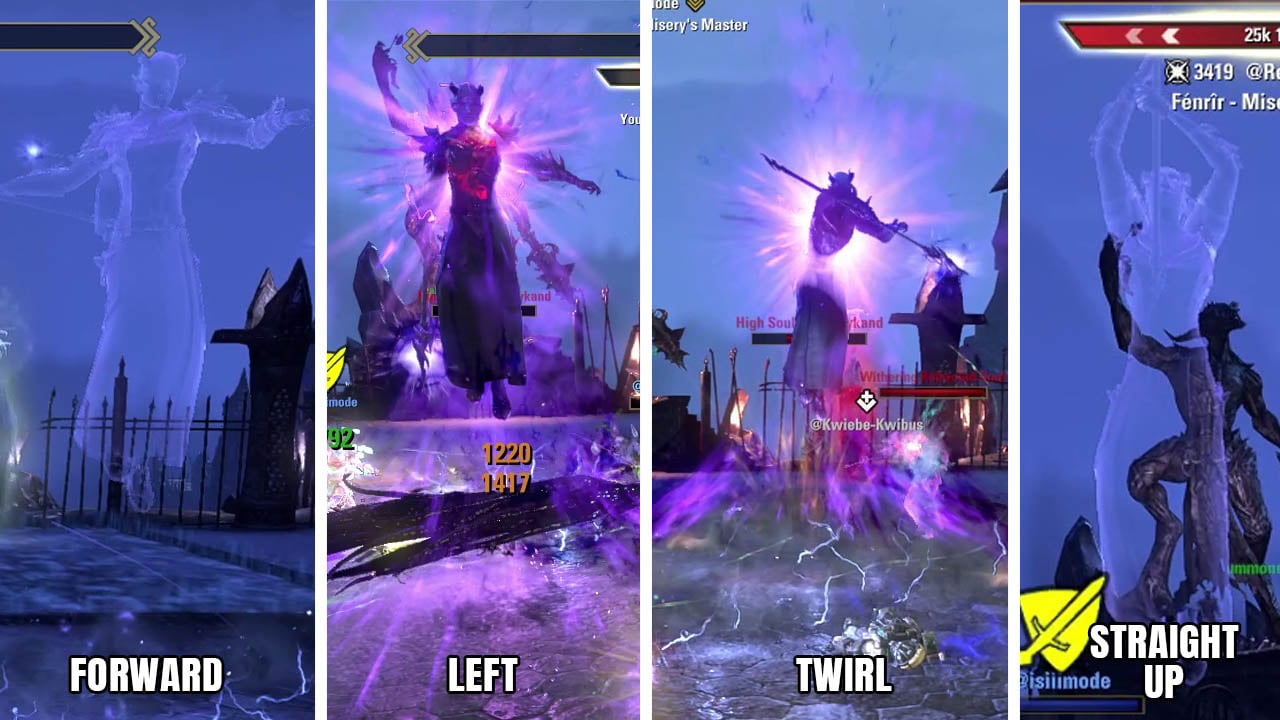
All four ominous visions
Add Management


The boss will periodically spawn adds that are usually considered either “big add” or “small add”. Killing the smaller adds will spawn an extra Soul Essence unless you drag it to the matching colored crystal and kill it inside it. You should prioritize killing the bigger adds as they do a lot of damage. The ranged mage add applies a hindered heal absorb debuff on the tank that you need to overheal.
Common Mistakes & How to Avoid Them
Common Mistake: Lack of Communication during Annihilation.
Solution: Before the fight, agree on simple, fixed names for the four outer platforms ( North, South, Center etc) and for the four animations.
All High Soulbinder Vykand Abilities listed and how to deal with them
We’ve compiled this list of High Soulbinder Vykand abilities to get a quick overview of what they are and how you should deal with them:
| High Soulbinder Vykand Abilities | Ability Descriptions and how to deal with them |
|---|---|
| Ominous Visions and Annihilation | This vision will show you an animation and a safe tile that you have to move to or you will die. Remember your animation and the safe platform, as the boss will next cast Annihilation showing everyone the same animations without showing the safe spot. If your animation is shown, you must tell your group where to go. |
| Staff Smash | Heavy Attack |
| Corrective Strike | Light Attack |
| Soul Lance | Ranged Light Attack |
| Soulbinding Slam | Heavy Attack that spawns small AOEs under everyone |
| Soul Cascade | Applies Soul Slag AOE |
| Acute Enervation | Boss chooses a player and creates small adds that you need to kill before the circle around the player is fully red. Acute Enervation will instantly jump to another player and you need to kill the adds again. It will not jump to a third player. |
| Summon Enervating Soul | The “small add”. Killing the smaller adds will spawn an extra Soul Essence unless you drag it to the matching colored crystal and kill it inside it. |
| Summon Lost Soul | The “big add”. You should prioritize killing the bigger adds as they do a lot of damage. The ranged mage add applies a hindered heal absorb debuff on the tank that you need to overheal. |
High Soulbinder Vykand Adds
| High Soulbinder Vykand Adds | Ability Descriptions and how to deal with them |
|---|---|
| Crushing Refracted Soul |
|
| Refracted Soul Essence |
|
| Unstable Refracted Soul | |
| Anguished Refracted Soul | |
| Withering Refracted Soul |
|
We hope this Black Gem Foundry Dungeon Guide ESO is helpful for completing the dungeon! If you have any further questions about the guide or want to connect with our community, join our Community Partner Discord.
Related Topics: