

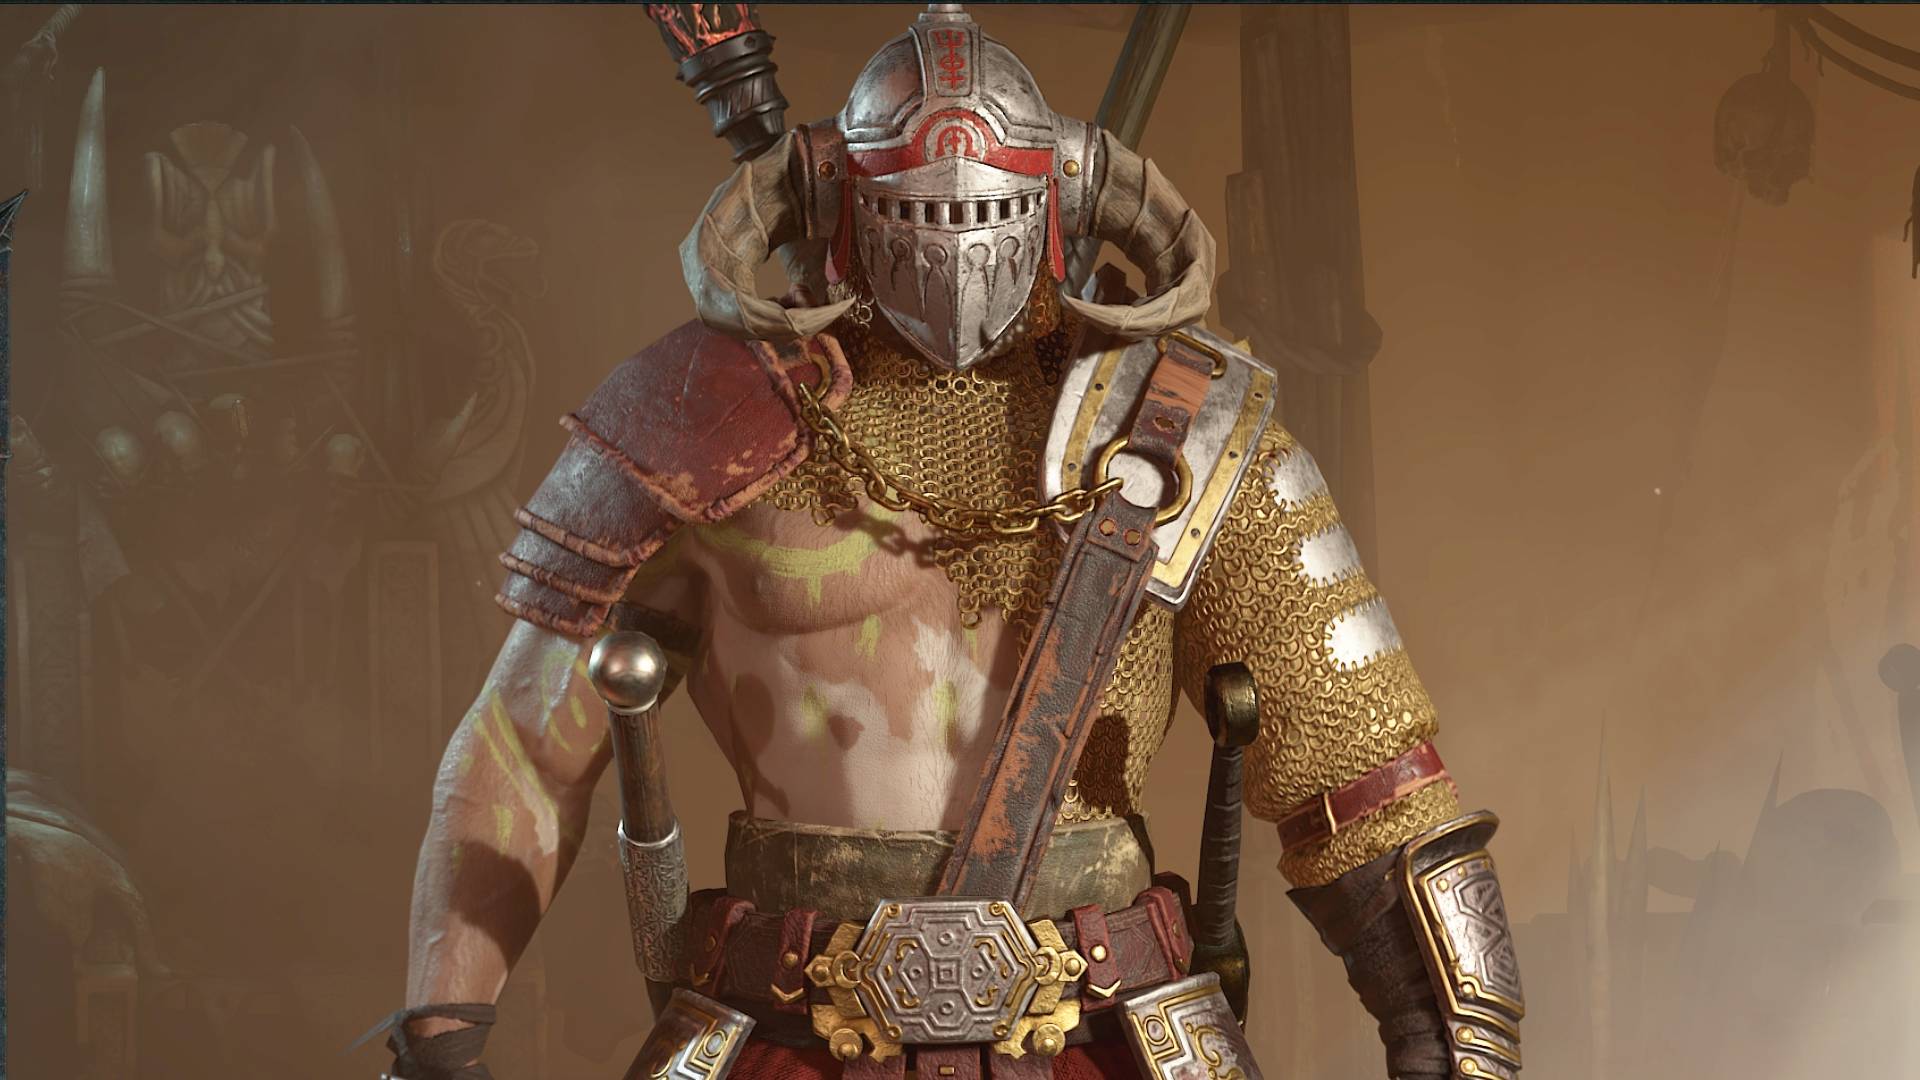
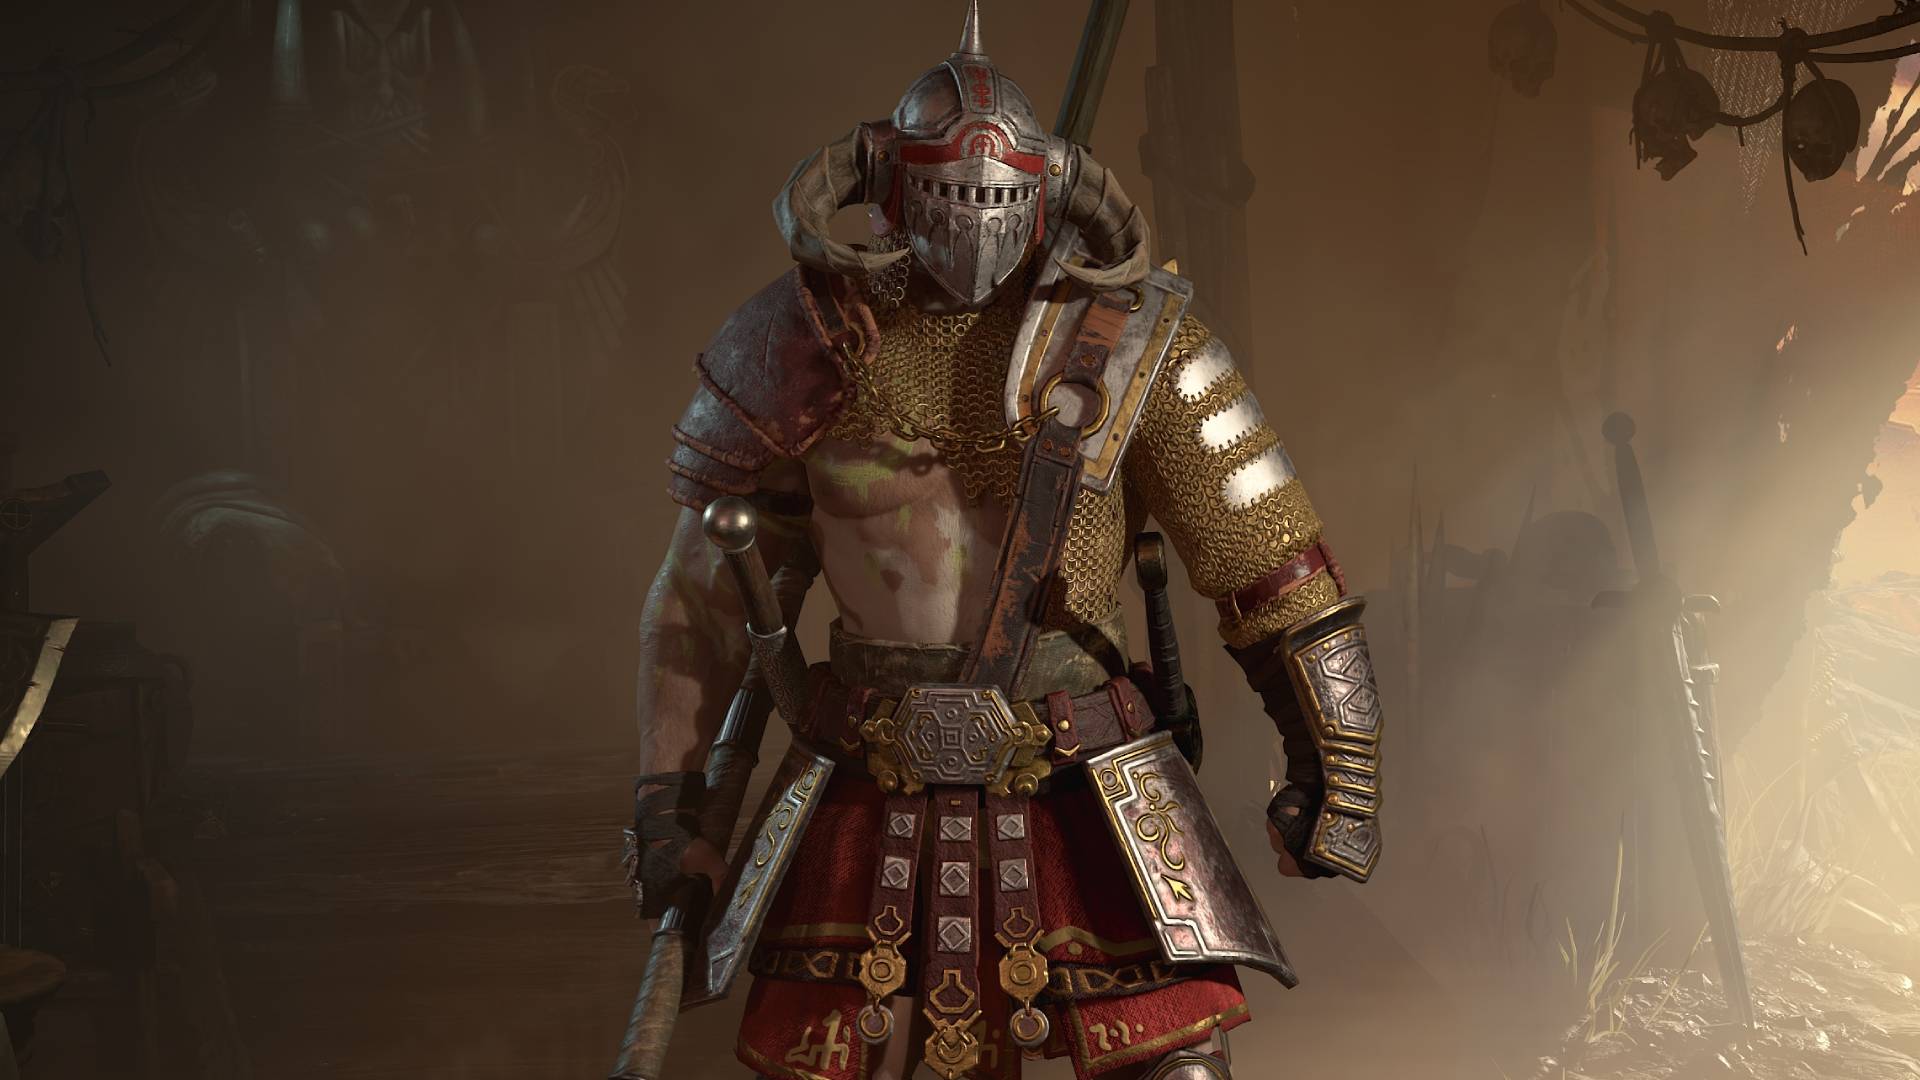
Welcome to our Diablo 4 Barbarian Rend Build. This build is focused primarily on high cleave and single target DPS.
We will guide you through all steps in the creation of the build, including how to spend your skill points if you want to gradually make the build as you level up.
Table of Contents:
Diablo IV Barbarian Build Skills
First, we will talk about the skills we are using for this Diablo 4 Barbarian build, along with which upgrades to choose. For each skill, we provided an explanation about how to use the skill and what purpose it serves in this build.
The skills we will use are:
- Lunging Strike (Basic)
- Rend (Core)
- Death Blow (Weapon Mastery)
- Rallying Cry (Defensive)
- War Cry (Brawling)
- Call of the Ancients (Ultimate)
Lunging Strike
Generates 9 Fury. Lunge forward and strike an enemy for X damage.
Chosen upgrades:
- Enhanced Lunging Strike – Lunging Strike deals 30% increased damage and heals you for 2% of your maximum Life when it damages a Healthy enemy.
- Battle Lunging Strike – Lunging Strike also inflicts 20% Bleeding damage over 5 seconds.
Explanation: Lunging Strike is a great basic skill for mobility, and it also generates Fury with each use, allowing you to sustain regular use of your other skills.
Rend
Cleave enemies in front of you, dealing X damage and inflicting X bleeding damage over 5 seconds.
Chosen upgrades:
- Enhanced Rend – Dealing direct damage with Rend increases the duration of Vulnerable on enemies for 2 seconds.
- Furious Rend – Direct damage with Rend generates 4 Fury for each enemy hit, up to 20 Fury.
Explanation: Rend makes the centerpiece of this build, allowing for high direct damage and bleed output. When fighting large groups of enemies, we ideally want to run around until they chase us and stack up in a group, then turn around and use Rend to dish out Cleave and bleed damage to the enemies.
With Furious Rend unlocked, you’ll refund over half of the skill’s Fury cost provided you hit five or more enemies.
Death Blow
Attempt a killing strike, dealing X damage to enemies in front of you. If this kills an enemy, the cooldown is reset.
Chosen upgrades:
- Enhanced Death Blow – Death Blow deals 100% increased damage to Bosses.
- Fighter’s Death Blow – If Death Blow damages at least one enemy, gain 20 Fury.
Explanation: While Rend on its own offers great potential for Cleave damage, the single target damage for Elites and Bosses isn’t amazing. This is where Death Blow comes in. This is the ideal skill to use against the more chunky enemies. A good way to use this skill against Elites is to first reduce their health with other skills like Rend, and then execute them with Death Blow.
Done correctly, this will allow you to one shot them, immediately resetting the skill’s cooldown and granting you 20 Fury, allowing you to keep your momentum going and immediately move onto the next troublesome target.
Rallying Cry
Bellow a Rallying Cry, increasing your Movement Speed by 30% and Resource Generation by 40% for 6.5 seconds, and nearby allies for 3.2 seconds.
Chosen upgrades:
- Enhanced Rallying Cry – Rallying Cry grants you Unstoppable while active.
- Tactical Rallying Cry – Rallying Cry generates 20 Fury and grants you an additional 20% Resource Generation.
Explanation: Rallying Cry is another great skill for mobility, giving you lots of extra movement speed and also some Crowd Control immunity with the Enhanced upgrade. It also regenerates much needed Fury, which is important to keep our Rend spam going.
War Cry
Bellow a mighty War Cry, increasing your Damage Dealt by 15% for 6.5 seconds, and nearby allies for 3.2 seconds.
Chosen upgrades:
- Enhanced War Cry – War Cry grants you Berserking for 4 seconds.
- Power War Cry – If at least 6 enemies are nearby when you use War Cry, your damage bonus is increased by an additional 10%.
Explanation: War Cry simply gives us an extra damage boost, which can make all of the difference in tougher combat situations. With the Power War Cry upgrade, the effect is even better when we’re fighting against large groups of enemies, and the damage buff will help you to quickly cleave through them with Rend.
Call of the Ancients
Call upon 3 Ancients to aid you in battle for 6 seconds.
Korlic leaps at enemies, dealing X damage, and swings his weapons in a frenzy, dealing X damage per hit.
Talic spins in a Whirlwind, rapidly attacking enemies for X damage.
Madawc upheaves the ground, dealing X damage.
Chosen upgrades:
- Prime Call of the Ancients – While Call of the Ancients is active, gain 10% bonus attack speed and 10% increased damage.
- Supreme Call of the Ancients – Each of the Ancients gains an additional power:
- Korlic: You gain 10 Fury each time Korlic damages an enemy with his Frenzy.
- Talic: Enemies are slowed by 50% for 1 second by his Whirlwind.
- Madawc: 30% chance to stun enemies for 3 seconds when using his Upheaval.
Explanation: Call of the Ancients is a very strong Ultimate, giving you lots of extra damage while it is active. The upgrades from Supreme Call of the Ancients can really mess with enemies while giving you respite and Fury regeneration too. If you’re in a really bad spot, you can kite enemies around and then use this on cooldown.

Diablo IV Barbarian Build Skillpoint Selection
In this section we will include which order you should unlock the skills and passives in when spending your Skillpoints. This is perfect if you’re just getting started with your Barbarian and want to gradually make the build as you level up.
We’ve included 58 Skillpoints here – the 48 you get from levels 2-49, and the 10 you get by earning Renown when exploring Sanctuary.
- Lunging Strike
- Enhanced Lunging Strike
- Rend
- Enhanced Rend
- Furious Rend
- Battle Lunging Strike
- Rallying Cry
- Enhanced Rallying Cry
- Tactical Rallying Cry
- Rend tier 2
- Rend Tier 3
- War Cry
- Enhanced War Cry
- Power War Cry
- Rend tier 4
- Rend tier 5
- Hamstring (Weapon Mastery passive)
- Death Blow
- Enhanced Death Blow
- Fighter’s Death Blow
- Death Blow tier 2
- Death Blow tier 3
- Death Blow tier 4
- Call of the Ancients
- Prime Call of the Ancients
- Supreme Call of the Ancients
- Death Blow tier 5
- Booming Voice (Brawling passive)
- Booming Voice tier 2
- Booming Voice tier 3
- Pit Fighter (Weapon Mastery passive)
- Pit Fighter tier 2
- Pit Fighter tier 3
- Unbridled Rage (Key passive)
- Rallying Cry tier 2
- Rallying Cry tier 3
- Rallying Cry tier 4
- Rallying Cry tier 5
- Raid Leader (Brawling passive)
- Raid Leader tier 2
- Raid Leader tier 3
- Guttural Yell (Brawling passive)
- Guttural Yell tier 2
- Guttural Yell tier 3
- Tempered Fury (Ultimate passive)
- Invigorating Fury (Ultimate passive)
- Invigorating Fury tier 2
- Invigorating Fury tier 3
- Cut to the Bone (Weapon Mastery passive)
- Cut to the Bone tier 2
- Cut to the Bone tier 3
- Aggressive Resistance (Brawling passive)
- Prolific Fury (Brawling passive)
- Prolific Fury tier 2
- Prolific Fury tier 3
- Pressure Point (Core passive)
- Pressure Point tier 2
- Pressure Point tier 3
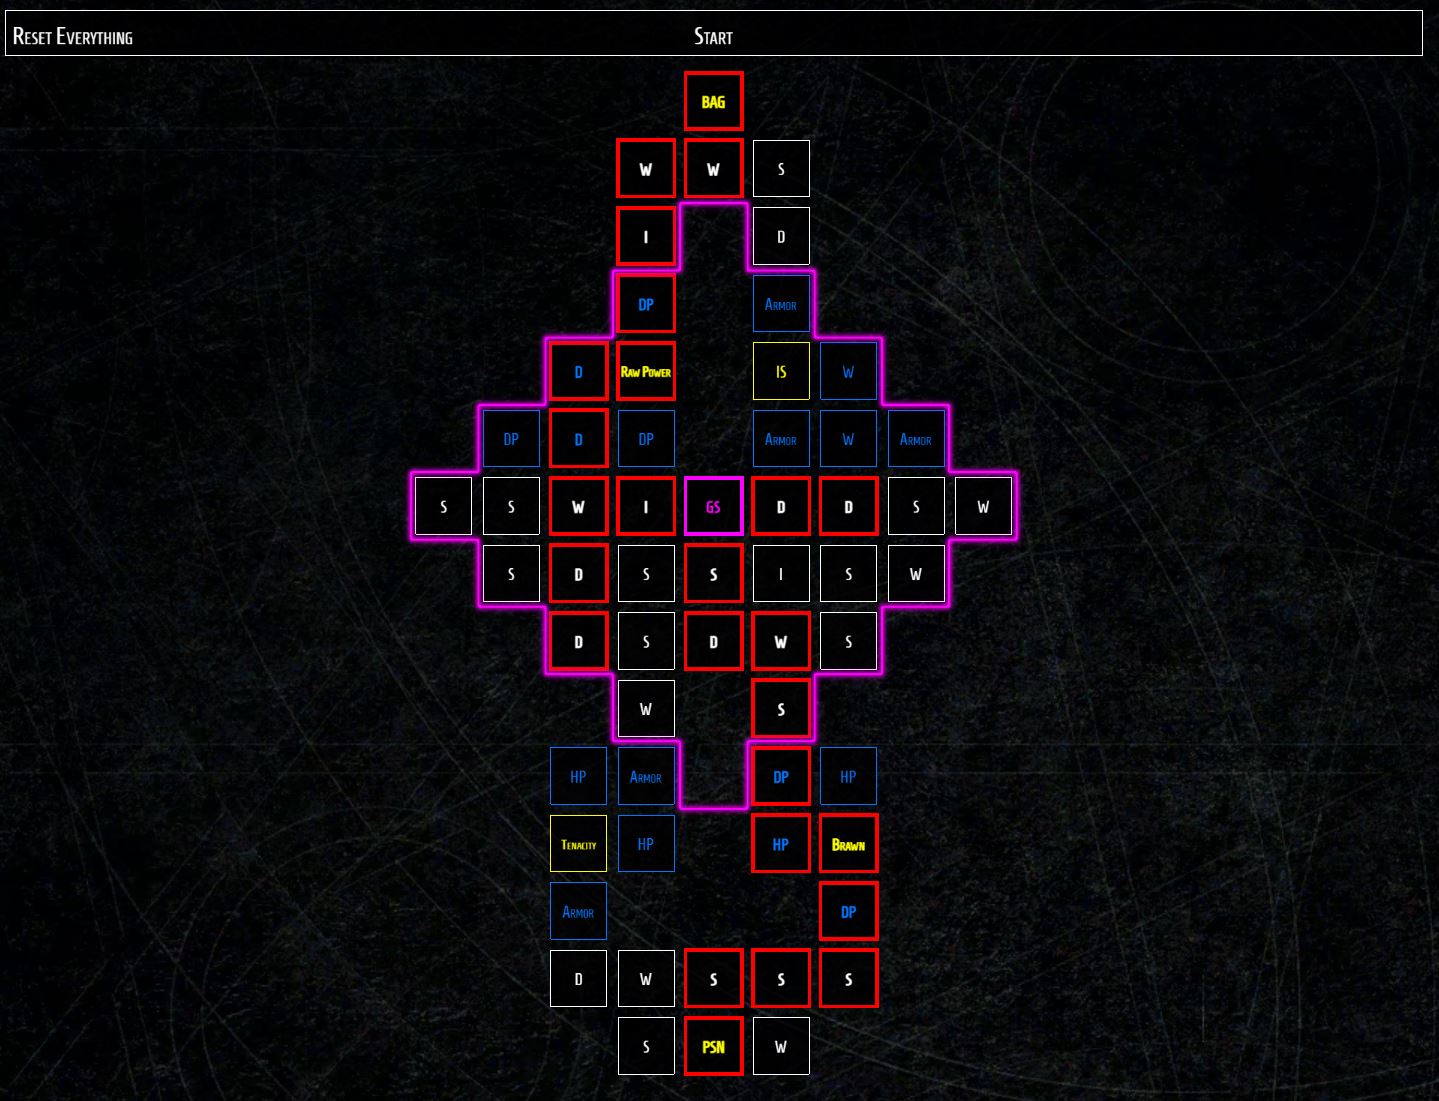
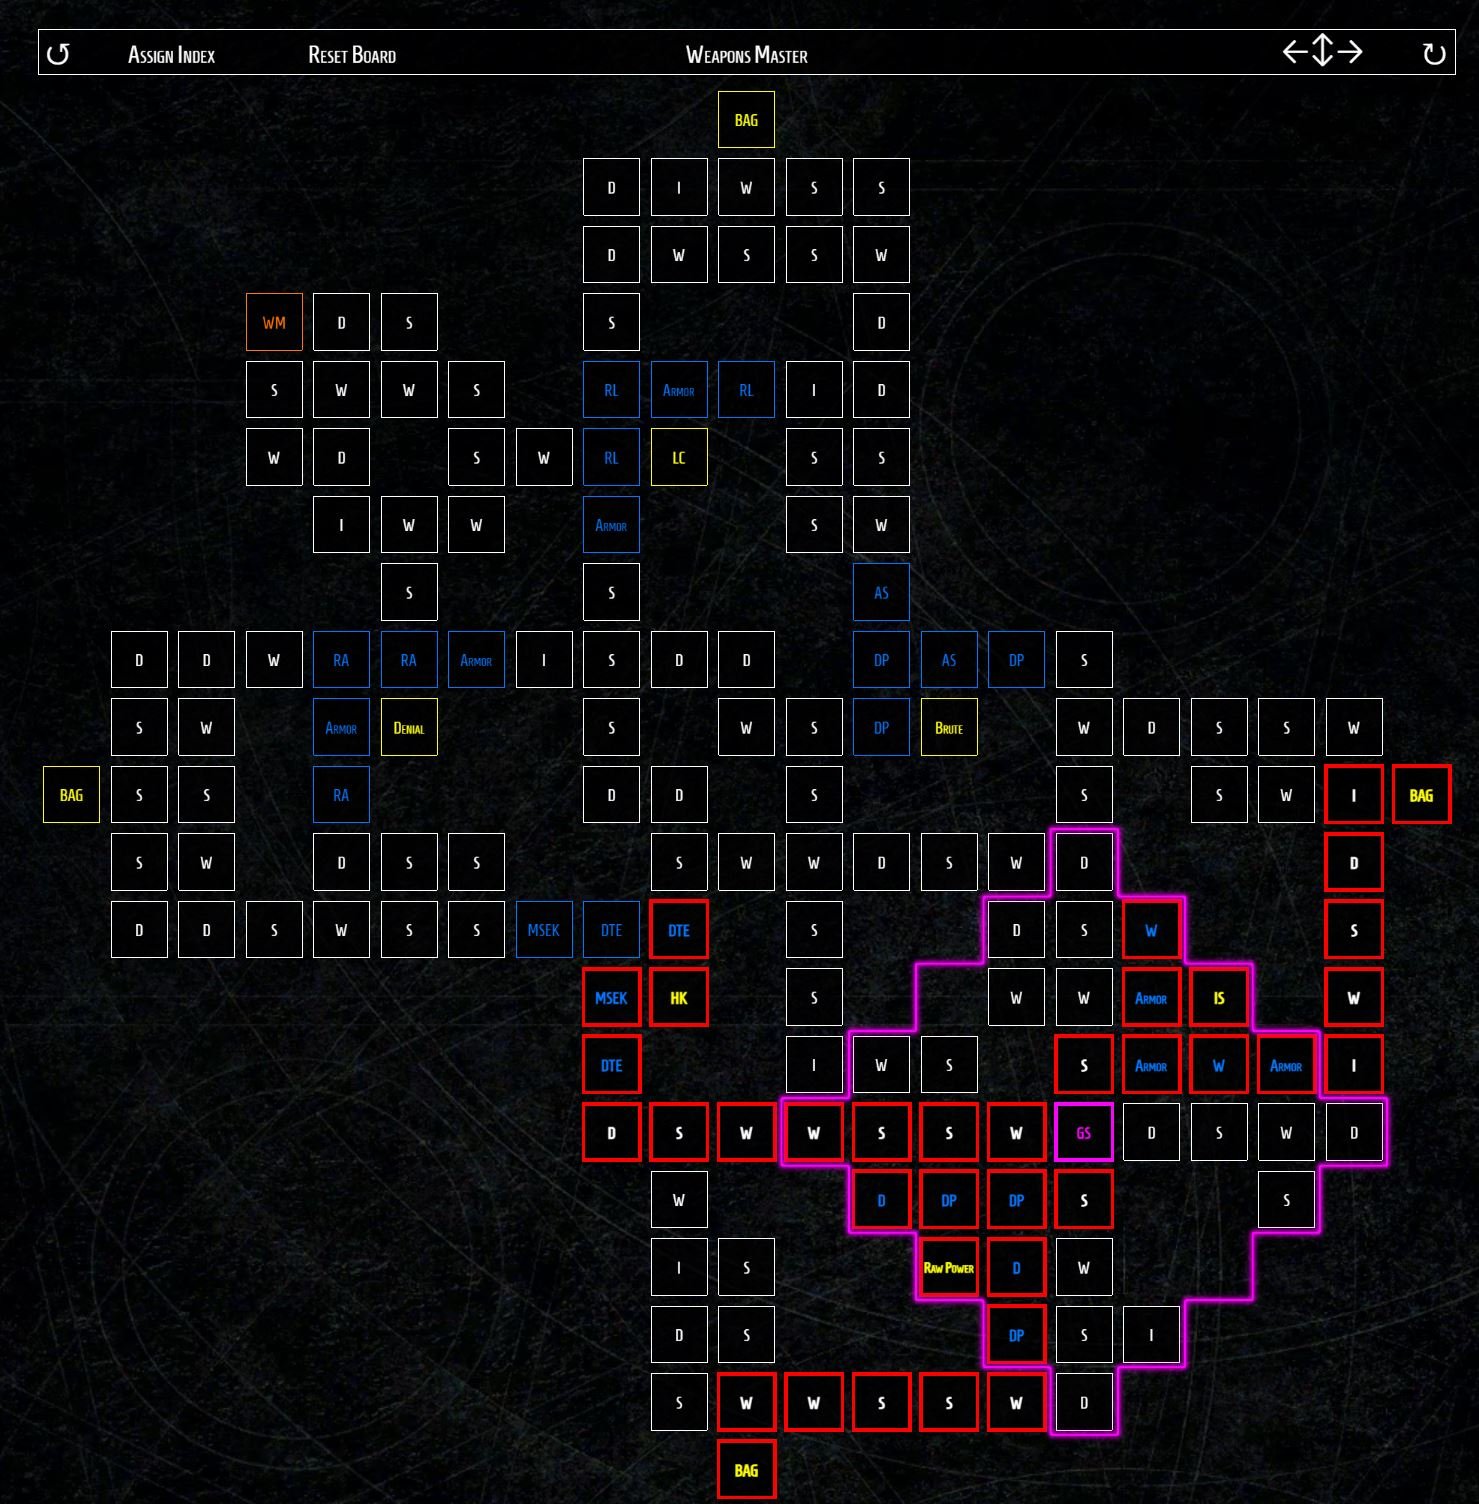
Barbarian Paragon Board
In this section we will cover the Paragon Board for the Rend Barbarian Build. We have included instructions on how to set up your Paragon Boards, along with some images showing the layout of each board. If you want to see them in more detail, we have saved them here.
Here are the step by step instructions for setting up the Paragon Boards:
- Starting Board
- Progress to the Glyph Socket, and choose Territorial.
- Take all Dexterity Nodes within range of the Socket, along with the Iron Strength and Raw Power Nodes.
- Progress along the upper left part of the board until you reach the exit node.
- Attach the Weapons Master Board.
- Weapons Master Board
- Rotate the board until the Glyph is in the bottom right corner.
- Progress to the Glyph, picking up the Raw Power node along the way. When you reach the glyph, socket Marshal.
- Unlock Strength Nodes within range of the Glyph, along with the Iron Strength node and the Magic Nodes.
- Progress to the right to exit the board. Attach the Warbringer Board.
- Warbringer Board
- Rotate the board until the Glyph is in the upper left corner.
- Progress to the Glyph, then socket Wrath.
- Unlock all the Dexterity Nodes in range of the Glyph, along with Raw Power.
- Progress to the right and unlock Hungering Fury.
- Progress downwards and leftwards to the Warbringer Node.
- Progress downwards to the Guarded Advance node, along with the nearby Magic Nodes.
- Exit the board at the top, and attach the Decimator Board.
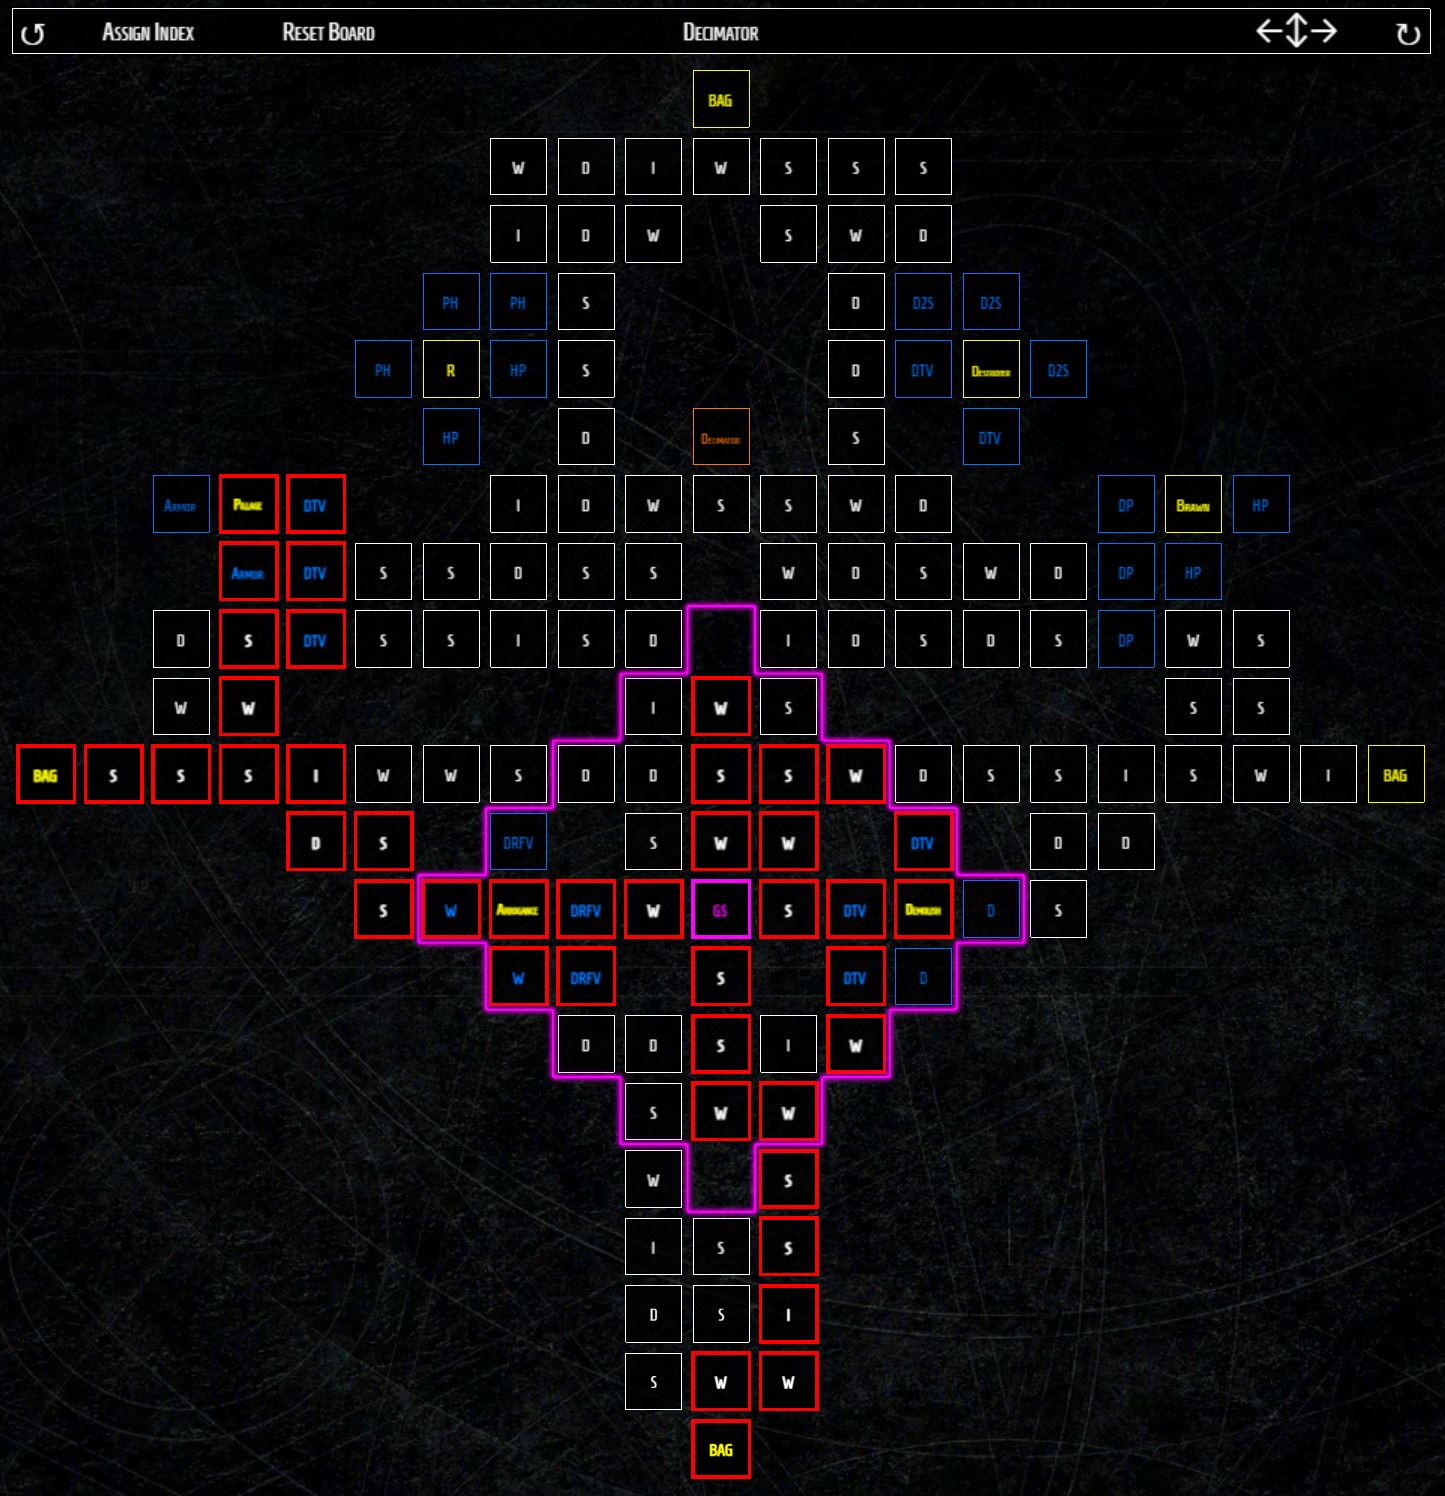
- Decimator Board
- Rotate the board until the Glyph is in the middle, slightly towards the bottom.
- Progress to the Glyph, then choose the Disembowel Glyph.
- Unlock the nearby Willpower Nodes, along with Demolish and Arrogance.
- Progress leftwards and upwards until you can unlock Pillage.
- Exit the board to the left. Attach the Bone Breaker Board next.
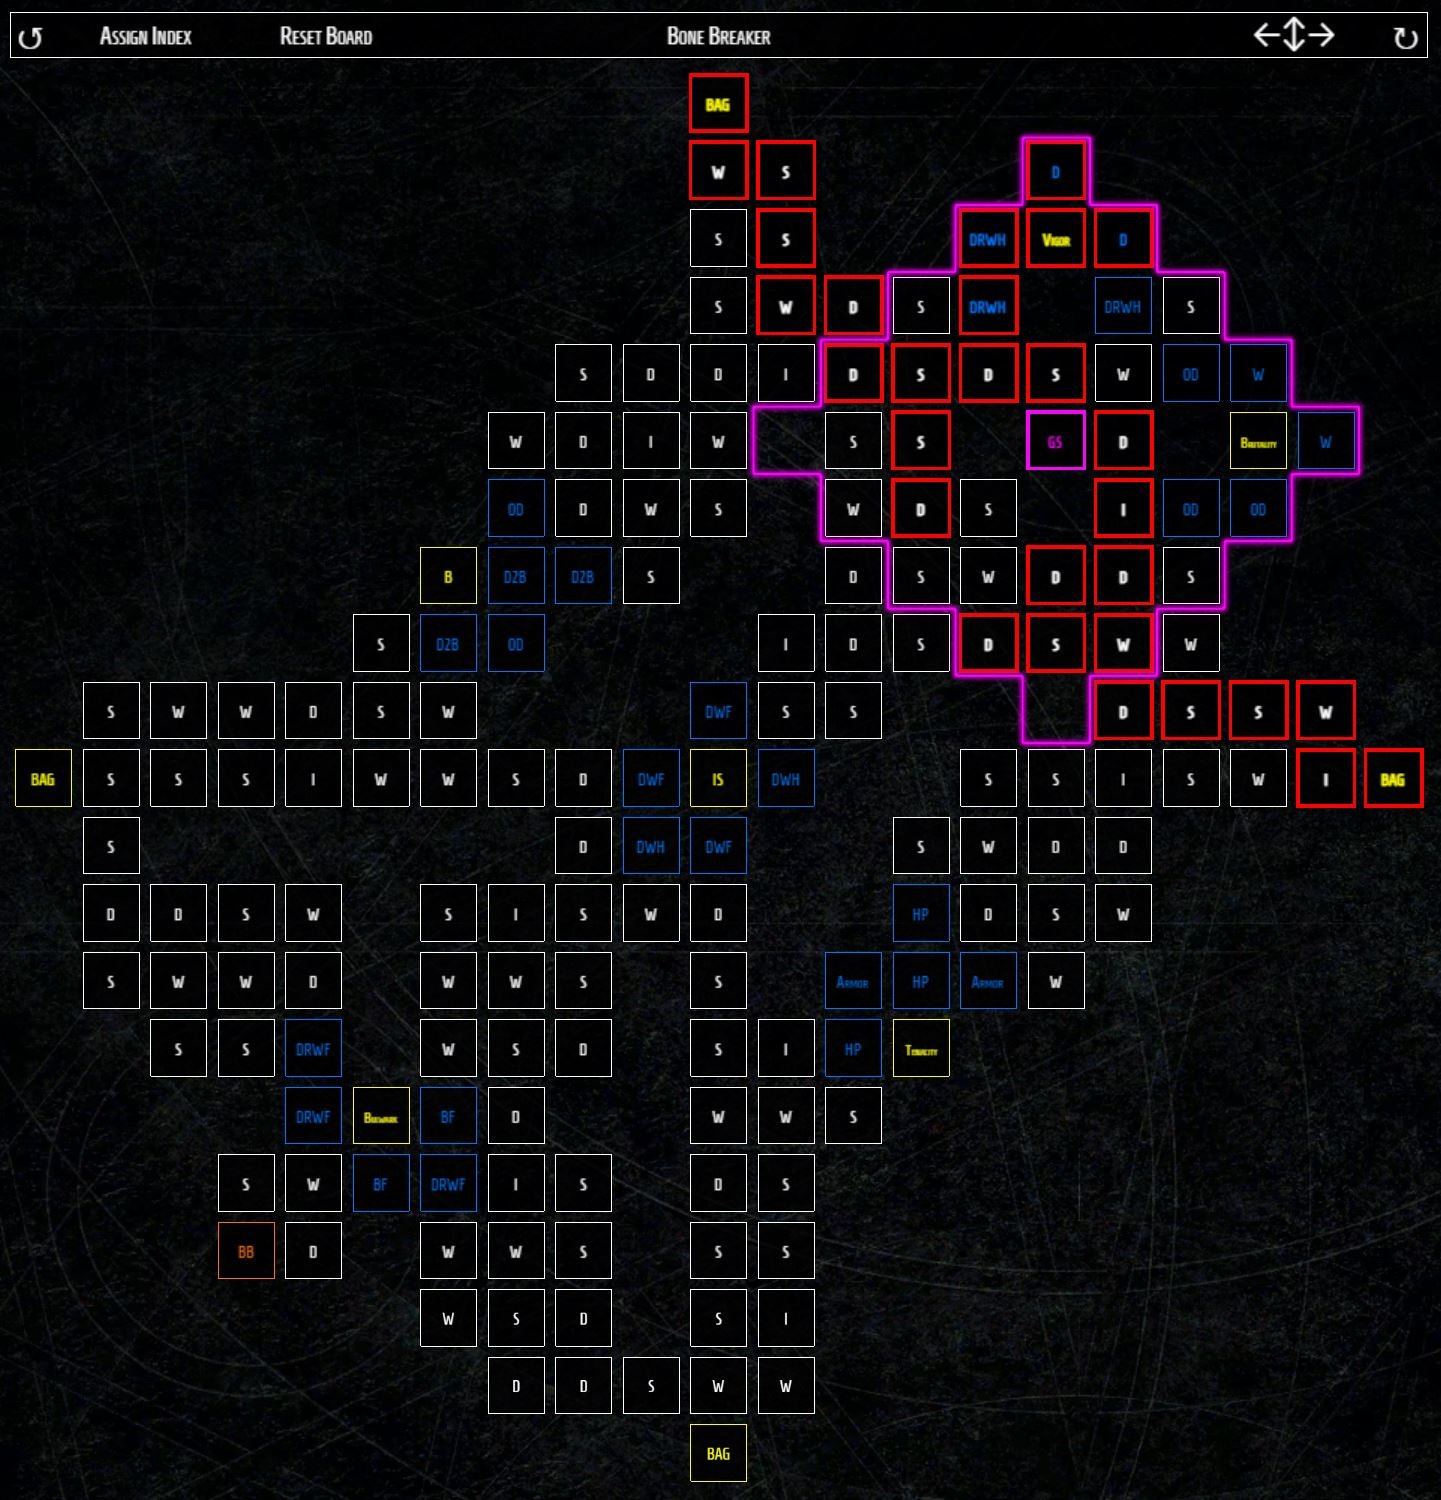
- Bone Breaker Board
- Rotate the board until the Glyph is in the upper right corner.
- Progress to the Glyph and socket Exploit.
- Unlock all Dexterity Nodes in range of the Glyph, along with the Vigour Node.
- Progress upwards and leftwards to the exit of the board. Attach the Flawless Technique Board.
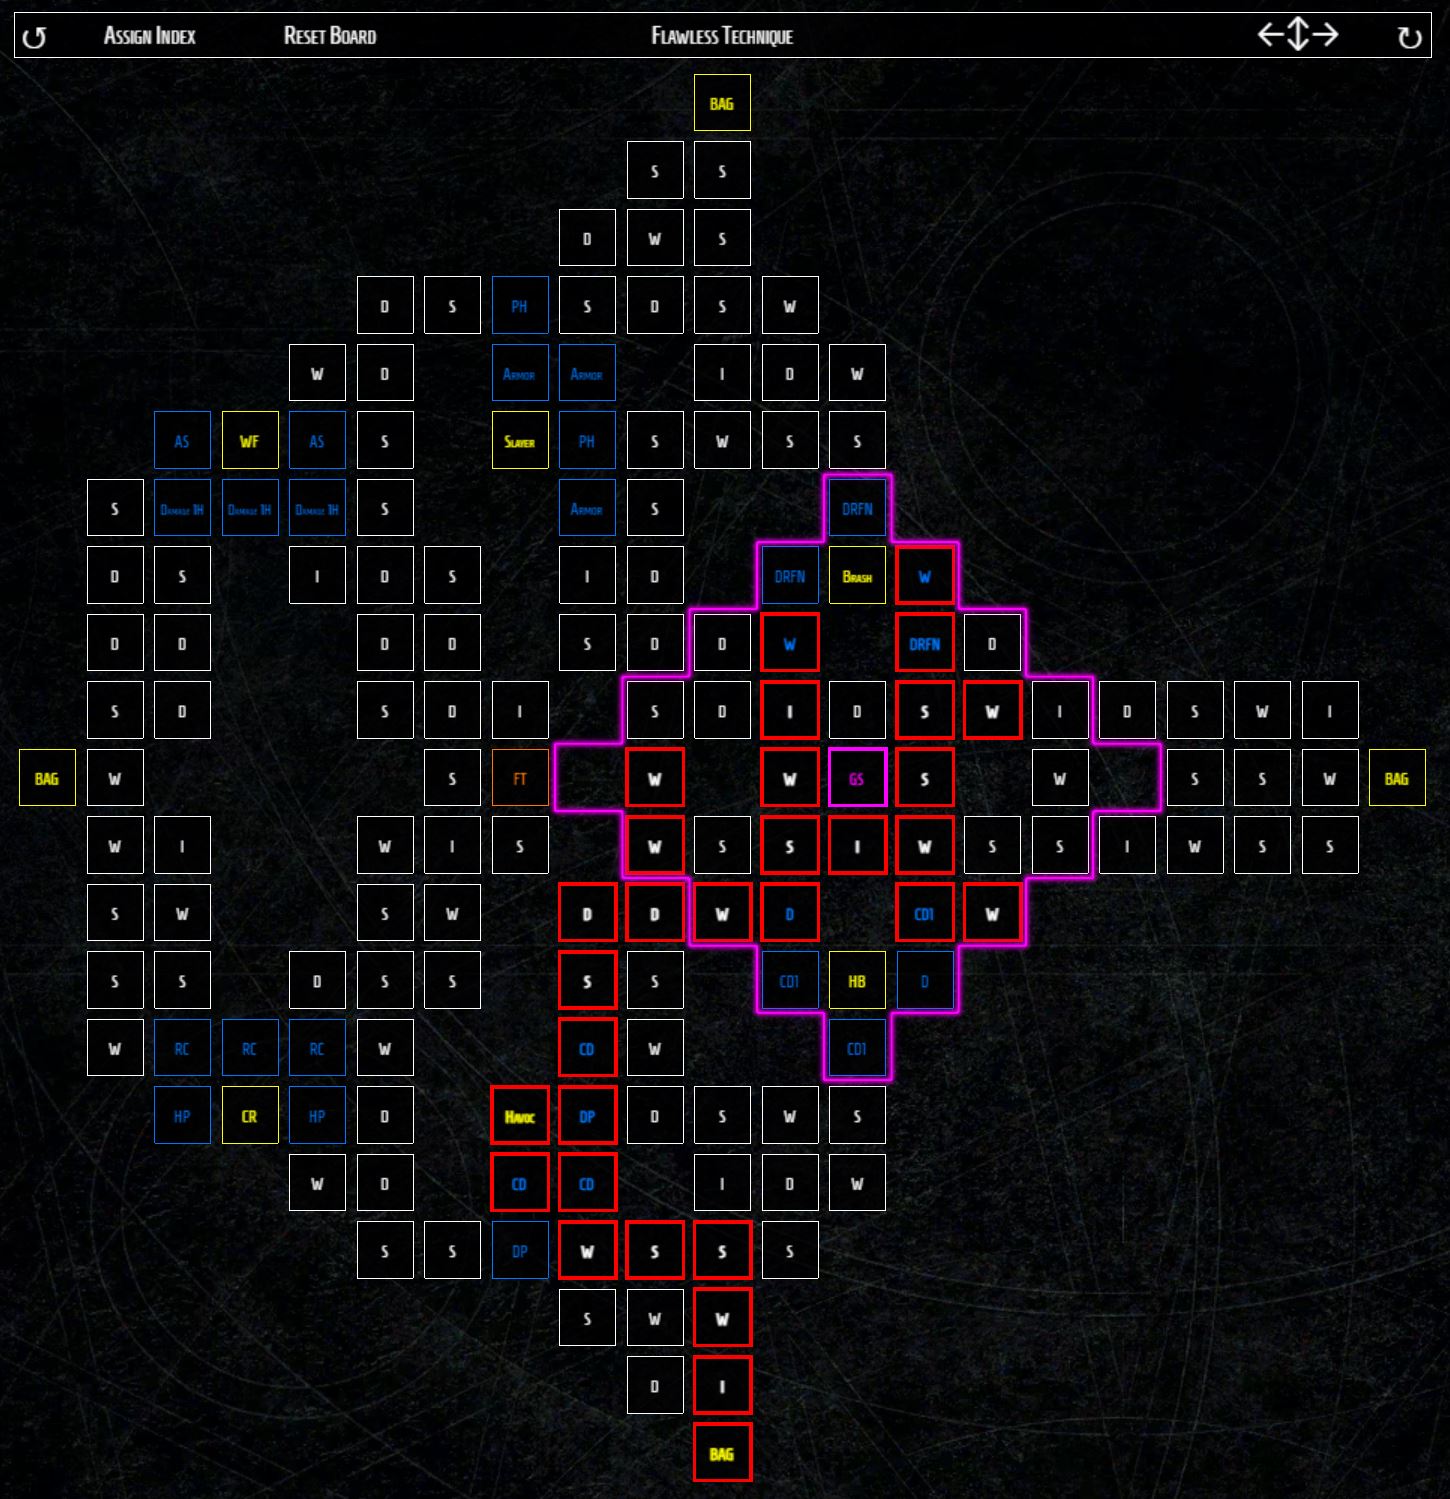
- Flawless Technique Board
- Rotate the board until the Glyph is just right of centre.
- Progress to the Havoc Node.
- Progress to the Glyph and socket Imbiber.
- Spend your remaining Paragon Points to unlock the Willpower Nodes within range of the Glyph.

Barbarian Arsenal Mechanic
The Barbarian’s unique class mechanic is called the Arsenal. In this section we will explain how best to utilize the Arsenal system for this build. It’s not super impactful compared to some other class mechanics, but it does make a difference, enough to be worth paying attention to, and there are a couple of nice synergies we can utilize.
Your first Arsenal slot will unlock automatically when you reach level 5. If possible, aim to use a two-handed sword in this slot, as it will cause enemies to bleed for 20% of all Direct Damage you deal to them. This synergises nicely with the Hamstring passive, applying a 10% Slow to all enemies, also allowing you to make use of effects that give a damage boost against Slowed enemies.
The second slot can be unlocked at level 15, by completing the Priority Quest called Barbarian: Masters of Battle. This will be automatically added to your quest log when you reach the required level.
In the second slot, we ideally want the two-handed axe, which gives a 15% damage boost against Vulnerable enemies.
Note that the percentage boosts mentioned in the above descriptions will be much lower when you start out – they can be increased by leveling up your weapon expertise, up to rank 10. All that’s required to do this is to keep using weapons of that type.
Best Legendary Aspects for the Diablo IV Barbarian
In this section we’ll include the best Legendary Aspects for each piece of equipment in this Diablo IV Barbarian build. Some of them are sources from the Codex of Power and can be unlocked and imprinted by visiting an Occultist, whereas others need to be dropped from looted Legendary Gear.
The main purpose of these choices is to stack up as many damage bonuses as possible.
- Two-Handed Bludgeoning Weapon: Offensive Aspect of Retribution – Distant enemies have an 8% chance to be Stunned when they hit you. You deal 40% increased damage to Stunned enemies. Unlocked by completing Abandoned Mineworks in Kehjistan.
- Two-Handed Slashing Weapon: The Grandfather (Unique Weapon) – Grants +17.5% Critical Strike Damage, +28% Damage, +2700 Maximum Life, +36 All Stats, Increases your Critical Strike Damage by 100% (these stats are with the best possible roll). Obtained randomly via loot.
- Dual Wield Weapon 1: Edgemaster’s Offensive Aspect – Skills deal up to 20% increased damage based on your available Primary Resource, receiving the maximum benefit while you have full Primary Resource. Unlocked by completing Oldstones in Scosglen.
- Dual Wield Weapon 2: Conceited Offensive Aspect – Deal 25% increased damage when you have a Barrier active. Must be sourced from looted gear.
- Helm: Defensive Aspect of Numbing Wrath – Each point of Fury generated while at maximum Fury grants 54 Fortify. Unlocked by completing Heathen’s Keep in Hawezar.
- Chest Armour: Defensive Aspect of Disobedience – You gain 0.5% increased Armour for 4 seconds when you deal any form of damage, stacking up to 50%.
- Gloves: Offensive Aspect of Inner Calm – Deal 10% increased damage for each second you stand still, up to 30%. Unlocked by completing Raethwind Wilds in Scosglen.
- Pants: Defensive Aspect of the Protector – Damaging an Elite enemy grants you a Barrier absorbing up to X damage for 10 seconds. This effect can occur once per 30 seconds. Unlocked by completing Lost Archives in Fractured Peaks.
- Boots: Ghostwalker Mobility Aspect – When Unstoppable and for 4 seconds after, you gain 25% increased Movement Speed and can move freely through enemies. Unlocked by completing Broken Bulwark in Scosglen.
- Amulet: Offensive Aspect of Limitless Rage – Each point of Fury you generate while at Maximum Fury grants your next Core skill 2% increased damage, up to 30%.
- Ring 1: Bold Chieftain’s Resource Aspect – Whenever you cast a Shout skill, its cooldown is reduced by 1.9 seconds for each enemy nearby, up to a maximum of 6 seconds.
- Ring 2: Resource Aspect of Berserk Fury – You gain 6 Fury per second while Berserking. Must be sourced from looted gear.
Best Stats and Socket Upgrades for the Barbarian
Finally, we will look at which stat rolls you should look out for on each gear slot, and which Socket upgrades you should use. Don’t worry if you don’t find items that match these exactly – most stats are still useful even if they’re not best in slot.
- All weapons – Look for Vulnerable Damage, Critical Strike Damage, Core Damage and Slowed Enemies Damage.
- Helm – Look for Cooldown Reduction, Maximum Fury, Increased Armour, Maximum Life and Strength.
- Chest – Look for various forms of Damage Reduction, and Maximum Life.
- Gloves – Look for increased Rend rank, Crit chance, Attack Speed, and Strength.
- Pants – Look for Maximum Life, Damage Reduction and Increased Armour.
- Boots – Look for Movement Speed and Fury Cost Reduction.
- Amulet – Look for Fury Cost Reduction, Cooldown Reduction, Vulnerable Damage and Fury Generation.
- Rings – Look for Crit Chance, Crit Damage, Vulnerable Damage and Fury Generation.
And finally, the Sockets:
- Weapons: Use the Royal Emerald stone for increased Critical Strike Damage against Vulnerable enemies.
- Armour: Use the Royal Sapphire for Damage Reduction while Fortified.
- Jewelery: Use the Royal Skull for increased armour.
Other Diablo 4 Builds:
FAQ about Barbarians