

Welcome to the ESO Hel Ra Citadel Guide. The Hel Ra Citadel Trial is located in Craglorn and is one of the three base game trials, so you do not need any DLC to play this trial. The Hel Ra Citadel is also often referred to as HRC.
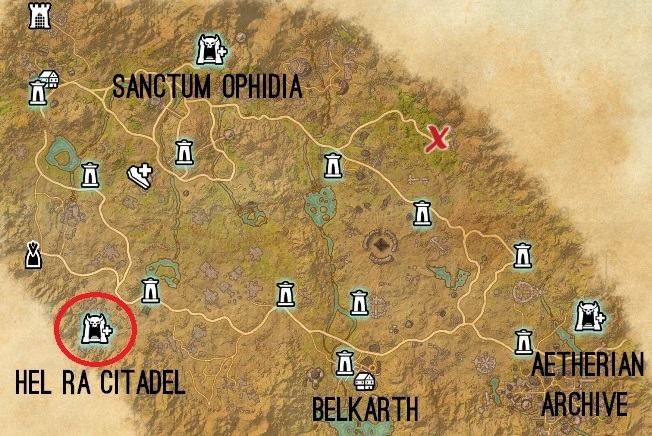
Location of Hel Ra Citadel
Hel Ra Citadel can be found in the South West of Craglorn.
General Information
Raid team: 2 dedicated Healers, 1 Main Tank, 1 Off Tank, 8 Damage Dealers.
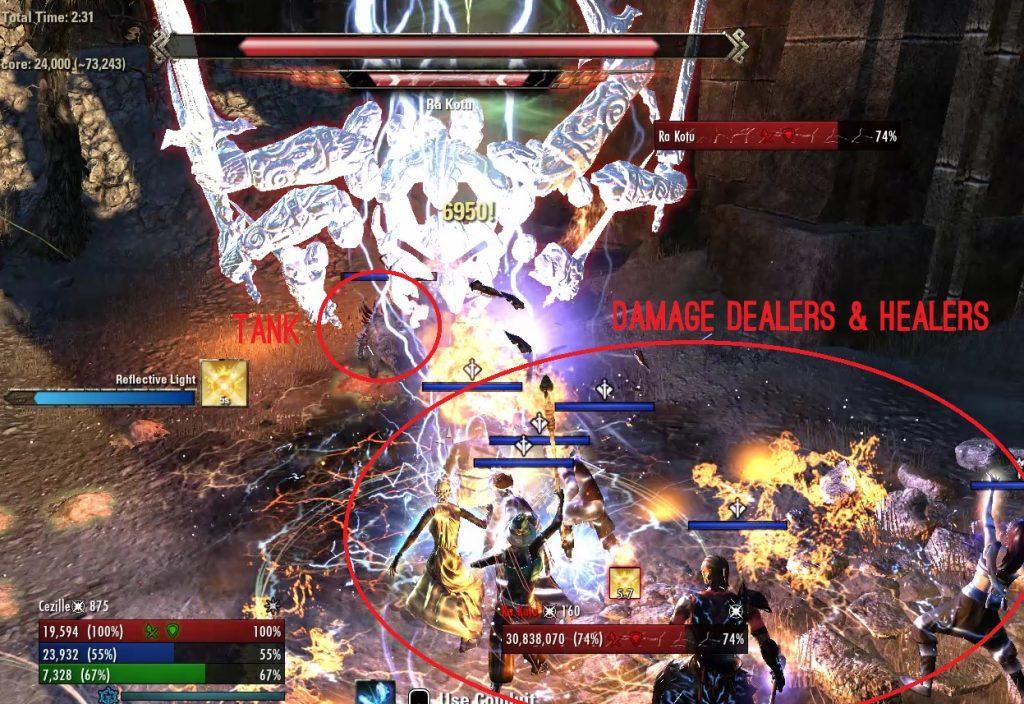
Before I start with explanations on how to best approach each section of the trial, it is important to note that your group of 12 members will split into two groups of 6 after the first boss. One group will take a left path, and the other will take the right, eventually rejoining one another before the final boss encounter. I will quickly explain how this is going to work and go into more detail later!
After the first boss is dead, there will be two gates where each six persons have to go in. Now you want to make sure to prepare this before you begin the trial. On each side there will be a few trashpacks that need to be killed.
On the left side you will encounter Yokeda Rokdun a Archer boss. The boss itself is not that difficult. However, there are quite a few big add waves before the boss shows up. Most of your melee damage dealers should be in this group, as most mobs will be stacked and you will kill them with AoE abilities.
Left group:
- 1 Full Heal, 1 Main Tank, 4 DDs
- Make sure your DDs use AoE damage skills
- Melee DDs should be in this group
On the right side you will encounter Yokeda Kai, the boss is a mage and has some interesting mechanics which I will explain later. Here it is important that you have skills that interrupt the boss. Because he will duplicate himself and all the duplicates and the boss himself will start charging fireball AoE damage. Which needs to be interrupted fast. You can bash the bosses to interrupt them. This can be very tricky that is why I recommend bringing skills with you that can interrupt the casting duplicates and the bosses. The Healer should have a Barrier Ultimate ready if your DDs are struggling with the fire AoE damage from the multiple adds.
Right group: 1 Healer , 1 Off Tank, 4 DDs.
Make sure some of the group members have interrupting skills slotted, such as:
- Crushing Shock from Destruction Staff
- Venom Arrow from Bow
- Off Tank can also interrupt them by bashing the Adds
- Off Tank can also interrupt them by bashing the Adds/using Deep Breath ability if they are a Dragonknight.
Defensive Championpoints
Make sure to check out my article which talks about how to optimize damage mitigation in Trials through red Champion Points. Red Champion Points can mitigate damage by a huge margin, so really make sure to have the correctly set up!
The majority of the damage you will receive in this trial is physical damage, so make sure you assign your RED Champion Points (CP) with this in mind: 100 points in Hardy. This will equal 25% damage reduction of all incoming physical damage.
First Addwave
When you first enter the Hel Ra Citadel, you can enjoy an easy ride on your mount to the bridge. It is a quite long journey so enjoy the view and grab the heavy sacks!
Make sure your group meets up together in the middle of the bridge, because as soon as you are close to the end of the bridge, the first mob groups will spawn. They will spawn in waves and you can either kill them group by group as they spawn by progressing towards the stairs, or, your tank can simply pull all of them upstairs to the area where you will encounter the first boss. These mobs are easy to kill, just keep a wary eye on the archers. They can hurt!
Once you reach the top of the stairs there will be another group of adds waiting for you. Here it is very important that you interrupt the Flame-Mages ASAP when they raise their staff in the air. Otherwise they will deal a shit ton of damage! You can also stack the mages to kill them faster! The tank can taunt the mages and run to the right side so they all follow him and stack together at a certain point.
The first boss, Ra Kotu, will spawn immediately after your group has dealt with the adds. This boss will aggro very easily and potentially kill players so it is important to ensure that the tank is prepared and ready to hold the boss!
First Boss – Ra Kotu [HP: 41 Mio.]
Ra Kotu is an air atronach and is the first boss of Hel Ra Citadel. Damage mitigation is the key for your healers here. The can use either the barrier ultimate from the Alliance War support skilltree, or class specific damage mitigation skills like Templar’s Nova, Nightblades Veil of Blades, if the incoming damage is too strong. Circle of protection from the fighters guild skill tree is also beneficial. Magicka Damage Dealers should use a shield skill like Dampen Magic or Harness Magicka from the Light Armor Skill Line, while Stamina Damage Dealers should use Deadly Cloak from the Dual Wield Skill Line, to reduce the incoming AoE damage. Your main tank has to tank the boss in the corner on the right side, right next the door where he spawned, facing Ra Kotu towards the wall, away from the group.
The boss has some friends he brings along, the friendly Flame-Mages!
Make sure that the Off tank separates them from the boss on the left side, but still within range of the boss so that Aoe damage skills can hit both the adds and the boss. Kill them first and then focus on the boss. As you should know by now, interrupt them as soon as possible when they lift their hand! There will be no more adds spawning during this boss fight, cool huh?
If your group is strong enough, you can just group the adds with the boss and let your AoE skills kill the adds while the Damage Dealers focus the boss.
Whirlwind
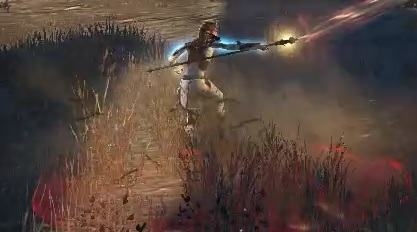
- There are summoned whirlwinds on the ground that deal a LOT of damage. They follow a random group member with a red circle.
They will show up on your death recap as “gust”. You can step outside of them, but they will follow you for some time.
- If your damage is not high enough the bossfight will take some time, so make sure that the Damage Dealers are standing in the right position where the healing springs are being placed by the healers, and do not forget to shield up regularly to mitigate the incoming damage. Your healers have to focus on healing and if possible damage mitigation.
Damage mitigation skills:
- Barrier Ultimate from Support Skill Line (Alliance War)
- Solar Prison Ultimate from Dawn’s Wrath Skill Line (Templar)
- Veil of Blades Ultimate from Shadow Skill Line (Nightblade)
- Ring of Preservation from the Fighters Guild Skill Line
If your damage output is strong enough, you can almost ignore the whirlwinds mechanics. Make sure your group stacks together behind the boss and deals good damage. The healers have to just heal through the 100% to 35% phase with Healing Springs and Combat Prayer.
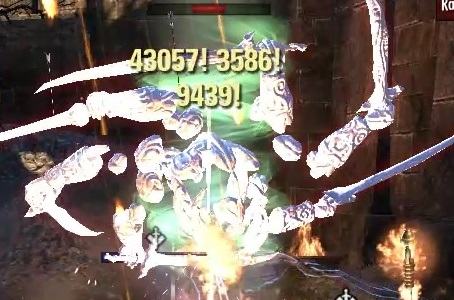
Six Sword Assault
- There is also a six sword assault special attack from Ra Kotu. Four swords are thrown forward and fly backwards in a diagonal attack. They will hit you twice if you stand in the wrong position and likely kill you. If your tank is doing his job correctly and facing the boss at the wall, you can avoid this attack by standing directly behind the boss. To be safe, make sure to block when he throws the swords.
Spinning Attack
- Below 35% HP Ra Kotu has an ongoing spinning attack that can be a death sentence for everyone that stands too close to the boss. Make sure that when Ra Kotus HP drops below 35%, Melee DDs stand away from him for the rest of the fight and change to ranged damage whilst he is spinning. If the melee DD’s are careful, they can come back into melee range after the spinning stops and continue their rotation. Just be careful when the boss starts spinning again!
- The faster the boss dies in this execute phase, the better. The incoming damage on the tank is huge. Dragonknights can use Corrosive armor to stand in the spinning attack. Other tanks have to run away (kite) to survive.
Splitting into two groups
Now it is time to split up into two groups, like we discussed before.
Right group:
- 1 Full Heal, 1 Off Tank, 4 DDs
- Make sure some of the group members have interrupting skills slotted such as:
- Crushing Shock from Deconstruction Staff
- Venom Arrow from Bow
- Off Tank can also interrupt them by bashing the Adds
Left group:
- 1 Full Heal, 1 Main Tank, 4 DDs
- Make sure your DDs use AoE damage skills
- Melee DDs should be in this group
Left Group – Adds and Boss Yokeda Rok’dun
This group has to deal with a small group of adds first, while avoiding the oil drops from above (big red circles on the ground). The mobs will spawn as long as gate to the next area is closed, so if you want to go easy mode, just let one add of the second wave alive and kill it when you the gate opens.
As soon as the gate to the next area is open, dash to it and meet up with two Gargoyles waiting for your group. You have to kill them before the gate to the next area will open. Make sure, your Tank deals with one after another of them. You have to avoid the red circle AoE from the Gargoyles, which is a ground pound that deals massive damage. Your Healer won’t be able to heal through it, so stand aside! Their frontal cone AoE just freezes you and you can easily break out of it using CC break.
In the next area you have to deal with waves of mobs. Remember to interrupt the Flame-Mages instantly and make sure your Tank pulls the Destroyers, cause they can wreck players otherwise, by putting an red circle around a random player. This circle will explode after a few seconds and hits everyone in the area like a truck if you are not blocking during the explosion. Also make sure you are standing outside of the group when you have the red circle, cause other players in it will also get hit by it during explosion.
Second Boss – Yokeda Rok’dun [HP: 23,3 Mio.]
The second Boss of Hel Ra Citadel is slightly easier to deal with than the boss for the right group, cause the mechanics are fairly simple.
Fire Circle
- From time to time Yokeda Rok’dun will place fire circles on the ground. They are quite easy to avoid, so just make sure you don’t stand in them.
Welwa Adds
- The main job for the Tank is to tank all the Welwa adds that are spawning. You don’t need to tank Yokeda Rok’dun. Make sure your tank stands away from the boss tanking them. Your Healer should always have an eye on the DDs and on the Tank to support and heal both of them. Your DDs just focus on Yokeda Rok’dun.
- As soon as one of the Welwas enrages and grows from a small puppy into a big fat dog, your tank will bring them to Yokeda Rok’dun, so that they will die in the AoE Damage from your damage dealers. When the big Welwas are killed, the tank separates again from the Boss group. The big Welwas need to be killed quite quickly as otherwise they will do massive amounts of damage. The longer the fight with Yokeda Rok’dun goes on, the more and more Welwas will spawn, so it is up to the damage dealers to do their job properly!
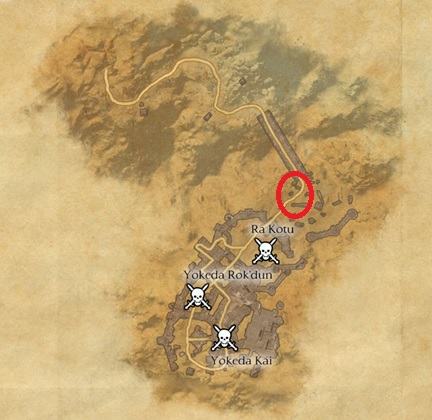
Right Group – Adds and Boss Yokeda Kai
- The right group has to wait all together to enter the gate until the left group entered theirs. A small group of mobs will spawn immediately after the gate. Once you killed them, keep going up the stairs. Clear the mobs spawning along the way. It is important, that you press two levers on your way, because each lever will open a gate for the group on the left side. You will find the first lever on the second base upstairs and the second lever across the narrow little bridge.
- After the second lever, upstairs, there are some other mobs and Gargoyles waiting for you. Just a little reminder: stay out of the ground pound AoE of the Gargoyles! Destroy the catapults, because otherwise they will rain fire down on the left group at the second boss area. If you killed all the mobs, enter the last room to meet and greet the second boss.
Second Boss Right Side – Yokeda Kai [23,3 Mio.]
The right group faces Yokeda Kai. This boss is a bit harder to deal with than the boss from the left group. Yokeda Kai requires quick reaction and quick interrupting skills.
Splitting
- Yokeda Kai will disappear and split into four adds, all of them with the same HP as the boss. The trick is: Only one of them is the actual boss. The copies of the boss take a lot more damage and will die faster, only Yokeda Kai will get the same damage as usual.
- Everytime he splits up, Yokeda Kai will run to the middle of the room. The adds will spawn at the very same place in the corners of the room everytime. Each DPS should be assign a spot prior to the fight so there is a DPS on each add. When you killed the adds, go back and focus again on Yokeda Kai until the next split.
- Depending on your DPS the split will take place several times.
Fire Attack
- Remember those Flame-Mages and their fire attack? Yokeda Kai does the same attack, so make sure you interrupt him as soon as he starts to lift his tiny arms.
- This is easy to deal with when you only face Yokeda Kai. But as soon as he splits up and the adds spawn, you will have to deal with Fire Attacks from him and his adds. So that’s why it is important, enough of your group members have interrupting skills. You need to interrupt Yokeda Kai and the adds as soon as possible when they start the fire attack.
Meteor Attacks
- This attack is a big red circle on the ground, which you have to immediately dodge roll out of it or block. If you aren’t fast enough, the meteor will hit and stun you. It deals a lot of damage and you are likely to die if it hits you.
- The meteor can land during the whole fight at any time, also in the splitting phase.
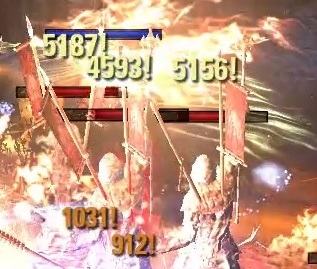
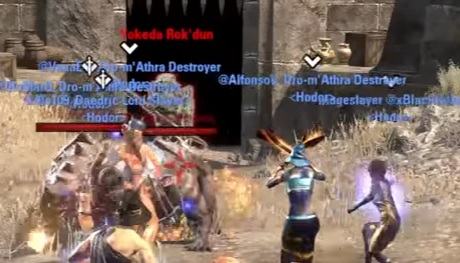
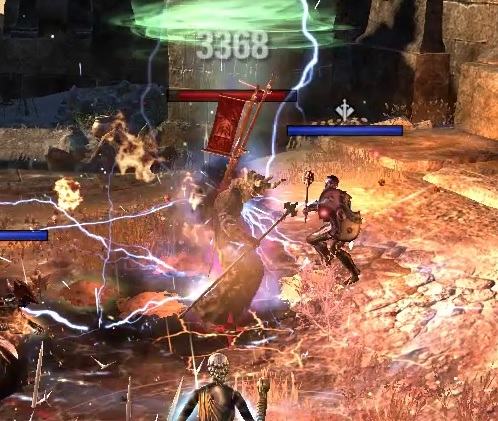
Fire Attack Explosion
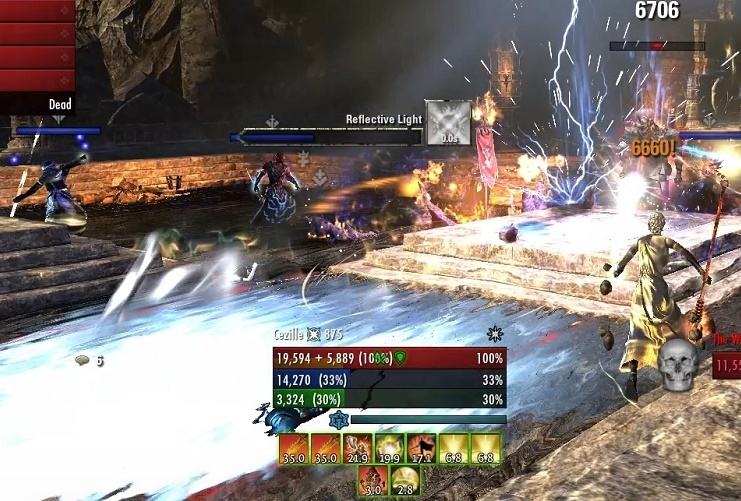
- From time to time the boss will cast a ground fire explosion. Everyone that stands in there will die, even if you block it. So you have to make sure to move out. It looks like the boss is charging is staff, like in the picture below.
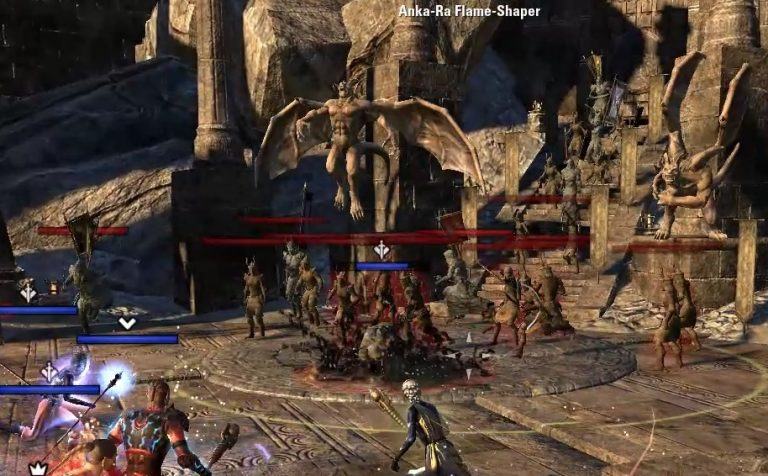
Adds and before the last Boss
After you are reunited with the other group you will face the last group of adds before the final boss. They are waiting for you before the stairs that lead to the room of the end boss. There are Gargoyles and Flame-Mages amongst the adds to be wary of, but you should know how to manage their mechanics by now.
There is a warhorn on the opposite side from the stairs. You will gain an achievement by blowing it but beware: as soon as you blow into it, all the mobs by the stairs will rush towards your direction! So make sure your group is ready to face them before anyone gets near that damn warhorn!
There are two different ways you can deal with this group:
- If you want to go easy mode, just kill the adds in waves, the Gargoyles at the back won’t come when you pull the first group.
- If you feel comfortable with your damage output, make sure everyone is ready and just burn the whole group down by standing on the platform right before the stairs all together. Healer can use damage mitigation (Nova Ultimate) and DDs can use Destruction Staff Ultimate. Tanks can pull the Gargoyles out of the group if you feel safer knowing that the pounding AoE is far away from you.
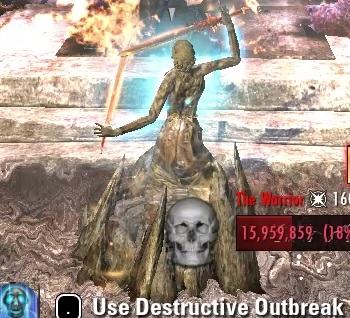
Last Boss – The Warrior [HP: 64,2 Mio.]
You made it! This is the last boss of the trial Hel Ra Citadel. Without Hardmode this boss is quite easy to defeat, if everyone knows when to dodge roll or how to avoid the red AoEs on the ground.
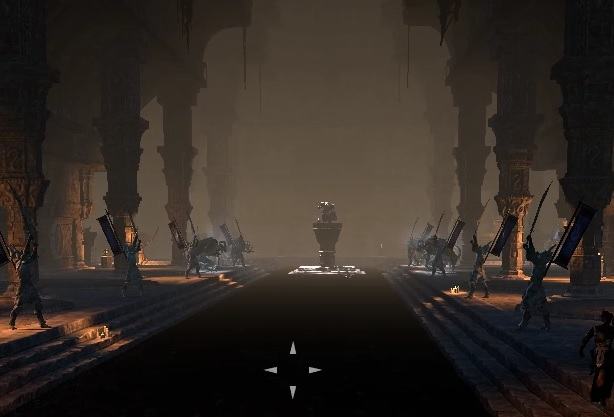
When you enter the room, you will see a lot of statues and the boss on a pedestal in the centre of the room. On the right and left side from the boss there are two big AoE circles on the ground. The left circle is light yellow and provides your group with a health buff that increases your health recovery. This circle is useless, so don’t use it. The circle on the right side is light blue and provides your group with a damage output buff. This is where your group wants to start the fight.
The Tank will pull the Warrior on the pedestal in the middle, just outside the blue circle so that the DD’s are in the circle but still within melee range of the boss. As a tank, be careful not to over taunt him, he’s a bit sensitive about that!
All other players will stand on the right side in the blue circle, close together, snuggling and cuddling. At about 70% HP from the Warrior the blue circle will disappear and your group will lose the damage buff from it.
Shield Attack
- The Warrior has a frontal attack, in which he throws his shield away and it comes back. You will see this attack as a long small strip AoE on the ground. It is important that you either dodge roll out of this attack or that you shield and block. It is easier when one person announce this attack and then everyone moves out of it. If you get hit by it, you are most likely dead.
Jump Attack
- The jump attack is a big round circle AoE with an inner and an outer circle. If you are in the inner circle when he jumps, you are dead, so try as fast as possible to dodge roll out of the red circle if this one appears.
- This attack can be avoided, if your group stands together close enough. But as soon as one player is too far away from the rest of the group, the Warrior will jump at him.
Adds
- During the fight, Destroyers and Flame-Mages will appear. Make sure the Off Tank pulls them on the side.
- This fight is also some kind of a DPS race. When adds spawn, focus them until they are dead and then go back to damage the Warrior. If you lose the race, a large amount of adds will spawn and wipe the group. So make sure your DDs deliver what they are here for.
- The Flame-Mage need to be interrupted when they are going to put their arms upwards.
- The Destroyer adds will place a red circle on some of the players. This circle will explode after a few seconds and everyone that stands in the red field will take damage. So make sure you are blocking when the circle explodes. Also make sure you are standing a little bit outside of the group when you have the red circle, because other players in it will also get hit by it during explosion.
- If the Warrior is close to 35% HP, ignore the adds and burn him down to 35% HP, now the execute phase begins.
Past 35% Phase
At 35% the Warrior will explode (this will take out all the remaining adds). He will raise his swords, which will glow bright. Make sure all players spread out immediately and block the knockback attack. After that all the raid members have to spread in the rear of the room, no more cuddling! The Tank is still on the platform in the middle of the room, together with the Warrior.
Shehai Storm
- This is a special attack of the end boss. He will raise his mighty sword up in the air and starts doing AoE damage that lasts for 4-5 seconds and deals so much damage.
There are two ways to handle this attack:
- Tactic I
- The group has to run and meet right by the Warrior on the pedestal, Healers use damage mitigation skill as soon as Starfall begins and spam healing springs. Make sure to spread out again after the Starfall end, cause of the Cleave Attack.
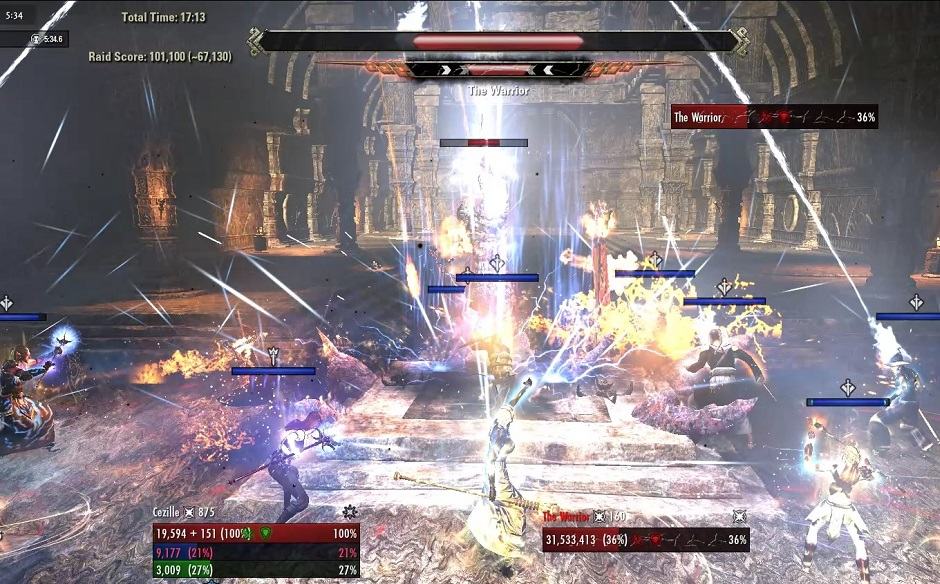
- Tactic II
- Make sure that every group member has a shield skill for this phase. When he starts the Starfall, just spam the shields until it’s over. This works only, if group members stand with enough room to each other and are spread out in the whole room. Everyone on the picture below stands slightly away from each other so the Starfall doesn’t kill people, everyone is still in healing springs range!
Cleave
- Right after the Starfall the Warrior has a roundabout attack, but this time the range is much wider and you have less time to react. This is a all-round attack, so make sure to never stand in front or behind the Warrior after the Starfalls.
Frontal Cone Attack
- This attack is similar to the shieldthrow, instead of throwing his shield, he rams his two hander into the ground and a huge shiny frontal AoE attack happens. If you do stand in there you will take a lot of damage. Make sure to dodge out of the red AoE if he targets you.
Congratulations, you managed to pass the Hel Ra Citadel Trial! Next step, hardmode!
Last Boss – The Warrior HARDMODE [HP: 86,2 Mio.]
If you feel the need for some challenge, try the Warrior on Hardmode. Just destroy the statues before the boss room. The hardmode version is the same as the normal fight, but before the actual boss fight you need to destroy the Gargoyles statues and the adds in the rear half of the room. I do recommend watching the video I linked. Your group needs to be very coordinated to succeed in killing the gargoyles.
There are different ways to destroy them, every guild has their own way of dealing with this mechanic. This is a guide on how Hodor is doing it. If you find out your own tactic and you and your group is comfortable with it, stick to it and practice it until it runs smoothly. If you are new to the Warrior Hardmode, this may help you as a starter technique.
Statues
- The key in beating the Hardmode of Hel Ra Citadel The Warrior is to destroy as many Gargoyle statues around the boss as possible. This is done by the Shield throw attack from the Warrior.
- Make sure that your group stands in line behind one of the gargoyles. The Tank has to position the boss in line with the group and the gargoyles, but facing away from your group. When the Warrior uses his Shield throw he will target one random person, make sure everyone rolls out. If the group was well placed and the boss threw his shield in a straight line, more then one gargoyle statue will be destroyed.
- Melee DDs have to look out for that they don’t stand in the Cleave attack of the Boss.
- The best way to do this is by going from one line of figures to the other, as you can also see in the video. It needs some time to practice but once you figured out how, it is easy do to. Well easy is probably the wrong word, because it seems many players do not know what a line is haha!
- Any Gargoyle that isn’t destroyed by the shield attack will spawn later during the fight and you have to kill it the normal way. Gargoyles stomp attack deals insane damage once he starts casting it. Make sure to focus the gargoyles that spawn. They must die as fast as possible. You could Negate (Sorcerer ultimate) the stomp attack of the Gargoyle, if you want.
Fossilize
Random players will get fossilized by The Warrior. If you are frozen, DO NOT USE THE SYNERGY! If you press the key for synergies while you are fossilized, all players around you will instantly die. Wait until the area around you is clear and announce when you will press the synergy keys. The Shield throw of the Warrior also clears the “fossilize” status from you.
The End
If you managed to get this far and kill The Warrior with Hardmode in Hel Ra Citadel then that is quite impressive, my Argonian would be proud of you!