

Welcome to the ESO Rockgrove Trial Guide. The Rockgrove Trial is located in the Deadlands Zone and can be played in normal and veteran mode. We will walk you through with this guide and explain all the mechanics in detail. The Rockgrove Trial has 3 main bosses with each boss having its own hardmode and 2 extra Mini bosses. The Rockgrove trial is also often referred to as RG. More info can also be found on the Rockgrove Overview Page on ESO-Hub.
Difficulty: Normal mode can be cleared with an inexperienced group. Veteran mode of the Rockgrove Trial is about as difficult as the veteran Sunspire. And the Hardmode versions are about on the same level as the Sunspire Hardmodes.
Table of Contents
- Loot & Rewards (Sets & Rewards)
- Boss List
- Quick Tips
- Trash Fights
- Boss 1 Oaxiltso
- Boss 2 Flame-Herald Bahsei
- Boss 3 Xalvakka
- Mini Bosses
- Gameplay
Loot & Rewards – ESO Rockgrave Guide
There are several sets and achievements that you can complete in the Rockgrove Trial.
New Sets in Rockgrave
In the ESO Rockgrave Trial you can find a perfected and an imperfected version of each set.
- Light Armor: Bahsei’s Mania – Perfected Bahsei’s Mania
- Light Armor: Stone-Talker’s Oath – Perfected Stone-Talker’s Oath
- Medium Armor: Sul-Xan’s Torment – Perfected Sul-Xan’s Torment
- Heavy Armor: Saxheel Champion – Perfected Saxheel Champion
Rewards in Rockgrove
- New Title
- Defender of Rockgrove – obtained by completing the achievement “Rockgrove Completed“
- Ca-Uxith Warrior – obtained by completing the achievement “Rockgrove Conqueror“
- Dadric Bane – obtained by completing the achievement “Xalvakka’s Bane“
- Planeswalker – obtained by completing the achievement “Soul Savior“
- Xalvakka’s Scourge – obtained by completing the achievement “Rockgrove Vanquisher“
- New Markings
- Sul Xan Raider Body Markings – obtained by completing the achievement “Rockgrove Conqueror“
- Sul Xan Raider Face Markings – obtained by completing the achievement “Rockgrove Vanquisher“
- New Mount
- Sul-Xan Fleshripper – obtained by completing the achievement “Xalvakka’s Bane“
- New Dye
- Glenbridge Green – obtained by completing the achievement “Rockgrove Completed“
Rockgrove Trial Boss List
Here you can find a list of all the bosses that appear in the ESO Rockgrove Trial and you can also see how much health they have.
| Boss | Health | Adds |
|---|---|---|
| Oaxiltso | 69.9 million / HM: 139.7 million | Havocrel Annihilator, Frogs |
| Flame-Herald Bahsei | 64.7 million / HM: 173.9 million | Flesh Abomination, Fire Behemoth, Skeletal Archers, Ghosts |
| Xalvakka | 59.5 million / HM: 238 million | Havocrel Goliath, Iron Atronach, Deadroth & more |
| Giant Snake Mini Boss | 20.7 million | Snakes |
| Ash Titan Mini Boss | 8.6 million | Havrocel Barbarian & Torchcaster |
Quick Tips for Rockgrave
Here are a few quick tips that you can use in the ESO Rockgrove trial. These should help you to survive.
- Trash Packs: They really hurt, If you are a melee setup, make sure to use Deadly Cloak on a stamina spec or Harness Magicka as a magicka spec. It is also recommended to have plenty of Stamina to block.
- Stack & Burn: There are a lot of trash packs, I recommend stacking them as much as possible and kill them with AoE damage.
- Energy Orbs & Shards: Make sure to use Energy Orb or Luminous Shards, this will ensure that your people will have better sustain.
- Addon: I do recommend using the Qcell’s Rockgrove Helper addon to get good readings on mechanics.
Trash Fights in Rockgrave
The trash fights in the Rockgrove Trial are brutal, especially the Elite monsters deal insane damage. Here is a quick explanation of the most dangerous elite monsters:
Sul-Xan Soulweaver (Argonian Mage): This is the most dangerous monster, always focus it. The Soulweaver will cast a shield and hit players with a crystal. You have to dodge roll the attack. We usually dodge roll a little bit after he casts the shield (0.5-1 second). If you dodge roll at the right moment you won’t get any damage. If you miss the dodge roll and you get hit by the attack, then you will have to permablock till the mage is dead, otherwise incoming damage will instantly kill you. (On PC Qcell’s Rockgrove Helper addon will alert you when the Soulweaver casts the shield).
Sul-Xan Reaver (Argonian Two Hander): The Reaver smashes the Two Hander into the ground (Like Onslaught), the tank has to dodge roll the ability, otherwise a heavy debuff is applied. The Reaver also uses an abilitiy called “Earthquake” that deals AoE damage on the ground, make sure to not stand in that AoE.
Sul-Xan Bloodseeker (Argonian Bow): Jumps from time to time into the air to relocate, otherwise not dangerous.
Havocrel Barbarian (Deadlands Dual Wield): The Barbarian teleports around and slashes players in random order, make sure to block this attack.
Havocrel Butcher (Two Hander): Stomps into the ground and applies a damage over time effect (Ignite) on all people around him, this hits hard but can be dodge rolled if you avoid the fire wave. The Butcher also charges a Heavy Attack on the tank, if possible this should be dodge rolled because it deals high damage.
Havocrel Torchcaster (Mage): Drops a glowing “Meteor” onto the ground which has to be destroyed. If not destroyed, whole group gets one shot.
Fire Behemoth (Two Hander): Charges a strong heavy attack, the tank has to dodge roll it. On his death he explodes, if you stand too close to it you take high damage and might die.
Boss 1 Oaxiltso – Rockgrove Trial
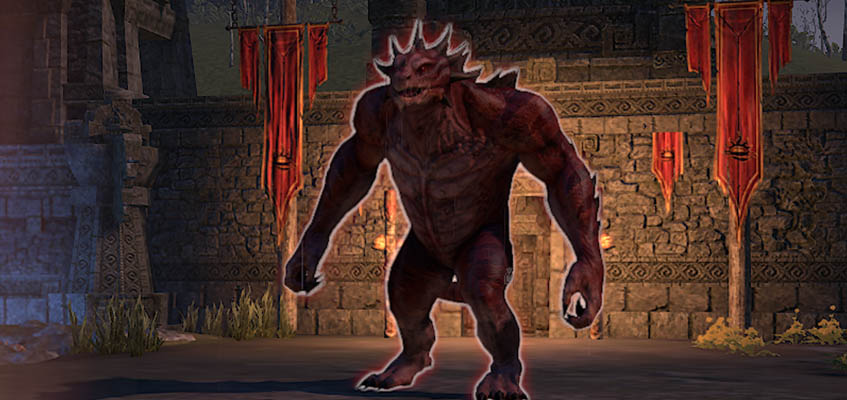
Oaxiltso is the first boss in the Rockgrove Trial. The first boss is already fairly difficult in the Rockgrove Trial. The team needs good coordination and proper placement of monsters to get the job done. You can either kill all the Mini Bosses that spawn during the fight or let the last one alive and focus the Main Boss down.
Mechanics Boss 1 Oaxiltso
Stomp: The boss will stomp into the ground and fire waves will come out in a straight line, low damage impact.
Meteors: Two meteors will strike down from time to time, avoid or block the impact. If you get hit by both you are most likely going to die.
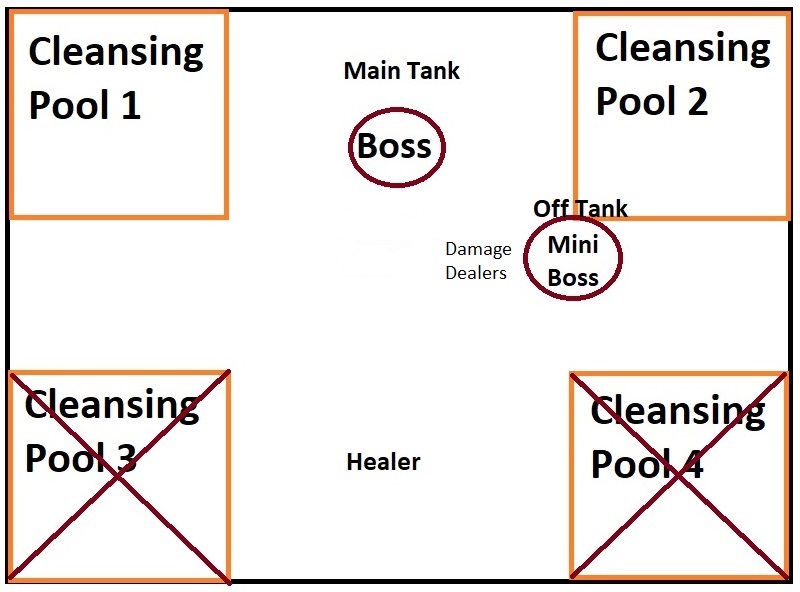
Noxious Sludge: The boss will spit “Noxious Sludge” at two players. The screen will turn orange, you have to go cleanse either in pool 1 or pool 2. Once you have cleansed the Noxious Sludge, the pool will turn green and it can’t be used for a while, but it will be ready for the next Noxious Sludge wave. If you don’t cleanse you will spawn poison AoE in the group and players will take extra damage.
Charge: The boss will charge from time to time, the boss charges at the furthers player, which should be the healer in the back.
Enrage: If the Main boss and the Mini Boss are too close together they will enrage. There it is important to place them far enough apart.
Havocrel Annihilator Monster
The main boss will start screaming and a big circle will slowly start to fill out which lets the Mini Boss spawn. The Off-Tank has to take care of the Mini Boss.
Spawns at: 95%, 75%, 50%, 25%.
Cleave: The Annihilator uses the Cleave ability which has a huge conal range, you can dodge roll the impact hit, but not the damage over time effect, unless of course you are not standing in the conal attack at all.
Chain: From time to time the Annihilator chains two random targets to himself.
Heavy Attack: The Annihilator has a strong heavy attack that the tank should dodge roll.
Positioning on Boss 1
By only cleansing on pool 1+2 you will avoid from players getting charged by the boss, because this way the healer in the back is always the furthest away. If someone is slow cleansing, the next wave might be a bit delayed till the pool is clear again.
Boss 1 Oaxiltso Video
Here you can find the Oaxiltso veteran fight in the Rockgrove Trial.
Oaxiltso Hardmode
Oaxiltso has a lot more health in Hardmode, 139.7 million health to be exact. The meteors that rain down occasionally also deal a lot more damage.
Oaxiltso will now charge twice instead of just once. That means the boss will charge to the healer and back to the tank (or the furthest player). When a player goes to a cleansing pool far away it might also be that the boss charges that player.
Havocrel Annihilator mini boss will now cast “Magma Sludge” that disables some of the cleansing pools (Pool will turn into Magma). Therefore players have to be more aware at which pools they can cleanse.
Frogs that spawn near the cleansing pools have to be pulled close to the group so they die from AoE damage.
Oaxiltso Hardmode Video
Below you can find the video of the veteran hardmode fight from the Oaxiltso Boss 1 in the Rockgrove Trial.
Boss 2 Flame-Herald Bahsei – Rockgrove Trial

Flame-Herald Bahsei is the second boss in the Rockgrove Trial. The difficulty curve on this one goes up quite a lot. The most difficult mechanic in this fight is the curse “Embrace of Death” that deals an insane amount of damage. Positioning and awareness is important in this fight.
Archers: Archers spawn at the edge of the arena. Pull them into the ground so they die from the groups AoE damage.
Frontal Cone: The tank has to face the boss away from the group because he will occasionally release curses in the front.
Embrace of Death: Two random people will get cursed and start glowing dark blueish. After 8 seconds the player explodes and shoots two AoEs out. During that time you have to make sure to stay out of the group like here in the video example. Otherwise, if someone gets hit by the AoE they will die. This is the main reason why you will wipe on this boss. The AoEs will go out in a random direction.
Cursed Ground: The boss will cast two chains from the ground that will explode. Move out of this, this goes to the two furthest players away from the boss.
Fire Waves: Fire waves will roam over the battlefield, they do moderate damage.
Fire Meteors: Meteors occasionally drop from above, they do moderate damage and can be avoided.
Bubble: Three players will get a slow growing circle around them that will explode and stagger players. Move out of the group when it pops.
Prime Meteor: At 25% the boss will start spawning Prime Meteors, they have to be destroyed. If not killed within a few seconds the whole group will blow up and die.
Flesh Abomination Monsters
Spawn at: 90%, 85%, 80%, 75%, 70%, 65%, 60%.
Make sure to not damage the boss too much, otherwise you will get overwhelmed by Flesh Abominations. Always focus the Flesh Abomination, they have to be tanked at the edges because they will leave a huge enemy AoE on the ground that won’t go away for the rest of the fight. Positioning example can be found in this video example.
Fire Behemoth Monster
Spawns at: 50%
Fire Behemoths will start spawning at 50% boss health. They will die automatically in your AoE damage, or you can also focus them. Once they have 0 health they will explode, make sure to not stand in the explosion.
2nd Boss Flame-Herald Bahsei Video
Here you can see the 2nd boss fight Flame-Herald Bahsei in veteran mode of the Rockgrove Trial in action.
Flame-Herald Bahsei Hardmode
The Hardmode of the 2nd boss Flame-herald Bahsei in the Rockgrove Trial is a big challenge. One tiny mistake and the whole group will wipe. The hardmode has additional new mechanics when you compare it to the non hardmode version of the fight. You will need Mist Form to survive the Embrace of Death mechanic and to survive the ghosts downstairs inside the eye. That means you have to turn into a Vampire for this Trial if you are planning on completing the hardmode,
Bitter Marrow (Eye of Death) Mechanic
In the hardmode fight an Eye will pop up from time to time. Three players have to go down, kill all the ghosts and then activate the three platforms by looking at the eye and pressing the “Action” button (Same button that you open doors and chests with). You will need two groups because there is a cooldown on how fast you can go down.
- Group 1: Player 1, Player 2, Player 3
- Group 2: Player 4, Player 5, Player 6
Once you are downstairs make sure to have pet abilities activated, they will also help kill the ghosts while you are in Mist form. It is recommended to use Blood Mist which deals damage to the ghosts when you get close to them. That way you never have to leave the Mist form.
Important: If you are not in your Mist form downstairs, every time you kill a ghost you will lose 50% health. In Mist form you will not lose any health, that is also why the Mist form tactic is so powerful.
Once all ghosts are dead 3 portals will show up, get there as fast as possible and one player should count down from 3 to 0 and then all players beam the eye at the same time (It isn’t the synergy button, you need to look at the eye and use the “Action” button.
Once the 3 players beam the eye, one person has to find the blue portal beam upstairs and also activate it. If done in time the eye will explode and players are teleported back up.
Flame Herald Bahsei Hardmode Video
Below you can find the video of the veteran hardmode fight from the Bahsei Boss 2 in the Rockgrove Trial.
Boss 3 Xalvakka – Rockgrove Trial
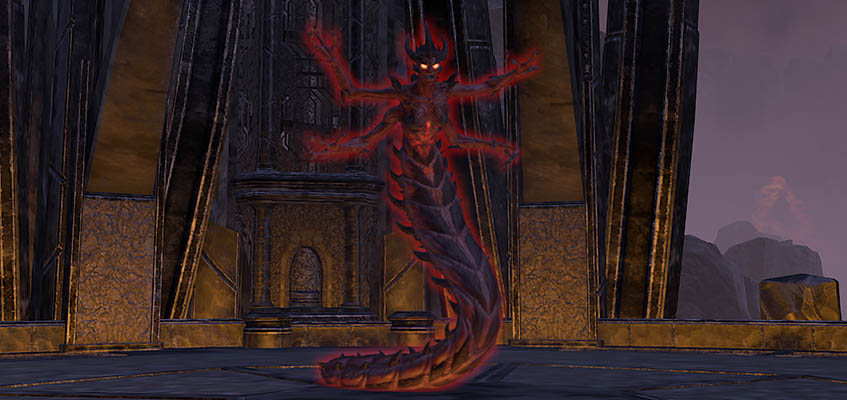
Xalvakka is the endboss in the Rockgrove Trial. This bossfight takes place on 3 different floors. Meaning you will have to run upstairs at a certain point because the lower floor will be filled with lava and if you are too slow you are going to literally melt and die.
- Phase 1: 100-70%
- Phase 2: 70-40%
- Phase 3: 40-0%
Plenty of adds will spawn throughout the fight that should be pulled close to the main boss, that way they die fairly fast in all the AoE damage.
Instant Wipe Mechanic: The Wraiths have to be killed before they reach Xalvakka. If too many Wraiths get to Xalvakka, she will get a unbreakable shield and start oneshotting players.
Xalvakka Phase 1
This is the ground floor and the first phase of the boss fight.
Fire Waves: Xalvakka will occasionally cast fire waves that do moderate damage.
Purge Soul: Purge Soul synergy may appear on players, if you use the synergy you drop a blob on the ground, make sure to place them outside the group, otherwise they will deal damage to everyone. If many of the blobs are close together they might form a bigger blob.
Slash: The boss has a very strong light/heavy attack, the tank needs to be able to absorb a lot of damage.
Once the boss reaches 70% health, he will move to the 2nd floor and you have to follow. Otherwise the lava will kill you.
Xalvakka Phase 2
All the previous mechanics from phase 1 can happen.
Boss Split: The boss will split in 3, two of them are fake and one is real. By getting close to the boss you can see whether it is the real one or not. If the boss goes half invisible, then it is the fake projection. Find the real one and damage the boss till the shield is gone. While this phase happens the ground will also deal fire damage.
Xalvakka Phase 3
All the previous mechanics from phase 1 and 2 can happen. Now you can fall down in the middle of the arena, be careful.
Lava Meteors: Lava meteors are bouncing around in the arena that deal damage, try to avoid them.
Boss Split: Same thing as in stage 2 but you have to be careful not to fall down in the middle of the arena.
Boss 3 Xalvakka Video
This was recorded during the Public Test Server.
Xalvakka Hardmode
No ETA
Mini Bosses in the Rockgrove Trial
The Rockgrove Trial has two additional mini bosses that drop loot and are required to be killed for the speed run achievement.
Giant Snake
The Giant Snake mini boss has a cleave that deals heavy damage, the tank has to turn the boss away from the group. At 50% a lot of mini snakes will spawn and attack the group. They have low health and usually die in your AoE.
Ash Titan
Pull the Havrocel Barbarian & Torchcaster close to the Ash Titan and focus the Torchcaster. The Torchcaster will spawn a meteor that has to be focused down, if the meteor doesn’t get destroyed within a certain time limit then the whole group will die.
The tank has to make sure that the Ash Titan mini boss faces away from the group, because he will shoot fire AoEs towards the tank from time to time. The Ash Titan will also rain down Fire balls and flame circles that have to be avoided.
Gameplay for the Rockgrove Trial