

Welcome to the ESO Maw of Lorkhaj Trial Guide. Maw of Lorkhaj is located in Reaper’s March, just south of the Do’Krin Monastery. You need the Thieves Guild DLC to be able to get into the Maw of Lorkhaj Trial. The trial is also often referred to as MOL.
Table of Content
- Raidsetup
- First Boss Zhaj’hassa
- Second Boss Vashai and Skinrai
- Endboss Rakkhat
- Endboss Rakkhat Hardmode
General Information
Maw of Lorkhaj is an ancient Khajiiti shrine, the Temple of Seven Riddles. It was the first new trial included in a DLC after the base game trials. When you and your group manage to complete this 12-man trial on veteran modus, you will receive the Dro-M’Athra Skin for your character.
Defensive Champion Points
Make sure to check out my article which talks about how to optimize damage mitigation in Trials through red Champion Points. Red Champion Points can mitigate damage by a huge margin.
The Lady
49 Hardy, 49 Elemental Defender, 48 Thick Skinned
The Steed
81 Ironclad, 32 Spell Shield
The Lord
11 Quick Recovery
First Adds in Maw of Lorkhaj
Make sure your group is ready, buff food and skills checked and then enter Maw of Lorkhaj (MoL). After your made it through the first long room and up the stairs, you enter the first stage of the Temple of Seven Riddles. Trash packs spawns there, Cursed Monks. They are easy to deal with. After this a Sun-Eater, a Shadowguard and an Archer will spawn.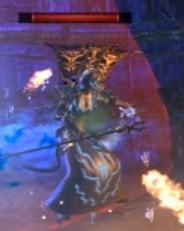 From this time on make sure, your group always focuses the Sun-Eater first! This lady has an huge eclipse field skill, which deals a ton of damage, slows you and negates your skills. When your group is fighting against the Sun-Eater, the Main Tank has to taunt the Archer and the Shadowguard, faced away from the rest of the group.
The Archer has one skill called “Marked for Death”. This skill will hit one random player and he will be chased by summoned panthers. The longer the Mark for Death is on this player, the more panthers will spawn. Do not try to focus the panthers, just make sure the Archer is killed after the Sun-Eater. The Shadowguard will do an AOE spin-attack, which has to be blocked from the Main Tank. He will do this attack every time after he has done his heavy attack. The other skill called “Void Rush” charges a random player and stuns them if they are not blocking.
After you finished this room, walk through the door and enter the next room. Focus the Sun-Eater, while the Tanks are taking care of the other adds. On the upper level, before the first boss room, there is another trash pack waiting for you. There is also a Savage add, which has to be taunted by the Off Tank, away from the rest of the group. Savage has an AOE attack that debuffs the physical resistance to zero for all players around him, so make sure to stay away from him.
First Boss
Zhaj’hassa the Forgotten [HP: 46,5 Mio.]
Positioning is key here! Make sure everyone has access to one of the six panels around the room and is in the healing springs from your healers, but with enough space to the next player to avoid splash damage and cursing. When you and your group found a good position for everyone, fix it / screen it / write it down, so you can remember it every time from now on. Every player has to stay on his position, unless he is cursed.
Followed you can find a suggestion, how your team could position themselves in the boss room:

Boss Mechanics:
- Sar’m’athra Panthers
- These purple little ones deal a ton of damage. As soon as they spawn, the Off Tank or the two DKs with Chain have to pull them closely to the boss. They cannot be taunted, but they can be chained, rooted and stunned.
- When they are in position by the boss, make sure to keep them there with skills like Eruption or Choking Talons.
- Make sure they die fast in the AOE damage from the boss.
- Void Pillars
- As soon as you start the fight, blue big pillars will spawn throughout the room. After a certain number of pillars are dropped, Zhaj’hassa will emanate a blue glow.
- Now it is time to run very quickly behind one of the pillars and hide yourself. You have to stand behind the pillar but facing Zhaj’hassa and continue dealing damage on him. When the explosion comes and you are not behind one of the pillars, you are dead.
- The longer this boss fight takes, the less pillars will spawn. So make sure, your group has enough damage to kill Zhaj’hassa quite fast.
- First you will have two rounds with five pillars, then you will have two rounds with four pillars, then two rounds with three pillars, two rounds with two pillars and at least two rounds with only one pillar. After that he will explode with no pillar, which will lead to a group wipe.
- The pillars spawn on the group member, which is closest away from Zhaj’hassa. So you can kind of control where the pillars will spawn and estimate the running distances for your group members when the explosion happens.
- Curse

- This mechanic is the main reason why positioning is key at this boss. After every Void Pillar phase, Zhaj’hassa will curse three random players. They will have a red AOE circle below them. Any other player, that stands way to near at these players (and in that circle) will also get cursed.
- When you are cursed, you have to clean yourself at one of the lightning panels around the room. The cleaning light of the panels will respawn every 25 seconds.
- You have 30 seconds to reach a cleansing panel before you get killed by the Curse.
- You take quite some damage while you have the curse and the longer you have it, the slower your movement speed gets.
- Boss Shield Phase
- This shield that spawns around the boss during this phase protects him from every damage. Also red AOE pulses appear under every player, which deal huge damage. This is the second reason why positioning and avoiding splash damage from other players is so important.

- The longer the shield on the boss remains, the more damage you will take. So your healers have to make sure everyone is in their healing springs and then they have to heal through this phase. Also they can drop a nova on the boss, 5 seconds after the shield appeared, to mitigate the damage taken.
- The first shield will appear at 70% HP from the boss and has 1,9 Mio. HP. If your group damage is accurate, you can bring this shield down in about 8 seconds.
- The second shield will spawn at 30% HP from the boss and has 2,8 Mio. HP. You can nuke this shield down in 12 seconds.
- This shield that spawns around the boss during this phase protects him from every damage. Also red AOE pulses appear under every player, which deal huge damage. This is the second reason why positioning and avoiding splash damage from other players is so important.
Second Add Wave to First Encounter
In the next room some treasure chests are waiting for you, maybe you are one lucky person and you get the legendary moondancer destro in sharpened? Before the next boss there are tons of trash packs for your group. So let’s go up to the next level to meet and greet them. Main Tank will taunt Renderers, Shadowguards and Archers. The Off Tank spots Shamans, Brutes and Savages. Your DDs always focus Sun-Eaters and Shamans first.
Renderers
- Their ability “Flesh Render” is quite hard to deal with. It does a huge ton of damage and knocks players around them down. DDs should stay away from him.
- The Main Tank has to interrupt this skill by bashing the Renderes just before he begins to cast the skill.
Shamans
- This Add heals himself, the Renderers and the Brute Adds after 15-20 seconds after they spawn.
- The healing ability also deals damage to all players around the healed enemy, so make sure you block or cast your shield when you get damage from this skill.
- If the Brutes Adds are still alive when the Shaman begins his healing ritual, cancel your skills and block, because the healing pulses will deal a lot of damage.
First Encounter in Maw of Lorkhaj
Before you start this encounter make sure everyone is ready, bufffood refreshed and sets repaired. This encounter has five Add waves. When you and your group wipe, you have to restart. One healer can focus on supporting and healing the tanks, the other healer has to focus the health bars from the other players. This makes things a little bit easier.
Wave One
- When you go down the hill, turn left and go into the cave. The Main Tank has to taunt the Brutes and the Shaman that spawn. Your group has to focus them down asap.
- The Off Tank has to taunt the Renderer and the Brutes outside the cave. Your group has to focus them as soon as the adds in the cave are dead.
Wave Two
- On the second wave a Sun-Eater will spawn at the position where the Renderer was. Focus her down.
- Main Tank taunts Archer and Shadowguard, focus these two right after the Sun-Eater.
- The Off Tank spots Savage and keeps him off the side, until DDs are done with the other Adds.
Wave Three
- At the West side a Shaman spawns, at the East side a Renderer. The Main Tank has to quickly take the Renderer away from the rest of the group. Off-Tank taunts the Shaman so DDs can focus him down.
Wave Four
- At this wave a Sun-Eater will spawn again. Make sure to roll out of the eclipse-negate field.
- The Main Tank has to deal with another Renderer and the Archer. He has to make sure to keep the Archer faced away from the other players and also watch out for the “Flesh Render” skill. Though job here, so one healer has to stay with Main Tank and keeps him alive.
- Off Tank taunts the Shaman and the Savage. Once the Shaman is dead, the off tank can bring the Savage to the Main Tank and DDs can focus all of them down.
Wave Five
- This final wave has two Sun-Eaters in it. The Off-Tank taunts the Sun-Eater that spawns far West and brings her to the entrance ramp, where the second Sun-Eater will spawn. The aim is to bring the two Sun-Eaters together, so that DDs can focus them down together.
- The Main Tank spots the Shadowguard and the Archer and tanks them away from the group. When the Sun-Eaters are dead, DDs can kill these adds.
Bravo, you made it through the first encounter. Now hurry, the two next bosses are awaiting.
Second Boss
Vashai and Skinrai – [HP: 2x 28,4 Mio.]
I highly recommend watching the video as it is quite difficult to show how the boss works.
For this boss you have to split into two groups. Every group needs a Tank, a Healer and 1 Magicka DK as DD with the Chain skills. Make sure your healers take the Purge skill from Alliance War (Support) with them, cause they need to purge the group regularly from the Flare skill the group will get. One group concentrates on Vashai, the Shadow Twin (so this players will get the shadow / dark aspect), and the other group concentrates on Skinrai, the Holy Twin (this players will get the holy / light aspect). Because from time to time you have to switch the room sides, it can help, when you mark “your” Twin.
Boss Mechanics
- Holy and Shadow Aspects
- This is one of the key mechanics from the Twins. When you master this mechanic, you can move on to learn the other ones, because as long as you do not know how this one works you will always wipe, I like to call it the “ultimate noobfilter”
- It is necessary that 6 players will get the holy and the other 6 players will get the shadow aspect. You will then see a either light or dark glint at the head of your char.
- If players with opposite aspects stand too close together, they will explode and all other players in that AOE will also die. So it is necessary that you always stay with your group and only change the group if you have a color change.
- The holy and shadow aspect of the players are assigned depending on their proximity to each boss at the beginning from the fight and at the end of every Prayer Phase.
- When you are under the holy aspect, you only can deal damage on shadow adds or the shadow boss (Vashai).
- Every group will start at their side of the room. The Tanks will spot their the boss near them and then switch it. So when you are in the Skinrai group, your tank will pull Skinrai towards your group, so that every group member gets the holy / light aspect. Then he will switch bosses across the room (use Inner Fire skill) with the other tank, so that Vashai now stands at your group and you can deal damage on him. Besides the two bosses, no one moves!
- Color Change
- After the beginning from the fight and after every Prayer / Reform Phase there will be a color change.
- Three random players on every group (excluding the Tanks), will get the opposite color. You can see it when your feet and head is glowing Dark / Light in the opposite color as you have now.
- These players then have to cross the room (always move CLOCKWISE to avoid collisions with other players!) and join the other group until the next Prayer / Reform Phase.
- When you miss the color change and so miss to change the team, you will get another color as your team mates and you will bomb them. So always make sure to have an eye on your feet or head.
- Rage of the Twins
- The Bosses and adds of the Twins have their own unique mechanics. They will spawn after every Prayer / Reform Phase. The longer the fights goes on, the more adds will spawn at every round. They spawn 10 seconds after the Prayer / Reform Phase. First there will spawn one add, upto four adds maximum.
- When they spawn, the Tank and the DKs have to pull the right adds with the right color at their boss, so that they get killed in the AOE damage. Just taunt the adds with the same color your boss have and you are good to go.
- If the adds are still alive after the following Prayer / Reform Phase, they will begin to bulge uncontrolled and deal very high damage. So make sure all adds are killed before this phase.
- Skinrai and Adds
- Skinrai and his adds will cast a Lunar Flare on up to four random players in their field of view. This Flare must be purged from your healers.
- They also have a skill called Lunar Destruction which has to be interrupet by bashing on them or using Deep Breath. Make sure to interrupt them quickly because this skill deals a lot of damage and you will die when no one interrupts.
- Vashai and Adds
- Vashai will cast a negate field on the furthest player in his field of view. This is way it is important that the Tanks taunts him facing away from the group, so that only the tank gets the negate field and can move out of it asap.
- The adds from Vashai use an orb ability, which sends 3 orbs into the room. They deal more damage the further they travel. It is the job from the Tank and the DK to taunt them facing away from the other group in the room. If the players from the other group across the room will get hit by the orbs, they will have to deal with a lot of damage and this can cost you a wipe.
- Prayer / Reform Phase
- Both bosses will teleport from their current position to the opposite side of the room. Which side each boss lands is random. The room then will divine itself into two colors, light and dark. You must stand on the correct side (light aspects on dark boss side, dark aspects on light boss sides) before the room explodes or you will die.
- Make sure everyone is running and changing sides CLOCKWISE! Otherwise you will bomb other players with a different color.
- Sometimes it is not necessary to change sides, you have to check by yourself if you need to move or not.
- After the explosion there will be a short time when no one has an aspect and these will be given newly, according to which boss you stand next to. So when the explosion is over you have to quickly run back to your starter Boss so you will get the correct aspect again. This time you can run across the room, because you can’t bomb any other players, because no one has an aspect yet.
- Tank and Off-Tank will then taunt the bosses with the opposite color from your group, so you can deal damage to them.
- Simultaneous Demise
- Once one of the twins dies all players will lose the aspects on their heads and a timer begins the countdown to the final explosion.
- The remaining Boss will teleport to the center of the room and after 20 seconds he will explode with nowhere to hide and all players are killed. This means both Bosses must take very similar damage during the fight to avoid one Boss dying far too early and your group wipes.
- So if you notice one group deals way more damage than the other group, you will have to switch some players so that the damage outtake is quite equal.
- Skinrai has almost a constant stream of damage on him, due to the close proximity of the adds. Vashai does not always have constant damage as his adds are ranged and not always pulled directly on top of him. This means that your damage dealers have to make up the lost damage on Vashai during the Prayer / Reform Phase when no aspects are active and all players can deal damage (at least dot damage) for a short period on Vashai.
After defeating the Twins you can be proud of yourself. The mechanics of these two bosses are surely not easy to learn and they play around with your color and coordination senses!
The Second Encounter
Let’s get straight on to the second encounter. Same rules here as the first encounter; if you wipe at any point during the following fight, you have to start again from the beginning. When you walk through the gate make sure everyone passes, because the gate will close when the fight starts. It is still possible for players to access the closed gate but it could take some time to open the gate prompt and this is a waste of time for the group. You will have to deal with some giant Sar’mathra Panthers right from the beginning on. These ones cannot be taunted by the Tanks. Once the panthers are alerted, they will mark two random players with their ability “Mark for Death”. If the panther catches the marked player, this is a one hit. After 30 seconds the mark will change to a other random player.
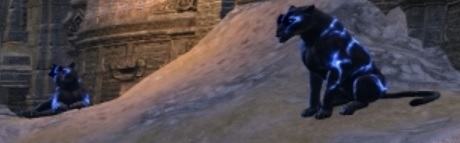
There is a simple tactic to deal with the giant panthers: The two marked players have to run around in a circle and make sure to not get caught by them, the others damage the them. If you can’t kill them in 30 seconds, you have to be prepared that two other players will get the mark and have to run away from them. Once the panthers are killed, there are multiple waves of Banner enemies awaiting you. The waves will begin, as soon as one player pulls the chain on top of the construction on the right or left side of the area. Pull one chain after another, or you will have to deal with the adds from both sides at the same time.
Left Side Chainpull
-
Wave One
- Prepare for One Sun-Eater, 2 Archers and a Savage.
- Focus down Sun-Eater first. The two Archers can be taunted from the Main-Tank in the group but facing away from them. Off-Tank has to taunt the Savage and take him out of the group.
-
Wave Two
- 2 Sun- Eaters, 2 Shadowguards and a Savage will spawn.
- Kill Sun-Eaters first. Main Tank has to taunt the Shadowguards and take them out of the group. When the Sun-Eaters are dead, he can bring them back into the group. Off-Tank taunts the Savage and brings him out of the group.
-
Wave Three
- Archer, 2 Shadowguards / 2 Sun-Eaters and a Savage
- The Archer and the 2 Shadowguards will spawn before the other Banner enemies, so your DDs can focus on them. Before the Sun-Eaters spawn, the Main-Tank has to pull the Shadowguards out of the group.
- When Sun-Eaters appear, focus your DPS on them. The Savage can be tanked by the Off-Tank and has to be taunted off the group as long as the others adds are alive.
Right Side Chainpull
-
Wave One
- A Sun-Eater, a Archer, a Shadowguard and a Savage appear.
- Focus DPS on Sun-Eaters. Archer has to be tanked facing away from the group by the Main-Tank. The Main-Tank also has to deal with the Shadowguard and keep him away from the Sun-Eaters as long as they are alive. Off-Tank pulls Savage and tank him near the Shadowguards, away from the group.
-
Wave Two
- You have to deal with one Sun-Eater, 2 Archers and 2 Shadowguards.
- Focus down the Sun-Eater. Main-Tank has to taunt the Archers by the entrance gate to group them both, keep them facing away from the rest of the group. Off-Tank has to tank the Shadowguards away from the Sun-Eater.
-
Wave Three
- Archer, Shadowguard and Savage / Sun-Eater and 2 Archers.
- Archer, Shadowguard and Savage spawn a few seconds before the rest of the Adds. Do some initial damage to the Archer. The Main Tank will have 2 more Archers to taunt in a second so for now just taunt the Shadowguard away from the Sun-Eater.
- Focus down the Sun-Eater. The Main Tank has to taunt all 3 Archers and run towards the entrance gate to group them together. The Off-Tank has to deal with the Shadowguard and the Savage.
Path to Rakkhat – The last Trash Adds
Only two more rooms before your group meets the final boss, Rakkhat. The next room is long and narrow. You will have to deal with three waves of Banner enemies and Cursed Monks. The Cursed Monks will drop down from above the room and deal an AOE that does a ton of damage. Because of this it is very important, that one of you group members equips Caltrops. This player has to make sure, that Caltrops are always thrown in the area. The Cursed Monks will get killed by the Caltrops. The other players have to move away if a Cursed Monk does come near to them, to avoid the AOE explosion from them. Some random players will get the “Mark of Death” ability placed on them by the Archers, all panthers in the room will target that player. This player should run around the edge of the room to pull all panthers away from the rest of the group until the Archers are killed.
Wave One
- A Sun-Eater, one Archer, one Shadowguard and a Savage will spawn.
- The Sun-eater spawns on the right-hand side of the room against the wall, about mid-way down. All group members should run there and lay down dots before she appears.
- The Archer appears on the far left-hand side of the room. Should be taunted by the Main-Tank to face him away from the group.
- The Shadowguard should be taunted away across the room by the Off-Tank.
- The Savage has to be taunted by the Off-Tank and pulled away from the group until all of the other enemies are killed. The Off-Tank should stand at the end of the room, mid-way between the walls.
Wave Two
- 2 Sun-Eaters and 2 Savages spawn.
- The first Sun-Eater will spawn on the left hand side, against the wall. After the first Sun-Eater is dead, the second one will spawn on the right hand side of the room.
- Your Tanks should split taunting the Savages and pull them to different sides of the room.
Wave Three
- 2 Sun-Eaters, 2 Archers, a Shadowguard and a Savage spawn.
- The Sun-Eaters will spawn both at the same time. One on left and one on right-hand sides of the room. DPS should kill the one on the right hand side first, then move quickly over to the left side.
- One Archer will spawn close to the entrance and the other one close to the exit door. Both should be taunted the Main-Tank, close to the exit door.
- The Shadowguard can be taunted away from the group by the Off-Tank.
- The Savage has to be taunted by the Off-Tank and pulled away from the group until all of the other enemies are killed. Tank should stand at the end of the room, mid-way between walls.
Head to the exit door and loot the three treasure chests. Then your group can prepare for their final fight.
Last Boss
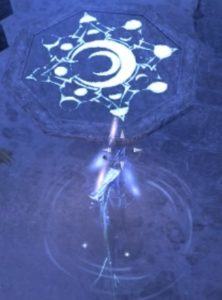
Rakkhat [HP: 64,6 Mio.]
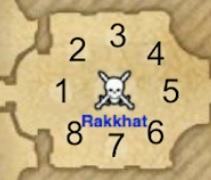
The High Lunarium room is divided into two main areas: one large inside room and one outside area (the backyard). In the main room you will find eight pads around from the middle platform. Before you start the fight, the raid leader should assign all pads to your DDs for the lunar phase. Also it is important, that the raid leader should choose two players (and one backup player) to run the backyard area, which will happen a few times during the fight. Players who run the backyard area will receive a shadow debuff and will need to purge each time after they travel back through the door to the main area, on one of the four cleanse pads in each corner of the main area.
There are two mechanics that are very important and need to be known by everyone.
- Each time one of the eight pads turns gold, the first player who stands on the pad will receive a Lunar Bastion Buff, giving them reduced damage from Rakkhat and other mechanics. Therefore it’s important that only the Main-Tank steps on the pad first.
- After the golden light goes away from the pad, it will be replaced by a dark blue glow, which indicates the “Shadow Debuff” is now active on that pad. Anyone who steps on the pad will receive a healing debuff, reducing your health. Therefore it’s important that none of your DDs ever step on the pads when they are blue, as it will force them to have to die, as there are no cleanse pads available for DDs, because these pads are only for the backyard runners.
You can divide the following fight into these phases: Tank starts with pad number 1 / Rakkhat will jump in the air and slam the ground / Players move to pad number two and first Hulk spawns / Rakkhat then again slams the ground / The backyard team goes into the void and all other players move to pad number three / Once the Backyard is complete Rakkhat slams again and the cycle is repeated / When he reaches pad number eight the Lunar Phase begins / After the Lunar Phase the cycle begins again from the start. Also, after 1 complete cycle Archer adds start spawning on each platform on top of the normal mechanics.
Boss Mechanics
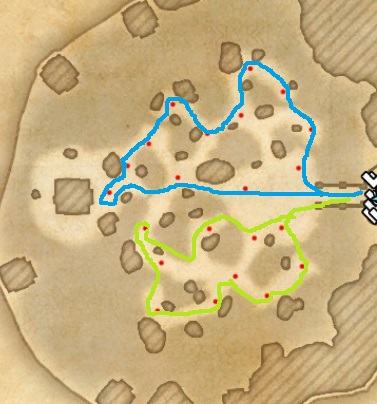
- Backyard Area
- You will see six shadows appear at the middle platform indicating it’s time for the two backyard players to enter there are.
- They have to expose and kill six Dro’mathra Shadows which are hidden in the backyard area. Two shadows are in the top area, two are in the left area, and two in the bottom area of map.
- The two runners will split the area and run the path indicated above (note that this is only one suggested path), stopping at each carpet and hitting the synergy to expose the Dro’mathra Shadow, if one is there. Each Dro’mathra must be killed before the player moves onto the next carpet location. Once the player has exposed two shadows in the top, bottom or middle, they can skip the rest of the carpets in that area and move directly to the next area.
- Once all six shadows have been exposed and killed, the two backyard players can come back through the portal, purge themselves and begin DPSing the boss until the next set of shadows appear on the middle platform. Rinse and repeat.
- The cleanse pads will NOT respawn until after the Lunar Phase, which means if the team’s DPS isn’t high enough to kill Rakkhat prior to the Lunar Phase, the backyard runners will need to alternate cleansing, dying and cleansing.
- There is a timer on the shadows which appears on the middle platform. If they aren’t exposed and killed in the backyard prior to the shadows in the main room sinking into the ground, the entire team will wipe and you have to begin the fight from start.
- The Hulk
- This is Rakkhats main elite add. He will spawn three times before Lunar Phase.
- The Off-Tank has to taunt him, as soon as he spawns. Place him near Rakkhat, so that he dies in the AOE damage. The Hulk will throw a debuff, same as Shattered Armor, on his target.
- After the Off-Tank has gotten the debuff two times, it is important, that the Main-Tank taunts The Hulk. The Main-Tank will receive the debuff once and then the Off-Tank has to taunt him again. This has do be done because when you get hit by the debuff three times, you will die.
- The Hulk will also use his “scream” from time to time, if not interrupted it will stun everyone in the group. So your off-tank and your DDs have to make sure it is being interrupted.
- Orb Mechanics
- In this fight there are three different type of Orbs.
- Void Combustion
- This will appear randomly on one player below their feet. They must move away from the group facing the wall, explode, break-free and rejoin the group.
- The explosion will shoot out mini-orbs, which will kill other players if they are too close.
- This mechanic continues until the moment Rakkhat jumps to pad number five.
- Stalker Orbs
- At pad number five tiny floating orbs will appear and move towards 1-2 players at random. These players must move away from other players and keep a few meters distance from the floating Orbs. If the Orbs get too close to you or other players in the group they will deal massive damage.
- This mechanic persists until Rakkhat jumps to pad number seven.
- AOE Orbs
- At pad number seven large AOE Orbs will spawn red circles on the floor. After one second the Orb will appear and deal damage to anyone that stood inside the red circle.
- Stay close together on each side of the Boss and when an Orb spawns move left or right a few metres together as a mini-group to avoid placing AOE Orbs everywhere close to the Boss.
- Void Combustion
- In this fight there are three different type of Orbs.
- Lunar Phase (Watch the explanation video, last part is about Lunar Phase)
- When Rakkhat slams pad number eight, he will rise up into the air. All pads will now turn gold and they all have the Lunar Bastion Buss now. The large middle pad can give four players the buff.
- On every outer panel a Banner Enemy will spawn. This adds will take massive damage when they are beamed from the four players on the middle platform.
 It is important, that you decide which DD will stand on which pad before the fight. Four DDs always have to focus one add on one platform. So the positioning must also consider which DDs are ranged and which are meele. Also make out a rotation on which add to beam first for the group on the middle platform.
- DDs on pads 1, 2, 3 and 8 work together, and DDs on pad 4, 5, 6 and 7 work together.
- First focus adds on pad number one and five. The group in the middle also only beams these two adds.
- Then focus adds on pad number six and two. Then adds on platform number seven and three, and last but not least adds on pad number eight and four.
- All DD players must immediately go to their bespoken position and begin attacking their elite enemy on that specific pad.
- The Tanks and Healers will position themselves on the center pad and beam the adds from the middle. You have to use synergy button to start beaming. Once one add is dead, go straight to the next one.
- Only one healer will be beaming at one time. This means the other healer can move around inside the middle circle and use breath of life to heal all players on the pads around him.
- When Lunar Phase is over, all of the gold pads will once again be dark and it will be as in the beginning of the fight, with pad 1 turning gold. Rinse and Repeat until Rakkhat is ready for execute.
- Note that any banner elites who were not killed during Lunar phase will need to be targeted and killed immediately when Lunar phase is over.
- Execute Phase

- When Rakkhat s HP is down to 11% health, he will move into the execute phase on the middle pad.
- During the Execute Phase there is one more mechanic that makes finishing Rakkhat harder. Starting on pad number one a Light Orb will appear which will be connected to Rakkhat. This causes him to take alot less damage.
- Whichever DPS is chosen to be at pad number one must run through the panel (not stand on!) and collect the Orb. After 5-10 seconds another Orb will appear in the middle of pad number two and the DD from pad number two must do the same. This continues all the way around the arena until you have killed Rakkhat. If you fail to do so then he will kill you with his big dark ball of energy.
- Void Combustion Orbs, Stalker Orbs & AOE Orbs are present at the execute phase at the same time. This can cause a lot of panic within the group as Rakkhat himself is also doing damage.
- Position a group with six players left near to pad number two and the other six players close to pad number seven. Make sure everyone stays in the Healers healing springs.
- If you have to go out of the group to collect the Light Orb from your pad make sure to use a shield as you cannot always be healed easily. Also once you run over the pad you will have the blue healing debuff.
- Hulk adds will spawn every 60 seconds starting from pad number five, so make sure your Tanks keep swopping them over every two shattered armor debuffs they receive.
- Void Spheres
- The void sphere is the attack from the middle it shoots 15+ projectiles which deal a insane amount of damage. 8-10k (well really depends on your resistance).
- Those spawn from the middle every now and then. They deal quite some damage, make sure to shield up everytime you hear them.
- The bubbles are pretty small but they have a pretty distinctive sound, so it is easy to know when they will come towards the group.
 It is important, that you decide which DD will stand on which pad before the fight. Four DDs always have to focus one add on one platform. So the positioning must also consider which DDs are ranged and which are meele. Also make out a rotation on which add to beam first for the group on the middle platform.

Rakkhat Hardmode [HP: 80,7 Mio.]
Everything in Hardmode does more damage, like always. And there are also some additional mechanics you need to be aware of. The boss and the adds all have more health. Most mechanics also happen more often.
- Backyard Area & Breath of Lorkhaj Debuff
- The backyard itself is unchanged. However, now after you come back from the backyard you can not cleanse yourself anymore. Which means you need to always send two different people out. Because the people that already walked outside can not go again because they have the debuff on them and when they try to walk though the door they will die.
- The debuff after returning glows darkish on you, it also gives you a healing debuff so you have to be very careful where you stand.
- On top of that the debuff also can spread to your groupmembers, so make sure not to stack right in the group with the others.
- Assassins
- Everytime you kill two of the six Dro’mathra Shadows in the backyard, a Assassin will spawn.
- You have to be careful, they have a Tornado attack which knocks back players that are in range of their attacks.
- The off-tank has to tank those adds close to the boss so they die to the AoE damage of your DDs.
Congratulations, you successfully beat Maw of Lorkhaj Hardmode!
Full Run Maw of Lorkhaj
Here you can see a 18 minute full run of Maw of Lorkhaj back in Dragon Bones DLC.