

Welcome to the ESO Fungal Grotto 1 Guide for both Normal and Veteran mode. The Fungal Grotto 1 dungeon is located in Stonefalls, in the Ebonheart Pact, one of the major factions in The Elder Scrolls Online.
This dungeon has 5 bosses: 2 main bosses, 3 mini-boss encounters and trashmob packs. (Trashmob = Enemies that can add to the difficulty and liveliness of a dungeon/trial and are fillers in-between bosses)
If you have more questions, you can also ask someone in our community partner discord about this Fungal Grotto 1 Dungeon Guide!
The Story in Fungal Grotto 1
Vila Theran wants you to clear this goblin and dreugh infested cave, so that she can access a shrine that is hidden within the grotto.
Table of Contents:
- Sets
- Trashmobs
- Maps
- Boss Fights
- Hardmode
- Full Run Fungal Grotto 1 (Video)
Sets in Fungal Grotto 1
3 different sets drop in Fungal Grotto 1, plus a Monster Set
- Light: Spider Cultist Cowl
- Medium: Viper’s Sting
- Heavy: Dreugh King Slayer
- Monster Set: Kra’gh (Veteran only)
Trashmonsters in Fungal Grotto 1
- Goblins, Dreugh, Mudcrabs: Generic Trahsmob.
Boss Map & Treasure Chests
Bosses, Heavy Sacks and Treasure Chest location.
(click to enlarge)

| Boss | Health | Adds |
| Tazkad the Packmaster | 872,271 | A few Goblins & Durzogs |
| Warchief Ozazai | 1,912,769 | Two Goblins |
| Broodbirther | 1,745,443 | Two Dreugh |
| Clatterclaw | 1,745,443 | Swarm of Mudcrabs |
| Kra’gh the Dreugh King (Endboss) | 3,993,959 | Summons Mudcrabs |
Bosses in Fungal Grotto 1
Tazkad the Packmaster

This is a Mini Boss in Fungal Grotto 1. There will be some Durzogs and other goblins accompanying him, which need to be tanked and/or killed while killing the boss.
Adds: The Tank can pull in the archers and taunt the Durzogs. Just stay close to the boss if an add is on you.
Agony: This is a magic damage attack that briefly stuns the one holding agro (ideally the tank). This can and should be interrupted. If not, the tank can break free from this.
Frenzy of Blows: This is an attack in the form of a cone and will hit the tank several times. Make sure to stand behind the boss, if you aren’t the tank.
Warchief Ozazai
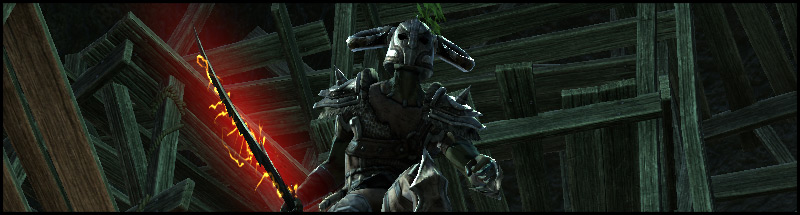
Warchief Ozazai can be considered the first real boss in Fungal Grotto 1. This one has a very simple, but often misunderstood mechanic. Deal with the two adds first. They will drop a Dragonknight fire standard. They have a Charge ability which will cause a lot of damage, if being used, so focusing them before the boss is strongly advised.
Shock Assault: This is how the boss opens the fight. He will jump down from his rock and cause a medium amount of damage to everyone in the range of his landing.
Haymaker: This is a Heavy Attack that the boss will use on the tank (ideally). Does a large amount of damage and will cause you to get knocked down, if not blocked.
Daedric Blast: Once in a while, Warchief Ozazai will cast a red beam on a player, with a growing AoE around them. Run away from the group far enough, so that you aren’t touching anyone with it, otherwise it will deal a large amount of magical damage.
Staggering Roar: When the boss drops to a low amount of health, he will use this ability to cause a lot of damage to everyone inside of it. You can avoid this by running out of the AoE.
Broodbirther

Coming with two adds, this boss has a few, but annoying attacks. The group should stand behind the boss and focus on the two adds, so that they can kill the boss more effectively instead of being annoyed by the adds.
Pull: Pulling in someone randomly, Broodbirther’s attack doesn’t do any damage. It literally just pulls you to the boss.
Shocking Rake: This is a frontal cone attack, meaning that the damage is dealt in front of the boss in a cone shape area. This is why it is important for the group to stand behind the boss and only let the tank stand in front of it. If you are the tank, don’t move the boss around or run around constantly, so that your group doesn’t get hit. Causes moderate amount of damage.
Clatterclaw
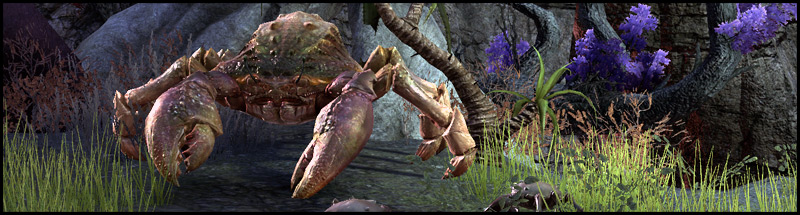
This giant Mudcrab is accompanied by a swarm of other Mudcrabs, but otherwise it’s pretty harmless. It doesn’t have any special skills except for Mudcrab Swarm, which is an ability to call forth a swarm of Mudcrabs which can be easily killed with the group’s damage AoE abilities. Don’t panic if the Mudcrabs are attacking you, just stand still and continue doing what you were doing.
Kra’gh the Dreugh King

The last and final boss in Fungal Grotto 1, Kra’gh is a giant Dreugh. On normal this boss is pretty straight forward, but on veteran you should keep an eye out for a few things.
Lunge: Like most bosses, Kra’gh also has a Heavy Attack. This must be blocked, otherwise the one holding agro will be kicked through the room.
Storm Flurry: Attacking several times, the boss will use this attack to cause a lot of damage. Blocking this attack is strongly advised!
Mudcrab Mob: Spawning a couple of Mudcrabs like the boss before, this attack is meant to distract you. Fortunately, these Mudcrabs die very quickly. Just don’t panic and start running around, but instead either kill them yourself, or run to the boss for them to die in the group’s AoE.
Lightning Field: On normal, this attack doesn’t cause many problems. You will get staggered and loose some health, but on veteran this will kill you if you aren’t the tank with enough health. As soon as you see it, run out of it. After that you can run back in to the boss, as he will take some time to recharge this attack again. The tank will most likely survive this, but will get knocked down if they take the damage.
Hardmode Kra’gh the Dreugh King
Increased Health & Damage: Hardmode doesn’t have more mechanics, but it does a lot more damage, and the health is increased quite a bit!
Skipping in Fungual Grotto 1
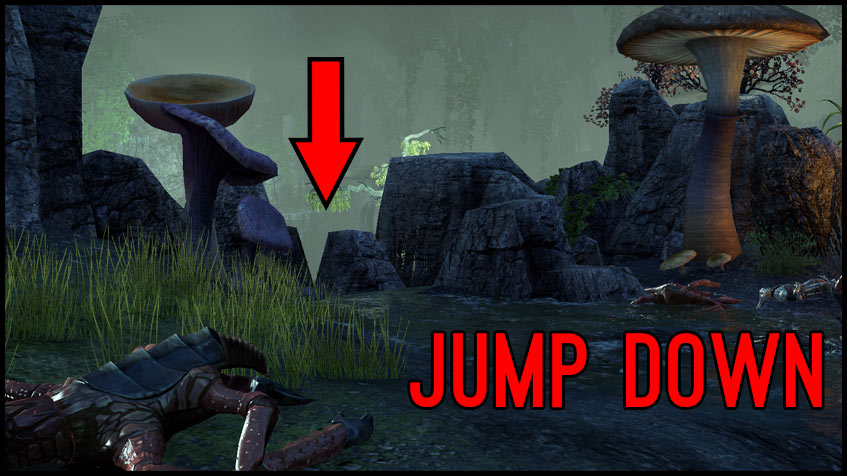
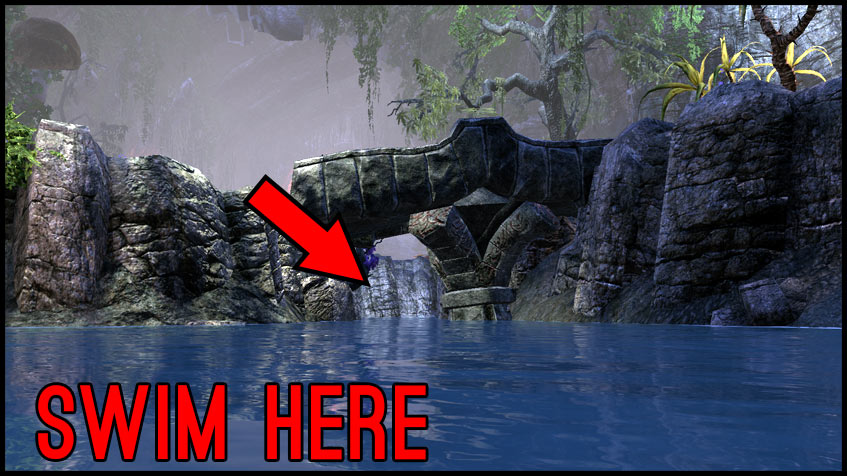
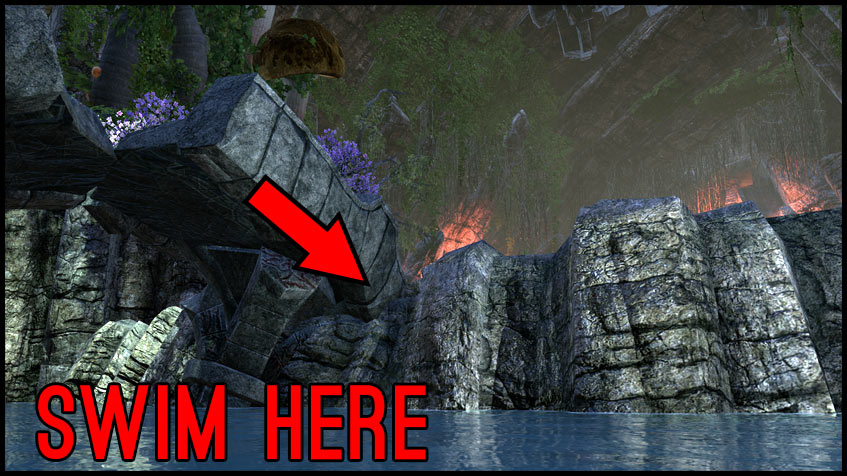
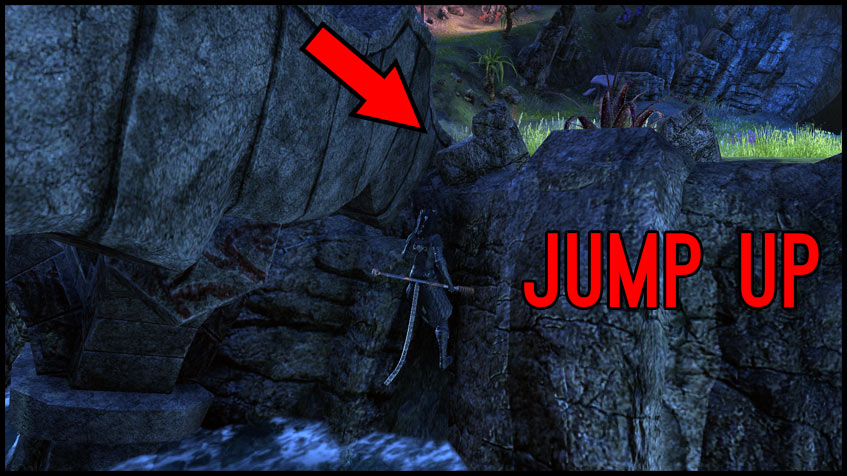
There’s one way to skip at least two bosses, but sometimes the Mudcrabs get pulled regardless. Jump down the first waterfall after leaving the smaller cave into the bigger cave, swim straight forward under the first bridge and left to the second, and then jump upwards.
Video Gameplay
- 1st Boss: Tazkad the Packmaster – 0:57
- 2nd Boss: Warchief Ozazai – 2:24
- 3rd Boss: Broodbirther – 4:03
- 4th Boss: Clatterclaw – 4:56
- Endboss: Kra’gh the Dreugh King – 5:28
Related Topics:
Magicka DPS Sets
Stamina DPS Sets
Beginner Tanking Guide
ESO Item Sets
Undaunted Beginner Guide
Animation Cancelling Beginner Guide