

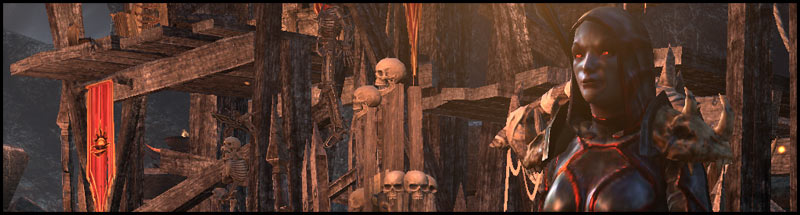
Welcome to the ESO City of Ash 2 Dungeon Guide for both Normal and Veteran mode. Both City of Ash I and City of Ash 2 are located in Greenshade.
This dungeon has 7 bosses: 3 main bosses, 4 mini-bosses and a lot of trashmob packs. (Trashmob = Enemies that can add to the difficulty and liveliness of a dungeon/trial)
If you have more questions, you can also ask someone in our community partner discord about this City of Ash 2 Dungeon Guide!
The Story – City of Ash 2
Happening after the events in City of Ash I, an elf named Fingaenion wants to travel to the Deadlands, into Mehrunes Dagon’s realm, to rescue his wife Gilraen. He and others tried to invade Mehrunes Dagon’s stronghold, but they failed at invading this Daedra’s realm.
Table of Contents:
- Sets & Rewards
- Trashmobs
- Maps
- Boss Fights
- Hardmode
- Skipping
- Gameplay (Full Run)
Sets in City of Ash 2
3 different sets drop in City of Ash 2, plus a very well sought after Monster Set
- Light: Burning Spellweave
- Medium: Sunderflame
- Heavy: Embershield
- Monster Set: Valkyn Skoria (Veteran only)
Rewards
- Dye: Sigil Orange
Complete Veteran City of Ash 2 by defeating Horvantud the Fire Maw, the Ash Titan and Valkyn Skoria.
- Title: Deadlands Adept
Complete the following achievements associated with City of Ash 2: City of Ash 2 Conquerer, Undaunted Rescuer, Mehrunes Dremora Slayer, Veteran Flame Colossus Slayer, Deadly Deadlands Survivor, A World on Fire, City of Ash 2 Assassin, Easy as Pie.
Trashmonsters in City of Ash 2
- Wildlife: In the beginning of the dungeon we meet a few animals and stranglers, but nothing too spectacular
- Flame Atronach: Pesky and even more fire-loving than the scamps
- Scamp: The scamps love to shoot wildly with fire and flames
- Clannfear: Very annoying and love to charge a target, simply block their attack
- Dremora: Archer, Melee and Casters, block the Melee’s heavy attack and pull in the Caster & Archer as tank
- Flame Colossus: With having a huge cleave attack, turn it away from the group, if you are the tank, and don’t stand in front of it as damage dealer or healer!
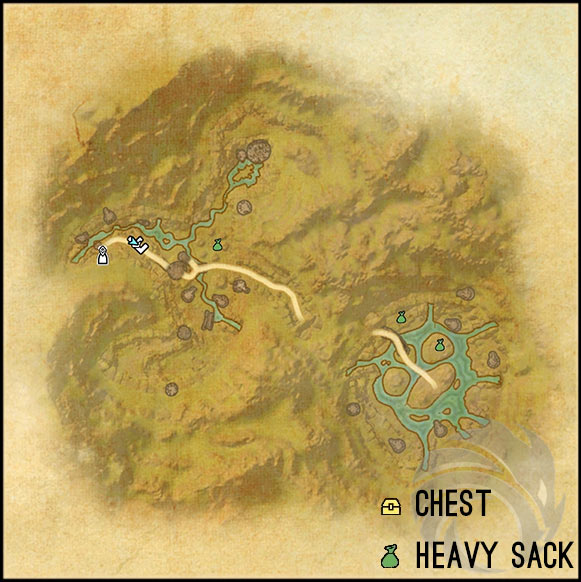
Bosses on the Map
(click to enlarge)


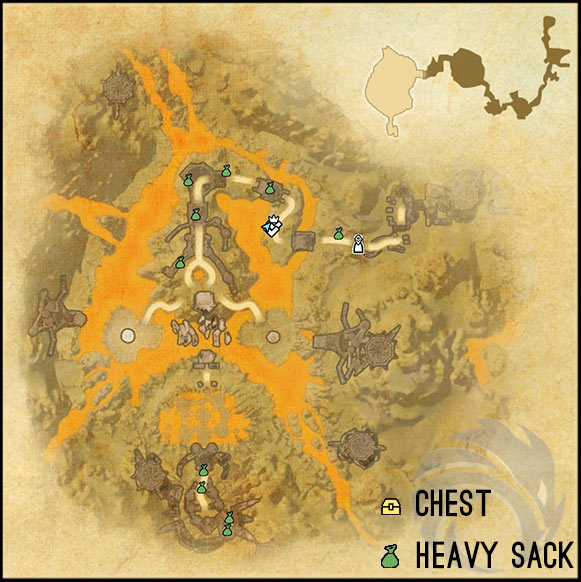
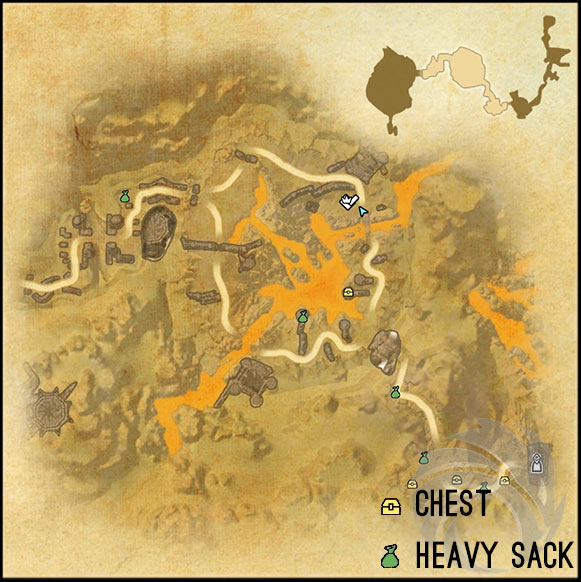
Treasure Chests & Heavy Sacks
(click to enlarge)

City of Ash 2 Bosses
Here you can find a list of all the bosses that appear in City of Ash 2 and you can also see how much health they have.
| Boss | Health | Adds |
|---|---|---|
| Xivilai Rukhan, Akezel & Marruz | 3,719,045 | – |
| Urata the Legion | 2,974,690 | Periodically 2 Dremora |
| Horvantud the Fire Maw | 2,460,134 | Waves of Dremora |
| Ash Titan | 3,007,499 | Maximal 2 Air Atronachs |
| The Two Guardians: Xivilai Boltaic & Fulminator | 2,493,490 & 2,077,908 | Up to 4 Storm Atronachs |
| Valkyn Skoria (Endboss) | 5,409,287 | Periodically 3 Fire Atronachs |
Bosses
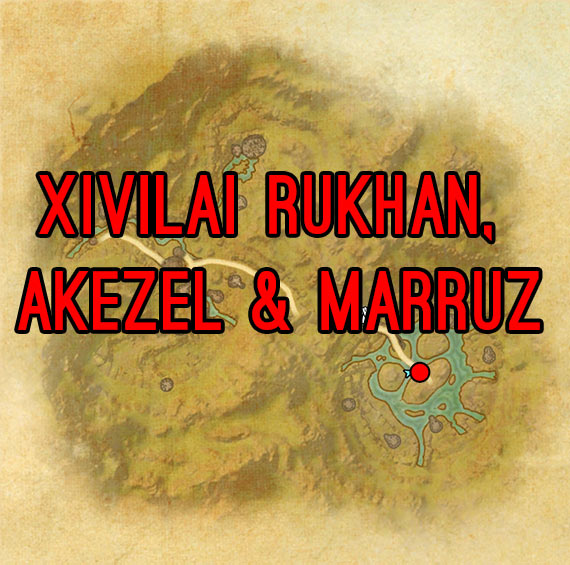
Xivilai Rukhan & his two assistants Akezel and Marruz
Before we enter Mehrunes Dagon’s realm, we have to fight a small force of scamps and flame atronachs before we meet our first mini bosses. They have emerged from the gate of Oblivion and want to hinder us from entering it.
The order in which you kill them doesn’t matter, but since the two assistants teleport away and the melee Rukhan can be very annoying, I advise to kill him first.
Rukhan has 4 main abilities, I will list them as follows:
Pyrocasm: In intervals, the boss will channel a giant AoE (Area of Effect) spell which you can’t interrupt and can’t block. If you don’t want to be knocked to the ground, you have to escape it by either running out, or dodge rolling out of it. Whichever you find easier.
Fire Chain: Much like a Dragonknight’s chains, this pulls in the character which he targets, favorably before doing his Pyrocasm.
Flame Atronachs: During the fight, the boss will spawn atronachs which are pretty annoying but also low in health. If your group damage is high, you don’t need to worry. Otherwise just kill them first before continuing with the boss, so you don’t get overpowered.
Uppercut: His Heavy Attack. Simply block it, so that you don’t get knocked over.
Akezel
Heal: Teleports and casts a heal on either of his companions, can be interrupted or ignored, depending on your group dps.
Marruz
Ranged: Teleports and uses Blazing Embers to place a trap underneath a group member. Simply step out and stand outside of her fire trap.
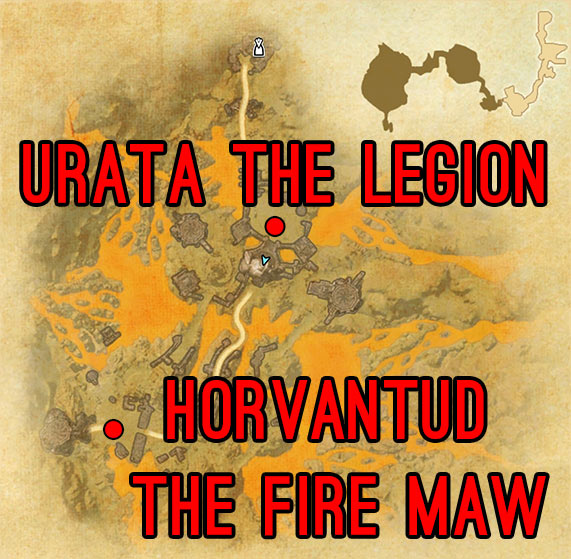
Urata the Legion
Urata is another Mini Boss in City of Ash 2 which we face after we have stepped foot into Oblivion. She will avoid the combat at first and calls in reinforcement, which you have to fight. If you are an inexperienced group or don’t know your potential, then pull carefully and don’t run into the room headlessly.
Flame Circles: Offensively speaking, this is her most dangerous ability. She will spawn Flame Circles underneath to up to 3 group members which are set ablaze immediately and can hurt quite a lot. Just step out of them, or dodge roll out of them.
Summoning Aid: Periodically, she will spawn 2 adds which can be either a Nightblade or Sorcerer type, with similar abilities. These are essentially a part of her, which she can recall and heal herself up. This is the only tricky part about this fight and can drag it out extensively. As soon as they spawn, get your DD to kill these first and then focus on the boss again.
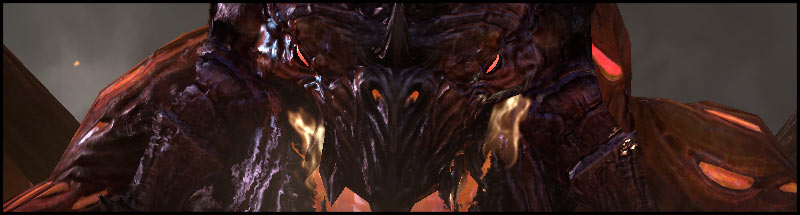
Horvantud the Fire Maw
Horvantud is the first Boss and also the first Boss that counts for the Undaunted Pledges. This giant Daedroth has a couple of attacks like all of his kind, but the most annoying part of this are all the Dremora that will drop down into the arena, assisting him in the fight against us.
Fire Breath: If you aren’t the tank, get out of this – just don’t stand in front of this boss at all! Otherwise block this huge cone of an attack, or even step out of it. This attack does a lot of damage.
Tremor: This looks like a stomp on the ground and sends a tremor through the ground, inflicting a lot of damage on any target standing in its way.
Ground Quake: Now Horvantud seems to get really angry. He pounds the ground beneath his feet, causing damage to everyone that stands in the circles that now form. You can avoid these by moving around in your spot. There is no need to panic. He will calm down.
Summoning Aid: This Daedroth doesn’t speak, so it technically doesn’t summon these, but various Dremora will join the fight. Depending on your group’s dps you can choose to ignore them, but if you don’t have a healer with you and you don’t know your group, this is not advised.
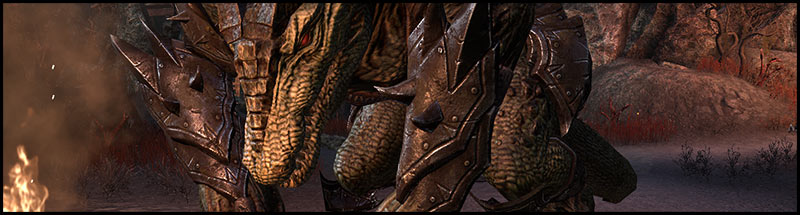
Ash Titan
Often mistaken as a dragon, this Daedric Titan doesn’t only look very scary, but is in fact a very serious encounter, especially for the tank.
The tank has to keep a taunt not only on the boss at all times, but also on the adds.
Up until the first add, the tank can stand close to it, otherwise use a range taunt to keep the boss on you. Otherwise it will have a nice snack with either the healer or the DDs.
Ethereal Flame: This is the Ash Titan’s “fire spit”. It’s a ranged attack with which he attacks anyone on range with.
Flame Wall: A wall of flames which emanates from him into the room after he slams the ground and which causes you to stumble. You can avoid it by stepping to the sides of these small waves of fire.
Lava Bolt: This skill is used at one point against all players, when the boss shoots lava bolts from his maw, leaving burning puddles on the ground.
Monstrous Cleave: Well, this is a cleave. He will do this to everyone that is standing in melee range, so get out of it if you don’t happen to be the tank! And please don’t move when it is on you, as it is locked unto your character, and not a position you previously had.
Burning Air Atronachs: They glow red and leave a trail of fire wherever they go. The tank has to take them to the side at 65% boss health and kite them there, meaning keeping a taunt on them while he guides them through the giant arena, as well as keeping the boss range-taunted at all times.
The Two Guardians – Xivilai Boltaic & Xivilai Fulminator

Before you can face Valkyn Skoria, who appears as a projection right as you enter the last area, you have to enable the bridge. To do this you have to destroy the guardians that guard the bridge.
It doesn’t matter in which order you do this, but you will have to choose whether to go left or right. You will see a large spire, which is fed by three Dremora which you have to kill first, before reinforcements try to kill you and hinder you from progressing. They spawn in three waves before you finally meet one Xivilai on each side.
Since they are similar in their skills, I will explain it once for both Mini Bosses. They only differ in their attack type.
Lightning Onslaught: This is a frontal lightning attack. This is interruptible. You can avoid it by stepping to the side, otherwise you might get a lot of damage.
Shock Aura: This spell is interruptible, but if you don’t, the boss will crouch and explode with a lightning burst. You can move out of this as well.
Heavy Attack: As with all Heavy Attacks, simply block this. Ideally the tank will do this, but if you find the Boss Heavy Attacking you, you should be fine with blocking.
Storm Atronachs: During the fight Storm Atronachs will spawn. These can be up to four. They should be killed by the DDs before progressing on the Boss. Sometimes people tend to ignore these if the group damage is high enough, or the tank skilled enough to tank four of them, but if they are tanked next to the Boss, they usually die from the AoE.
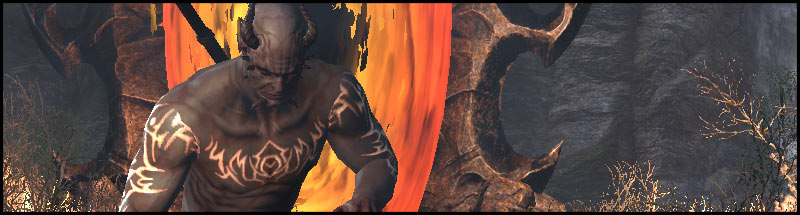
Valkyn Skoria
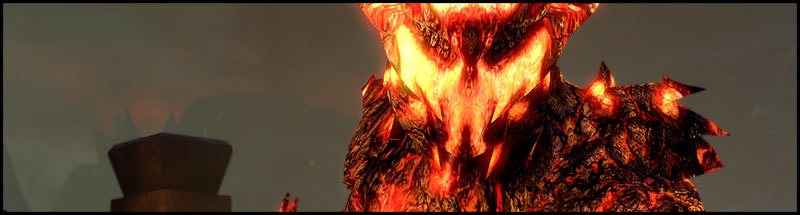
Last but not least, we face Valkyn Skoria, one of Mehrunes Dagon’s generals. Having led the attack on the graht-oak city “Whisper Grove” in Greenshade, he now tries to hinder us from rescuing Fingaenion’s wife and all the others in his part of the realm.
This fight is very tough if you don’t have the dps for it, because it has something which we used to call “Enrage Timer”. Meaning that there’s only so much time that you have to kill it before it becomes impossible and you all die.
Platform Detonation: You will have 5 platforms available, which will be destroyed by the Dremora general after some time and Valkyn Skoria teleports to the next platform. Just run to the next platform as soon as possible and remember to stay together!
When you run out of platforms, usually so much damage will be incoming from the lava and the Boss, that you will not survive for long.
Also, don’t stand on the intersections, as you will receive lava damage.
Flame Strike: Something that I like to call a “trap” is an exploding fire that emanates into various directions. It can be entirely avoided, but usually hits you at least once. The more you are on the move, the less damage you get and you shouldn’t get hit too often.
Fire Stab: This is what both his Light and Heavy Attack are called. As a tank definitely keep an eye out for his Heavy Attack, otherwise you might lose control of him and/or be pushed into the lava.
Magma Prison: After having destroyed a platform and having teleported to a new one, Valkyn Skoria lifts his sword up high and shoot fire balls from it. Additionally, he will gain a damage shield and you need to destroy this before he stops doing his attack.
Fossilize: Aimed at a random group member, this skill will imprison someone into a stone prison from which you have to break free. You can dodge roll it, but only if you notice it in time.
Flame Bolt: During the fight the Boss can charge a Flame Bolt at a random group member, meaning you will be tossed backwards into the lava if you don’t block or dodge roll this attack.
Flame Atronachs: Upon destroying the platform and teleporting to a new one, as soon as he raises his shield and sword, Flame Atronachs will spawn. Best is to take them to the center and kill them in the DDs’ AoE, as they will die relatively quickly.
Hardmode Valkyn Skoria
Hardmode differs from the normal mode pretty much in having 2 platforms removed, which in turns means that you have less time to beat Valkyn Skoria. Only do this if you bring a lot of dps to the table, because otherwise this might be an impossible task.
You can active the Hardmode in the far right and upper corner. On an altar you can find the scroll which, upon being read, will destroy these 2 platforms.
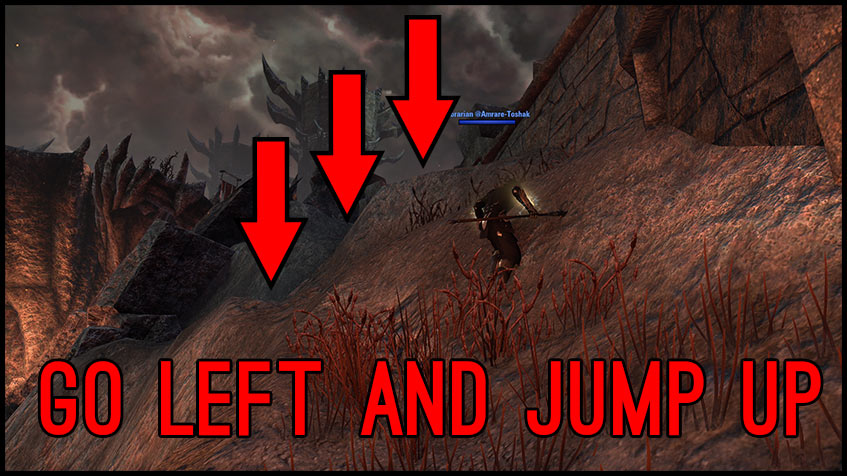
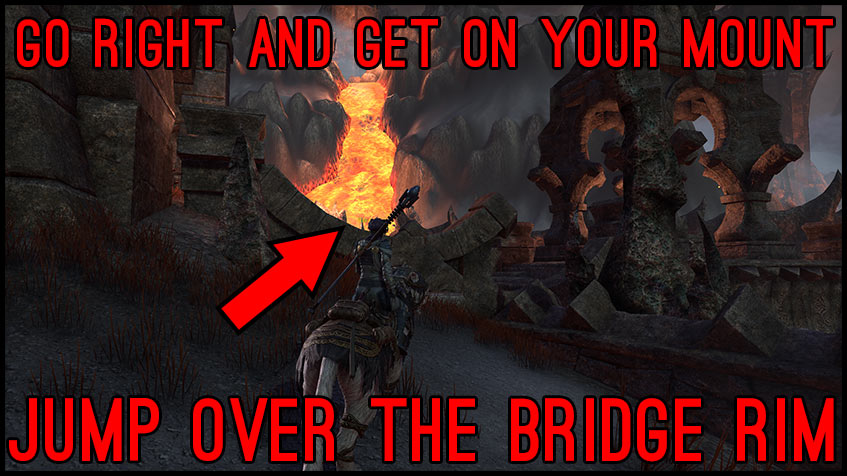
Skipping in City of Ash 2
You can also skip certain parts in this dungeon, so that you are even faster in case you want to do a speedrun or just avoid unnecessary trashmob. Here an explanation in pictures!
Skip right before the Ash Titan
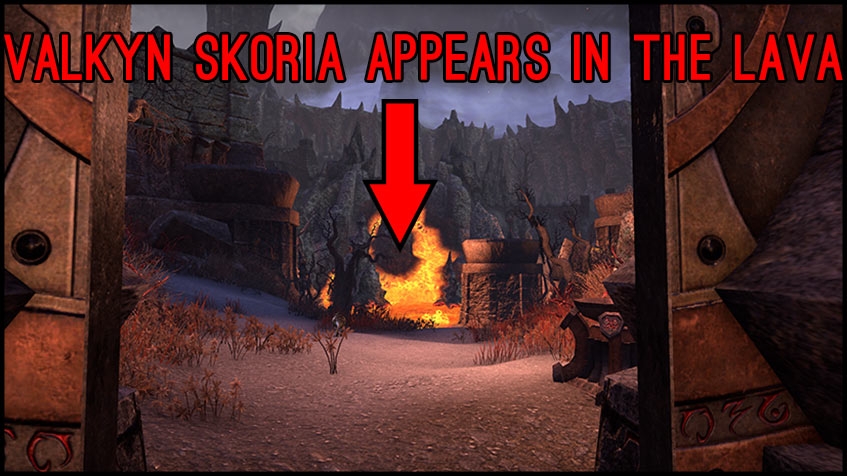
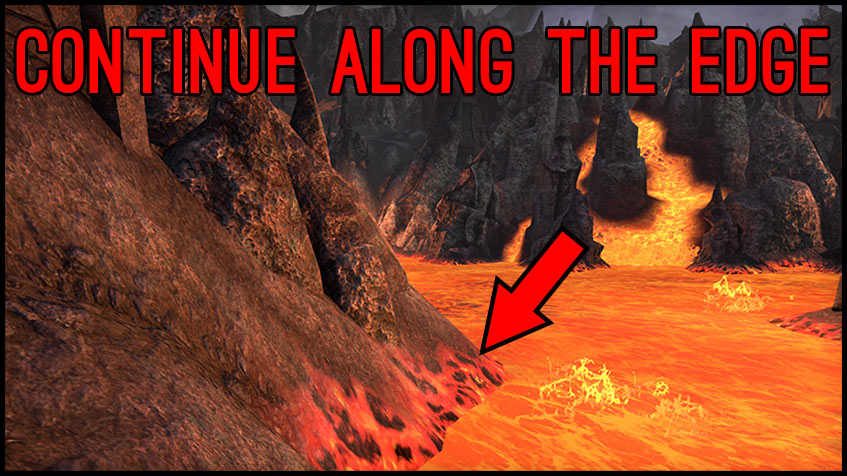


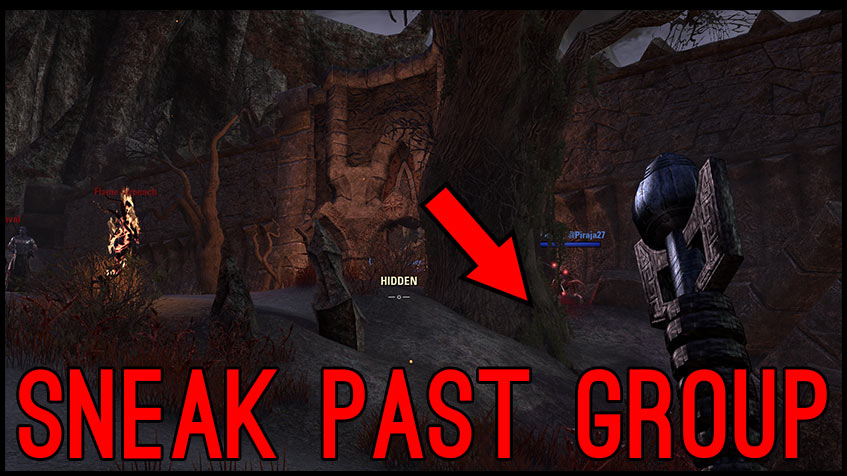
Skip right before Valkyn Skoria’s plateau


Video Gameplay
- 1st Boss: Xivilai Rukhan, Akezel & Marruz – 2:26
- 2nd Boss: Urata the Legion – 5:43
- 3rd Boss: Horvantud the Fire Maw – 10:26
- 4th Boss: Ash Titan – 14:52
- 5th Boss: The Two Guardians: Xivilai Boltaic & Fulminator – 21:40
- Endboss: Valkyn Skoria – 25:28
Solo City of Ash 2 Veteran Hardmode
You can also find a full dungeon run of the Solo Stamina Necromancer build clearing City of Ash 2 on veteran with hardmode activated.
Related Topics:
Magicka DPS Sets
ESO Item Sets
Undaunted Beginner Guide
Animation Cancelling Beginner Guide