

Welcome to the Banished Cells 1 Dungeon Guide for both Normal and Veteran mode. The Banished Cells 1 dungeon is located in Auridon, in the Aldmeri Dominion, one of the major factions in The Elder Scrolls Online.
This dungeon has 5 bosses: 2 main bosses, 3 mini-boss encounters and trashmob packs. (Trashmob = Enemies that can add to the difficulty and liveliness of a dungeon/trial and are fillers in-between bosses)
If you have more questions, you can also ask someone in our community partner discord about this Banished Cells 1 Dungeon Guide!
The Story in Banished Cells 1
High Kinlord Rilis, a very dangerous spirit of an ancient Altmer, has escaped the Banished Cells and you need to help the Keepers in order to restore peace.
Table of Contents:
- Sets
- Trashmobs
- Maps
- Boss Fights
- Hardmode
- Full Run Banished Cells 1 (Video)
Sets in Banished Cells 1
3 different sets drop in Banished Cells 1, plus a Monster Set
- Light: Sanctuary
- Medium: Jailbreaker
- Heavy: Tormentor
- Monster Set: Shadowrend (Veteran only)
Trashmonsters in Banished Cells 1
- Skeletons, Clannfear, Scamps and Banekin: Generic Trashmob, except for the ice mage skeletons and scamps that can hit very hard with their magic abilitites.
Boss Map & Treasure Chests
Bosses, Heavy Sacks and Treasure Chest location.
(click to enlarge)

| Boss | Health | Adds |
| Cell Haunter | 2,493,490 | A few |
| Shadowrend | 3,007,499 | Will spawn a shadow |
| Angata the Clannfear Handler | 831,163 | A lot of skeletons |
| Skeletal Destroyer | 2,077,908 | Scamps and summons skeletons |
| High Kinlord Rilis (Endboss) | 3,993,959/4,992,448 | None |
Bosses in Banished Cells 1
Cell Haunter
This is the first Mini Boss. This boss is a wraith and is accompanied by a few skeletons. The tank can pull this to the boss, so that they get killed in the damage AoE of the damage dealers.
Adds: There is one add which the tank should be aware of, which is the tank of them. Before the skeleton charges its Heavy Attack, it will block, so make sure not to attack it at that moment if you are the tank. Block directly then or afterwards, otherwise you will get stunned.
Winter’s Grasp: This ability is the reason why the boss should be tanked facing away from the group. The boss will start casting a tornado (which can be interrupted) and release it into its target’s direction. If the group stays behind the boss, this will only affect the tank.
Magic Missile: This is a series of attacks, hitting the tank (ideally) multiple times. This ability can be blocked.
Leech: The boss will turn to a random target and steal health of a target, causing a large amount of damage. This can easily lead to a player’s death if they either don’t block, or don’t get healed. Additionally, the boss will heal itself up by the amount of health it drained. Can not be interrupted.
Shadowrend
Upon entering the room, you will have to face a wave of enemies first. After that you will have to active buttons at the far end, directly opposite to you and to the right in order for the boss to appear. The boss itself is a clannfear and is very manageable when keeping an eye on a few of his abilities.
Jump: This ability will only get triggered when a player stands too far away. It’s very advisable for the entire group to stand together, but not too close, so they don’t get knocked over by another ability called Swipe. Just don’t stand too far away from the boss, and it will make it a lot easier for everybody else in your group. If you should happen to get jumped by the boss, he will start casting an ability that looks like he is taking a bite out of the player. This can be interrupted. Causes a large amount of damage if left uninterrupted!
Swipe: From time to time, the boss will charge up an attack which looks as if he swipes his tail around in a circle, knocking everyone back that stands in it and does a moderate amount of damage. Be sure to either block the attack, or get out of it.
Shadow: The boss will start splitting itself, casting a shadow image that will attack another player. Don’t panic here and just continue standing where you were, so that everyone can take care of it. Running around like a headless chicken is usually the death of a player.
Angata the Clannfear Handler

A lot of adds accompany this boss, which makes it usually a lot harder than it should be. To get the initial agro, it’s beneficial that the tank runs in first. It makes it a lot easier for the tank to get the situation under control!
Adds: Focus on these first, as they have absolute priority. If you keep them up for too long, they will start tearing your group apart, as they all together do a lot of damage!
Fire pools: This might still happen when the adds are alive, so keep an eye out for this. This is an ability that Angata will cast on the ground, leaving a somewhat large pool of fire. As with all enemies’ damage AoEs, move out of this.
Summon Clannfear: What would a clannfear handler be without their clannfear? Very frequently, the boss will summon a clannfear (can be interrupted). This clannfear is relatively low in health, but can be very annoying. Don’t run away and just stand where you are, and either let the tank take it off of you or help kill it.
Skeletal Destroyer

This boss is a giant bone colossus with 4 scamps waiting for you. The scamps are pretty scattered, so either focus them first, or have the tank pull them in with a chaining ability. They will cause a lot of damage, if they aren’t killed before you attack the boss.
Summon Adds: Pretty much when the fight starts, the boss will also summon 3 skeletons. Initially, these don’t cause a lot of damage, but if left unattended, they will explode and cause a high amount of damage! So focus them or burn them with your AoE abilities by the boss, whichever suits your group the best.
Cleave: Because of this ability, you want to turn the boss around so that it no longer faces the group. This is a relatively wound up cast, which means the tank can step out of this relatively easily. It will cause a moderate amount if damage, especially if not blocked.
Rune Stomp: Very regularly, the boss will stomp the ground, causing a daedric explosion to happen at his feet and causing a lot of damage. Keep your distance when this happens. The tank can block this ability.
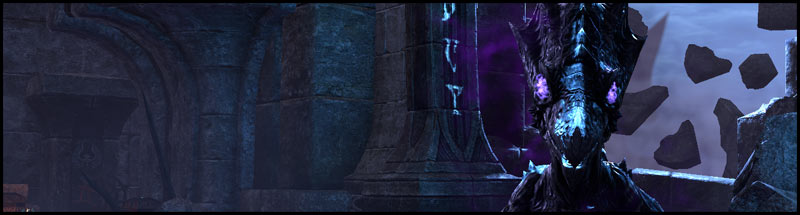
High Kinlord Rilis
The last and final boss in Banished Cells 1, High Kinlord Rilis is someone that will remain in people’s memories, if not for the voice alone! You will see what I mean when you enter Banished Cells 2!
Regardless, this fight can be relatively easy if you prepare well for his abilities.
Empowering Orb: To aid himself, Rilis doesn’t summon adds, but instead an empowering orb which will make his abilities hurt a lot morem. This is one of the reasons why the boss is tanked a bit away from the platform, so that the damage dealers can take care of the orb. If your damage dealers aren’t strong enough, the tank has to kite the boss to the other side of the room so that it doesn’t reach him.
Daedric Fire: Raising his sword up into the air, one player after another, there will spawn a fire beneath everyone. They will stay for a while and will kill a player if they don’t move out of it. This makes it important to not tank the boss on the platform and for everybody to be a bit spread out, so that you don’t run into each other when the fire gets dropped beneath you.
Crushing Blow: Since the boss hits like a truck, it’s very advisable to block this Heavy Attack. Even as a tank it can deal a large amount of damage and will kill anyone that doesn’t block and isn’t a tank.
Soul Blast: This is a shadow orb that the boss casts on a random target. It will not only cause a large amount of damage, but will also knock the player back if it isn’t dodge rolled or blocked. This is usually a one-shot mechanic on veteran difficulty if the Empowering Orb reached High Kinlord Rilis.
Hardmode High Kinlord Rilis
Increased Health & Damage: Hardmode doesn’t have more mechanics, but it does a lot more damage, and the health is increased quite a bit!
Skipping in Banished Cells 1
There are two skips, but that also means skipping two bosses. You don’t have to kill either Cell Haunter or Angata the Clannfear Handler and just skip the rooms.
Video Gameplay
- 1st Boss: Cell Haunter – 1:15
- 2nd Boss: Shadowrend – 2:38
- 3rd Boss: Angata the Clannfear Handler – 4:00
- 4th Boss: Skeletal Destroyer – 5:20
- Endboss: High Kinlord Rilis – 7:39
Related Topics:
Magicka DPS Sets
Stamina DPS Sets
Beginner Tanking Guide
ESO Item Sets
Undaunted Beginner Guide
Animation Cancelling Beginner Guide