Welcome to the Naj-Caldeesh Dungeon Guide ESO! This guide is your essential resource for mastering Naj-Caldeesh on both Veteran and Veteran Hard Mode. We’ll cover every difficult mechanic and how to survive them. While Normal mode offers a less punishing experience, our focus is on strategies for higher difficulties. Naj-Caldeesh is part of the “Feast of Shadows” DLC and is located west of the city of Sunport in the Solstice zone.
This dungeon has 3 bosses: 3 main bosses and a lot of trashmob packs. (Trashmob = Enemies that can add to the difficulty and liveliness of a dungeon/trial)
If you have more questions, you can also ask someone in our community partner discord about this Naj-Caldeesh Dungeon Guide!
Table of Contents:
- Introduction & Lore
- Gear Sets & Unique Rewards
- Trashmobs
- Naj-Caldeesh Boss Fights: Detailed Strategies
- Optional Content:
Introduction to Naj-Caldeesh

Naj-Caldeesh Entrance room with the bridge lowered.
Welcome to the ancient and long-hidden Xanmeer of Naj-Caldeesh, a brand-new Elder Scrolls Online dungeon introduced with ESO Update 47 (U47) as part of the Feast of Shadows DLC. Once forgotten by the Stone-Nest Argonians of Solstice, its secrets remained buried with few defenses. However, a faction of Argonian Necromancers has uncovered its entrance.
Your mission is to stop these necromancers before they can corrupt the mysterious power inside and unleash Naj-Caldeesh’s Voskrona Guardians on the rest of Solstice. This Naj-Caldeesh guide will cover everything you need to know for successful runs.
Lore, Setting, and Story Overview of Naj-Caldeesh

The story of Naj-Caldeesh revolves around a hidden, legendary Xanmeer that was forgotten by the Stone-Nest Argonians. Its secret remained buried until a faction of Argonian Necromancers uncovered its entrance.
You are tasked with stopping these necromancers from corrupting the mysterious power within the Xanmeer and preventing the unleashing of its powerful Voskrona Guardians upon Solstice. This narrative sets the stage for the dungeon’s encounters and challenges, providing a deeper understanding of the ESO U47 and Season of the Worm Cult lore.
Dungeon Difficulty & Requirements (Normal, Veteran, Hard Mode Explained)
Naj-Caldeesh can be completed on both Normal and Veteran difficulties. Completing it on Veteran unlocks additional challenges and achievements, including specific Hard Mode encounters for each boss within the dungeon. This guide will help you understand the Naj-Caldeesh mechanics for all difficulties.
- Normal Mode
- Difficulty: Easiest.
- Requirements: Level 10+, flexible group composition.
- Veteran Mode
- Difficulty: Significantly harder than Normal.
- Requirements: Level 50 (CP 160 recommended for base game, CP 300+ for DLC dungeons). Requires a dedicated tank, healer, and two DPS.
- Veteran Hard Mode (HM)
- Difficulty: Highest; activated within Veteran mode on the final boss. Most new dungeons have Hard Mode on each main boss.
Gear Sets & Unique Rewards in Naj-Caldeesh
Unique Item Sets & their Bonuses
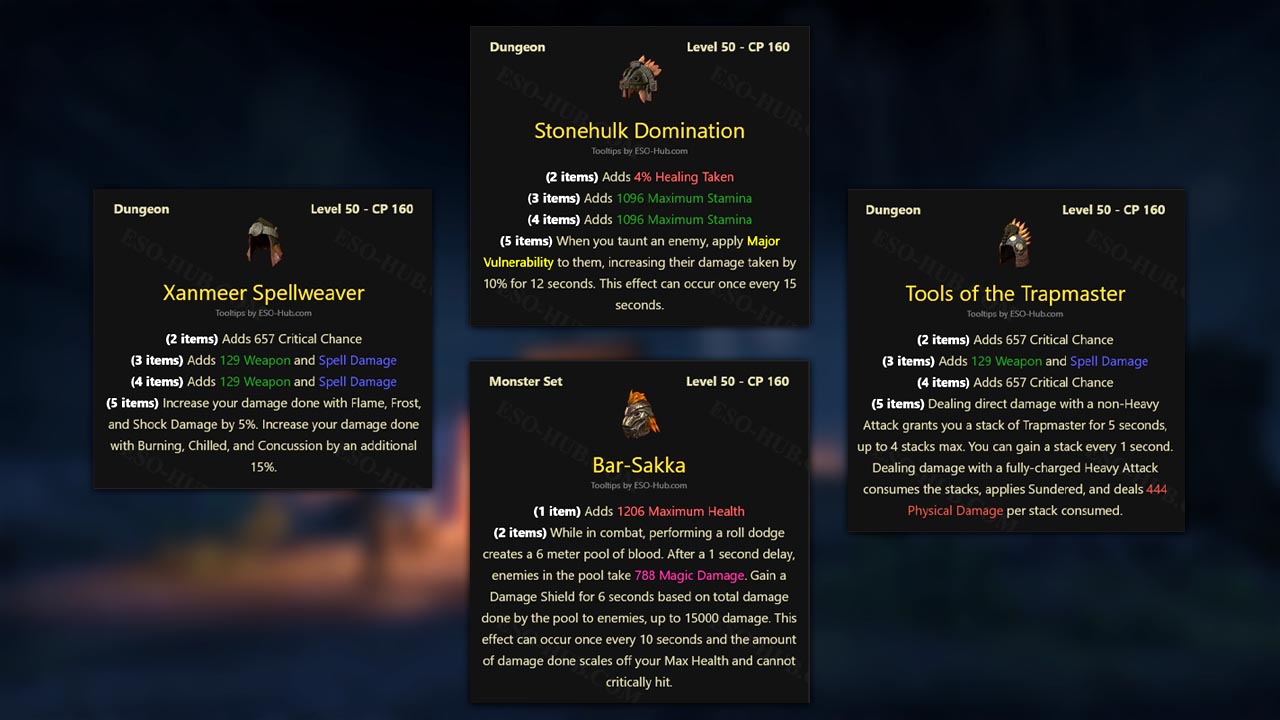
Naj-Caldeesh introduces four new ESO gear sets, including Bar-Sakka Monster Set. Each of the Naj-Caldeesh sets below drops from the dungeons bosses and chests. Specifically, weapons and jewelry pieces are only found by defeating the final boss and with good luck, from chests.
- Light: Xanmeer Spellweaver
- (2 items) Adds 657 Critical Chance
(3 items) Adds 129 Weapon and Spell Damage
(4 items) Adds 129 Weapon and Spell Damage
(5 items) Increase your damage done with Flame, Frost, and Shock Damage by 5%. Increase your damage done with Burning, Chilled, and Concussion by an additional 15%.
- (2 items) Adds 657 Critical Chance
- Medium: Tools of the Trapmaster
- (2 items) Adds 657 Critical Chance
(3 items) Adds 129 Weapon and Spell Damage
(4 items) Adds 657 Critical Chance
(5 items) Dealing direct damage with a non-Heavy Attack grants you a stack of Trapmaster for 5 seconds, up to 4 stacks max. You can gain a stack every 1 second. Dealing damage with a fully-charged Heavy Attack consumes the stacks, applies Sundered, and deals 444 Physical Damage per stack consumed.
- (2 items) Adds 657 Critical Chance
- Heavy: Stonehulk Domination
- (2 items) Adds 4% Healing Taken
(3 items) Adds 1096 Maximum Stamina
(4 items) Adds 1096 Maximum Stamina
(5 items) When you taunt an enemy, apply Major Vulnerability to them, increasing their damage taken by 10% for 12 seconds. This effect can occur once every 15 seconds.
- (2 items) Adds 4% Healing Taken
- Monster Set: Bar-Sakka (Veteran only)
- (1 item) Adds 1206 Maximum Health
(2 items) While in combat, performing a roll dodge creates a 6 meter pool of blood. After a 1 second delay, enemies in the pool take 788 Magic Damage. Gain a Damage Shield for 6 seconds based on total damage done by the pool to enemies, up to 15000 damage. This effect can occur once every 10 seconds and the amount of damage done scales off your Max Health and cannot critically hit.
- (1 item) Adds 1206 Maximum Health
Collectibles

Seed-Heavy Hist Bulb memento
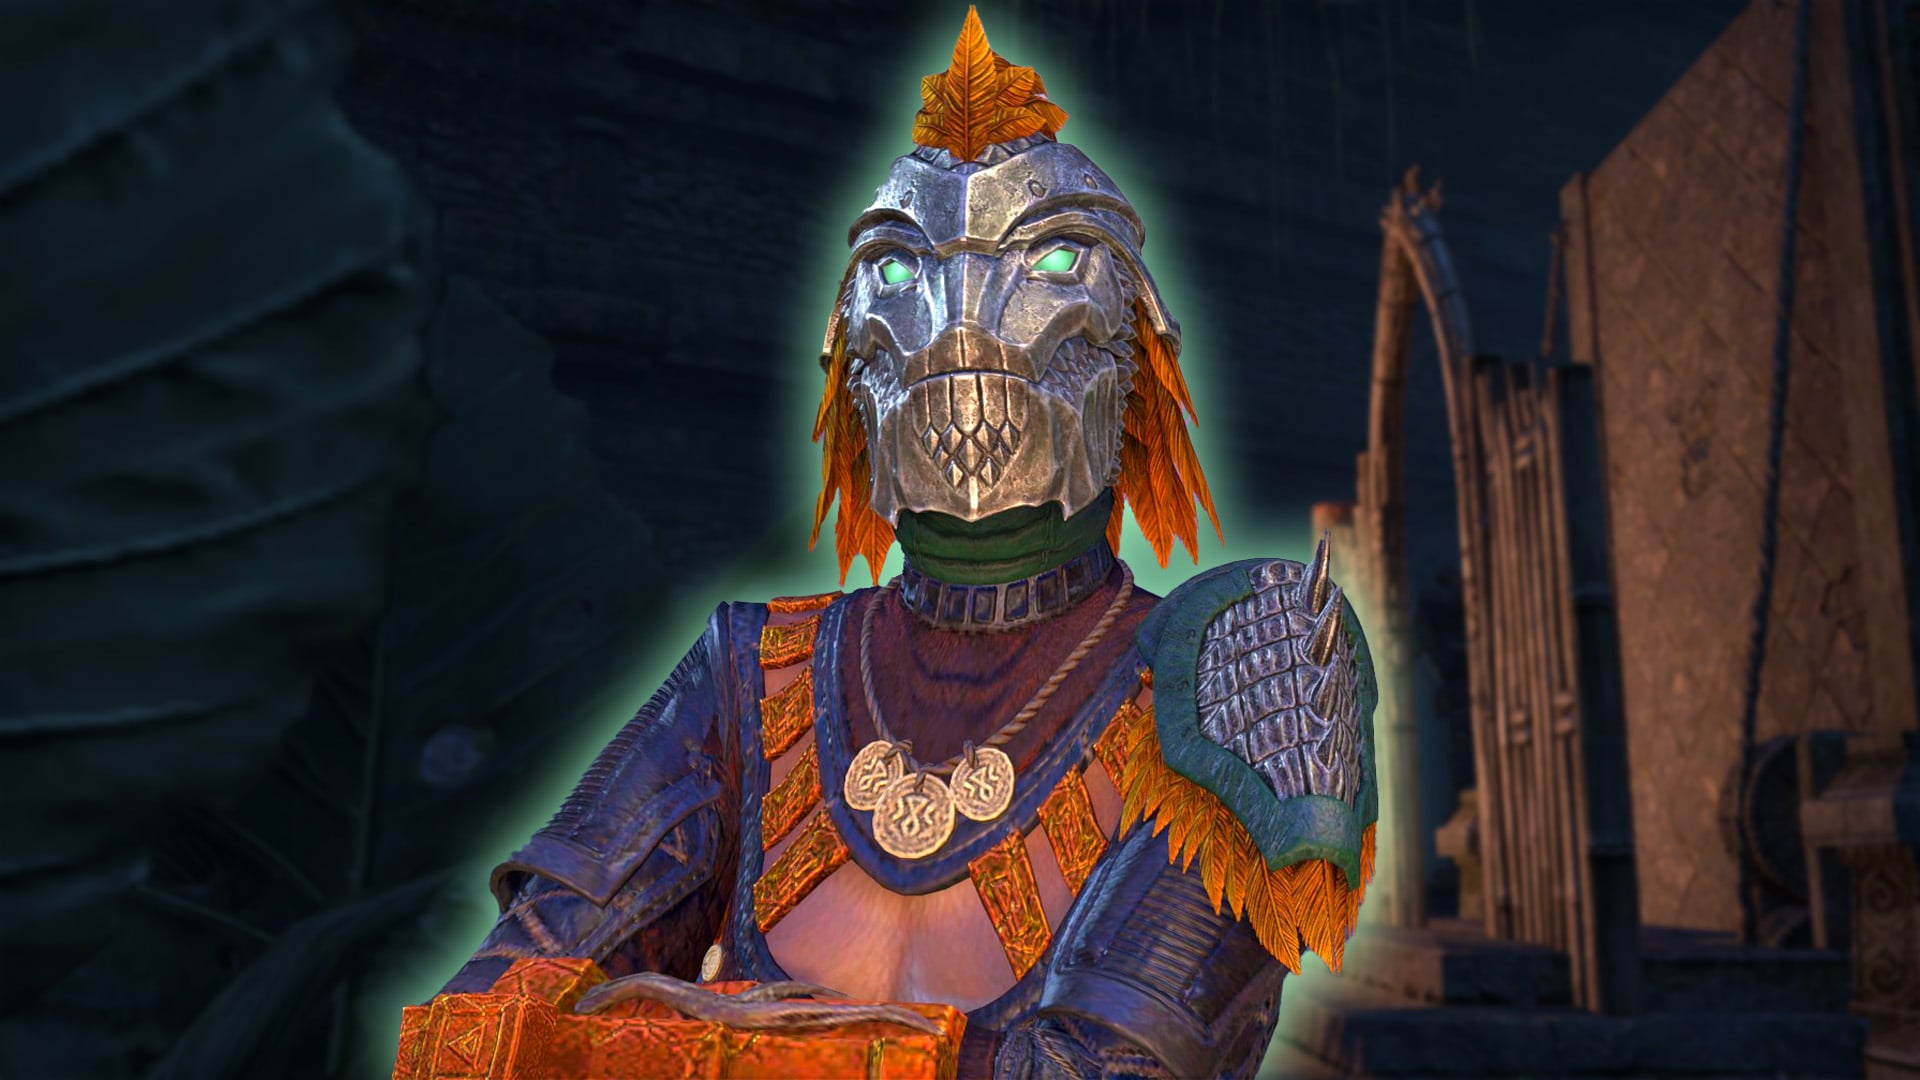
Naj-Caldeesh offers a variety of unique collectibles in ESO, including the Xanmeer Defender skin, the Seed-Heavy Hist Bulb Memento, a furnishing called the Naj-Caldeesh Drawbridge, and a selection of titles.
- Skin: Xanmeer Defender (Obtained by completing “Feast of Shadows Delver“)
- Dye: Weathered Keystone Green (Obtained by completing “Temple Hero” and “Mining Tunes“)
- Skill Style: Weakness to Elements, Orange (Obtained by completing “Naj-Caldeesh Vanquisher“)
- Memento: Seed-Heavy Hist Bulb (Obtained by completing “Naj-Caldeesh Conqueror“)
- Furnishings:
- Trophy: Bar-Sakka (Obtained by completing Naj-Caldeesh on normal)
- Bust: Bar-Sakka (Obtained by completing Naj-Caldeesh on veteran)
- Naj-Caldeesh Drawbridge, Stone can be bought from Undaunted Quartermaster for 40,000 Gold after completing the Naj-Caldeesh Vanquisher achievement
- Titles:
- Key Master (Obtained by completing “Facing Mortality“)
- Deathbringer (Obtained by completing “Key to the Stone“)
- The Crypt Singer (Obtained by completing “Naj-Caldeesh Champion“)
Images of all the collectibles you can get from Naj-Caldeesh


Trashmonsters in Naj-Caldeesh
The trash mob fights between bosses are straightforward, but there are more enemy packs here than in the companion dungeon, Black Gem Foundry. There is a summoner enemy that adds and extra mechanic if not interrupted:
- Wuj-Laxul Summoner: Interrupting it’s cast “Summon Wardens” is your top priority. If the cast is not interrupted, a stationary add will spawn that creates a circle. A tank must stand in this circle to prevent the group from taking damage.
All adds in this dungeon: Bog Blight, Death Hopper, Double-Blade, Environment, Flame Crest, Haunting Specter, Skeletal Archer, Skeletal Berserker, Skeletal Bruiser, Skeletal Foot Soldier, Strangler, Voskrona Flamerock, Voskrona Guardian, Wuj-Laxul Ravager, Wuj-Laxul Shade Sentinel, Wuj-Laxul Shadow Bruiser, Wuj-Laxul Shadow Mag and Wuj-Laxul Summoner.
Gear and Build Considerations: Hitting the Caps
WIP
Naj-Caldeesh Boss Fights: Detailed Strategies
Naj-Caldeesh features three main bosses, each with their own unique ESO boss mechanics and challenges.
Below you can find a list of all the bosses in Naj-Caldeesh, along with their health pools on Veteran and Veteran Hard Mode difficulty.
| Boss | Veteran / Hard Mode Health |
|---|---|
| Boss 1: Poxito |
|
| Boss 2: Voskrona Stonehulk Poxito |
|
| Boss 3: Talen-Lah (Endboss) |
|
Boss 1: Poxito
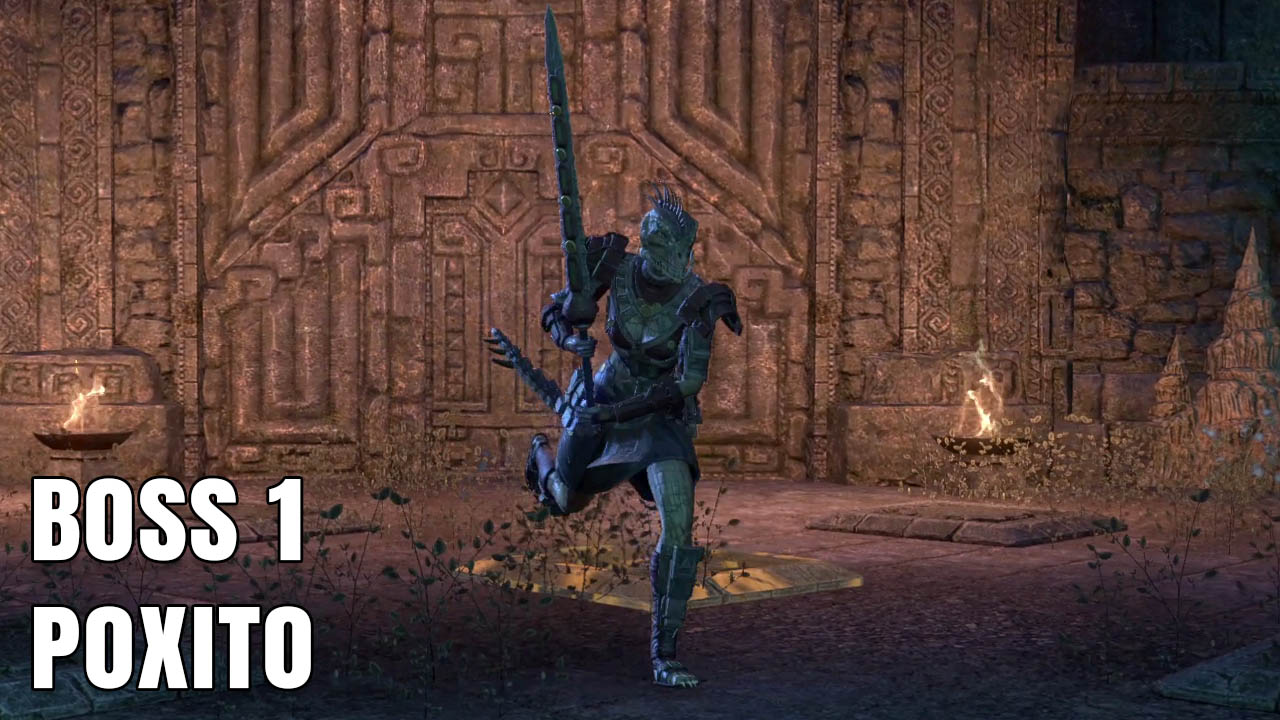
The first boss of the Naj-Caldeesh Dungeon, Poxito is a demanding encounter that tests your groups ability to manage adds, positioning and strategically using environmental hazards. Success relies on bypassing his unique invulnerability mechanic and prioritizing key targets to prevent a group wipe.
Poxito: Core Mechanics & Flow

The argonian boss Poxito is a heavy-hitting boss with this basic light attacks hitting upwards of 32k unblocked and 8k-20k when blocked by a tank. Tanks should always aim to cap spell and physical resistances (32k)! Poxitos heavy attack also deals massive damage which must be blocked or dodged.
Arena Traps: Saw Blades & Pressure Plates
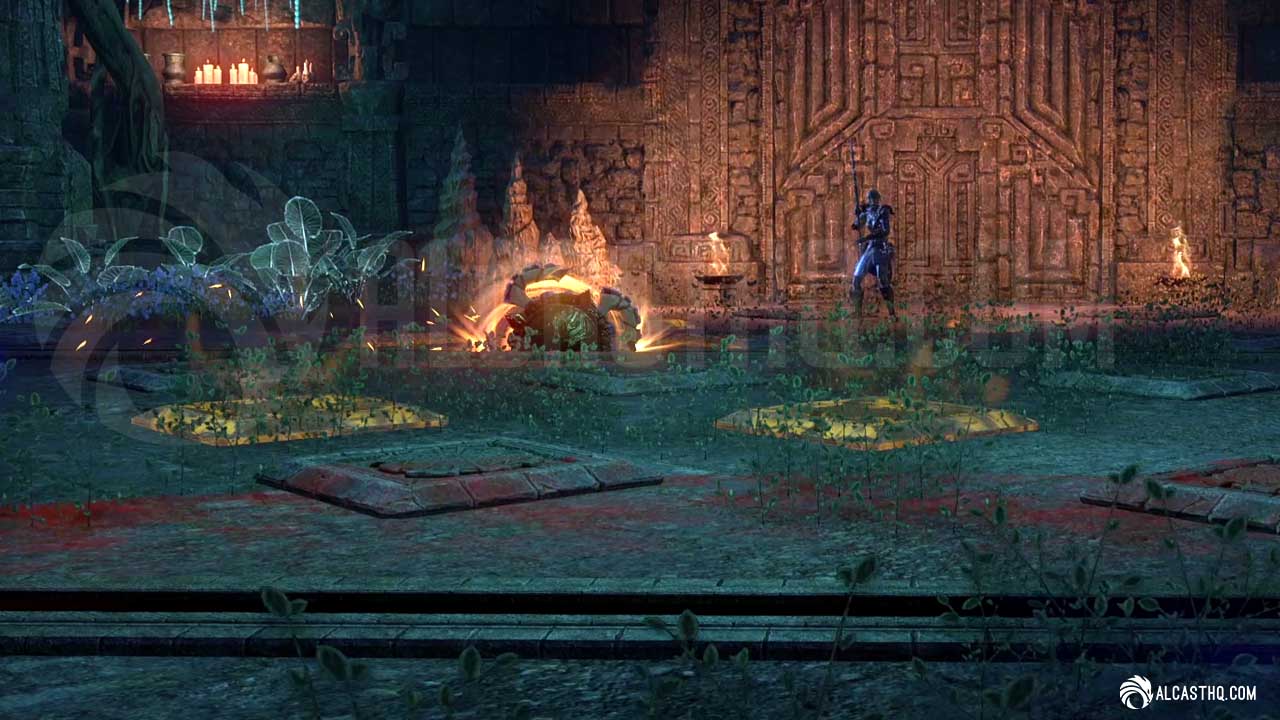
The traps and the Saw Blade can be seen before you pull the boss
The boss arena features pressure plates on the ground that when stepped on trigger environmental traps like splash-damage fireball launchers and fast-moving saw blades. Saw Blade traps are especially lethal on Hard Mode where a single hit from a saw blade is a one-shot attack.
Totems and the Soul Storm Wipe Mechanic

Left circle: Soul Storm Skull and AOE under it. Right circle: Bone effigy totem
Throughout the fight Poxitos will summon Bone Effigy totems. Always prioritize killing the Bone Effigy totems, then kill Haunting Specters and Skeletal adds. The summoned ghosts deal low damage but will attempt to crowd control (CC) you by pulling you toward the nearest pressure plate trap so remember to break free.
Poxito stops his regular attacks and starts to channel Soul Storm, which spawns a skull in the middle that is connected to Bone Effigy Totems. A large AoE circle begins to grow outward. If the AoE expands to fill the arena and you have Bone Effigy Totems alive you will die.
Bone Armor Invulnerability

Bone Armor Invulnerability as seen on the health bar and visually on Poxito
Poxito periodically casts Bone Armor on himself and becomes immune to all damage. The only way to strip the Bone Armor is to have Poxito get hit by a moving saw blade trap. The tank must position Poxito on the path of an activated saw blade. A successful hit will remove the Bone Armor and keep him vulnerable for the majority of the fight.
Add Management: Berserkers First
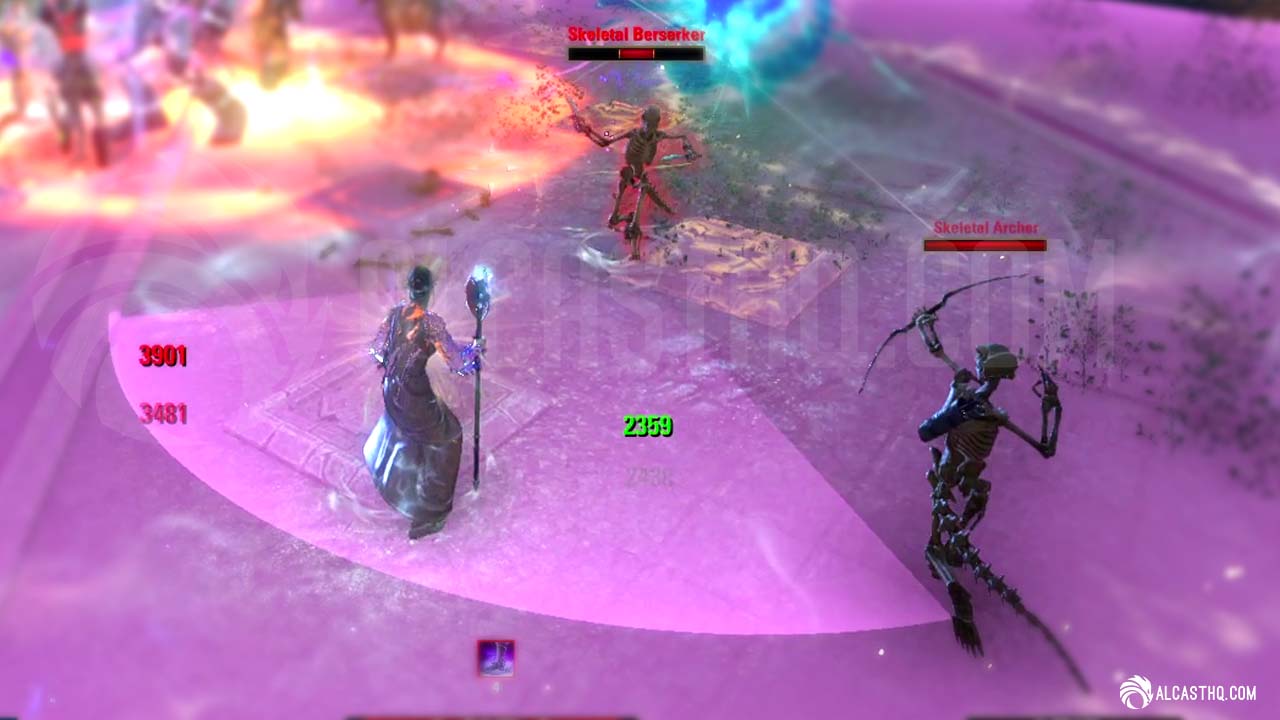
Skeletal Berserker in the middle and Archer on the right during Soul Storm
Throughout the fight Poxito summons two types of Skeletal Adds.
- Skeletal Archers should be chained to the boss without needing to focus them.
- Skeletal Berserkers should be taunted fast or prioritized because they channel a Blood Frenzy cone attack that does a lot of damage especially to DD’s.
Since the boss summons adds based on your groups damage output you can slow down the fight by doing less damage. If your group has enough AOE damage and survivability, you can burn the boss down without caring that much about adds.
Common Mistakes & How to Avoid Them

Poxito stays invulnerable.
Solution: Tank needs to move Poxito on top of the saw blade lines which remove the invulnerability.
Being CC’d onto Traps by Ghosts.
Solution: Ghosts spawn from the totems. Focus totems the second they spawn because sometimes it’s just impossible to break free in time. If you run out stamina top break free, you can slot the Red Champion Point Slippery which automatically breaks free at no cost (21 second cooldown).
All of Poxitos Abilities listed and how to deal with them
We’ve compiled this list of Poxito’s abilities so you can see what killed you and learn how to prevent it from happening again.
| Poxitos Abilities | Ability Descriptions and how to deal with them |
|---|---|
|
Bone Effigy (Totem) |
Summons totems which summon Haunting Specter adds if not killed quickly. DD’s need to always prioritize killing totems |
| Soul Storm | The boss begins to cast a growing AoE hat originates from him which explodes when it reaches the wall. Kill totems or this kills you instantly. Any totems that are alive, increases the Soul Storm damage. |
| Bombastic Swing | A large conical AoE attack that charges for 1.5 seconds. Tank should face the boss away from the group. Everyone else should move out. |
| Summon Skeletons | Summons Skeletal adds (listed below). Kill these adds while damaging the boss by pulling them to the boss. Adds can overwhelm you if you ignore them. |
| Bone Armor | Creates an armor for himself, making him invulnerable. Boss needs to stand on top of the trap lines so the saw blade hits him, removing the invulnerability |
| Stinging Strike | Light Attack. Tank should block |
| Offended Uppercut | Heavy Attack. Tank should block |
Poxitos Adds
Adds should be pulled to the boss by the tank whenever possible so they die to AOE damage.
| Poxitos Adds | Ability Descriptions and how to deal with them |
|---|---|
| Skeletal Archer |
|
| Skeletal Berserker |
|
| Haunting Specter |
|
| Flame Crest |
|
Boss 2: Voskrona Stonehulk Poxito
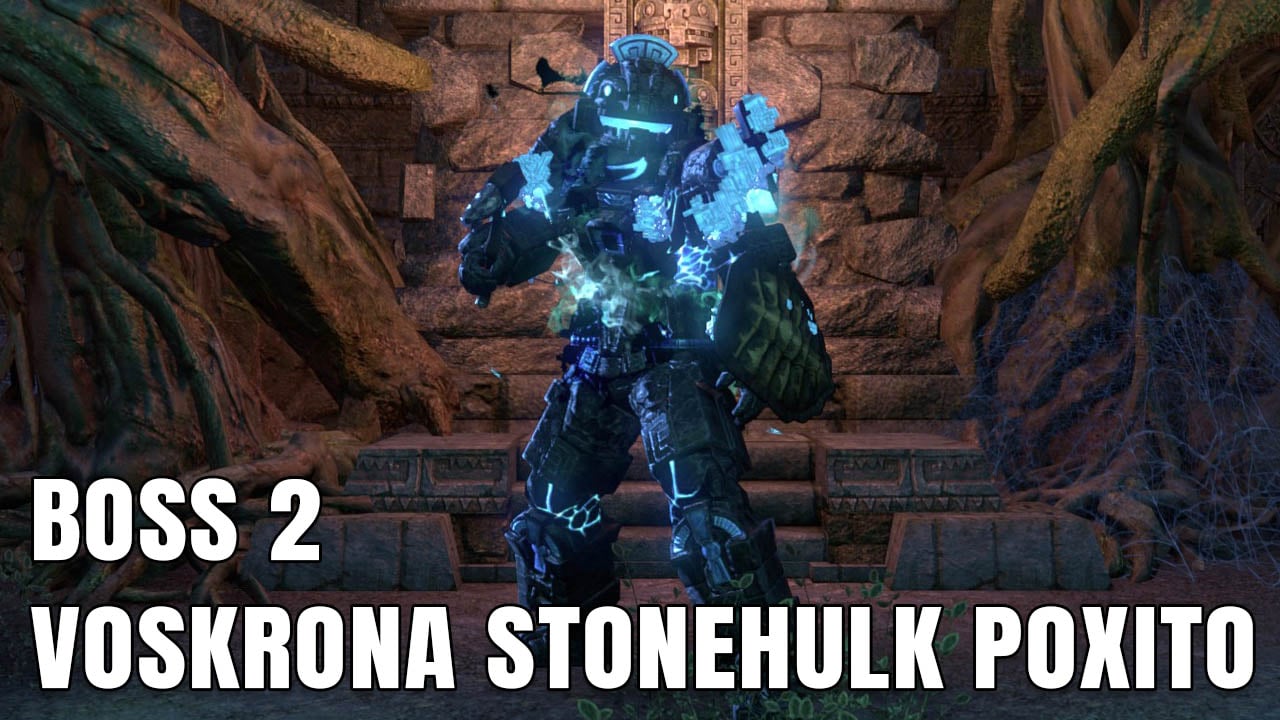
The second boss, Voskrona Stonehulk Poxito, is a complex, multi-phase fight that requires precise add management and an awareness of environmental mechanics.
Voskrona Stonehulk Poxito: Core Mechanics & Flow
The boss disappears several times during the fight by possessing statues and becoming a statue itself. During this phase the Death Essence in the middle of the room will pulsate with damage and create Sentinel Tether connecting adds to the middle by a damaging line. The Pulsating Ring damage increases over time.
Since the statues create an invulnerability Fatal Pool when they are defeated, the best tactic is to keep moving while killing the adds. This minimizes the invulnerability time for the adds. Once the adds are killed, the boss will come back.
In the Execute phase (around 30% boss health), all mechanics will happen at once while the boss is active. The Death Essence pulsates, the adds are active and have a Sentinel Tether to the middle. If you have enough damage, you can burn the boss, but you then have to position yourself in a way that your skills do not kill the adds, making the boss invulnerable.
WIP
Common Mistakes & How to Avoid Them
WIP
All of Voskrona Stonehulk Poxitos Abilities listed and how to deal with them
We’ve compiled this list of Voskrona Stonehulk Poxito’s abilities so you can see what killed you and possibly learn how to prevent it from happening again.
| Voskrona Stonehulk Poxito Abilities | Ability Descriptions and how to deal with them |
|---|---|
| Fatal Pool |
An invulnerability AoE circle that appears on the ground when the Voskrona Guardian add dies. Do not stack the adds with the boss, instead |
| Ancient Blaze | A cone-type Dragonknight flame breath towards the tank for 6 seconds. Tank should block, other players should move away. |
| Dragonknight Standard | A large, damaging AoE that applies a healing debuff if you stand in it. The boss nor the group should not stand inside it. |
| Dark Talons | Talons around your lower body and roots you in place. |
| Low Slash |
Heavy Attack. Block. |
| Vivacious Strike | Light Attack. Block. |
| Spirited Strike |
Light Attack. Block. |
| Possessing | The boss activates a Voskrona Guardian or Flamerock statue. |
| Death Essence |
Voskrona Stonehulk Poxito Summons Death to the middle of the area which creates a Sentinel Tether from the central skull to an add.
|
Voskrona Stonehulk Poxitos Adds
The Voskrona statue adds in this fight can cause more issues to your group than the boss itself as they do not fully die. The adds are statues that get activated by Voskrona Stonehulk Poxitos Possessing ability and once defeated, they deactivate and create a Fatal Pool under them. Fatal Pool makes other adds and the boss invulnerable and does damage to players if they stand in it. You should always try to kill the adds with some precision
| Voskrona Stonehulk Poxito Adds | Ability Descriptions and how to deal with them |
|---|---|
| Voskrona Guardian |
|
| Voskrona Flamerock |
|
Boss 3: Talen-Lah (Endboss)
Talen-Lah is the final boss of Naj-Caldeesh.
Talen-Lah: Core Mechanics & Flow
At the start of the fight, Bar-Sakka will spin at the edges of the arena, leaving behind AOE’s so make sure to not stand at the edges. Bar-Sakka will keep doing his own thing while you fight with Talen-Lah, but when you fight Bar-Sakka, Talen-Lah will leave the arena.
WIP
Common Mistakes & How to Avoid Them
WIP
All of Talen-Lah and Bar-Sakka Abilities listed and how to deal with them
We’ve compiled this list of Talen-Lah and Bar-Sakkas abilities.
| Bar-Sakka (beast) Abilities | Ability Descriptions and how to deal with them |
|---|---|
| Vile Maw | Heavy attack that applies a heavy hitting Vile Maw bleed dot. Block and purge. |
| Focused Smash | A heavy attack slam which applies heavy disease Bonerot DoT and also applies the healing absorption Trauma effect to the tank. At the same time it creates Seeping Viscera under all players that drops on the ground and stays there. DD’s should drop the Seeping Viscera on the edges and quickly move away from it. |
| Boulder Roll |
Boss summons Boulders that bounce from the walls and split into two if they hit a player. He can cast these from behind the group, so be aware of your surroundings and avoid these when possible. |
| Heinous Swipe |
Light attack. Block. |
| Vortex |
Boss chooses a player, casts Vortex and starts walking in that direction, while creating small Vortex pools that originate from himself moving outwards. It’s best to walk behind him avoiding/dodging the pools. Talen-Lah ignores the tank while walking. |
| Fetid Slam |
A ground slam that creates that spawn Skeletal Stalker adds. Cleave these adds, they don’t have a lot of health. |
All of Talen-Lah Abilities listed and how to deal with them
| Talen-Lah (mage) Abilities | Ability Descriptions and how to deal with them |
|---|---|
| Gravedirt Getaway | |
| Necrotic Spear | |
| Spinning Vos-Rus |
|
| Thump | |
| Summon Executioner |
Talen-Lah Adds
| Talen-Lah Adds | Ability Descriptions and how to deal with them |
|---|---|
| Skeletal Archer |
|
| Skeletal Executioner |
|
| Skeletal Ravager | |
| Skeletal Warden |
|
ESO Naj-Caldeesh Vossa-Saxtl Challenge: How to Initiate & Complete

This is an optional content mini-game tied to several achievements, including Temple Hero, Mining Tunes, Rhythmic Genius, and Jamming Session. To complete these, you must play the vossa-saxtl in specific locations: the Hidden Entrance, the Ritual Quarters, and the Keystone Chamber. The challenge requires everyone to step on a pressure plate at the correct time.
- Temple Hero: Complete optional content in Naj-Caldeesh by playing songs on the vossa-saxtl wherever they’re found.
- Mining Tunes: Complete optional content in both Naj-Caldeesh and Black Gem Foundry.
- Rhythmic Genius: As a team, beat the challenge songs on the vossa-saxtl while only executing perfect stomps in Naj-Caldeesh.
- Jamming Session: As a team, complete all challenge songs for the vossa-saxtl in a single location during the same run through Naj-Caldeesh.
How to Complete the Vossa-Saxtl Puzzle

Once activated, the Vossa-Saxtl mini-game will begin. The core mechanic involves precise timing:
- The Glowing Ball: A glowing ball will fly from the Vossa-Saxtl instrument towards the instrument
- Press ‘E’ (Activate/Interact): Your goal is to press your ‘E’ key just as the glowing ball reaches its target in front of you.
Vossa-Saxtl Challenge Tips
While the puzzle is designed for timing, we discovered an almost “unfailable” strategy for the Vossa-Saxtl challenge: Instead of precise timing, simply spamming the ‘E’ key repeatedly throughout the challenge will registers the “hit” even if you don’t time it at all.
Vossa-Saxtl Locations on map
-

- Ritual Quarters location on map

-
- Keystone Chamber location on map

-
- Hidden Entrance location on map

Your group must locate and activate the ancient Argonian instruments at three locations within Naj-Caldeesh Dungeon:
- Playing the vossa-saxtl in the Hidden Entrance: Two players need to stand on the pressure plates to open the Hidden Entrance.
- Playing the vossa-saxtl in the Ritual Quarters: You can just walk in through the roots.
- Playing the vossa-saxtl in the Keystone Chamber: On this one two players need to stand on the pressure plates again to open the way to the Keystone Chamber.
Related Topics: