

Welcome to the ESO Sunspire Guide. The Sunspire Trial is located in the Elsweyr Zone and can be played in normal and veteran mode. I will walk you through with this guide and explain all the mechanics in detail. The Sunspire Trial has three bosses and each boss has its individual hardmode! The Sunspire trial is also often referred to as SS.
Difficulty: The veteran mode of the ESO Sunspire trial is slightly easier than veteran Maw of Lorkhaj without hardmode. The difficulty really spikes once you activate the hardmodes for each boss. To be able to activate the hardmode on the last boss you must have fought the other two bosses with hardmode.
Table of Contents
- Loot & Rewards
- Quick Tips
- Group Setup
- Trash Fights
- Boss 1 Lokkestiiz
- Boss 2 Yolnahkriin
- Boss 3 Nahviintaas – Gold Dragon
- Gameplay
Loot & Rewards – ESO Sunspire Guide
There are several sets and achievements that you can complete in this trial.
New Sets in Sunspire
In the ESO Sunspire trial you can find a perfected and an imperfected version of each set.
- Perfected Tooth of Lokkestiiz & Tooth of Lokkestiiz
- Perfected False God’s Devotion & False God’s Devotion
- Perfected Claw of Yolnahkriin & Claw of Yolnahkriin
- Perfected Eye of Nahviintaas & Eye of Nahviintaas
Rewards in Sunspire
- New Title
- Sunspire Ascendant – obtained by completing the Sunpsire Completed achievement.
- Sunspire Saint – obtained by completing the Sunspire Conqueror achievement.
- Extinguisher of Flames – obtained by completing the Sunspire Vanquisher achievement.
- Hand of Alkosh – obtained by completing the Sunspire Dragonbreak achievement.
- Godslayer – obtained by completing the Godslayer Sunspire achievement.
- New Skin
- Sunspire Ice-Fire – obtained by completing the Sunspire Conqueror achievement.
- New Mount
- Sunspire Champion Senche-Lion – obtained by completing the Sunspire Dragonbreak achievement.
Quick Tips for Sunspire
Here are a few quick tips that you can use in the ESO Sunspire trial. These should help you to survive.
- Trash Packs: They really hurt, I do recommend using ranged setups on trashpacks to avoid deaths. If you are a melee setup, make sure to use Deadly Cloak on a stamina spec or Harness Magicka as a magicka spec.
- Stack & Burn: There are a lot of trash packs, I recommend stacking them as much as possible and kill them with AoE damage.
- Energy Orbs & Shards: Make sure to use Energy Orb or Luminous Shards, this will ensure that your people will have better sustain.
Group Setup
Tank Tips – ESO Sunspire Guide
Like always, I recommend using Ebon Armory. Ebon Armory is nice because it boosts the health of your group members, thus you can take more overall damage. Dragonknight as a main tank is a good choice because of skills like Magma Shell that enable godmode for a few seconds in tough situations and just in general they still have better resource management and are tankier then other classes.
If you are new to the trial I also recommend using a higher health setup to avoid deaths in the first tries, you can use Plague Doctor for that.
Roar of Alkosh has a lot of hitbox issue in this trial, so far it is better to play without it and replace it with another set like Claw of Yolnahkriin, Powerful Assault etc.
Both a Warden or a Necromancer Off-Tank are great choices for the group. The Warden can give you Minor Toughness via the Maturation passive to increase the groups health by 10% and the Necromancer is a beast in Ultimate regeneration due to the Necrotic Potency skill and also has Minor Protection and an extra Synergy to offer from Agony Totem.
Healer Tips – ESO Sunspire Guide
As a healer also make sure to provide Energy Orb or Luminous Shards to boost the overall sustain of your group members. We found that a combination of Vestments of Olorime, Hollowfang Thirst and a Monster Set were nice for the trial. Olorime is a no brainer, as it gives your group the Major Courage buff, which means a lot of overall weapon and spell damage with an uptime of almost 100%. Sanctuary increases your overall healing, which is always nice to have.
Sentinel of Rkugamz is always a good choice to boost your groups overall sustain.
Mender’s Ward is very helpful on Lokkestiiz Hardmode for when you need to heal the frozen players back up to full health.
Stamina Damage Dealer Tips – ESO Sunspire Guide
I highly recommend using a ranged damage setup with Arrow Spray for most of the trash packs. it is so easy to get oneshot here and Arrow Spray does a lot of damage and you are save from any sort of melee damage. During all the boss encounters I recommend using Deadly Cloak to mitigate a lot of the AoE damage from the bosses.
Magicka Damage Dealer Tips – ESO Sunspire Guide
Make sure to have Harness Magicka throughout the whole trial, this helps bolstering incoming damage. False God’s Devotion is a very good set for all magicka setups, it gives you a huge sustain boost due to the 8% cost reduction and the extra magicka when you kill a monster.
Trash Fights in Sunspire
The trashfights in this Trial are tough, there are a lot of situations where you can easily get oneshot because you get hit by so many AoE fields at the same time. That is why I recommend using a ranged setup on trashfights to avoid instant deaths. The Steroidkitties leap towards the group and drop big shockwaves that go over the whole area, if you get hit by two of them you are dead. Same goes for pretty much every other monster.
I recommend stacking the trashpacks on the mages that spawn, that way you can pull everything together and kill it with AoE damage.
It is easier to showcase this in a video, you can check out the Godslayer run in the Gameplay section to see how we placed the trashpacks.
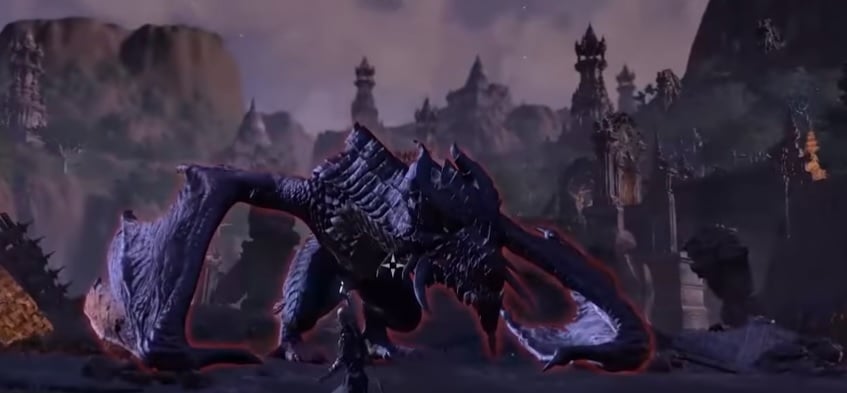
Boss 1 Lokkestiiz – Sunspire Trial
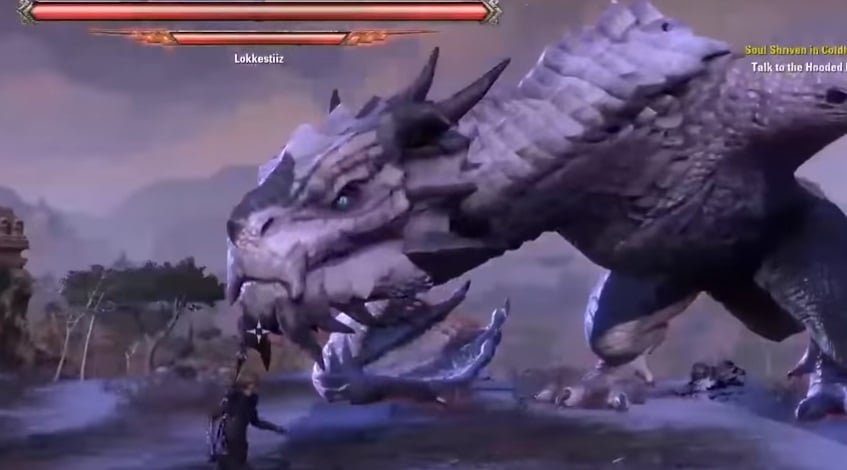
This is the ice dragon that you have to fight against. It is best when the group stacks in front of him, but be careful if you are too close you will take frost damage. If you stand too far on the side of him he will swipe his wings into your face and deal a lot of damage.
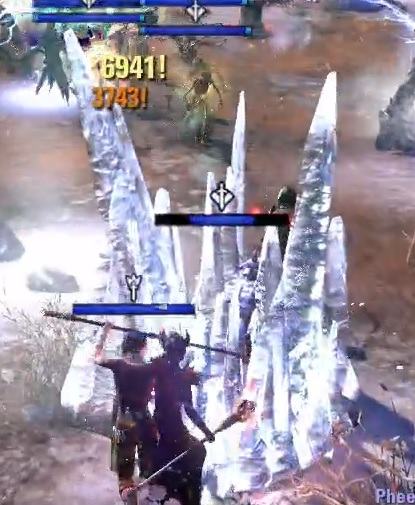
The most important mechanic happens when he shouts into the air and one ice circle will drop somewhere towards the edge of the back in the arena. One player must run into the ice circle, the player will get stunned and the healers need to heal the player back up to maximum health to remove the frozen debuff. If it takes too long the player will explode and create a huge shockwave that will kill anyone standing too close.
The Frost Atronachs are not meant to be killed with damage abilities. You have to attack the Storm Atronach and kill them, once they are dead they will leave a huge shock circle on the ground. The tanks have to move the Frost Atronachs into the shock circle for them to die.
The boss will also do a lazer beam from time to time that you have to block, if not blocked you will die.
The boss will go up in the air at 80%, 50%, 20%. The laser beam phases are always different
- 80% You have time to kill enemy monsters, laser beam comes later
- 50% Laser beam will come instantly once the boss is up in the air, make sure to get ready to block soon
- 20% You have time to kill enemy monsters, laser beam comes later
Lokkestiiz Hardmode
There are a few additional mechanics to be aware of in this fight.
- Instead of one you now have two ice circles at the edge of the back where two players need to get frozen and the healers have to heal them back up, the heal debuff is also stronger now.
- Note: Second player can take the frost circle 3 seconds later, so the healer has time to heal the first one back up first.
- Note: Mender’s Ward will help a lot to boost your healing on that target.
- When you enter the ice form, you loose 70% of your health, so make sure you have full health going in.
- Defile is applied when you are frozen.
- You will get DoT damage while you are frozen, Healer should use Healing Ward to shield the damage.
- If you are not healed up to full health after 8 seconds, you will explode and die.
- Flame Atronachs will now also spawn throughout the fight, one of your tanks needs to pull them into the group.
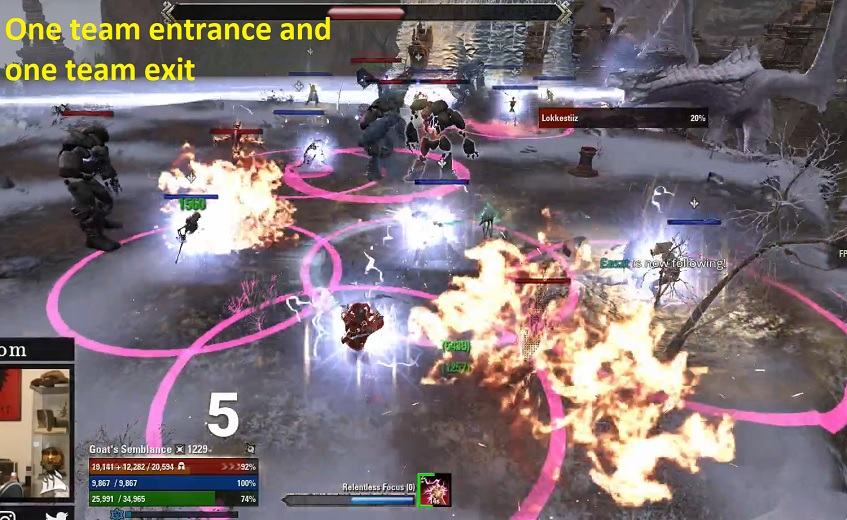
- When the boss does the laser beam an AoE circle will appear below every character that will deal a lot of pulse damage. You need to make sure to set up positioning for this and out heal it, even possibly use a Barrier because it hits so hard (check picture)
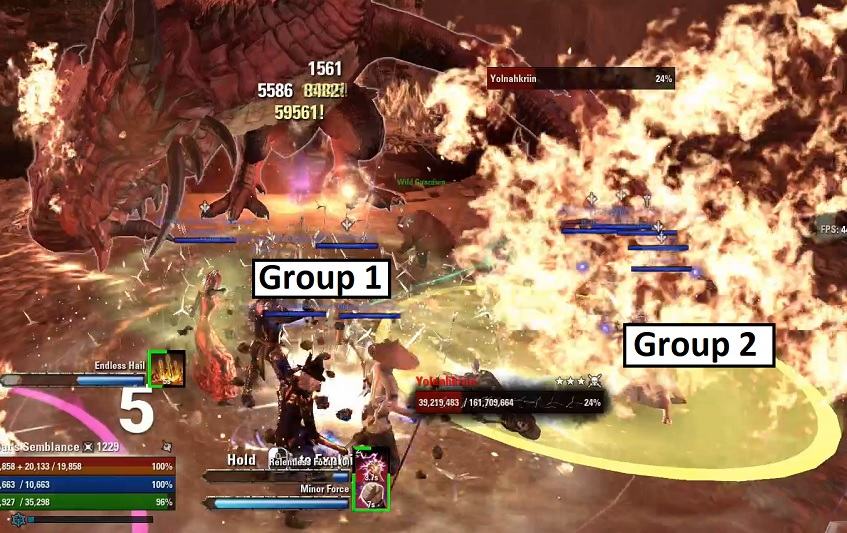
Boss 2 Yolnahkriin – Sunspire Trial
This is the second boss of the trial, at 75%, 50% and 25% the boss will go up and fly around. If he flies away you want to make sure to go to the outer ring of the arena, because everything else in the middle will get insta killed once he spits fire onto the ground. Lava will also appear from time to time, if you take too long to get to the next phase the lava will cover the whole arena and you will die, so you have to push the boss into the next phase as fast as possible.
The main tank wants to stand slightly to the left so when the boss does the fire breath, the group takes no damage, the rest of the group can stand in front of him in two separate groups. There will be fire explosions that go onto one of the two groups. Once the fire explosion happened the people will get a debuff, if they get hit by another fire explosion again they will die. That will not happen if you always group up with the same players in your team, so you have to really make sure to stay in the right group. The fire explosion also happens fast after the boss lands, so you have to make sure not to waste time after the fly phase is over.
Flame Atronachs will also spawn that you have to kill.
The off tank has to tank the big Iron Servants at the edge, they are not meant to be killed till the dragon fly phase happens. After the boss spit fire onto the ground, they will receive a debuff and you can kill them fairly easy because they take a lot of increased damage then for a short duration.
Yolnahkriin Hardmode
Flame Atronachs become enraged after a short duration. They start glowing blueish like the Planar Inhibitor in White Gold Tower. If you get close to them they will insta kill you. So make sure to kill the Flame Atronachs before they enrage.
When you stand in your group and the fire explosions happen, make sure to block the last explosion as it can one shot players easily.
Boss 3 Nahviintaas, the Gold Dragon – Sunspire Trial
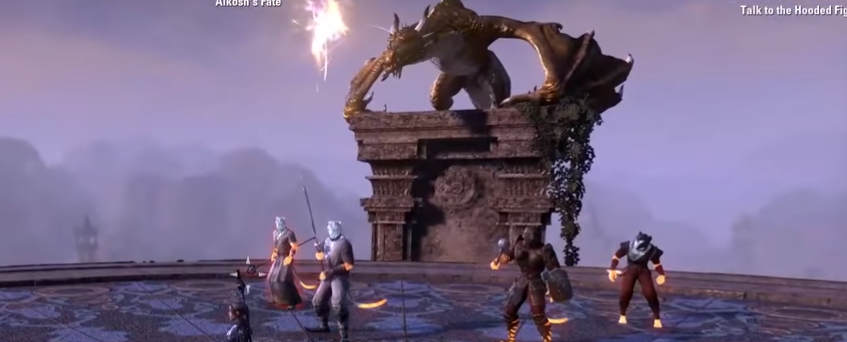
You will fight Nahviintaas on a big platform, once you engage the boss flames will light up all around the arena, if you touch the flames you will instantly die. First thing you want to do is focus on the monsters while the Dragon is in the air.
Phase 1
The fight starts off with the monsters on the ground, stack all of them on the mage to kill them as fast as possible. While dealing with the monsters, the boss will fly around spiting fire around, make sure to avoid that otherwise you will instantly die. Once the monsters are dead fire explosions will start happening, hide behind one of the statues to avoid death. Be careful, do not hide behind the statue too soon, otherwise you will get flame damage behind the statue.
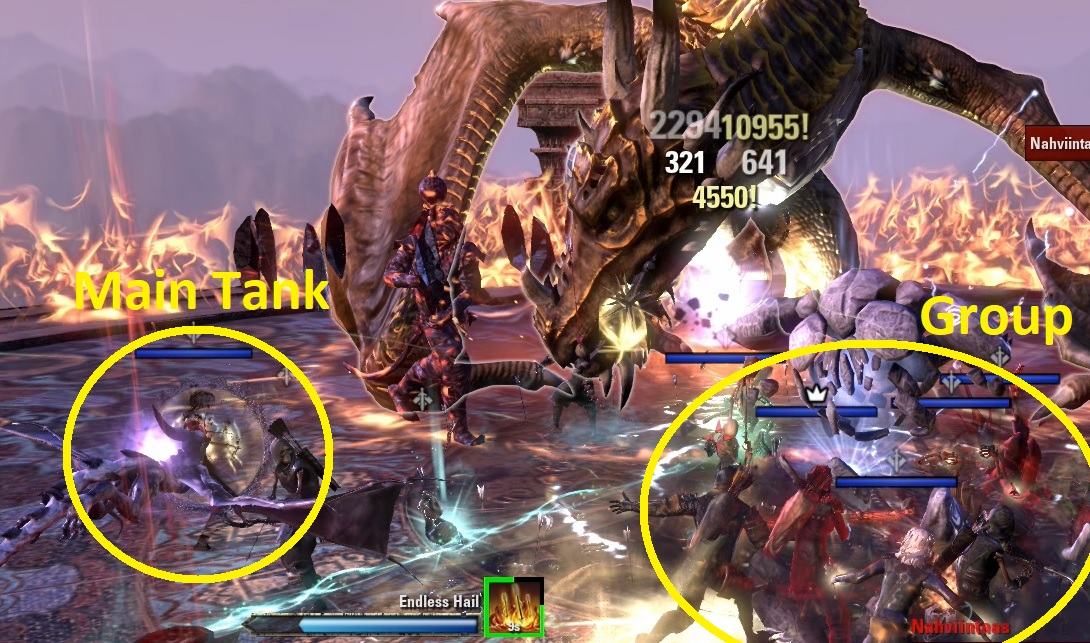
Phase 2
The boss will land and the main tank has to make sure to taunt him. The main tank can stay more towards the left side so the boss looks to the left, that way the fire spit will only hit the main tank but not the group. Do not stand too far on the left though, because if the tank stays too far on the left, the boss will attack with his wings too. The boss will also lift his head up to the side to swing it around by 180 degree, make sure to block or out range that head attack. The boss will do a 180 degree fire breath from time to time, you need to block the fire breath to survive.
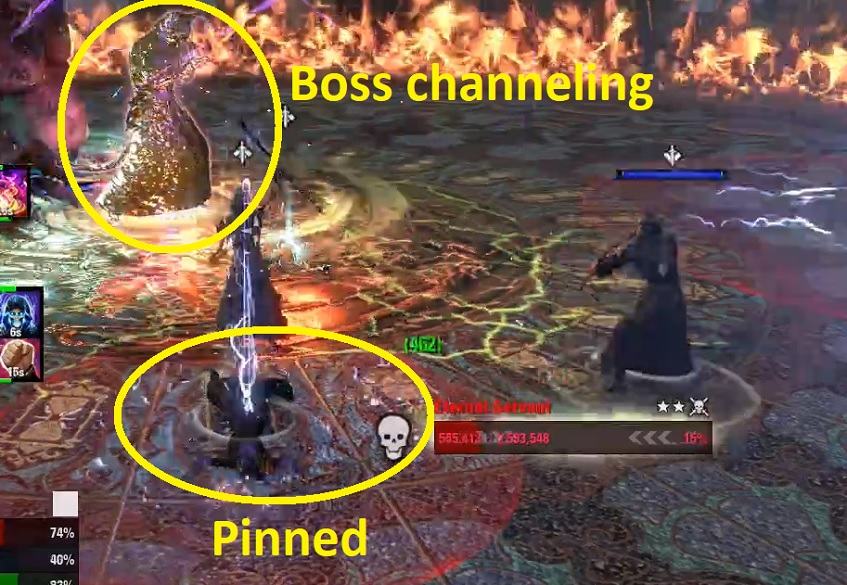
After a while the boss will shout something into the air and 3 portals will appear, you have to send 3 damage dealers down because it is a dps race. You need to make sure that your damage dealers also have some heals equipped otherwise they will die. The mini boss downstairs has similar attacks to Molag Kena from White Gold Tower. You have to avoid a huge shock AoE field that also negates all your magic abilities and the mini boss will also constantly throw small AoE circles to all players downstairs, make sure to keep your movement up to avoid these. From time to time he will also channel a big attack, you can interrupt this. Be careful though, if you try to interrupt too soon, you will get knocked back, so you have to wait for 3 seconds and then interrupt. He will also pin players to the ground, you can unpin your friends with the synergy button.
The portals where you have to go down will appear three times over the whole fight and it can be that you still have people downstairs when you push the boss into the next phase upstairs. If you push the boss below a certain percentage, he will fly away and spawn adds again:
- 80%
- 60%
- 40%
Be aware that in every phase where the boss spawns adds, you will have to fight more monsters.
Phase 3
After 40% you have to not go down anymore, now there will be a new mechanic. The boss will shout a new spell and your screen becomes white/goldish which applies a damage over time effect on you. Make sure to out heal this enemy attack. The next thing you have to be aware of, the boss will target a few players and they will get a red circle below them. The players with the red circle have to make sure to run to the edge of the arena, after a few seconds the circle will blow up and place a fire AoE on the ground. Make sure you do not place that fire AoE in the middle of the group, if the fire circle is at the edge it will not really bother anyone, but if it is in the middle it will be annoying to dealt with. The fire circles will not go away anymore once they are placed, so this is the execute dps race, if you are too slow there will be no room anymore that is not full of fire.
Flame Atronachs keep spawning in the execute, the tank should pull them in and they will die from AoE damage.
- Tip: When people stand in the time bubble upstairs that shows up from time to time, then the people downstairs will get a small green field that they can pick up to increase their damage for a short duration!
Nahviintaas Hardmode
The Hardmode has a few additional mechanics.
- Defile
- The boss will cast a green looking spell that applies a defile to your group, making your heals less effective.
- Vigil Statue
- Your off tank has to take this add close to the right side of the boss and deal with it. The statue has a huge smash attack that hurts, make sure to avoid it. The Vigil Statue can not always be damaged, you need to wait till he starts casting and throws rock at your group, that is the point where you actually can damage him. If he casts the rocks too long your group will take more and more damage, therefore after about 6 rock waves you should interrupt him and focus on the boss again.
- Downstairs 90 seconds
- The mini boss downstairs has now 11,3 million health and you have 90 seconds to kill him before he pins all 3 people (like in Sanctum with Ozara boss fight)
- We had specialized setups downstairs in the Elsweyr Chaptrer, 1 Nightblade with War Machine, 1 Warden with Morag Tong and 1 Dragonknight with Scavenging Demise. Sustain and self healing will also be harder downstairs as you do not have any support, so each DD must pull its own weight!


Gameplay for the Sunspire Trial
Full Worlds First Godslayer run Stam Necro PoV
Here you can see the worlds first Godslayer run that was live streamed on the AlcastHQ twitch channel.
Full Godslayer run HEALER PoV
This video showcases the healer PoV during the Godslayer run.
Magicka Group Godslayer Run
Here is another full run that was done with a full magicka based group.