Welcome to the ultimate BG3 Gauntlet of Shar and Shadowfell Guide. In this guide, you’ll find a full walkthrough covering every trial, puzzle, and secret, along with all four Umbral Gem locations and how to reach the Shadowfell.
The Gauntlet of Shar holds many powerful unique items and is part of Shadowheart’s personal quest in BG3.
Table of Contents:
- How to Enter the Gauntlet of Shar
- BG3 Gauntlet of Shar Map
- Gauntlet of Shar Walkthrough
- Navigating the Shadowfell
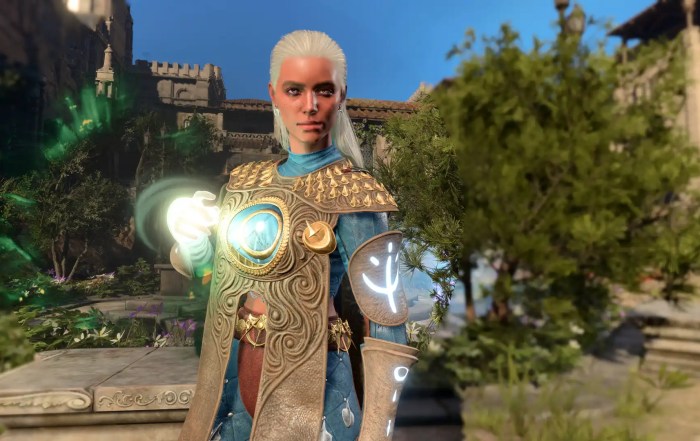
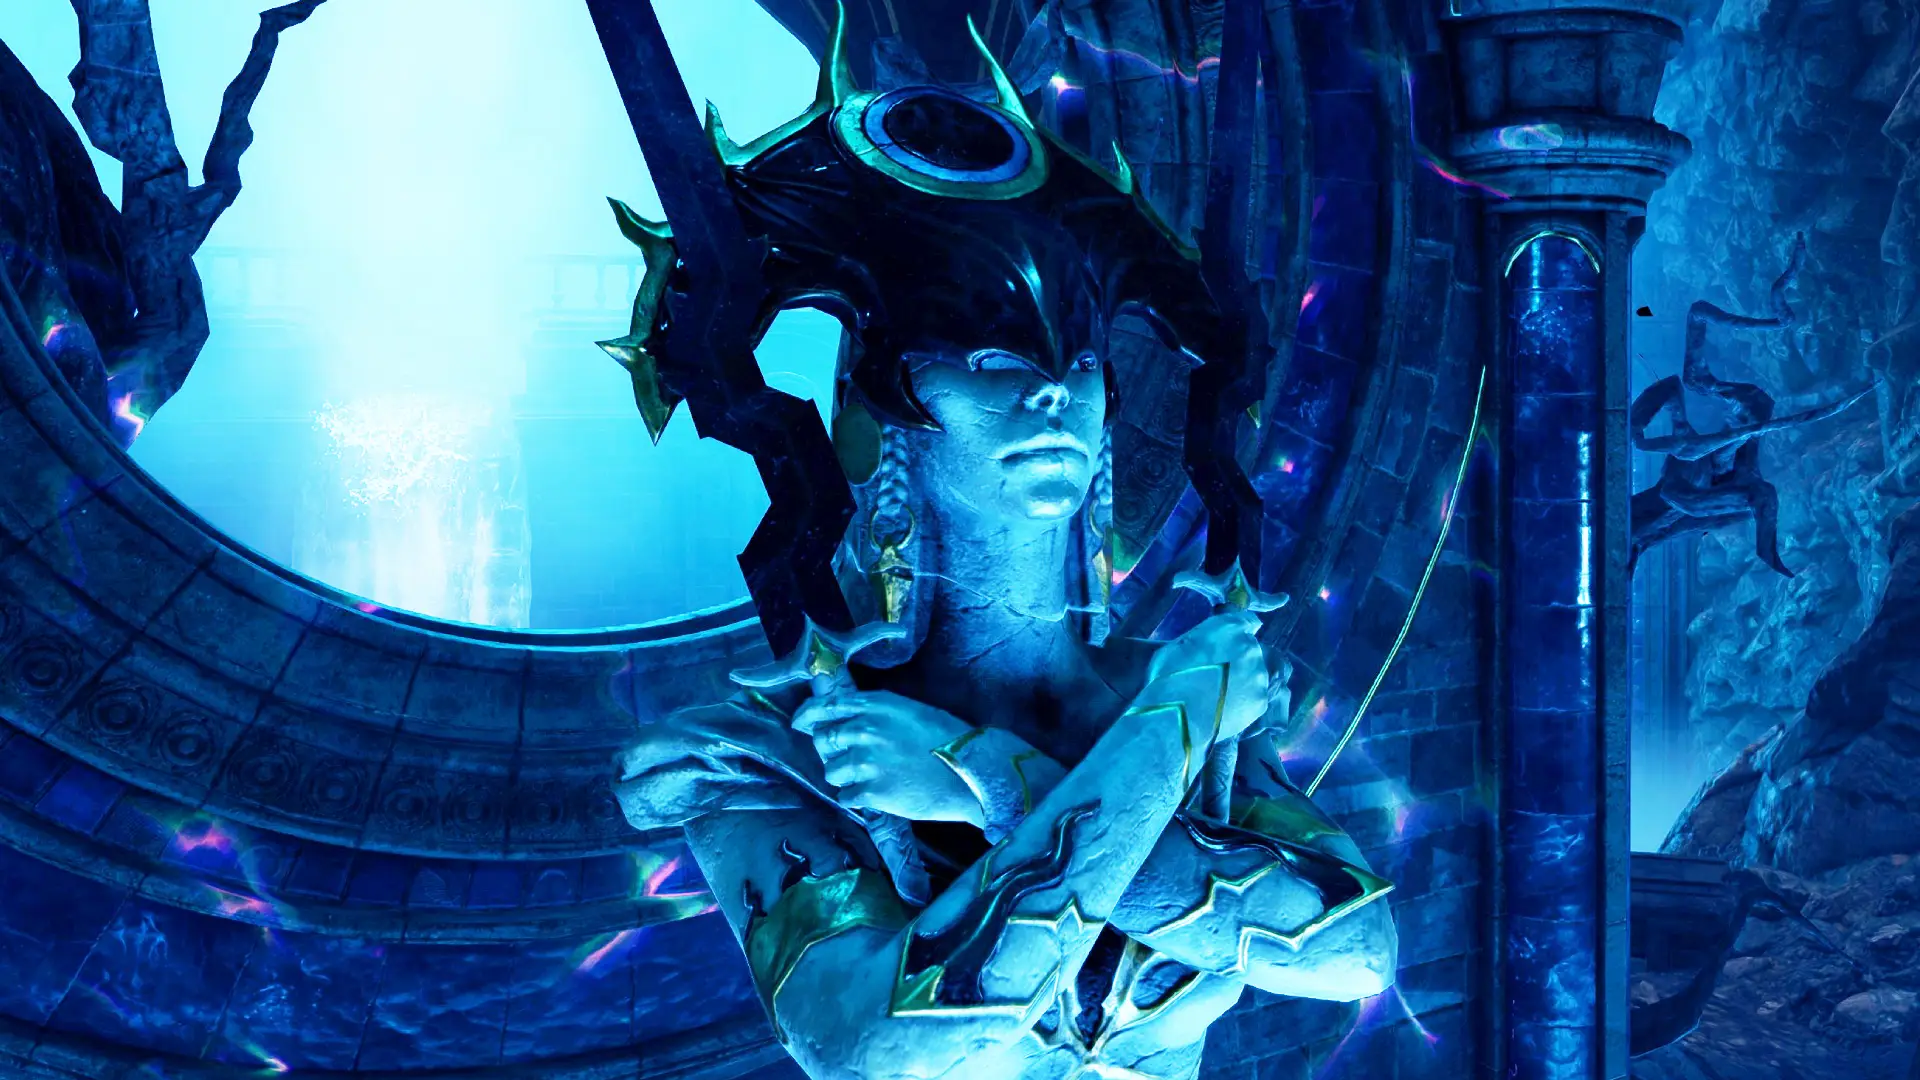
![]() Shadowheart: As you are likely to bring Shadowheart with you because of her personal quest, make sure to read our optimized Shadowheart Build for BG3.
Shadowheart: As you are likely to bring Shadowheart with you because of her personal quest, make sure to read our optimized Shadowheart Build for BG3.
How to Enter the Gauntlet of Shar in BG3
The Gauntlet of Shar is a large underground area found in Act II. It is accessed via the Reithwin Mausoleum.
You don’t have to go out of your way to find it because it’s an essential part of Act II’s story. Progressing through the Act II storyline will eventually give you a quest that leads you straight to the Gauntlet of Shar.
BG3 Gauntlet of Shar Map

This map shows the Gauntlet of Shar, with the most important locations mentioned in the guide highlighted. Boss encounters are orange, Shar’s trials are purple and other encounter types are blue.
BG3 Gauntlet of Shar Walkthrough
In this section, we will explain how to pass through the Gauntlet of Shar, including how to solve each puzzle, where to find all unique items, and the different story options and their immediate consequences.
This contains spoilers, including some story spoilers.
Reithwin Mausoleum
Not technically a part of the Gauntlet of Shar, but you have to navigate through it to enter the Gauntlet.

There is some other minor loot scattered around the room. When you’re finished, enter the room with three paintings on the walls.
You will see lots of traps here, but they won’t do anything if you just step on them – they’ll only activate if you fail the puzzle related to the three paintings.
In the next room, there are several skeletons you can loot, and a dirt mound you can dig up if someone in your party finds it. Press the glowing purple button on the disc to proceed into the Gauntlet of Shar itself.
Entering the Gauntlet of Shar
Once inside the Gauntlet, you can head up the broken stairs to your left, as you’ll find some loot at the top.
Then go down the long corridor and enter the room at the end.
You will find a statue of Shar in the centre of the room, with several purple lanterns hanging from the ceiling. This is another puzzle that must be solved before we can proceed. It’s best to take only one character to solve the puzzle, because you need to avoid a few traps.
In each corner of the room, there is a small chamber with a coffin and a lever inside. The doorway into each chamber has a pressure plate on the ground. You must either disarm or jump over the plates. Triggering them will spawn a dark cloud that deals ![]() Cold Damage, which is quickly fatal.
Cold Damage, which is quickly fatal.
You will now see purple lines on the floor around the statue. You must walk to the statue without touching any lines, then interact with it to make the room safe and open the way to the next areas.
Before proceeding, go through the door to the right of the statue to find a small area with a bit of extra loot.
Going through the door behind the statue takes you straight to the main area of the Gauntlet of Shar, but the left door involves a detour with a mini boss fight and more loot.
Cloaker Cave
Taking the left path and going up the stairs will lead you to a large, open cave filled with giant mushrooms. Jump across the mushrooms until you reach the climbable rock, and climb down to ground level.
Head west, and you’ll find locked double oak doors, which lead to the main area of the Gauntlet of Shar. Before going in, you can head south to fight a boss called the Cloaker. It will ambush and surprise your party when you get too close, unless someone spots it.
Focus down the main Cloaker, and the copies will also die. This fight is pretty easy, as long as you have one or two melee heavy hitters and a way to counter the ![]() Frighten debuff.
Frighten debuff.
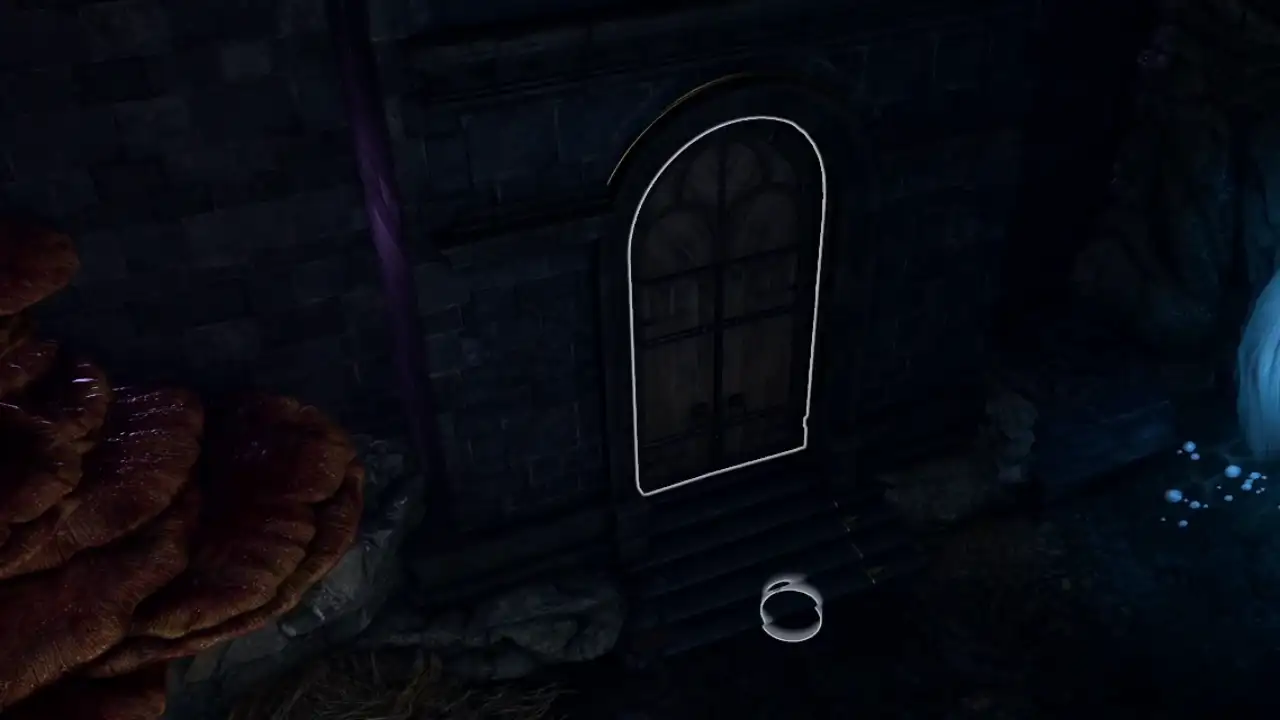
However, the loot from it is very disappointing, so you can skip this fight entirely if you want. Either way, lockpick the doors to get through them, and you’ll find a room with lots of fungal alchemy ingredients and bowls of mushroom soup for your camp supplies. To proceed, pull the lever to unlock the next door.
Finding Balthazar
You will now enter a large square room. When proceeding into the room, you’ll be confronted by skeletons controlled by Balthazar.
After a conversation, the skeletons of Shar’s Dark Justiciars will begin spawning in through portals. You can destroy the portals before they spawn enemies. A large, final portal will eventually appear in the middle of the room. If you don’t destroy it in time, it will spawn a much tougher Crusader skeleton, whom you’ll also have to beat.
After winning the fight, Balthazar will invite you in to speak with him. You can either go along with it and accept his mission, or you can fight him then and there. This will be a hard fight because he has his minions with him. Focusing him down quickly is vital because he has a lot of dangerous spells.
Either way, head back out into the large square room when you’re done.

Entering the Vault
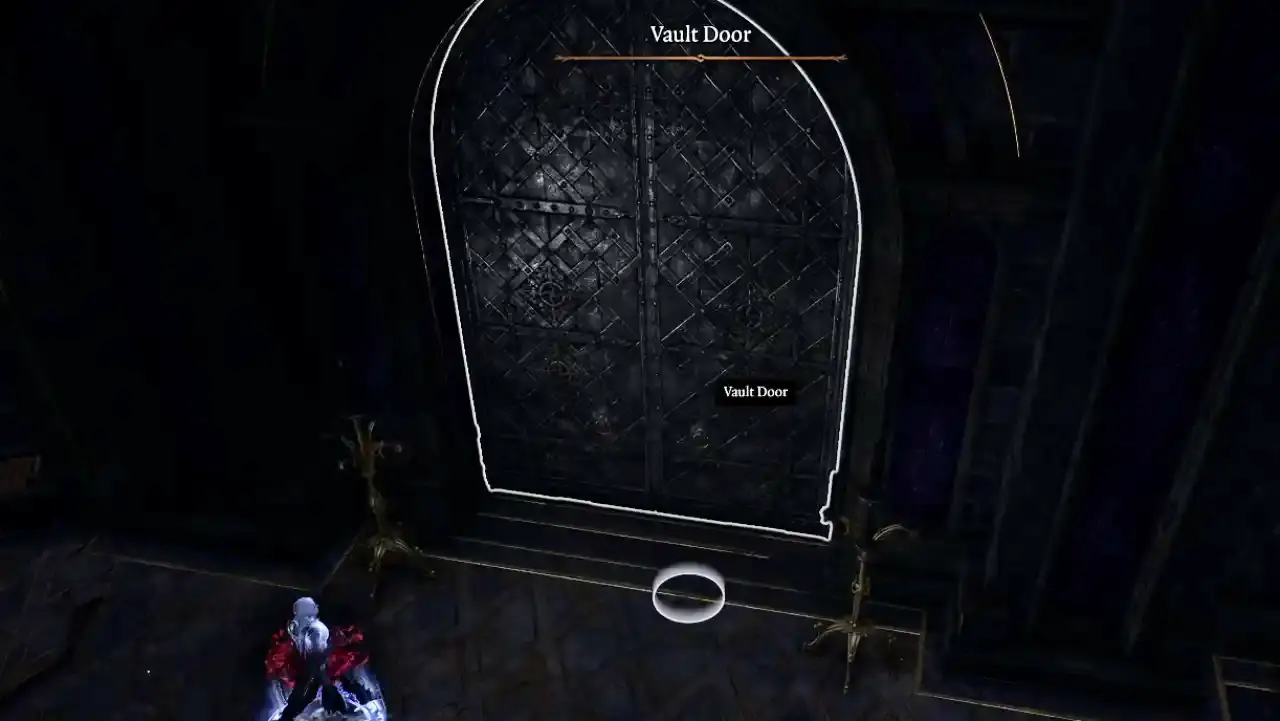
Back in the square room where you fought the Dark Justiciars, on the northern wall there is a door with a DC30 lock.
We definitely want to get into this room because it contains extra loot, including the powerful ![]() Callous Glow Ring.
Callous Glow Ring.
When you’ve looted the vault, head east along the main passage. You can find a chest hidden behind a table, containing the ![]() Least Expected shortbow.
Least Expected shortbow.
Head further east and go down the broken stairs to reach the next part of the Gauntlet.
Dealing with Yurgir
Follow the passage after the broken stairs, and you will reach a large open area with some ruined structures. Here you will find a demon called Yurgir, whom Raphael has tasked you with killing.
This is a pretty tough fight, but you can also persuade Yurgir to do a deal with you instead of attacking. Failing to kill Yurgir will greatly upset Astarion and may cause him to leave your party.
If you are in need of good builds, you can read our BG3 Builds Tier List article to improve your group composition.
If you know in advance that you want to fight Yurgir, you can make it easier for yourself by approaching by jumping across a gap to reach an area that overlooks the room, instead of walking through the archway into his ambush.
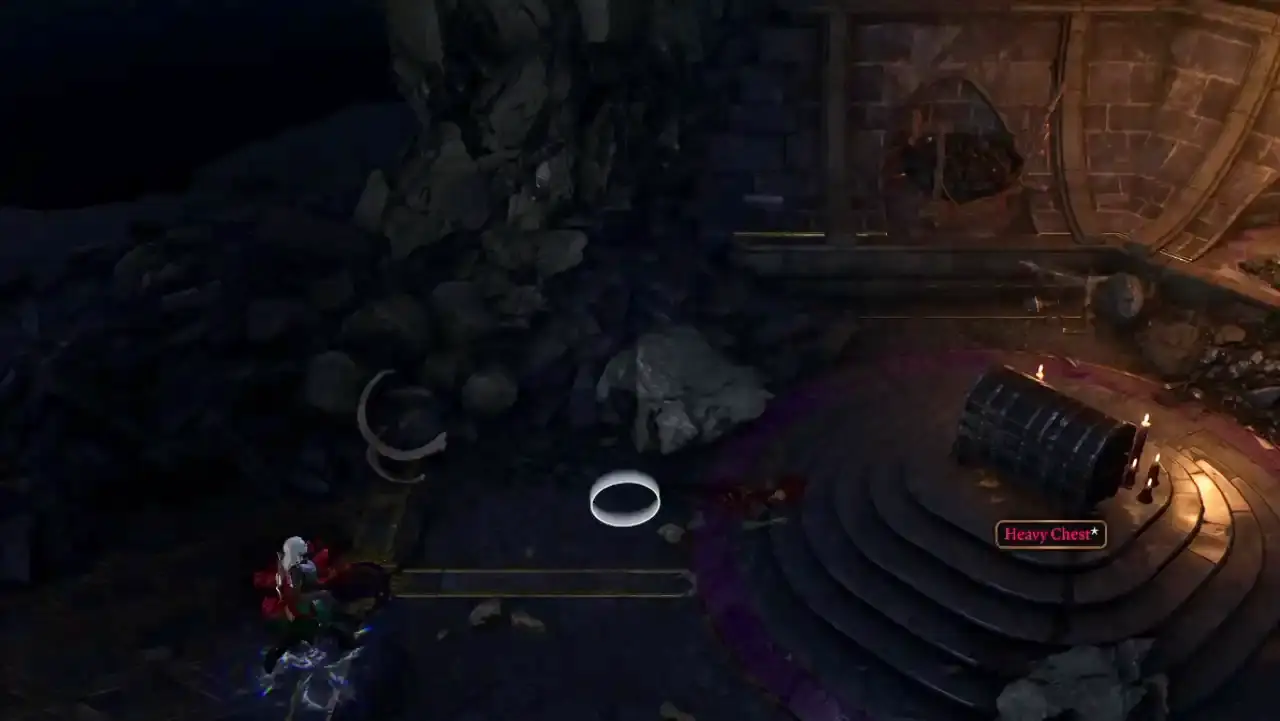
You can also take a third path, going round the back. This is good for picking off the Displacer Beast before any other enemies can join the fight. From this point, your best bet is to stealth your entire party, sneak to Yurgir and kill him before his minions can intervene. There is also a heavy chest here containing the ![]() Boots of Brilliance.
Boots of Brilliance.
When Yurgir is nearly dead, he will drop lots of bombs on the ground. These bombs are very dangerous – throwing them will deal AoE damage. Yurgir’s minions will utilise this and throw the bombs at your party, so you either need to ensure that they are dead before you kill Yurgir, or quickly kill Yurgir away from the minions and run away before they can throw any bombs at you.
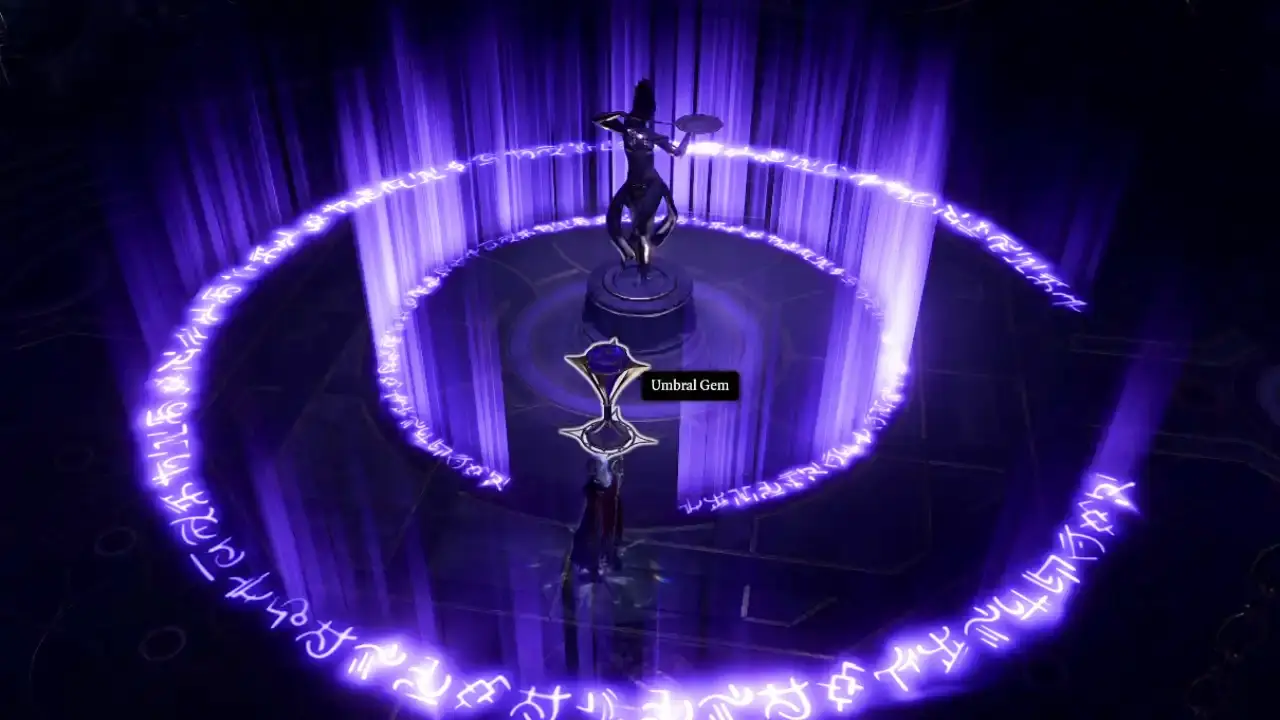
However you decide to deal with Yurgir, be sure to grab the Umbral Gem. You’ll need four of these to complete the Gauntlet of Shar – we’ll be getting the others soon. If you decide to kill Yurgir, you can loot him to find the ![]() Hellfire Hand Crossbow, which is one of the best ranged weapons in the game.
Hellfire Hand Crossbow, which is one of the best ranged weapons in the game.
You can also avoid encountering Yurgir at all by sneaking in and stealing the Umbral Gem.

The Rat King
Head north from Yurgir’s area. Descend into the pit. Halfway down, you can turn to the southeast to find a room. There is a Heavy Chest just inside the room, which contains some gold and a Potion of Animal Speaking. This might come in handy soon if you don’t already have a way to speak with animals.
Explore the rest of this room to find a few more coins and a Gilded Chest that contains 141 Gold and a couple of magical arrows.
Leave the room and continue descending into the pit, climbing down the rocks. When you reach the bottom, you’ll find a ritual circle. Drink the Potion of Animal Speaking before interacting with it, otherwise you’ll miss out on some dialogue.
When the rat spawns and confronts you, you can either make a deal with the rat in exchange for the location of a stash of loot or attack the rat to start a fight.
If you attack the rat, a very large swarm of rats will attack your party in several waves. At first, they will be normal rats, then necrotic rats. The final waves include rats that release toxic clouds that send your party members to sleep.
After defeating all of the rats, Lyrthindor will spawn and must be defeated. You can loot the ![]() Justiciar’s Scimitar and
Justiciar’s Scimitar and ![]() Justiciar’s Greatshield from him.
Justiciar’s Greatshield from him.
Soft-Step Trial
We’ve now completed all of the side content in the Gauntlet of Shar, so we can get back to finding the Umbral Gems. Three of them are found by completing trials.
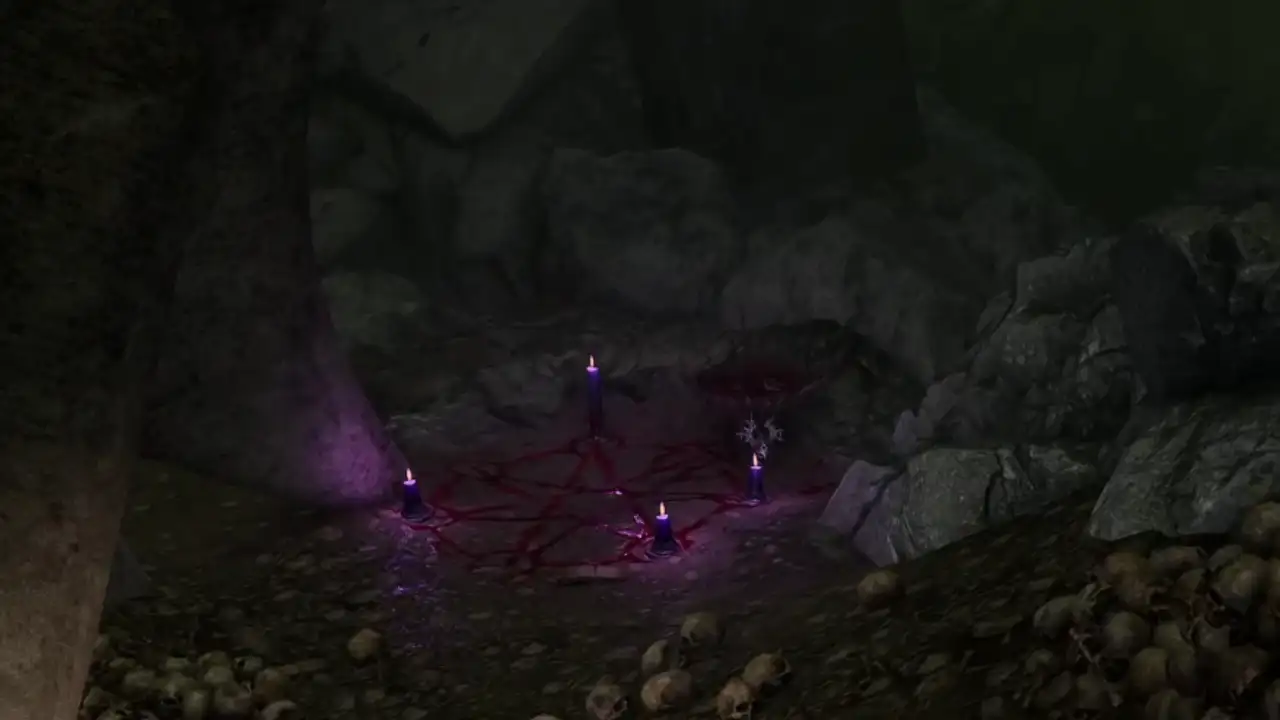
Return to the main corridor (where the fast travel point is) and head down the stairs into the final area we haven’t yet explored. Enter the first doorway on the left. Make a sacrifice to the Shar statue to begin the Soft-Step trial. This trial works best if you take just one party member.
When you’ve got the gem, you can press the purple button to be teleported back to the start of the trial.
Head back out, then continue down the corridor and go through the next door to enter the Self-Same Trial.
Self-Same Trial
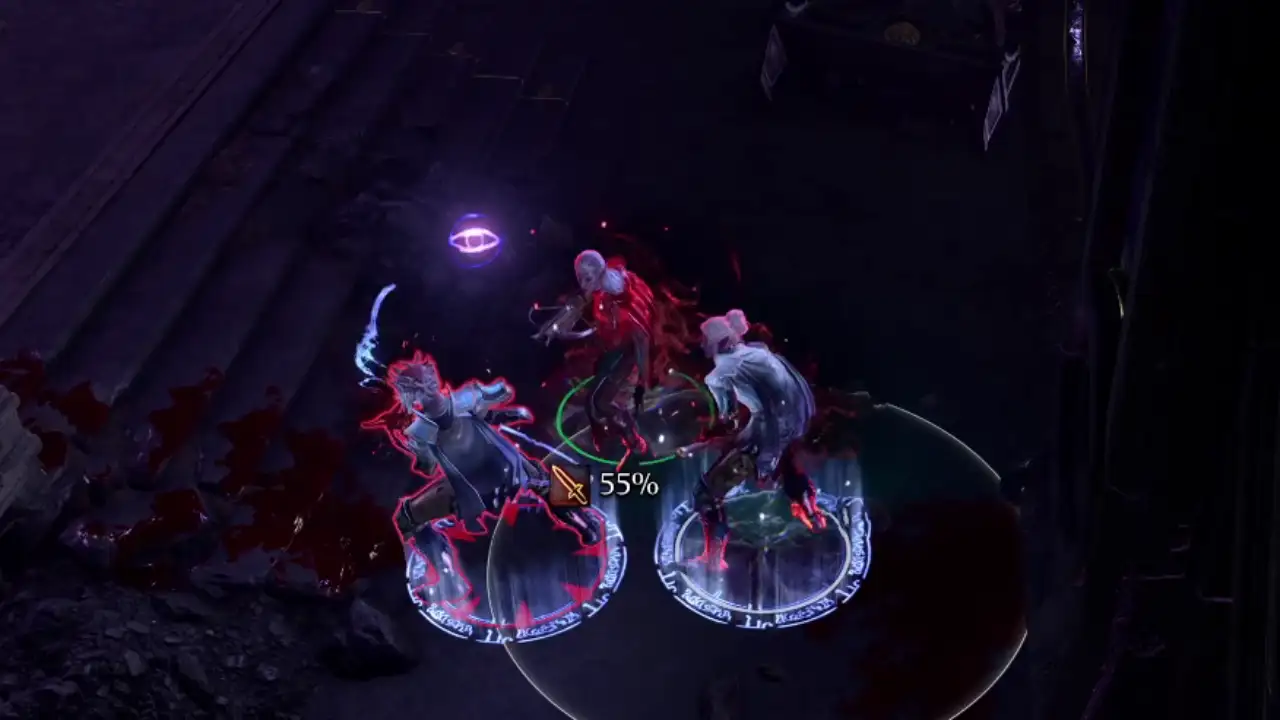
This trial contains a copy of each of your party members. They will have all of your equipment and abilities, making them potentially dangerous foes.
Try to sneak your way into the trial, and hopefully one of your party members will detect the ambush. If so, you can sneak around the back and hit one of the enemies to Surprise them all.
Therefore, the best way to approach this fight is to get the character with the best damage output to kill their shade asap, and then have them help everyone else.
Once you’ve defeated the last shade, they will drop another Umbral Gem. Now we only need one more.
Go back out into the corridor, then downstairs into another corridor. The next door leads to the Faith-Leap Trial.
Faith-Leap Trial
This is the hardest of the three trials for most players.
To complete it, you just need to traverse the maze in front of you, but the problem is that you cannot see any of the paths. To reveal the paths, they must be in darkness, and you must be some distance away from them.
Therefore, you basically have to memorise the path across. You can optionally stand on the platforms shrouded in darkness to take a break and split up the crossing, so it’s easier to remember the path.
To make the final part easier, after jumping to the first platform, position the camera to overlook the final gap. Have a good look at the path. If you’re really struggling, stick some Blu Tack on your screen to mark the path. Then jump to the second platform and walk across the now-invisible platforms to reach the end.
Take the gem, then use the purple button to teleport back to the start.
Shar gives you two chances in this trial. The first two mistakes you make will just teleport you back to the start. But the third time you mess it up, you will get instakilled.
Some sources suggest you can jump across all platforms to bypass the puzzle entirely, but this appears to have been patched.
Silent Library
Enter the next room in the corridor. This is the final encounter we’ll face in the Gauntlet of Shar. Luckily, it’s quite easy compared to many of the previous ones.
The library contains several skeletons wandering around. In the middle of the library is a magical orb that Silences everyone in the library. This prevents you from casting spells. You can destroy the orb from a distance before starting to the fight, which removes the Silence effect.

The skeletons are pretty easy to fight.
In the room, there are lots of trapped bookshelves. You need to disarm them and search until you find a book called Teachings of Loss: The Nightsinger.
Important: You must disarm the bookcases before touching them, or they will spawn a splash of acid that will destroy the books!
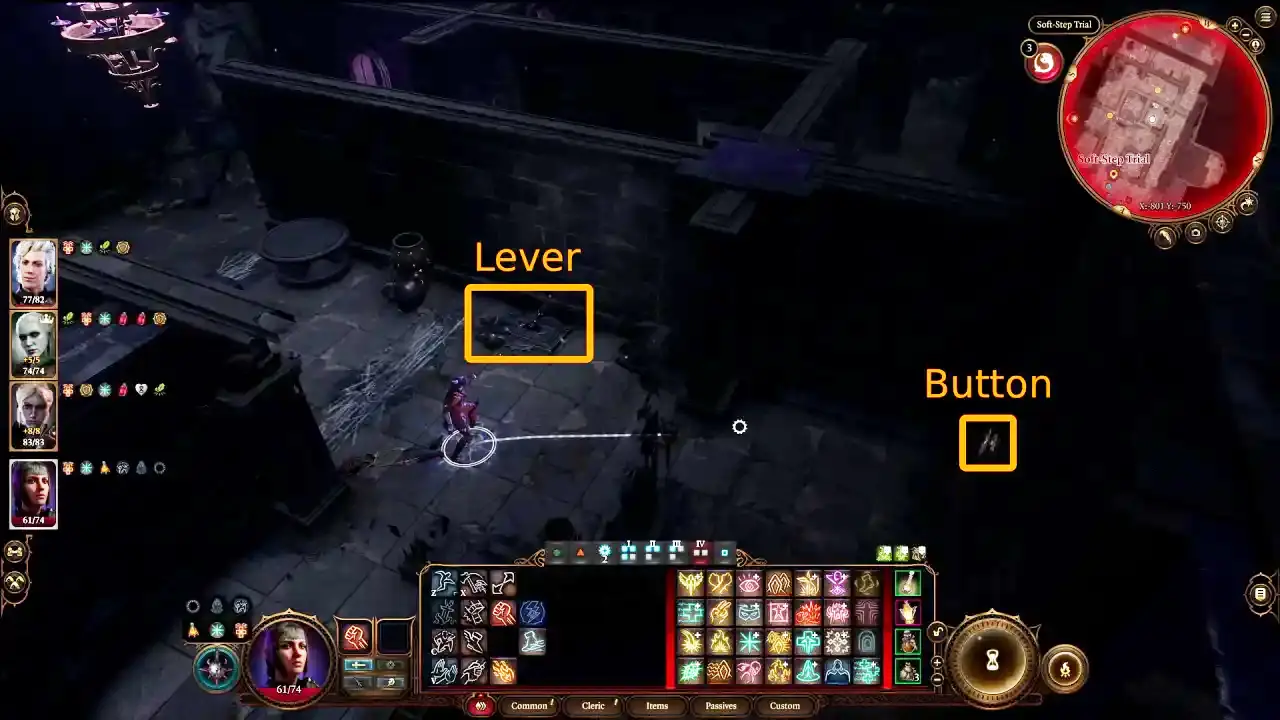
Next, you need to get past the gate. There are four buttons in the room, but three of them are traps. Press the northwest button to open the gate.
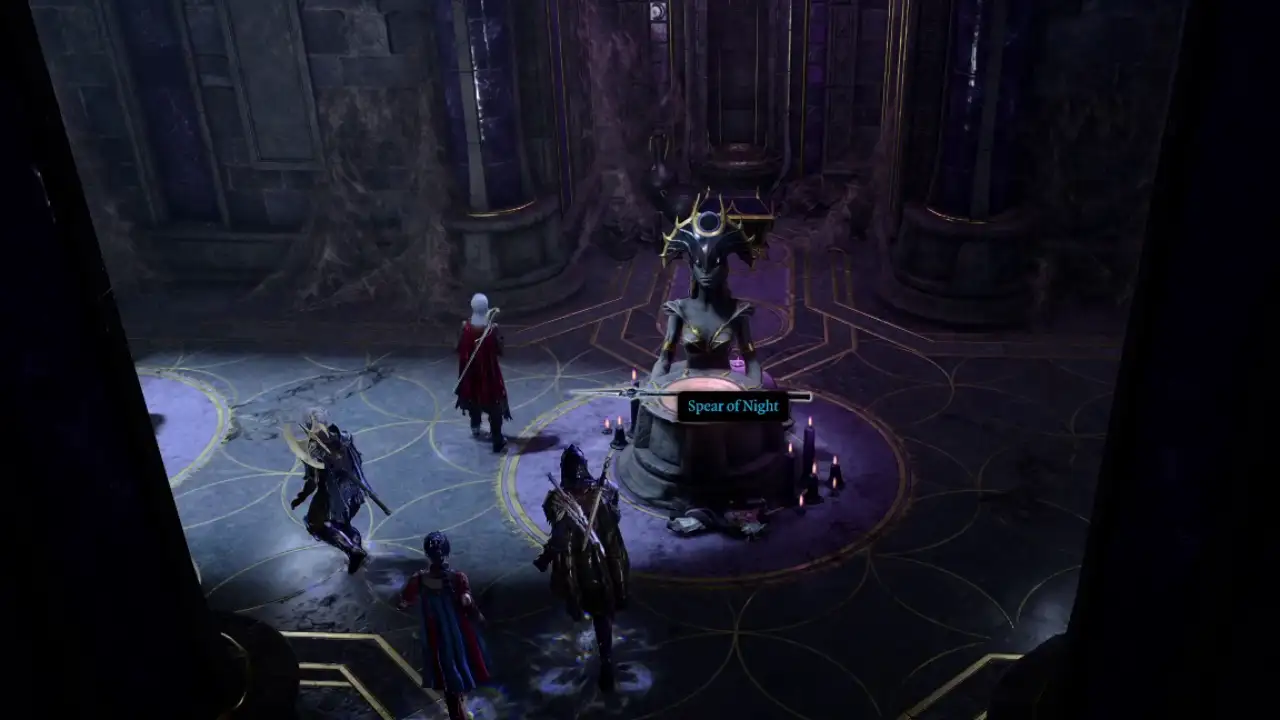
Inside the room, you can find ![]() Spear of Night (this item is essential if you have Shadowheart with you). You can also find
Spear of Night (this item is essential if you have Shadowheart with you). You can also find ![]() Dark Justiciar Half-Plate and a
Dark Justiciar Half-Plate and a ![]() Dark Justiciar Helmet.
Dark Justiciar Helmet.
Entering the Shadowfell
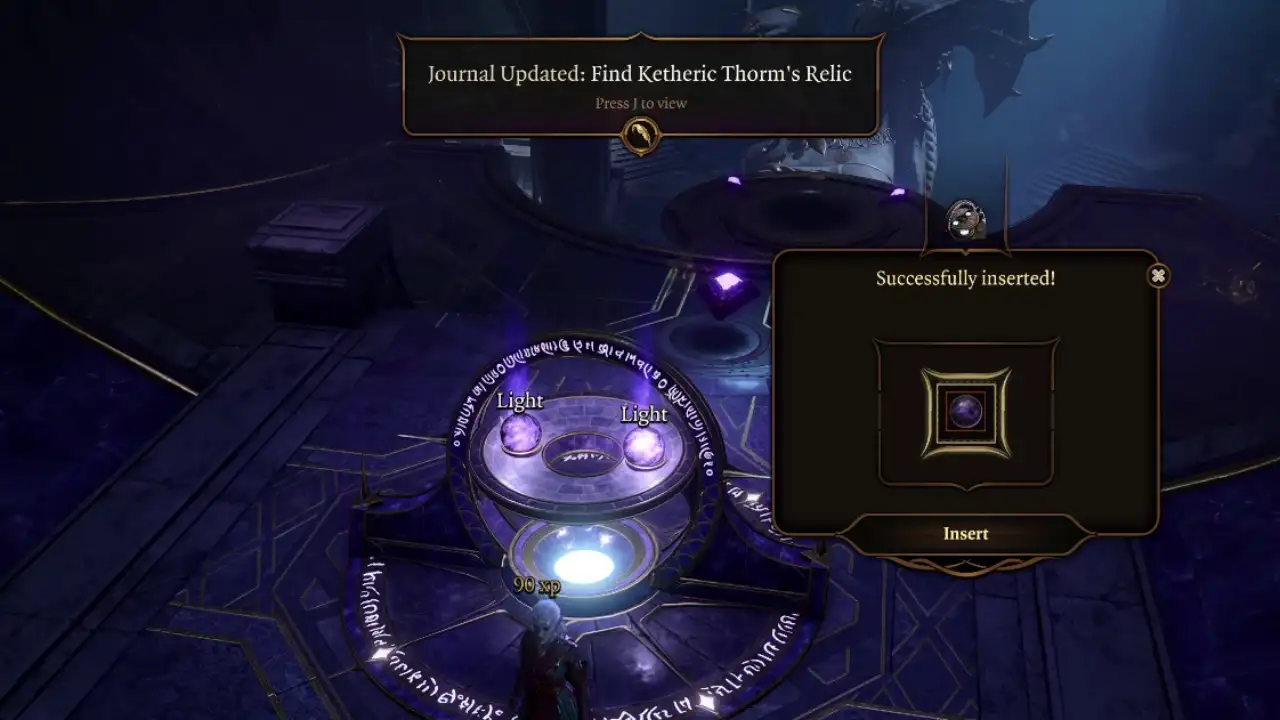
You have now explored the entire Gauntlet of Shar and can proceed to the Shadowfell to wrap up this dungeon crawl. Go back towards the entrance of the Gauntlet, then head downstairs onto the floating disc. Interact with it and put an Umbral Gem into the slot. Activate the disc to move your party forward.
You will be led to a huge locked door with another pedestal in front of it. Interact with the pedestal and put your three remaining gems there to open the door.
You can enter the Shadowfell by walking into the magical water at the end of the passage.

Navigating the Shadowfell in Baldur’s Gate 3
Climb down the floating rocky pathway until you reach the island where the Nightsong is imprisoned. Be sure to loot the skeletons on your way down.
This part can play out in many different ways depending on your choices. If Balthazar is still alive and you want to prevent him from taking the Nightsong, there will be a big fight.
Once you have concluded the cutscenes, you are finished with both the Gauntlet of Shar and the Shadowfell.
One final note, though: If you opted to leave Balthazar alive back at the start of the Gauntlet, you can now return to the room where you first found him and take the loot that was available there, which includes some rare alchemy ingredients.