

Welcome to our Sienna Necromancer build for Warhammer: Vermintide 2. In this guide we will provide you with a powerful setup for the new Necromancer class.
This build is designed to be versatile – it is good at dealing with hordes, elites and specials, and can help out with monster damage too.
Table of Contents:
Necromancer Cold Flames Build Introduction
In this Sienna Necromancer Build, we will be using the Coruscation Staff as our main damage source – it provides powerful AOE damage as well as a short-range shotgun-style blast that can one-shot many enemies on Legend difficulty. We’ll also be using the new Ensorcelled Reaper melee weapon to deal damage at close quarters and keep enemies at bay. Sienna’s new skeleton summons will primarily be used defensively, holding enemies back to force them to stay in our flame AOEs. However, you can also consume the skeletons to rapidly vent overcharge when needed, allowing you to continue casting with overloading.
If you want a build more focused on sniping elites and specials rather than dealing AOE damage, check out our Bolt Staff Necromancer Build.
Necromancer Talents
Here is a quick list of each of our chosen Talents for this Sienna Necromancer build in Vermintide 2. Below that is a more detailed description of each talent, and why we chose it.
- Corpsemaker
- Reaping
- Smiter
- Cursed Blood
- Spirit Leech
- Dread Seneschal
Corpsemaker
Corpsemaker grants us Temporary Health for each enemy we cleave in melee. This is a good fit for the new Ensorcelled Reaper weapon, which we are using. Use the heavy attacks in hordes for high THP gain – this will help to protect your green HP and keep you alive!
Reaping
With Reaping, Critical hits with your melee weapon will have unlimited cleave. This is a no-brainer with the Ensorcelled Reaper since it has really strong cleave and this talent lets you get the most out of it. Even if you forget to use your staff, you can still do decent damage with the Reaper, especially with this talent.
Smiter
Smiter gives you a nice damage boost in melee against staggered enemies. If you focus very heavily on using your staff, then you can use Enhanced Power instead – you may get more value from that in this case.
Cursed Blood
When you hit burning enemies with a critical strike, they will explode, dealing extra damage to nearby enemies. The Coruscation Staff is really good at triggering this effect.
Spirit Leech
Spirit Leech restores 15% of your Career Skill Cooldown whenever you kill an Elite enemy. Since the Necromancer ultimate has a pretty long cooldown, this is really useful. As long as you pay attention, it’s very difficult to run out of overcharge with this talent – it rewards aggressive play and gives you plenty of skeletons to consume in order to vent your overcharge quickly. The more you kill, the more spells you can cast.
Dread Seneschal
Dread Seneschal makes your skeletons survive the fight for longer, which serves a good purpose for this build. While the skeletons are quite bad at doing damage by themselves, they create space for you by holding enemies back, allowing you to cast lots of fire AOEs on the enemies while they are fighting your skeleton summons.

Necromancer Equipment
In this section, we will explain the optimal equipment for this build, including Traits and Properties. If you cannot get an exact match right away then don’t worry too much – since this build is focused mainly on AOE damage we don’t have to worry much about hitting breakpoints with our single-target damage. Upgrading your items to red will guarantee that all of the properties on the item have the maximum possible roll, however, if you don’t have enough red dust to accomplish this then once again do not worry too much. Having red items helps but it’s not essential. I do recommend upgrading everything to at least gold tier though, as this is required to have a trait and two properties on the item, and it’s much easier to accomplish than upgrading to red.
Melee Weapon – Ensorcelled Reaper
For the melee weapon, we are using the Ensorcelled Reaper, which was newly added with the Necromancer class. This weapon deals great cleave damage and decent single-target damage against armoured enemies. for the best cleave, I recommend mainly using the heavy attacks. For armoured enemies, use the first light attack, then quickly block cancel the attack sequence and repeat it. This lets you quickly chip away at the health of armoured elites.
- Trait – Swift Slaying
- Property – Block Cost Reduction
- Property – Crit Chance or Attack Speed
Ranged Weapon – Coruscation Staff
The Coruscation Staff is intended as the main damage source of the build. Ideally, you are playing from the rear of your team and have relative safety to drop fire AOEs on advancing enemies. Try not to get too carried away with this – remember that your teammates also need to do some damage to hordes to replenish their Temporary Health!
Against dangerous special and berserker/plague monk enemies, the single-target attack of the staff is really good. It will one-shot most of these enemies at close range.
- Trait – Thermal Equalizer
- Property – Power vs Infantry
- Property – Power vs Skaven
Necklace
Our Necklace is used to improve the defensive side of the build – even a back-line build should have enough staying power to survive on its own sometimes, and that’s what we’re aiming to do here.
- Trait – Barksin (veteran players may want to use Natural Bond instead)
- Property – Health
- Property – Block Cost Reduction
Charm
The Charm is used to add a couple more buffs and determine how your Potions will work.
- Trait – Proxy
- Property – Power vs Chaos
- Property – Attack Speed
Trinket
With our Trinket we can add a few more beneficial modifiers to the build. We’re using the Explosive Ordnance trait which makes the radius of incendiary bombs huge! This is a really good intervention in dangerous situations – if you sense that the run is about to take a drastic bad turn, you can turn the tide with a well-timed fire bomb. Drink a Strength Potion before throwing the bomb to make it even stronger.
- Trait – Explosive Ordnance
- Property – Curse Resistance
- Property – Stam Recovery for more survivability, or Crit Chance for more damage
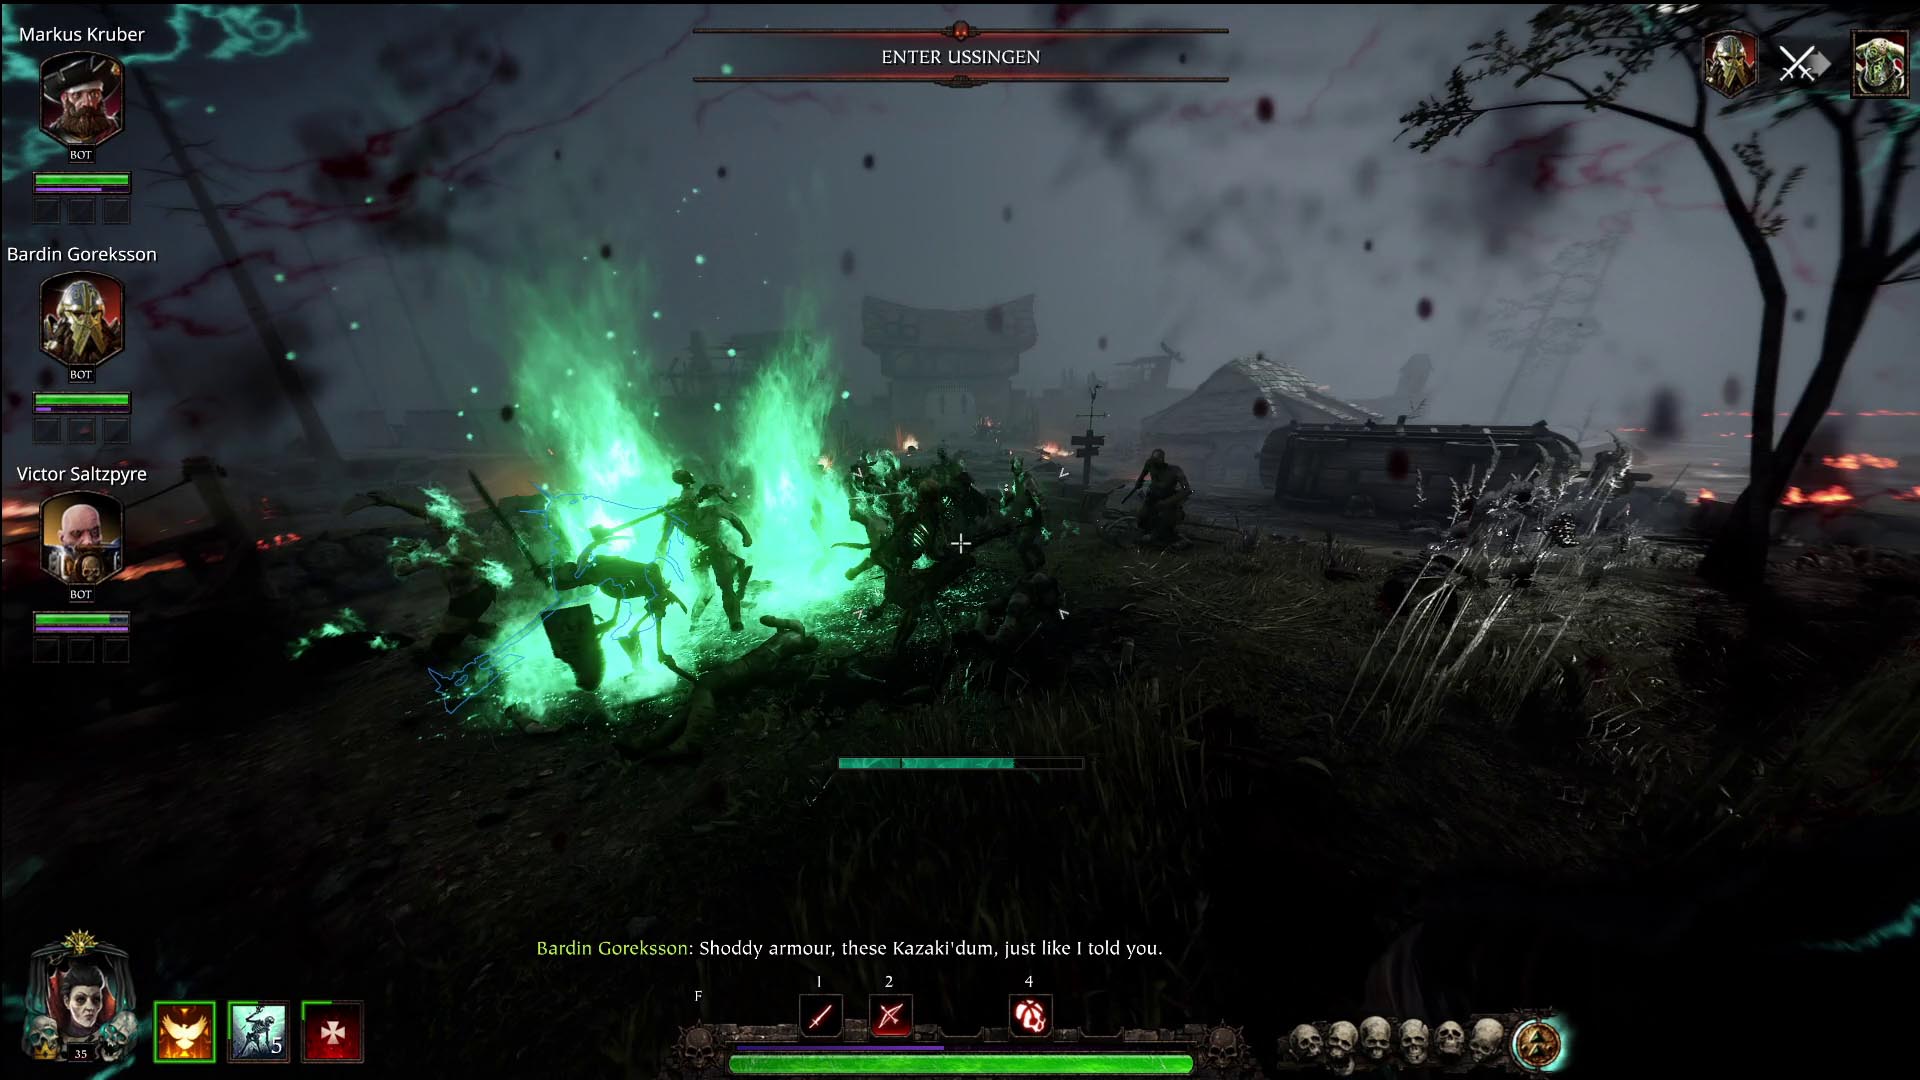
How to Play this Necromancer Build
With this Necromancer build, you can use Sienna’s skeleton summons defensively to block a chokepoint, and then place fire AOEs near the skeletons to burn the enemies. To order the skeletons to defend an area, equip the skull (press 4 on PC), hold right click to aim and then left click to confirm the position. The skeletons will hold the position until they die or until you reset their order by equipping the skull again and left-clicking.
The Necromancer build gives you a new way to rapidly vent overcharge without losing health – as long as you have at least one skeleton “alive”, you can equip the skull and press vent/reload (R by default on PC) to immediately vent a large portion of your overcharge. Since your ultimate summons 6 skeletons, this is very powerful and lets you rapidly vent lots of overcharge. It takes a bit of practice to get used to doing this, but once you get a feel for it you can cast huge amounts of fire magic with the Coruscation staff.
Remember that left click with the Coruscation staff fires a fairly short-range shotgun-style blast. It can devastate enemies if you cast it at point-blank range, but the further out you are the less damage it does. Holding right click with the staff charges up a fire AOE, and left click will cast the AOE. Cast several of these during heavy fights to deal damage to many enemies at once.
In melee remember to make ample use of pushes, push attacks and dodges to keep enemies at a safe distance and avoid taking unnecessary hits. Keep practising with this – learn which attacks you can dodge, which can be blocked safely and which enemies can be pushed back with your chosen melee weapon.