

Welcome to the Imperial City Prison Guide for ESO. The Imperial City Prison dungeon is located in the heart of Cyrodiil, in the Imperial City, just like the White Gold Tower dungeon.
This dungeon has 6 bosses: 3 main bosses, 3 mini-boss encounters and a lot of trashmob packs. (Trashmob = Enemies that can add to the difficulty and liveliness of a dungeon/trial)
If you have more questions, you can also ask someone in our community partner discord about this Imperial City Prison Dungeon Guide!
The Story
The Imperial City is overrun by Daedra and so is the Imperial City Prison. Lyranth wants vengeance on the Lord Warden in order to reclaim her clan’s animus.
Table of Contents:
Sets in Imperial City Prison
3 different sets drop in Imperial City Prison, plus a good Monster Set for Tanks
- Light: Scathing Mage
- Medium: Sheer Venom
- Heavy: Leeching Plate
- Monster Set: Lord Warden (Veteran only)
Rewards
- Dye: Putrid Flesh Teal
Defeat the Overfiend, Ibomez the Flesh Sculptor, the Gravelight Sentry, the Flesh Abomination, the Lord Warden’s Council, and Lord Warden Dusk in Veteran Imperial City Prison. - Dye: Tower White-Gold
Free prisoners from their cell blocks in Imperial City Prison.
Trashmobs
- Dread Daedrats: Pretty pesky, but not really a big deal.
- Dremora Ferylkyn, Invokers & Kynvals: Also pretty unremarkable and don’t really hurt much.
- Mindshriven Bloodfiends, Spellfiends, Foot Soldiers & Inmates: Same as the ones before, they die relatively quickly and are mainly a nuisance to the tank to get them under control.
- Vigilant Watchers: These are more dangerous and they have an ability with which they shoot three beams from their eyes, stunning everyone that doesn’t walk out of these or blocks. They will summon additional adds.
- Xivkyn Necromancers & Berserkers: The Berserkers are Nigthblades, that will use their abilities to stun or attack from behind, whereas the Necromancers can summon a Bone Colossus. Those during the Gravelight Sentry fight summon Venomous Skeletons.
- Harvesters: These are best tanked with them facing away from the group, as they have an ability that shoots three rows of high magical damage.
- Necrotic Hoarvor: They can deal a lot of disease damage, especially when they explode. Don’t stand in their disease pool!
- Flesh Atronachs: These should be tanked with them facing away from the group as well, as they have a cone ability that will hit everyone inside with flame damage. They can be quite the DPS check on veteran, as they will enrage at one point, where they will pretty much one shot everyone.
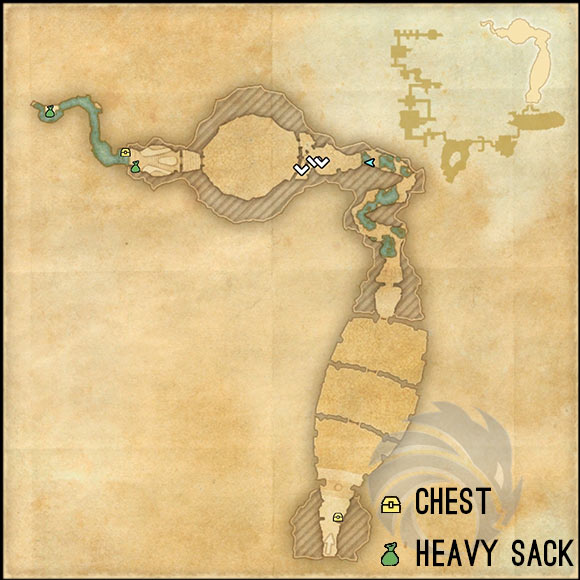
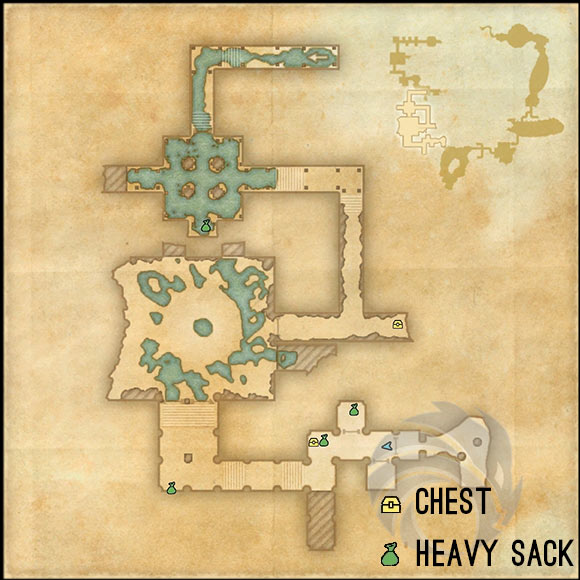
Bosses on the Map
(click to enlarge)
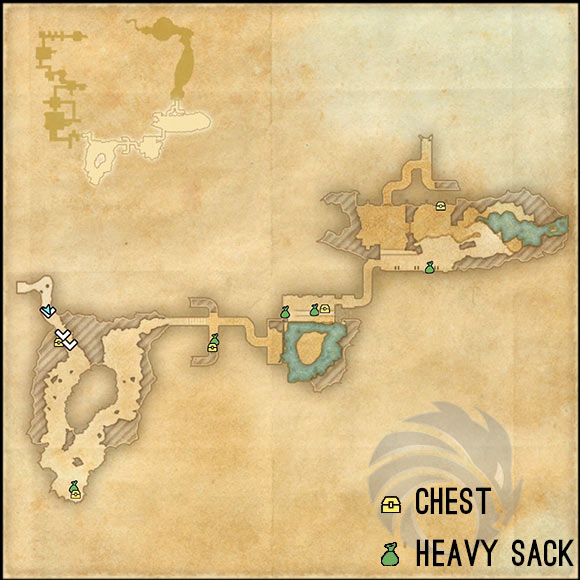
Treasure Chests & Heavy Sacks
(click to enlarge)


Imperial City Prison Bosses
Here you can see a full list of all the bosses in the Imperial City Prison from ESO.
| Boss | Health | Adds |
| Overfiend | 2,493,490 | Will continuously spawn Adds |
| Ibomez the Flesh Sculptor | 2,460,134 | Flesh Atronachs |
| Gravelight Sentry | 3,855,068 | 5 Necromancers |
| Flesh Abomination | 3,007,499 | 2 Hoarvor & Zombies |
| Lord Warden’s Council | 3,827,724 | Boss is 4 single Dremoras |
| Lord Warden (Endboss) | 3,993,959 | Splits up into 4 Shades periodically |
Bosses
Overfiend

Probably being one of the most powerful Soulshriven, the Overfiend itself relies on calling upon aid to help him overwhelm you. He is the first boss you will encounter and while not being overly dangerous himself, the most dangerous help he will call upon is a Harvester.
Energy Consumption: A purple ring will spawn under two players, stunning everyone who touches it. Especially with adds this can be a death sentence. You can break free from this.
Entropic Flare & Flurry: Two attacks that deal a small-medium amount of damage.
Flurry: A very dangerous melee attack, it’s easily recognizable by a cone. This should always be blocked and never be targeted into the group, as this deals a ton of damage!
Jump: Jumping into the air, the Overfiend will slam back unto the ground. The Tank has to block this in order to not be thrown to the ground and receive a huge amount of damage.
Slash: He will channel an attack that looks like a claw, which the Tank and everyone else standing in its way has to block.
Harvester
At 50% boss health, a Harvester will spawn from a blue, bright gate. It needs to be immediately taunted and turned away from the group! A good tactic here is to drop your Ultimates around this time, as it’s best to take her out fast.
Black Winter: Her most dangerous attack are three ground targeted AOEs she releases. It deals a lot of magical damage, but can be interrupted, blocked or avoided by standing behind her.
Ibomez the Flesh Sculptor

Ibomez is the first major boss you will encounter. He can be very annoying because he will run to the pool in the center of the room at 75%, 50% and 25%, summoning prisoners that will slowly wander towards the pool.
All members in your party then need to use the Flesh Grenades that spawn, throwing them on the prisoners in order to dissolve them. Otherwise, if too many went into the pool, more and more Flesh Atronachs will spawn.
If you have high DPS you can ignore the bombing and instead attack the spawning Flesh Atronachs and use the Flesh Grenades to bomb them in order for the Damage Dealers (DD) to inflict more damage on them before they enrage, but this is really only advisable if your DDs can handle it.
Hack & Bleed: The bleed is applied to everyone getting a hit from this boss, so ideally this would be the tank and the boss’ standard attack has a moderately high physical damage, which should ideally also only hit the tank. So the tank should really make sure not to lose taunt.
Heavy Attack: His Heavy Attack is a high damage ability and stuns the player if not blocked. Ideally, this only hits the tank, but everyone is advised to still block this if they see this coming.
Poison Wave: Dealing high poison damage, this cleave will be indicated by a red cone. In order to keep the group alive, the tank should face the boss away from the group and no other person should stand behind the Tank.
Tenderize: This will fear the entire group, but also stun one random player. This player won’t be able to break free and another player needs to interrupt the boss’ charged up Heavy Attack, or else the stunned player will die.
Gravelight Sentry
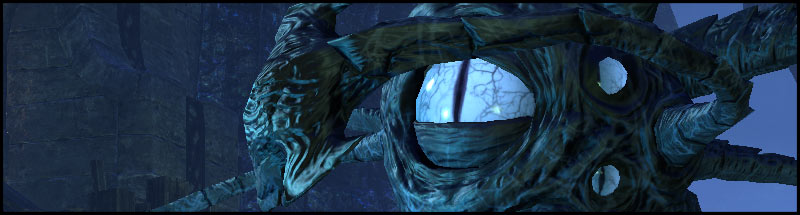
Waiting for you in the middle of an island, the Gravelight Sentry is surrounded by 5 Necromancers.
It’s advisable to run on the island as a group, especially because the gate will close on you and the water is poisonous.
Knock Back: This is the first mechanic you will observe. A giant AoE will form beneath your feet as the boss spins and upon ending, everyone standing in this AoE will be knocked back and most likely into the toxic water.
The Tank should take the boss to one of the Necromancers on the far sides and tank him there, so that the DDs can deal with the Necromancers without being knocked back constantly.
Necromancers: The Necromancers should not be ignored and killed before the boss is being attacked, as they will start summoning skeletons and won’t stop.
Eye Beams: Just like all the other Sentries, the boss will aim 3 beams at the Tank (or whoever has the aggro). Block or walk out of this in order to avoid getting stunned.
Poison Water: Worth mentioning is the water here that is poisonous. If you stand in it, you will die. If you get stunned in it, you will most likely die. Which is why it is important that the Tank has the awareness to take the boss away from the group and pulls it to a Necromancer to keep the group from being constantly pushed into the water.
Flesh Abomination
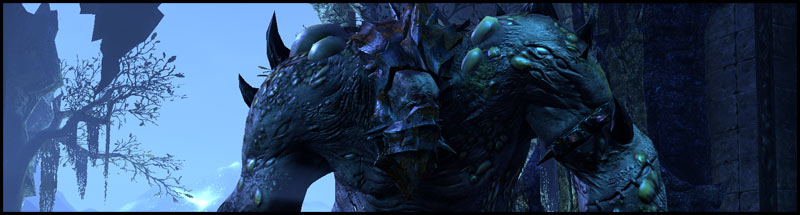
This Flesh Abomination is quite nasty. Not only in appearance, but also in mechanics.
The easiest would be to tank it against the edge of the room, whether it’s at the wall or at the spikes, the Tank should decide what’s easiest for them.
Hoarvors: These giant tick look-alikes need to be focused immediately, as they deal a lot of disease damage when they bite you and they leave pools of poison, doing an incredibly high amount of damage.
Hoarvor Explosion: The boss will summon a Hoarvor for each player that will explode upon the boss’ smash hits the ground. You can either dodge roll away from them, or block. You should definitely not stand upon each other and instead spread out.
Poison Rings: During the fight, every player will get a large AoE beneath them. This indicates that you should spread out and not stand next to each other. One player will be put inside a poisonous ring and has to stay inside of it, otherwise they will die. Other players touching the poison will die as well, so stay away from it and kill the zombies that will spawn from it!
Heavy Attack: The tank will have to face these rather hard hitting heavy attacks, which, even when blocking, can kick them off their feet. Best is when the tank positions themselves against a wall or the fence, so that the knockback won’t kick the tank through the entire room.
The Gates and Lord-Warden’s Council

This area is a little tricky. It might look easy enough, but especially the first pull in front of the gate needs to be coordinated, otherwise the tank will most likely die.
First Gate: The first gate doesn’t really have any special mobs. Probably the most important part here is to know that there’s a lever which opens the gate. It will be the same for the other two, but there will be two levers. So two people will have to activate them.
Second Gate: The second gate will have two Hoarvors, one Flesh Abomination and a Harvester. Ideally, you should be focusing on the Harvester first, as she stuns the Tank and they could die in a pool of poison from the stun. Next should be the Flesh Abomination, as it can enrage and will deal a ton of damage. The Hoarvoars should die by the AoE of the group.
Don’t forget to pull the levers after the fight, otherwise you can’t progress!
The Lord-Warden’s Council (The Third Gate)
This fight is a little tricky, but can be easily managed if you know how to.
Important are a few things:
- Stacking makes things always easier. The Tank can do so by taunting all enemies and running into one of the lower corners, forcing them to all run to one spot. The DDs will have to wait until the tank has positioned them, but after that it makes it easier to damage them all at once.
- The Kill Order is also quite important! The reason for this is that they aren’t dead when they die until the last of them is dead. They will come back as ghosts and continue doing damage or even heal. But you also can’t interrupt them from doing these things. So I will list them in the order they should be killed.
Necromancer: The Necromancer’s worst ability is summoning a totem. This one will shield the entire Council from all attacks. So if he summons it, focus on the totem first. By killing the Necromancer first, we take this out of the equation. Duly noted though, this only happens on veteran!
Dragon Knight: The Dragon Knight charges around and will run anything over in his path. Since this will knock a player down, try to stay out of it, or try blocking it.
Nightblade: The Nightblade uses Steel Tornado, which has to be blocked. Unless he is in ghost form, then you have to walk out of it because you won’t be able to block it anymore!
Templar: This healer can only heal and can be interrupted when alive. Which makes him dangerous for when he dies, so he definitely should be killed at the end.
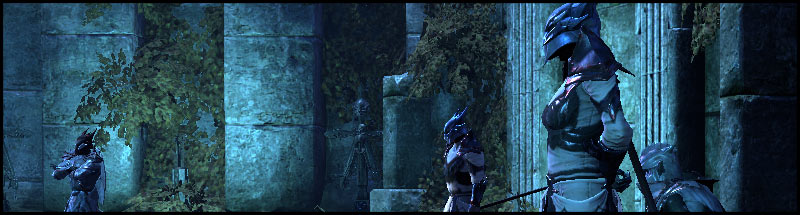
Lord Warden Dusk

This Grievous Twilight has a lot to say during the fight. Not only does he try to avert you from proceeding with your destructive path, he also gives a lot of combat clues.
Shadow Orb: From time to time these will appear as a dark-blue glowing orb, which will tether anyone’s health that is too close and slow them down. Avoid them by standing out of range.
Shadow Barrage: The Lord Warden will turn towards one player and shoot a barrage of orbs at them. The Tank has to stand in front of that player to absorb the damage by blocking. This also means that the targeted person is not supposed to run around.
Teleportation: The Lord Warden likes to teleport around, especially behind the person that has the aggro and dealing quite some damage with a heavy attack, after stunning that person. You should break free from the stun, so that you can block the heavy attack.
Shades: When the boss is at 65% and 35% health, he will summon shades of himself. The Tank has to taunt all four of those, as they will start throwing bolts at group members that deal a lot of damage. Only 2 of them are active at the same time, the others will become transparent and won’t take any damage.
Meteor: During the Shade phase, small meteors will fall down from the ceiling, doing some damage, but also stunning you. It can be dodged, but it’s usually easier to be blocked as there’s not a lot of time to run out of it.
Portals: During the fight the Lord Warden will spawn two large, light-blue portals that move through the room. You have to avoid them, otherwise you will be teleported to the ceiling of the room. If it happens though you can use the synergy to lower the damage upon impact with the ground. The portals are VERY important for the next ability.
On Veteran, the portals will no longer be available for everyone. Only two people will be allowed to enter, before it despawns.
Darklight Blast: Now is the time to run into the portals! The Lord Warden will fly up high into the air, balancing an orb of dark light above his head and trying to blast you out of existence.
Use a portal to escape this blast, but don’t forget to press the synergy button! Otherwise you will die of the impact.
This might not kill you on Normal if you don’t go into the portals, but it will definitely kill you on Veteran.
Hardmode Lord Warden Dusk
Meteors: They will now be raining throughout the entire fight.
Portals: You will receive a “Feedback” debuff which will kill you the next time you enter a portal and use the synergy for as long as it is active.
Skipping
You can also skip certain parts in this dungeon, so that you are even faster in case you want to do a speedrun or just avoid unnecessary trashmob. Here an explanation in pictures!
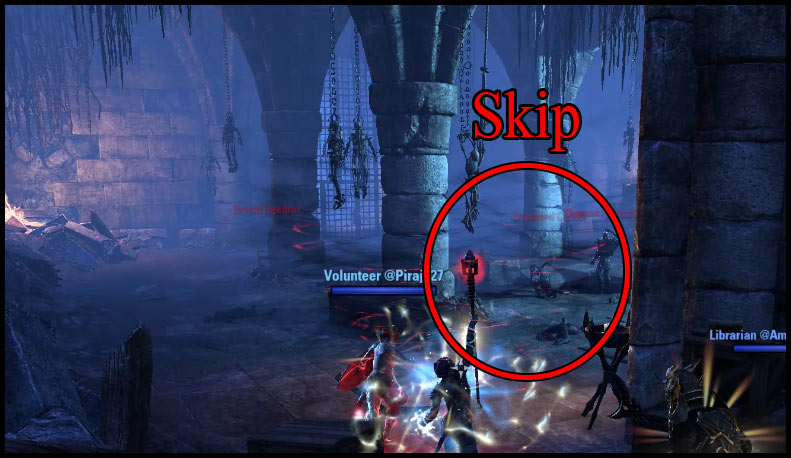
Skip in the Prison
As we start leaving behind the actual prison, there’s a small cave before coming into the prison tract with a hole in the ground. A Harvester and some Xivkyn are waiting for you.
You can entirely skip these mobs by just running past them and falling into the ground through the hole.
Skip in the Cave
It’s only a very minor skip, but you can avoid a few mobs by jumping past these spikes.

Video Gameplay
- 1st Boss: Overfiend – 1:43
- 2nd Boss: Ibomez the Flesh Sculptor – 7:12
- 3rd Boss: Gravelight Sentry – 14:31
- 4th Boss: Flesh Abomination – 18:41
- 5th Boss: The Gates & The Council – 22:05
- Endboss: Lord Warden Dusk – 24:14
Related Topics:
Magicka DPS Sets
ESO Item Sets
Undaunted Beginner Guide
Animation Cancelling Beginner Guide