

Welcome to the Taedal’s Tower guide for Throne and Liberty. Taedal’s Tower is a Secret Dungeon in TL that contains twenty floors, with each floor featuring a unique boss fight. This guide will explain how to beat each stage of Taedal’s Tower so you can finish the dungeon.
Table of Contents:
- What is Taedal’s Tower?
- How to access Taedal’s Tower
- Floor 1-10
- Floor 11-20
- Floor 11 – Avolos Umbramancer
- Floor 12 – Tower Crystal Scorpion
- Floor 13 – Lightning Jump Attacker
- Floor 14 – Old Wizard’s Eye
- Floor 15 – Stealer of Light
- Floor 16 – Immortal Guardian
- Floor 17 – Chaos Archwizard
- Floor 18 – Desert Wizard
- Floor 19 – Nightmare Conductor
- Floor 20 – Revenging Skeleton Commander
What is Taedal’s Tower in Throne and Liberty?
Taedal’s Tower is a special solo challenge dungeon. It features progressively harder boss fights that allow the player to hone their skills and learn how to survive when fighting tougher enemies. The earlier bosses are not very punishing and you can probably get away with ignoring the mechanics, but this is no longer the case at the higher levels of the tower.
There are 20 levels for you to work through before you can finish the tower. Don’t worry if you cannot finish it all on your first attempt – you can always return later after you have got better gear, improved your character and practised combat more.
It is strongly recommended to take an ample supply of healing potions with you when entering, as some of the bosses deal a lot of damage and you will likely struggle to survive without the potions.
Each time you complete a floor, you will immediately receive a reward for doing so, and a gate will appear offering transit to the next floor.
Is it worth going to Taedal’s Tower?
It is definitely worth giving Taedal’s Tower a try. Not only does it offer a good way to practice fighting bosses solo, but you also earn rewards for each level, including Growth Stones, Recovery Crystals, Amitoi, Coins and XP. Additionally, you will need to progress Taedal’s Tower sooner or later anyway because of the Main Story line in Throne and Liberty.
How do I access Taedal’s Tower in Throne and Liberty?
There are two ways to access Taedal’s Tower in Throne and Liberty:
- Enter via the painting in Codex Chapter 3: Veterans Never Die. The quest will task you with completing the second level of the tower. You can return to the painting later to access the tower.
- Once you have accessed the tower via the painting once (or when you are Level 30) you can enter the tower freely from any location via the Secret Dungeons section of your Main Menu.
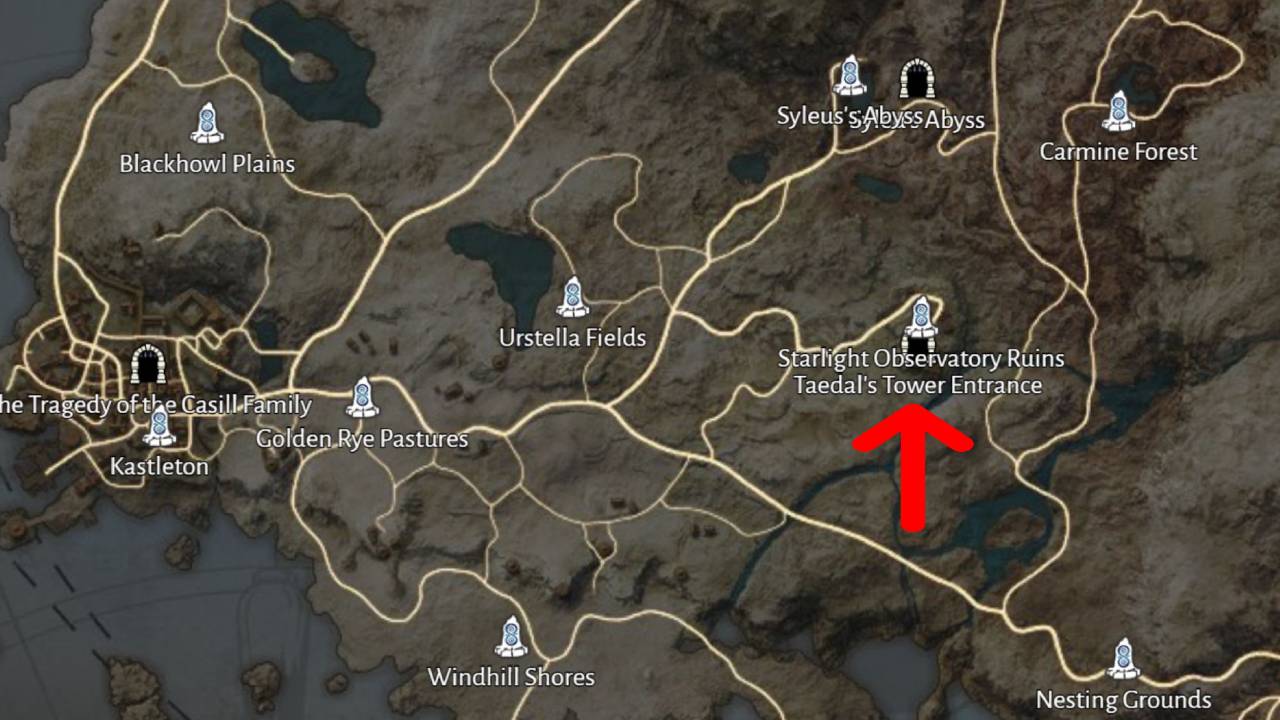
View on map: Taedal’s Tower Location on the Throne and Liberty Map.
Now that this is sorted, lets get to how you beat each floor in Taedal’s Tower in Throne and Liberty.
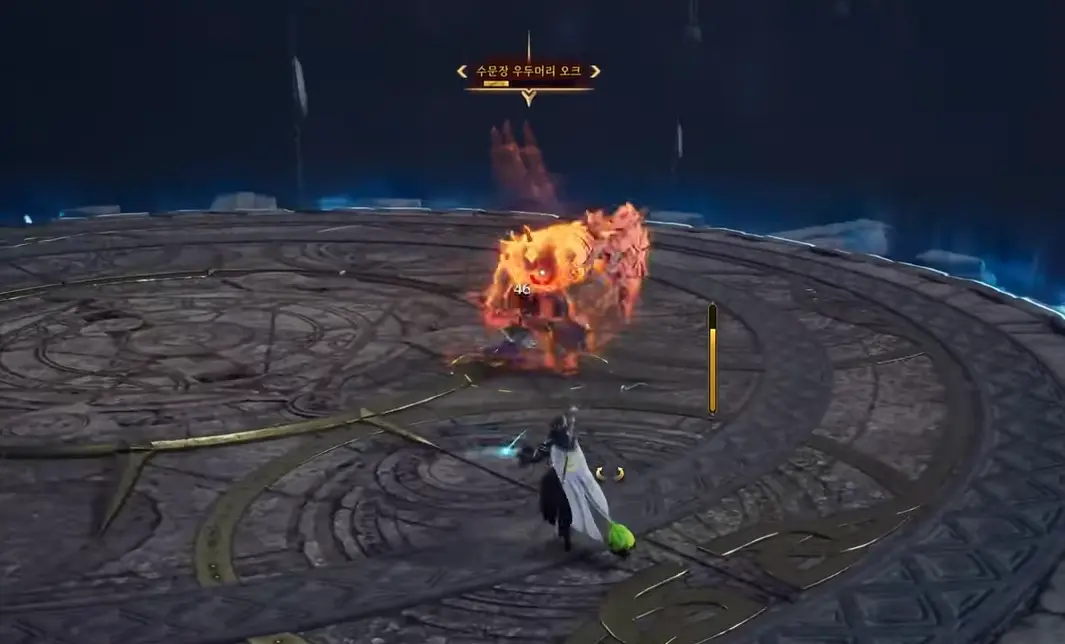
Taedal’s Tower Floor 1 – Charging Gatekeeper
Floor 1 of Taedal’s Tower has a fairly easy boss called the Chief Orc Gatekeeper. His melee attacks do hurt you a bit, but he is quite slow and you can easily outrun him by running around – if you have ranged abilities then use them while kiting to keep safely damaging the boss. This boss has the following mechanics to watch out for:
- Charge – The boss will turn orange and then charge at you. You should quickly sidestep the charge to avoid being hit. He may repeat this up to three times in a row.
- Hook – If you are not in melee range of the boss, he may attempt to throw a hook at you which will pull you toward him. You can avoid this with a perfect block or by quickly dashing away.
- Ground slam – The boss can slam the ground, sending a directional rectangular AOE towards you. This can be easily sidestepped. He may repeat the attack immediately after.
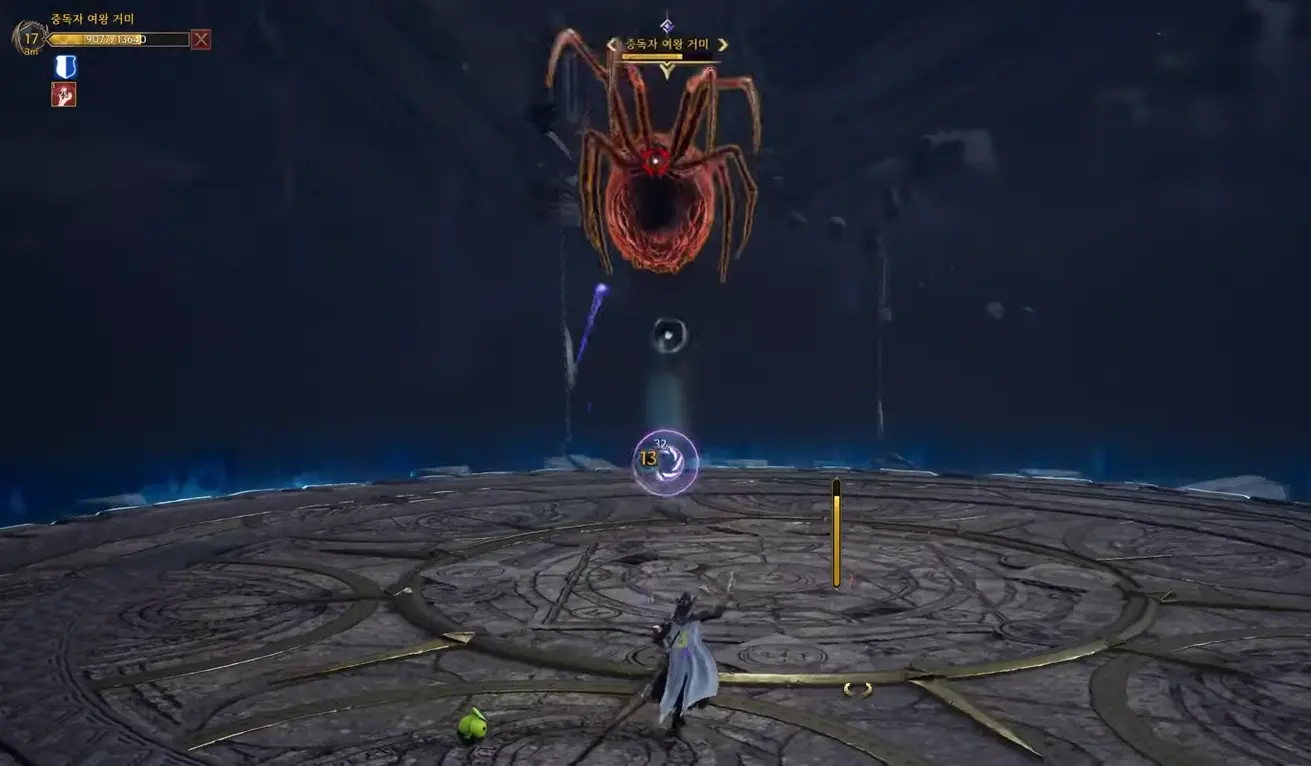
Taedal’s Tower Floor 2 – Queen Spider
On the second floor of Taedal’s Tower, you will fight the Queen Spider. This is another fairly easy boss – it just has a few easy mechanics to watch out for, listed below:
- Venom Jump – The boss will pounce on you, dealing damage and poisoning you. You can avoid this by watching for the purple circle. The purple circle appears on many enemies in Throne and Liberty, and indicates that you need to block or avoid a special attack. Time your block just right and you can perform a perfect block, negating the attack.
- Rush – The boss will rush towards you and attack. You can avoid this by simply backing away from the attack.
- Back Spray – The spider shoots a directional AOE from her back, three times in a row. If you are hit by this you will have your Movement Speed reduced, so try to sidestep this AOE.
- Web – The spider will stand still with its front legs raised for a moment. She will then spray a web at your location, damaging you and reducing your Movement Speed. The web will stay at the location for 10 seconds and damage you if you stand on it. When the spider throws the web, try to move out of the way before it lands, and then avoid that spot until the web disappears.
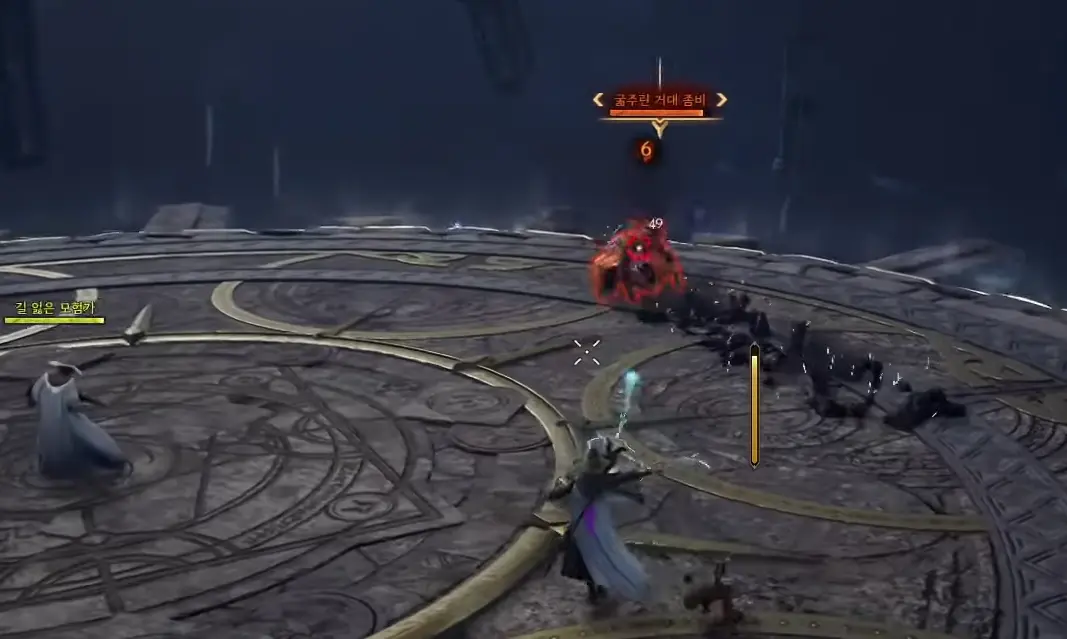
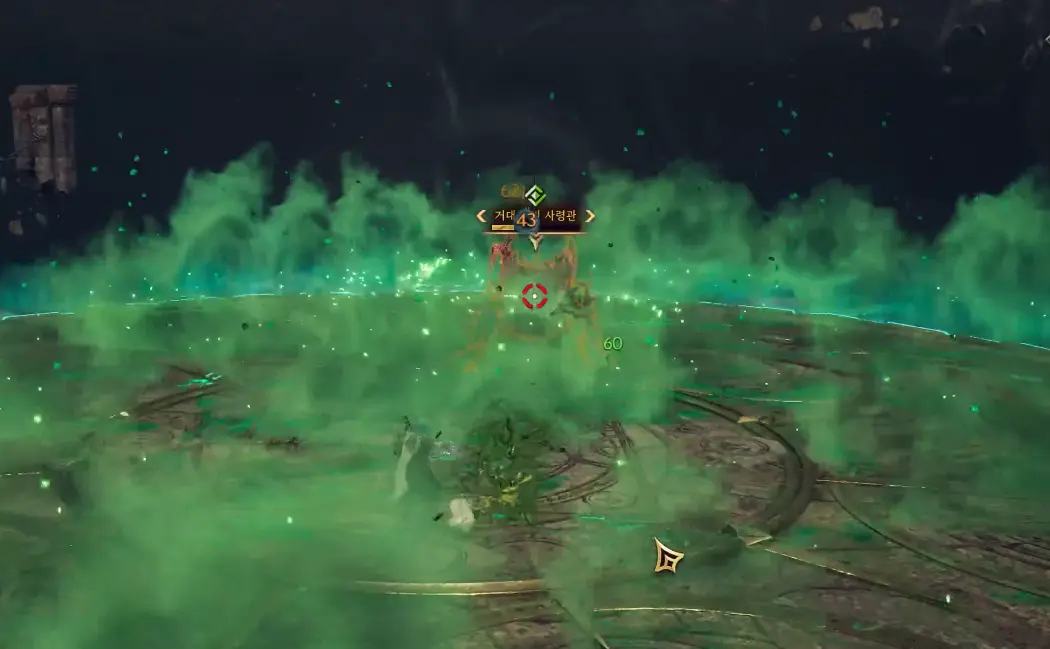
Taedal’s Tower Floor 3 – Giant Zombie
On the third floor in Taedal’s Tower in Throne and Liberty, you will find a Lost Adventurer in the middle of the room. To begin with, some weak Starving Zombie mobs will spawn around the edges of the room and begin walking to the middle to attack the Lost Adventurer. You should kill them quickly before they can reach the middle – be careful, as they will explode when they die.
After killing a few of the small zombies, the boss Giant Zombie will spawn. Just like with the previous boss, you need to watch out for the purple circle that indicates the boss is targeting you with a special attack, and try to time your block just right so you don’t take damage. The Lost Adventurer will continuously heal you throughout the fight, as long as she remains alive. The Giant Zombie has the following attacks to watch out for:
- Projectile Throw – The zombie throws a projectile that deals instant and DoT damage.
- Ground Smash – The zombie smashes the ground, sending an AOE in your direction. Sidestep this AOE. You should avoid standing close to the Lost Adventurer because if she gets caught in this AOE she will take a lot of damage – a couple of hits from the AOE is enough to kill her.
- Take Cover – Periodically, the Lost Adventurer will shout something about protecting you. At this time you can go and hide behind the Lost Adventurer, otherwise you will be hit by some rapid-fire projectiles from the boss. After this ends, you should move away again to avoid the NPC getting hit by the Ground Smash.
- Starving Zombie – Near the end of the fight, the boss will summon another Starving Zombie to the fight. The safest way to proceed is to kill the Starving Zombie quickly, and then return to fighting the boss as normal.
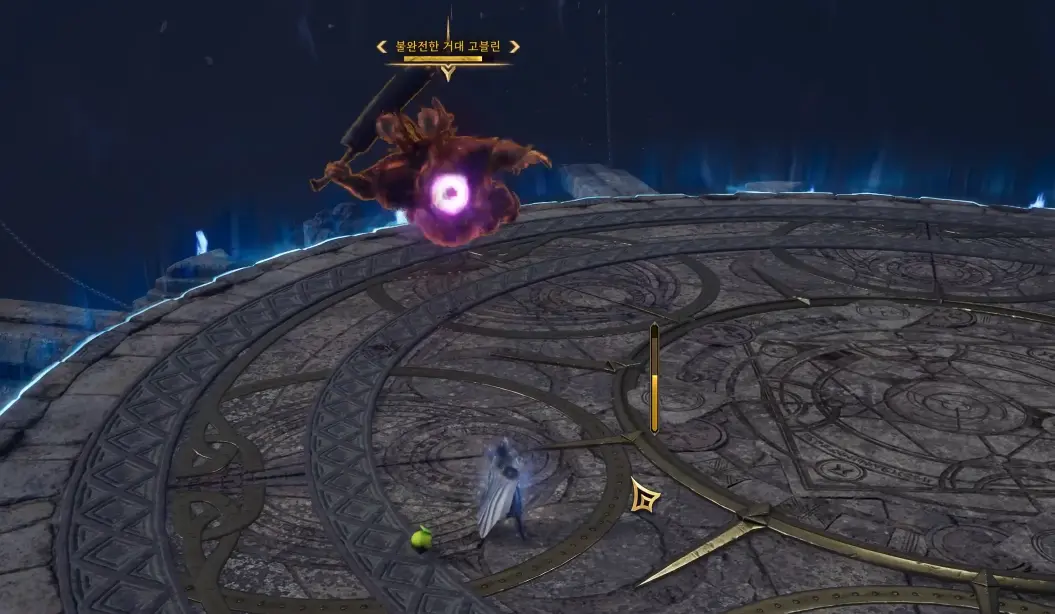
Taedal’s Tower Floor 4 – Giant Goblin
The Giant Goblin also has a couple of attacks that you should aim to perform a perfect block against. As usual, you can see when these attacks are coming by the purple circle that appears on the boss. Here is a list of this boss’ attacks:
- Spinning Attack – The boss will shout something like “no one can stop me!” and then begin a spinning attack, damaging you if you are too close to him. Move away when you hear the shout, and keep kiting until he stops spinning. This method should allow you to completely avoid being damaged.
- Stunning Jump – The boss jumps to your position and stuns you on contact. You can avoid the stun with a perfect block.
- Pull – The boss pulls you towards him, then attacks with his sword.
- Push – The boss pushes you away, then uses his jump attack.
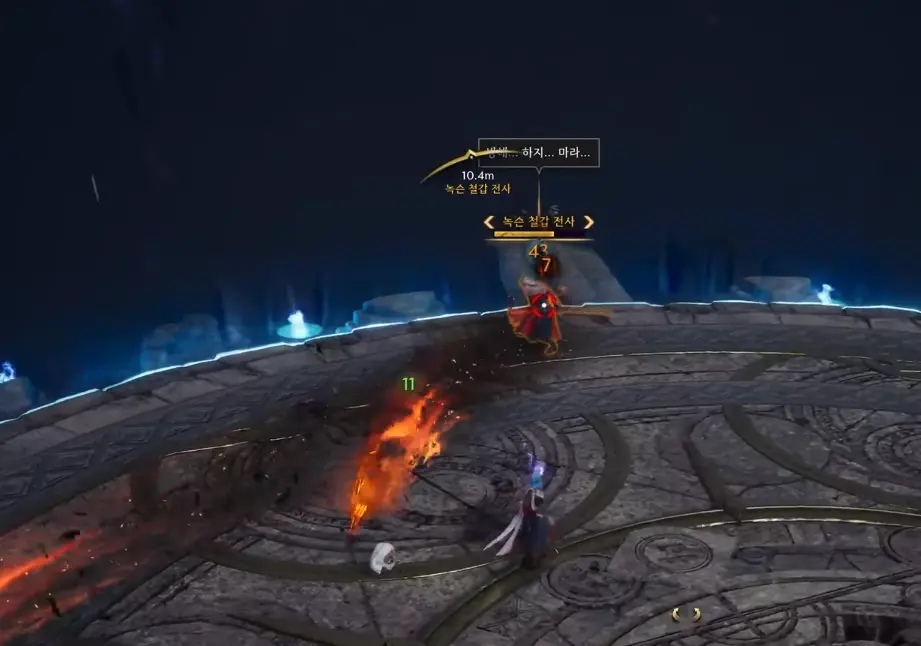
Taedal’s Tower Floor 5 – Armoured Warrior
The Armoured Warrior will chase you and attack with rapid melee attacks when close to you. If you are ranged then you can simply kite the boss and deal damage, but if you’re only melee then it will be a bit more difficult. This boss has a few different attacks that you should watch out for. The attack animations are fast and unpredictable, but you can learn the voice lines associated with each attack to anticipate what is about to happen:
- Kill kill kill – This chant means that the boss is about to do a forward charge that ends in a slashing blow. If you are hit by the slash you will be stunned, and the boss will follow up with a hard-hitting attack. You cannot block this skill, you need to dodge it.
- Do not interfere – When you hear this voice line, the boss will launch three projectiles toward you and then charge to your position. You can sidestep the projectiles to avoid them.
- No one can pass – The boss moves forward while performing a spinning attack. Keep away from the boss to avoid the damage.
- Die. Die. Die. – This is similar to the first attack – the boss will perform two attacks while advancing towards you. The first attack can stun you.
Taedal’s Tower Floor 6 – Red Pyromancer
The Red Pyromancer‘s attacks will cause you to burn, dealing extra damage over time. He has a few mechanics that are important to remember:
- Teleport – This boss can teleport to new locations.
- Charged attack – Look out for the purple circle on the boss and try to time a perfect block to avoid this attack.
- Fire bombs – The boss will hold his staff in the air, and red AOEs will begin following you. You have a couple of seconds to move out of each AOE before a fire explosion happens, dealing damage.
- Burning Ground – The boss will teleport to the middle of the room, crouch down and start chanting. Pillars will appear around the edge of the room, and you need to quickly grapple up to one of the pillars. The ground will turn red and you will take fire damage if you don’t get on a pillar in time.
- At low health, the boss will do this again, but there will only be one pillar. Try to stay near the middle of the room to avoid being caught too far away from the pillar.
Taedal’s Tower Floor 7 – Shadowmancer & Dark Enforcer
The seventh floor of Throne and Liberty’s Taedal’s Tower has two bosses, but you only need to defeat one of them to end the fight (both of them will aggro to you). The Shadowmancer is a ranged boss who will stay still and cast spells at you, while the Dark Enforcer is melee and will chase you.
The easiest way to proceed is to focus your attacks on the Shadowmancer – you can continue to attack it while kiting the melee Dark Enforcer at the same time.
Try to keep both bosses in view and keep an eye out for the purple circle, indicating that you need to perform a perfect block. Also keep an eye out for any blue AOEs on the ground. These will damage you if you touch them.
The Shadowmancer has the following attacks:
- Area Strike – The Shadowmancer casts a blue AOE around him. Stay out of the blue area to avoid damage.
- Beam – The Shadowmancer aims a bright blue beam that deals high damage. Avoid touching the beam, or use parry to defend against the damage.
- Lightning Strike – His staff turns blue and he launches a bolt of lightning at your position. Move away from the bolt before it hits. He may cast several bolts in a row.
The Enforcer has a different set of moves:
- Lighting Line – The Enforcer launches lightning towards you with his scythe. The lightning leaves behind dark blue areas that you should avoid.
- Spin Attack – The Enforcer rapidly spins, damaging you heavily if you are too close.

Taedal’s Tower Floor 8 – Giant Ant Commander
The Ant Commander will repeatedly charge at you throughout the fight. Try to stay mobile and avoid these attacks as much as you can. There is also a strong poison effect in this fight that you will need to cure by picking up plants. The full mechanics of the boss are listed below:
- Poison Wave – The boss covers the room with a cloud of green poison. This will give you three stacks of poison, dealing considerable damage over time. You need to quickly find and pick up Detox Herbs. Each herb will remove one stack of poison and heal you. Picking up all three herbs completely cures the poison effect.
- Explosive Ants – These smaller ants will spawn throughout the fight. They run to your position and then wait there for a couple of seconds before exploding. The easiest way to avoid them is to wait for them to stop moving and then quickly move away before the explosion happens.
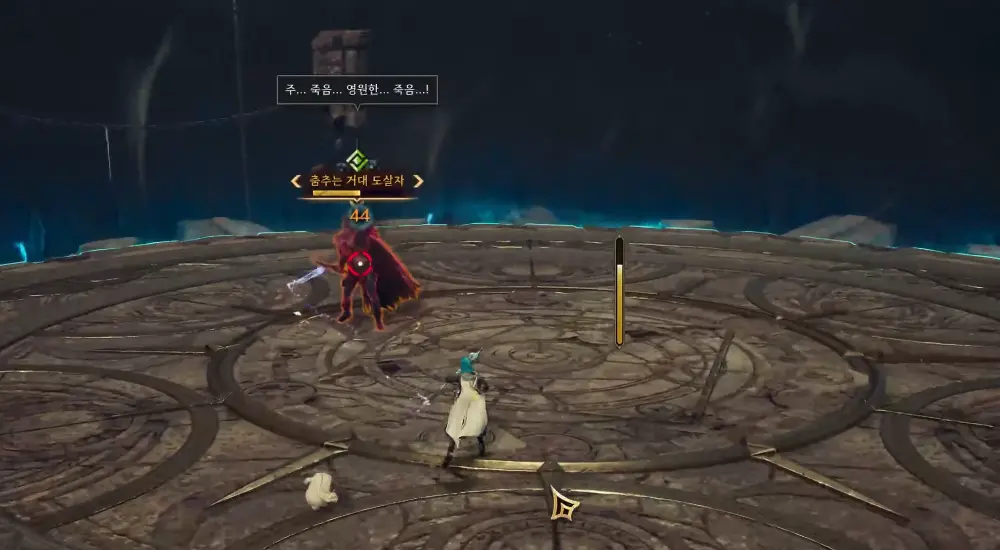
Taedal’s Tower Floor 9 – Giant Butcher
The Giant Butcher has both melee and ranged attacks. Sometimes he will stay at range and throw daggers at you, and at other times he will chase you down and begin melee flurries. Watch out for the purple circles and try to perform perfectly timed blocks against his special melee attacks, and perfect dodges against his special ranged attacks.
This boss is the trickiest one so far, as he has quite a lot of health and his attacks hit hard, so he can wear your health down over time. You can use stealth or stun effects to stop the boss from attacking you for a while, buying time to heal yourself with your amitoi or potions. The mechanics are below:
- Backstab – The boss can teleport behind you and follow up with a stab. Be ready for the teleport, and try to quickly block or avoid the follow up strike.
- Ranged Attacks – The boss will chant something like “Death, eternal death!” and then begin launching projectiles at you. You can block these to reduce the damage.
Taedal’s Tower Floor 10 – Skeleton Commander
As usual, remember to perform perfect blocks against the boss’ special attacks, indicated by the purple circle. learning how to block attacks is very important in Throne and Liberty. It will help clear Taedal’s Tower more quickly.
The Skeleton Commander will periodically jump in the air, covering the entire room with AOE damage when he lands. This only persists for a short time – to avoid the damage you need to jump so that you are not on the ground when the AOE is present.
The boss also charges at you sometimes, and other times he throws a rectangular ground AOE in your direction – both of these attacks should be side-stepped to avoid the damage.
Just like the previous boss on floor 9, the Skeleton Commander has a high HP pool and hard-hitting attacks, so make use of stun and stealth effects, or anything else you have to slow the fight down. This can buy you time to heal yourself if you’re having a hard time. The full mechanics of this boss are:
- Ground Slam – The boss jumps in the air and then crashes to the ground. The ground turns red briefly, signalling the presence of a damage AOE. This covers the entire room, dealing heavy damage to you when he lands. You can completely avoid the damage by jumping – make sure you are in the air when he lands. Sometimes the boss will do this several times in a row, so be careful.
- Dark Pull – The boss casts a dark cloud, then pulls anything caught in the cloud to him. Try to sidestep this effect to avoid being pulled.
- Pull Jump – When below 50% HP, the boss will jump and pull you towards him. You need to react fast and move away, otherwise you will take heavy AOE damage.
- Stunning Rush – The boss charges at you and stuns you. A perfect block or dodge can prevent the stun from happening.
Taedal’s Tower Floor 11 – Avolos Umbramancer
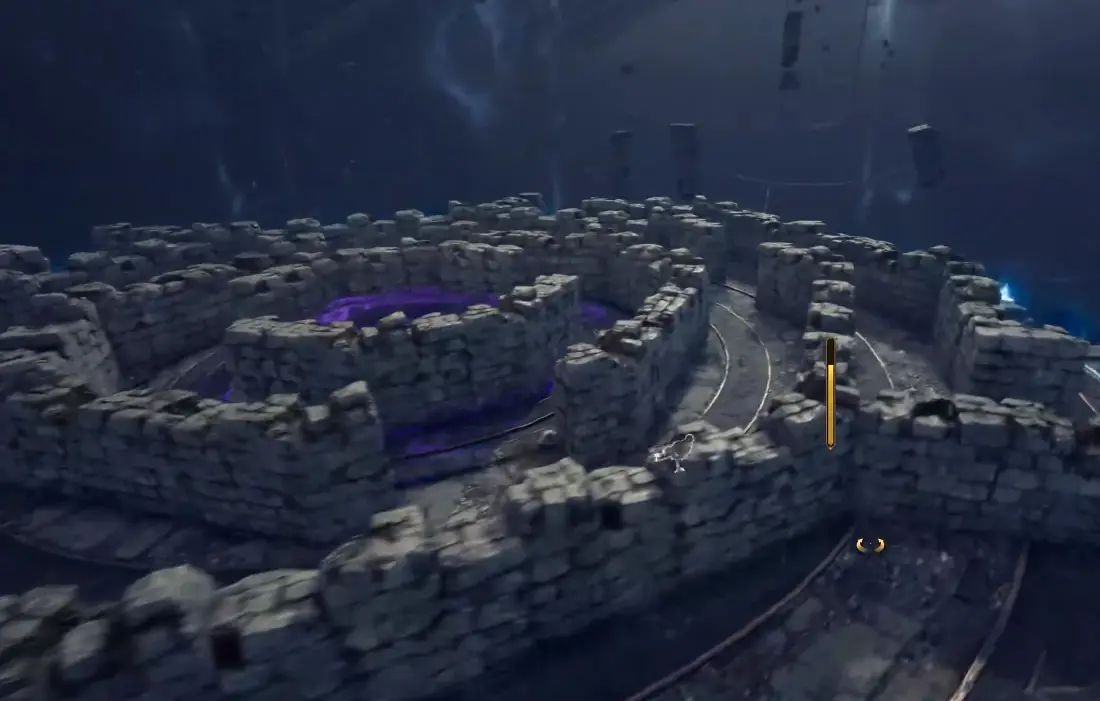
From Taedal’s Tower Floor 11 onwards, the tower’s mechanics begin getting more complicated, and the boss fights continue to get harder. In this fight, you will have to survive the Maze of Death while fighting the boss Avolos Umbramancer.
The mechanics of the Umbramancer are listed below:
- Maze of Death – The boss will pull you to the middle of the room (you cannot avoid this). He then conjures a maze, and a deadly blue AOE begins expanding from the middle of the room. You need to find your way out of the maze before the AOE catches up with you. You cannot jump over the walls of the maze, you must find your way by running.
- Lightning Bolts – After the maze phase ends, you will see many dark blue circles on the ground. Make sure you are not standing inside one, as these will be struck by lightning after a moment.
- Beam – The boss launches a beam in your direction. Make sure you sidestep away from the beam to avoid it.
- Seeking Lightning – Three small circles appear on and next to your character. You need to quickly move out of these, after a short time they will be struck by lightning bolts. Later in the fight, there will be six circles instead of three. This can happen several times in a row.
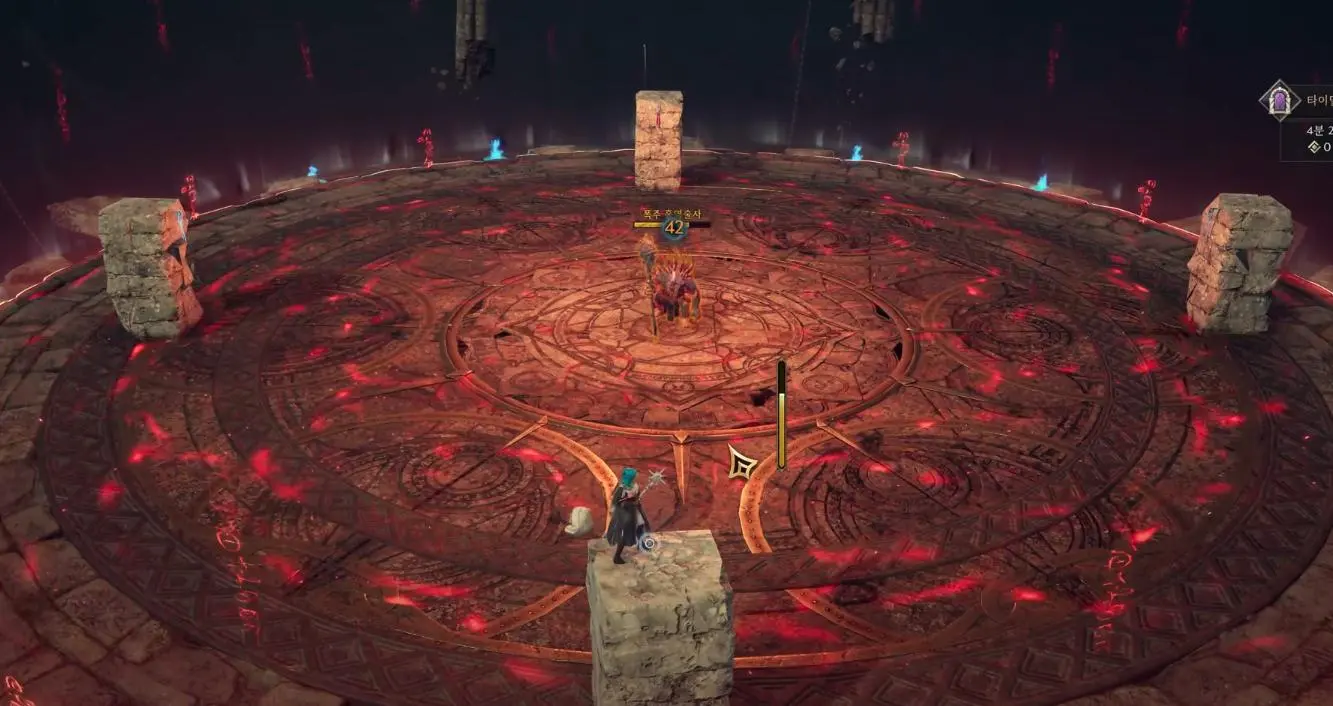
Taedal’s Tower Floor 12 – Tower Crystal Scorpion
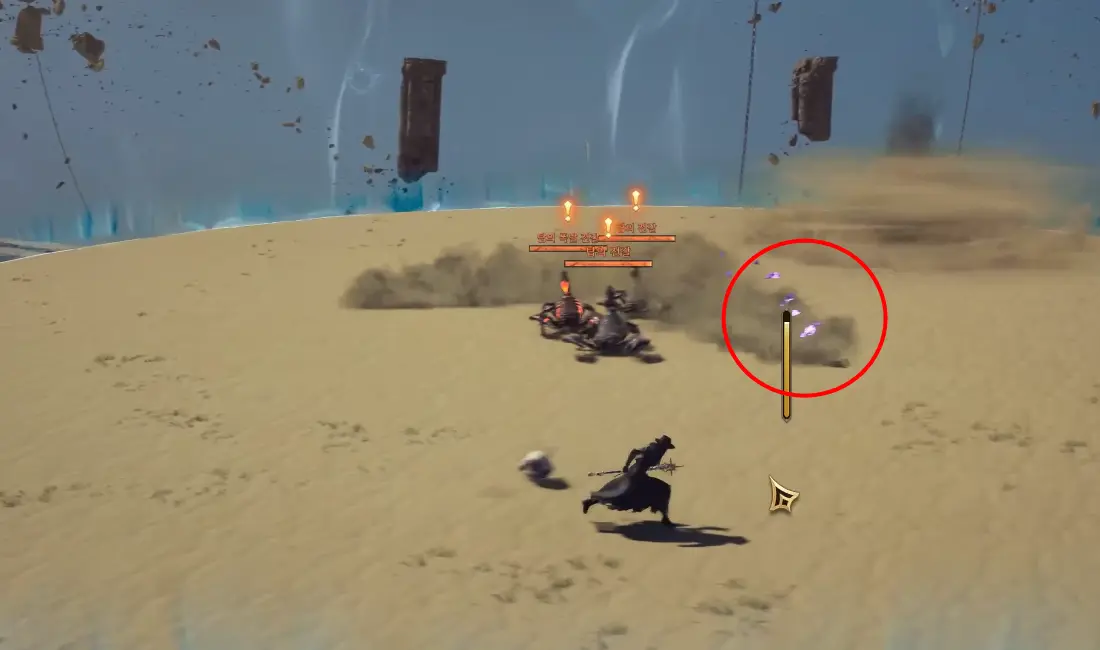
On the 12th Floor of Taedal’s Tower in Throne and Liberty, the arena will look different as usual. It is covered in sand, and is home to a giant scorpion boss called Crystal Scorpion!
To begin with, the boss is not visible, but there will be a smaller version of the boss. To activate the boss, kite the scorpion into the whirlwind in the middle of the room. He will disappear and be replaced by the real boss.
Below are the mechanics of the Tower Crystal Scorpion fight:
- Burrow – The Scorpion will burrow beneath the sand and emerge at a new location. He is trying to attack you from below, so keep moving around to avoid being caught by this attack.
- Hide – The boss will disappear and be replaced by three smaller scorpions (like the one at the start of the fight). There will also be three light patterns, one of them is purple and this is the one you need to follow. When the light patterns stop moving, they will be replaced by whirlwinds. Kite the small scorpions into the correct whirlwind (the one created from the purple light) to force the boss to come out of hiding.
- Spin Attack – The boss rapidly spins around, dealing heavy damage if you are too close. Make sure to stay away when this is happening.
Taedal’s Tower Floor 13 – Lightning Jump Attacker
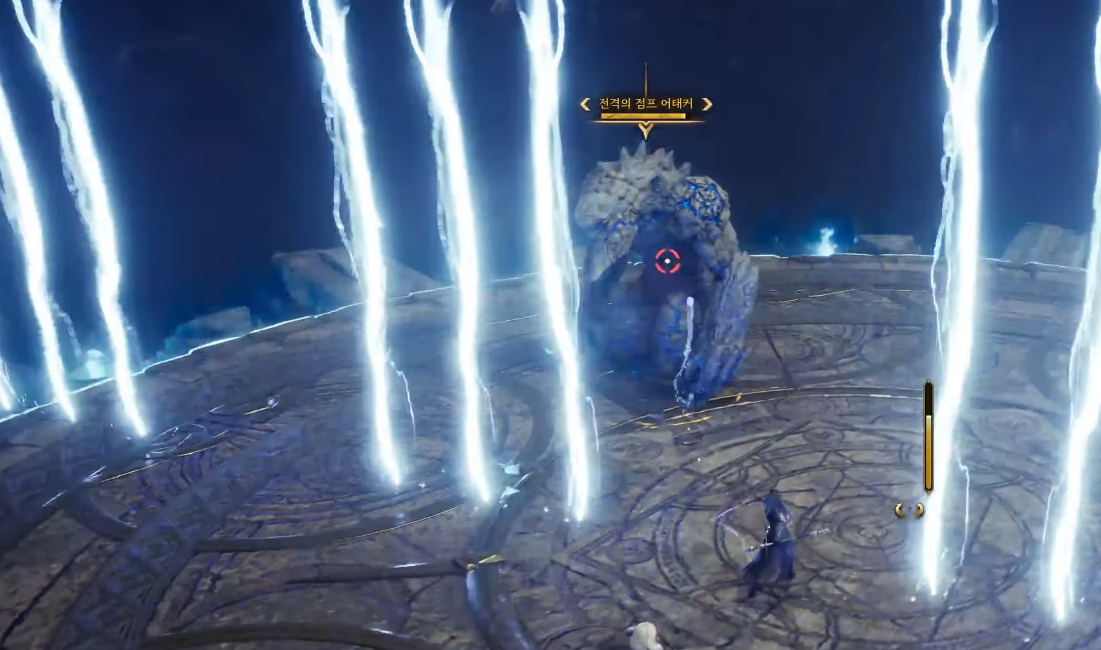
Once again, when you enter this floor of Taedal’s Tower the boss will not be present, and you need to solve a small puzzle to make it appear. You will see three rock formations, one red, one neutral and one blue. You need to transfer the energy from the red rock to the blue rock, which you can do by activating them in order (red, blue, middle).
This boss fight requires good situational awareness, as you will need to avoid a lot of lightning effects throughout the fight. The mechanics are listed below:
- Jump Attack – The boss charges up and then jumps to your location, creating a fairly large damage AOE when he lands. Ideally you should move out of the area before he lands, but you can also block the attack (aim for a perfect block).
- Lightning Stomp – The boss stomps on the ground, causing a large lightning AOE which can be blocked. Pillars of lightning then appear, which you will need to sidestep. If you are hit by the lightning, you will be paralysed.
- Enraged Lightning Stomp – At Low HP, the boss does a more powerful version of this mechanic. This time, the lightning pillars will be replaced by a wall of lightning that crosses the entire room. There is a small gap in the wall that you need to quickly find and ensure that you pass through it to avoid being hit by any lightning.
- Lightning Punch – The boss punches the ground, creating a large AOE that will paralyse you if you are hit.
- Hide – Similarly to the previous boss, the boss will hide during the fight and you need to solve a puzzle to make him come back. Just like before, this puzzle is closely related to the one you had to solve to start the fight to begin with. Activate the rocks to transfer the energy from the red rock to the blue rock. This time the puzzle is slightly complicated by the presence of lightning pillars that you need to avoid. After transferring the energy, the boss will be forced to return.
Taedal’s Tower Floor 14 – Old Wizard’s Eye
The Old Wizard’s Eye is a ranged boss. It has hard-hitting attacks and lots of AOE abilities. The mechanics of the Old Wizard’s Eye are:
- Tentacle Beam – The boss fires a beam from its tentacle directly at the player.
- Spinning Beam – The boss spins around while beaming with its tentacles, creating a dangerous AOE that deals heavy damage and stuns you. It is not possible to dodge the attack, however you can negate it by performing a perfect block.
- Ground AOE – The boss briefly charges up energy, and then creates a small AOE on the ground. Make sure to quickly get out of the area before you take damage. After performing this ability, the boss will be exhausted for a short while, allowing you to heal or replenish your mana. Attacking the boss while it is resting will immediately wake it up and initiate the next mechanic on this list.
- Ground Smash – The boss smashes into the ground three times, unleashing a large and powerful AOE. You cannot avoid this, but you can use a shield skill or perfectly timed block/parry to negate it.
- Wide Beam – The boss charges up a beam of energy which will cover about half of the room in front of him. You can avoid the damage by quickly dodging or sidestepping out of the affected area.

Taedal’s Tower Floor 15 – Stealer of Light
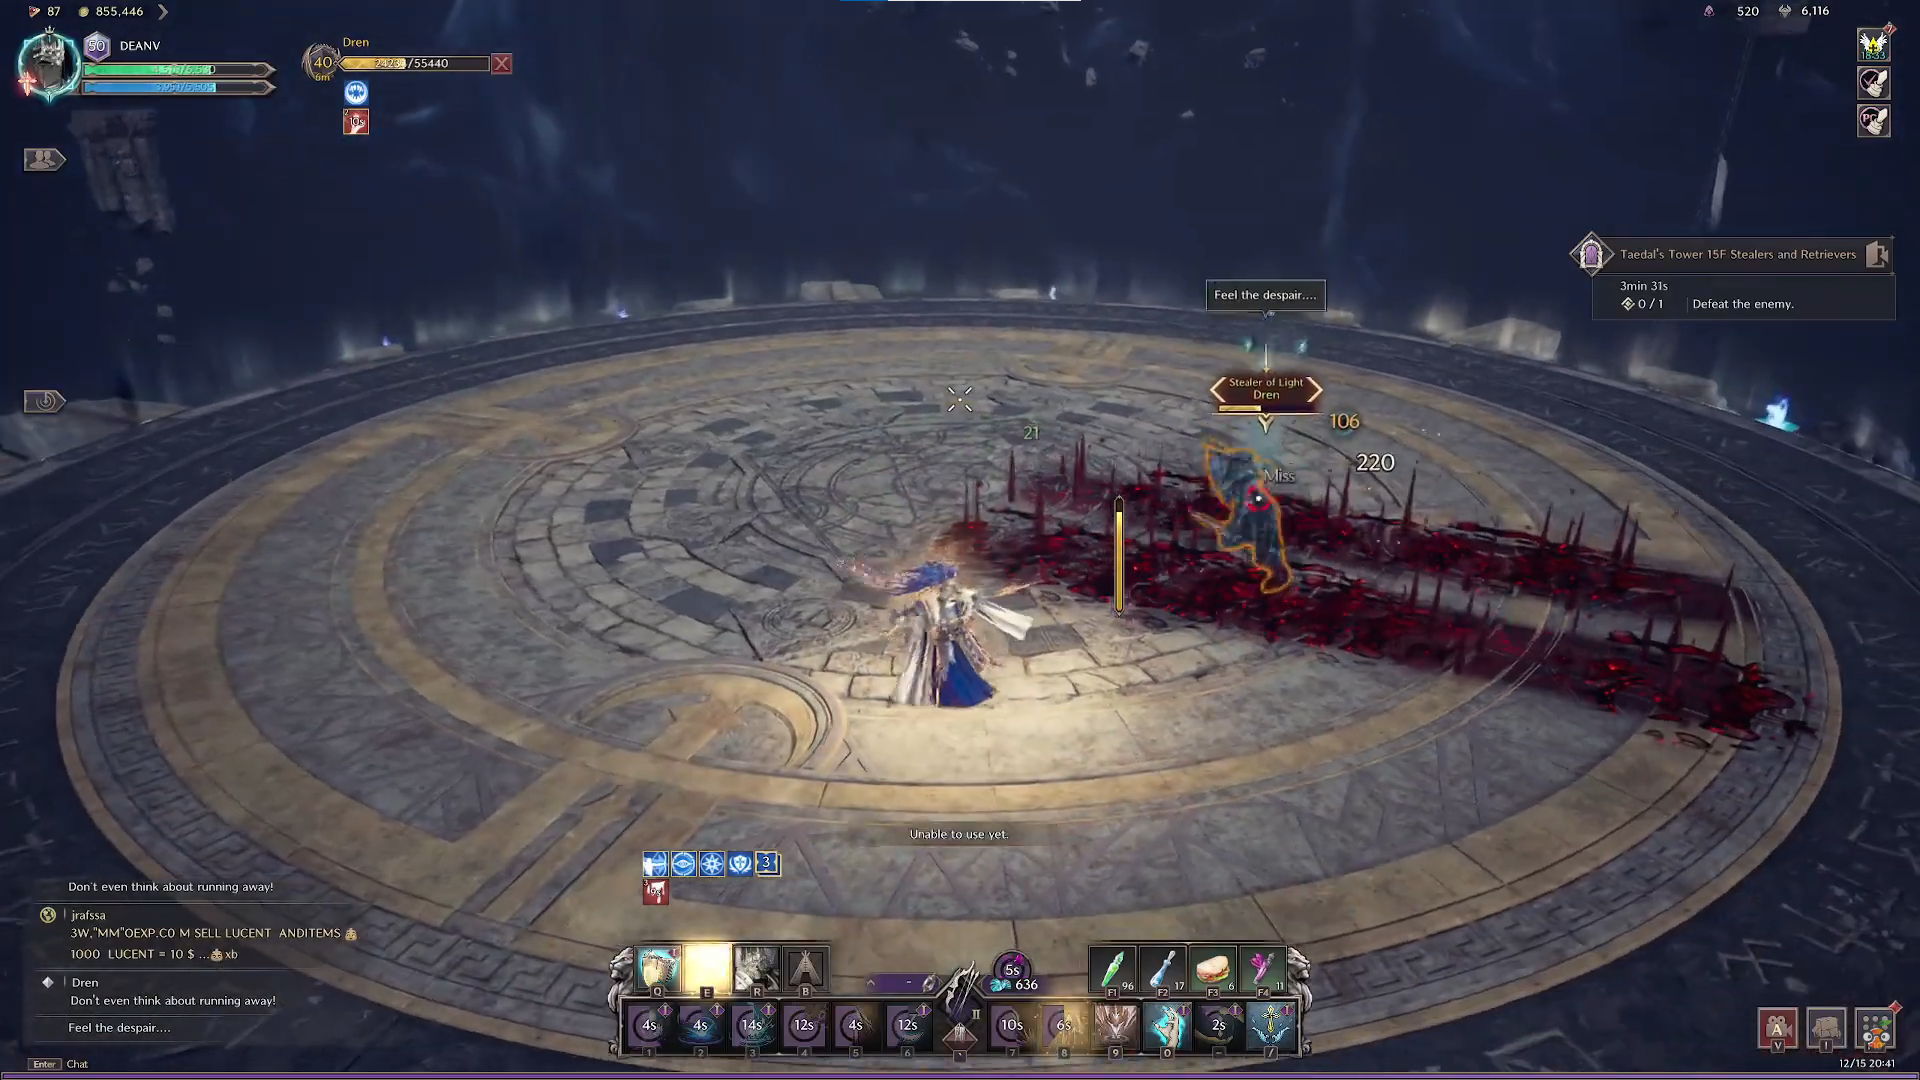
The arena on floor 15 of Taedal’s Tower looks a little different as usual. You will notice that it is quite dark, with a ball of light in the middle of the room. To activate the boss, go to the light and activate it.
The Stealer of Light is a mostly melee-focused enemy. He will chase you down to attempt to hit you with melee attacks, and he also possesses abilities with a very short wind-up time. Therefore it is a good idea to stay mobile, and having fast reaction times will also be a benefit in this fight.
The mechanics of the Stealer of Light boss are:
- Knife Slash – The boss has a short-range knife slash that he will repeatedly try to hit you with. You can avoid this by kiting if you are ranged.
- Stun – The boss fires a projectile that stuns you if it hits. You can avoid the stun with a perfect parry.
- Blood Rain – A row of blood pillars appears, dealing heavy damage if you touch them. This attack happens quite quickly so you need good reaction times to avoid it. You can make it easier to avoid by staying mobile and moving around throughout the fight.
- Light Steal – The boss teleports to the middle of the room and teleports you to the edge. The room is then cast into darkness and the boss becomes invisible. The boss’ shadow will hunt you during this phase. Try to stay at the edge of the room and look for the light orb. When you find it, activate it to return the room to normal and reveal the boss’ location. This will also stun him for 10 seconds, giving you a great window to deal damage undisturbed, or to heal yourself and recover mana.
- Blood Charge – The boss charges at you several times. Each time they leave behind a rectangular AOE which you should avoid while it persists.
Taedal’s Tower Floor 16 – Immortal Guardian
The Immortal Guardian carries a huge hammer. You will notice several pillars around the room, which will be important for the mechanics of this fight. We will explain this in the boss mechanics list below:
- Hammer Smash – The boss smashes his hammer into the ground, dealing AOE damage across the entire area. This needs to be blocked to avoid the damage. If you are directly hit by the hammer you will take the same amount of damage, but also be stunned.
- Hammer of Light – This is a similar attack to the previous one. The boss will charge up the hammer, which will begin to brightly glow. He then smashes the hammer into the ground, dealing AOE damage across the room. You should aim to parry this to avoid the damage, which will otherwise be quite heavy.
- Burning Ground – The boss will jump to a pillar and the ground of the arena will begin burning. You should also jump to a pillar to avoid the damage.
- Hammer Flurry – The boss unleashes a flurry of attacks with his hammer. These are directional – you can avoid them by staying behind the boss.
- Recharge – At low health, the boss will jump to another pillar and place his hammer on the ground. He will stay like this for a few seconds, being invulnerable to damage while this happens. This buys you some time to heal or recover mana, but beware that the boss will hit harder after this phase ends.

Taedal’s Tower Floor 17 – Chaos Archwizard
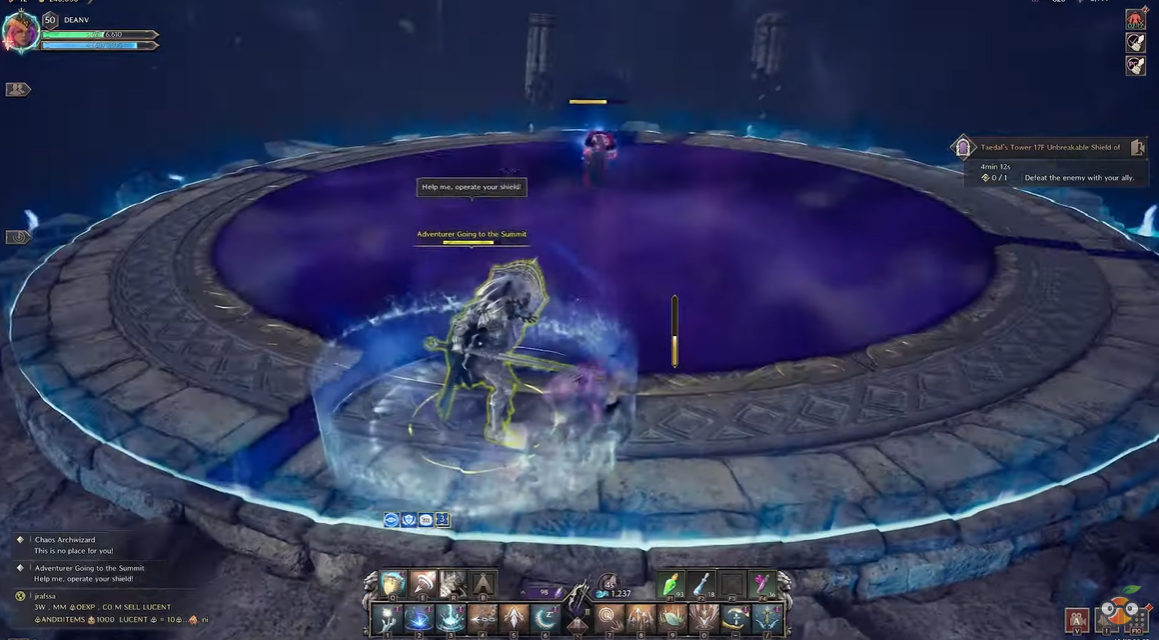
As the name suggests, the Chaos Archwizard boss in Taedal’s Tower possesses powerful magic that deals heavy damage to anyone caught in the radius of his spells. Situational awareness and fast reactions will be important in this fight. On this floor of the tower, you will be accompanied by an Adventurer NPC who will help you fight the boss.
The mechanics of the Chaos Archwizard are:
- Ground Detonation – A blue area appears on the ground, which detonates shortly after. You will take heavy damage if you linger in the area too long.
- Blue Fire – The boss rotates while casting blue fire in a line in front of him. Keep moving to avoid the fire.
- Magical Sphere – The boss slams a magical sphere into the ground, causing AOE damage over a wide area.
- Deadly Haze – A purple haze engulfs most of the room, dealing heavy damage if you touch it. The outermost area of the arena is not completely covered, but you must navigate between (or jump over) rotating strands of smoke to avoid damage. Alternatively, you can shelter with the Adventurer NPC to avoid the damage from this mechanic.
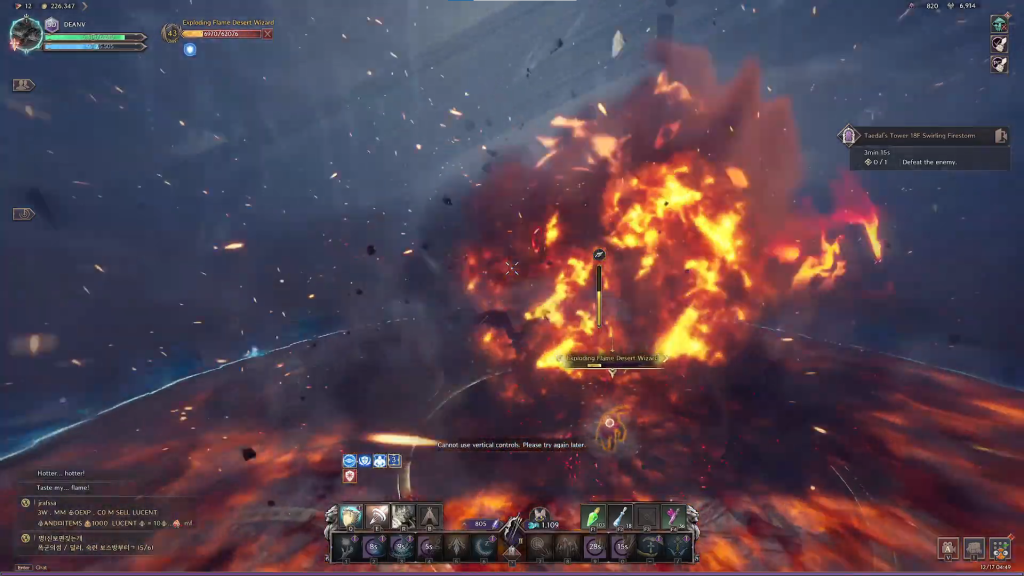
Taedal’s Tower Floor 18 – Desert Wizard
The Desert Wizard makes use of powerful fire magic during the fight. You will need to stay mobile and parry a lot of attacks to survive.
The mechanics of the Desert Wizard are:
- Fire Tornado – A small Fire Tornado will move around the room for the duration of the fight. Touching the tornado allows you to jump higher. Keep an eye on its location, as you will need to use it during the fight to survive some of the boss’ attacks.
- Fireball – The boss throws a fireball at you. This attack can be negated with a good block or parry.
- Charged Fireball – Very similar to the previous attack, this Fireball will also knock you back if it hits you. Once again, a well-timed block or parry will allow you to negate it.
- Fire Wave – The boss rushes backwards, then slams the ground to unleash lines of fire along the ground. She then smashes the ground again, causing a wave of fire to travel between the lines. Keep your distance and avoid touching the fire.
- Immolation – The boss teleports to the middle of the room and begins charging a huge fireball. She smashes the fireball into the ground, dealing AOE damage and temporarily turning the ground molten. There is a small are behind the boss that remains unaffected by this attack – when she teleports to the middle of the room you should get to the fire tornado mentioned above and use it to jump into the safe spot.
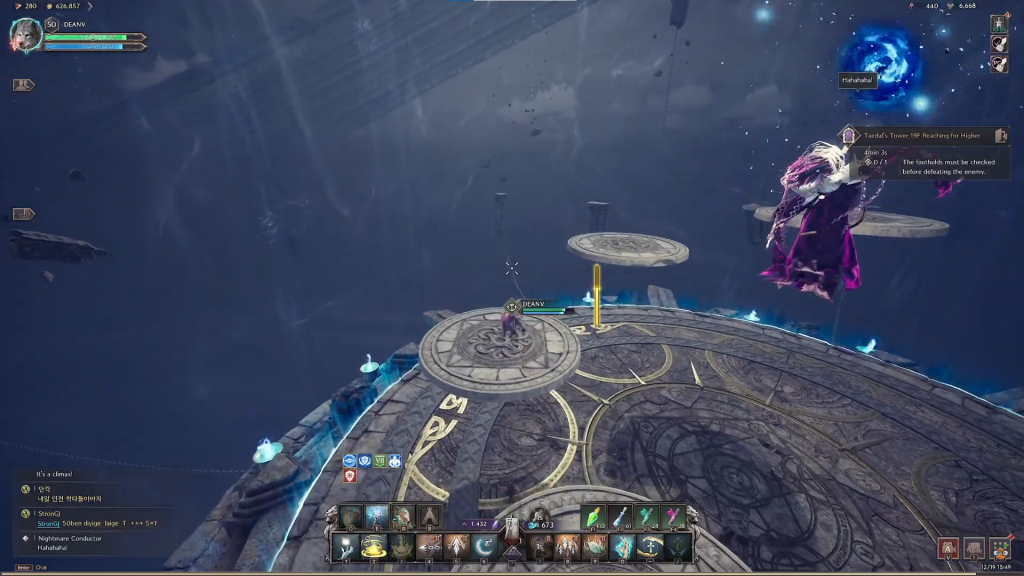
Taedal’s Tower Floor 19 – Nightmare Conductor
The penultimate boss in Taedal’s Tower, the Nightmare Conductor is another powerful mage who will target you with a variety of ranged spells:
- Spell Beam – The boss launches a spell at you, dealing damage. Use parry or a shield skill to avoid the damage.
- Charged Spell – The boss charges a spell before targeting you. If it hits, it stuns you and deals damage. Keep an eye on the purple circle for parry timing.
- Triple Orbs – The boss conjures three balls above his head, two are red and one is blue. The red orbs deal AOE damage and cause damage over time if you are hit. The blue orb targets you directly but can be parried. The orbs will be launched at different times, so keep an eye on them to avoid being caught be surprise.
- Magical Wave – The boss unleashes a wave of deadly magic across the ground, engulfing the entire arena. You cannot evade the attack, but you can use a shield skill to negate the damage.
- Giant Orb – The boss levitates and begins charging a large blue orb. After some time, he will throw the orb at the ground dealing massive damage. To avoid this, you need to make your way up a series of platforms by jumping. If you make it to the top platform in time then you will not take any damage.
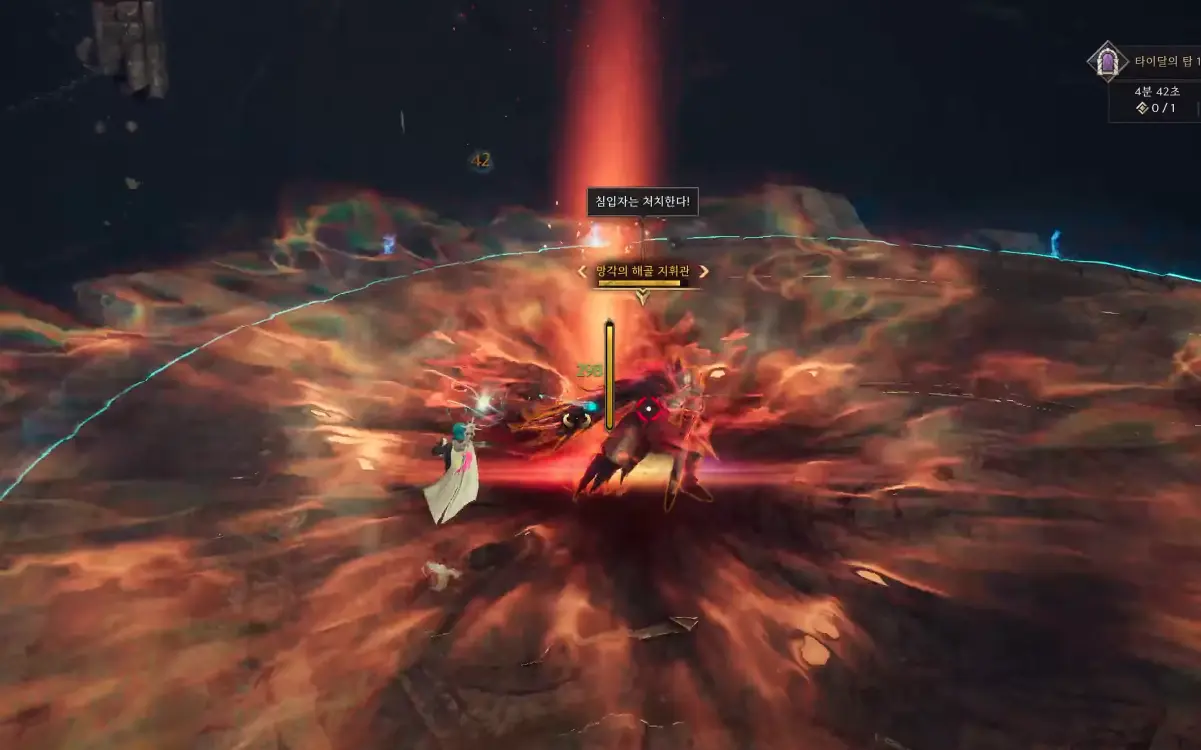
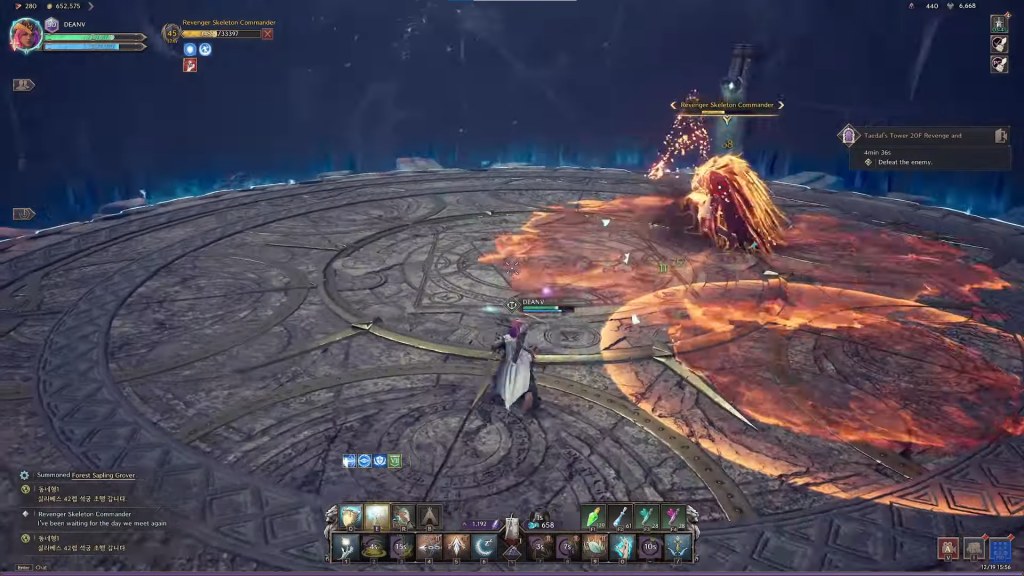
Taedal’s Tower Floor 20 – Revenger Skeleton Commander
The final boss of Taedal’s Tower is another skeleton commander called Revenger Skeleton Commander, similar in appearance to the one you fought on a previous floor. However this version of the boss is much more powerful, with powerful melee attacks and the rather annoying ability to heal himself to full health after being “killed”.
The Revenger Skeleton Commander has the following mechanics:
- Tower Skeletons – The boss will summon smaller skeleton helpers who will attack you. It is recommended to focus on quickly defeating these additional skeletons before they cause problems.
- Charge – The boss charges towards you and slashes with his sword, dealing heavy damage if it connects. You can dodge this attack, but the boss will relentlessly persist with it throughout the fight.
- Fire Wave – The boss can be seen charging up a fiery aura, before unleashing it to deal AOE fire damage. This will also stun you if you are hit, but you can use a shield skill to negate it.
- Flaming Circle – The boss uses his sword to summon a fairly small fire AOE on the ground. This deals a lot of damage, but you can avoid it by quickly stepping away and staying out of the area while the AOE persists.
- Fiery Charge – The boss charges up, before leaping at you. When he lands, you are knocked back and a large wave of fire expands on the ground. You cannot avoid this attack, but you can use shield skills to negate it.
- Second Wind – When you reduce the boss to zero HP, unfortunately, he heals himself to full health and you have to fight him all over again. He only does this once per fight, so you effectively have to kill him twice.
We hope you found our Taedal’s Tower Guide for Throne and Liberty useful. You can also find plenty of Throne and Liberty Builds on the website. We also have the Death’s Abyss Dungeon Guide complete if you are looking for another dungeon guide.