


Type: Group Cyrodiil, Solo & Battlegrounds
Buildname: Nature’s Grip
Table of Contents
Welcome to the ESO Warden Healer PvP Build “Nature’s Grip” for Elder Scrolls Online. This build is made for Cyrodiil small or large group play and works well in Battlegrounds as well. Back bar sets will be support sets and can be adjusted depending if other players in the group have those sets.
This ESO Warden Healer build has high survival with AOE heals and will require a group to do damage as it will focus solely on staying alive and keeping others alive as well. You’ll be healing with a Restoration Staff primarily and buffing or recovering from burst on your sword and board bar. This setup is flexible and allows you to swap in other sets both defensively and support sets. You can find more builds on our ESO Builds overview page.
- Cyrodiil & Battlegrounds
- Heavy/Medium Armor
- Warden Healing
- AOE HOTs (Heal over Time)
- High Mobility
- Adaptable Setup to Allow other Buff Sets
- Great Recovery Healing
Build Setup ESO Warden Healer PVP Build
Now let’s take a look at how to create the ESO Warden Healer PVP Build. We will walk through each stage of setting up this build below. Having Vampire will add survival and is standard for higher Health build setups currently. We will have a Monster Set and Food focused on recovering both Magicka and Stamina in combat to allow us to sustain.
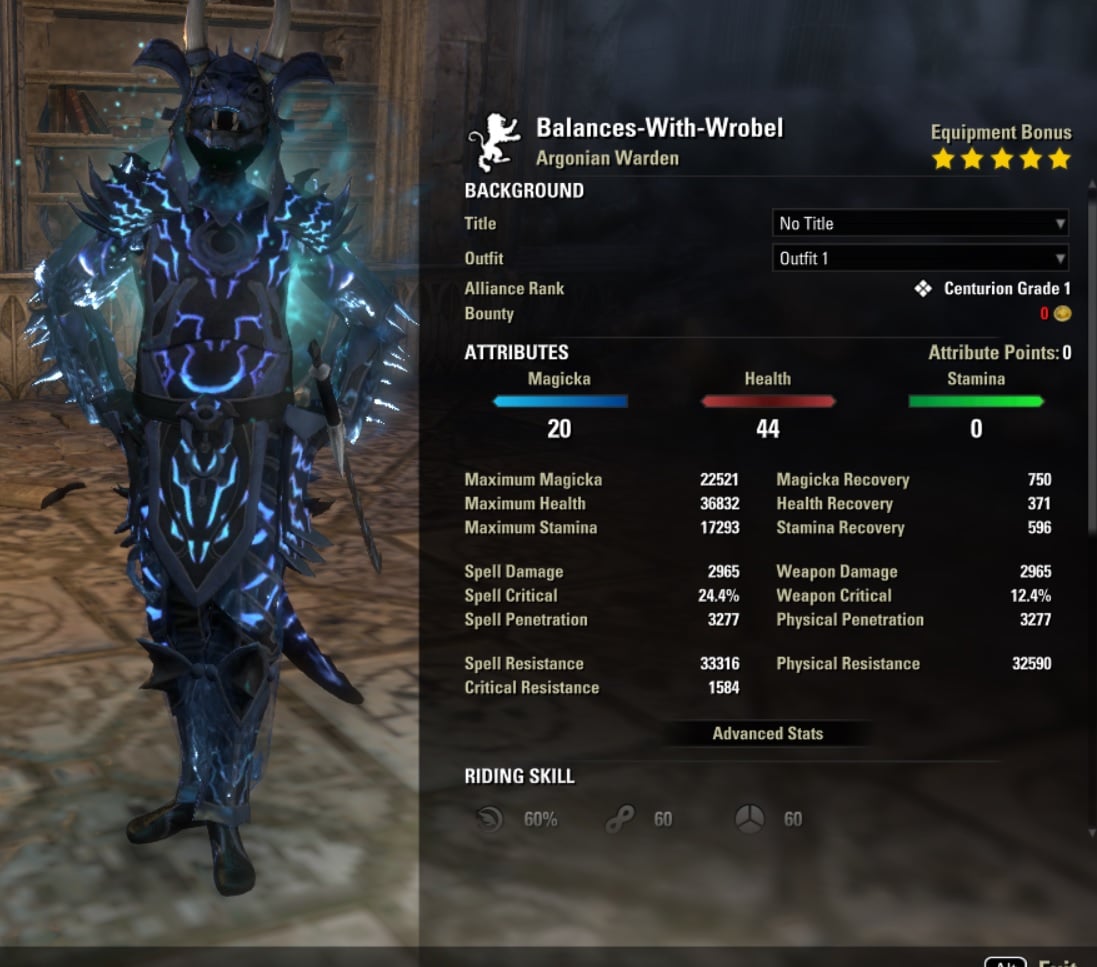
Our back bar is setup to provide more defensive setups and we should block while we shield and heal when taking pressure. Outside of that, we still have high mobility to line of sight if being focused by multiple targets and should relocate rather than tank until we are dead. We should not look to block much except when casting and stopping a direct attack for a brief moment. Using Nature’s Embrace will allow us to move around while continuing to heal. Here are what our stats look like generally self buffed.
Gear for Warden Healer PvP Build
Now lets take a look at the equipment you want to run for the ESO Warden Healer PVP Build. We will run Spell Power Cure as a buff set on our Front Bar and a survival Set on the back bar. There are various options you can use on the backbar depending on if you are in group or solo, in CP Cyrodiil or non-CP like Battlegrounds. Rallying Cry will offer more survival in the critical resistance but this is often run by other damage dealers.
Using an active back bar and front bar setup will allow us to use a Mythic and a Monster Set as well.
Gear Setup
| Gear | Set | Weight | Trait | Enchantment |
|---|---|---|---|---|
| Chest | Steadfast Hero | Heavy | Reinforced | Tri Stat |
| Belt | Spell Power Cure | Light | Impenetrable | Tri Stat |
| Shoes | Steadfast Hero | Heavy | Reinforced | Tri Stat |
| Pants | Steadfast Hero | Heavy | Reinforced | Tri Stat |
| Hands | Trainee | Medium | Impenetrable | Tri Stat |
| Head | Earthgore Visage | Heavy | Reinforced | Tri Stat |
| Shoulder | Earthgore Visage | Heavy | Impenetrable | Tri Stat |
| Necklace | Spell Power Cure | Jewelry | Swift | Magicka Recovery |
| Ring | Death Dealer’s Fete | Jewelry | Triune | Magicka Recovery |
| Ring | Spell Power Cure | Jewelry | Triune | Magicka Recovery |
| Weapon 1 | Spell Power Cure | Resto Staff | Powered | Weapon Damage Enchantment |
| Weapon 2 | Steadfast Hero | Sword + Shield | Powered | Restore Stamina |
Other Options?
Monster Sets instead of Earthgore Visage:
- Earthgore Visage – Always good to have one in larger groups to counter ground effects and get quick healing to someone who needs it.
- Ozecan the Inferno – Provides a unique armor boost and Vitality. An excellent addition to any group that doesn’t have it and leveraged on a build using multiple group HoTs.
- Symphony of Blades – A great means of increasing resource return for a party that may be struggling on sustain. When paired with Mender’s Bond, resources will be greatly increased for the party.
- Magma Incarnate – A good option to provide minor buffs and may allow you to drop Combat Prayer in place of other Scribing Skills.
- Chokethorn – Not a bad option in smaller group play and will provide heavy direct healing on whoever it hits at random.
Back Bar Defensive Sets instead of Steadfast Hero:
- Steadfast Hero – This is a highly protective option that allows you to have high, near full uptime of Major Protection.
- Daedric Trickery – Provides great buffs when you’re on main bar as well.
- Mark of the Pariah – Provides a huge amount of armor on back bar making you hard to kill while recovering. This will put you over the armor cap but allow you to still be at cap or near it with debuffs. Pairs well with Level 3 vampire.
- Arkasis Genius – Useful for generating ultimate more quickly for your group. A great battlegrounds set and useful for group play in Cyrodiil as well. This is listed as a buff set but can be used as a survival set as well in larger group play.
Buff Set Options instead of Spell Power Cure:
- Spell Power Cure – The stats are great on this set and allow you to provide Major Courage to your group. This is the best option to provide along with Rallying Cry to a group if they have niether.
- Rallying Cry – Provides buffs for yourselves and huge crit resist. This is a great 2nd option to Spell Power Cure.
- Gossamer – This provides Major Evasion which is very useful and near required for survival in large group play, as you will absorb high levels of AOE like Dawnbreaker if your group is going to die from another group.
- Transmutation – While this is generally outshined by Rallying Cry, you can further stack a larger groups Crit Resist with this set.
- Powerful Assault – Additional unique Weapon/Spell Damage buff you can provide the group. Only use if Rallying and Spell Power Cure are covered already.
- Meritorious Service – A unique armor buff for the group that can be added if the above are covered already.
- Arkasis Genius – Useful for generating ultimate more quickly for your group. A great battlegrounds set and useful for group play in Cyrodiil as well.
Skills ESO Warden Healer PVP Build


| Restoration Staff Staff Main bar | Sword and Board Back bar |
|---|---|
| Slot 1: Warding Soul | Slot 1: Nature’s Embrace |
| Slot 2: Radiating Regeneration | Slot 2: Polar Wind |
| Slot 3: Race Against Time | Slot 3: Ice Fortress |
| Slot 4: Mender’s Bond | Slot 4: Leeching Vines |
| Slot 5: Energy Orb | Slot 5: Blue Betty |
| Ultimate: Life Giver | Ultimate: Northern Storm |
Skill explanation:
Front Bar
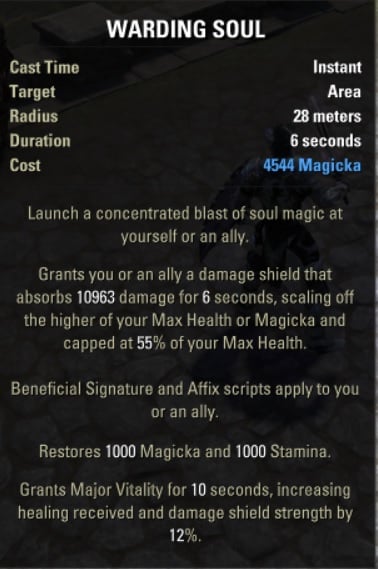
- Warding Soul: This can be morphed to a heal as well, but the shield allows no wasted health if our HOTs are running on a target. Additionally, it will have reduced cost and restore our Stamina on use. Ultimately, this is used on a target being pressured or taking heavy damage. It will grant Major Vitality, and if our HOTs are up, they will recover health rapidly. This also goes through walls and can save lives along with Life Giver.
- Radiating Regeneration: Hitting up to 3 targets, we want to keep this up on everyone as well. Cast multiple times as necessary for other group members. Regen and Vigor are ideal to keep on everyone in the area at all times.
- Race Against Time: This is used for mobility from snares and roots. Additionally, we will keep up with groups and position in comfortable places to heal from using Race.
- Mender’s Bond: Providing a constant shield to our target, the secondary effects are very powerful. We can access a wider array of Minor Buffs with this skill, and by default I have Minor Vitality. Heroism and Courage are among other great options. The heal over time from any who pass through this beam is very powerful over 5 seconds, so keeping this refreshed will offer a very potent healing option.
- Energy Orb: Energy Orb will need to be addressed before and after Vigor and Regen as well. Orb is a very powerful AOE heal that we want to throw in the mess of our team fighting. It will continuously heal as a powerful HOT and can restore our allies resources.
- Life Giver: This is our main ultimate we use unless we use Barrier in a larger group environment. Life Giver provides powerful direct heals to whoever needs them in the area. It will also go through walls and can save peoples lives quickly. Use this when mana is starved, our ally is blocked or out of range for other heals, or when we need to reposition ourselves and catch up resources.
Back Bar
- Nature’s Embrace: This is useful for keeping up with targets and providing a small heal over time. Primarily, we use it to relocate ourselves in fights if we are focused or we need to get to someone who will be focused. This will activate healing and allow us to begin cycling through various heals on our party member.
- Polar Wind: This is our main heal for a target that has taken a lot of damage. We need to be close so if we can’t run in time we can Nature’s Embrace to close the gap to use this heal. It provides a Heal over Time as well.
- Ice Fortress: Our Major Resolve buff that also provides Minor Protection. This allows us to slot a back bar ultimate that will provide some utility to our stats like Barrier or Northern Storm.
- Leeching Vines: A strong heal over time that we can apply to a target being focused. This also provides Minor Lifesteal which will add more healing for our target under fire. This skill is a great one but can be flexed out in a larger group setting.
- Blue Betty: Blue Betty provides us with a Major Sorcery buff as well as helps our Magicka sustain. It will purge buffs and can be reactivated when swapping to back bar for Major Protection while using Steadfast Hero. This can be used to clean off unwanted debuffs by spamming it, but shouldn’t be spammed while actively healing your party.
- Northern Storm: I swap Northern Storm as it still gives a powerful offensive AOE on a good team that is moving in on a team fight while providing Major Protection, helping mitigate damage. If nothing else, it provides armor on our back bar. Barrier can be used as well for more passive regen and in larger group settings.
Warden Scribing Skills


The ESO Scribing System has great options for support players. You will have a variety of shield/heals to use or add to the build. Additionally, you can provide very useful Minor buffs like Courage and Heroism to fit your groups needs.
- World: Wield Soul
- Mage’s Guild: Ulfsilds Contingency
- World: Soul Burst
- Restoration: Mender’s Bond
Wield Soul
Wield Soul turns into Shocking Soul with our Scribing scripts.
- Focus Script
- Signature Script
- Affix Script
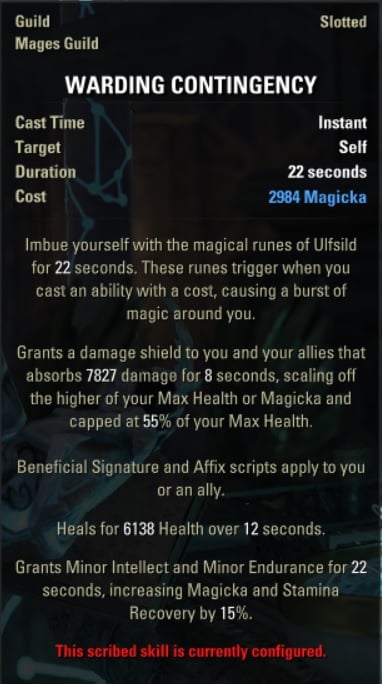
Ulfsilds Contingency
Ulfsilds Contingency turns into Warding Contingency with our Scribing scripts.
- Focus Script
- Signature Script
- Affix Script
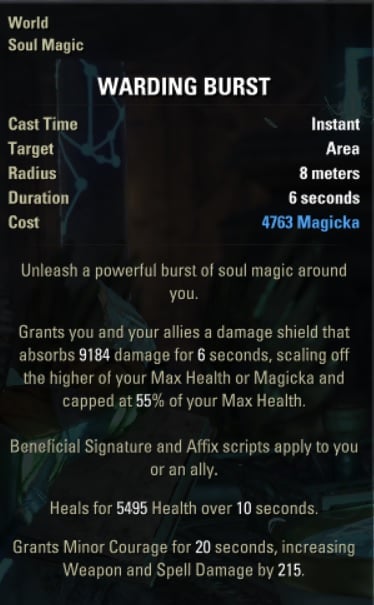
Soul Burst
Soul Burst turns into Warding Burst with our Scribing scripts. This can be put in place of Combat Prayer for larger group support and access to other Minor Buffs.
- Focus Script
- Signature Script
- Affix Script

Mender’s Bond
Mender’s Bond can also replace another scribing skill if there is plenty of healing and allow you to restore resources for the whole party. This is a very powerful morph and still has access to a wide range of Minor Buffs.
- Focus Script
- Signature Script
- Affix Script
- Intellect and Endurance or Heroism or Courage or Protection or Vitality
You can also test more combinations out with the ESO Scribing Simulator.
Champion Points Warden Healer PVP Build
Below you can find the recommended slottable Champion Points setup for this build. Prioritize the slottable perks, but get as many passive perks as possible.
Warfare Tree Points Allocation
- Soothing Tide (50) (Slottable)
- Unassailable (50) (Slottable)
- Swift Renewal (50) (Slottable)
- Ironclad (50) (Slottable)
Fitness Tree Points Allocation
- Survival Instincts (50) (Slottable)
- Sustained by Suffering (50) (Slottable)
- Pain’s Refuge (50) (Slottable)
- Fortified (50) (Slottable)
Craft Tree Points Allocation
- Steed’s Blessing (50) (Slottable)
- Rationer (30) (Slottable)
- Liquid Efficiency (75) (Slottable)
- Treasure Hunter (50) (Slottable)
Important Info for Warden Healer PvP Build
Attributes
24 Magicka, 40 Health, 0 Staminac
These can all be put into Health as well if you are able to manage your Magicka well. This distribution will be comfortable to get through your spells between heavy attacks.
Buff-food
Orzorga’s Smoked Bear Haunch Is the best option as we are primarily interested in boosting our Max Health and also increasing our Magicka and Stamina Recovery.
Mundus Stone
For a dedicated healer, the choice is simple. We want to boost our overall healing with The Ritual.
Race
Breton makes for a good healer for cost reductions, however we can use anything that can assist with more health, regen, or lastly any maximum stats.
Vampire or Werewolf
Using Vampire on this build at stage 3 will give grant us the best version of Undeath Passive. When we swap to backbar and block to recover health, we will become much more durable in lower health situations and allow us additional mitigation to recover.
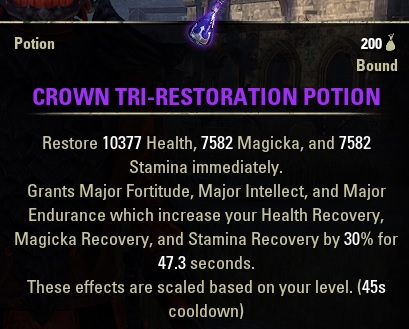
Potions
There are two options here. Tri-Stat if you’re struggling maintaining your health and Stamina at first. But you will get better healing once you learn the build using Alliance Spell Draught pots.
Alliance Spell Draught
(Major Intellect, Major Sorcery, and Major Prophecy)
(Purchased in Cyrodiil at Vendor)

Tri-Stat Potion
(Health, Stamina, Magicka)
(Bugloss, Columbine, Dragonthorn)

You can find more pvp builds in the ESO PVP Builds section.